- What Is Stolen Device Protection and How It Works: Apple’s iPhone feature that locks sensitive actions behind Face ID or Touch ID, even if someone knows your passcode.
- Why You Should Turn It On: Stolen Device Protection stops thieves from changing settings, passwords, or banking info without biometric verification, keeping your data safe.
- What You’ll Need First: Your iPhone must run iOS 17.3 or later with Face ID or Touch ID, Find My, Location Services, and two-factor authentication enabled.
- How to Enable or Disable It: Go to Settings > Face ID & Passcode, scroll to Stolen Device Protection, then toggle it on or off and choose your security mode.
- Things to Remember: Disable the feature before selling your iPhone, keep location data current, and note that damaged Face ID or Touch ID sensors can block access.
Keeping your iPhone safe isn’t just about finding it if it goes missing; it’s also about protecting the personal data inside it. To strengthen your privacy and security, Apple introduced Stolen Device Protection, a feature designed to stop thieves from accessing or changing your sensitive information even if they know your passcode.
In this guide, I’ll explain what Stolen Device Protection is, how it works, and how to turn it on or off to keep your iPhone data secure.
What Is Stolen Device Protection and How Does It Work
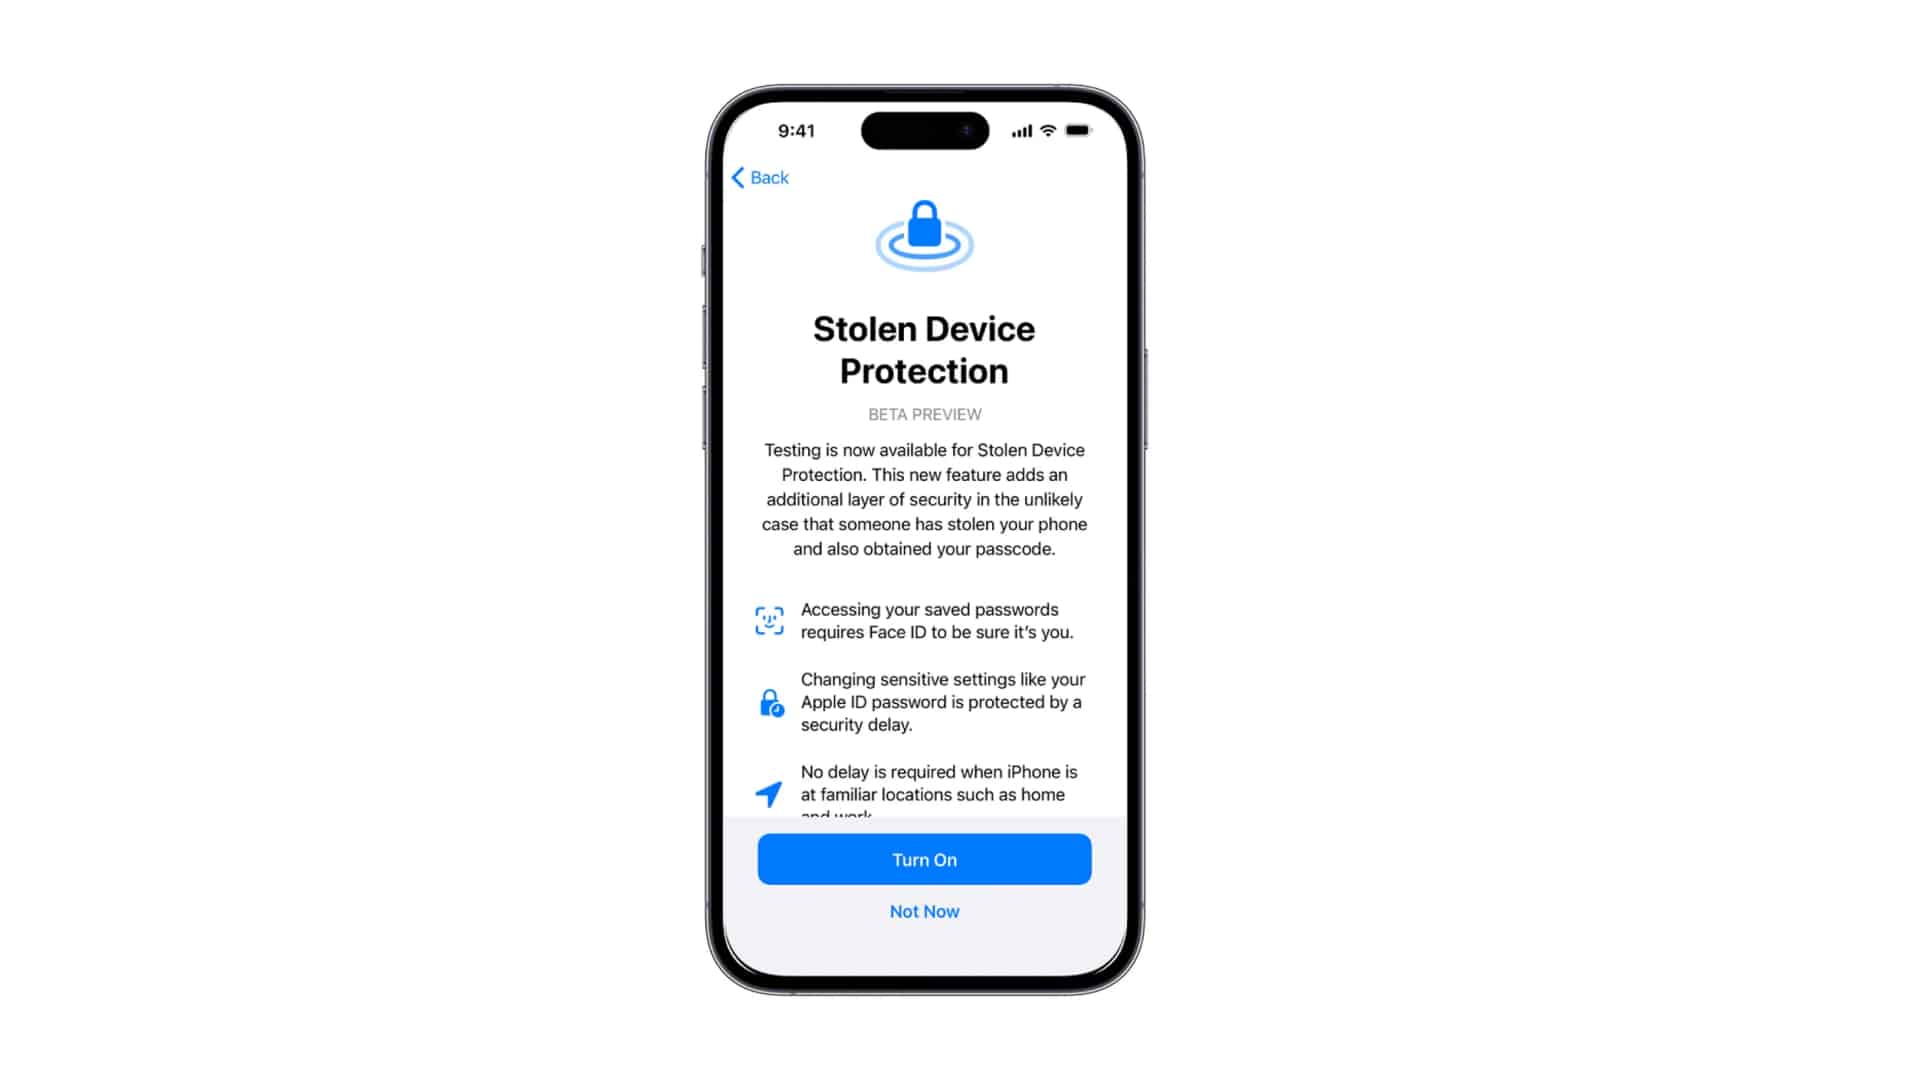
Stolen Device Protection is Apple’s built-in security layer that protects your most sensitive settings and data if your iPhone is stolen or lost, even if someone already knows your passcode.
When turned on, your iPhone automatically switches to high-security mode whenever it detects that it’s away from familiar locations like your home or workplace.
In this mode, your iPhone:
- Requires your Face ID or Touch ID to access or modify sensitive data. The passcode alone is not accepted.
- Adds a mandatory one-hour Security Delay before allowing high-risk actions, such as changing your Apple ID password or turning off Find My. After the delay, it requires biometric verification again.
- Blocks immediate access to your saved passwords, Apple Card virtual numbers, Safari autofill payment info, and certain banking or Apple Cash actions.
- Prevents thieves from turning off Lost Mode, Stolen Device Protection, erasing your device, or setting it up as new without biometric authentication.
When you’re at a familiar location, the feature stays on but runs quietly in the background. You’ll only notice the extra layer of security when you try to perform a protected action in an unfamiliar area.
Why You Should Enable Stolen Device Protection on Your iPhone
Your iPhone isn’t just a piece of hardware; it holds your personal data, passwords, Apple ID, banking info, and more. If it’s stolen, the real loss goes far beyond the device itself.
That’s where Stolen Device Protection comes in. Even if someone learns your passcode, they can’t change key settings or access sensitive information without biometric verification.
If you want to strengthen your iPhone’s defenses even more, you can also check out our guide on how to protect iPhone data from thieves.
Requirements Before You Can Use It
Before turning this feature on, make sure your iPhone meets these requirements:
- Running at least iOS 17.3 and later.
- You have enabled Face ID or Touch ID, and you have a device passcode.
- You have enabled Find My on your iPhone.
- Two-factor authentication (2FA) is enabled for your Apple ID.
- Location Services and Significant Locations must also be enabled.
How to Enable or Disable Stolen Device Protection on iPhone
- Open the Settings app and tap Face ID & Passcode.
- Enter your device passcode when prompted.
- Scroll down and tap Stolen Device Protection.
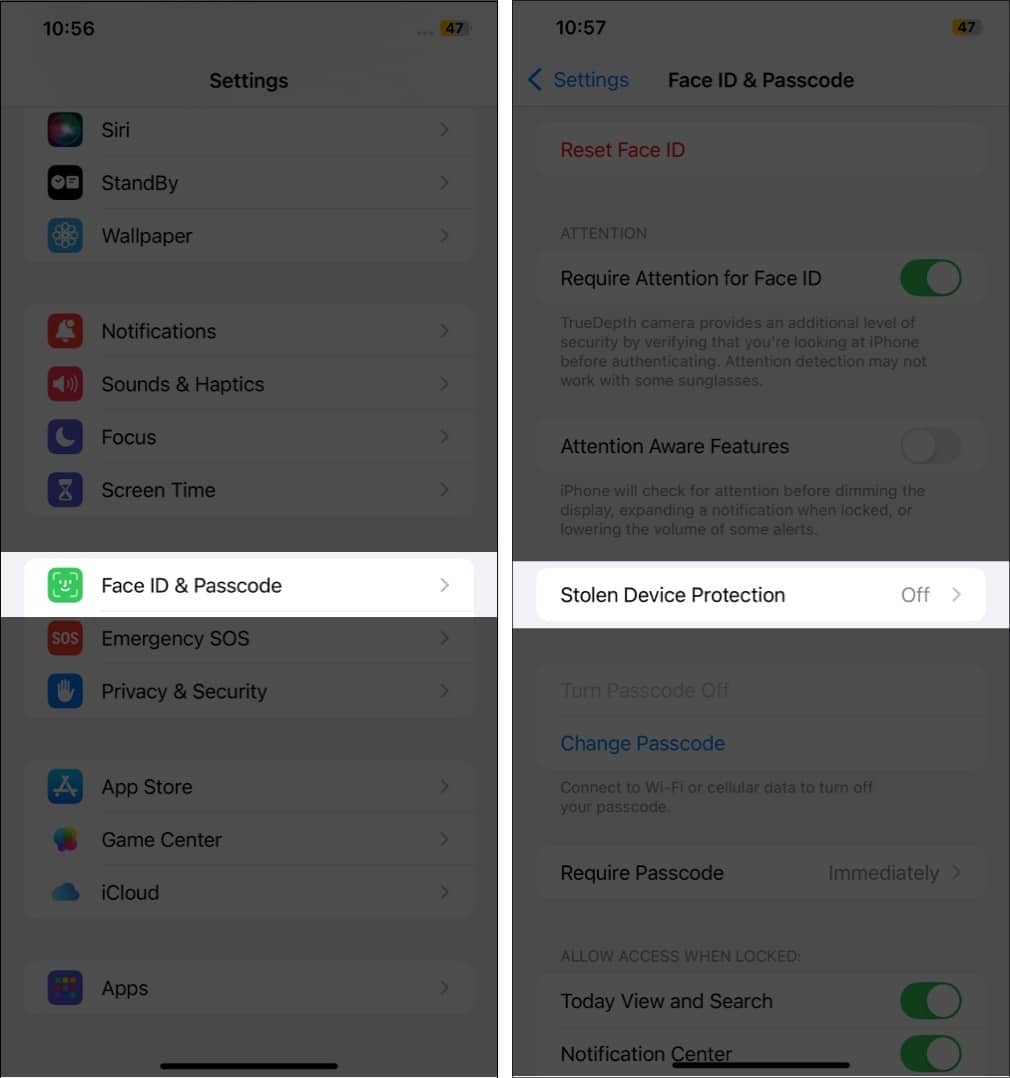
- Toggle on Stolen Device Protection.
- Choose the mode of enforcement:
- Away from Familiar Locations: extra security kicks in only when your iPhone is away from home/work.
- Always: it applies everywhere, regardless of location.
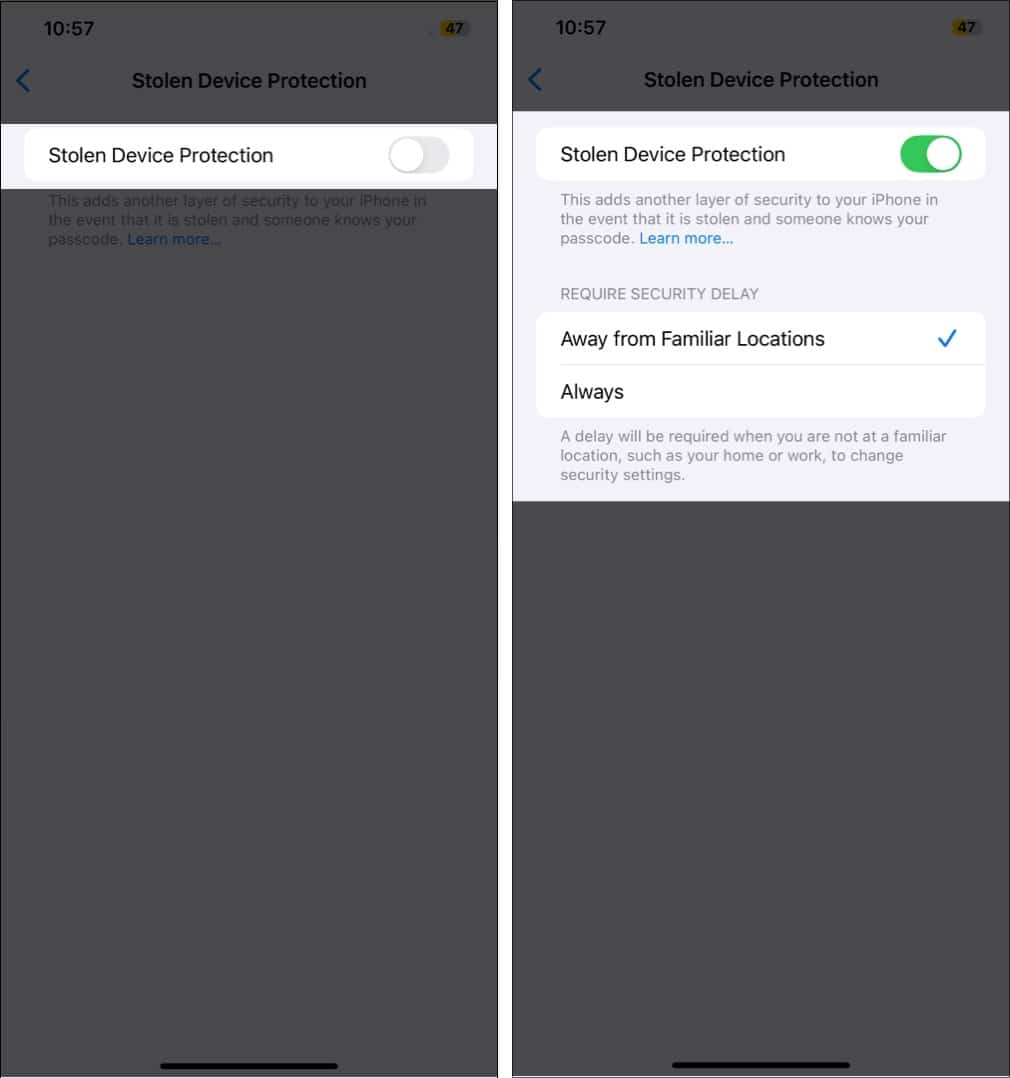
- If you ever want to disable it, go back and toggle it off. However, if it’s set to Always, you might need to wait for the security delay or sign in via iCloud.com to disable.

Tips and Edge Cases to Keep in Mind
- If your Face ID/Touch ID hardware is damaged (screen replaced, sensor broken), you may not be able to easily turn off Stolen Device Protection, as the feature requires biometric verification.
- Before trading in or selling your iPhone, turn off this protection, sign out of your Apple ID, and disable Find My. Otherwise, the next user might face hurdles.
- Because this feature uses location awareness, make sure your home/work addresses are set correctly.
- Even with this turned on: take regular backups, keep your passcode strong, and don’t share your Apple ID credentials. It’s one layer among many.
Why This Matters in 2025
Phone theft isn’t as simple as someone snatching your device and selling it. Thieves have grown smarter. According to a Wall Street Journal report, thieves were capturing your passcode entry via long-range cameras, then using it to unlock the phone, turn off tracking, change Apple ID settings, and drain accounts.
By enforcing biometric checks and delays for critical changes, Apple is raising the bar for how quickly a thief can act. For everyday users, especially those with financial apps, sensitive data, or corporate devices, that extra barrier offers real peace of mind.
Final Thoughts
Stolen Device Protection is one of Apple’s most impactful security features yet. It works quietly in the background, but when it’s needed, it can prevent serious damage.
If you haven’t turned it on yet, do it now. It only takes a minute and won’t affect your everyday iPhone experience.
Do you use any other iPhone security features? Share your setup or favorite tips in the comments below!
Read more: