Our iPhones hold a lot of sensitive and personal information, so protecting that data is crucial. To help you, the Safety Check feature lets you quickly review and manage the access granted to people and apps. You can activate the emergency reset and quickly stop data sharing to prevent data abuse. Let’s learn what Safety Check is and how to use it on your iPhone.
What is Safety Check on iPhone?
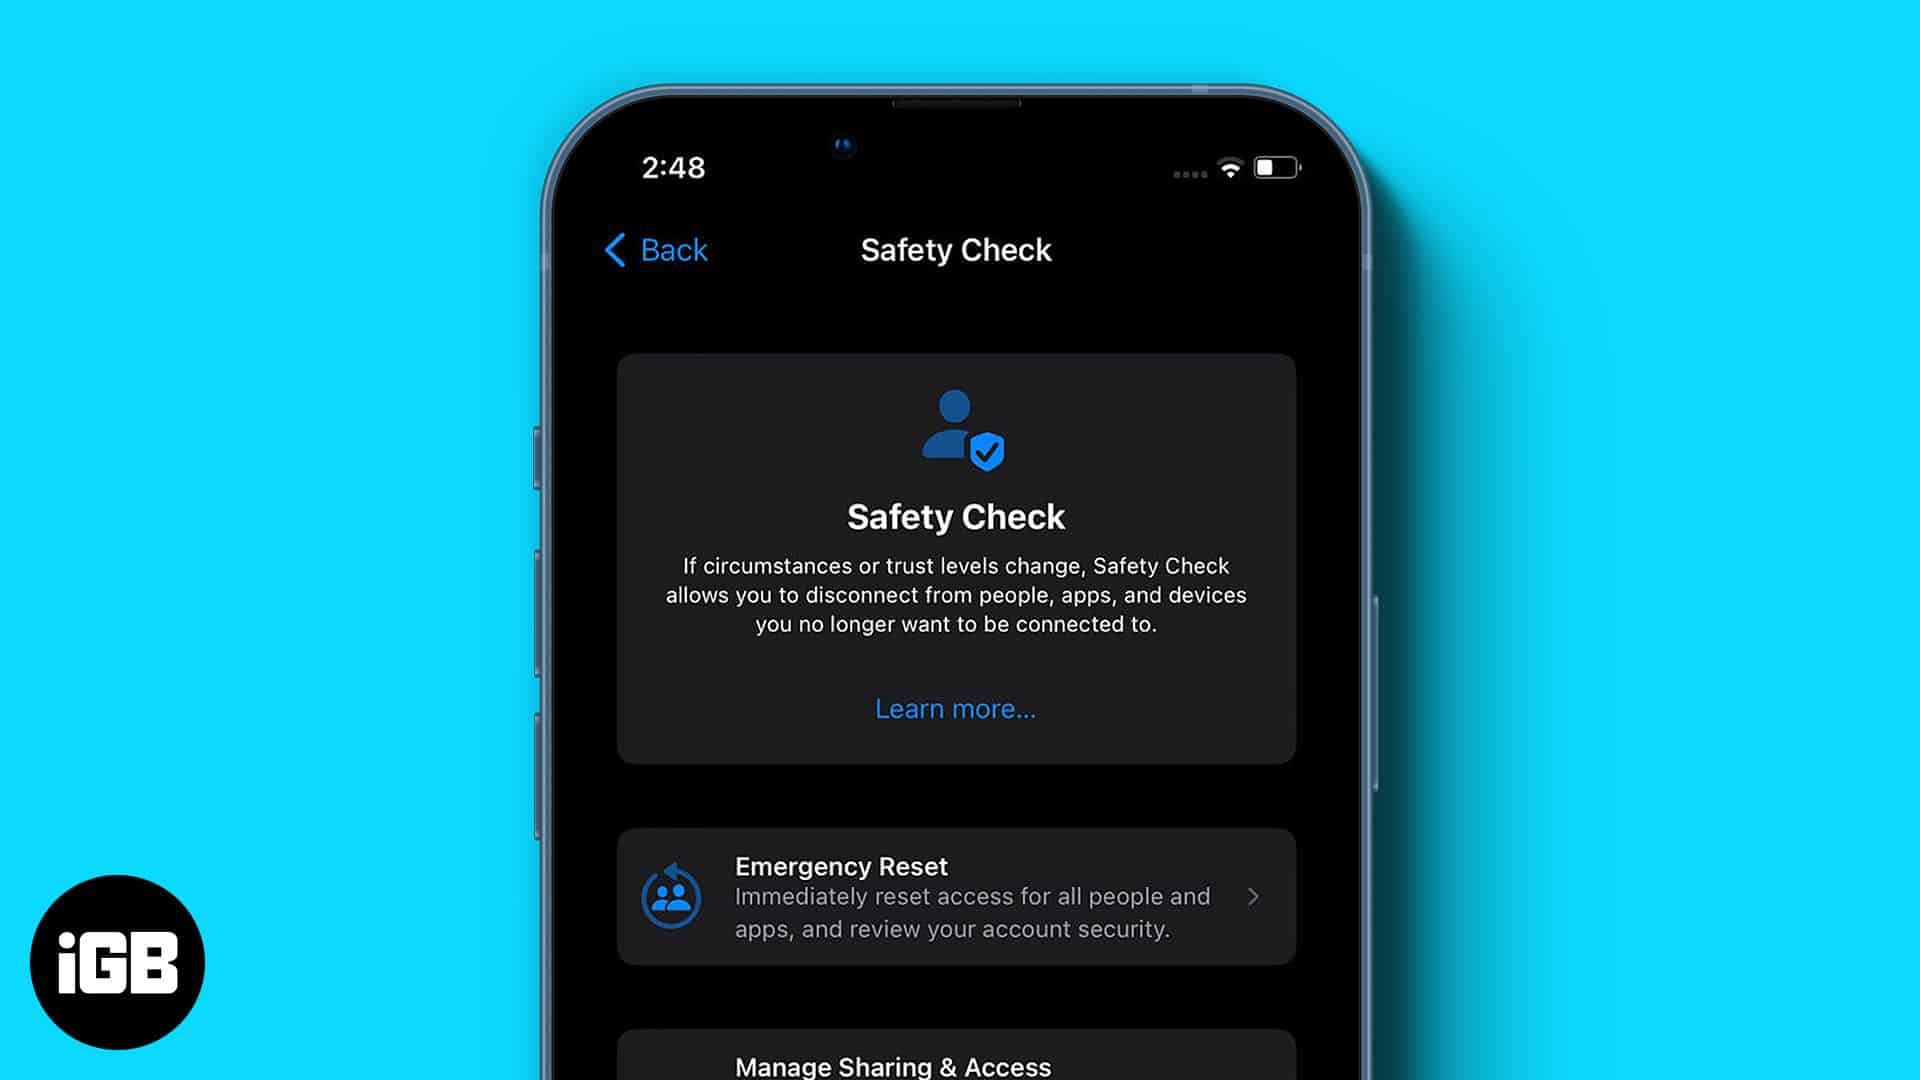
Safety Check is a security tool that stops sharing your location in Find My Network, resets your privacy permission for all apps, and protects access to your messages by signing out of your iCloud account.
Many of us are comfortable sharing credentials with our partners. They may know your iPhone passcode or have their Face ID or Touch ID saved on your iPhone so you can access information on your iPhone. Moreover, you may have shared photo albums, passwords, etc.
However, in some abusive relationships, this becomes a threat to privacy and can even prevent us from getting help.
Basically, Safety Check consists of two main features:
- Emergency Reset – Quickly resets access to your device’s information for all people and apps.
- Manage Sharing and Access – This allows you to customize access you’ve given to apps and people.
What is Emergency Reset, and how it works?
As the name suggests, Emergency Reset is for emergency situations when you don’t want anyone to access your location or iCloud data. This feature wipes all access permissions and redirects you to review your account security and reset your credentials. Moreover, Apple will not notify other users who have access to it.
When you perform an Emergency Reset, Apple will perform actions in these three areas.
- People And Apps: It will immediately stop sharing your data with everyone and remove access from all apps.
- Account Security: You will be asked to change the password of your Apple ID and review account security.
- Emergency Contacts: We can edit existing or add a new emergency contact to the list.
There is another option called Quick Exit. When you open the Safety Check screen, you will see it in the top right corner. Tapping it takes you to your iPhone Home Screen, auto-saving your changes in Safety Check settings.
So, if someone snatches away your iPhone and uses the App Switcher to go to the Settings app, they won’t figure out that you were on the Safety Check screen.
What does change when you use Safety Check on iPhone
As mentioned earlier, Safety Check stops sharing data with people and apps and logs you out of your device. So no one can exploit your data. When you use the feature, the following things occur:
- Remove devices signed in to your account
- Update trusted phone numbers and emergency contacts
- Change your Apple ID password
- Update your device passcode and your Face ID or Touch ID information
- Restrict Messages and FaceTime to your iPhone
- Turn off data sharing on Activity, Check In, Health, and Home app
- Remove your information from shared calendars, shared items and locations in Find My, shared Maps ETA, shared Notes, shared Passwords, and shared Photos (including Shared Library and Shared Albums).
- Revoke access to privacy permissions such as Bluetooth, Contacts, Calendars, Location, Microphone, Camera, and more.
- Deletes all data gathered by Files, local network, Apple Music, Reminders, Research, speech recognition, etc. apps and features.
Therefore, your privacy is safe by all means! As your Find My location sharing is stopped, they can’t even track you down. If you still feel at risk, you can use the Emergency SOS feature on your iPhone.
How to perform an Emergency Reset using Safety Check on an iPhone
- Go to the Settings app on your iPhone.
- Scroll down and select Privacy & Security.
- Select Safety Check → Tap Emergency Reset.

- Tap Start Emergency Reset → Reset People & Apps.
- Tap Reset.

- Select the device you want to remove access from.
- Tap Remove Selected Devices → Next.
- Now, add or remove the trusted phone number → tap Continue.
- Update Apple ID password → Continue.

- Add or remove emergency contacts → tap Continue.
- Tap Done.


How to manage sharing and access on an iPhone’s Safety Check
You can customize with whom you share your Information, which includes granting/revoking access to apps and people. It will save the changes on the spot. Moreover, it won’t even notify the users about the same. In sharing access management, you can manage People, Apps, and Account security.
- Go to the Settings app on your iPhone.
- Select Privacy & Security.
- Select Safety Check → Manage Sharing and Access → Continue.
- Select the people you want to share data with → Continue.

- Next, select the apps you want to grant access to → Continue.
- Finally, choose the devices you want to revoke access → Remove Selected Devices.
- Add or remove Trusted Phone Number → Continue.

- Update your Apple ID Password.
- Add or remove Emergency contact.
- Update your iPhone Passcode.
- Now, tap Quick Exit at the top right.


Understand the risks of the Safety Check feature
Nothing is 100% perfect, and it applies to Apple’s Safety Check as well. While Safety Check is excellent in situations such as domestic violence, the feature also has major disadvantages.
For instance, what if the partners use the same Apple ID on their devices, and there’s a rift between them; one partner (say abuser) revokes access of the other partner (the victim) before the latter and gets access to all their data, including the proof. In such a case, the victim will get locked out of their data.
This major flaw can be partially prevented by implementing a simple step like OTP authentication via the registered phone number or email.
Signing off
I hope the above guide helped you understand more about the iPhone’s Safety Check feature and how it works. What do you think about this feature, and how do you think Apple will overcome its misuses? Share your thoughts in the comments below!