How to Create and Use Safari Profiles on iPhone, iPad, and Mac
Learn how to create and use Safari Profiles on your iPhone, iPad, and Mac to keep your browsing perfectly organized.
- What are Safari Profiles?: Safari Profiles create independent browsing spaces on iPhone, iPad, and Mac, each with separate history, cookies, favorites, and extensions for organizing work, personal, and study.
- Why use multiple profiles: You can keep logins independent, reduce distractions with focused tabs, tailor extensions per profile, and increase privacy while keeping research, shopping, and entertainment separate.
- What’s separated vs shared: Profiles isolate history, cookies, site data, and tab groups, but share iCloud Keychain, start page style, enabled extensions, and system-wide privacy settings across devices.
- Requirements and setup: Safari Profiles need iOS 17+ and macOS Sonoma 14+. Create in Settings → Safari → Profiles, then switch via tab bar or the start page.
- Precautions and limits: Deleting a profile removes its tabs and data, extensions apply globally, iCloud Keychain stays shared, and cross-device syncing requires the same Apple ID.
Safari, the default web browser for Apple devices, has always been lacking in one way Let’s face it: opening one browser for everything you do gets confusing quickly. With work tabs, personal browsing, and occasional late-night research, Safari can become digital chaos. That’s where Safari profiles fit in.
With this convenient feature on your iPhone, iPad, and Mac, you can have multiple browsing spaces for various workflows. Each profile has its own history, cookies, extensions, and favorites, so nothing gets mixed up.
Here, we’ll show how to create, personalize, and maintain Safari profiles on all your Apple devices, along with tricks for staying organized.
What are Safari Profiles?
Safari profiles allows you to create instances of the web browser on your iPhone, iPad, and Mac that work independently from each other. If you have multiple accounts for a single web service, it can become a headache to frequently switch between accounts according to the task at hand.
With profiles, you won’t have to worry about this, as you can stay logged in to different accounts in each profile. Similarly, you may have separate requirements from Safari at work versus when you are at home. In that case, you can have separate profiles with its own set of browser extensions, history, Tab Groups, and bookmarks.
For example, I have this setup on my Mac:
- A Work profile logged into my office email, project management tools, and company Slack.
- A Personal profile for social media, shopping, and streaming.
- And a Study profile for research, notes, and online classes.
No more logging out and in or accidentally confusing tabs. Every profile keeps you organized and on track.
Why Do You Need Multiple Browser Profiles?
Most of us use one device for everything. And that gets messy fast. Multiple profiles solve this by helping you:
- Stay focused: Keep work tabs far from YouTube rabbit holes.
- Independent sign-ins: Employ various Google accounts or email logins without conflicts.
- Privacy is protected: Cookies and history stay separated.
- Personalize extensions: Use different extensions per profile.
- Declutter: Prevent your personal bookmarks and AutoFill information mixing in your work profile.
So, it provides less mental juggling, better privacy (no accidental shares), and focus boost.
What Safari Profiles Separate vs. What They Share
Before I show you steps, here’s a quick lowdown on how Safari works:
| Separated Per Profile | Shared Across All Profiles |
|---|---|
| Browsing history, Cookies, and website data | iCloud Keychain (saved passwords and passkeys) |
| Start page settings and Favorites | Website-specific settings |
| Tab and Tab Groups | AutoFill information (credit cards and addresses) |
| Extensions | General Privacy and Security Settings |
You can use your extensions across all profiles by enabling them individually for each one. Moreover, you may use the same bookmark folder for Favorite bar in every profile.
Requirements and Compatibility
To use this convenient feature, you’ll need:
- iPhone/iPad: iOS 17, iPadOS 17 or newer.
- Mac: macOS Sonoma 14 or later.
- Apple ID: You must be signed into the same Apple ID with iCloud on all devices.
- iCloud: Turned on for Safari syncing (Settings > [Your Name] > iCloud > Safari on iPhone/iPad; System Settings > Apple ID > iCloud > Safari on Mac).
- Default Profile: When you create your first new profile, all your existing browsing data (history, cookies, etc.) is automatically assigned to the default Personal profile. This default one cannot be deleted.
How to Create and Manage Safari Profiles on iPhone & iPad
iOS 26 makes creating Safari profiles on iPhone straightforward. Let’s break it down, step by step.
Create a New Safari Profile
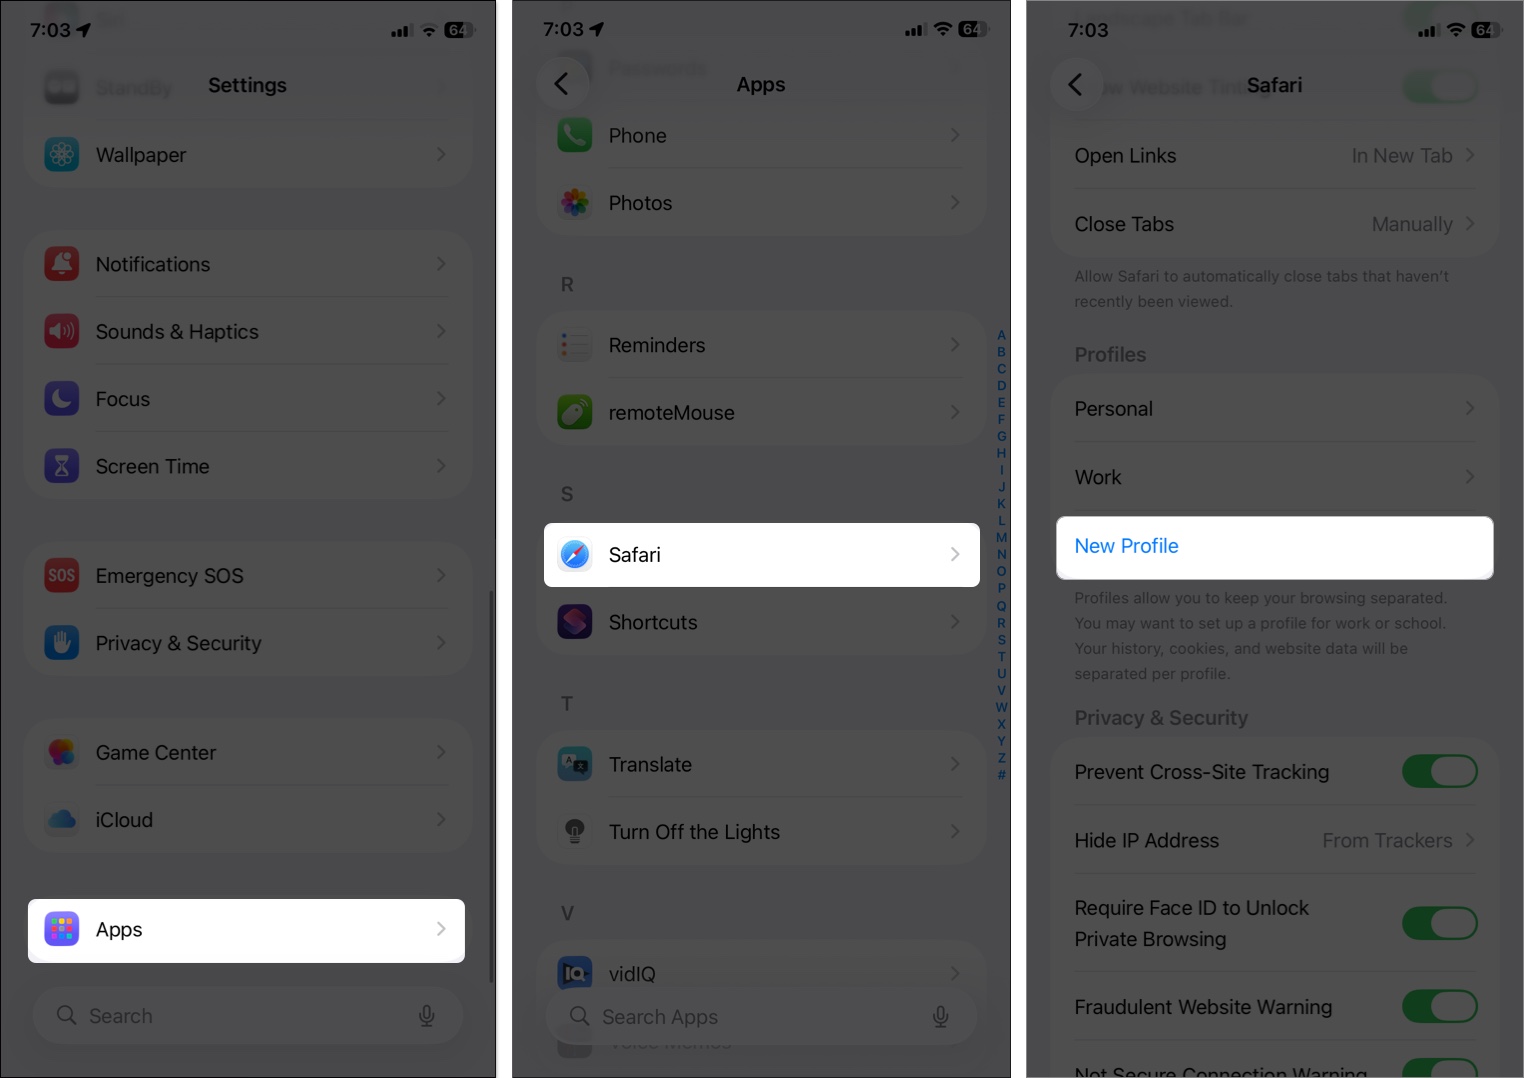
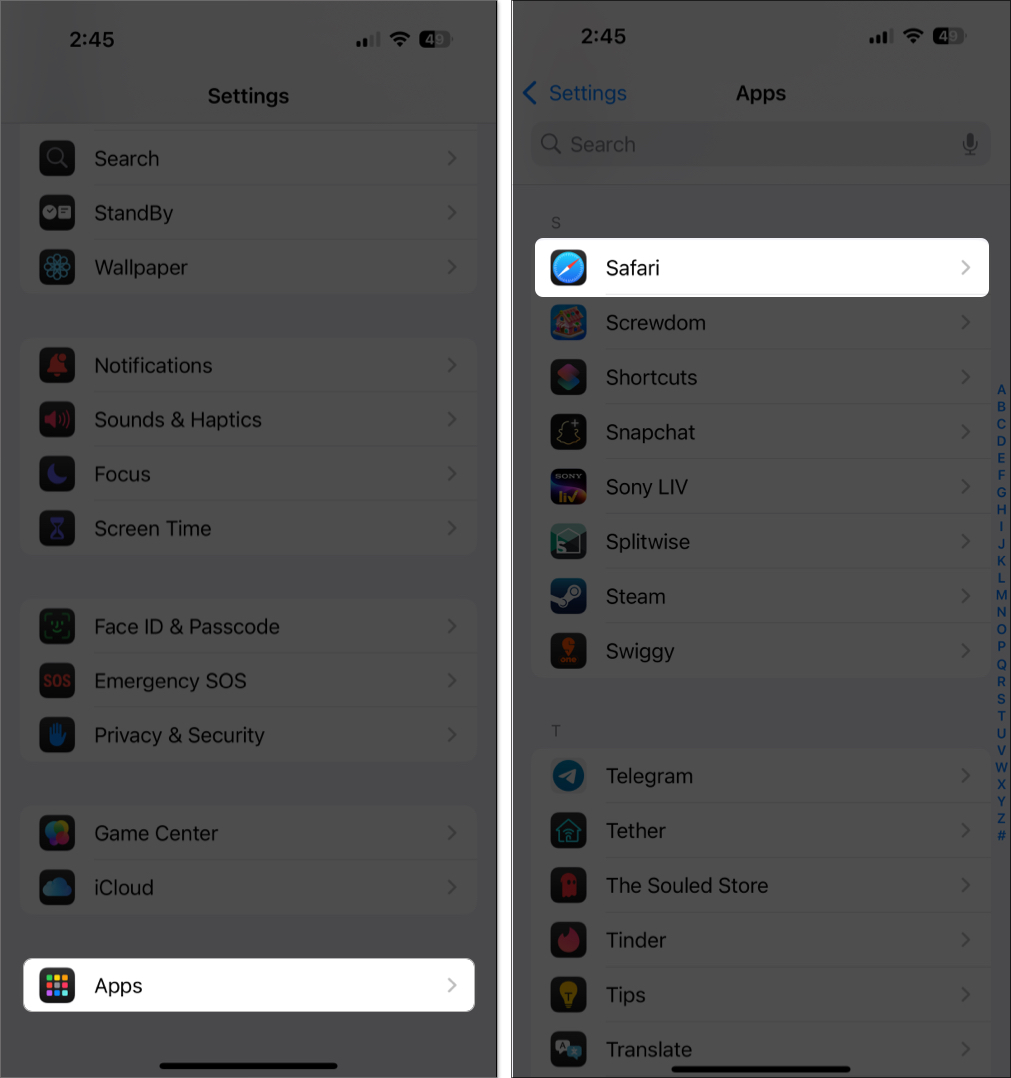
- Open the Settings app.
- Scroll down, tap on Apps, and select Safari from the list.
- Under the Profiles section, tap New Profile.
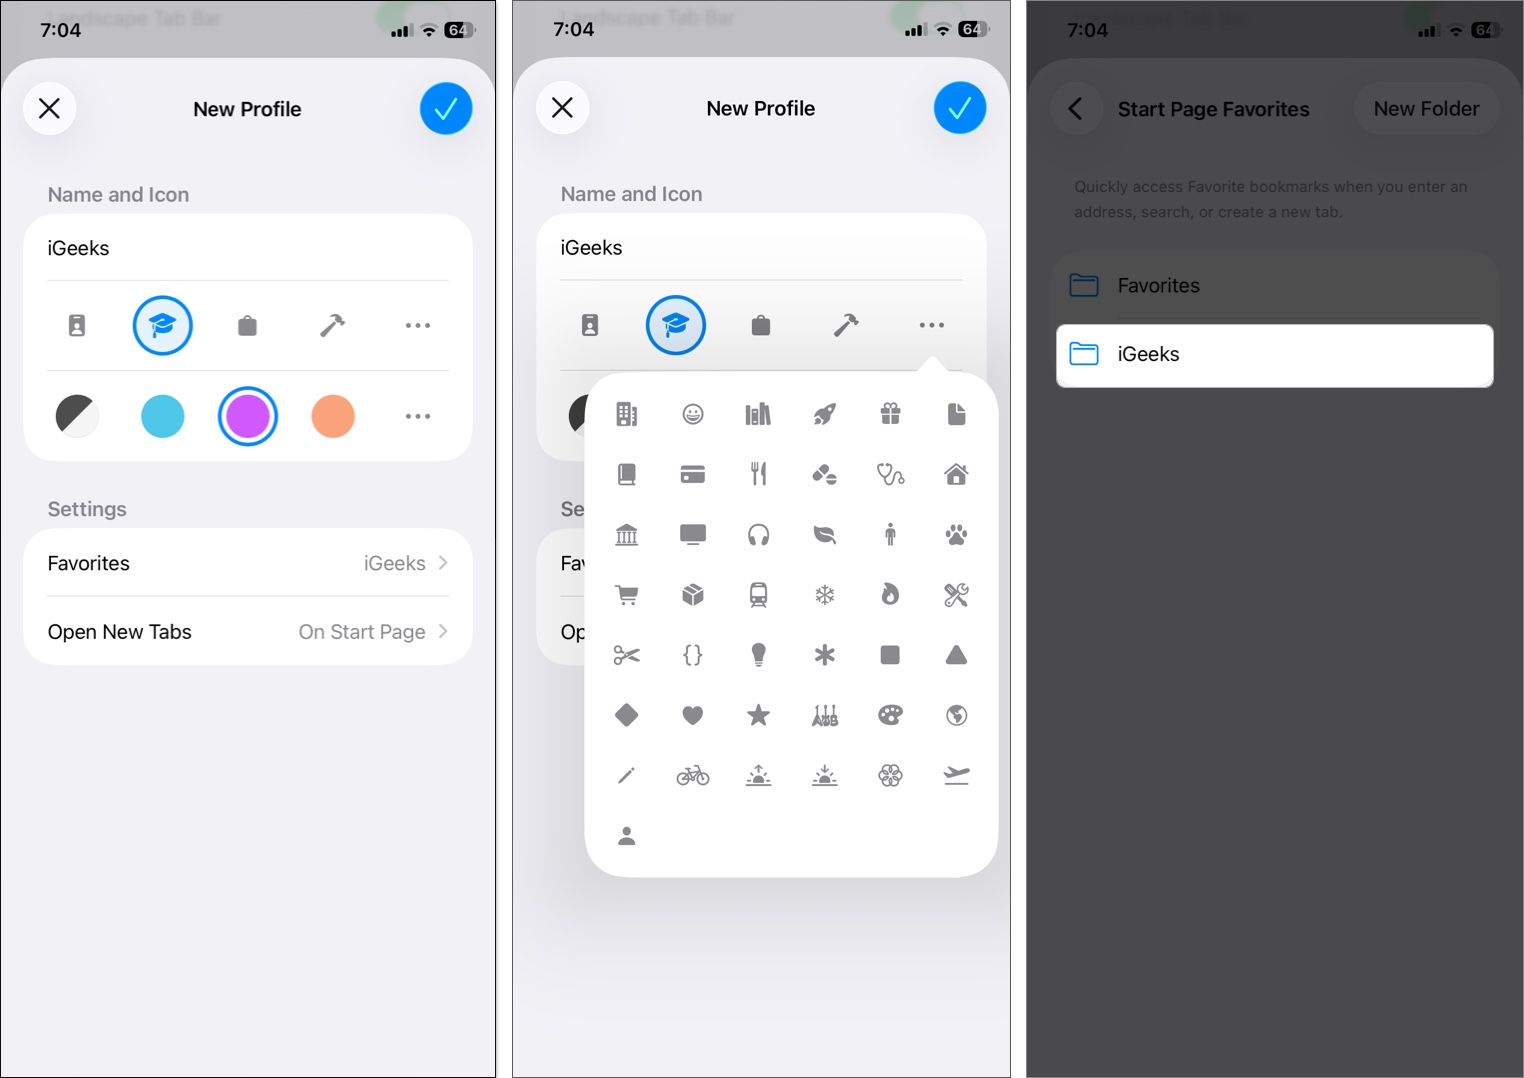
- Now, customize your profile. Enter a name (e.g., “Work”) and choose an icon and color. Tap the three-dot icon to access more options.
- Tap Favorites under Settings to select a new or existing bookmarks folder.
- Select Open New Tabs to set the page you want new tabs to open to.
- Once done, tap the checkmark icon in the top right corner.
That’s all; your profile is live. Start browsing; it’ll auto-save its own history.
Switch Between Safari Profiles
Using the steps above, you can create multiple Safari profiles. While browsing, you can easily switch between those profiles with these steps:
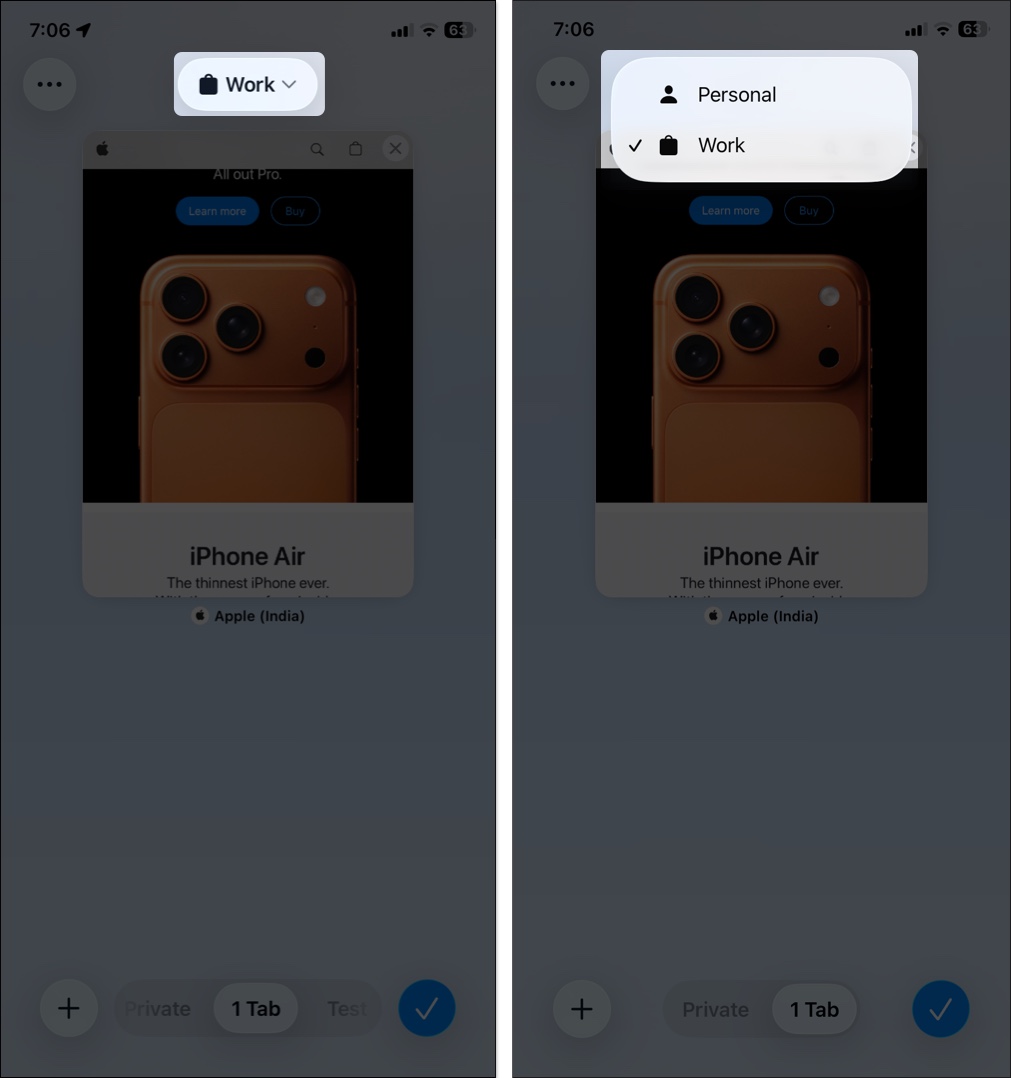
- In Safari, tap the More (three-dot) button, then select All Tabs.
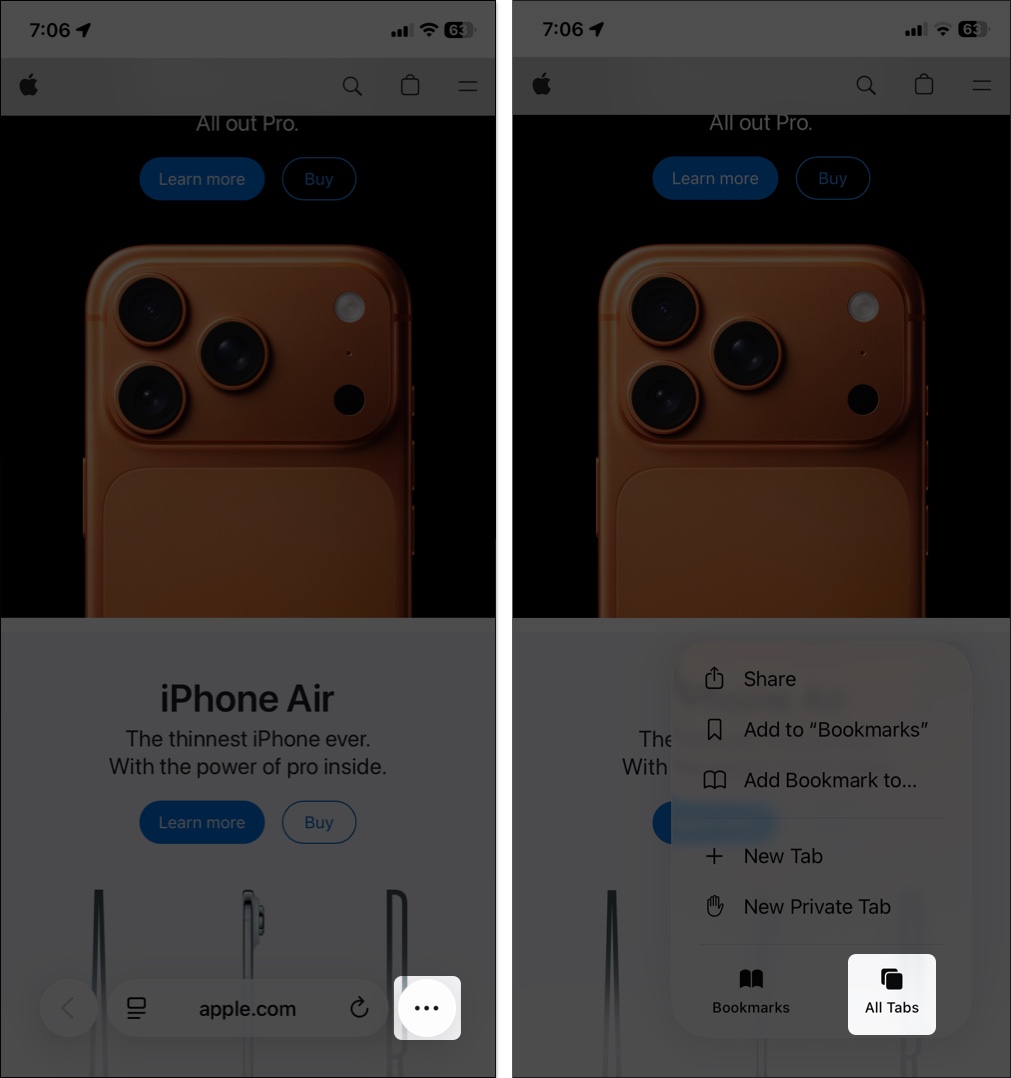
- You will see your active Safari profile name at the top. Tap it to see other profiles.
- From the dropdown, select the profile you want to use.
Manage Extensions Per Safari Profile
Safari extensions enable advanced features that help you boost productivity and save time. You can choose which extensions to use with each profile:
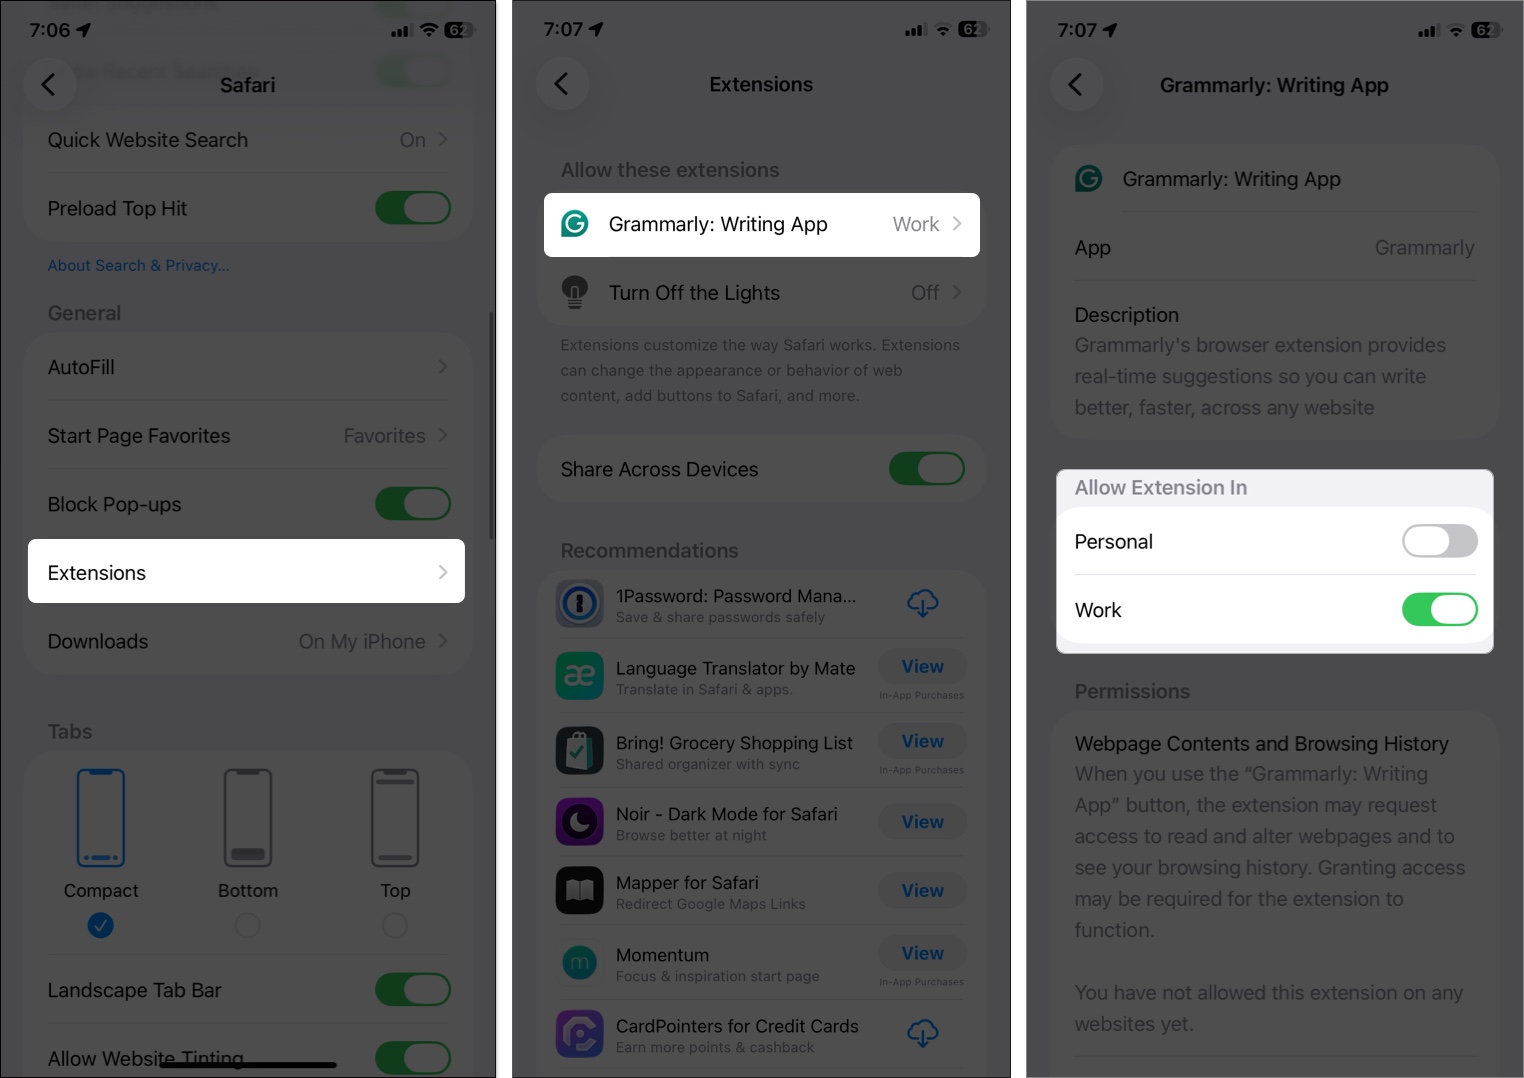
- Go to Settings > Apps > Safari.
- Here, tap Extensions and select the extension name.
- Under the Allow Extension In section, you will see toggles for each of your profiles. Turn the toggles On for the profiles where you want the extension to be active.
- Repeat this for other extensions as well.
Edit or Delete a Safari Profile
Want to rename your profile, change Favorites folder, or remove the profile entirely? Apple lets you quickly do this from Settings.
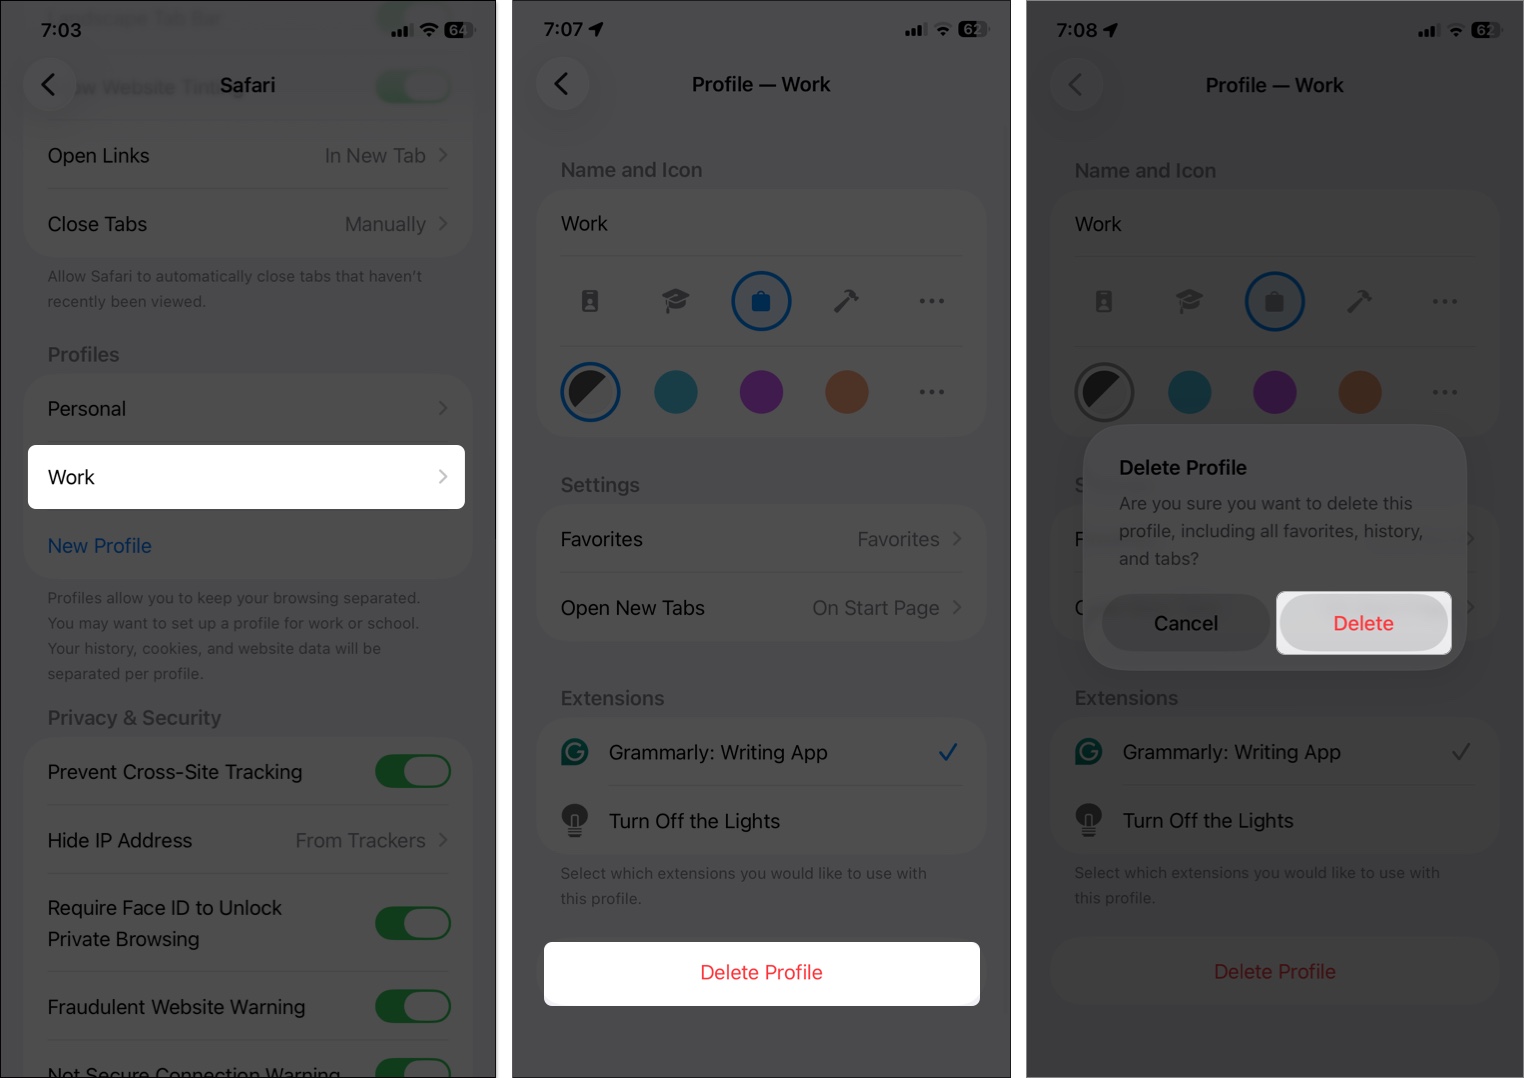
- Head to Settings > Apps > Safari and tap on a Profile.
- Now, change the name, icon, color, or settings.
- Else, tap Delete Profile at the bottom and select Delete to confirm.
Note:
How to Create and Manage Safari Profiles on Mac
Safari profiles are even more powerful on Mac. Let’s see how to use it on the latest macOS.
Create a New Safari Profile on Mac
- Launch Safari on your Mac.
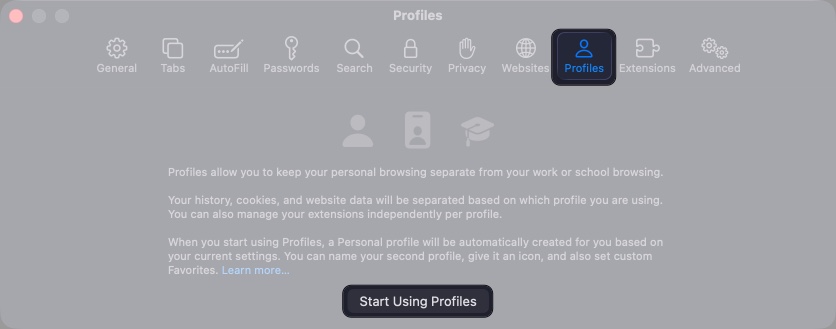
- Click Safari in the top menu bar and select Create Profile.

- Click Start Using Profiles on the prompt.
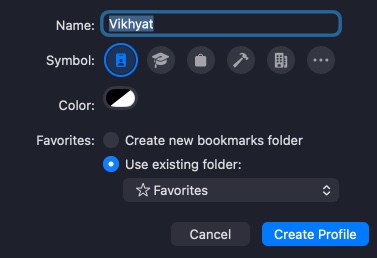
- Now, then customize the profile accordingly.
- Name: This name will show up on the Safari toolbar button.
- Symbol: The profile’s start page’s default backdrop and the Safari toolbar button for this profile will both display the symbol.
- Color: Similar to symbol, it appears in the start page’s background and the Safari toolbar button.
- Favorites: Select an existing bookmarks folder or create a new one for this profile.
- Click Create Profile once you’re done.
Switch Between Profiles & Open Profile Windows
Following profile creation, you will see a button displaying the name, symbol, and color of the active profile in the Safari toolbar.
- Open a new window: Click the toolbar icon and select New [Profile] Window. If the Safari sidebar is open, go to the Files in the menu bar and select New [Profile] Window.
- Switch to a different profile in the same window: Go to the Start page, click the toolbar icon and select Switch to [Profile] Window.
![Go to the Start page, click the toolbar icon and select Switch to [Profile] Window.](https://dev.igeeksblog.com/wp-content/uploads/2025/10/switch-profile-on-mac.jpg)
What I do is: Control-click on the Safari icon on the Dock and open a window in the desired profile directly.
Manage Extensions Per Profile
All extensions installed on your Mac are available across your Safari profiles. However, you can activate them for a specific profile using the following steps:
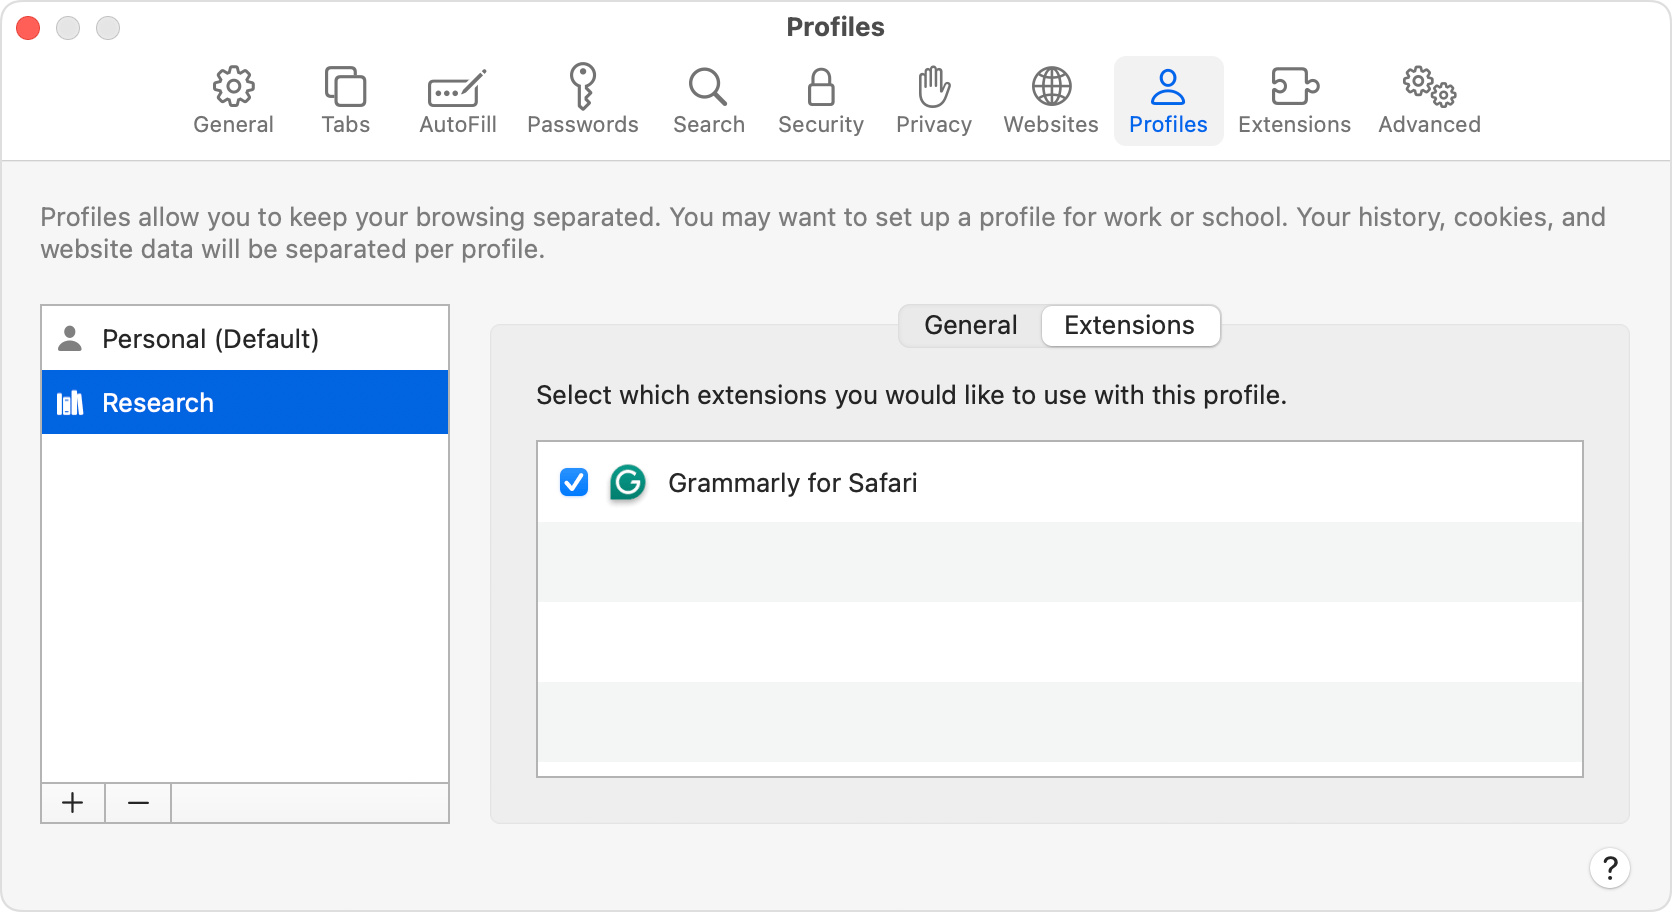
- Open the Safari app, click Safari in the menu bar, and select Settings > Profiles.
- Select the profile name from the sidebar.
- Now, click the Extensions tab to see all the extensions.
- Check the box next to the extensions that you want to use in the profile.
Open Links in a Specific Profile
When you click on a link in a message or email, the website opens in the most recent Safari profile by default. However, you may make URLs open on a certain profile. For instance, I have included my work-related links in my Work profile. So, they won’t mix up.
- Launch Safari and navigate to the website that you want to set up.
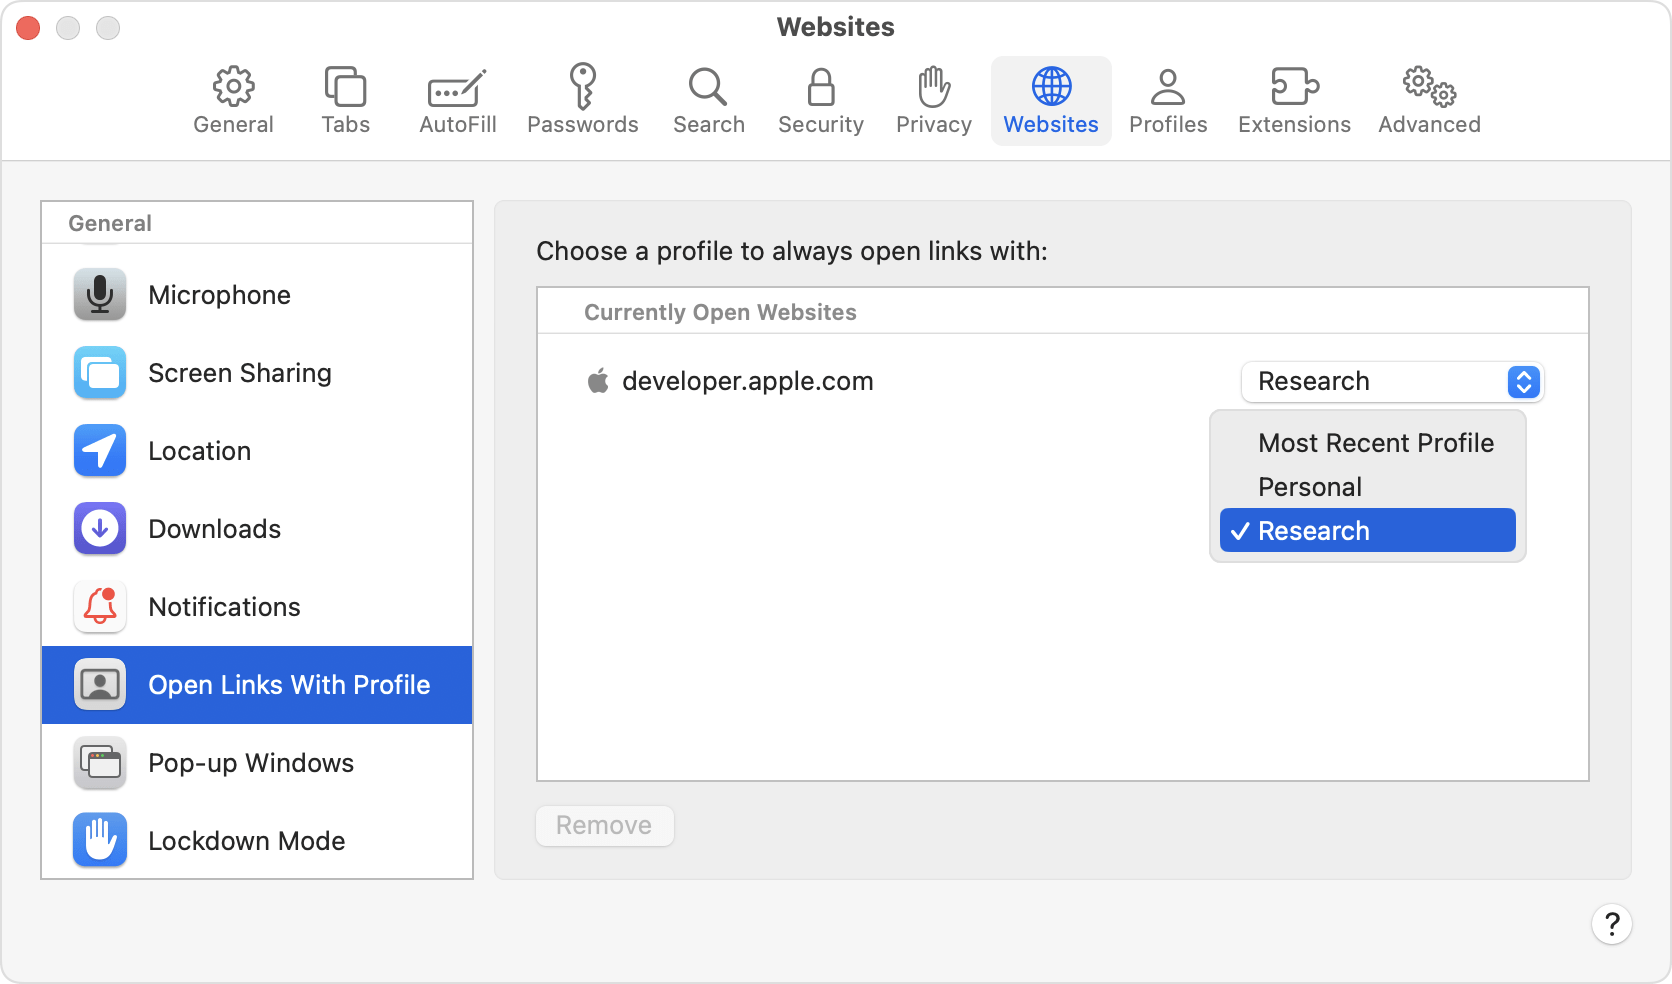
- Now, access Safari Settings and move to the Websites tab.
- Scroll down the sidebar and select Open Links With Profile.
- You will see a list of open websites on the right panel.
- Click the dropdown menu next to a website and choose the profile name.
This function is limited to links that are accessed from sources other than Safari, such Mail, Messages, the Finder, or other apps. Unless the website is already open in another profile, the link opens in the profile you selected for that website.
Delete a Profile on Mac
If you no longer need a Safari profile, you can quickly delete it to remove all related data.
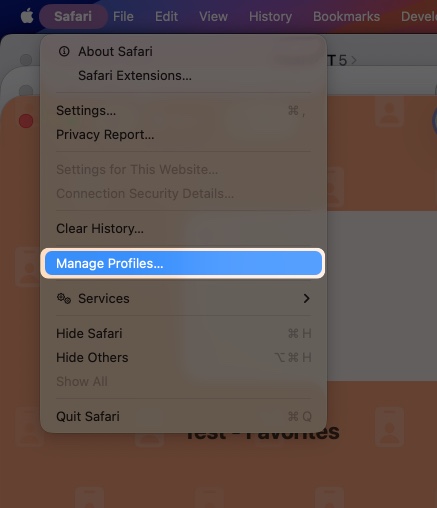
- Open the Safari app, click Safari on the menu bar, and select Manage Profiles.
- Select the profile you want to remove from the sidebar.
- Click the minus (–) button at the bottom.
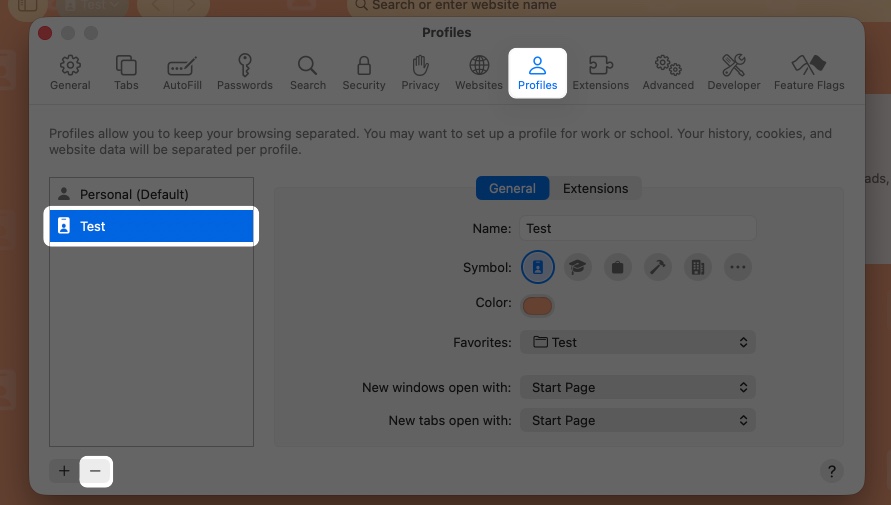
It will delete all the history, cookies, and other website data. However, your Favorites and other bookmarks are retained.
Cross-Device Profile Syncing with iCloud
Safari Profiles sync beautifully across your Apple devices via iCloud, meaning your Work profile on Mac will also appear on your iPhone and iPad. All settings, browser history, Tab Groups, and Favorites are also synced.
Just make sure you’re:
- Signed into the same Apple ID
- Have Safari turned on in iCloud Settings
If you use iCloud Tabs, they also stay consistent across devices. For example, when you open the Work profile on your iPhone, you will see the iCloud Tabs from the Work profile on your Mac on the Start Page. So, you can quickly pick up where you left off.
Privacy, Sign-Ins, and Clearing Data of Profile
As I already mentioned, multiple profiles allow you to use different accounts of one website without logging out. However, as the cookies and website data are not shared across profiles, you need to sign into your accounts (like Google) once for each profile. After the first set up, you can quickly switch profiles to access your different accounts.
Similarly, you can clear browser cache and data for a specific profile or altogether. Here’s the steps for iPhone and iPad:
- Go to Settings > Apps > Safari.
- Scroll down and tap on Clear History and Website Data.
- Now, select a profile or All Profiles and Clear Timeframe.
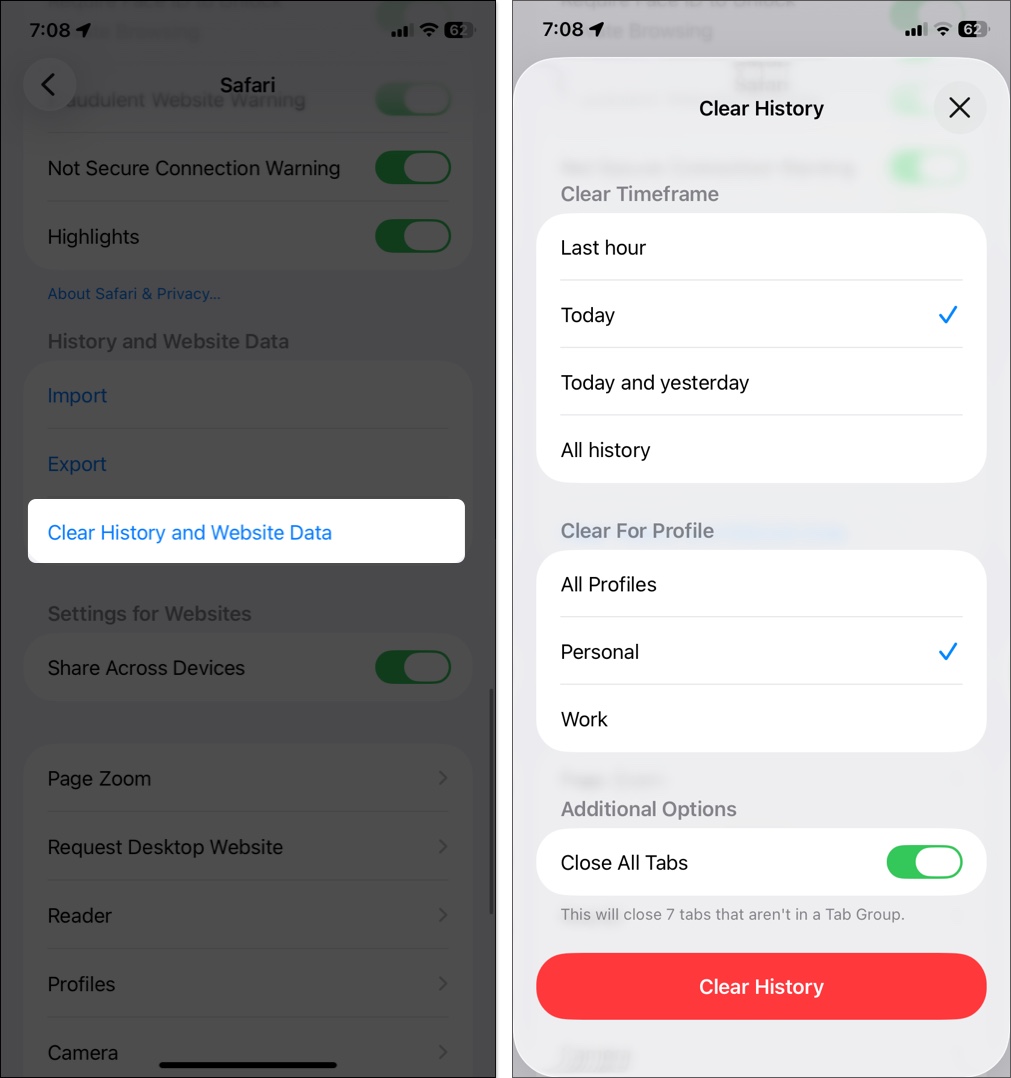
- Finally, tap Clear History.
Automating Safari Profiles with Focus Filters
Here’s where things get really cool. With Focus Filters, you can make Safari automatically switch profiles based on your current Focus Mode.
For example:
- When you turn on Work Focus, Safari switches to your Work Profile.
- When you activate Personal Focus, it jumps back to your Personal one.
To set this up:
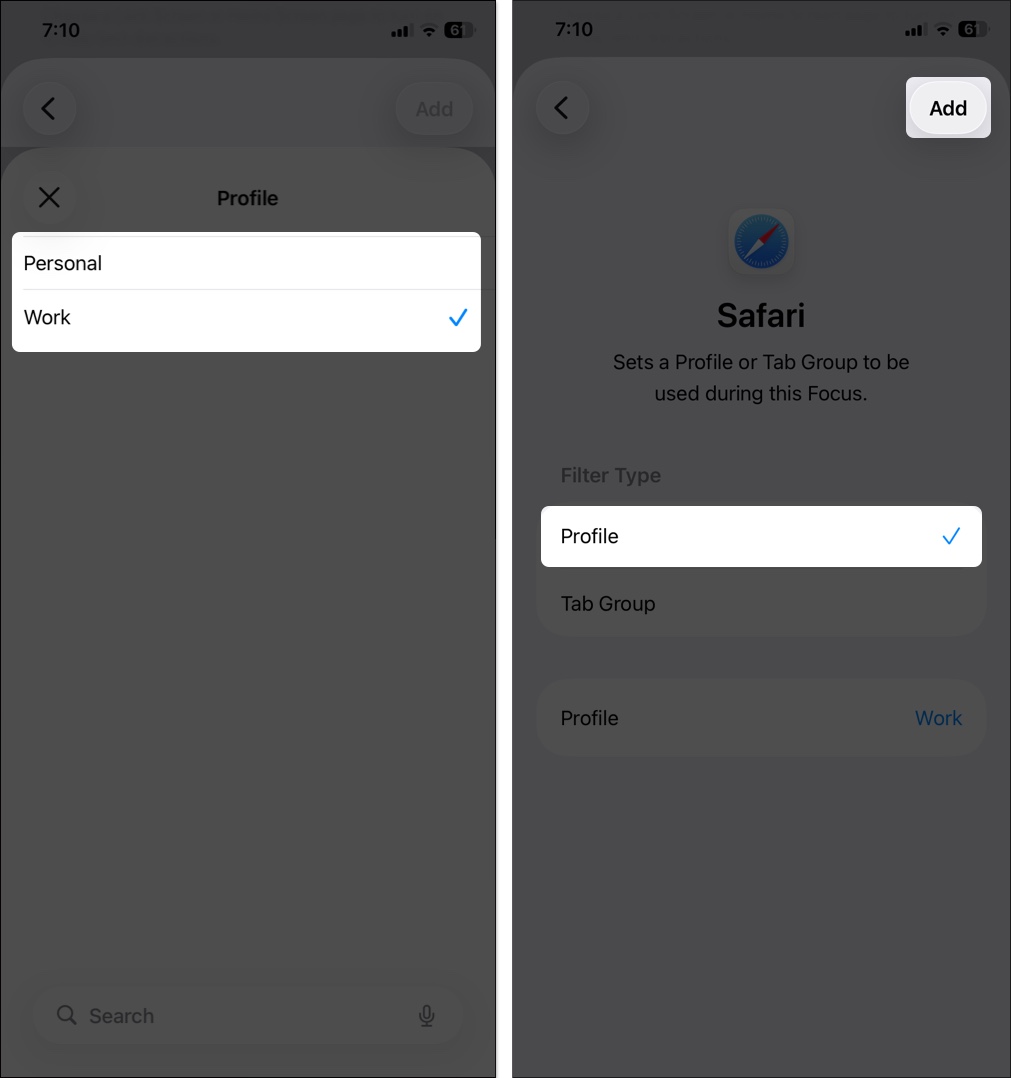
- Open Settings > Focus and select a Focus mode.
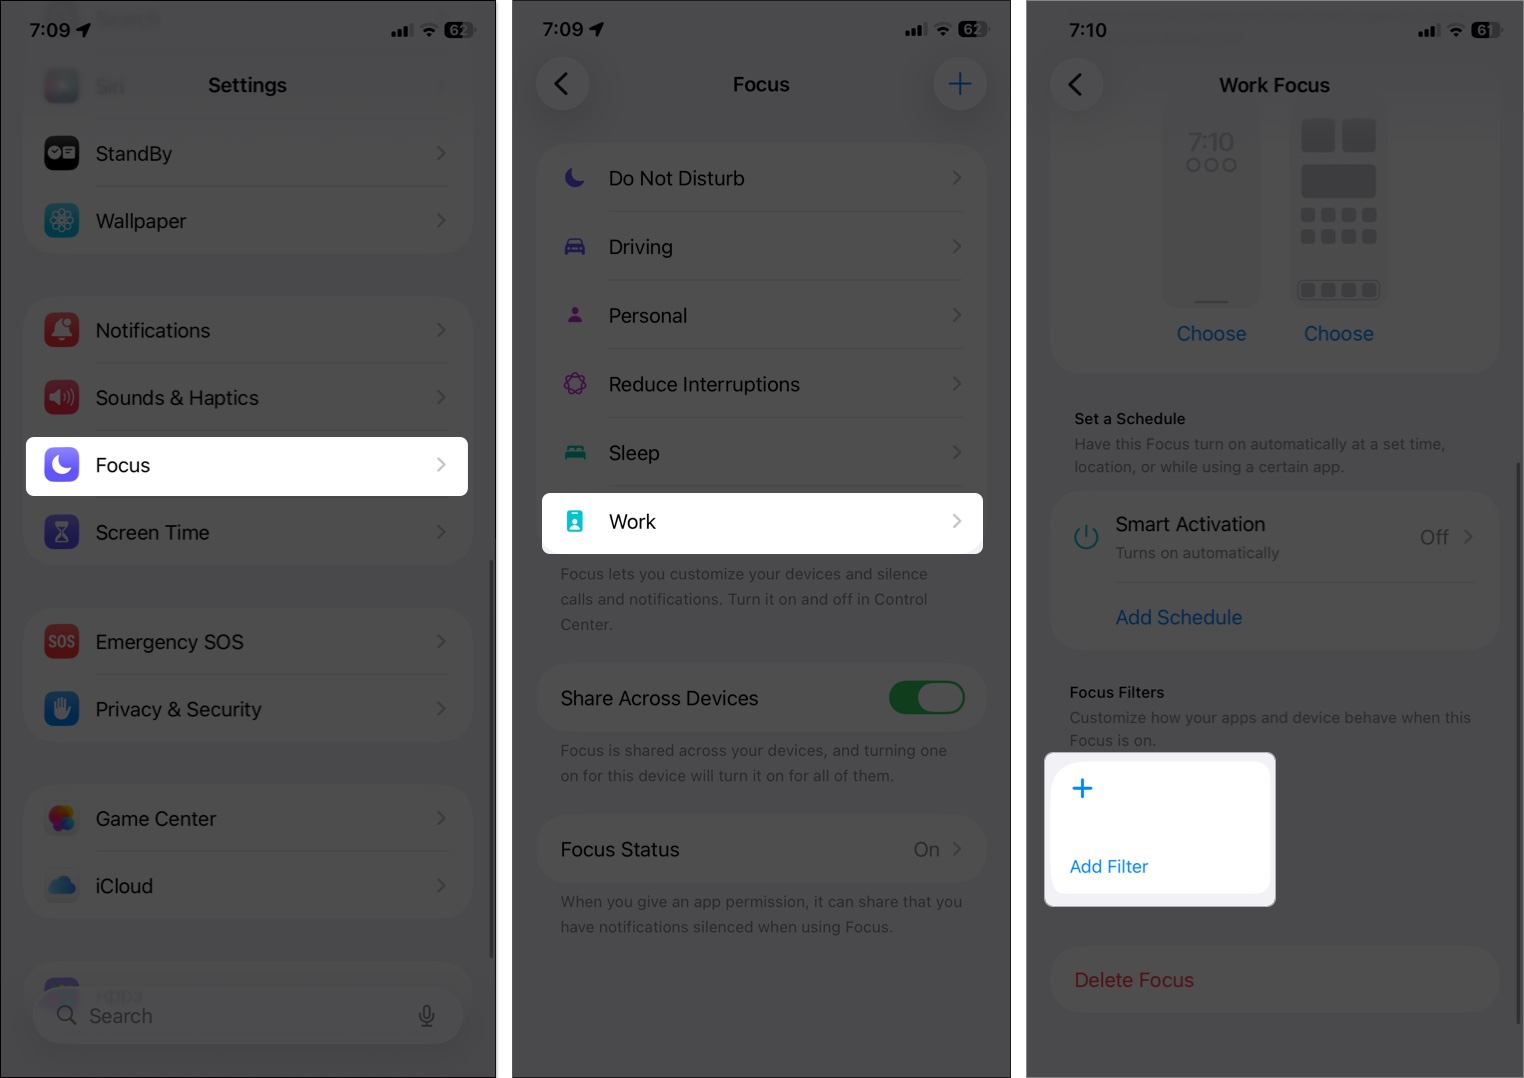
- Scroll down and tap Add Filter > Safari.
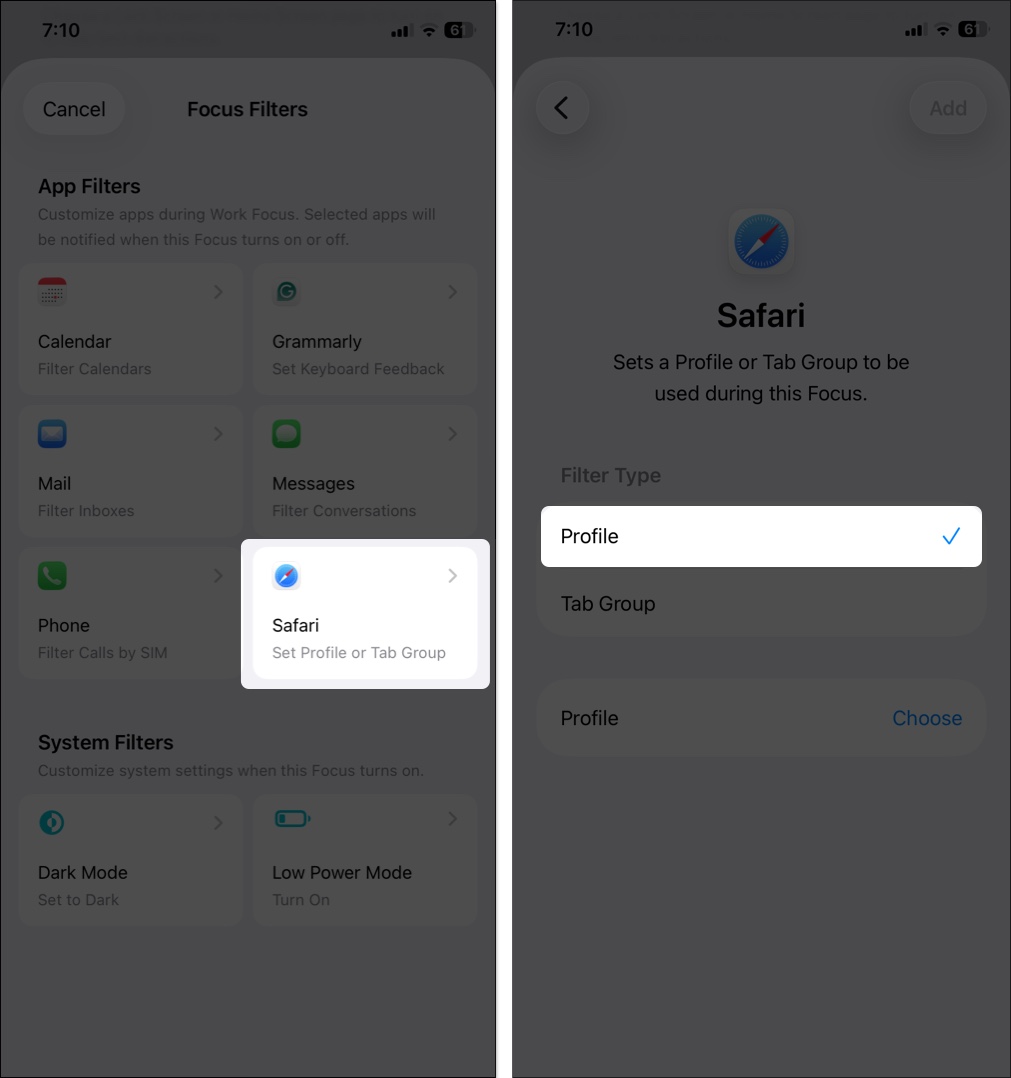
- Choose which profile to link and tap Add to save.
Now Safari adapts to your day automatically, no manual switching needed.
Troubleshooting Common Profile Issues
Glitches happen in Safari, but fixes are easy to follow:
| Issues | Solutions |
|---|---|
| Can’t find the “Create Profile” option | Make sure your device is running iOS 17 / macOS Sonoma or later. Restart your device. |
| Profiles not syncing | Check your iCloud settings and ensure Safari is enabled. Force close the Safari app or sign out/in of iCloud. |
| Extensions not showing per profile | Try re-enabling them from Settings > Safari > Extensions for each profile. Reinstall the extension from App Store |
Check out: Safari not working on your iPhone? Here’s how to fix it
Browse According to Your Mood!
Safari Profiles make it easy to keep your online life organized and distraction-free. By separating your work, personal, and other browsing activities, you get a cleaner, more focused experience. Moreover, the smart Focus mode integration makes a big difference across your iPhone, iPad, and Mac.
Once you set them up, you’ll wonder how you ever lived without them. Give it a try and let us know what you think about this nifty feature in the comments section below.
Frequently Asked Questions
Topics

Written by
Ava BiswasAva is a die-hard Apple aficionado and seasoned writer with a knack for breaking down complex tech concepts into easily digestible content. Having honed her writing and editing skills over 4 years at renowned media houses like TechBurner, Ava crafts informative and engaging articles including troubleshooting guides, product reviews, editorials at iGeeksBlog. When not typing, you can find her exploring the latest Apple releases or pondering the future of tech innovation.
View all posts →More from How-to
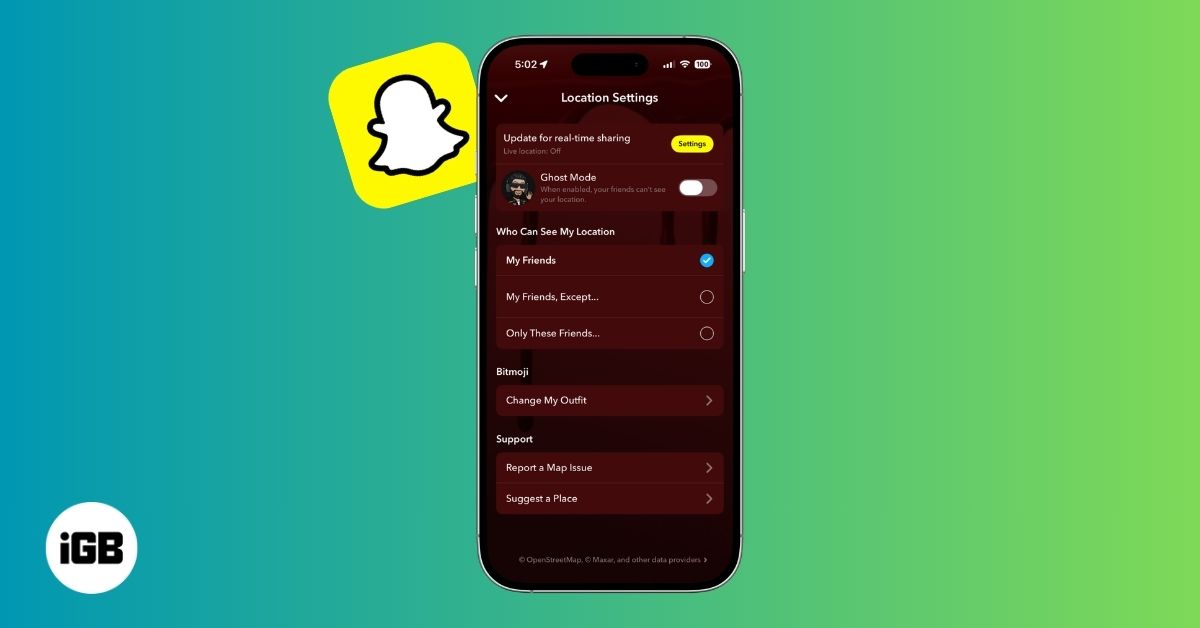
How to Turn Off Location on Snapchat (Step-by-Step Guide)
Want to stop sharing your location on Snapchat? This guide explains how Snapchat location sharing works and shows simple ways to turn off your location using Ghost Mode or phone settings. Stay in control of your privacy in just a few steps.

Snapchat Parental Controls: How to Set Up Family Center and Keep Your Teen Safe
Snapchat’s Family Center lets parents monitor their teen’s friend activity and screen time without reading private messages. Here’s how to set it up and what to expect.

How to Block and Unblock Someone on Instagram
Instagram lets you block or unblock someone in seconds. Follow these simple steps to take full control of your privacy and online peace.