
- Why iPhone screen recording matters: Screen Recording on iPhone captures everything on your display as a video, which helps when you want to show steps, explain issues, or share gameplay.
- What you can do with Screen Recording: You can record tutorials, save app walkthroughs, capture social moments, or review meeting clips when you need details later.
- How to start and stop recordings on iPhone: You tap the Screen Recording icon in Control Center to begin, then stop it through the red status indicator or the same icon, with a mic toggle for audio.
Screenshots work for quick moments, but they fall short when you need to show someone a full process like resetting network settings. It can take several images and they’re easy to mix up. In these cases, a screen recording is much clearer.
Screen recording on iPhone is simple. Once you add it to Control Center, you can start or stop a recording with a single tap. Here’s a quick guide to help you get familiar with it
What is Screen Recording on iPhone?
Screen recording is a built-in iPhone feature that captures everything on your screen as a video. If you only need part of the clip, you can trim it after saving and share it anywhere. Apple introduced screen recording in iOS 11, so any iPhone from the 5s onward supports it.
Why Use Screen Recording?
- To make quick app tutorials or walk someone through a process step by step.
- To capture gameplay moments from titles like PUBG Mobile, COD Mobile, or Roblox and share them.
- To save Instagram Stories or Snapchat Snaps before they disappear.
- To record parts of Zoom or Google Meet sessions for notes or later review, with permission.
How to Add Screen Recording to Control Center on iPhone
Before you start recording, you may need to add the feature to Control Center. If your iPhone is on iOS 17 or earlier, follow these steps:
- Open Settings from your home screen.
- Scroll down and tap Control Center.
- Tap the + icon next to Screen Recording to add it to your Control Center.
If you’re on iOS 18 or later, the Screen Recording button should appear by default. If it doesn’t, customize your Control Center and add it from the available controls.
How to Start Screen Recording on iPhone
Once you’ve added the shortcut to your Control Center, here’s what you should do next:
- Open the Control Center by swiping down from the top-right on iPhones with Face ID or swiping up from the bottom on iPhones with Touch ID.
- Tap the Screen Recording icon.

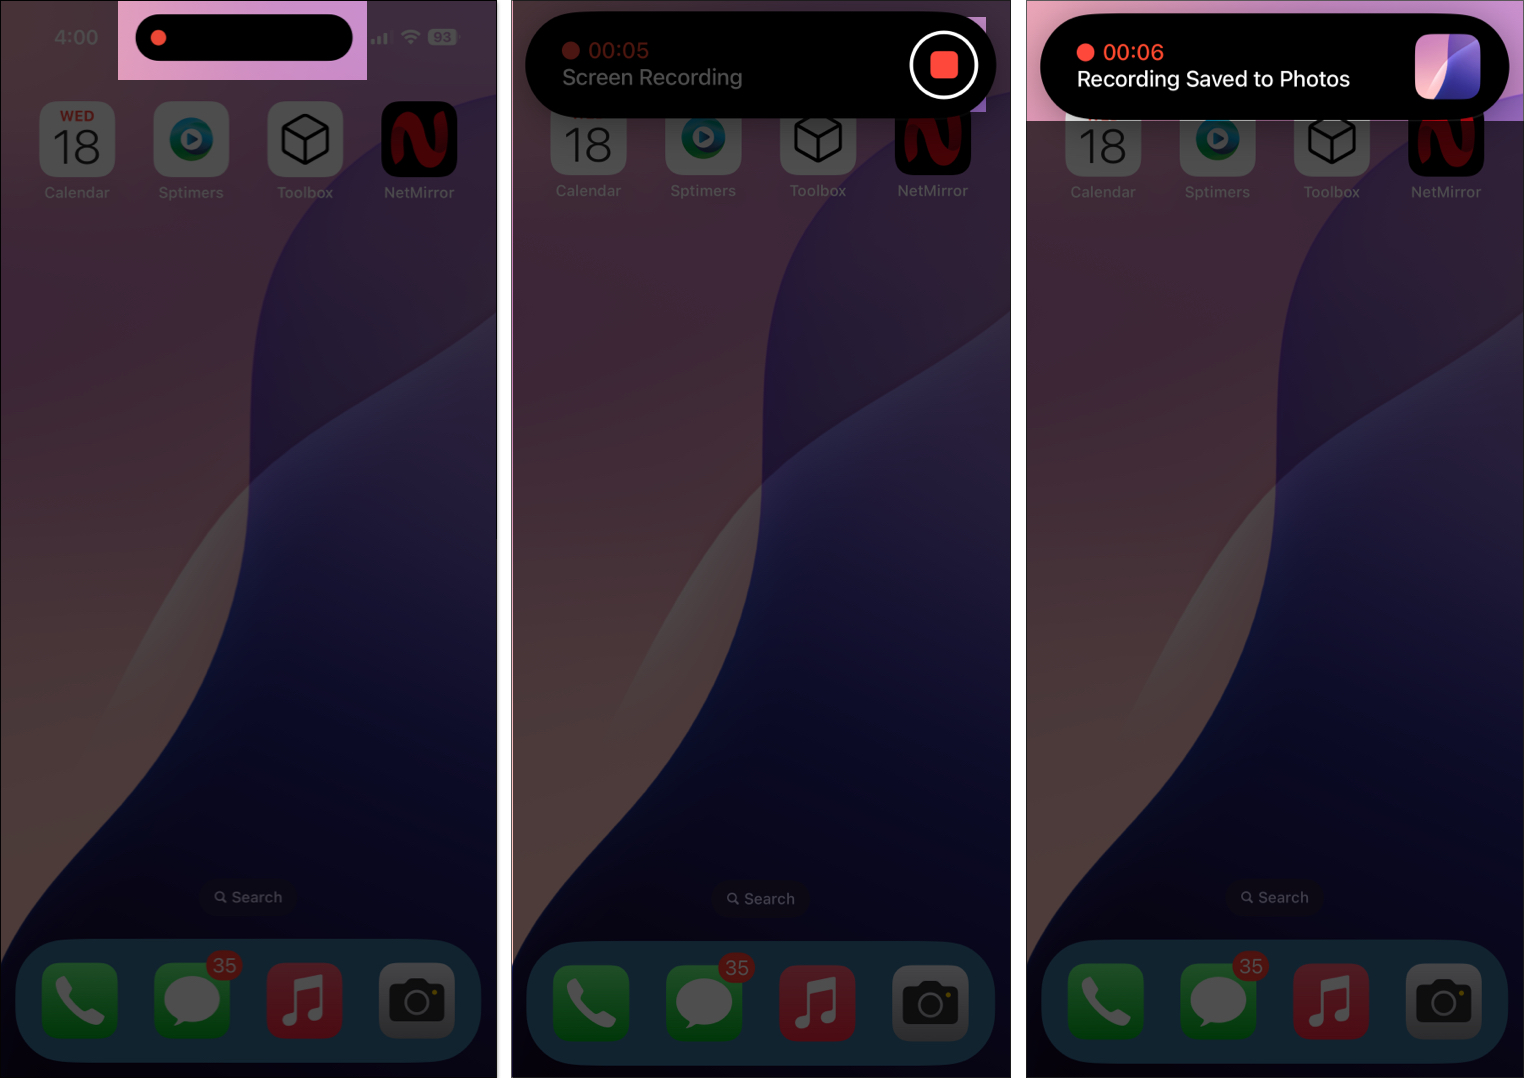
- The screen recording will begin after a 3-second countdown. You’ll soon see a red indicator at the top of the screen.
Screen Record with Audio
If you want to add a voiceover while recording, turn on the microphone before you start. Here’s how:
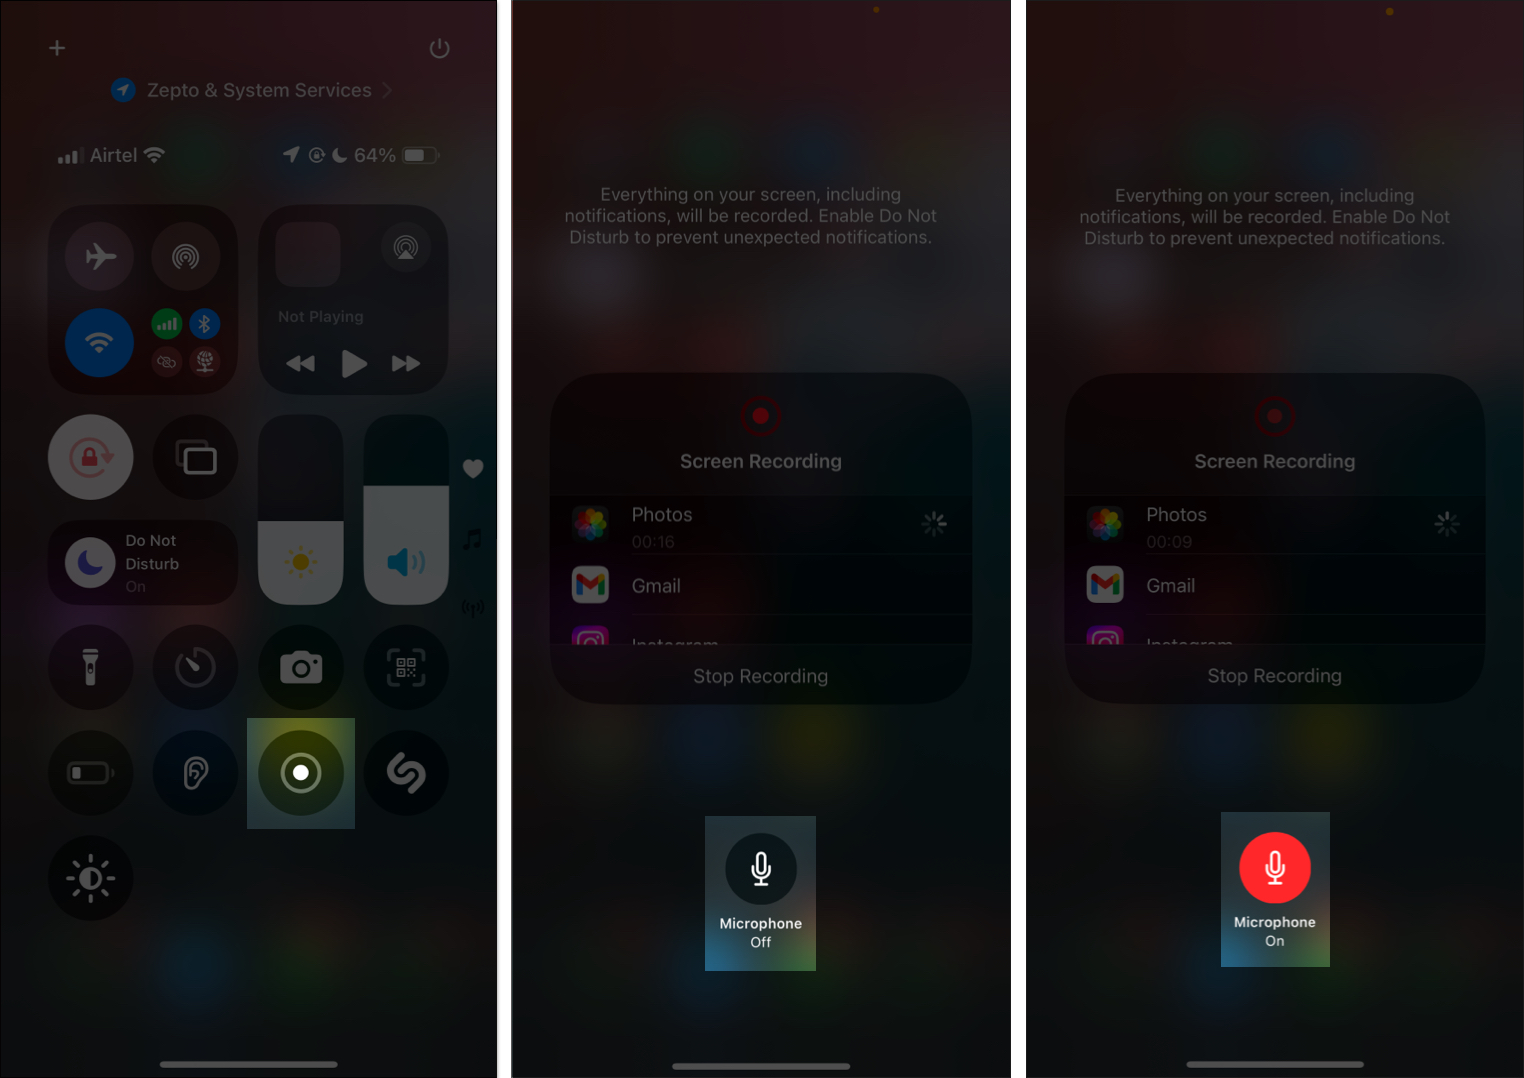
- Open the Control Center and press and hold the grey Screen Recording icon.
- Tap the Microphone icon to turn it on before you start recording.
Stop Screen Recording
Once you’ve captured everything you need, you can stop the screen recording to save it to your Photos. Follow these steps:
- Tap the red indicator at the top of the screen.
- Tap Stop to finish and save your screen recording.
- Alternatively, you can swipe up to open the Control Center and tap the Screen Recording icon to stop the recording.
How to Edit a Screen Recording on iPhone
If you want to trim your clip, add filters, or remove audio, you can edit the recording with these steps:
- Open the Photos app and tap on your saved screen recording.
- Tap the edit icon (the adjuster icon).
- You’ll see several options, including trimming, cropping, adding filters, and even removing audio.

- Edit the recording as needed, depending on what or how you want.

Tips for Better Screen Recording on iPhone or iPad
- Turn on Do Not Disturb to avoid calls and notifications.
- Check your storage so the recording doesn’t stop midway.
- Use landscape mode for gameplay or video content.
- Test the microphone and settings before you start.
- Record in a quiet space for clearer audio.
Signing Off
Screen recording on iPhone makes it easy to create tutorials, troubleshoot issues, or save moments you don’t want to miss. It’s simple to use and handy for both productivity and content creation. Follow the steps above and start capturing what you need.


