- You can turn on Do Not Disturb in several ways including Control Center, Siri, Lock Screen switching, or the Action Button on supported iPhones.
- Automate Do Not Disturb by time, location, or app use, so your iPhone minimizes interruptions without needing manual input each time.
- Customize who and what gets through during Do Not Disturb, with Focus Filters that can also trigger actions like enabling Low Power Mode.
- You can quickly turn Do Not Disturb off anytime using Siri or Control Center, restoring all alerts and calls instantly.
- Do Not Disturb fully silences your phone, unlike Silent mode, which still allows vibrations and screen lighting for incoming notifications.
In today’s digital world, apps constantly battle for our attention with constant pings. Whether you’re in a meeting or trying to focus on something important, putting your iPhone or iPad on Do Not Disturb is an effective way to silence undesired calls, alerts, and notifications from such apps and minimize distractions.
If you’re new to iOS or iPadOS, this guide will show you how to turn on, customize, and turn off Do Not Disturb on your iPhone or iPad.
How to turn on Do Not Disturb on iPhone
There are several ways to turn on Do Not Disturb on your iPhone or iPad. You can pick a method that works best for you.
1. Turn Do Not Disturb on from Control Center
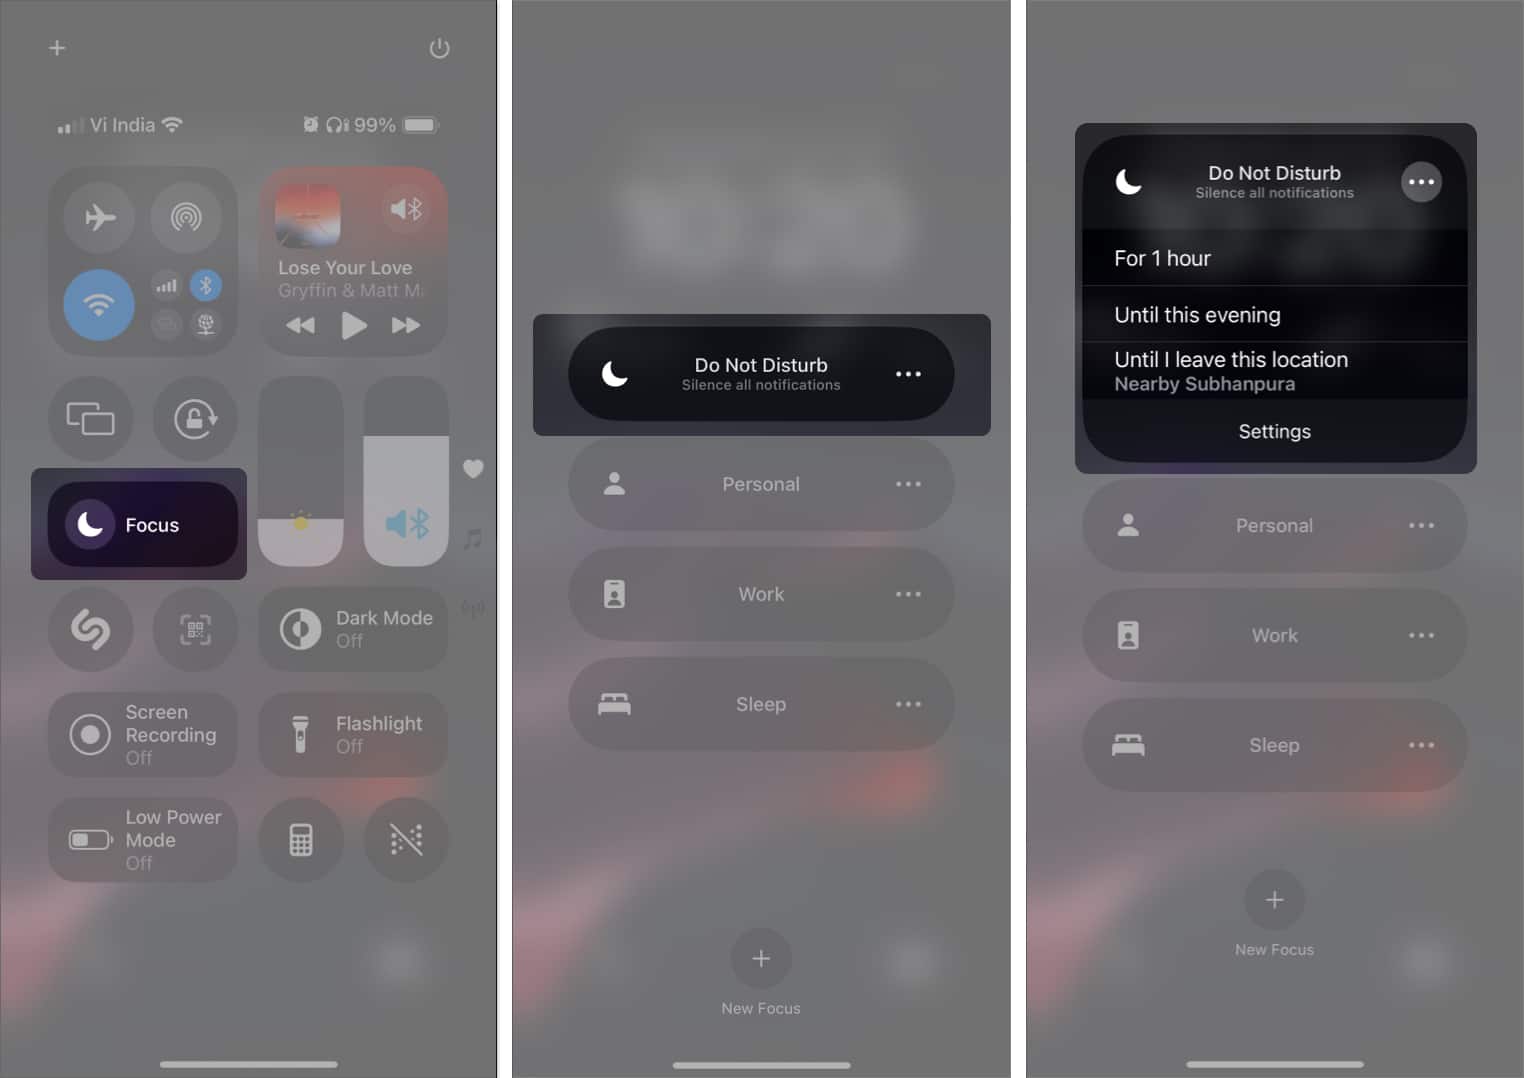
The simplest way to enable Do Not Disturb on an iPhone or iPad is from the Control Center.
- Swipe down from the top-right corner of the screen to bring up the Control Center.
- Tap Focus, and select Do Not Disturb from the resulting menu.
- For more DND options, tap the three-dot button next to Do Not Disturb.
If you don’t see Focus in the Control Center, customize the Control Center and add it first. Then, try the above steps.
2. Turn Do Not Disturb on using Action Button
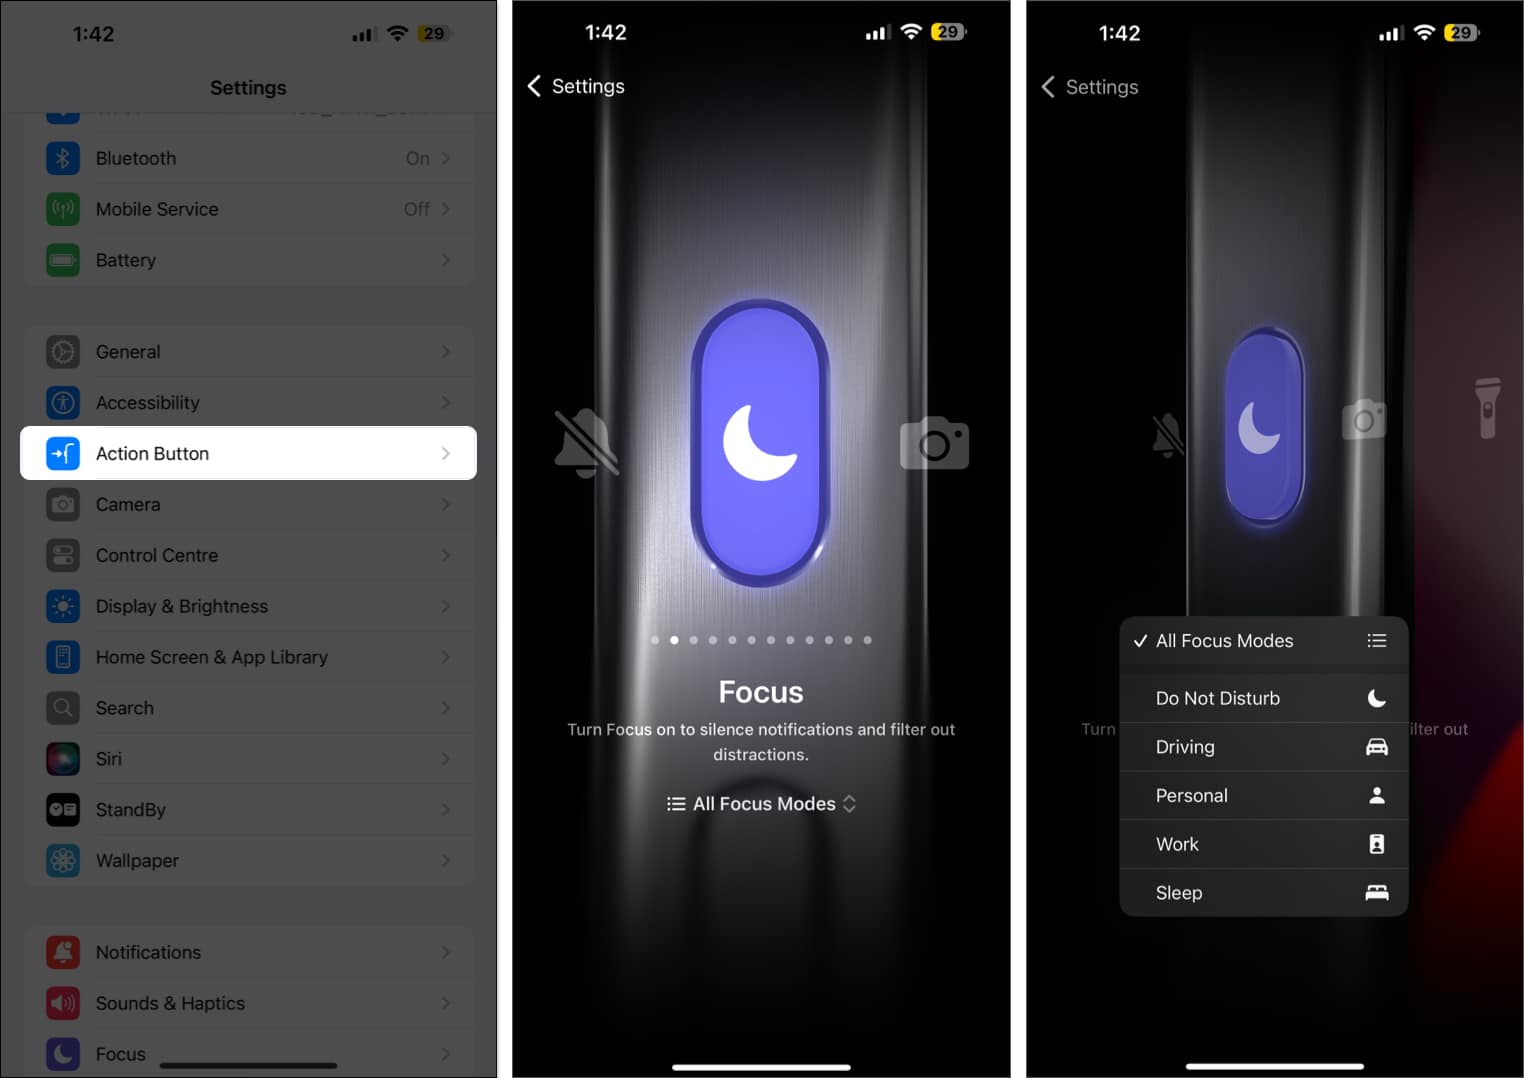
If you have a supported iPhone (iPhone 15 Pro or iPhone 15 Pro Max), you can customize the Action Button to trigger a Focus mode. Once done, press and hold the Action Button whenever you want to turn on Do Not Disturb.
3. Turn Do Not Disturb on using Siri
Another quick way to toggle Do Not Disturb on your iPhone or iPad is by using Siri. Simply press the Side button to summon Siri and say, “Hey Siri, turn on Do Not Disturb.”
4. Turn Do Not Disturb on by switching Lock Screens
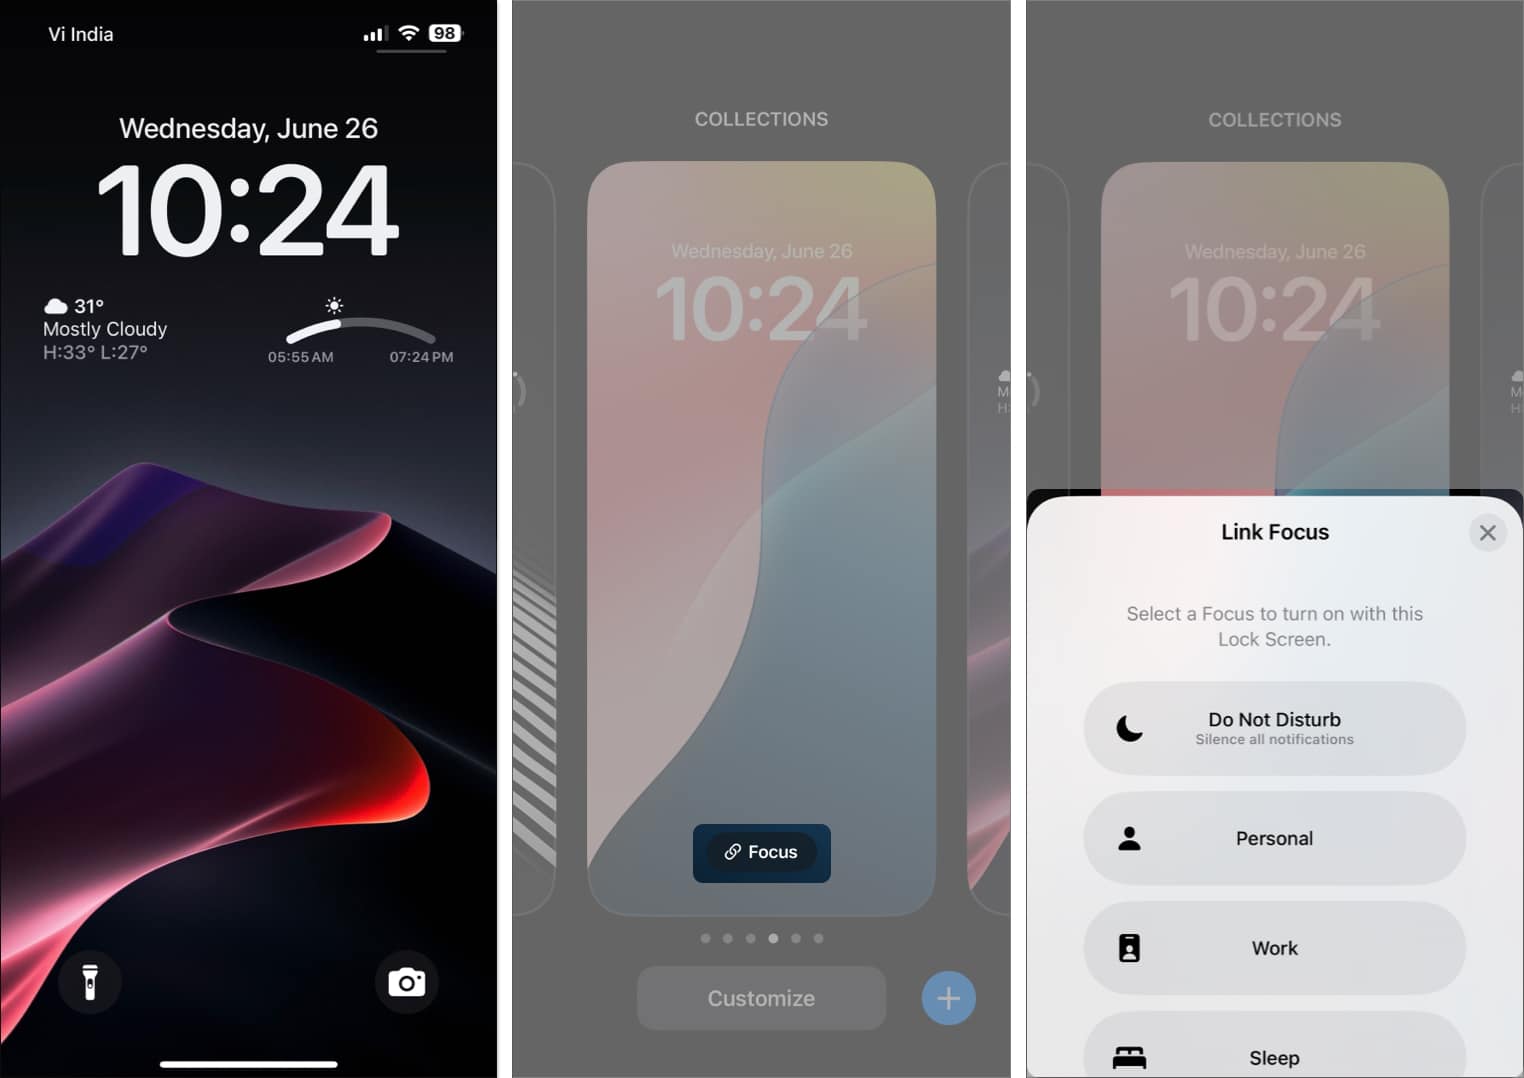
You can also toggle Do Not Disturb (and other Focus modes) on your iPhone by switching your Lock Screens. With this method, your device will automatically turn on Do Not Disturb whenever you switch to a specific Lock Screen.
Here’s how to do this:
- Unlock your device.
- Tap and hold an empty area on the Lock Screen for a few seconds.
- Scroll horizontally to pick a Lock Screen you want to link with Do Not Disturb.
- Once you have Lock Screen in the center, tap Focus and select Do Not Disturb.
How to schedule Do Not Disturb to turn on automatically
You can, of course, activate Do Not Disturb manually at any given time. However, you might find it annoying to do so every day. To save you the trouble, Apple offers different ways to schedule Do Not Disturb to turn on automatically.
- Open the Settings app on your iPhone or iPad.
- Navigate to Focus and select Do Not Disturb.
- Now, scroll down and tap on Add Schedule.
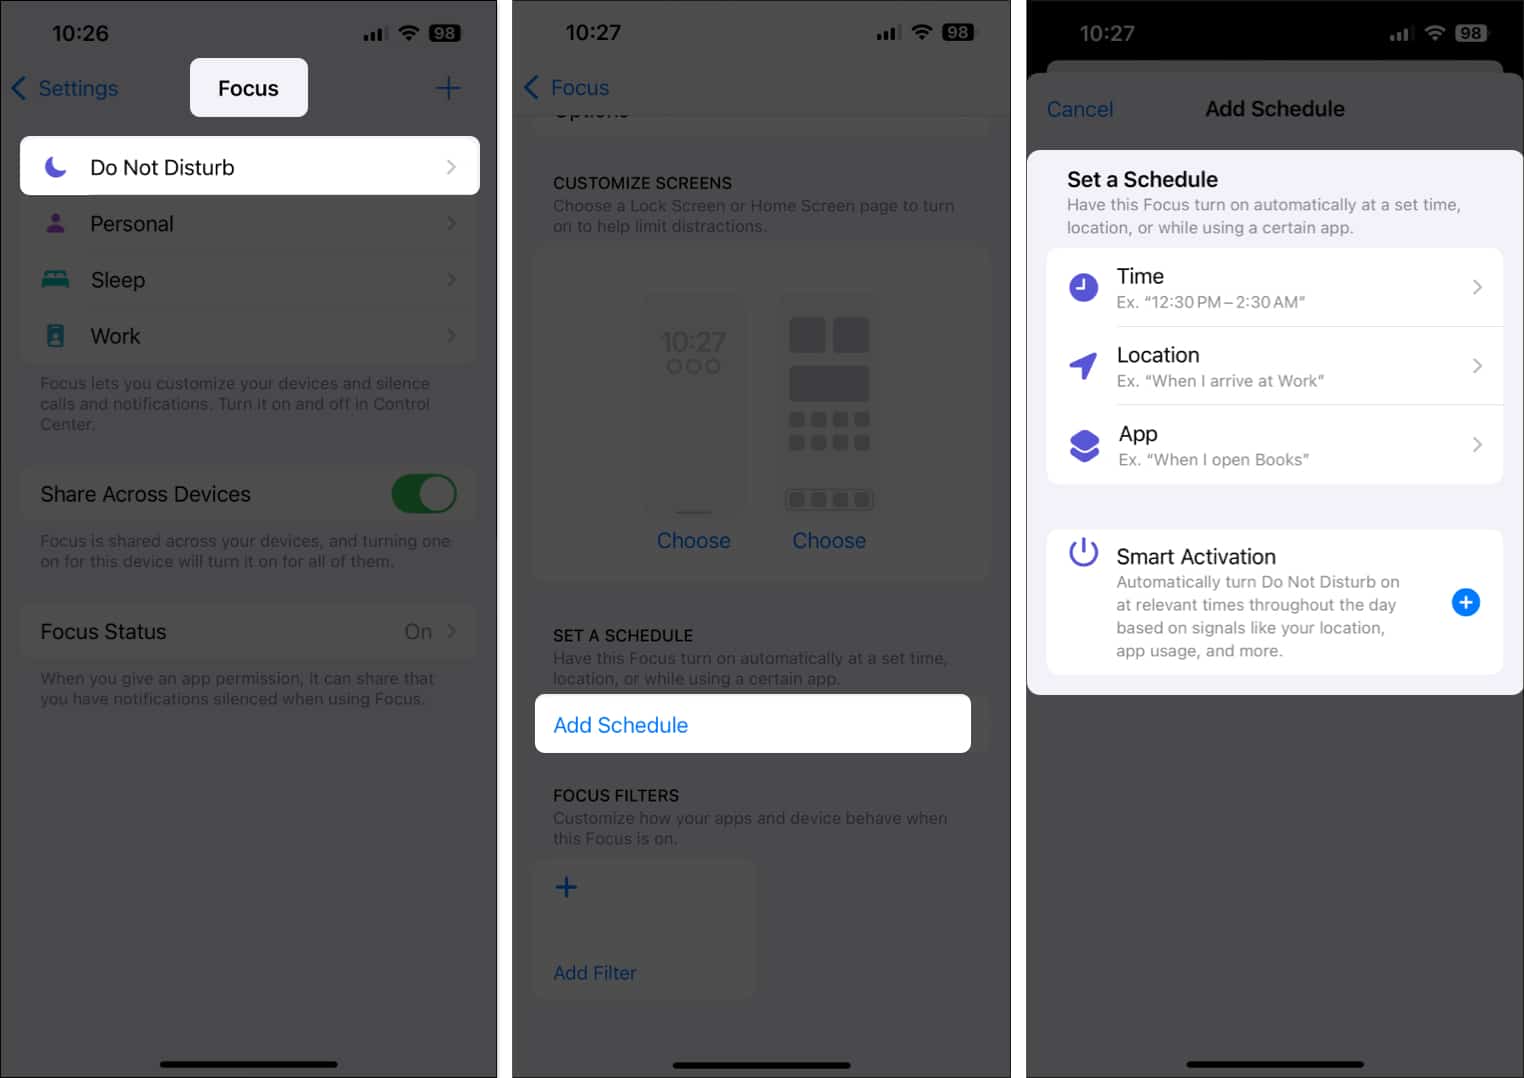
- Select a relevant option to set a schedule:
- Time: You can pick a specific start and end time to activate and deactivate Do Not Disturb.
- Location: It allows you to trigger Do Not Disturb whenever you visit a specific location. For example, you can have Do Not Disturb turn itself on when you head home after work.
- App: With this, you can trigger Do Not Disturb whenever you open a specific app on your device.
- Smart Activation: This option automatically triggers Do Not Disturb based on your routine.
How to customize Do Not Disturb on iPhone or iPad
Apple gives you several options to modify Do Not Disturb on your iPhone and iPad. If you want to learn more about these options, we’ve got you covered below.
Allow notifications from specific apps
When you enable Do Not Disturb, it silences notifications from all the apps installed on your iPhone. However, if you want to make exceptions and allow notifications from specific apps, even when the Do Not Disturb mode is turned on, you can do so using the steps below:
- Open the Settings app on your iPhone or iPad.
- Navigate to Focus and select Do Not Disturb.
- Tap Apps under Allow Notifications.
- Select Allow Notifications From.
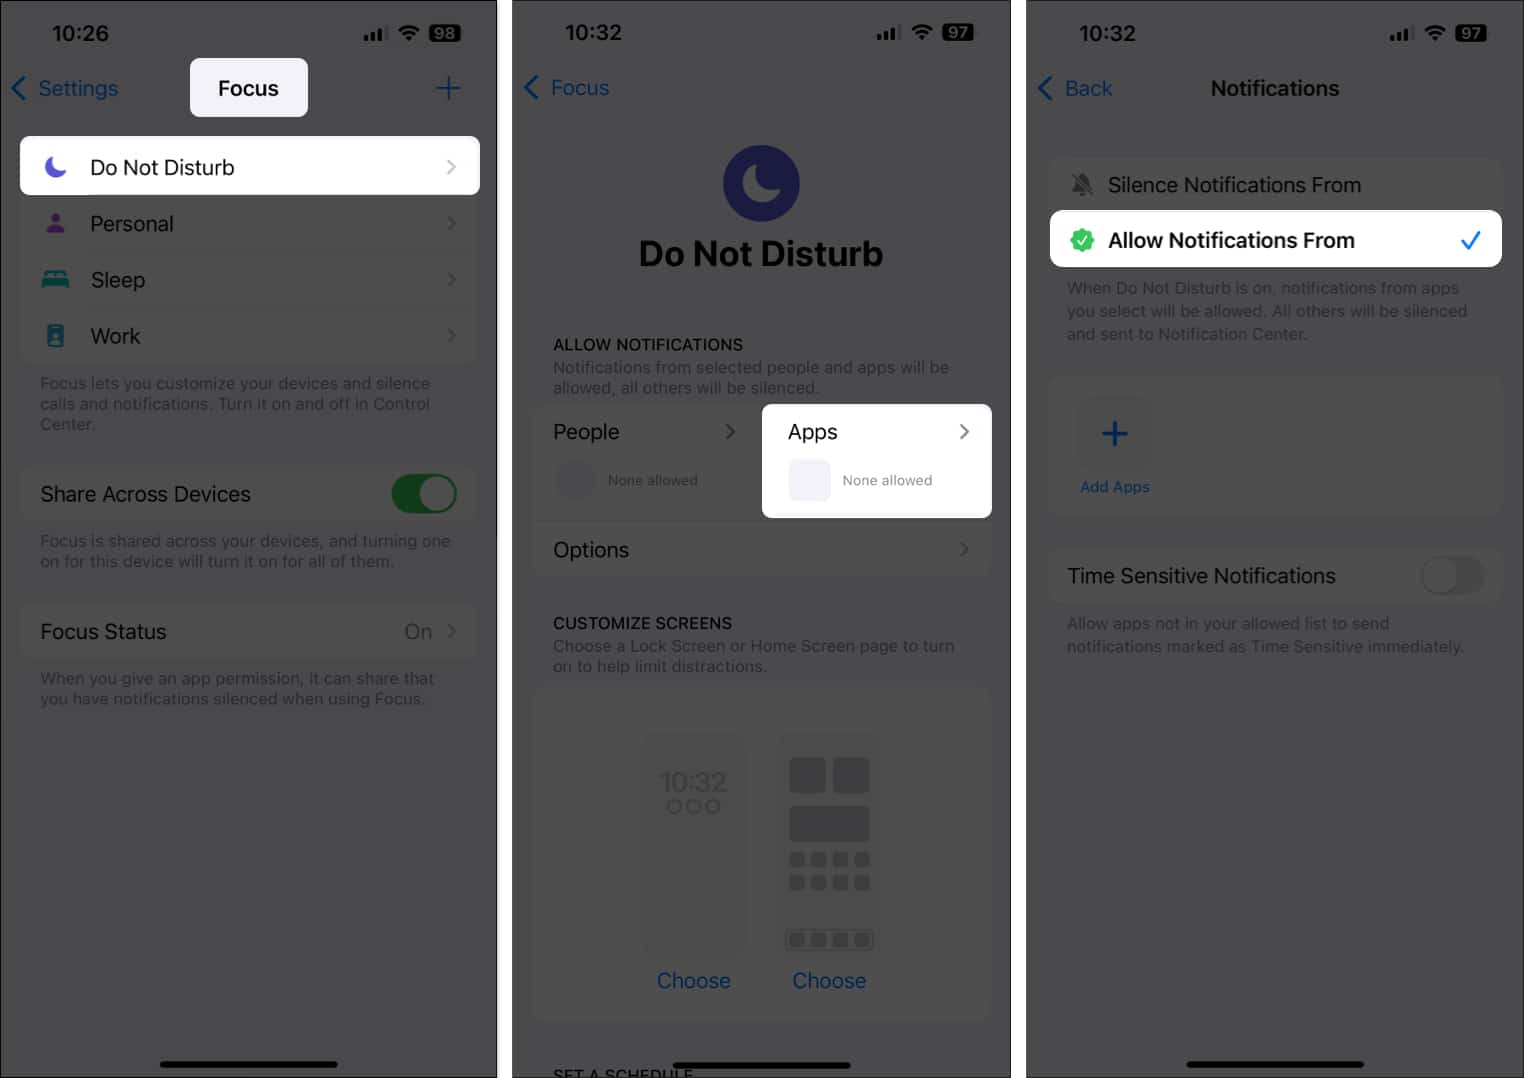
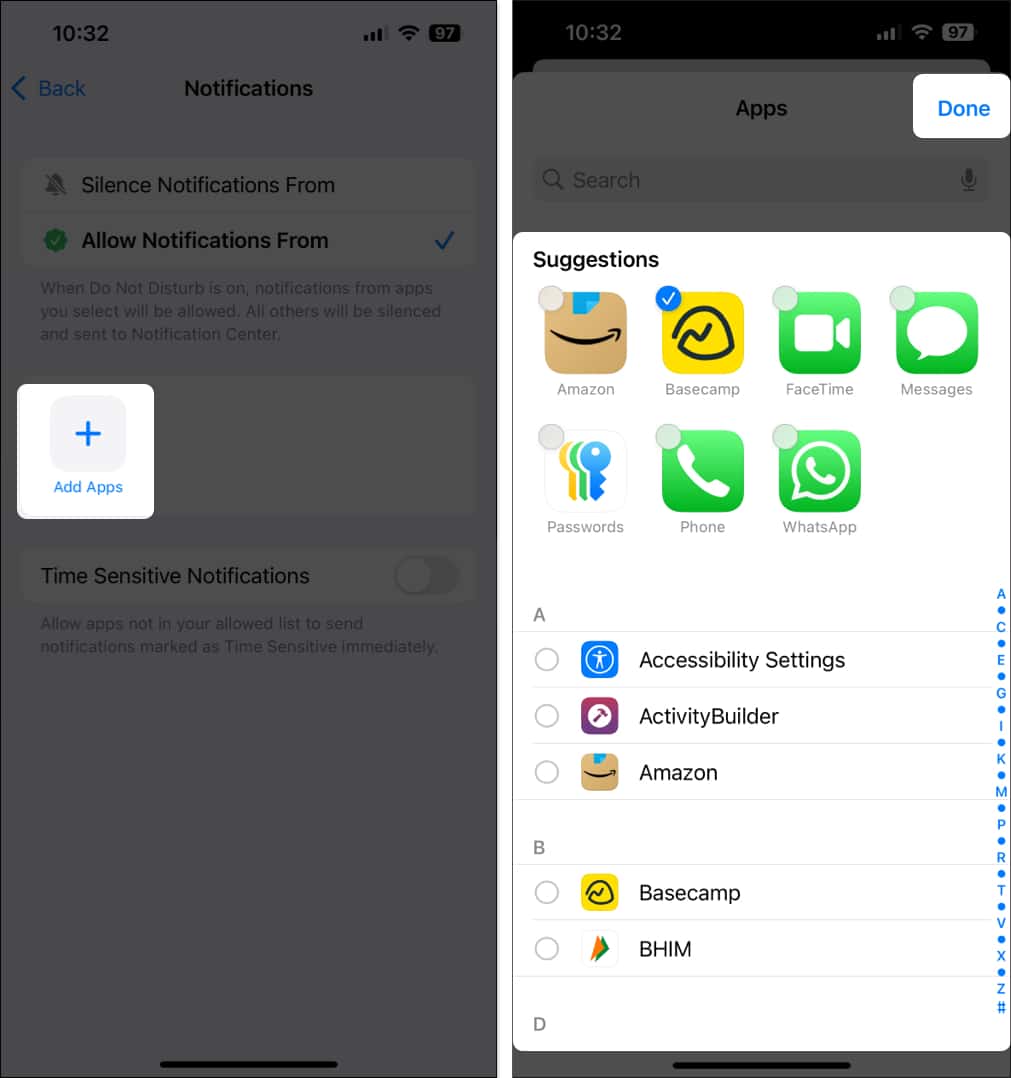
- Tap Add Apps to select an app and hit Done.


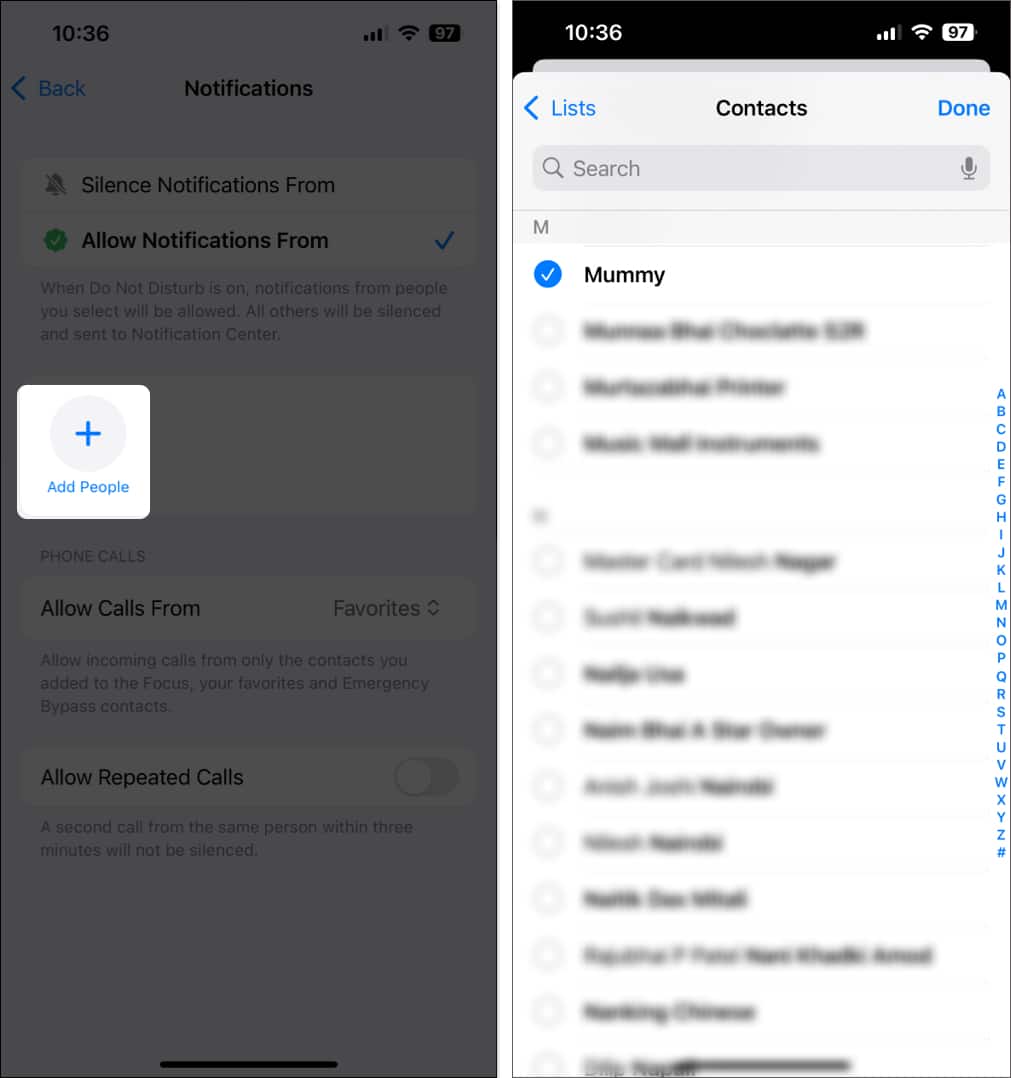
Allow notifications or calls from specific people
If you have someone from whom you wouldn’t want to miss any notifications, you can set Do Not Disturb to allow notifications from them. Here’s how:
- Launch the Settings app on your iPhone or iPad.
- Navigate to Focus and tap Do Not Disturb.
- Tap People under Allow Notifications.
- Select Allow Notifications From.
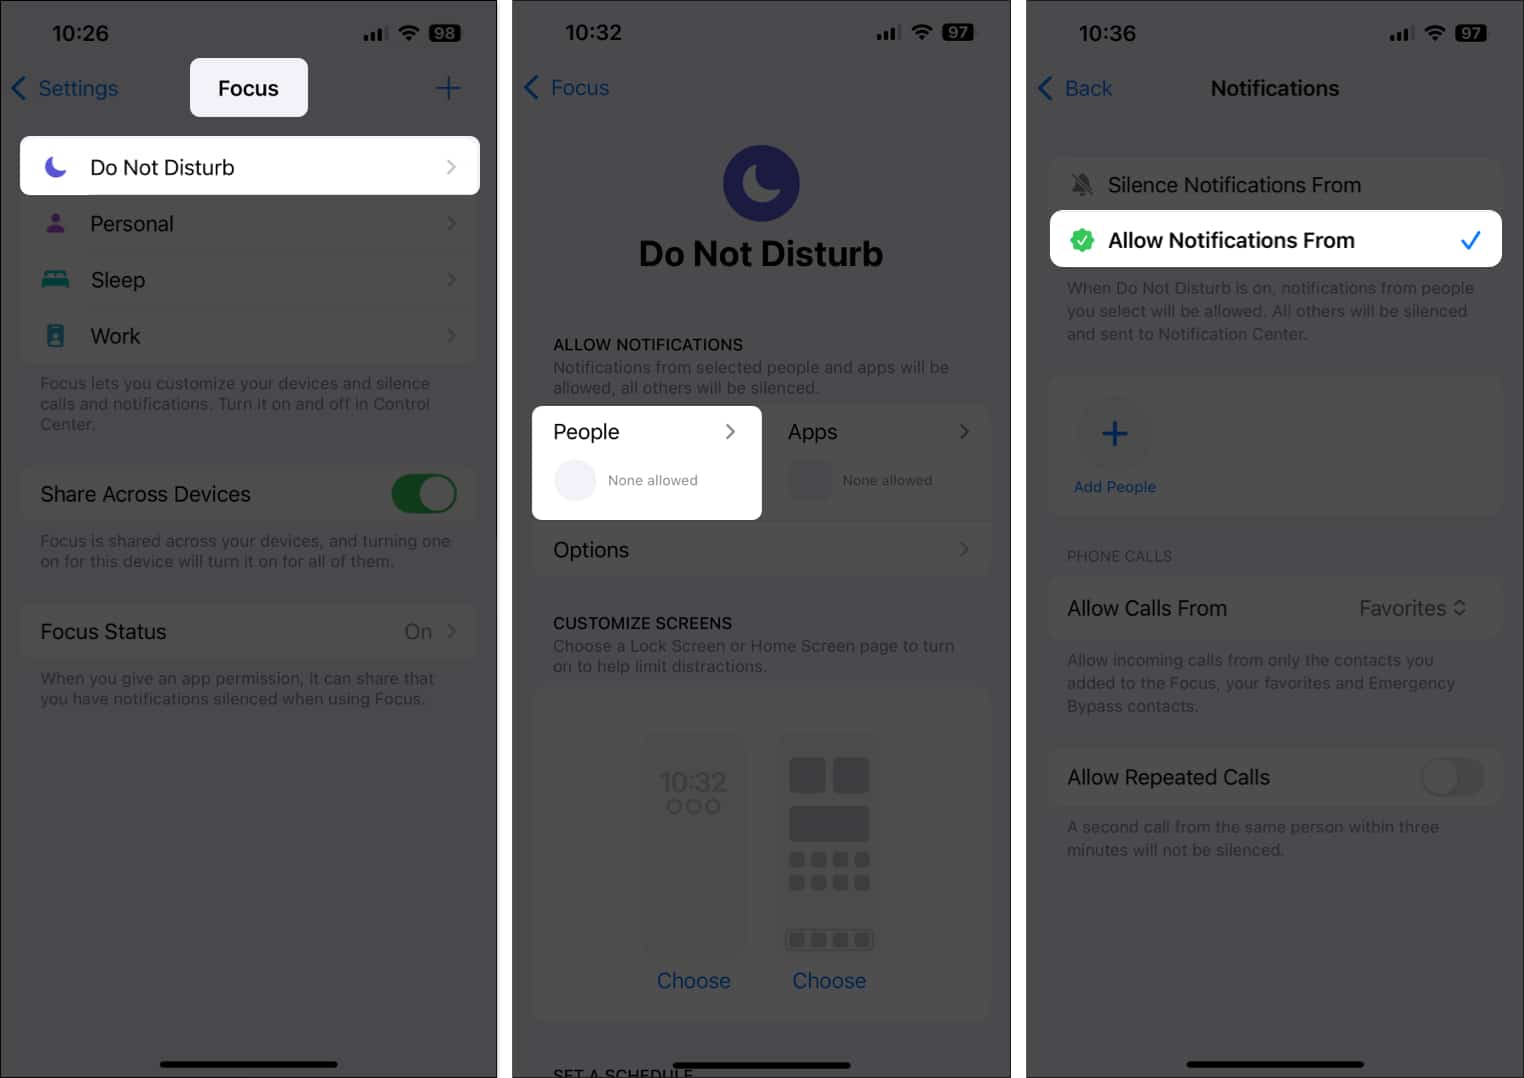
- Tap Add People.
- Tap on Allow Calls From, select the contact, and hit Done.
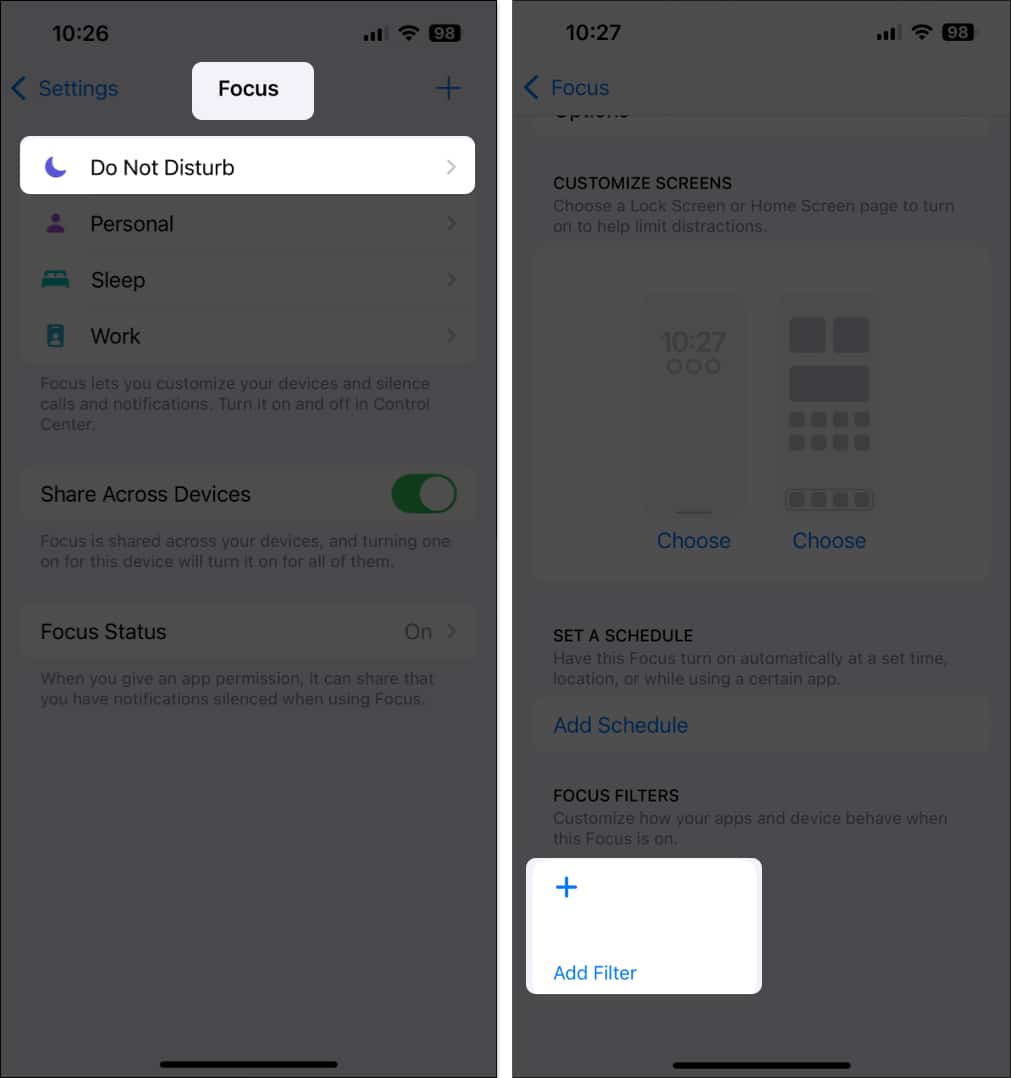
Use Focus Filters with Do Not Disturb
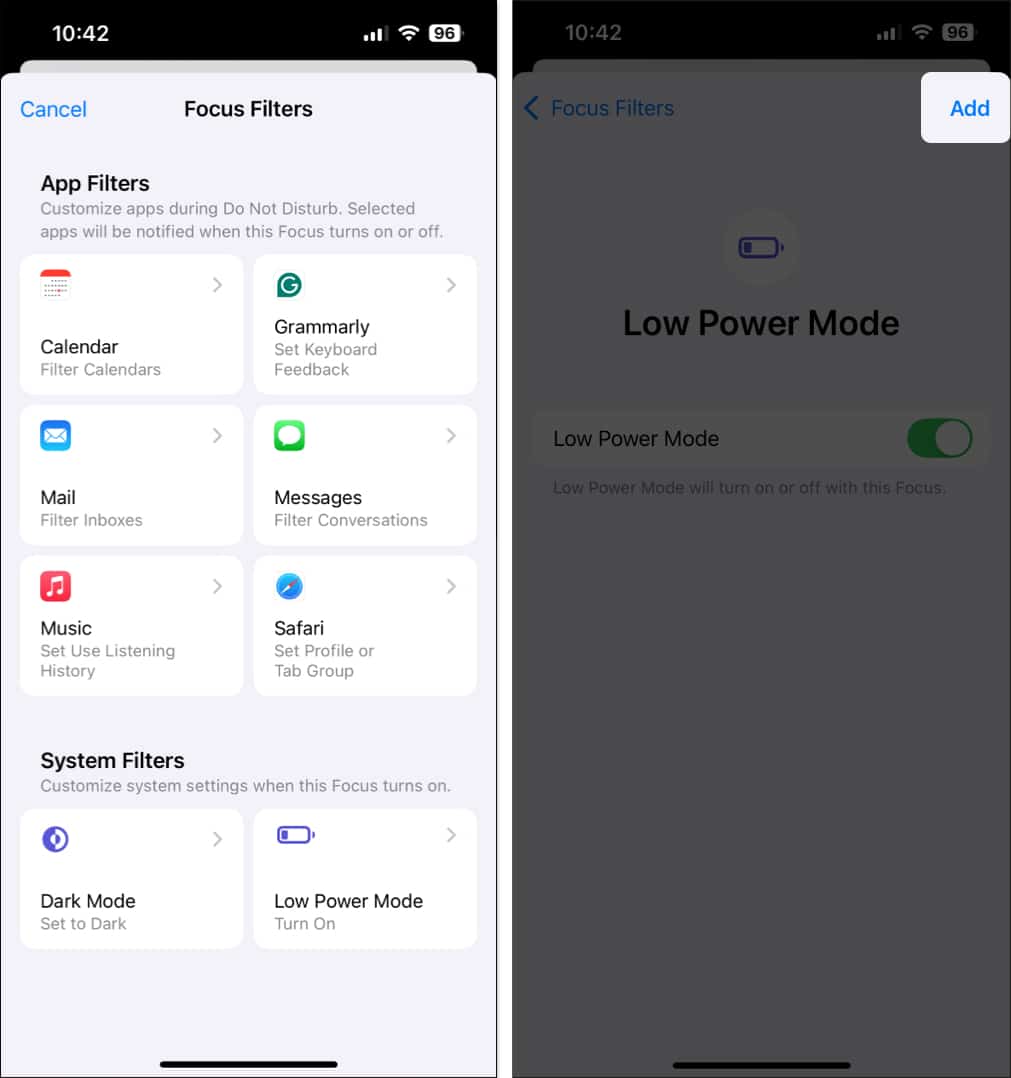
Apart from silencing calls and notifications, you can link Do Not Disturb to a Focus Filter to trigger useful actions. For instance, you can have your iPhone automatically go into Low Power Mode, toggle Dark Mode, switch Safari profiles, and more when you enable DND.
If you want to use Focus Filters with Do Not Disturb on your iPhone or iPad, follow these steps:
- Go to the Settings app on your iPhone or iPad.
- Tap on Focus and select Do Not Disturb.
- Scroll down and tap on Add Filter.
- Choose the relevant app or system filters based on your requirements.
- Follow the on-screen instructions and tap Add.

How to turn off Do Not Disturb on iPhone or iPad
It’s pretty easy to turn off Do Not Disturb. You can either ask Siri to do it or you can open the Control Center and tap the button with the crescent moon icon. Once you disable Do Not Disturb, you’ll then be able to receive calls and notifications as usual.

Signing off…
Using Do Not Disturb on your iPhone or iPad helps you minimize unnecessary interruptions and enhance your ability to focus on things that matter more. Not only that, but it can also do wonders for your digital well-being and work-life balance when you’re trying to sleep or want to unwind after a workday.


