Your Apple Watch is your constant companion. However, you might need to turn off your Apple Watch notifications when you are in a library, theatre, or meeting.
A step further, you can also control the mirroring iPhone alerts for third-party apps on your Apple Watch. Here, I have discussed more than one way to manage notifications on your Apple Watch for both native and third-party apps.
How to temporarily turn off notifications on Apple Watch
If you’re busy in a meeting or need some time away from annoying pings, let’s say for the next hour, this solution is perfect for you.
Follow the steps discussed below to temporarily stop notifications on your Apple Watch.
- Go to your Apple Watch face.
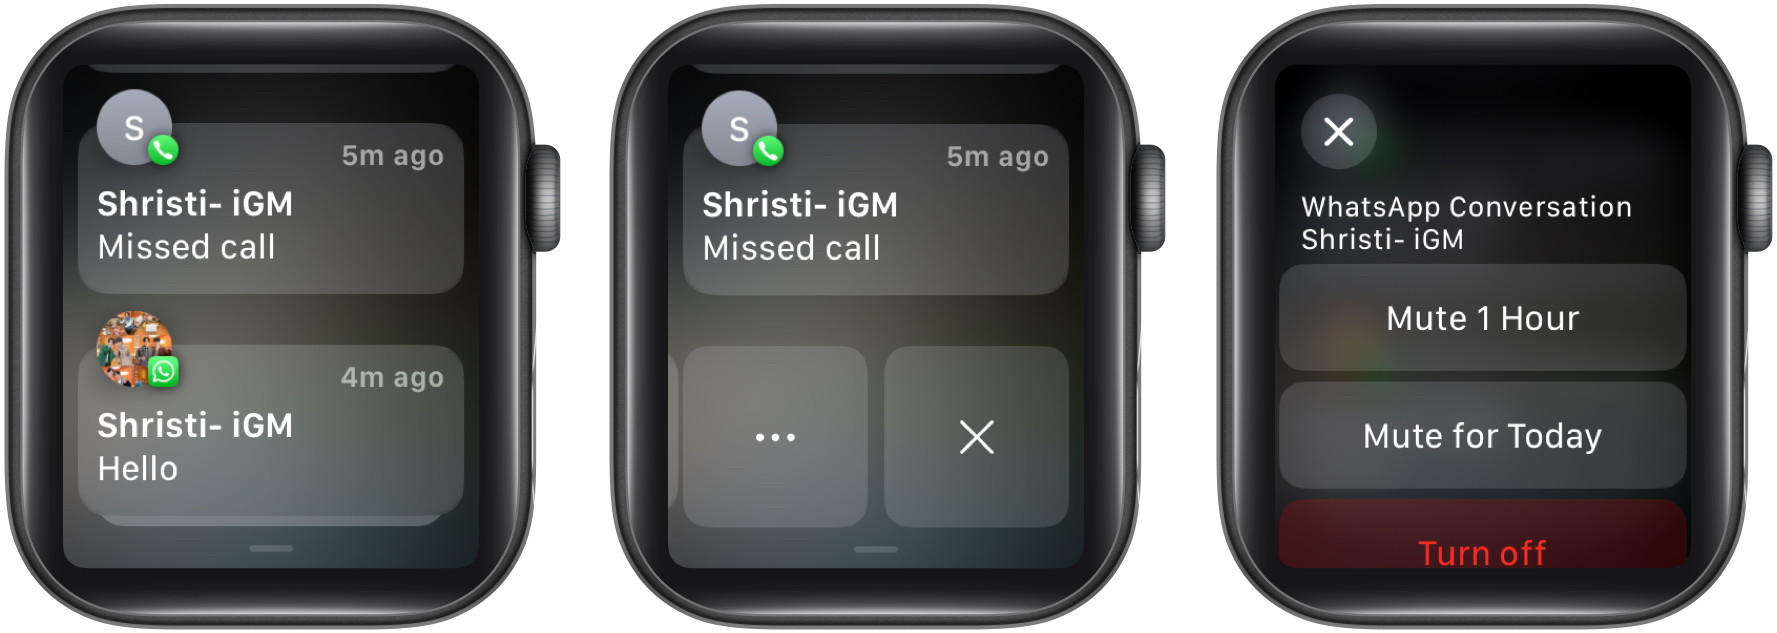
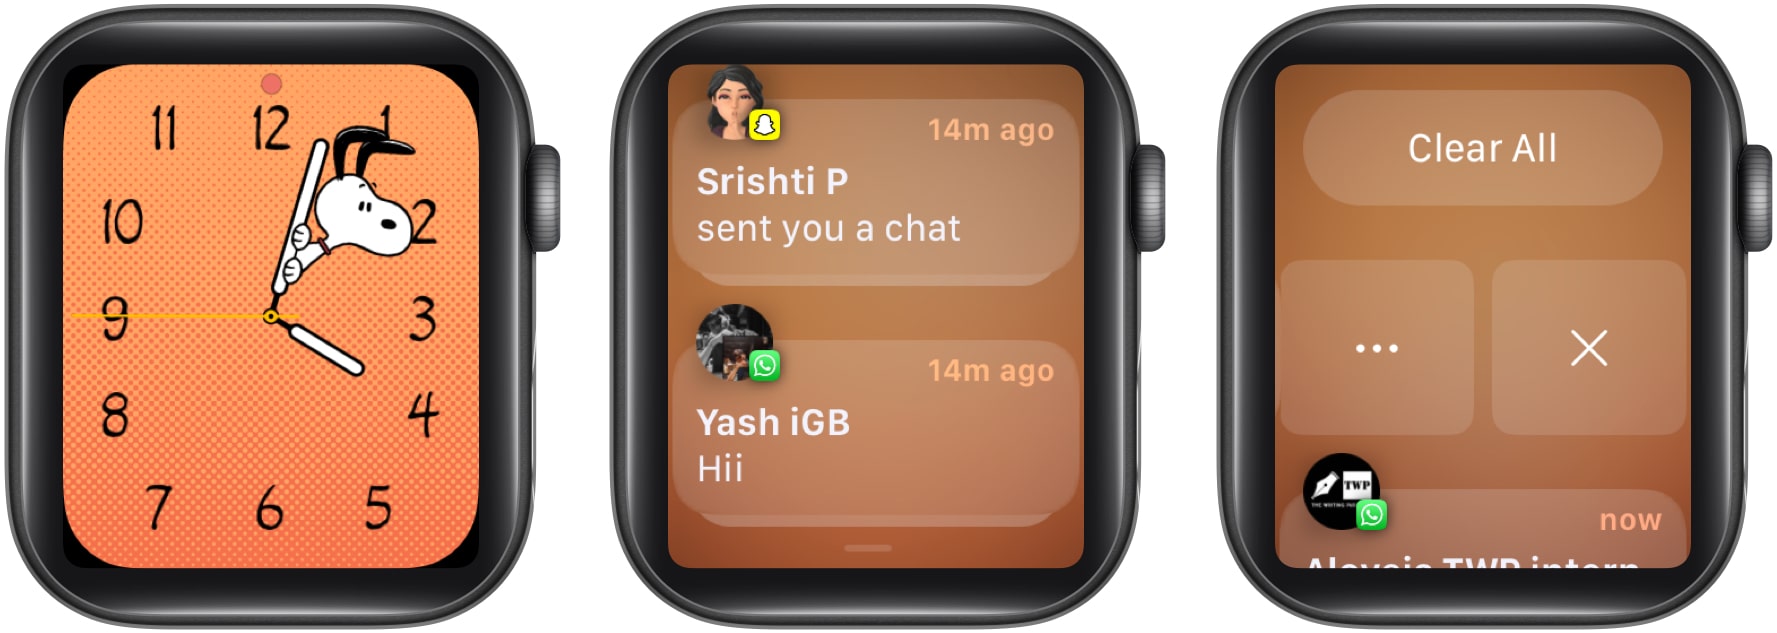
- Swipe down the interface to access the Notification Center. You can scroll through notifications using the Digital Crown or just by swiping up and down.
- Swipe left on the app notification that you want to mute.
- Tap the three-dot icon.
- Now, you can select any one of the following: Mute 1 Hour or Mute for Today.
Upon complying, the muted notifications will stay in the Notification Center until manually removed. Moreover, you’ll not receive any pings from the respective app for the selected duration.
You might have also seen the Turn off option. It permanently disables the notification for that particular app. More on that later.
Note: You cannot mute multiple notifications simultaneously on Apple Watch.
How to disable notifications on Apple Watch
Before you begin, make sure there is an existing notification of the app whose notifications you want to disable. If you don’t have one, move to the next method and use the iPhone to disable notifications.
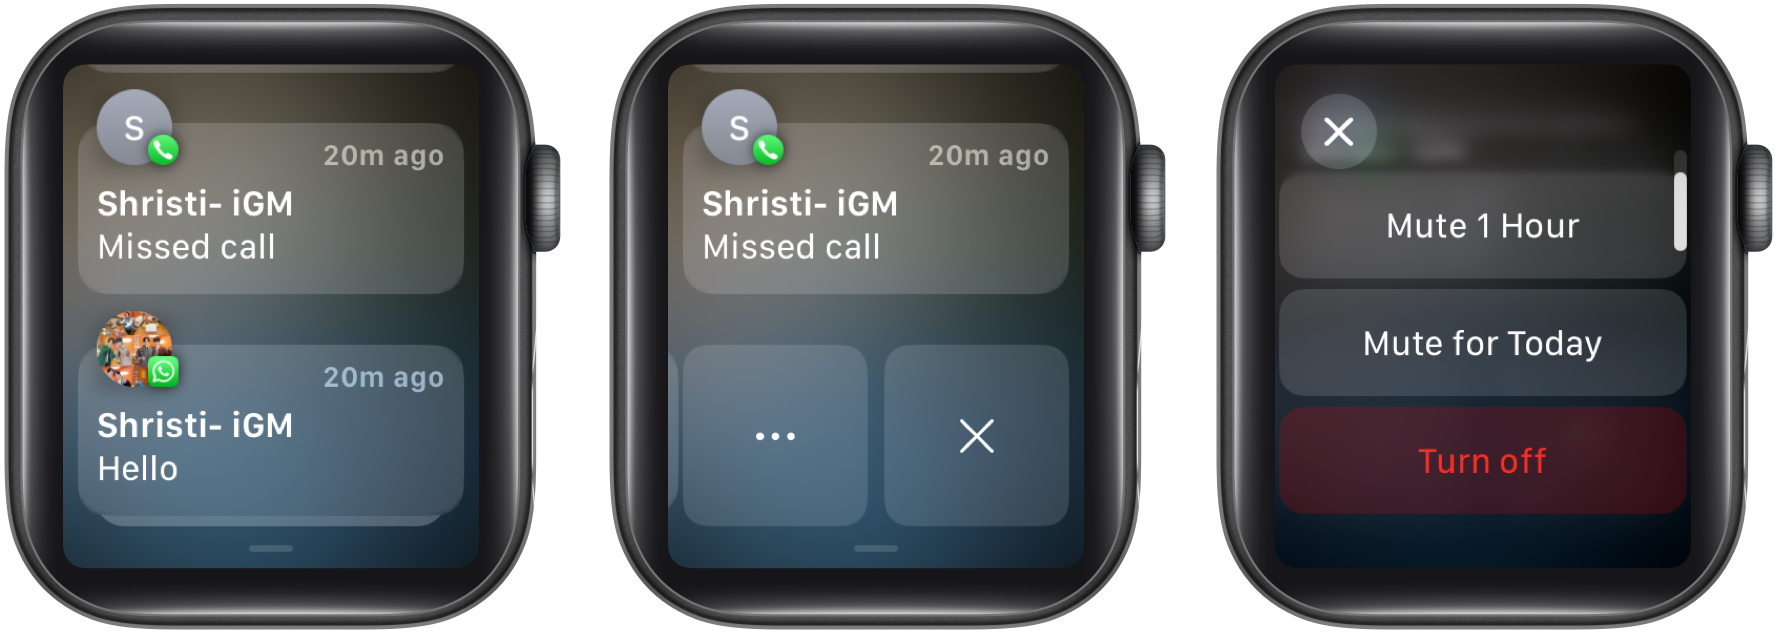
- Swipe down the watch face.
- Locate and swipe left on the app notification you want to disable.
- Tap the three-dot icon → Select Turn off.
You can repeat these steps for other notifications of your Apple Watch as well.
How to disable Apple Watch notifications from iPhone
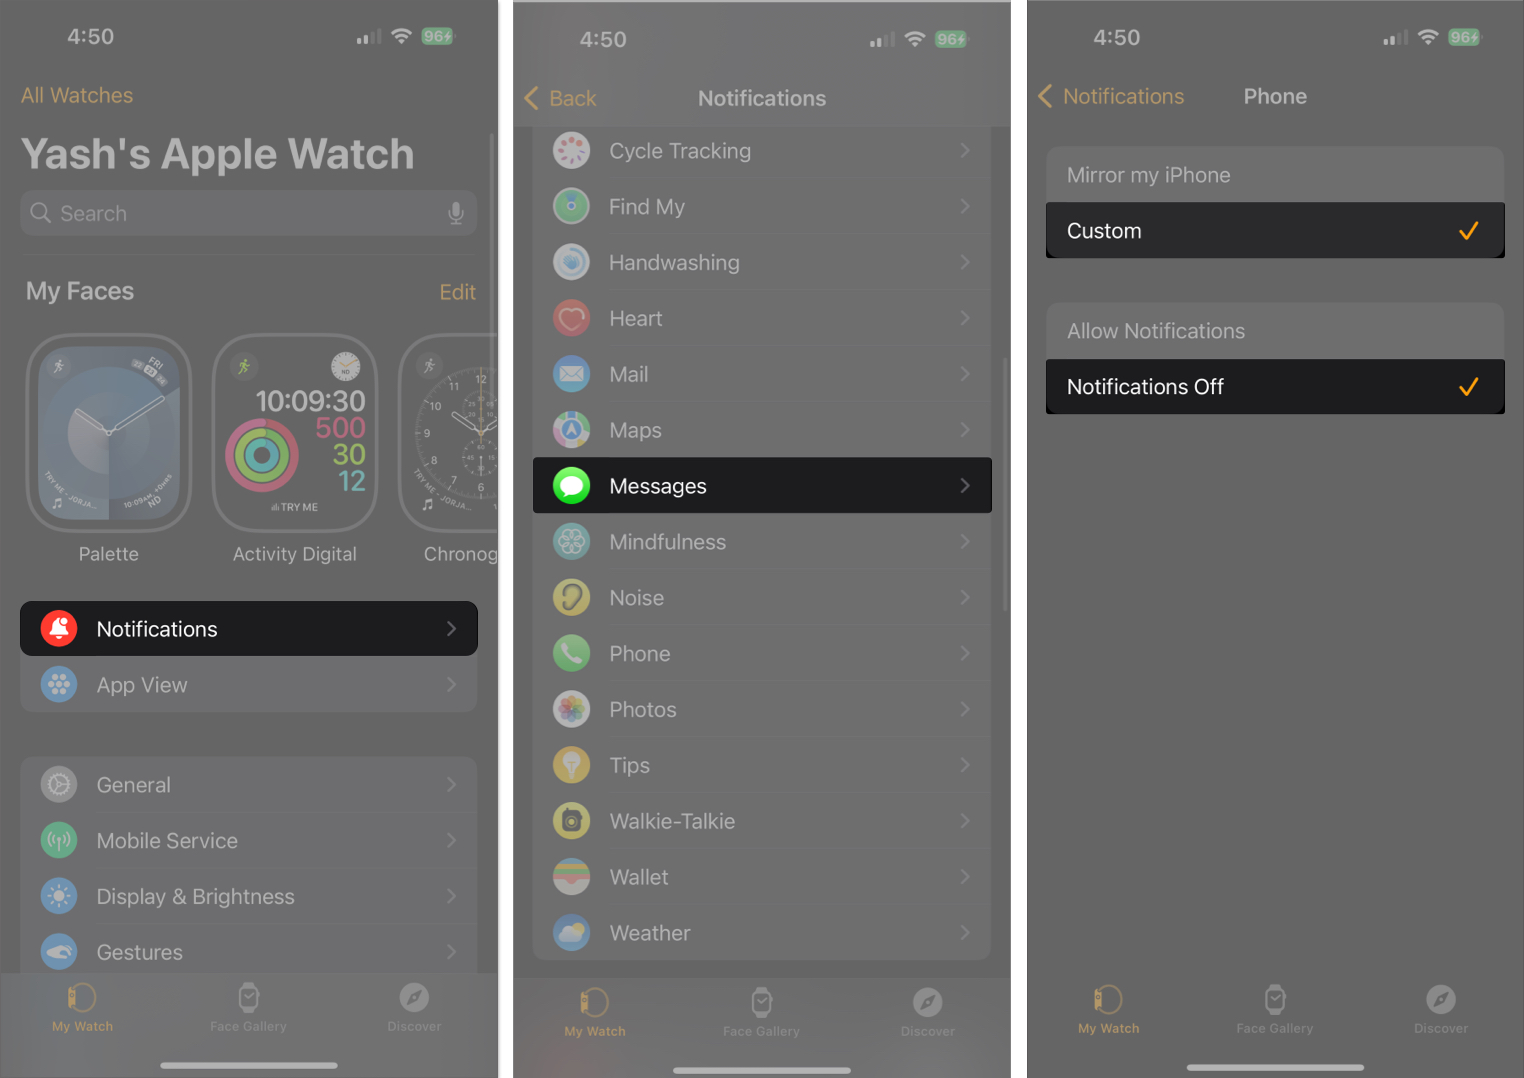
- Access the Watch app on your iPhone.
- From the My Watch tab, select Notifications.
- Scroll down and select any native app of your choice.
I have used the Phone app for this demonstration. - Choose Custom → Then pick Notifications Off.
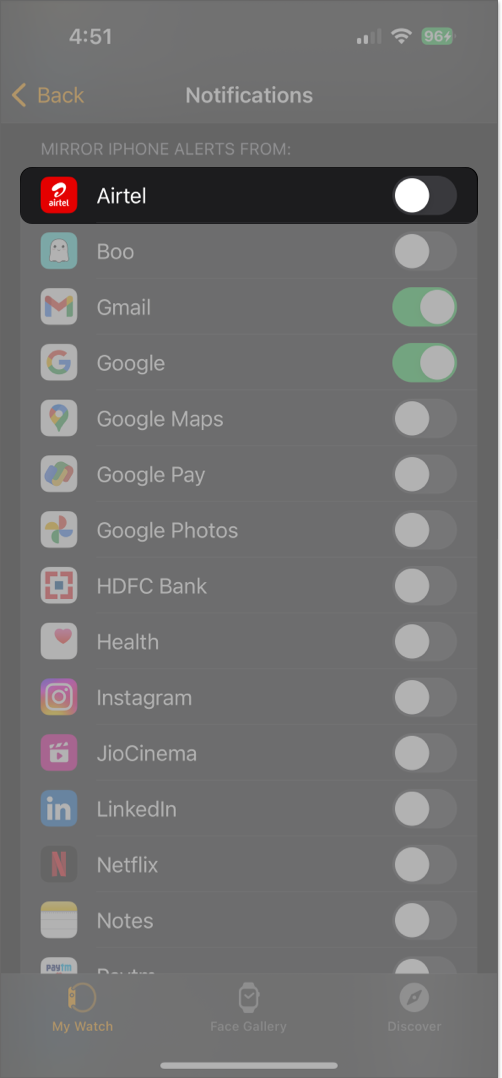
- For third-party apps, go back to the previous menu and scroll through the Mirror iPhone Alerts From menu.
- Switch off the toggle for the app to stop its notifications.
By following this practice, you can choose to receive important notifications from selective apps on your Apple Watch and disable the rest.
How to mute notification sounds on Apple Watch
Suppose you want to see your notifications but don’t want to hear the notification sound, there’s a way out for that too.
From Apple Watch
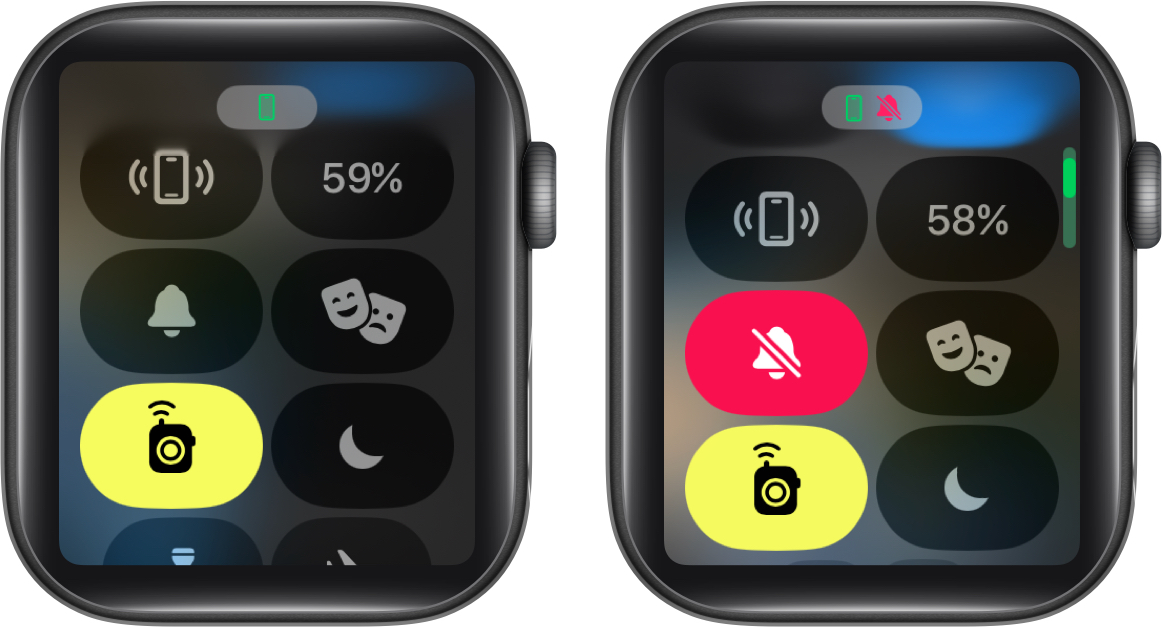
- Press the Side button to summon the Control Center.
- Select the Bell icon.
- A red icon indicating the same will appear on the top.
If you’re a fan of customization, take a look through our detailed take on customizing Control Center on Apple Watch.
From iPhone
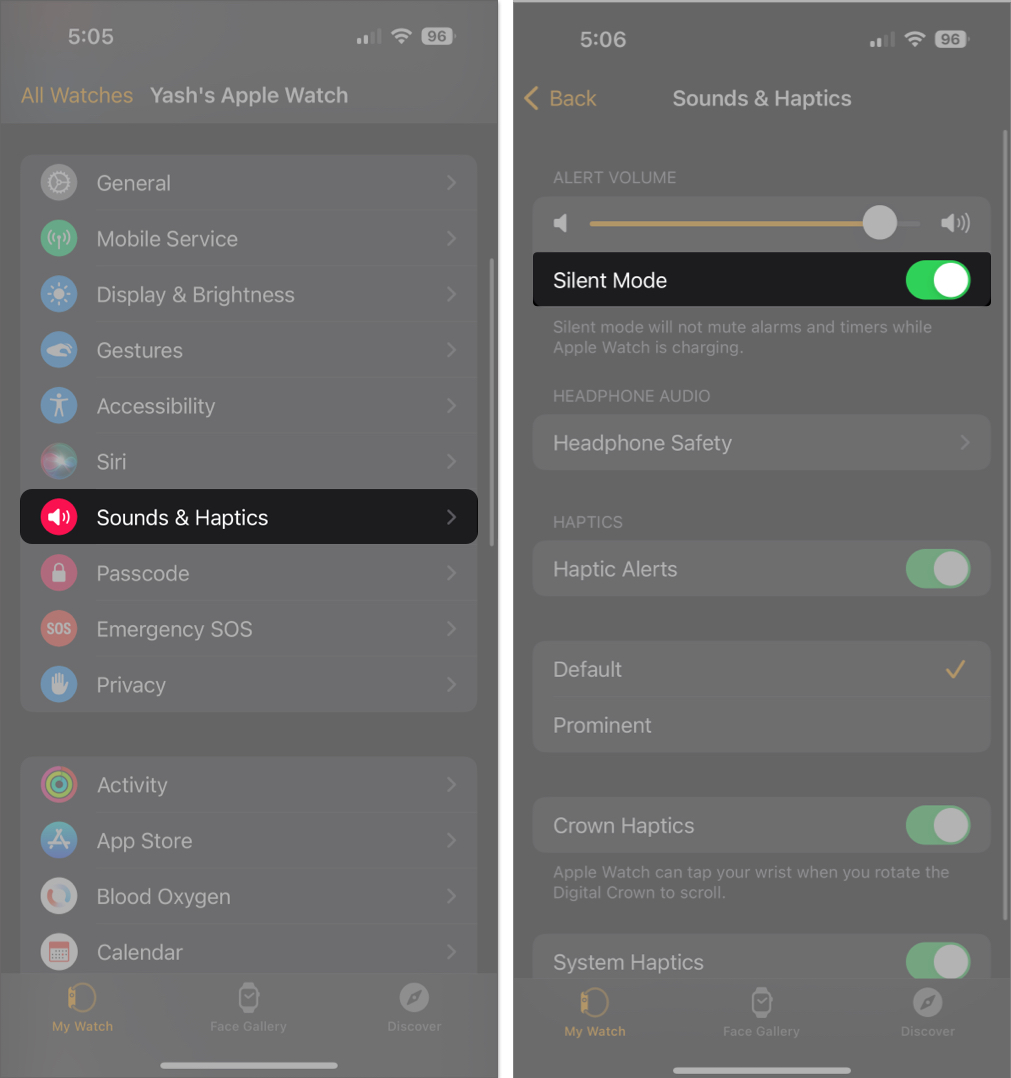
- Open the Watch app on your iPhone.
- From the MyWatch tab, select Sounds & Haptics.
- Enable Silent Mode.
You will no longer receive audible alerts from your Apple Watch, but you will still feel the vibration whenever you receive a notification.
How to hide lock screen notification summary on Apple Watch
To help you avoid missing important notifications, your Apple Watch provides a notification summary for any incoming alerts. It contains critical information such as the name of the contact, the app’s icon, and a brief overview of the same.
As you raise your wrist, you will get the full details of the notification right on the load screen. Thankfully, you can turn off the lock screen in a jiffy. Here’s what you need to do:
From Apple Watch
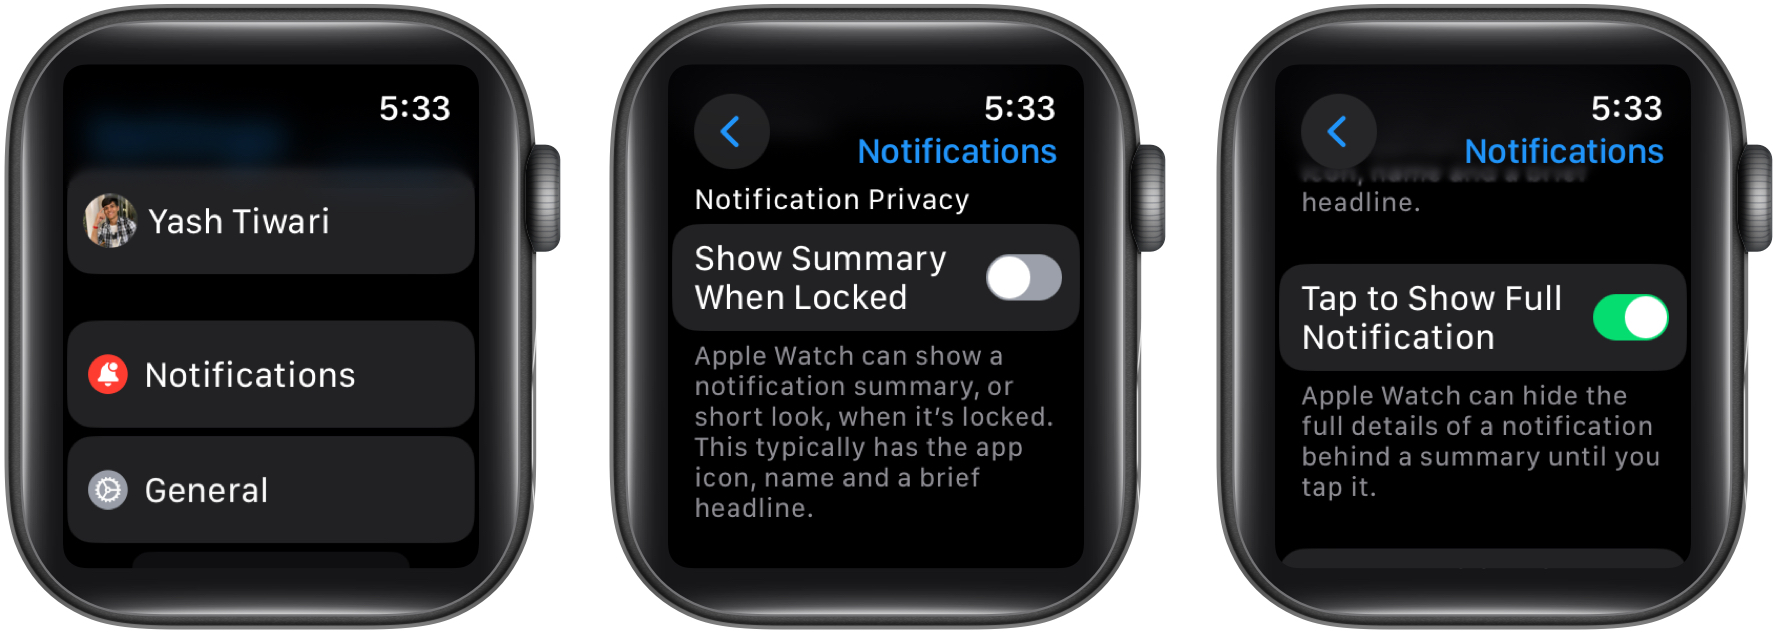
- Open the Settings app → Select Notifications.
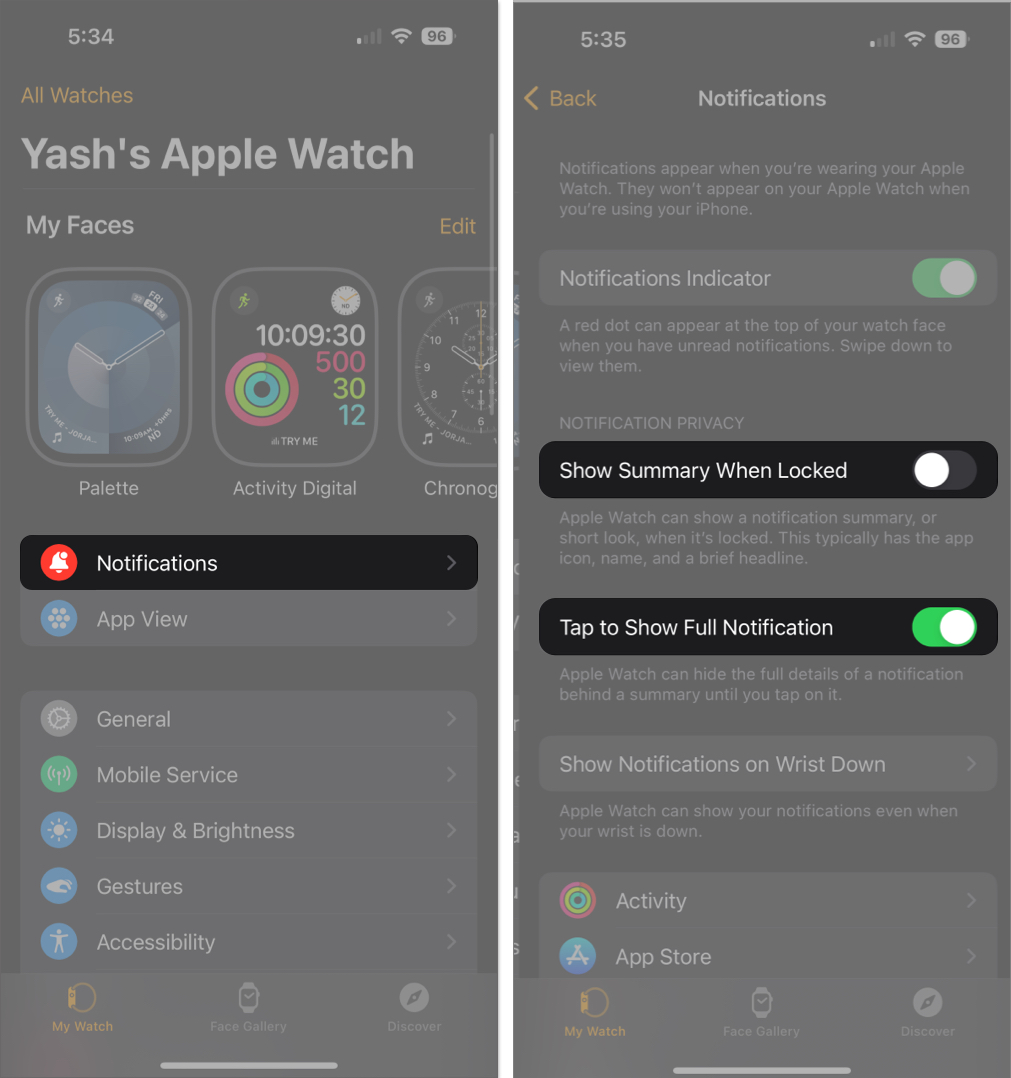
- Toggle off Show Summary When Locked.
- Scroll down and turn on Tap to Show Full Notification.
From iPhone
- Launch the Watch app → Choose Notifications from the My Watch tab.
- Disable Show Summary When Locked.
- Next, enable Tap to Show Full Notification.
This process will disable notifications from appearing on the watch face when it’s locked but still allow you to access them in the Notification Center.
Hide Apple Watch Notifications Indicator
As you receive a notification on your Apple Watch, a red dot will appear on the top of the watch face. It indicates there are unseen notifications that require your attention.
I found it very distracting, especially when I was trying to focus on work. If you, too, find it annoying you can refer to our guide and disable the red dot on your Apple Watch.
How to clear unread notifications on Apple Watch
Turning off Apple Watch notifications won’t remove existing ones in your Notification Center. But fear not! You can clear them individually or all at once for a clean slate.
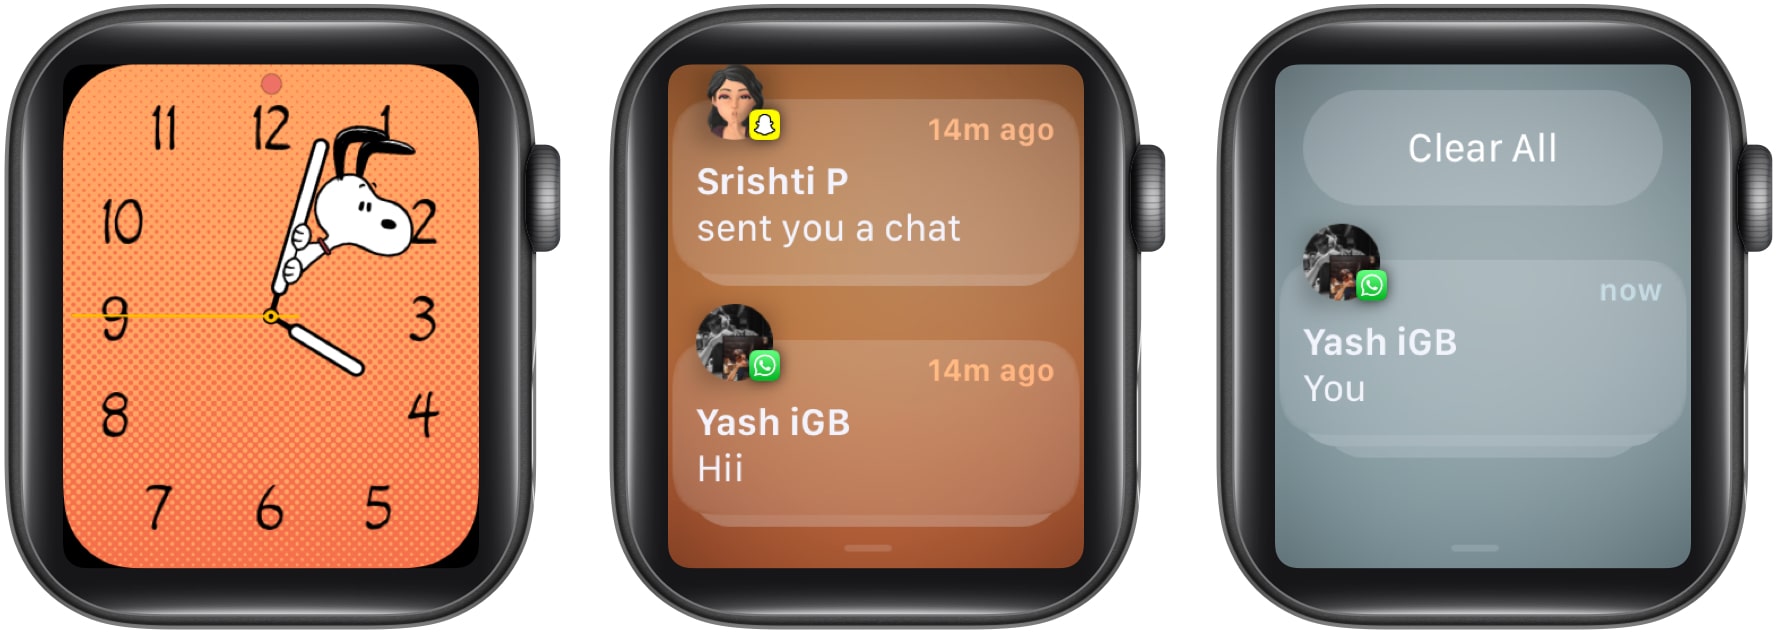
- Head to the Notification Center on your Watch.
- Swipe from right to left on the notification you want to remove.
- Tap the X icon to remove it.
Additionally, you can also tap on the notification you wish to remove → Scroll down and tap Dismiss.
Note: If you have received multiple messages from the same person, you will see a Clear option when you tap the notification of the chat
Clear all your unread notifications on Apple Watch
- Navigate to the Notification Center.
- Go to the top of the list → Tap Clear All.
Definitely. You can enable Do Not Disturb on your Apple Watch for as long as you want and stay away from frustrating notifications.
To stop receiving vibration alerts for incoming notifications, go to Settings → Sounds u0026 Haptics → Toggle off the switch for Haptic Alerts.
Open the Watch app on your iPhone u003e Go to the My Watch tab u003e Go to Messages u003e Select Custom instead of Mirror my iPhone u003e Then select Notifications Off. This will stop your Apple Watch from showing notifications, playing sounds, or vibrating when you receive a text message.
Claim the peace you deserve!
By following the steps outlined above, you can easily customize your notification settings and limit the number of notifications that you receive on your watch.
Whether you want to reduce distractions, conserve battery life, or simply streamline your device, these tips can help you get the most out of your Apple Watch and improve your overall user experience.
Thank you for reading. If you have any questions or suggestions, do not hesitate to leave your thoughts in the comment section below.
Read more:

