Your iPad or Mac can turn into a better multitasking device with Stage Manager, a multitasking feature that offers a more intuitive environment to work with multiple apps at once. If you are unaware of Stage Manager, read on, and I will walk you through everything you need to know about the feature, including how to use it on your iPad and Mac.
What is Stage Manager?
When you attend a concert, you can notice how optimally managed the stage looks. From the lighting, sound, and design to adeptly timing performances from your favorite artists, it’s all perfectly handled by the stage manager working behind the scenes.
Likewise, you have Stage Manager on your iPad and Mac to perfectly manage your stage, i.e., your screen. With Stage Manager, you can seamlessly switch between apps, group apps for a specific task, arrange and resize the app windows, and more on your iPad and Mac that support it.
Which iPads and Macs support Stage Manager?
Unfortunately, Stage Manager is not supported on all iPad and Mac models. Check to see if your device is included in the list below.
Stage Manager-supported iPads running iPadOS 26:
- 13-inch iPad Pro (M4 chip)
- 12.9-inch iPad Pro (3rd generation and later)
- 11-inch iPad Pro (1st generation and later)
- iPad Air (3rd generation and later)
- iPad mini (5th generation and later)
- iPad (8th generation and later)
For those of you who didn’t find your iPad in the above list, don’t worry—you can still multitask; check out our iPad multitasking guide to learn how.
Stage Manager supported Macs:
- All the Macs running macOS Ventura and later support Stage Manager
How to turn on and off Stage Manager
To start using Stage Manager, you first need to turn it on. Here is how to do it on your iPad and Mac.
Turn on Stage Manager on iPad
You can turn on Stage Manager on your iPad like this:
- Go to Settings > Multitasking & Gestures.
- Select Stage Manager in the menu above.
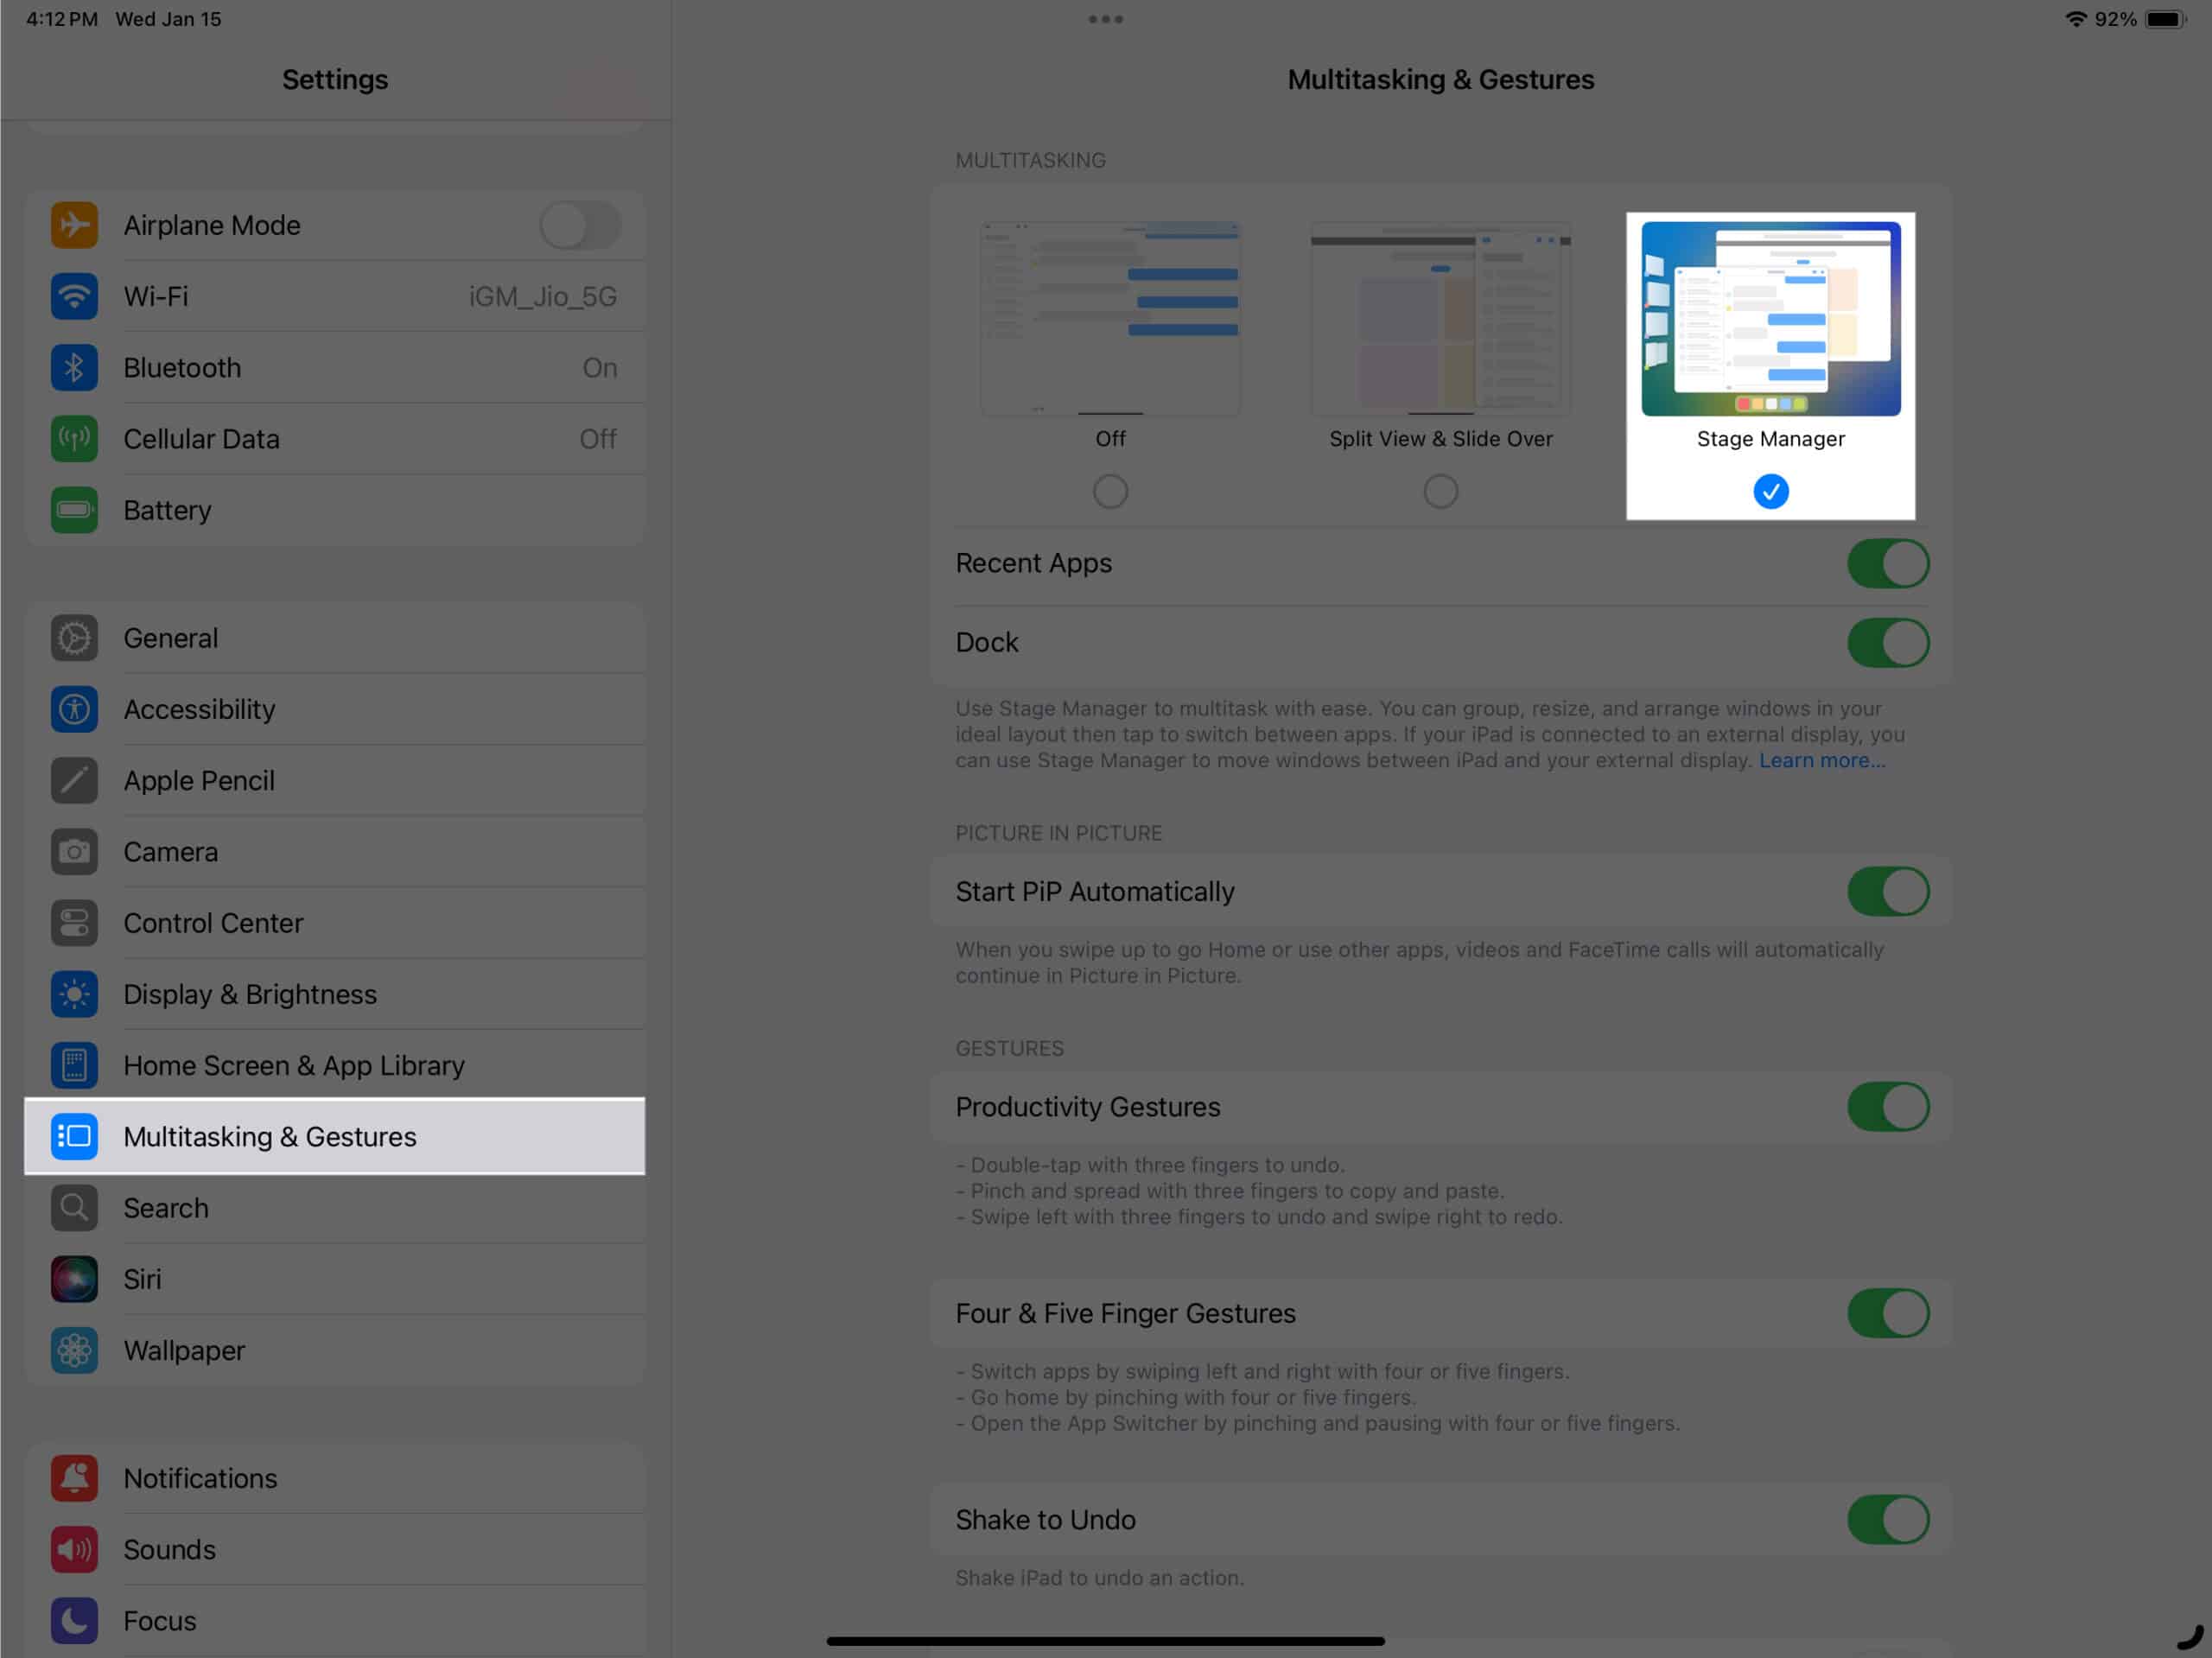
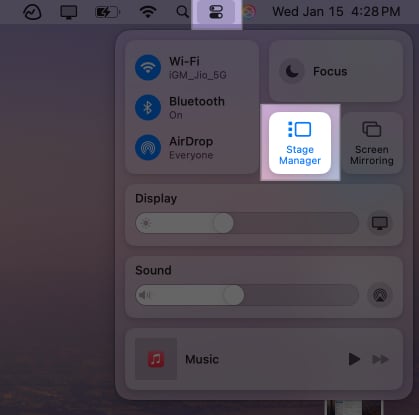
- Alternatively, open Control Centre and tap the Stage Manager icon to turn it on.

That’s it. You are now ready to start using Stage Manager on your iPad.
When you want to turn off Stage Manager, repeat the same steps.
Turn on Stage Manager on Mac
Just like on an iPad, you can turn on Stage Manager on a Mac from the System Settings app as well as the Control Center. Follow the steps:
- Head to System Settings → Display & Dock.
- Toggle on the Stage Manager option.
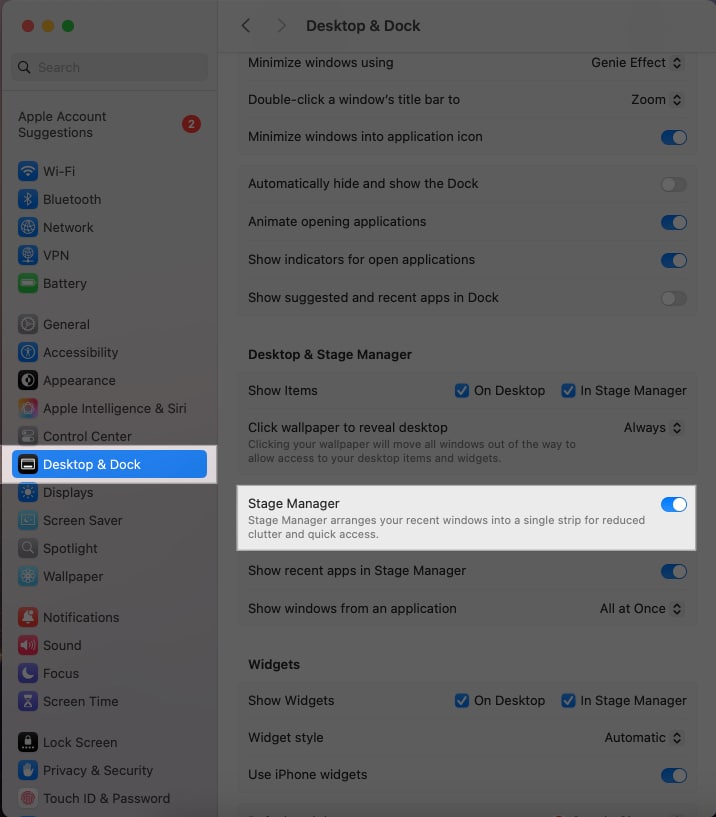
- Alternatively, you can turn on Stage Manager from the Control Center, too, just like on an iPad. Access the Control Center and click the Stage Manager icon.

Repeat the same steps when you want to turn off Stage Manager on your Mac.
Unlike on an iPad, you can customize certain behavior of apps in Stage Manager on a Mac. This includes choosing whether recent apps appear in Stage Manager and how the app windows appear when you are using the feature.
To do this, head to System Settings > Desktop & Dock, and you will see a couple of options in the Stage Manager section. Modify these options according to your preference.
How to use Stage Manager on iPad
Using Stage Manager on an iPad is easy. Below, I have listed everything you can do with Stage Manager on your iPad.
Group apps together for specific tasks or projects
You can group up to four apps that stack on top of each other. Here is how to do it:
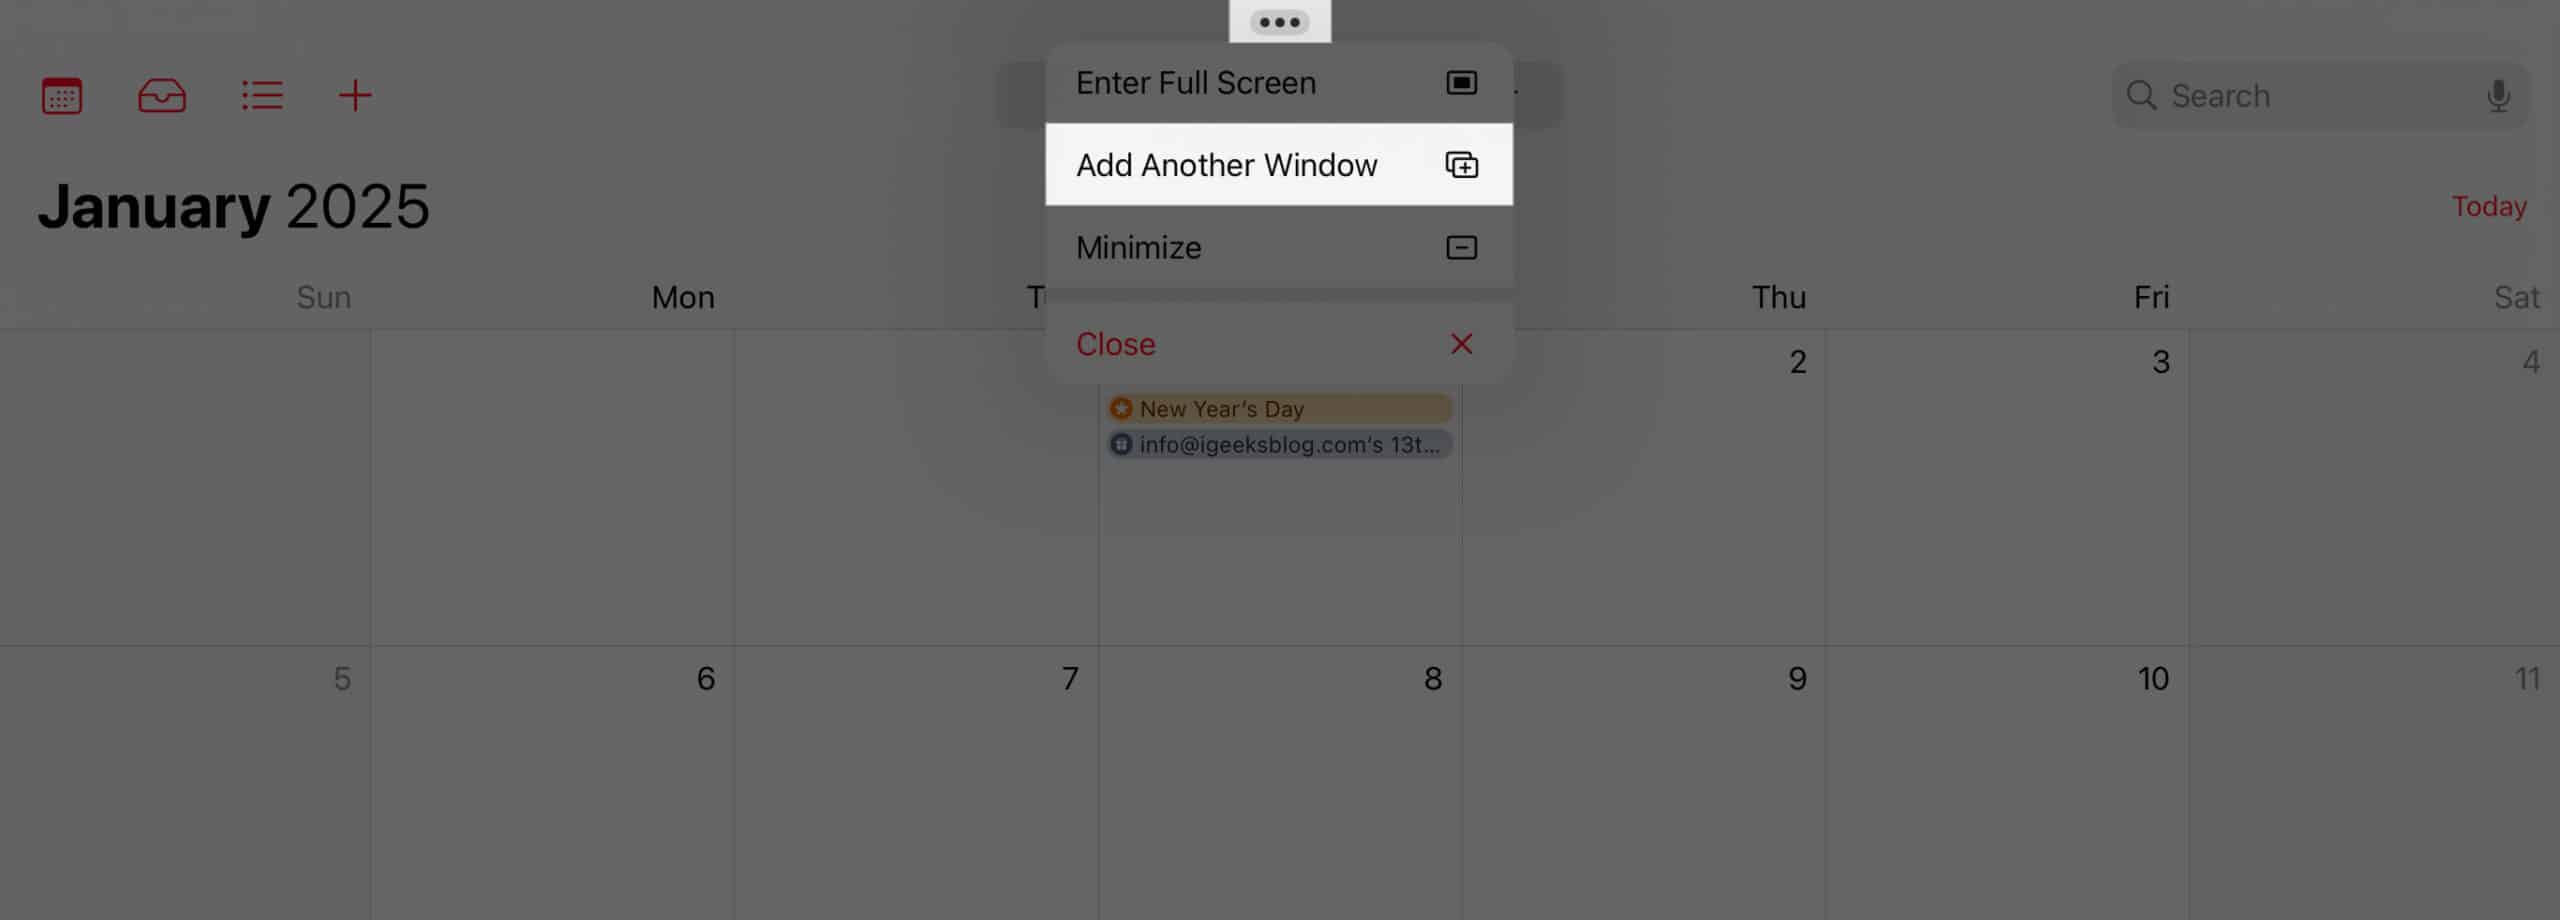
- Open an app and tap the three dots at the top-center of the screen.
- Tap Add Another Window.
- Select the other app you want to group with.
- Now, both your apps will be grouped. Likewise, you can group up to four apps. Alternatively, you can drag an app from the Recent app stack on the left side of your screen or the Dock and drop it on top of an already open app to group it.
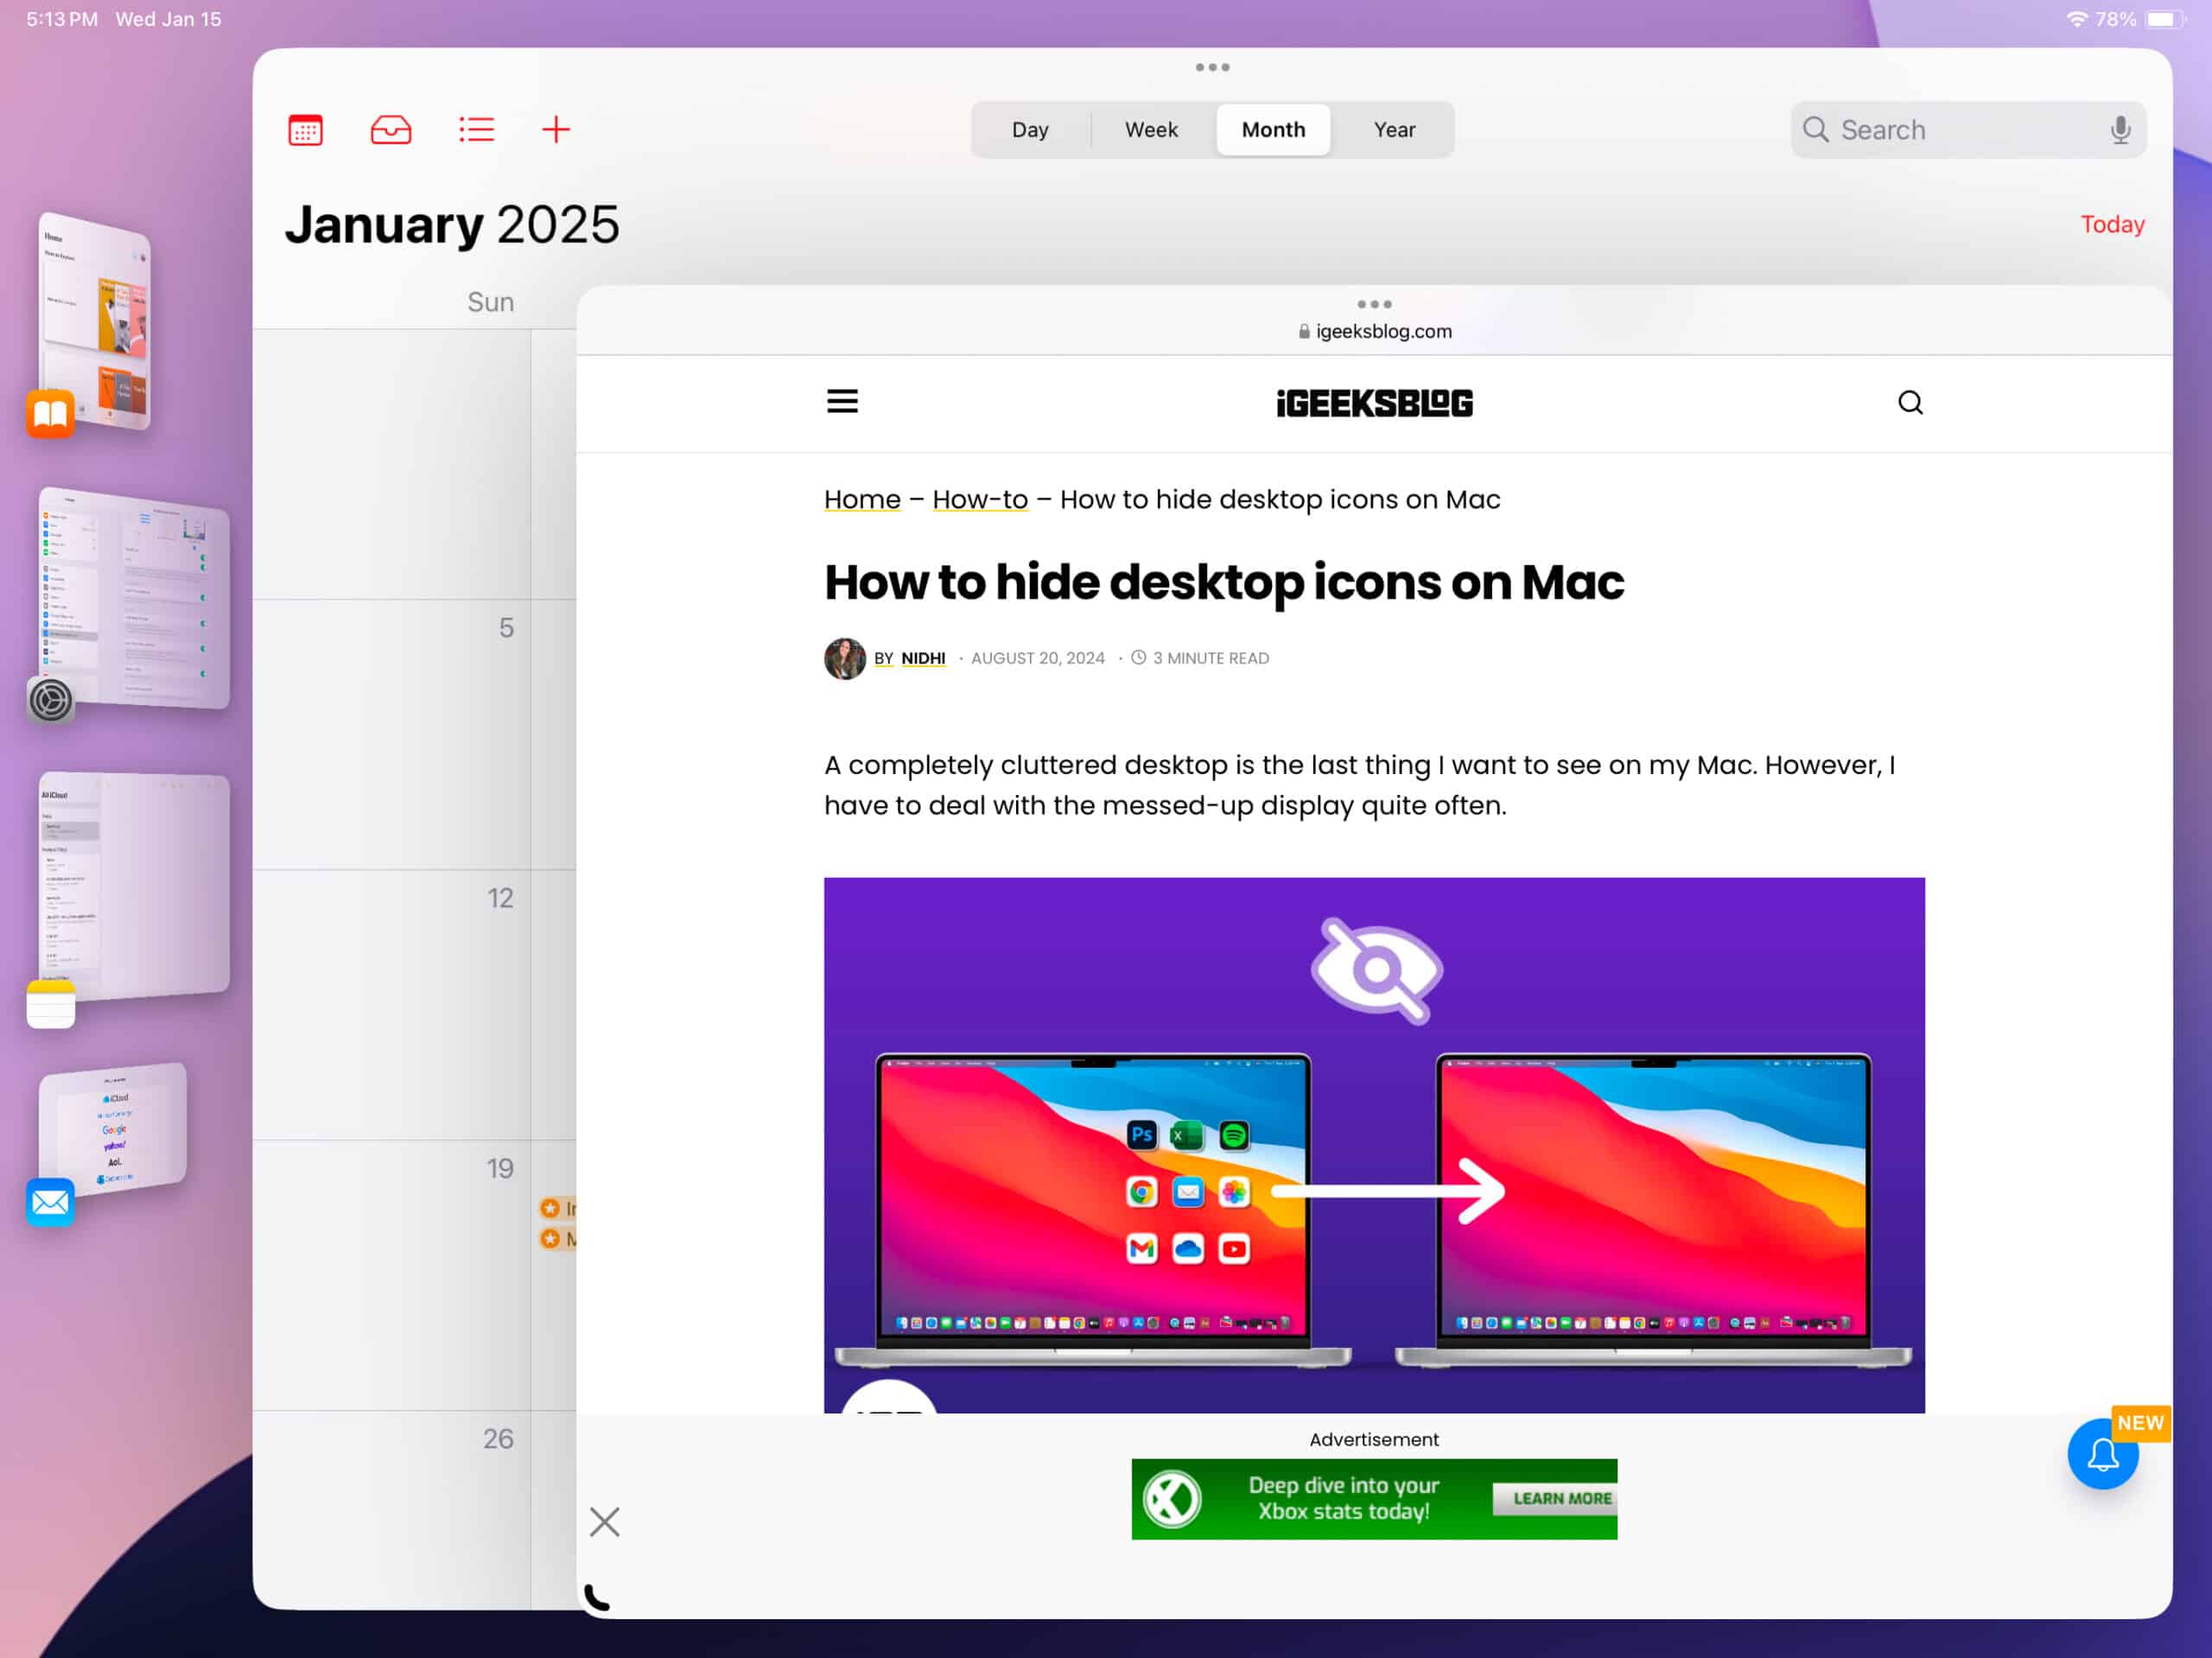
- To resize the grouped apps, drag from the corner handles on the app window and resize it into your preferred size.


Switch between apps
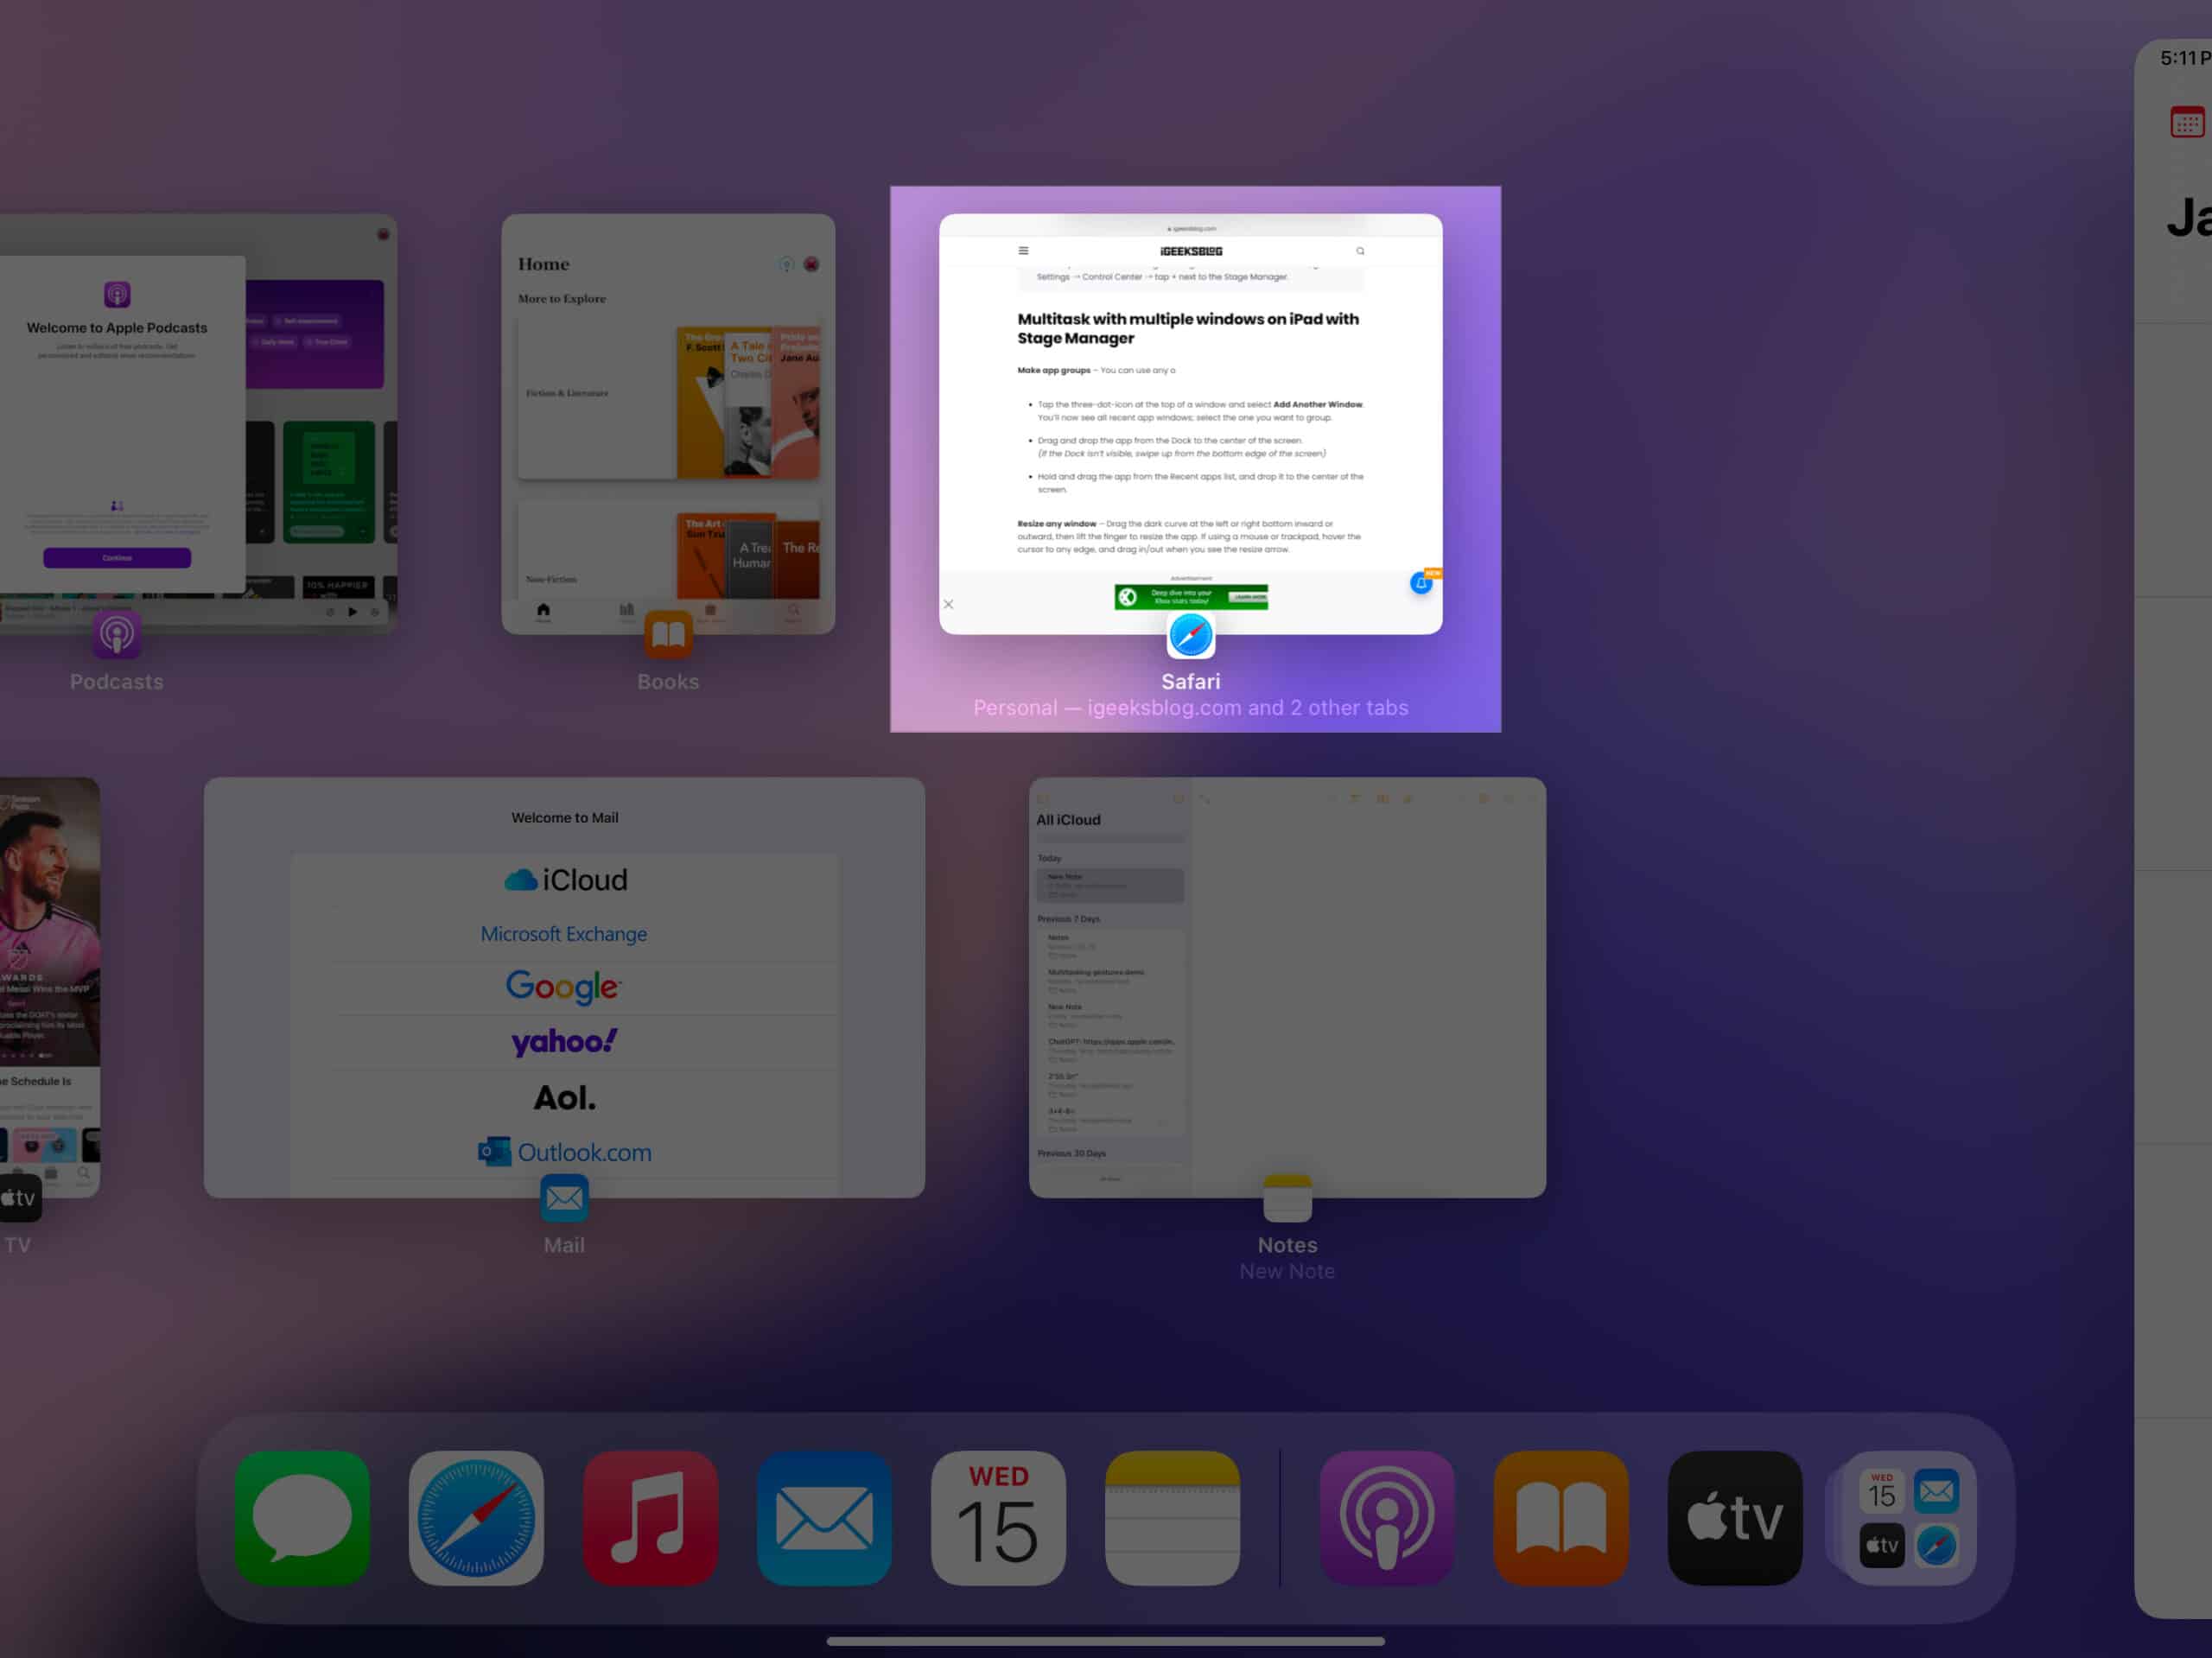
To switch between apps or grouped apps, simply tap on the desired app either in the Recent app stack on the left hand of your screen or in the Dock at the bottom.
Switch to full screen or exit from the group
If you want the app to switch to full screen, just tap on the three dots in the middle of the app screen and then tap Enter Full Screen.
Likewise, if you want to minimize or close an app, tap Minimize or Close.
How to use Stage Manager on Mac
Using Stage Manager on your Mac is slightly different than using it on an iPad. Here is how to use it effectively.
Group apps together for specific tasks or projects
To group apps with Stage Manager on a Mac, drag an app from the Recent app stack on the left side of your screen and drop it on top of the already-open app. This will group both apps. You can add up to four apps to the group.
You can resize the app window by simply dragging it from any of the four corners or even sides.
Switch between apps
When you want to switch between apps in the same group, just click on the app; even if a tiny part of it is visible on the display, click it.
To switch to a different app that is not part of the group, click on the app’s thumbnail you want to switch to in the Recent app stack on the left side of your screen.
Is Stage Manager better than using traditional multitasking methods?
There is no way of saying one is better than the other, as it all depends on your preference. You can try out both traditional multitasking methods and Stage Manager and choose whichever makes you comfortable and allows you to complete your tasks speedily.
Signing off…
Stage Manager provides an alternative way to multitask on your iPad and Mac. If traditional multitasking methods do not suit your workflow, give Stage Manager a try and see if it meets your needs.