Splitting the screen on Mac is one of the easiest ways to make the most of the screen estate. As a writer, I usually have Google Docs or Microsoft Word open on one side while the other has a browser with multiple tabs.
While split-screen is a more generic term for having two apps or windows on a screen, Apple prefers to call it Split View mode, introduced with macOS X El Capitan in 2015, nearly a decade ago. In this article, I will explain what Split View (or split-screen) is, how to use this mode on your Mac, and some bonus tips to make the most of it.
Table of Contents
- What is Split View on a Mac?
- Compatible macOS versions for split-screen (or Split View)
- How to split screen on your Mac
- How to customize the Split View layout on your Mac
- How to exit Split Screen on your Mac
- What is the keyboard shortcut for Split View on a Mac
- Tips for maximizing productivity in Split View
- What to do if Split Screen isn't working on your Mac
What is Split View on a Mac?
Split View is a macOS feature that allows you to use two apps simultaneously in full-screen mode on your Mac. It helps with multitasking by giving each app equal screen space. You can easily drag a window to the screen’s edge to Split View.
Whether you’re an editor, a writer (like me), a graphic designer, a web developer, or simply someone who wants to keep two apps open for better productivity, Split View is a must-try. Plus, you can tweak the size of each app by adjusting the vertical divider between them.
Compatible macOS versions for split-screen (or Split View)
As I mentioned above, Split View first arrived on the Mac with the introduction of macOS El Capitan (10.11), and it’s been available on all later macOS versions since. Here’s a quick rundown of all the versions Split View is compatible with:
- macOS El Capitan
- macOS Sierra
- macOS High Sierra
- macOS Mojave
- macOS Catalina
- macOS Big Sur
- macOS Monterey
- macOS Ventura
- macOS Sonoma
- macOS Sequoia
How to split screen on your Mac
There are two main ways to split the screen on a Mac, as we will discuss below. I suggest going with the first method since it’s straightforward and quick. The second method comes in handy when you’re juggling multiple windows.
1. Enter Split View using the green button
The steps to enter Split View vary based on what macOS version you’re running on your Mac, so it’s best to run the latest version for additional features. For example, macOS Sequoia allows you to arrange four windows simultaneously with just one click.
On macOS Sequoia:
- Hover over the green button in the top-left corner of the window.
- Select Full Screen and choose either Left of Screen or Right of Screen.
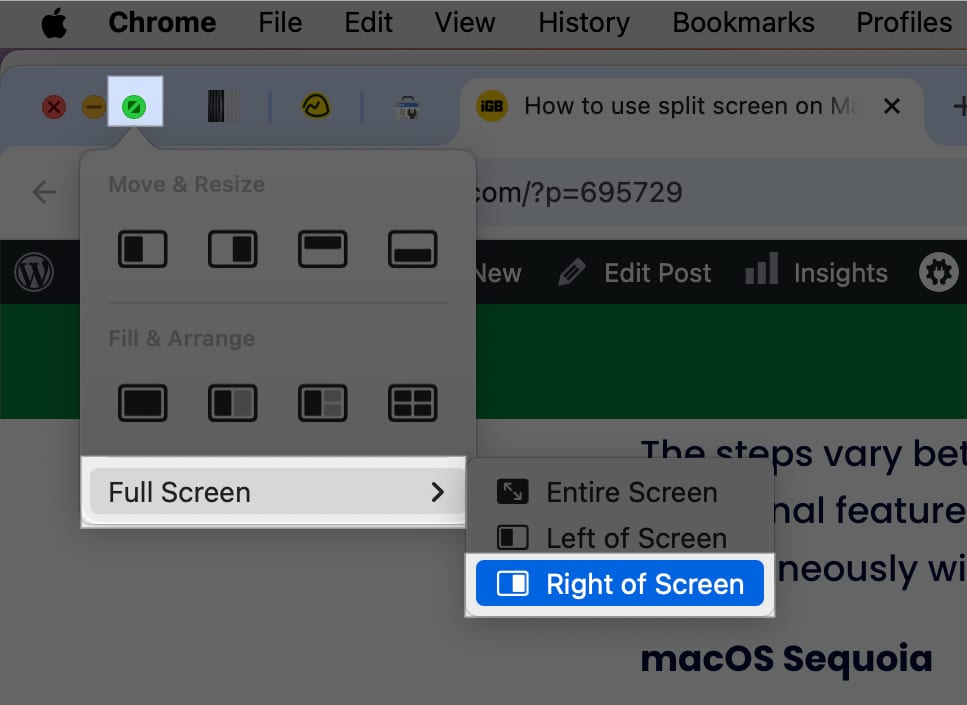
- Click the second app you want to use on the other side of the screen.
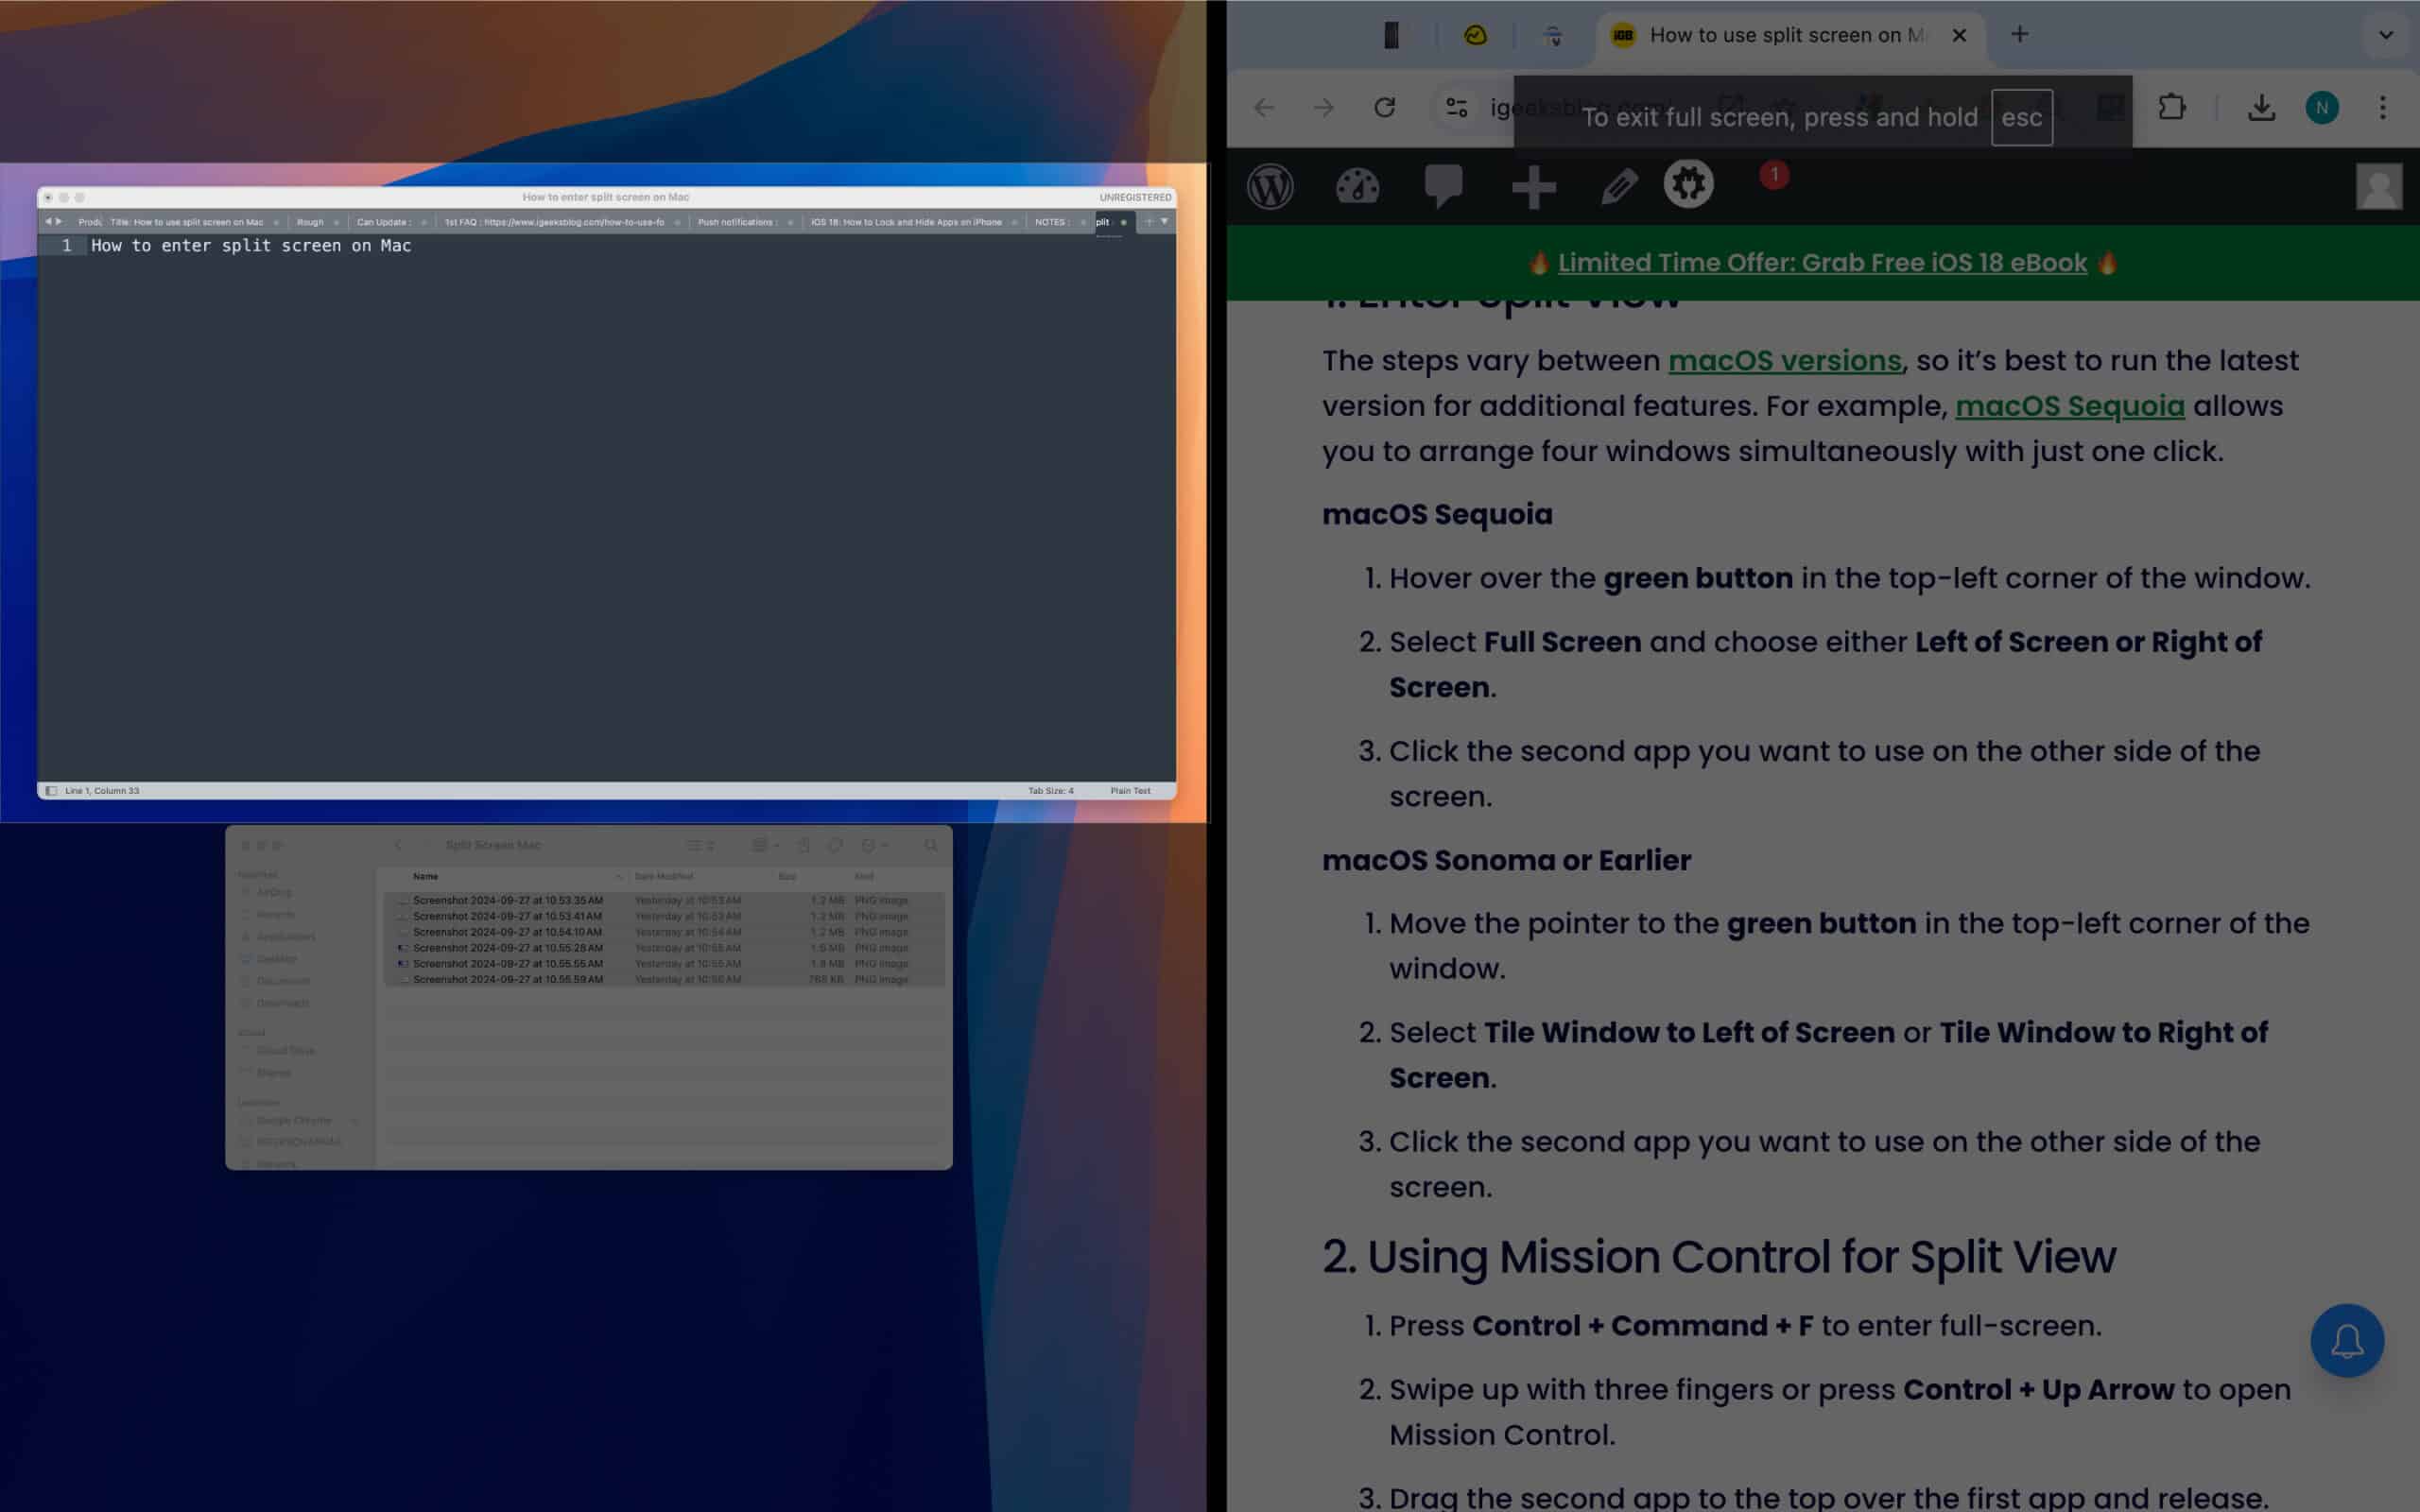
You should now have both apps open in Split View on your Mac.
On macOS Sonoma or earlier:
- Move the pointer to the green button in the top-left corner of the window.
- Select Tile Window to Left of Screen or Tile Window to Right of Screen.
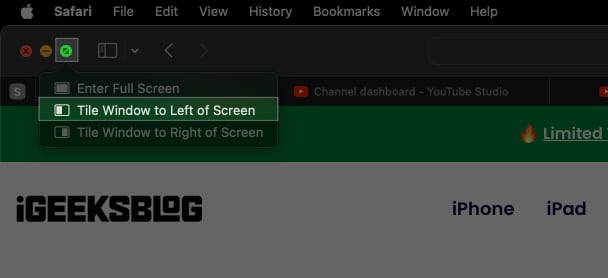
- Click the second app you want to use on the other side of the screen, and you will enter Split View.
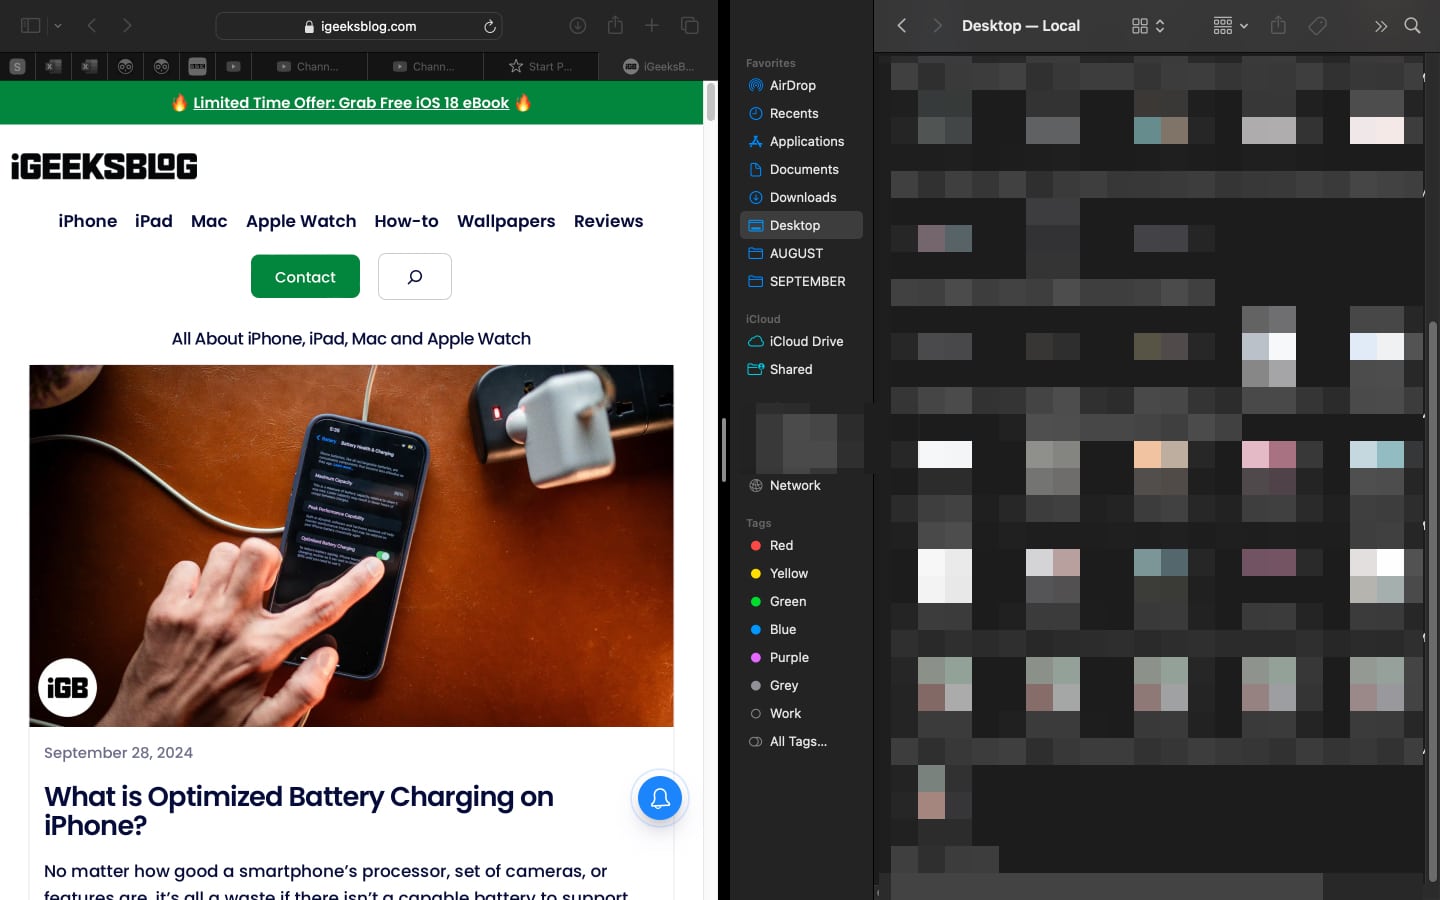

2. Entering Split View using Mission Control
You can also enter Split View using Mission Control:
- Press Control+Command+F to enter full-screen.
- Swipe up with three fingers or press Control+Up Arrow to open Mission Control.
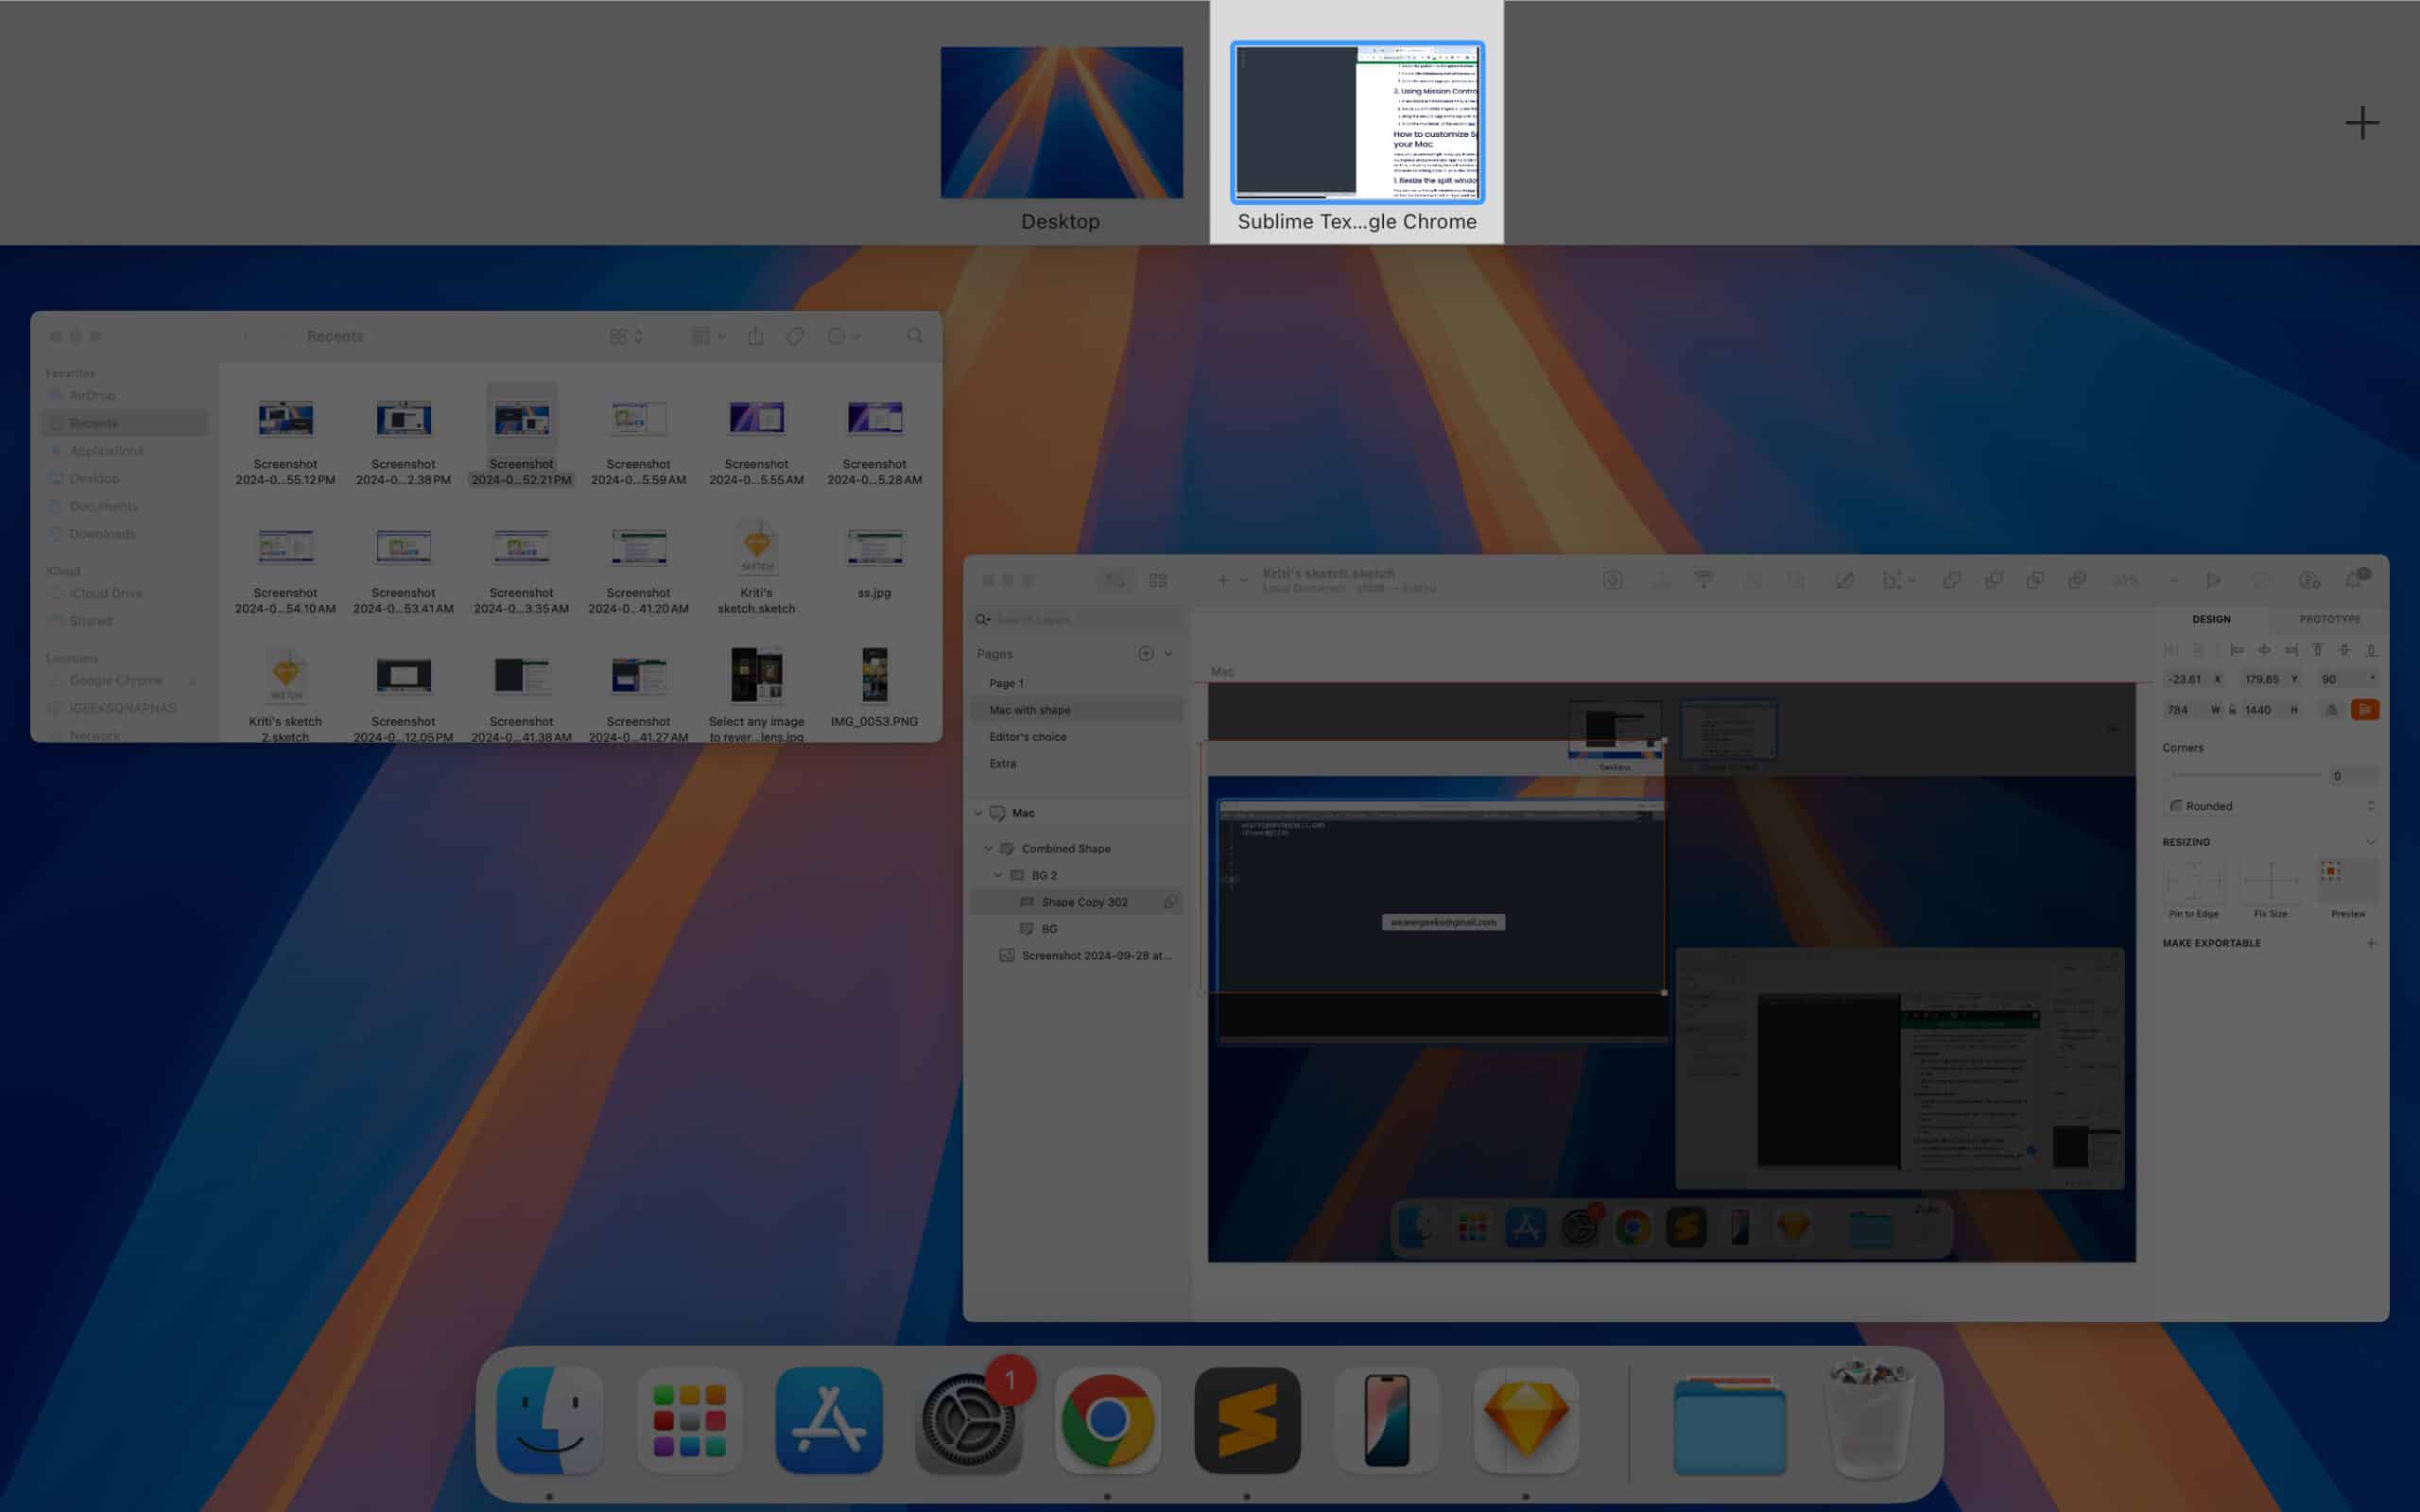
- Drag the second app to the top over the first app and release.
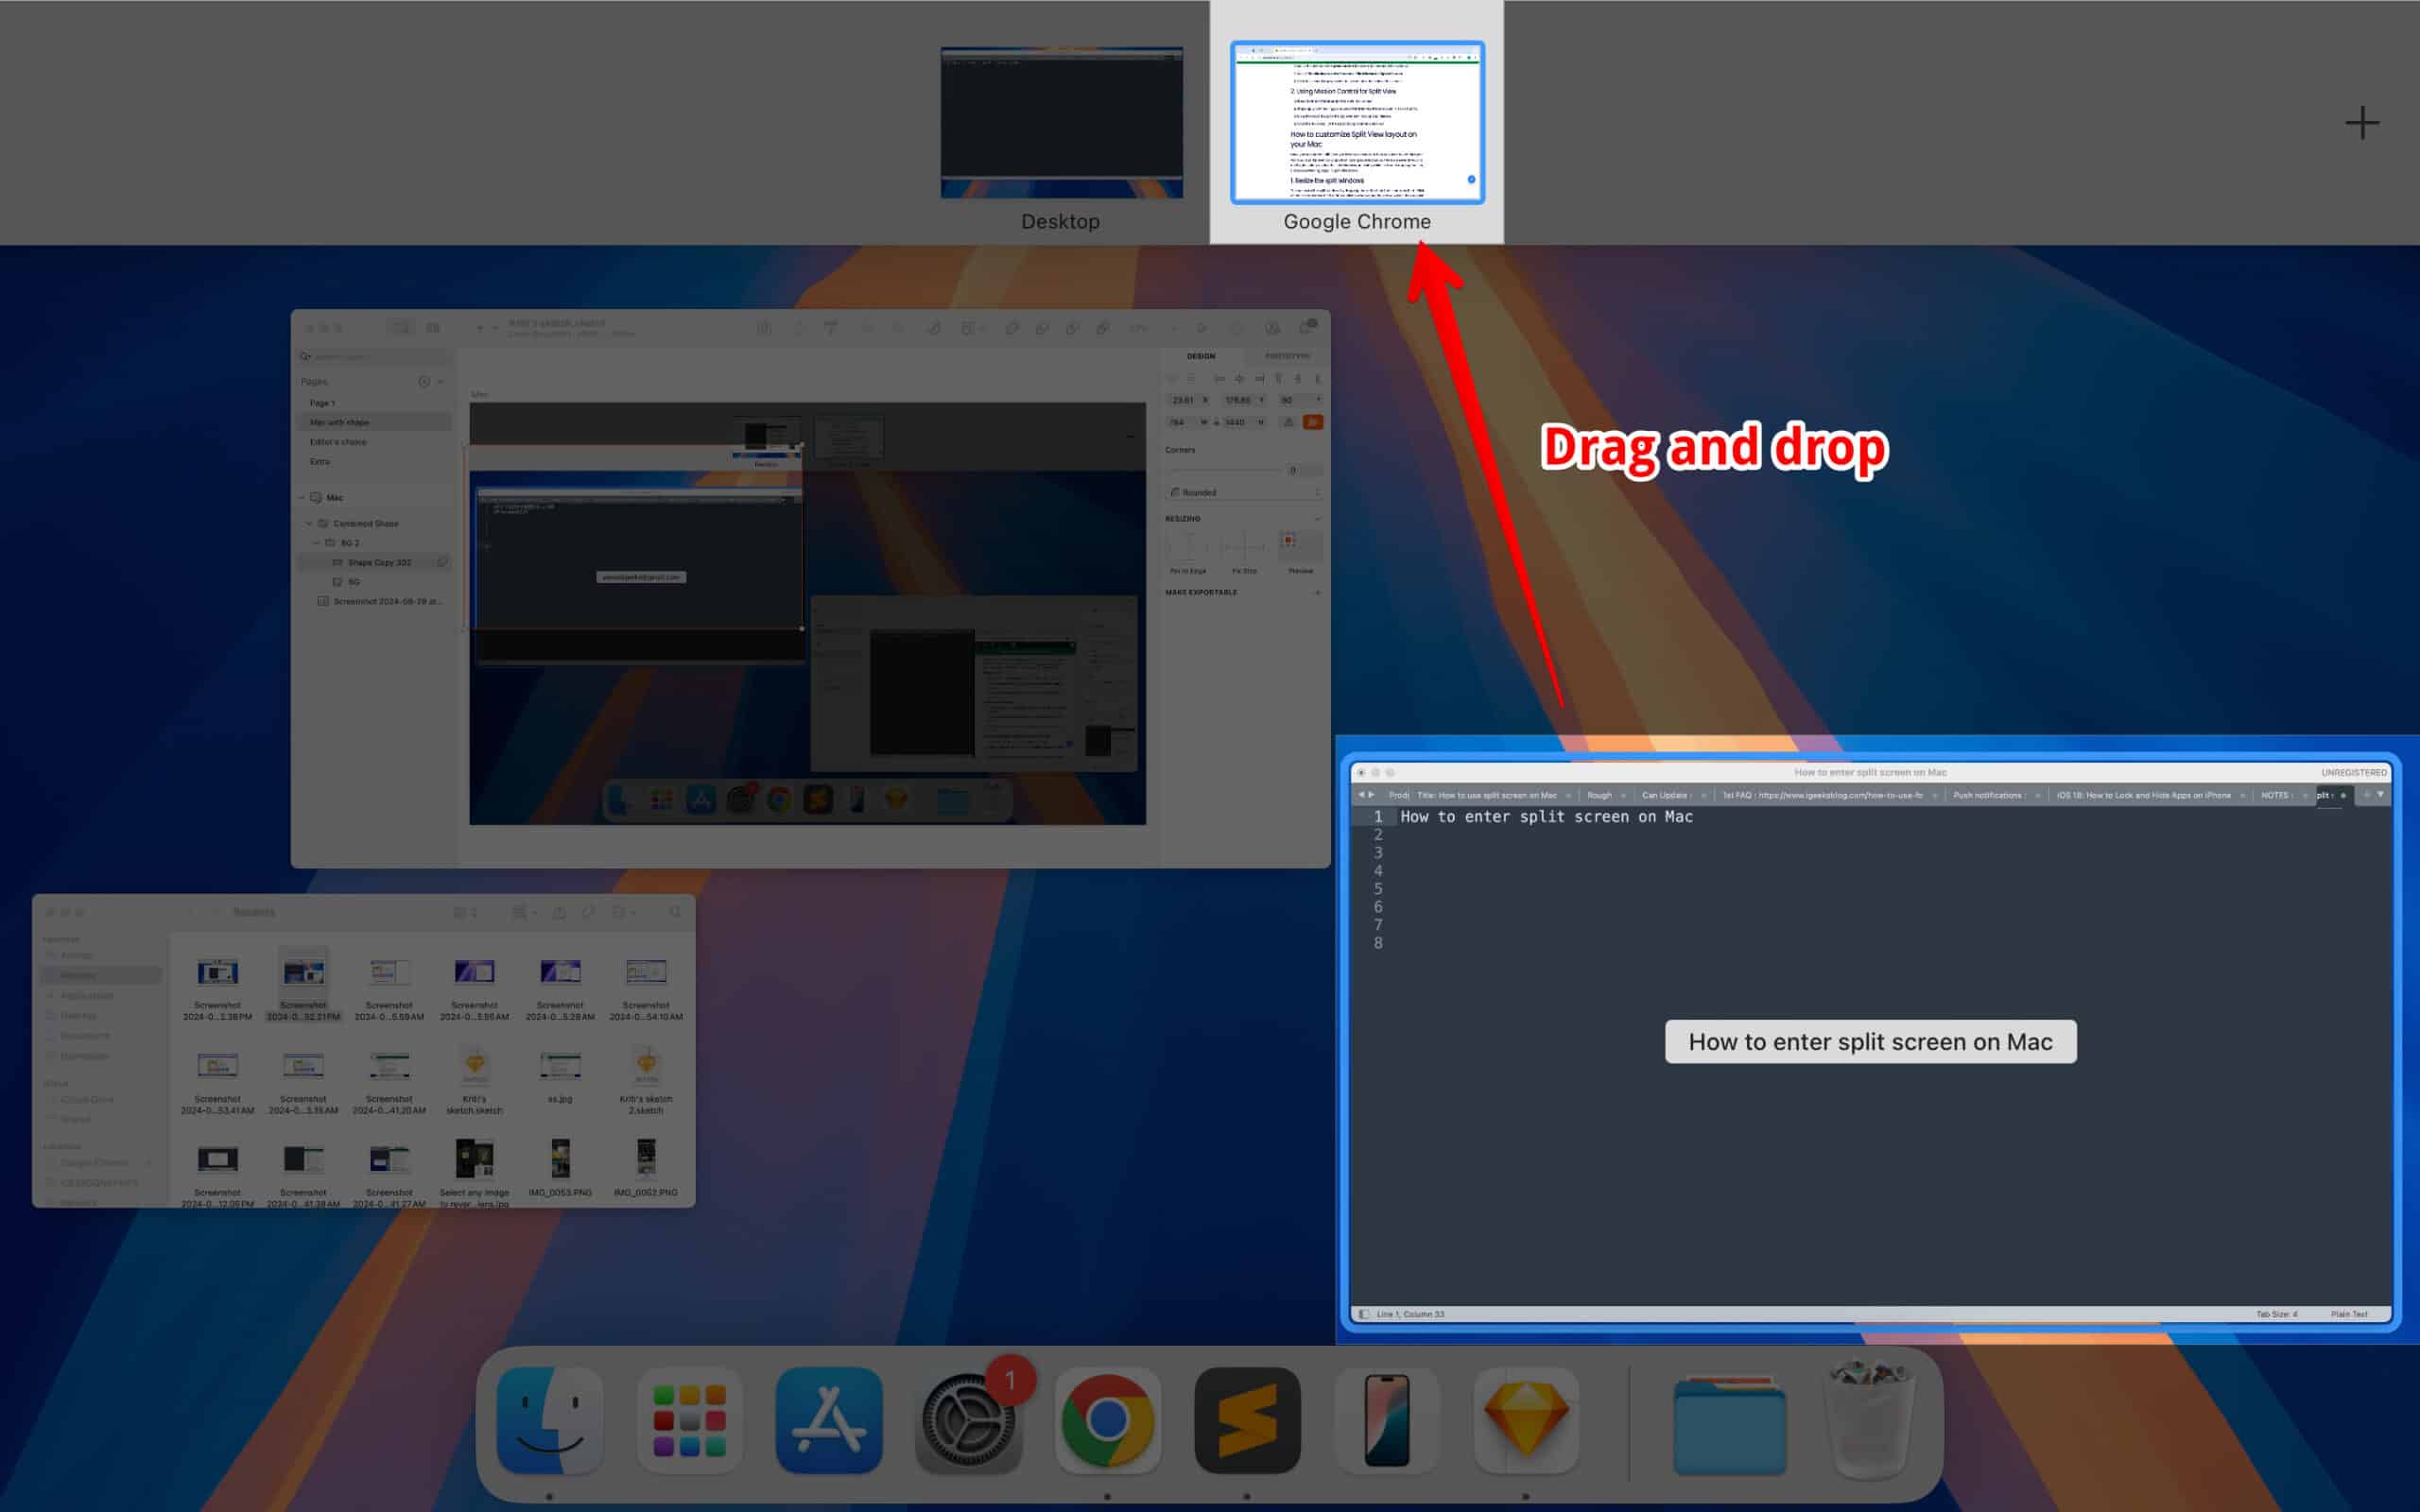
- Click the thumbnail of the second app to enter Split View.


How to customize the Split View layout on your Mac
Once you’ve entered Split View, you’ll want to customize it on your Mac to optimize your workspace. There are several ways to do this, including resizing the split windows, adjusting which side each app appears on, and even switching apps in Split View mode.
1. Resize the split windows
You can resize the split windows by dragging the vertical line that separates them. Click on the line and move it left or right until the windows are the size you want, then let go of the cursor.
2. Change which side each app appears on
You can switch which app appears on which side. Simply click and hold the title bar of the window you want to move, then drag and drop it to the other side of the screen to place it there.
3. Switch apps in Split View mode
You can switch between apps by clicking on the window you want to use. You can also use keyboard shortcuts or open Mission Control to quickly change between different windows or apps.
How to exit Split Screen on your Mac
Once you’re done with multi-tasking and no longer want two apps simultaneously eating up your screen, you can exit Split View. To do this click the green full-screen button on one of the windows or press Control+Command+F, and you will enter normal mode.
What is the keyboard shortcut for Split View on a Mac
Those who want to jump straight into Split View mode can do so using the keyboard shortcut. Start by entering full-screen mode with Control + Command (⌘) + F. Next, press F3 to launch Mission Control, drag one window to the left or right edge of the screen to set up Split View. Finally, select another window to fill the remaining space.
Tips for maximizing productivity in Split View
Split View is a great feature for multitaskers—those who are adept at using two or more apps at once. For instance, you might use one window for research (such as Excel sheets or articles) and another for writing (like Microsoft Word or Notes). Alternatively, you could have your email open on one side while planning your calendar on the other to schedule your days.
There are multiple ways to make the most of Split View, but I recommend opening a browser on one side and documentation on the other in most cases. This setup allows you to search on the go without needing to switch between windows frequently.
What to do if Split Screen isn’t working on your Mac
- First, ensure that your Mac is updated to the latest version, and it supports Split View mode. (FYI, macOS El Capitan and later support Split View)
- Secondly, you should note that not all apps support Split View. For example, some old apps aren’t optimized for Split View.
If you’re still struggling with Split View not working on your Mac, you should check out our Split View troubleshooting guide.
Signing off…
Split View is one of the most helpful macOS features for multitaskers or anyone who needs to use two apps side by side. I hope this guide explains the feature and you are able to browse and use multiple windows simultaneously with Split View on your Mac.


