How to screen record on your Mac (With or without audio)
Master the built-in tools and pro tips to record your Mac screen effortlessly.
- What It Is: Screen recording creates a video of your Mac’s screen activity, which is perfect for making tutorials, demonstrating software, or documenting issues for tech support.
- Available Methods: You can use the built-in Screenshot Toolbar for quick captures, QuickTime for basic recordings, or third-party apps for professional features and more control.
- The Easiest Method: For the easiest method, press `Shift+Command+5` to open the Screenshot Toolbar. From there, you can record the entire screen or a selected portion.
- QuickTime’s Limitation: QuickTime Player offers basic screen recording but importantly, it cannot capture your Mac’s internal audio, only audio from an external microphone by default.
- For Advanced Features: For professional results, use third-party apps like OBS Studio or ScreenFlow to record internal audio, edit your video, and add annotations.
A screen recording is more than just a tech trick—it’s a powerful tool for sharing tutorials, capturing issues, or documenting live events. Whether you’re walking someone through an app or saving a Zoom call for later, macOS makes it incredibly simple with built-in options like Screenshot Toolbar and QuickTime Player.
In this guide, I’ll explain how to record your Mac screen using native tools and when you might need a third-party app. Let’s get started.
What is Screen Recording on Mac?
Screen recording allows you to create a video of everything happening on your Mac’s screen. Unlike a screenshot, which freezes a single moment, screen recording captures the full experience in real time—ideal for walkthroughs, troubleshooting, or preserving digital events like webinars or video calls.
3 Easy ways to screen record on Mac
There are a few different ways to screen record on your Mac. I’ve discussed them all in detail below.
1. Using Screenshot Toolbar (macOS Mojave and later)
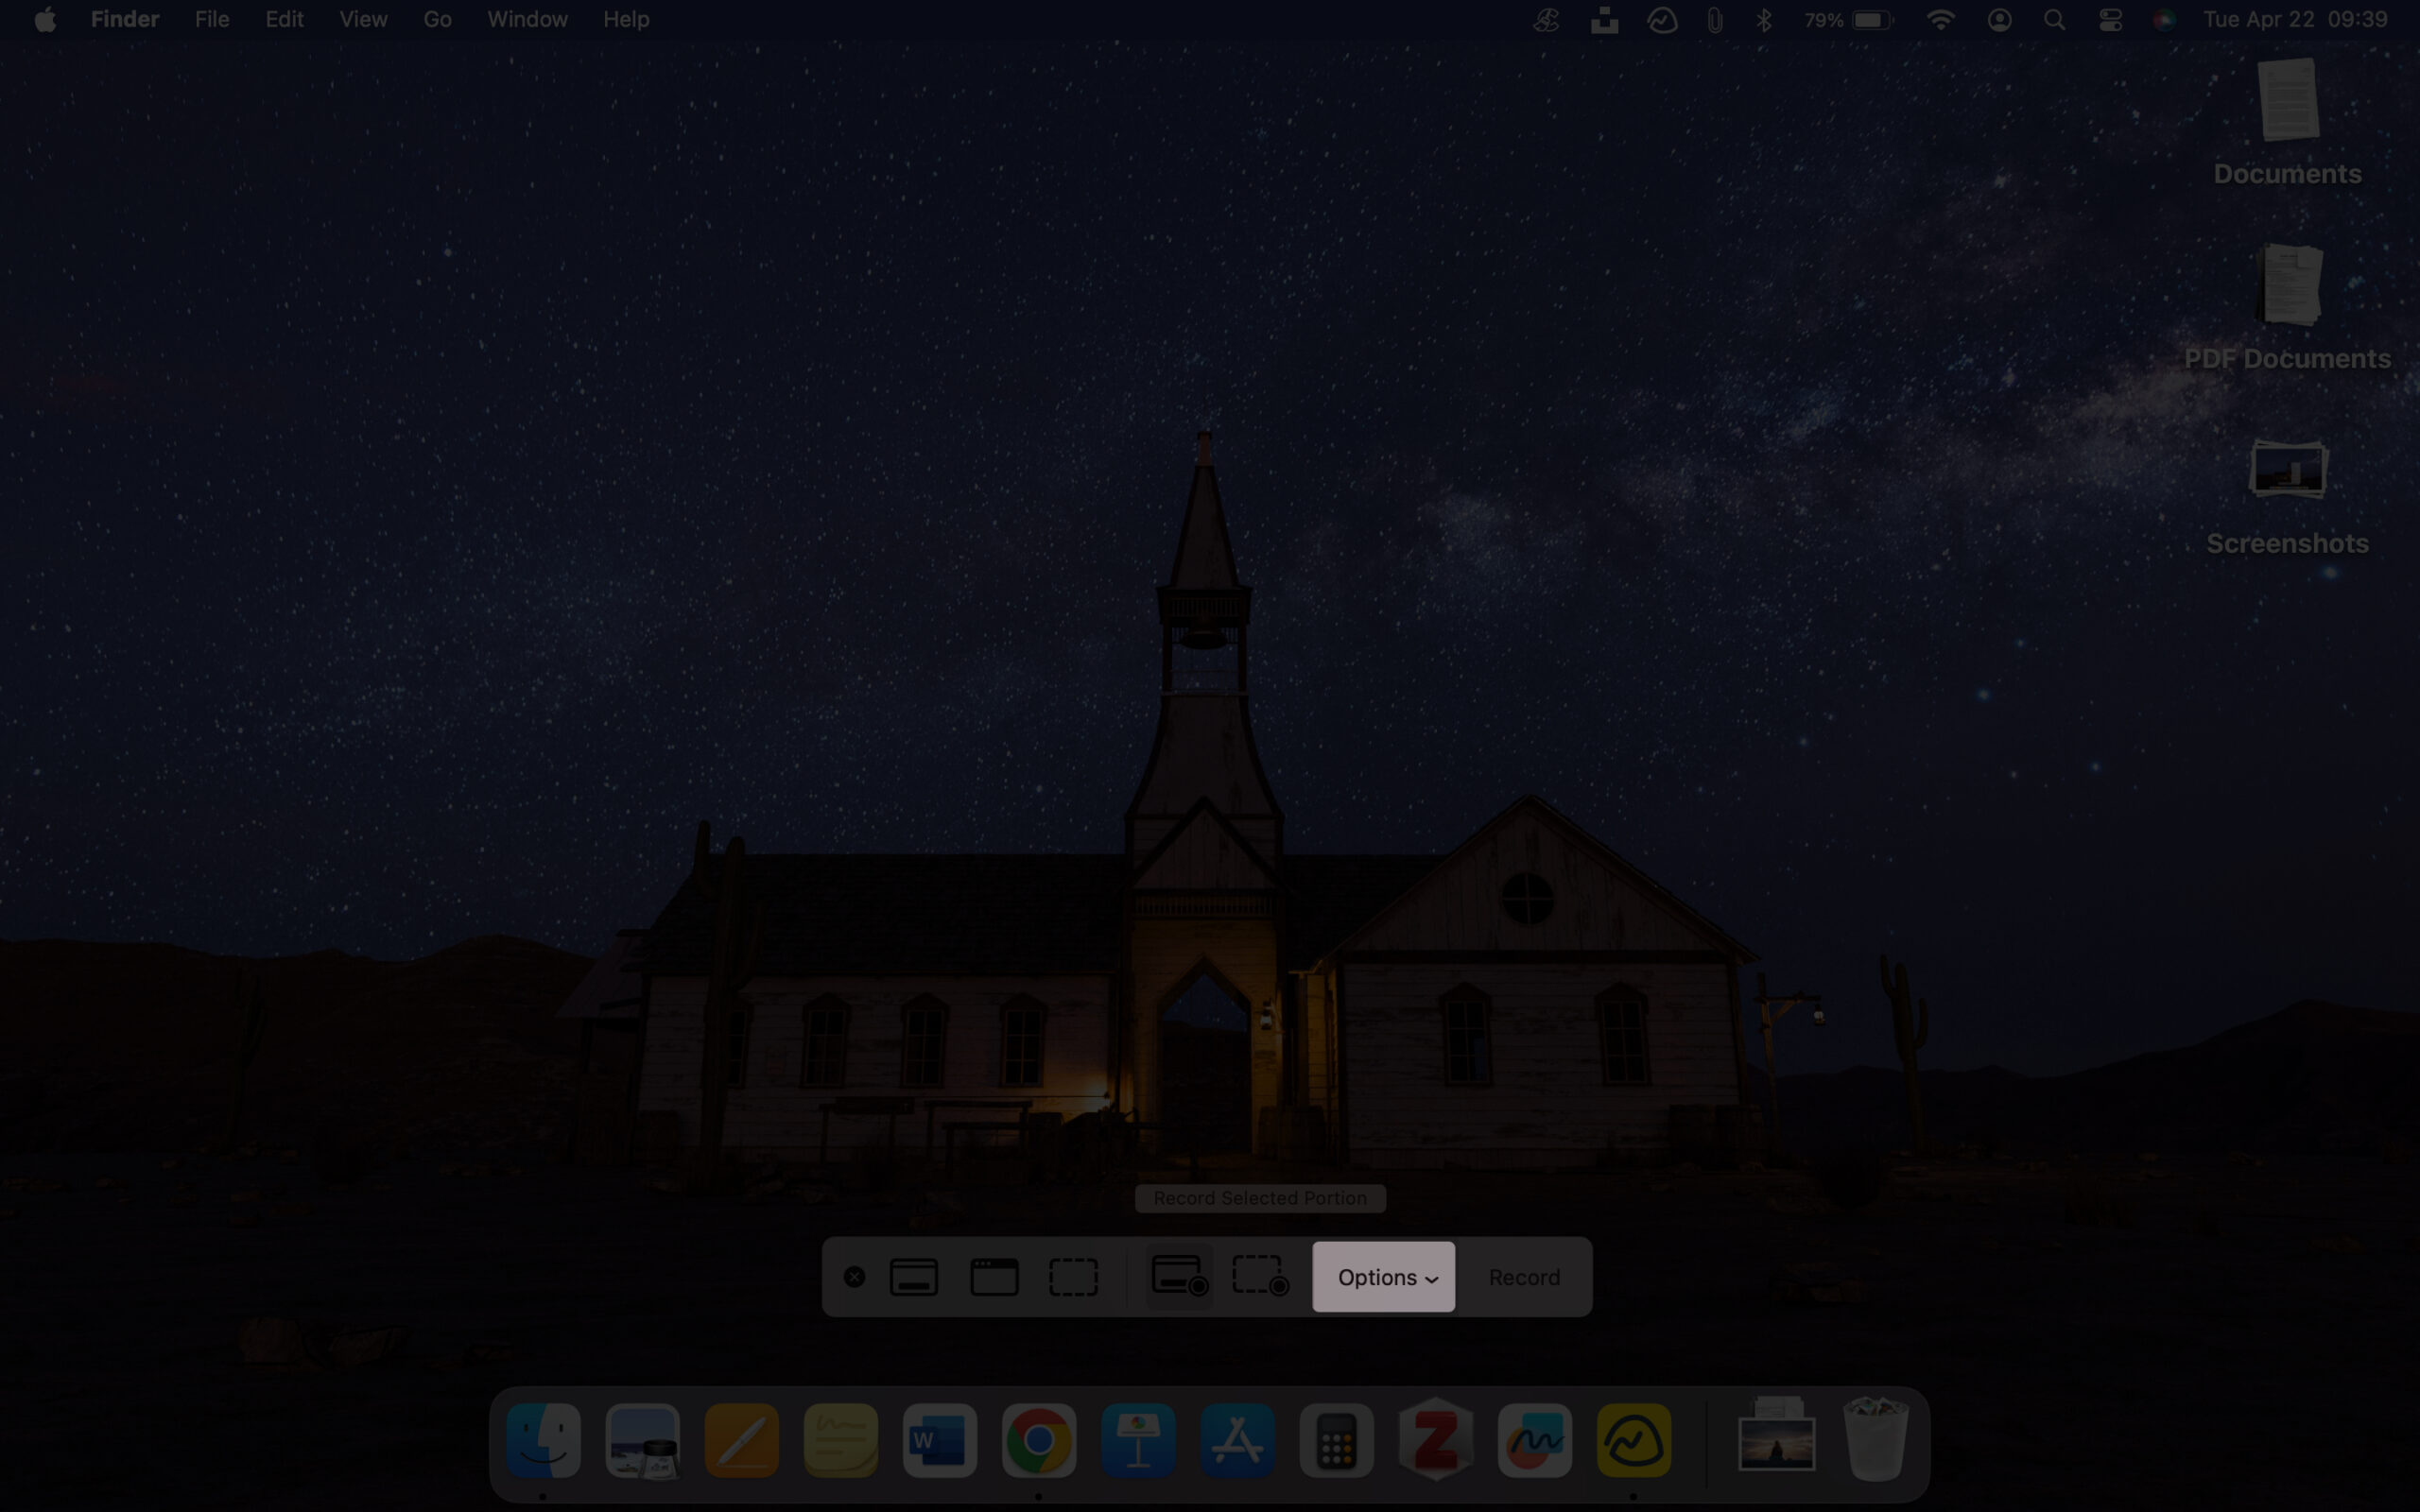
If you’re running macOS Mojave or newer, press Shift + Command + 5 to launch the Screenshot Toolbar.
Here’s how to get started:
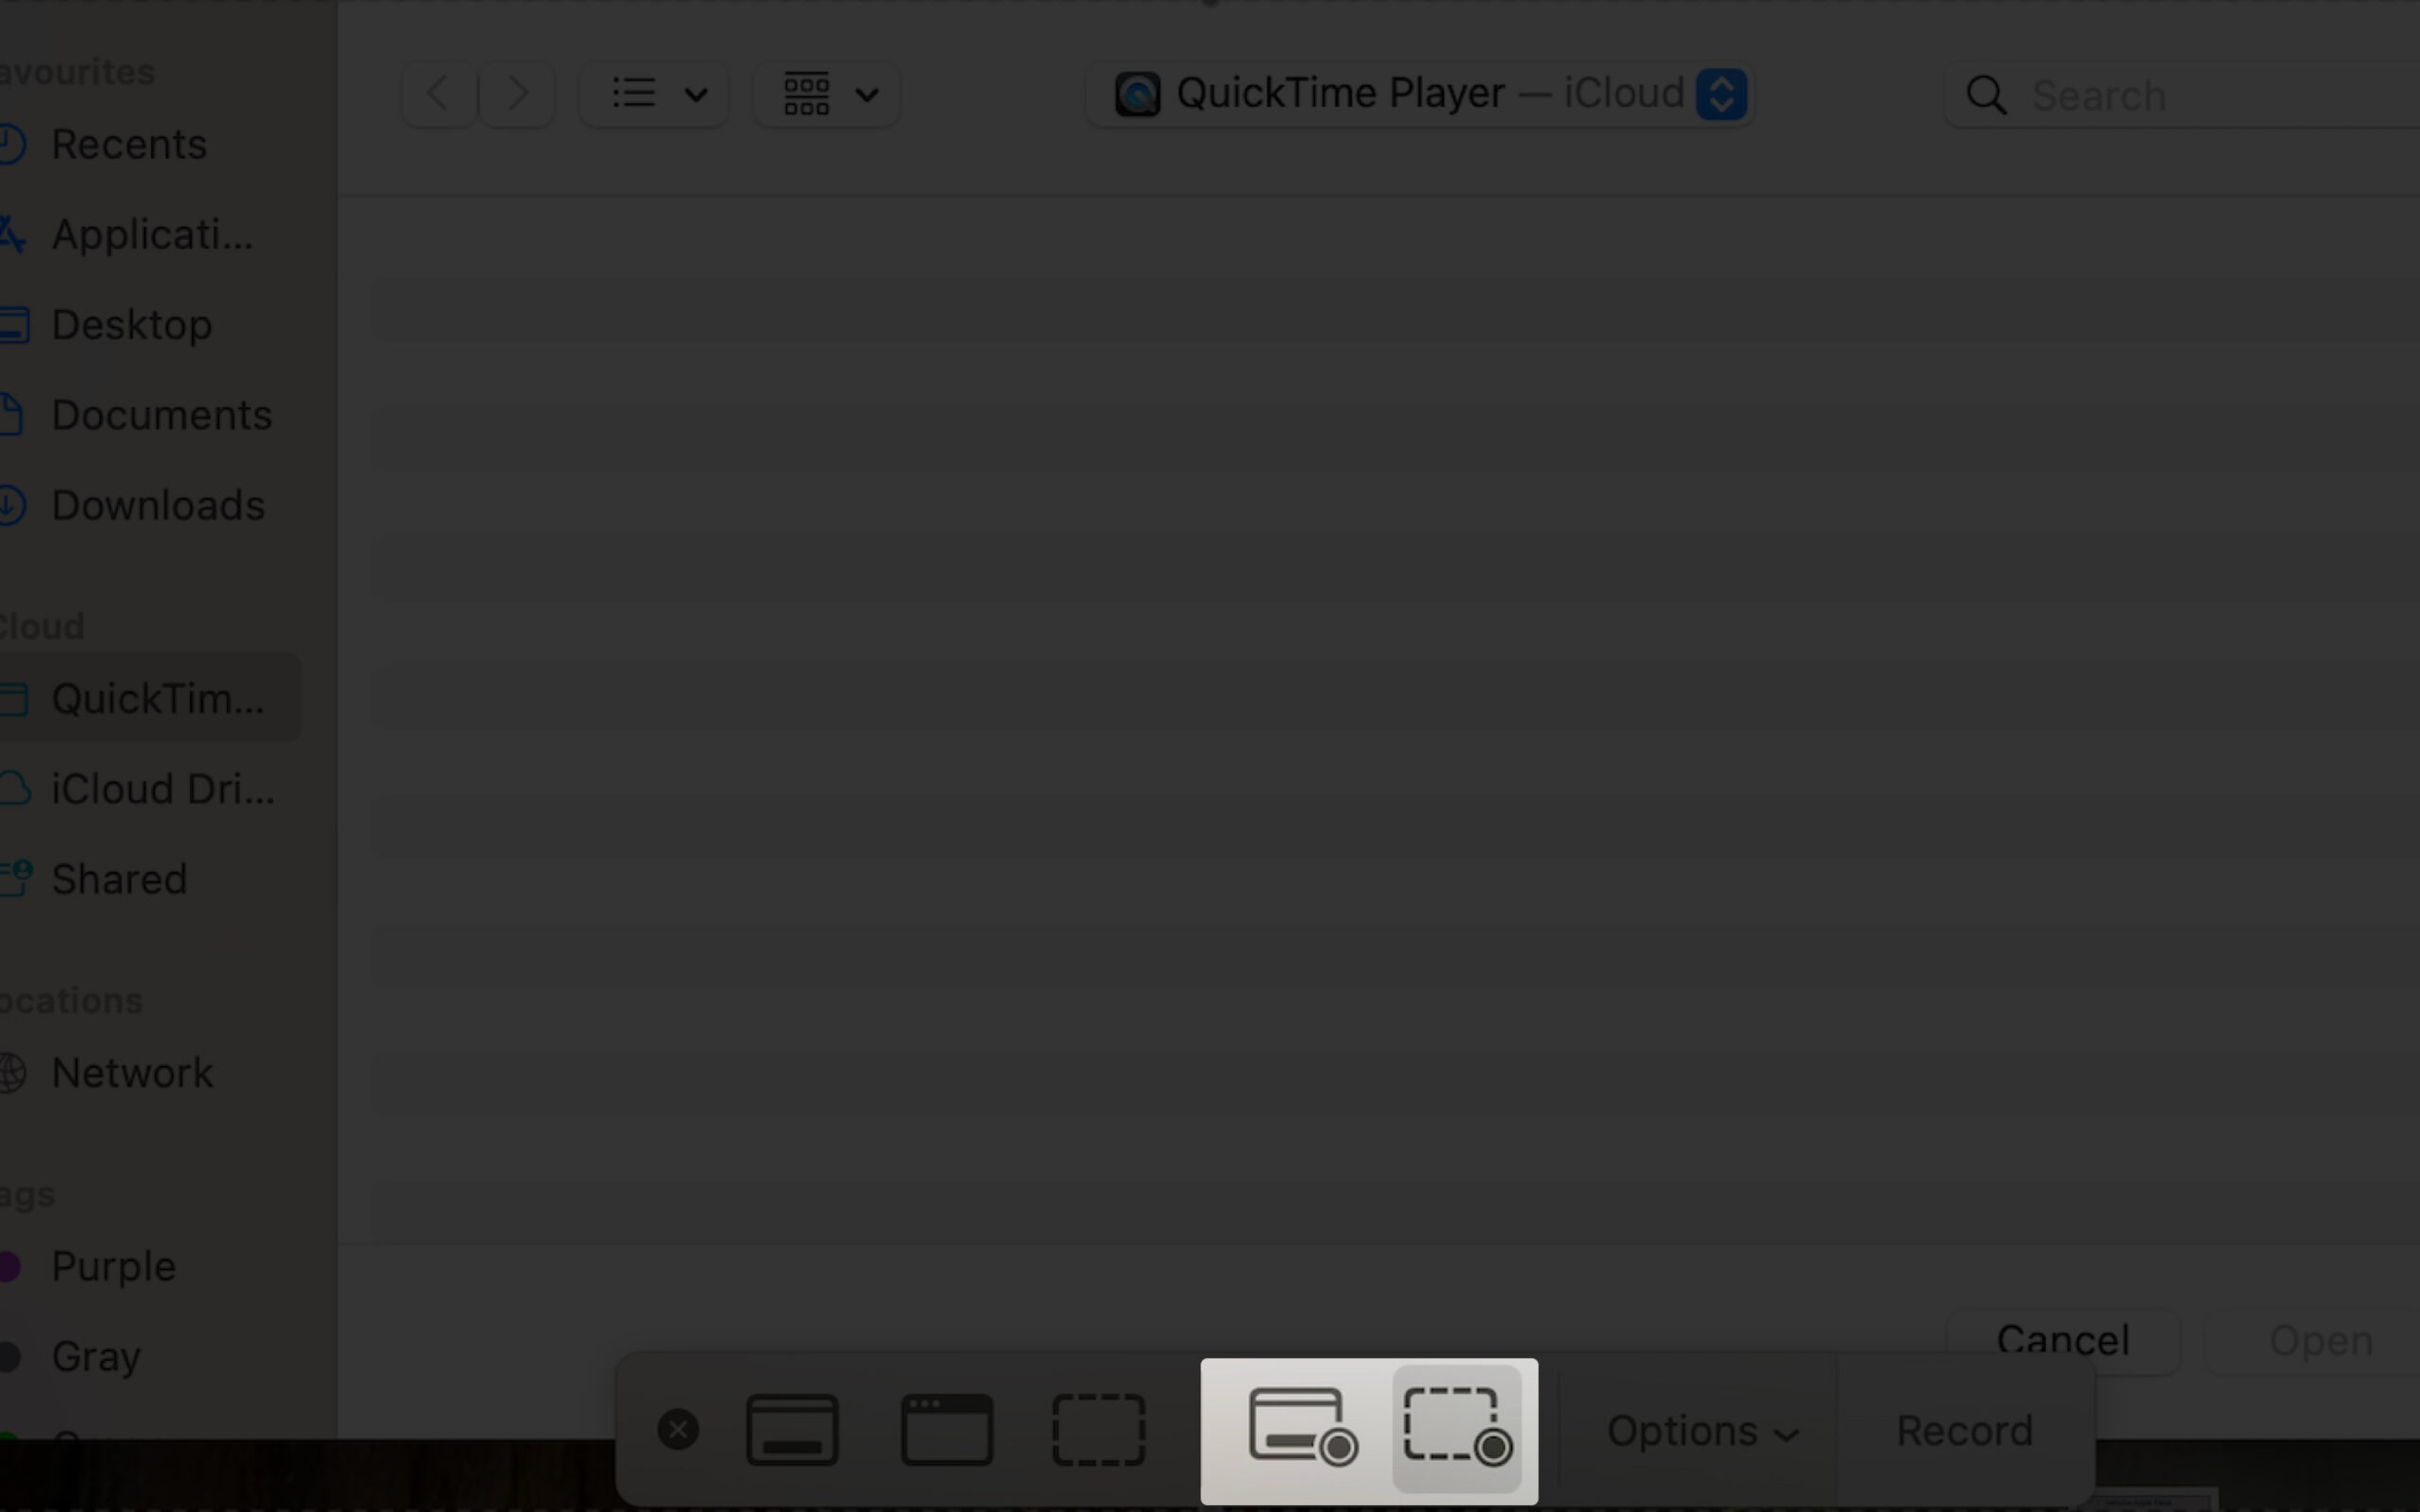
- Choose what to record: Select either Record Entire Screen or Record Selected Portion.
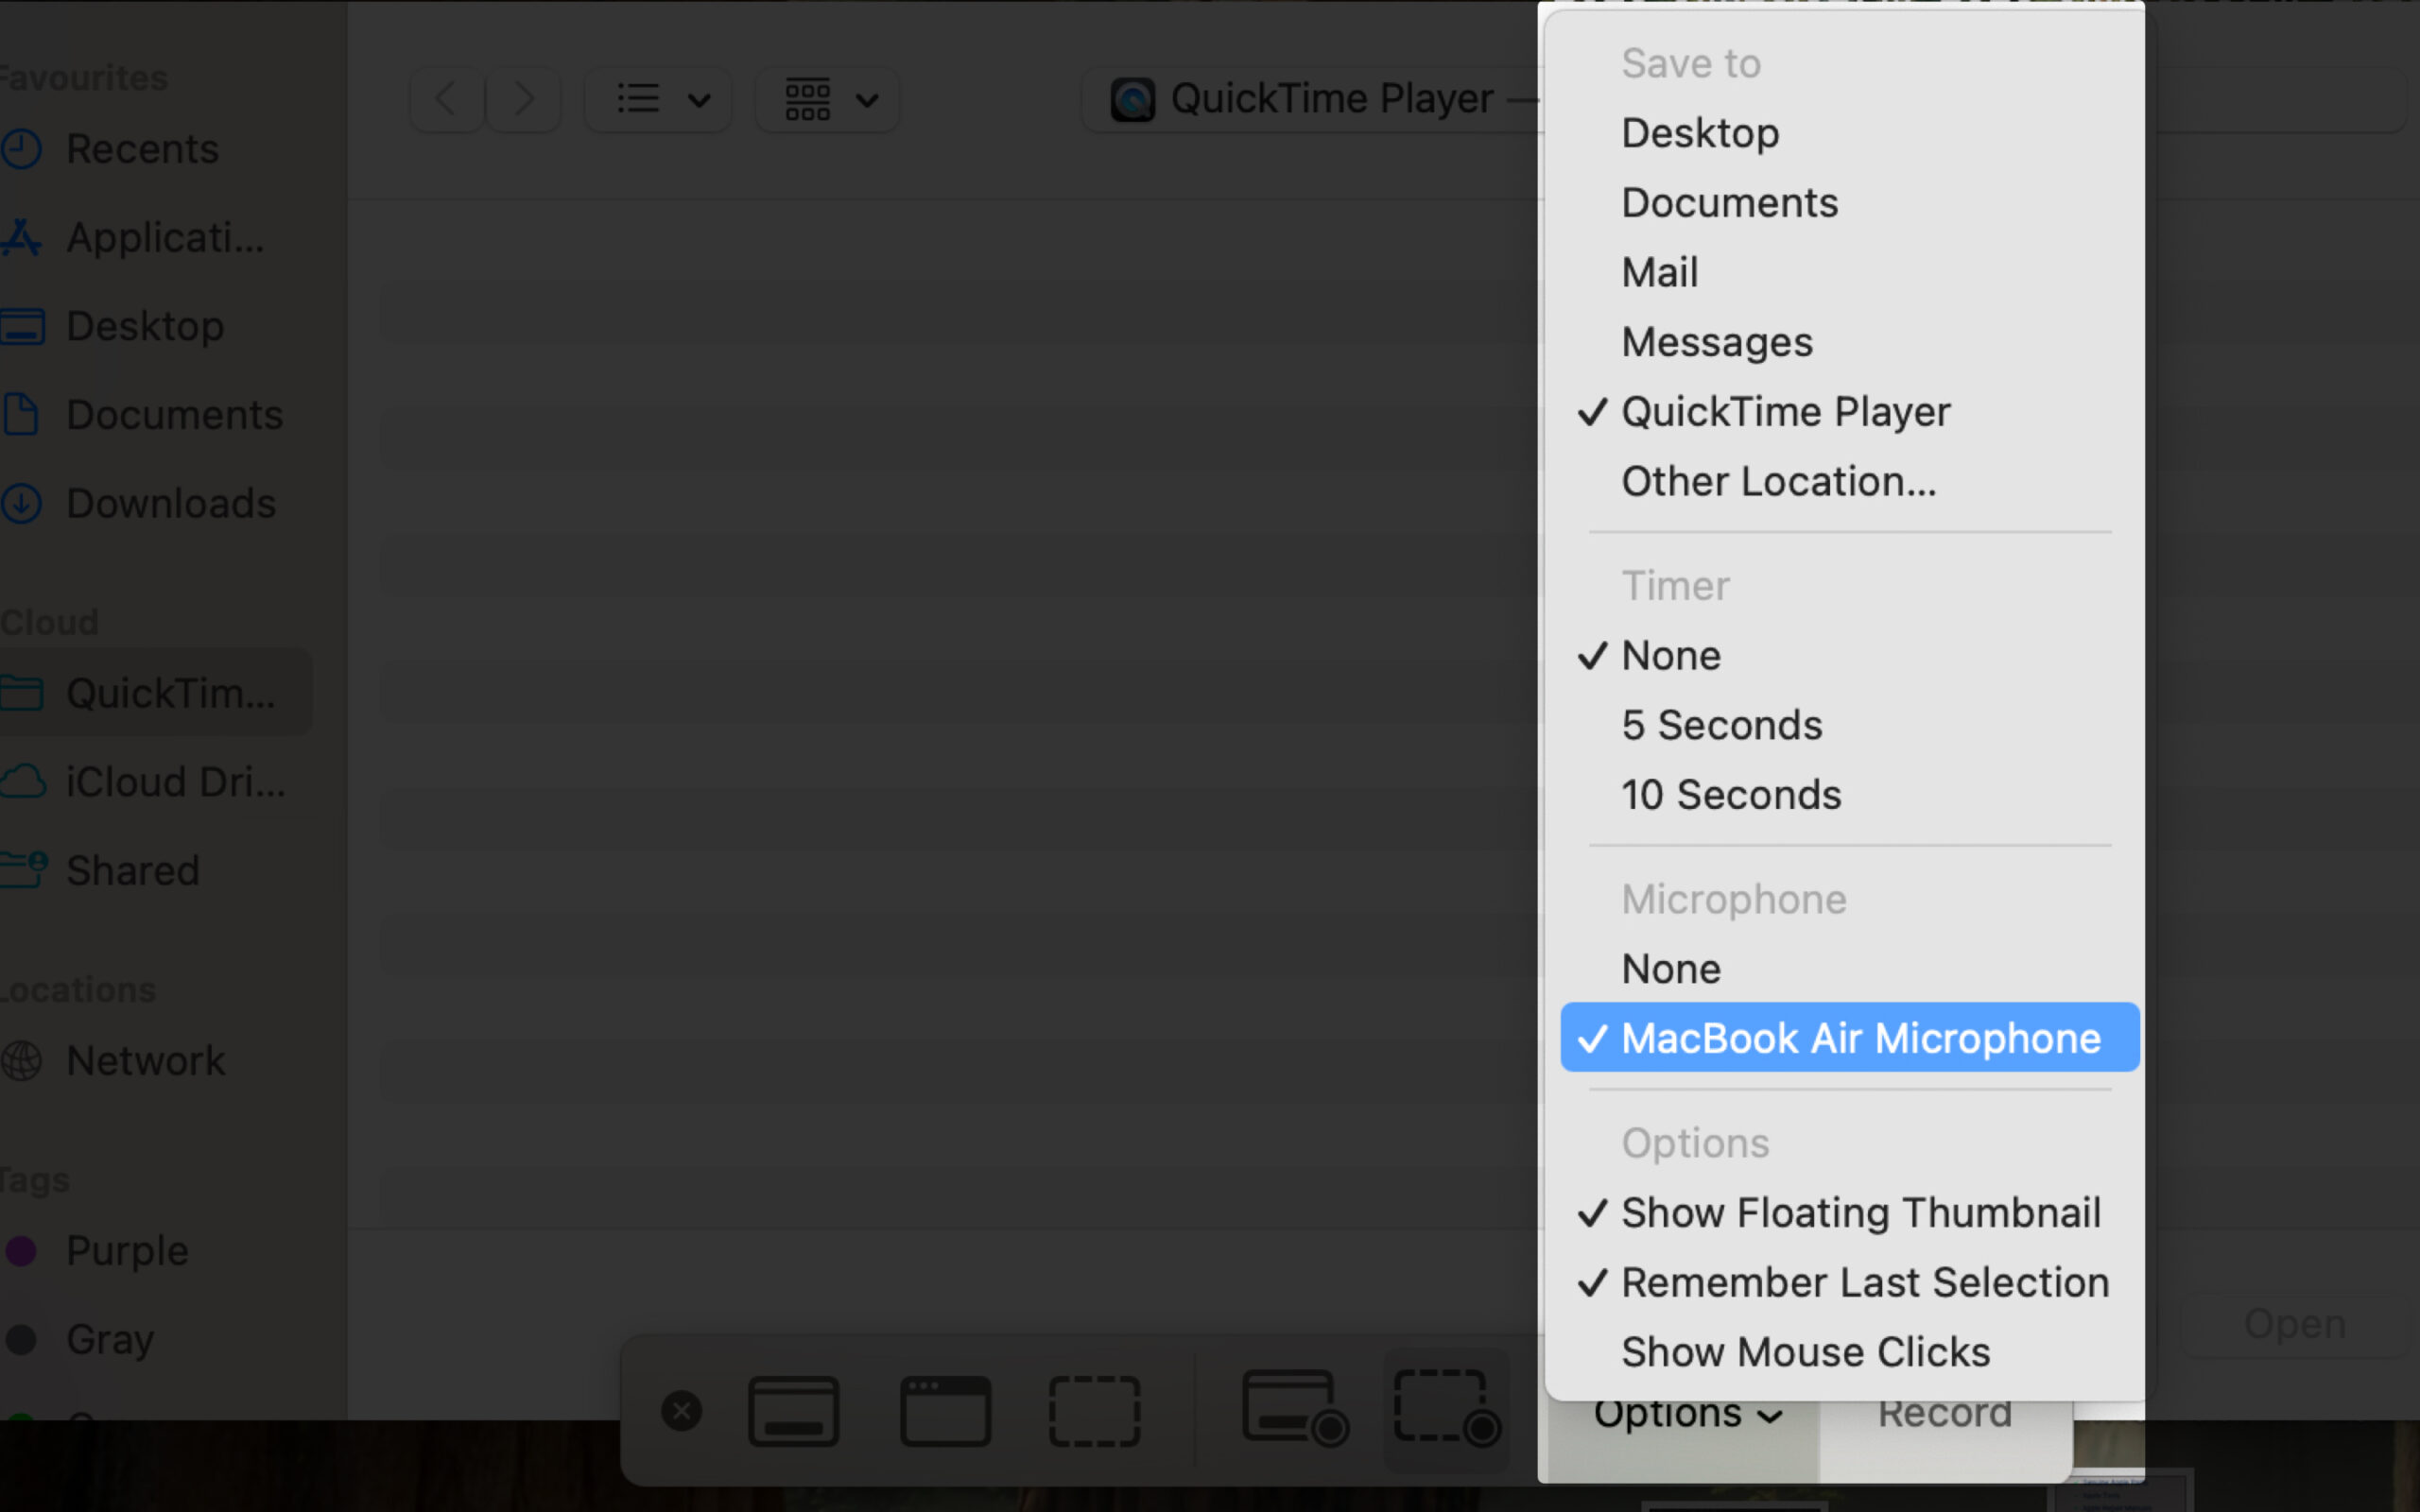
- Click Options in the toolbar to customize your recording settings as follows:
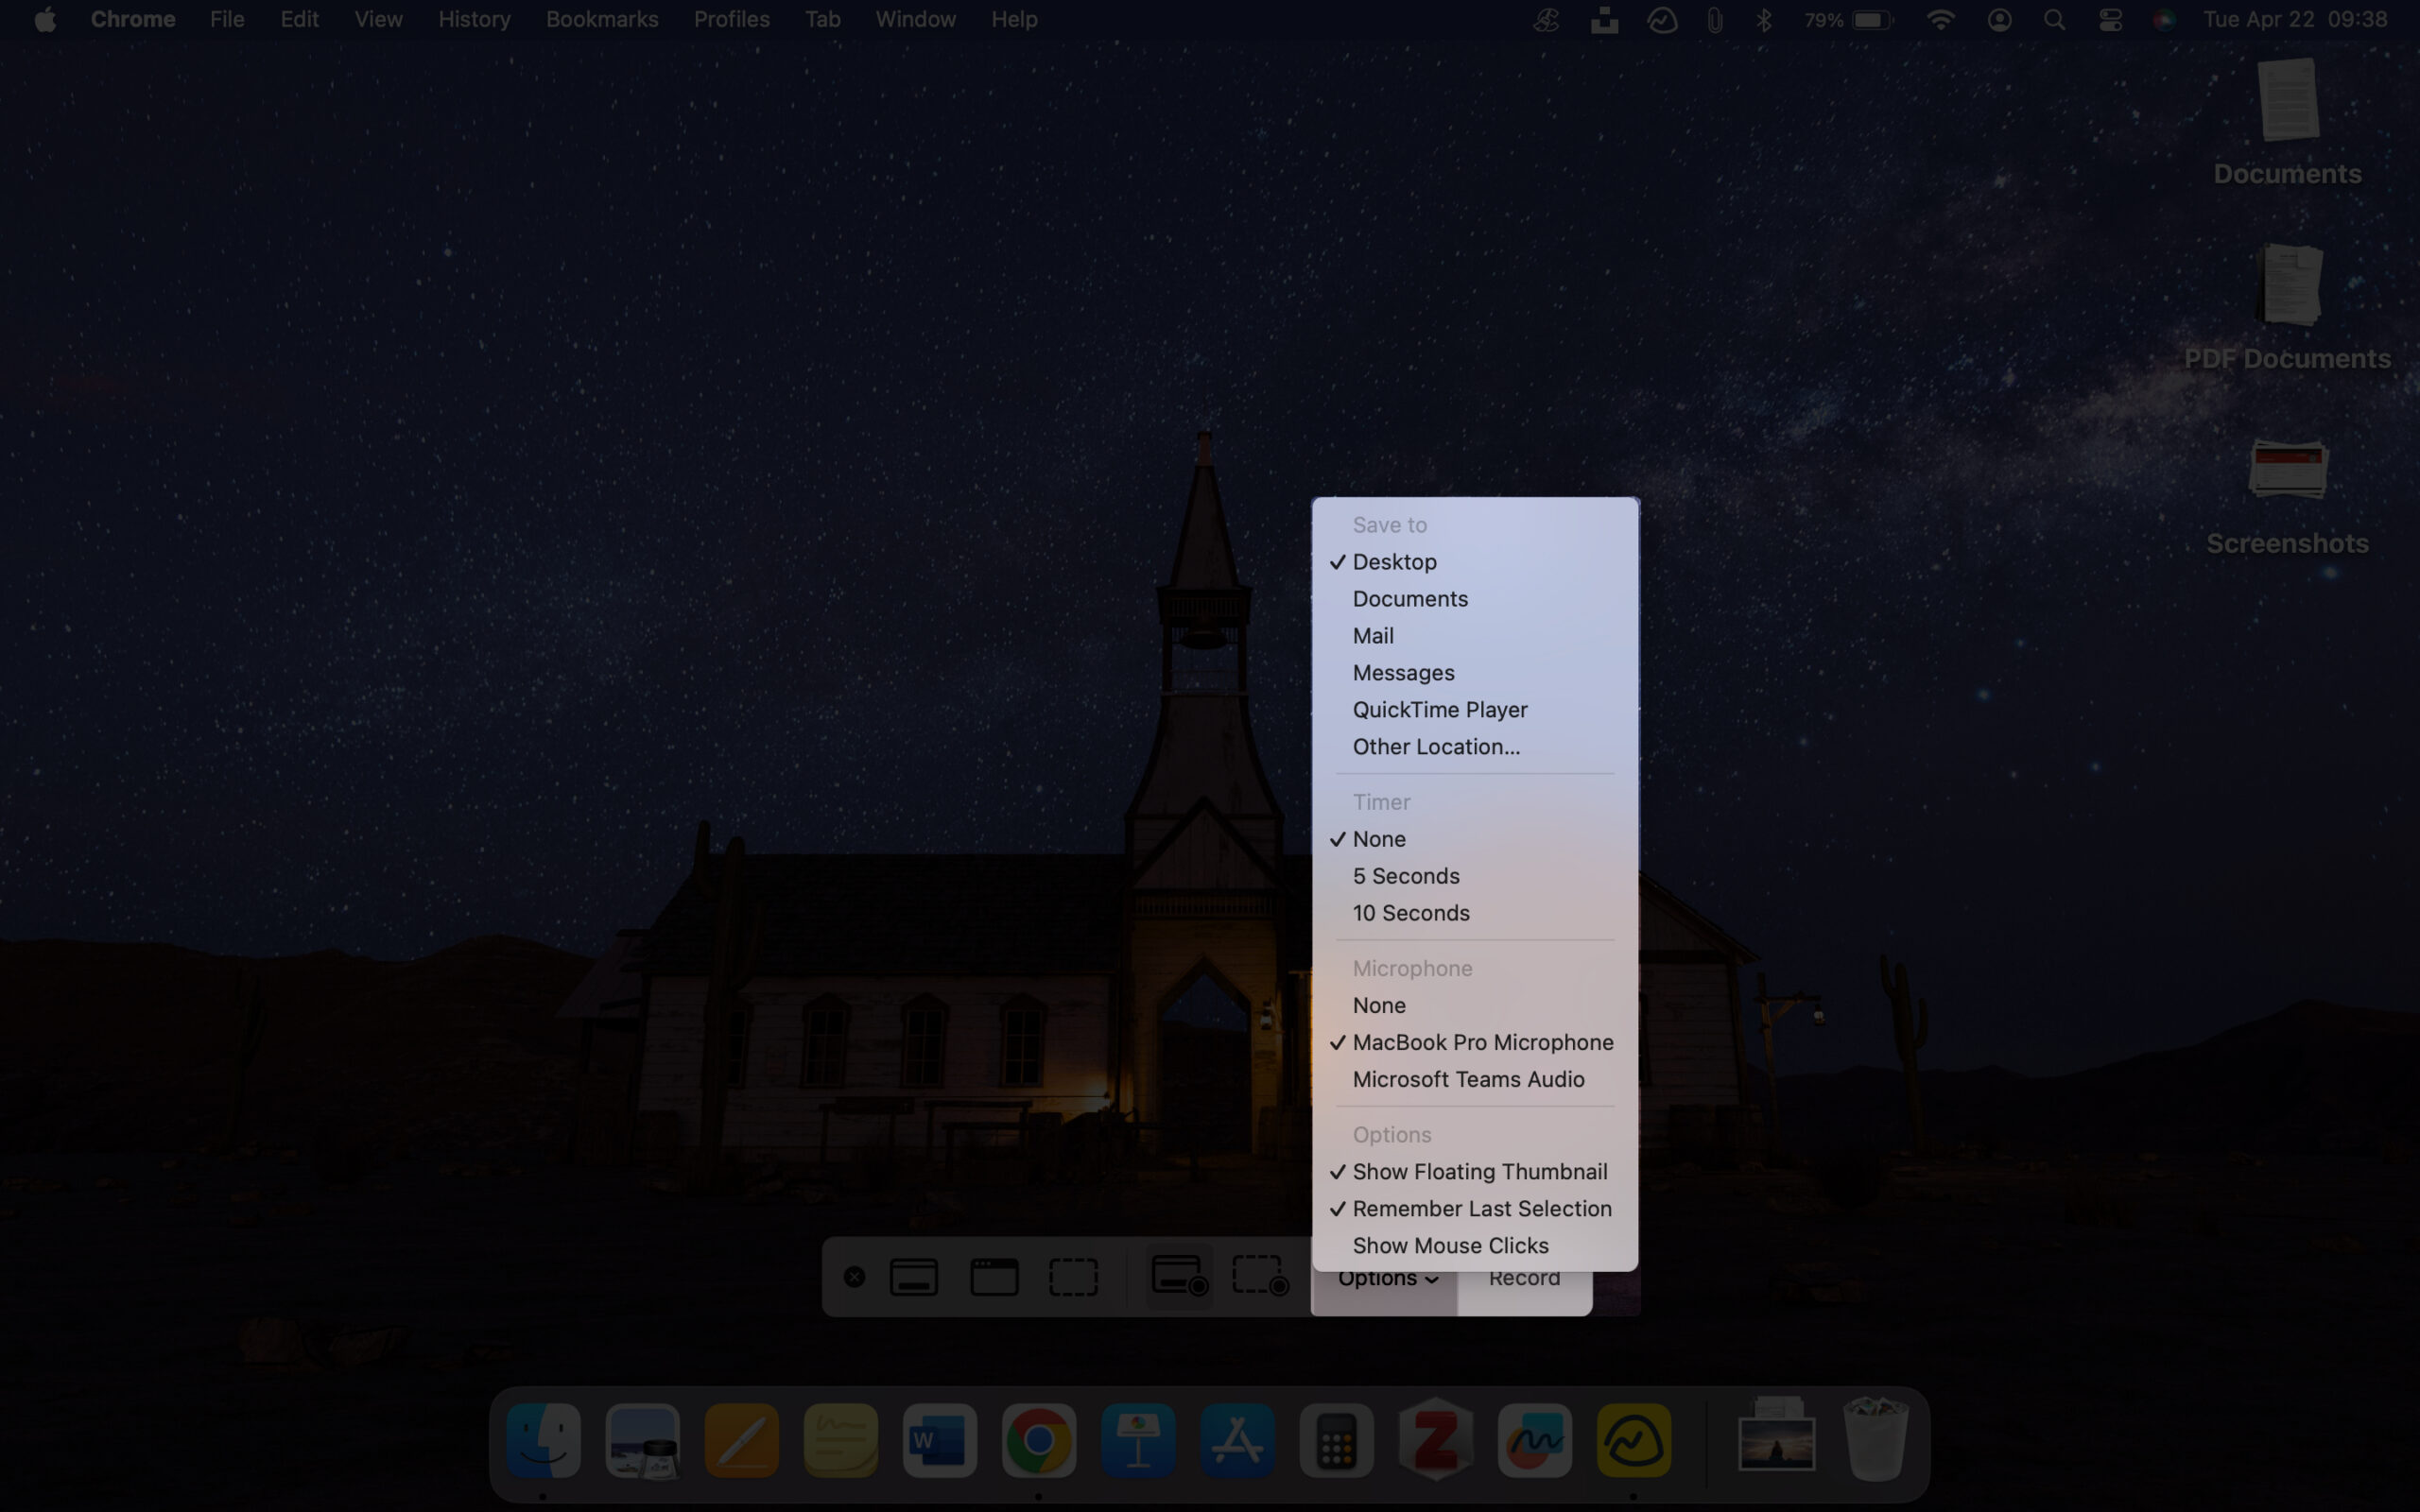
- Choose a location where your screen recording will be saved. By default, they are saved to your desktop.
- Select a microphone if you want to record a voiceover or other audio with the screen recording.
- Select a timer to delay the recording by five or ten seconds after you click Record.
- Select Show Mouse Clicks to see a black circle around your pointer when you click during the recording.
- After selecting your options, click Record to begin the screen recording.
- To stop screen recording, click the Stop button in the menu bar, or use the keyboard shortcut of Command + Control + Esc (Escape).
2. Using QuickTime Player
QuickTime Player is another built-in app perfect for quick recordings.
Steps to use QuickTime:
- Open QuickTime Player from the Applications folder.
- In the menu bar, click File > New Screen Recording.
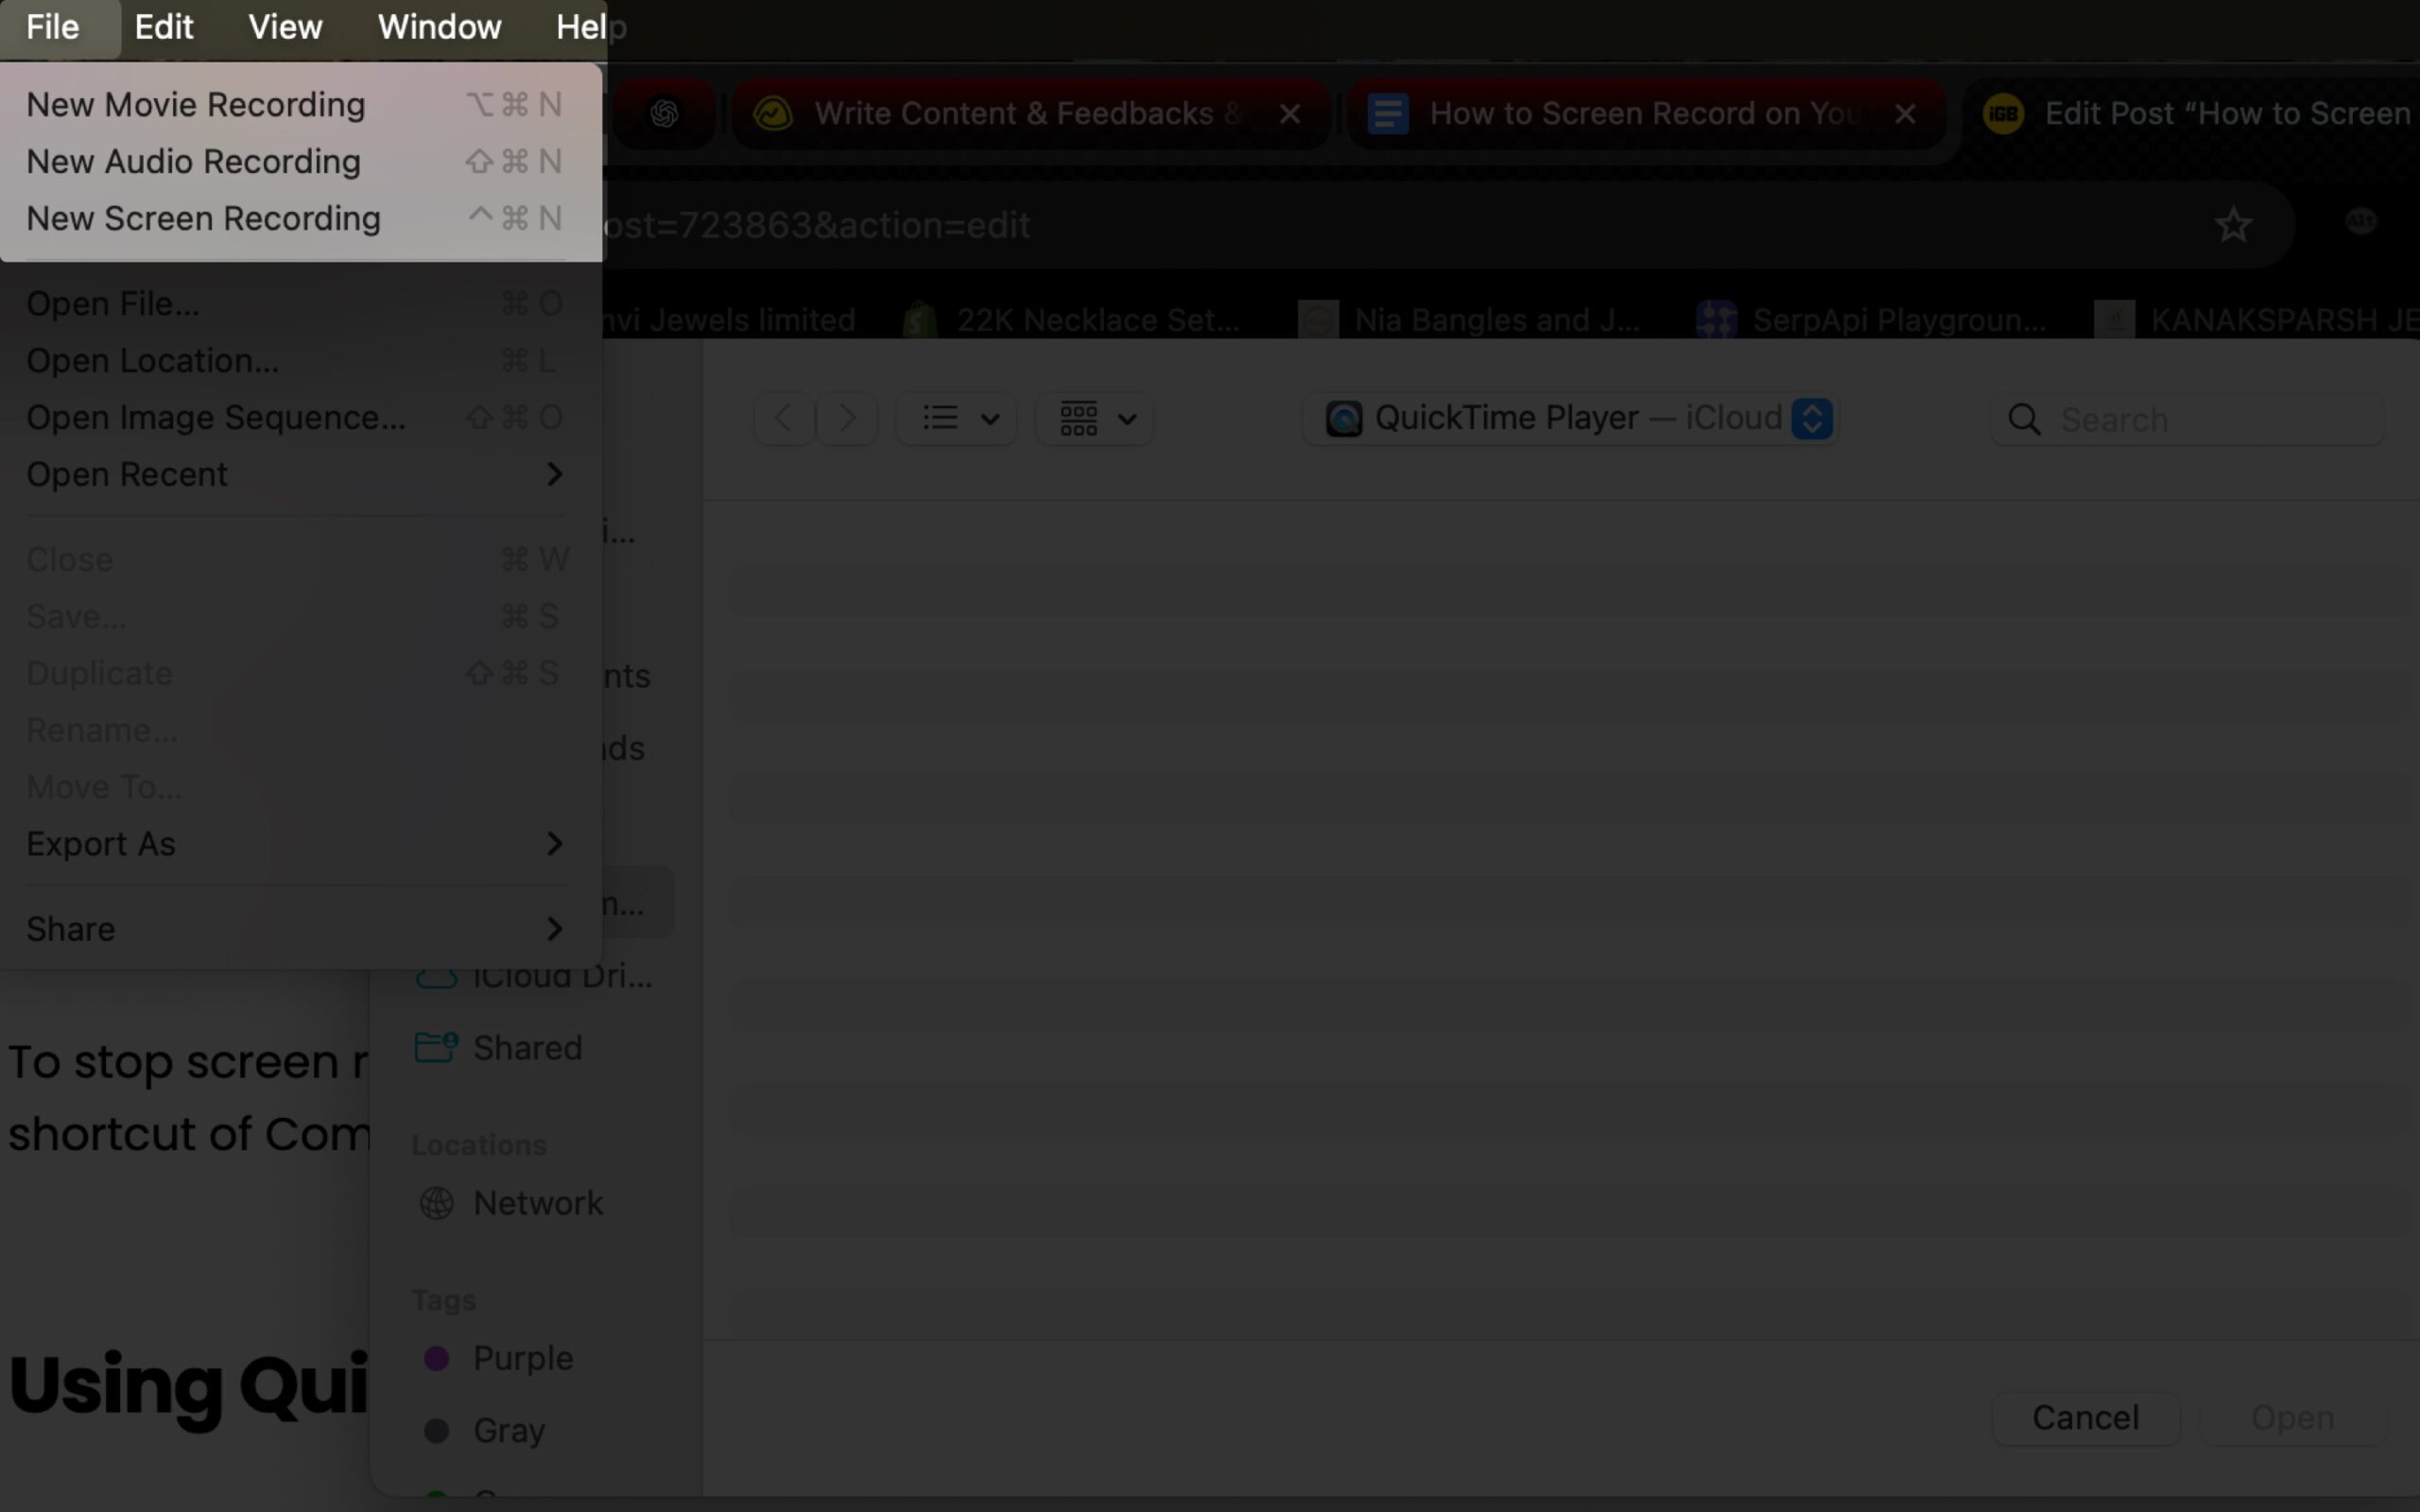
- A small recording window will appear with a Record button in the center.
- Click the small arrow next to the Record button.
- Under Microphone, choose either:
- Internal Microphone – to capture your voice or external sounds.
- External Microphone – if you have a plugged-in or Bluetooth mic.
If you don’t select a microphone, your screen recording will be silent. Since macOS doesn’t allow QuickTime to capture internal system audio by default, you’ll need third-party screen recording software to include it. We’ll cover those options in the next section.
- Click the red Record button to begin recording. You’ll see two options:
- Click anywhere on the screen to record the full screen.
- Or, drag to select a specific portion of the screen to record, then click Start Recording within the selection.
- To stop, click the Stop button in the menu bar or press Command + Control + Esc.
The recording will automatically open in QuickTime when done.
QuickTime doesn’t record internal audio. For that, you’ll need a third-party tool.
3. Use Third-Party apps (For Pro features)
Although macOS has built-in functionality for basic screen recording, you may want to use third-party apps when you need more control and features such as screen recording with audio. Some of the best apps tools such as:
- OBS Studio: Open-source, great for streamers and advanced setups
- ScreenFlow: Excellent editing tools and effects
- EaseUS RecExperts: Intuitive interface with internal audio recording
For a more advanced setup, check out our step-by-step guide on how to screen record on a Mac with audio using EaseUS RecExperts.
These are ideal for educators, gamers, YouTubers, or professionals creating high-quality tutorials or presentations.
Where do screen recordings save on Mac?
By default, screen recordings on a Mac are automatically saved to your Desktop. Once you stop recording, a video file with a name like Screen Recording [date] will appear. This makes it easy to find your recording right away without digging through folders.
If you’re using the Screenshot Toolbar (Command + Shift + 5), you can also click on Options before starting your recording to choose a different save location, such as Documents, Downloads, or a custom folder.
No matter which method you use, you can always move or rename the file later just like any other video on your Mac.
How to edit screen recordings on a Mac
For Quick Edits:
- Use QuickTime Player: Open the video > Click Edit > Trim > Drag sliders to crop beginning or end.
For More Advanced Editing:
Try iMovie (free) to add:
- Transitions
- Titles
- Music or Voiceover
For high-level editing, use third-party video editors like ScreenFlow or DaVinci Resolve give you even more control.
Pro tips for high-quality Mac screen recordings
Want your recordings to look polished and professional? Here’s how:
- Record only what matters: Select the portion of the screen you need.
- Close clutter: Quit unused apps and tabs to keep the screen tidy.
- Use Focus Mode: Enable Do Not Disturb or Focus to block notifications.
- Use an external mic: Better sound can elevate your recording quality.
- Test before the real deal: Run a quick practice recording to catch any setup errors.
- Watch your final cut: Always review before sharing.
Signing off
Screen recording on a Mac is easy, whether you’re using the Screenshot Toolbar, QuickTime Player, or advanced apps like OBS Studio. I hope this guide made it clearer for you to record what’s on your Mac screen like a pro.
Got questions? Drop them below—I’m happy to help!
Other interesting posts:

Written by
Ankur ThakurI have been an Apple user for over seven years now. At iGeeksBlog, I love creating how-tos and troubleshooting guides that help people do more with their iPhone, iPad, Mac, AirPods, and Apple Watch. In my free time, I like to watch stand up comedy videos, tech documentaries, news debates, and political speeches.
View all posts →More from How-to

Snapchat Parental Controls: How to Set Up Family Center and Keep Your Teen Safe
Snapchat’s Family Center lets parents monitor their teen’s friend activity and screen time without reading private messages. Here’s how to set it up and what to expect.

How to Block and Unblock Someone on Instagram
Instagram lets you block or unblock someone in seconds. Follow these simple steps to take full control of your privacy and online peace.

Apple Watch Not Responding? 8 Fixes That Actually Work
Is your Apple Watch unresponsive or stuck on a black screen? Here are 8 proven fixes to help you unfreeze it and get it working again quickly.