- What is Git?: Git is a free version control system that tracks file changes and helps teams collaborate on projects.
- Check for Git: In the Terminal, run the command `git –version` to check if Git is already installed on your Mac.
- Easiest Install Method: Run `git` in Terminal and accept the prompt to install Xcode Command Line Tools, which includes Git.
- Homebrew Method: For more control, first install Homebrew, then run the `brew install git` command in your Terminal.
- Essential Configuration: After installation, you must configure your user name and email using `git config` commands in Terminal.
If you are new to writing code or planning to collaborate on projects with other people, Git is an essential tool. It helps you organize your coding projects and reduces collaboration overhead to a great extent. Follow along, and I will show you how to download and install Git on your Mac.
What is Git?
Git is a free and open-source version control software that allows you to track changes in your source code. While primarily used by developers, you can use Git on macOS even for any project where managing versions would be useful—be it documents, design files, or personal notes.
Here’s how Git can prove helpful:
- Saves snapshots (called commits) of your work over time
- Records who did what and when in the project
- Enables you to revert back to any past version of your project
- Assists you develop new features or fixes in different branches and later merge with the main project
- Enables multiple people to work in the same project without getting in each other’s way
- Provides collaborators a full local copy of the project history, allowing work offline and better cooperation
Git is easy to download on a Mac and works really well with the Terminal, making it an amazing tool for managing your projects.
How to check if Git is already installed on your Mac
Before we get into installation, let’s check if Git is already present on your Mac. Some versions of macOS have Git installed, if you have used tools like Xcode. You can check if yours has it using these steps:
- Open the Terminal app. You can find it by searching Terminal in Spotlight or Launchpad.
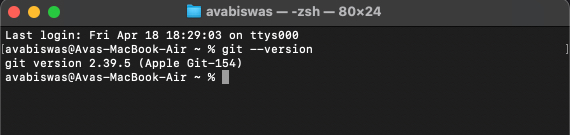
- Type
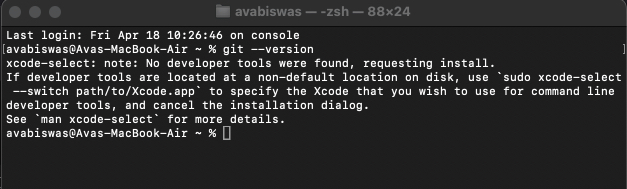
git --versionand press Return. - If Git is installed, you’ll see something similar to git version 2.49.0 on your screen. Make a note of the version number—it’s useful to know if it’s old.
- If you get an error like “No Developer Tools Were Found, Requesting Install,” it means Git isn’t installed on your Mac. You can proceed with installation as shown below.
You should always check the version first because it saves time and avoids unnecessary installations. If you have an older version, you might want to update it (we’ll cover that too later in the guide).
How to install Git on a Mac
There are two main ways to install Git on your Mac, and I’ll break each one down so you can choose what works best for you.
Method 1: Install Git using Xcode Command Line Tools
This is the easiest method if you don’t mind installing a small set of developer tools alongside Git. Xcode Command Line Tools include Git and are maintained by Apple, so you’ll get automatic updates through macOS.
- Open Terminal.
- Type
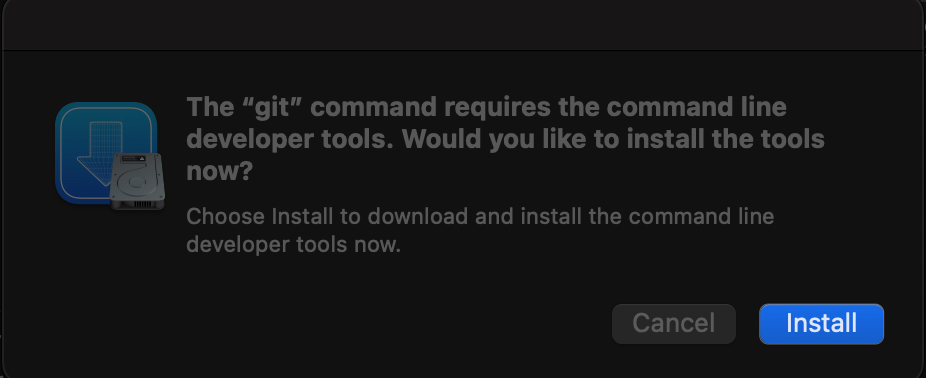
gitand press Return. Since Git isn’t installed, macOS will ask you to install the Xcode Command Line Tools.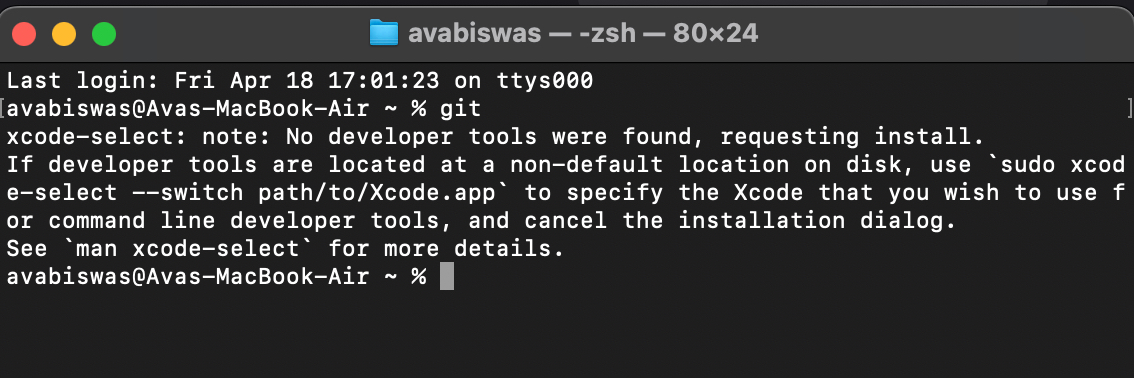
- Click Install in the pop-up window.
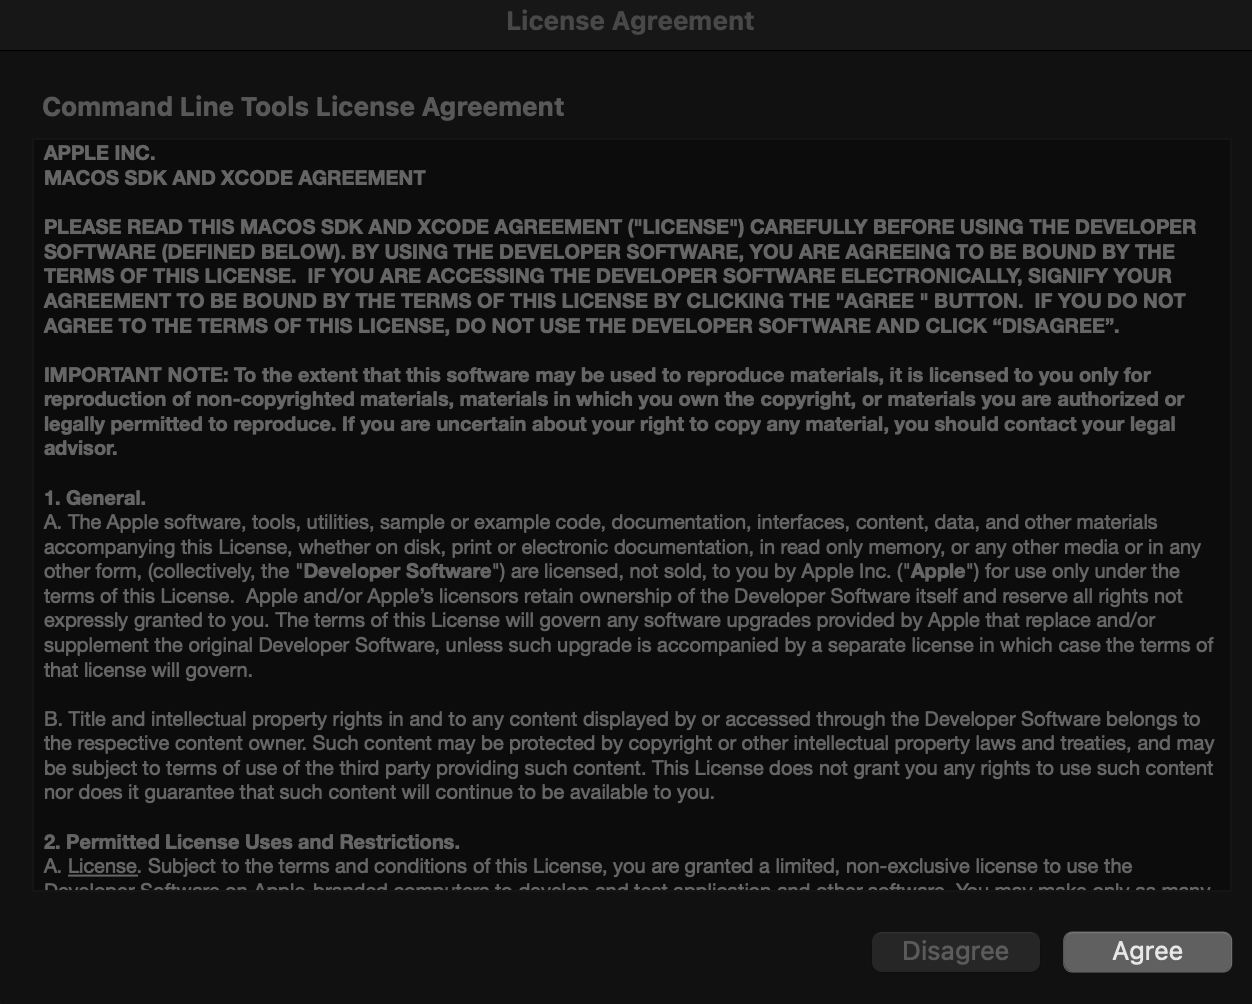
- Now, select Agree on the License Agreement prompt window.
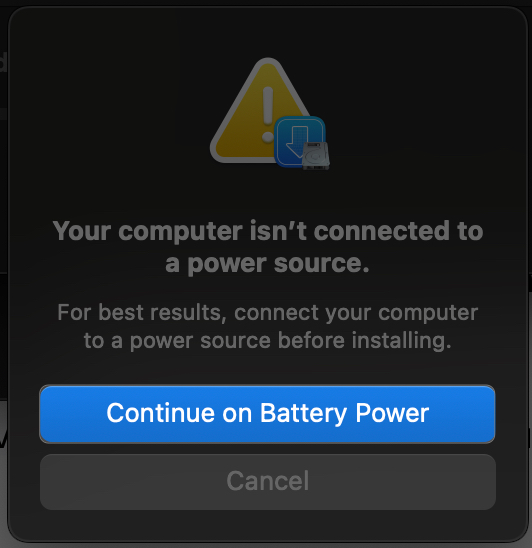
- If you’re not connected to power, click Continue on Battery Power. This starts downloading the tools, including Git. It may take a few minutes, depending on your internet connection.
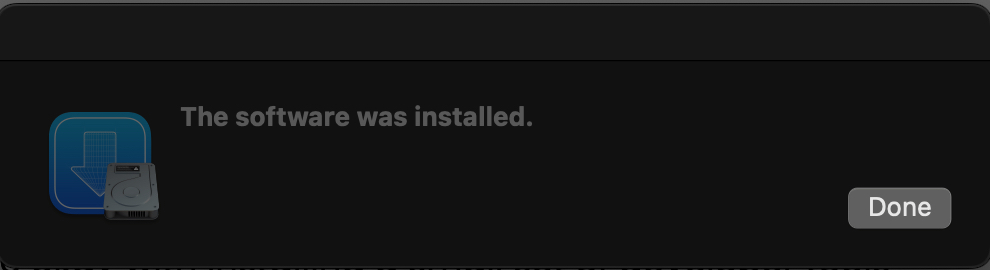
- After installation, click Done on the dialogue box.
- Confirm it by typing
git --versionin Terminal. You should be able to see the installed version.


I love this method because there’s no extra hassle. Plus, if you’re planning to do any development on your Mac, these tools are super useful for other tasks.
Method 2: Install Git via Homebrew
Homebrew is a package manager for macOS that allows you to install tools such as Git via command line. So, first install Homebrew on your Mac if you don’t have it. Once Homebrew is installed, proceed with the instructions below:
- In the terminal, type
brew install git - Press Return and wait for the installation to complete. Homebrew will download and set up the latest version of Git on your Mac.
- Verify the installation by typing
git --version. You should see the version number, like git version 2.48.2.
Homebrew is awesome because it keeps everything organized and makes updating Git a breeze (more on that later). If you use command-line tools, this method feels like a natural fit.
Note:
How to configure Git on a Mac
Now that Git is installed, let’s configure it so it knows who you are. This is necessary because Git stamps your commits with your name and email, so it’s easy to see who changed what in a project. Open the Terminal app and run the following commands one by one:
- To set your username, enter
git config --global user.name "Your Name"Replace “Your Name” with your real name (e.g., git config –global user.name “Ava”).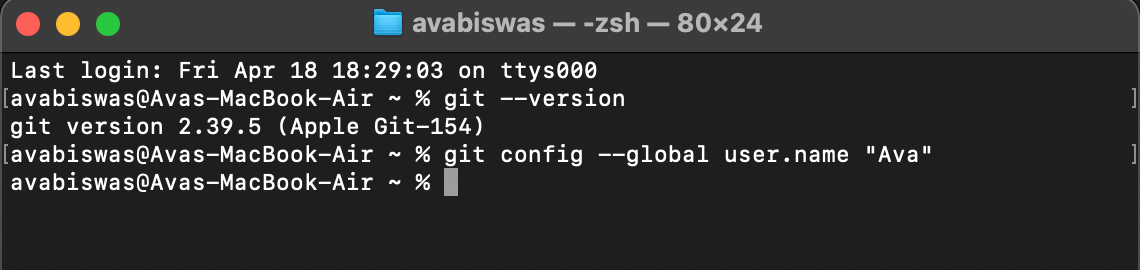
- Set your email address with the command
git config --global user.email "you@example.com"Use the email you intend to use with your Git commits (e.g., git config –global user.email “ava.igeeks@example.com”). - You can also set your preferred text editor for Git. For instance, to use Visual Studio Code, use the command
git config --global core.editor "code --wait"Or, to use nano (a simple Terminal editor), use the commandgit config --global core.editor "nano"Write any of your desired editor command instead of “code –wait”. - Verify your configuration by running
git config --listThis displays all your configurations, like your name, email, and editor.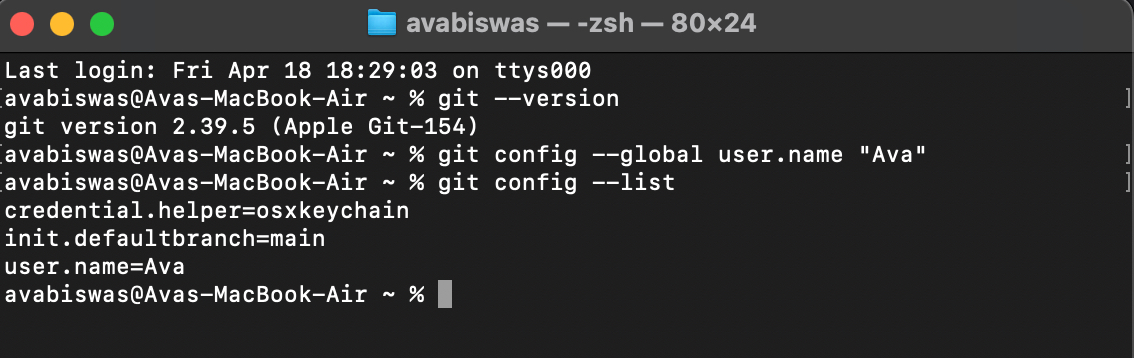


That’s all! You must double-check your config to ensure that everything’s good. It’s a trivial step, but it prevents headaches down the line when you’re working on projects with people.
How to update Git on a Mac
It is important to keep Git up-to-date. New releases patch bugs, enhance performance, and introduce features that simplify your workflow. So, you should check the latest version on the official Git website at git-scm.com occasionally.
Once an update is available, follow the steps below depending on how you’ve installed Git.
If you used Homebrew:
- Launch Terminal.
- Type
brew upgrade gitand press Return. Homebrew will download and install the latest version of Git. - Verify the update with
git --version.
If you installed Git via Xcode Command Line Tools, updating macOS will also update these tools.
Signing off
Installing Git on your Mac is a great first step toward learning version control and working more efficiently on your projects. Each method I’ve described here is beginner-friendly and gets the job done. Now that Git is ready to go, you’re all set to harbor your skills. Happy coding!
You would like to read these posts as well: