Homebrew is an open-source package manager that makes it easy for Mac users to install software using the command line. If you’re a programmer, enjoy using the command line, or just want a simpler way to install software on your Mac, this piece is for you.
With Homebrew, you can install nearly any open-source program or package, including Python, Ruby, MongoDB, PHP, Git, Node.js, and even casks like Slack, VLC, and many more. In this article, I’ll walk you through the step-by-step process to install Homebrew on your Mac, along with how to use it. But before that, let’s quickly go over what Homebrew is and the installation requirements.
What is Homebrew?
Homebrew is a package manager for macOS that makes it easy to install, update, and manage applications, programming languages, and utilities on a Mac using the command line. According to its developers, Homebrew “installs the stuff you need that Apple didn’t.”
This package manager is an open-source project developed and maintained by a large community of contributors. It not only just help install apps but also handles dependencies, ensuring that all required packages are installed correctly.
While the App Store is great for installing all sorts of applications on your Mac, you won’t find most open-source software and tools—often available on GitHub—there. So, Homebrew is a piece of software used to install and manage other software packages on your Mac.
Think of it as the app store for command-line tools, libraries, and casks (GUI applications) — it makes software installation much easier. You simply have to run a command in your terminal to install the software you need and manage the app—update, uninstall, and more.
Benefits of using Homebrew
The fact is, using Homebrew makes installing software a lot easier, especially if you’re comfortable running a few simple commands—that’s the main advantage of using it on a Mac. Here are all the main benefits of using Homebrew on Mac:
- Easy Installation: Homebrew makes installing software super simple—just run a command and you’re done. No need for manual downloads or setups.
- Huge Software Selection: You can install a wide range of open-source tools, programming languages, libraries, and even GUI apps (casks). It allows you access to a huge repository of software not readily available through the Apps Store.
- Automatic Dependency Handling: Homebrew takes care of all the required libraries and tools for you, so everything you install works without a hitch.
- Quick Updates and Uninstalls: It makes updating or removing software fast and hassle-free with just a command, keeping your system organized and up-to-date.
- Strong Community Support: Homebrew is open-source and backed by a huge community, meaning you get frequent updates and access to tons of software.
Requirements to use Homebrew on Mac
Before discussing how you can install Homebrew on your Mac, here are the software installation requirements According to Homebrew Installation Documentation:
- CPU/Chipset: Apple Silicon (M1/M2/M3) or a 64-bit Intel processor
- Operating System: macOS 13 (Ventura) or newer is ideal. macOS 10.11 (El Capitan) to 12 (Monterey) aren’t supported but might still work. Anything older won’t run Homebrew.
- Command Line Tools (CLT): Xcode, Terminal
- Shell: Any Bourne-compatible shell like Bash, zsh, or fish
How to install Homebrew on macOS M1/M2/M3
Here are the steps to install Homebrew on your Mac:
1. Ensure your Mac meets the system requirements
Make sure your Mac has an Apple Silicon chip (M1, M2, M3) or a 64-bit Intel processor. Also, confirm you’re running macOS 13 (Ventura) or later to make the Homebrew installation process smoother. If you’re unsure how to update, check out our guide on upgrading to macOS Sequoia.
2. Install Command Line Tools for Xcode
To use Homebrew on Mac, you’ll need to install CLT for Xcode. Xcode is Apple’s app development and programming suite, but you only need the command line tools for Homebrew. These tools enable your Mac to support some of the package components Homebrew relies on.
To install Command Line Tools for Xcode:
- Open Terminal on your Mac using Launchpad or Spotlight Search. You can also open Terminal from Finder → Applications → Utilities.
- Type
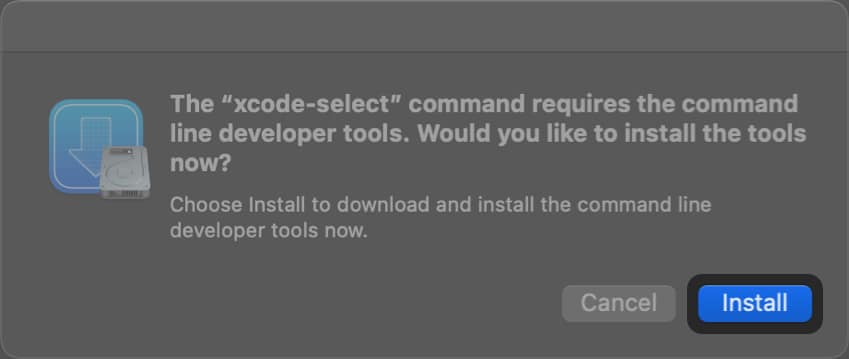
xcode-select --installin the Terminal then hit the Return key. - After entering the code, if you don’t have Xcode previously installed on your Mac, you’ll get a prompt. Click Install.
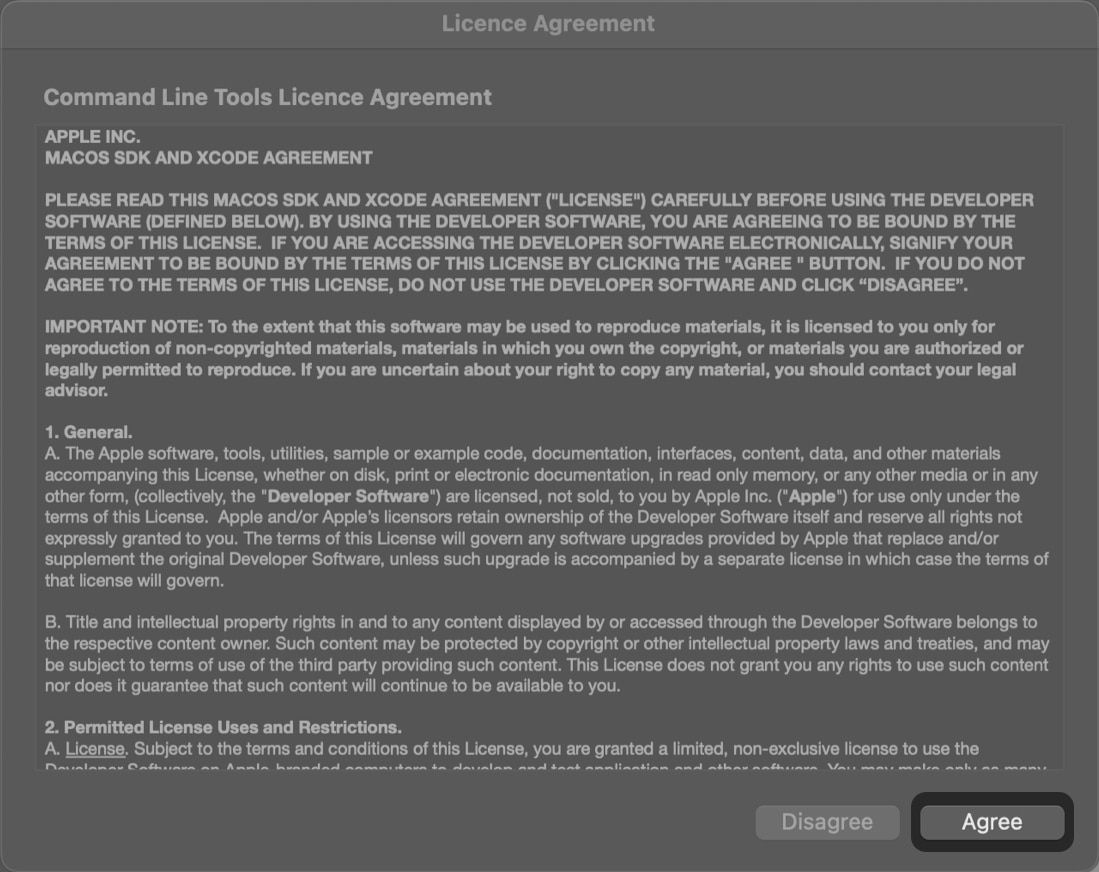
- Go through the License Agreement, then click Agree.
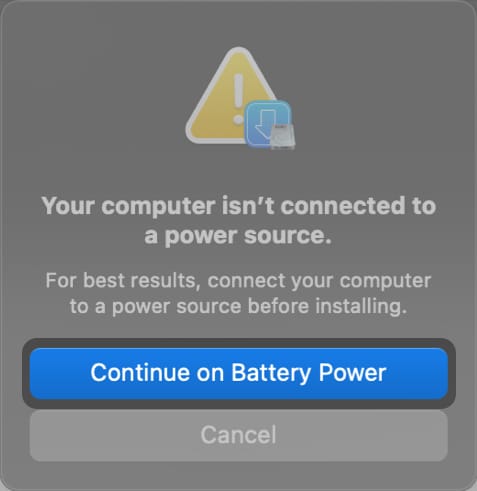
- If the Mac is not connected to power, you’ll be prompted to do so. You may click Continue on Battery Power If your Mac’s battery is at 50% or above.
- Once the Xcode command line tools are downloaded and installed, click Done.
3. Install Homebrew from its GitHub repository
Once you have Command Line Tools for Xcode ready, you can use the Terminal on your Mac to fetch Homebrew from its official GitHub repository. Here are the steps to follow:
- Open the Terminal app on your Mac.
- Go to the official Homebrew website and copy the installation command provided under “Install Homebrew”:
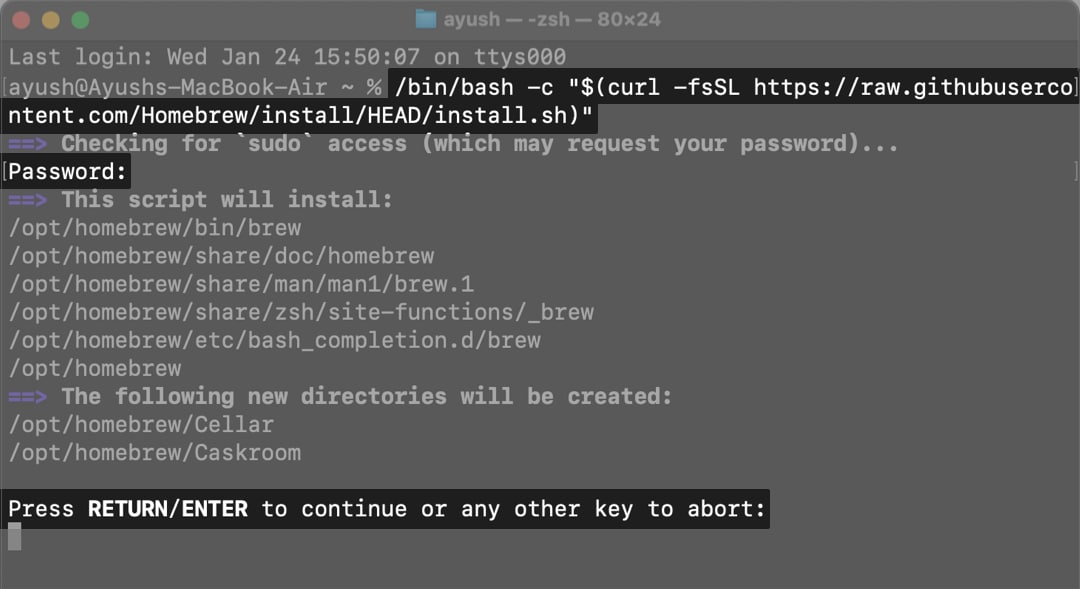
/bin/bash -c "$(curl -fsSL https://raw.githubusercontent.com/Homebrew/install/HEAD/install.sh)" - In the Terminal window, paste the command and press Return.
- When prompted, enter your Mac’s password and press Return to proceed. Keep in mind that you won’t see anything appear on your screen as you type your password.
- After correctly entering your password, you’ll be presented with the list of every that’ll be installed. Press Return again to confirm the installation.
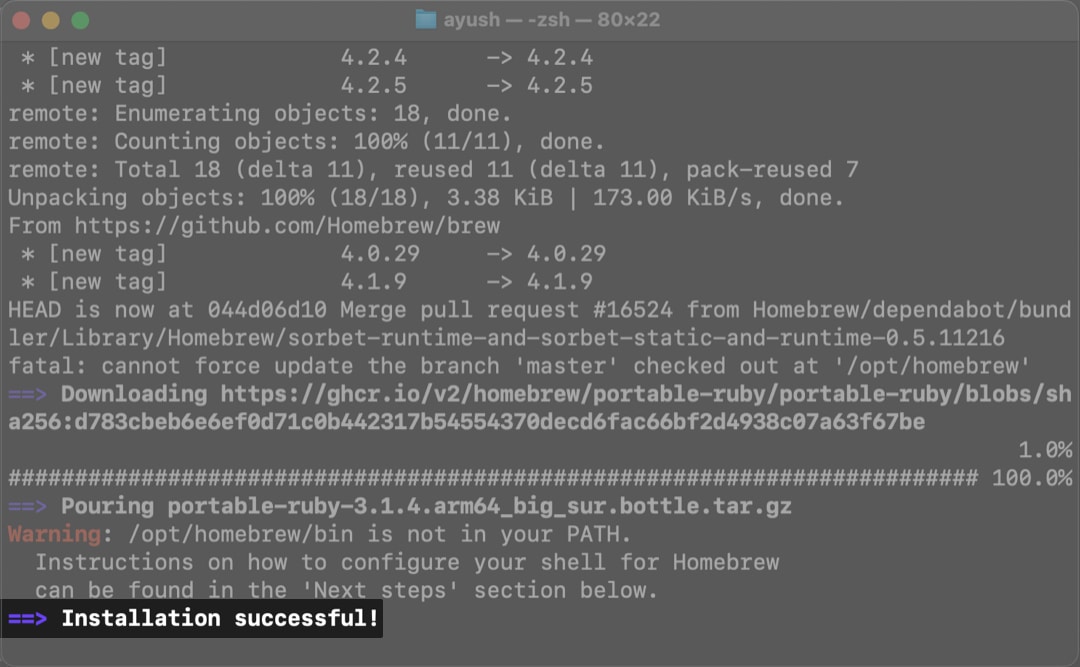
- Once the installation is complete, you’ll see a “Installation successful” message in the Terminal.
4. Add Homebrew to your PATH
After installing Homebrew, you may need to add it to your shell’s PATH. This makes finding, installing, using, and managing software packages easier.
If you choose to skip this step, you can still use Homebrew, but you’ll have to specify its installation directory every time you access it in the Terminal. To save yourself some hassle, here’s how to add Homebrew to you PATH;
- Open the Terminal app on your Mac.
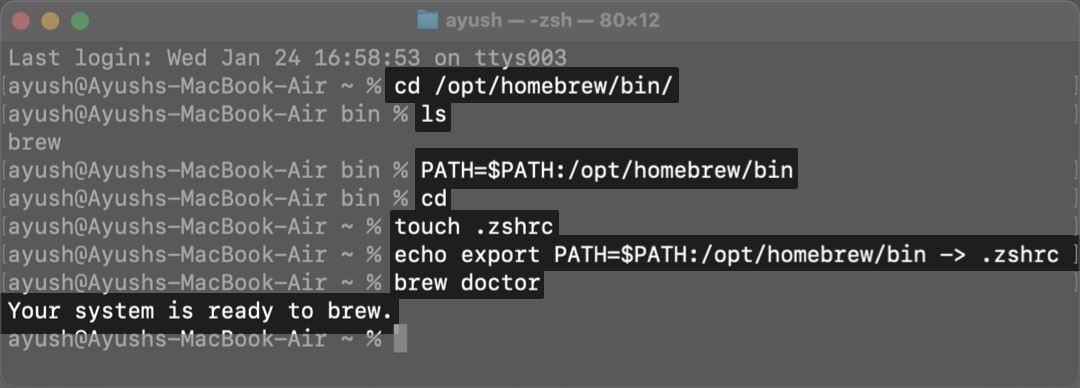
- Paste the following commands one by one, pressing Return after each:
cd /opt/homebrew/bin/lsPATH=$PATH:/opt/homebrew/bincdtouch .zshrcecho 'export PATH=$PATH:/opt/homebrew/bin' >> .zshrc
- After updating the PATH, run the following command to ensure everything is working properly:
brew doctor
- If everything is set up correctly, you should see the message: “Your system is ready to brew.”
That’s it! You can verify if Homebrew has been installed correctly and get moving!
5. Verify if Homebrew is installed correctly
After installing Homebrew on your Mac, it’s a good idea to verify that the installation was successful. Here’s how to do that:
- Open the Terminal app on your Mac.
- Type
brew --versionin the Terminal window and press Return. - If Homebrew is installed correctly, you’ll see its version number displayed.
- If the command doesn’t work, type brew doctor and hit Return. This command will check your Homebrew installation for any potential issues.
- If you see the version number from the
brew --versioncommand, it means Homebrew is installed properly. If you get an error message from the brew doctor command, follow the instructions provided to resolve any issues and try again.
How to install packages on Mac with Homebrew
This is where all the hard work pays off. Once Homebrew is successfully installed on your Mac, follow these steps to quickly find and install the apps of your choice:
- Open Terminal on your Mac.
- Type
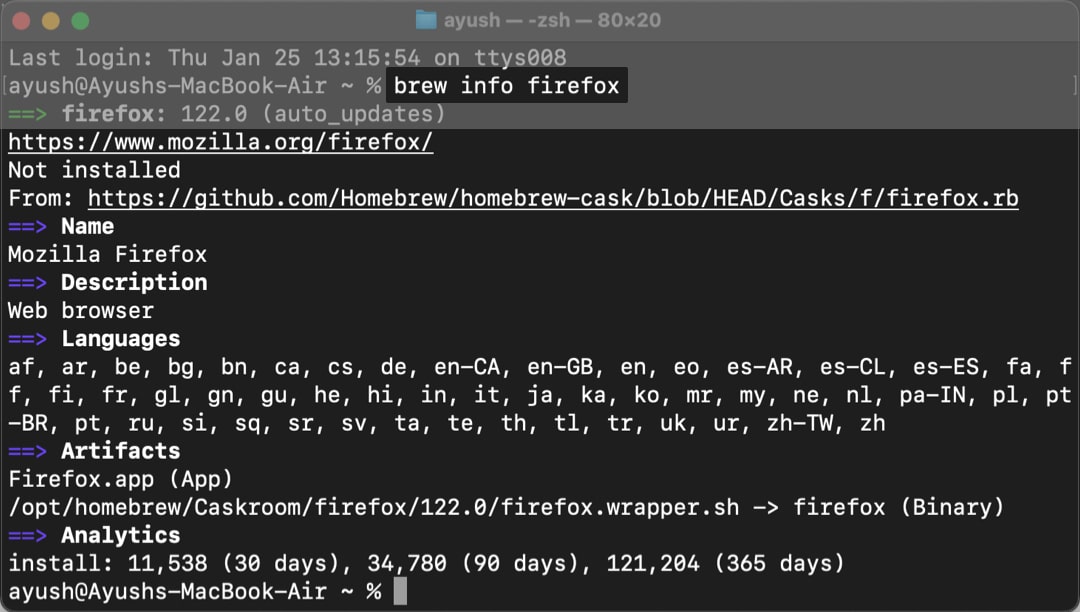
brew search(SearchTerm) into the Terminal window and press the Return key. Replace (SearchTerm) with the package you’re looking for. So if you want to search Firefox, for example, you’ll type brew search firefox. - Type brew info (PackageName) and hit Return to retrieve details about a package. Replace (PackageName) with the name of the package.
- Type brew install (PackageName) into the Terminal window and press Return to install a package. Replace (PackageName) with the name of the package. In my case, I’m installing the FireFox browser, so I’ve typed brew search firefox
After you install software using Homebrew, it will automatically show up in the Launchpad. But if you want to access the downloaded packages (known as casks), you can find them under /opt/homebrew/caskroom in Finder.
How to uninstall packages with Homebrew
If you want to uninstall or delete specific packages or apps on your Mac, you can easily do so by following these steps:
- Open Terminal on your Mac.
- Type brew list into the Terminal window and press Return. This command will list all the apps you installed via Homebrew.
- Type brew uninstall (PackageName) into the Terminal window and hit the Return key. Replace (PackageName) with the name of the package. In this case, we’re removing the FireFox browser, so we’ve typed brew uninstall firefox.
How to turn off Homebrew analytics
Homebrew, while open-source, collects and shares analytical data to help improve the tool. If you prefer not to contribute or share your data, you can turn off Homebrew analytics:
- Open Terminal on your Mac.
- Type brew analytics off into the Terminal window and press Return.
How to update apps with Homebrew
Homebrew also provides an easy way to keep your apps updated. Here’s how you can do this:
- Open Terminal on your Mac.
- Type
brew outdatedinto the Terminal window and press Return. This command lists all the apps that need to be updated. - Type brew upgrade (PackageName) into the Terminal window and press Return. Replace (PackageName) with the name of the app you want to update.
To update all apps at once, just type brew upgrade and hit Return.
How to update Homebrew on Mac
Like any other app, Homebrew receives periodic updates. To keep it updated:
- Open Terminal on your Mac.
- Type
brew updateinto the Terminal window and press Return.
How to uninstall Homebrew on Mac
If you no longer need Homebrew and want to remove it from your Mac, follow these quick steps:
- Open Terminal on your Mac.
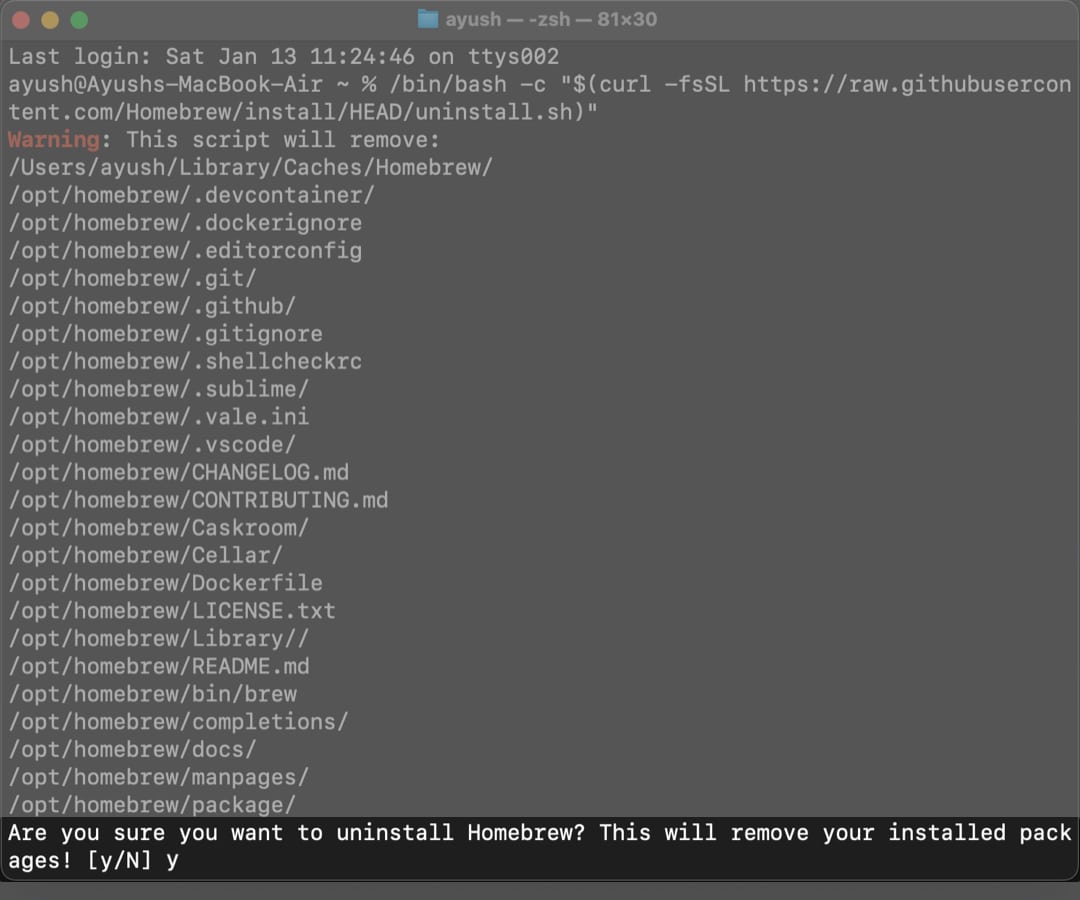
- Paste the following command into the Terminal window and press Return:
/bin/bash -c "$(curl -fsSL https://raw.githubusercontent.com/Homebrew/install/HEAD/uninstall.sh)" - Type y in the Terminal window and press Return.
- Enter your Mac’s password, and then Homebrew will be uninstalled.
After that, Homebrew will be uninstalled from your Mac.
Wrapping up…
Homebrew offers a seamless way to manage apps on Mac, regardless of whether you’re a developer, sysadmin, or regular user. If you want to install Homebrew on your Mac, the steps outlined in this guide can help. However, if you’re facing any difficulties with installing Homebrew, you can restart the whole installation process.
Also, let us know what you think about Homebrew. Do you see yourself using it regularly, or do you prefer installing packages on your Mac manually?
FAQs
It’s not essential to install Homebrew on your Mac. However, Homebrew can be a valuable tool for quickly downloading applications and developer tools on your device without fiddling around in a web browser.
Yes, of course. In addition to installing developer tools like git, Homebrew can also be used to install apps with a graphical user interface. However, it’s recommended that you install the Homebrew cask to manage GUI applications efficiently.
Unless specified otherwise during the installation, Homebrew is typically installed at /opt/homebrew (on Apple Silicon Macs) or /usr/local/bin (on Intel Macs).
Yes. Homebrew can be installed on all M1/M2/M3 Apple Silicon and Intel Macs that support at least macOS Big Sur or later versions of macOS, such as Ventura and Sonoma.
You may also read:









Great post! I followed your steps to install Homebrew on my M1 Mac, and it worked perfectly. Thanks for the clear instructions and helpful tips!
Great post! I found the installation steps really clear and easy to follow. Homebrew has made managing my packages on my M1 Mac so much smoother. Thanks for sharing!