Recording your screen is always helpful when you need to share your tasks or save live sessions so that you can revisit them anytime you want. Despite it being a simple task, many people are unaware of how to screen record Mac without losing audio.

While it’s possible to do this with system apps, you will be lacking many essential features, such as the ability to schedule recording or to make necessary edits when required.
Many apps claim to be the best screen recorder for Mac that can even record internal audio, but not all of them are good. Most of them are guaranteed to waste your time.
In this article, we’ll take a look at EaseUS RecExperts, and see if it’s worth your time and money. We will also look at how to record screen and audio simultaneously on Mac using EaseUS RecExperts.
Why should you screen record on Mac?
There are many reasons why you should use screen record on Mac. Some have been discussed below:
- Online Meeting: It’s not always easy to remember what’s said in online meetings, as one might last a long time. Hence you can use a good screen recorder app to record these meetings on popular apps such as Skype, and FaceTime, and even for apps such as Zoom or Google Meet without any issues. You can even share it with your colleagues who missed the meeting or use it to prepare a detailed report.
- Video tutorial: Whether you are a teacher or someone trying to help your friends, family members, or team members, you can screen record your Mac to make a step-by-step video tutorial and share it along.
- View desktop remotely: Even without any remote desktop apps for Mac, you’ll be able to see what’s on the screen of your colleagues or friends. They only need to record their screen and share it with you.
- Record Live streams: Won’t you wish to watch live streams again? At least I do, and if you’re also like me, you can use a free/paid screen recorder app to record your screen and rewatch it anytime you want.
- Game highlights: When playing games on Mac, there might always be an instance when you had a great game and wanted to showcase it to others. With a good Mac screen recorder, that’s possible. You can even use it to upload on popular social media platforms such as Youtube, Instagram, or others.
EaseUS RecExperts: Simplify screen recording on Mac with audio
As you can guess from the name, the app focuses on making it easy for you to record your Mac’s screen. So what makes it better than the Quicktime screen recording with audio on Mac? Well, here are some key features of the app that will help you to understand the difference.
- Record Screen with Audio: There might be instances where the QuickTime player might not be able to record internal audio on Mac while screen recording. EaseUS promises freedom from this issue once and forever. You can use this app to record both the screen and the system audio and the sound from the microphone.
- Capture Any Screen: With this tool, you can capture your Mac’s screen, and more importantly, capture only a particular part of the screen for up to HD 60FPS.
- Webcam Recording: Apart from recording the content on screen, you can even capture yourself using the webcam.
- Extract Audio from Recording: Among the many good features offered by EaseUS, this is one of my favorite features. You can extract audio from the screen recordings, and it’s simple!
- Automatic Recording: One feature you won’t get with the default screen recording app or other third-party apps is the ability to schedule screen recording. This feature comes in handy when you have daily meetings or classes without setting any alarm.
- Save recordings to multiple formats: After screen recording on your Mac, you don’t have to depend on any video converter to convert it to other formats.
How to screen record with audio on Mac using EaseUS RecExperts
- Download and install EaseUS RecExperts.
- Open EaseUS RecExperts.
- Grant access to the required permissions → Hit OK.
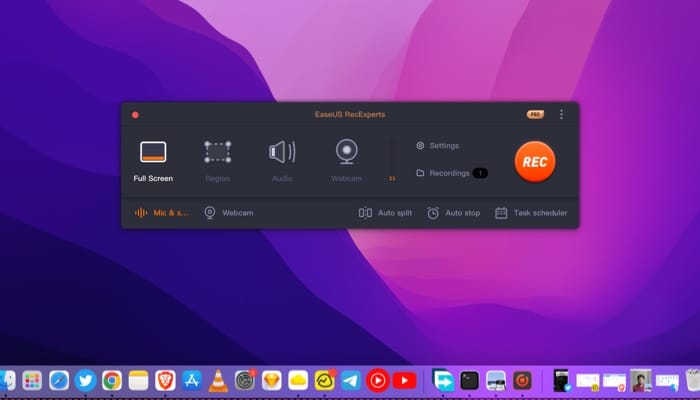
- Choose any of the following options:
- Full Screen: To capture the entire screen of your Mac
- Region: Record a part of the screen
- Audio: Record only the sound of your Mac
- Webcam: Use it to record the webcam of your Mac
- Make any changes to the screen recording if needed.
- Hit REC to start recording → once done, click the Stop button.
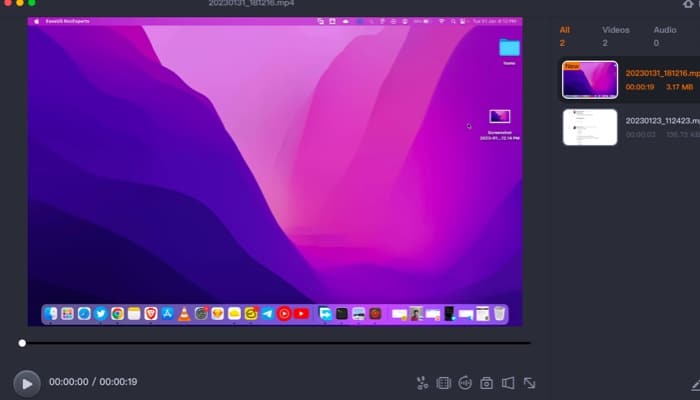
- You’ll be shown a preview of the screen recording where you can make necessary edits such as:
- Trim
- Add opening title/closing cards
- Extract audio
- Screenshot
Once you stop recording, the file will be automatically stored on your Mac. You can also change the storage location on your Mac.
Additionally, you can refer to the maker’s tips to improve screen recording on Mac.
My experience with EaseUS RecExperts
Since the default option to screen record on Mac was there, I was a bit skeptical about even considering the need for a third-party screen recording app. However, I’m happy to report EaseUS proved me wrong with its feature set.
From the ability to customize the video quality to even providing features to split the recording automatically and making it easy to share, there’s a lot to explore in the app.
I particularly liked the feature where you can schedule a screen recording where it will start on its own and end automatically. There’s even the option to extract audio from the video or simultaneously record from the webcam.
All these features make it a perfect solution for those who want to create tutorials or take classes.
Room for improvement
However, there are some things that I felt could make the app better – mainly on the video editor front. Apart from adding title/end cards, you don’t have any other option to add text to the video, which might force you to consider another video editor app for Mac.
The app could benefit from some UI adjustments to enhance the user experience and make it look more premium and user-friendly, even with new features. Let me give you an example.
While using the Region feature to record the screen, I selected a particular area and wanted to resize it again. When I placed the mouse pointer over the endpoints to adjust the screen size, I didn’t see the resize icon. I realized later that you need to click and drag to use this feature.
Should you consider EaseUS?
The short answer will be yes! However, picky users might want to weigh the pros and cons before making a call. So, to help you make a better decision, let’s compare the free and premium plans to help you know if the app is really worth your investment.
Which EaseUS RecExperts plan should you choose?
Let me keep this easy for you. You’ll be only able to record the screen of your Mac with audio for only a minute; to record further, you need to have a premium plan. As we all know, very minimal instances only require a screen recording of less than a minute. But if you are happy with a minute, feel free to use the free plan.
As for the rest, you can consider the premium plan, which starts at close to $20 per month. With that, you’ll be able to capture lengthy screen recordings, schedule them, and even screen record simultaneously from your webcam, external mic, and even with the internal audio.
There is also a lifetime version for the ones looking for value and even a business plan to use on multiple devices simultaneously. Basically, there’s a plan for everybody!


