We know Apple is all about its ecosystem. But within the ecosystem, have you explored the possibility of using your iPhone as a trackpad for your Mac? Well, if you have tried and succeeded, then great. But if you are wondering how to successfully convert iPhone into a trackpad, then we have got you covered.
There’s no native Apple app that provides this service, but you can download third-party apps from App Store. Below, we have mentioned the ways to use the Remote Mouse app.
How to use iPhone as a mouse with Remove Mouse app
Time needed: 10 minutes.
The Remote Mouse is a really helpful iPhone app that works like magic to convert your iPhone’s touchscreen display into a trackpad for a PC/Mac. Before proceeding, make sure your iPhone and the Mac/PC are on the same Wi-Fi network.
- Download the Remote Mouse app for your iPhone and Mac.
- Run the software on Mac/PC.
- Now, open the Remote Mouse app on your iPhone.
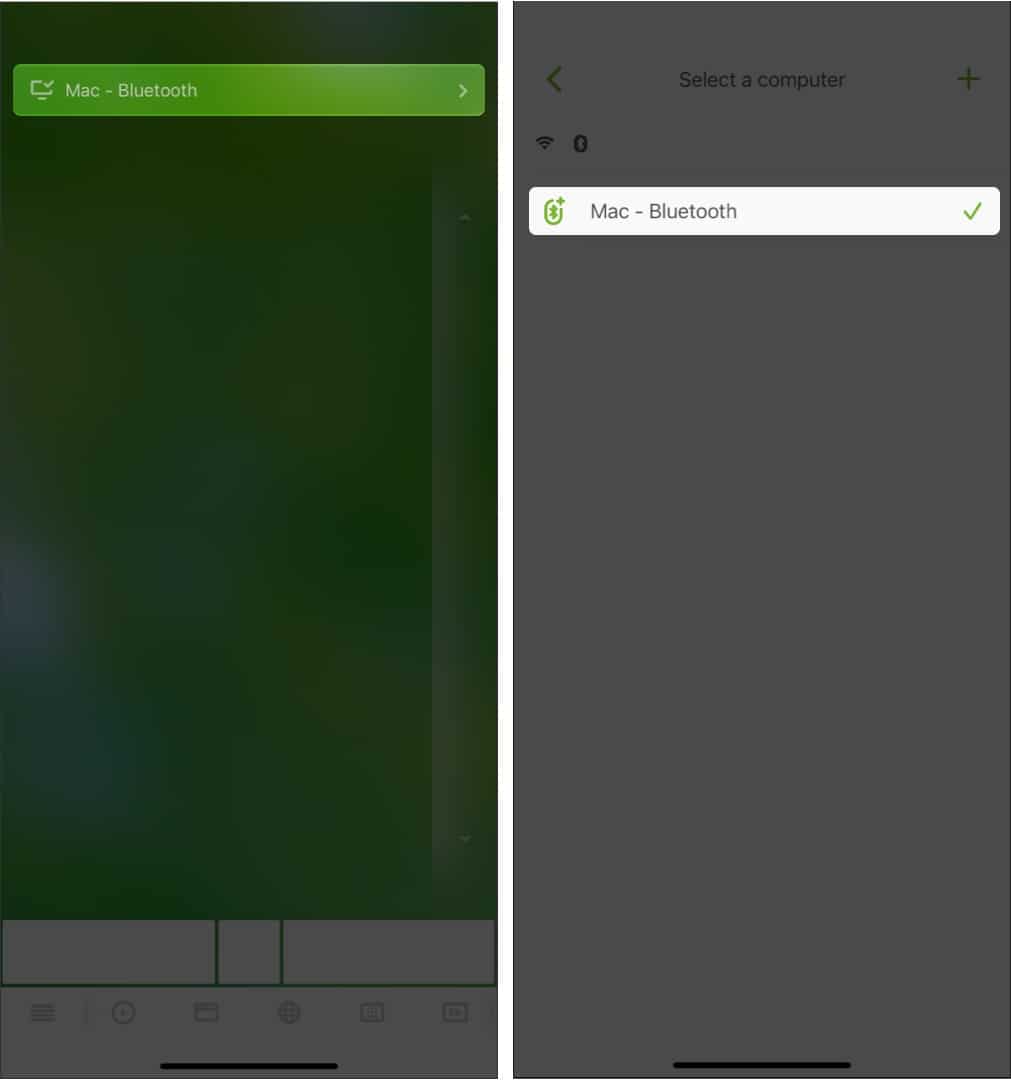
- Tap [your device name], and it should automatically connect.

If your Remote Mouse does not connect automatically:
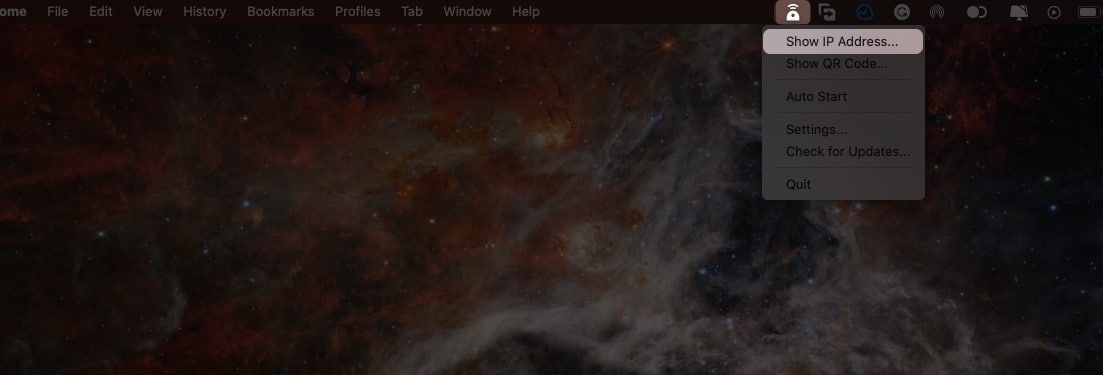
- On Mac, click on the Remote Mouse app icon in the status bar.

- From the options, select Show IP address or Show QR code.

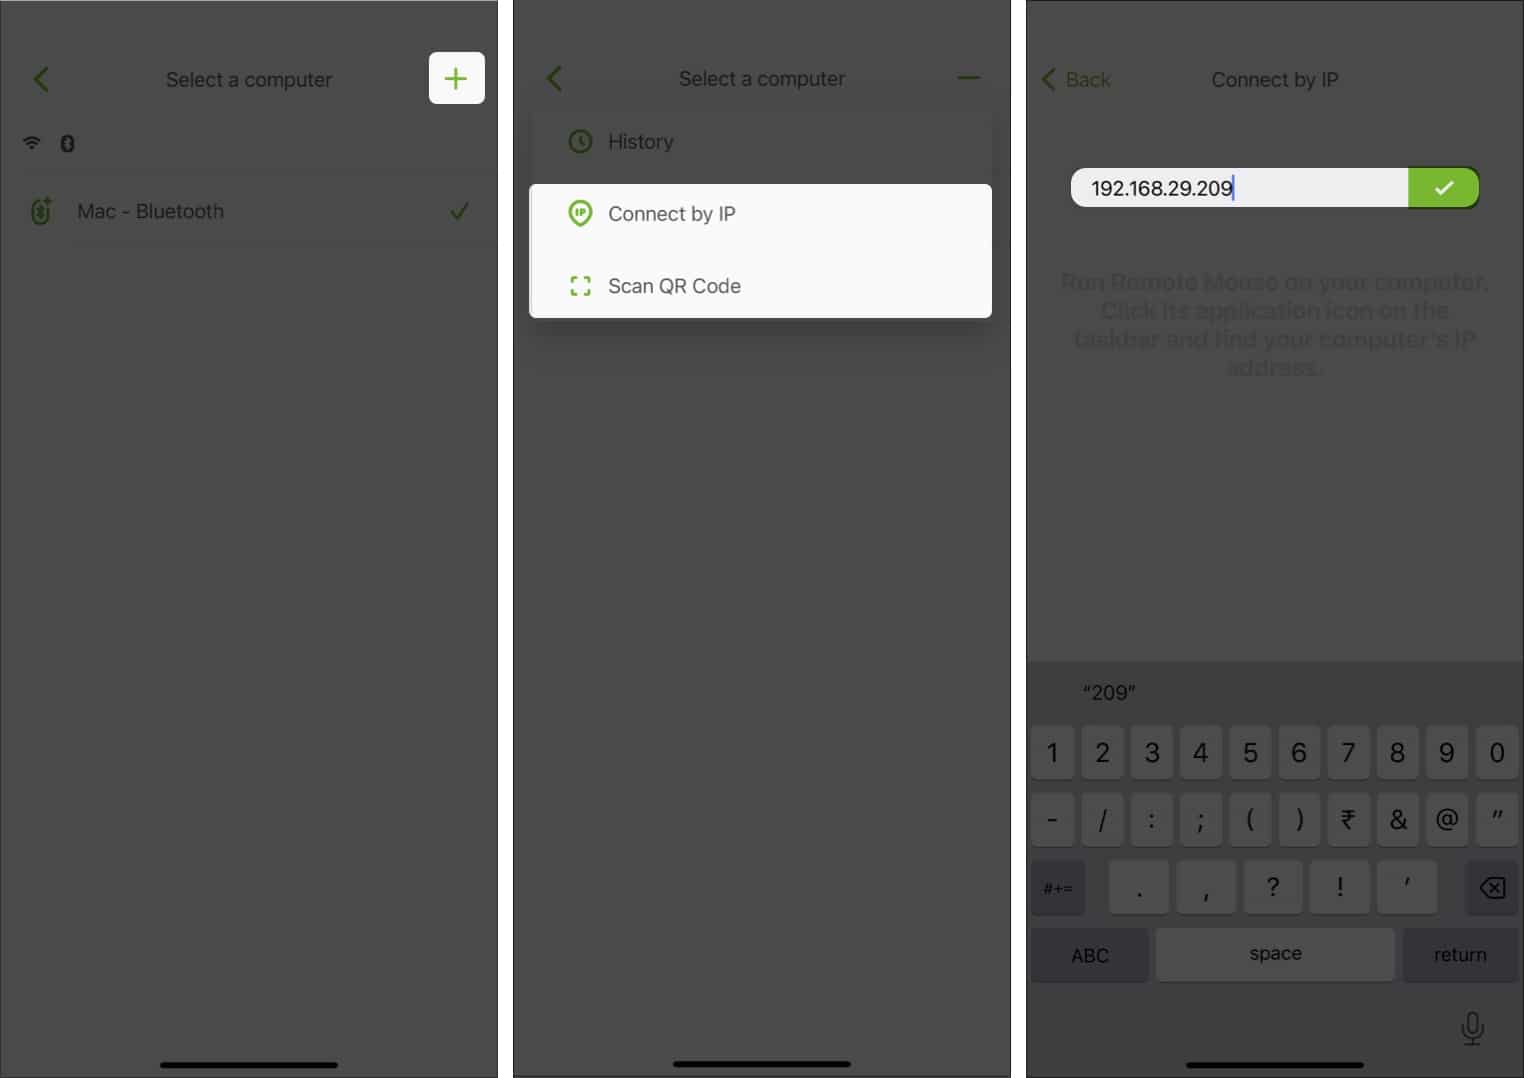
- On iPhone, launch the Remote Mouse app.
- On the top right corner, tap the (+) plus icon.
- Select the same option as you selected on Mac. (Your IP address or Show QR Code)
- Now enter either the IP address or scan the QR code shown on the Mac. Click done (green tick).

That’s all! Your iPhone display is turned into a MacBook trackpad. A two-finger tap is taken as a right-click, and a swipe is taken as a scroll. There are also buttons on the screen that you can tap on to emulate clicks. The Remote Mouse is the user’s top choice app to turn the iPhone into a trackpad, but if you want to try other options, we’ve listed a couple more below.
Alternate apps to use iPhone as a trackpad
There are plenty of apps out there that can help you use the iPhone as your MacBook’s trackpad. Here is a list of alternates that can be used.
1. WiFi Mouse
WiFi Mouse can replace your real mouse, keyboard, or controller as and when required. This app has positive reviews and is a great addition to the apps on your Mac and iPhone.
It’s a free-to-download app, but some perks and features require a paid subscription.
Price: Free (Offers in-app purchases)
2. Remote Mouse & Keyboard
This one has over a million downloads, and almost 90% of the reviews are positive on the App Store. In addition to the mouse and keyboard functionality, you can start any app on your Mac, send your Mac to sleep, wake it up and perform many more useful actions to control it remotely. You’ll need to download the Mac Helper application from Cherpake.com and then connect your Mac and iOS device to the same Wi-Fi network to complete the setup process.
Price: Free (Offers in-app purchases)
3. FullControl – Remote for Mac
This Helper app for your computer is available for free. This one is different from the rest because it is highly customizable, and there are specific commands for each Mac application. You can launch files, control media, and shut down or restart your computer – all with a few taps. You can update to the paid version to remotely take screenshots of your Mac and enjoy other cool features.
Price: Free (Offers in-app purchases)
Conclusion
Apple’s ecosystem is really amazing if we know how to utilize it properly. While almost every Apple device is tailor-made to pair well with each other, you can use the iPhone as a trackpad for your MacBook with this simple trick! Are you looking forward to using it, or are you already using it? Let us know in the comments!
For more tips:

