Your Apple ID is your all-access pass to everything Apple—whether that’s downloading apps from the App Store, backing up precious photos and files to iCloud, or streaming your favorite tunes and movies. But what if you lose access to your old email address, want to switch to a different account, or simply need a fresh start with a new Apple ID? Don’t worry! Updating your Apple ID is easier than you might think.
In this guide, I’ll walk you through each step, from checking your account details to making changes safely, so you can continue enjoying all of Apple’s services without interruption.
Why Might You Want to Change Your Apple ID?
Let’s face it—life changes, and so do our email addresses. Here are a few common reasons you might want to update your Apple ID:
- You lost access to the email address linked to your Apple ID.
- You want to use a new primary email for security or convenience.
- You’re updating your personal information.
- You’re consolidating accounts or moving from a work to a personal email.
Whatever your reason, keeping your Apple ID current is an important way to stay secure and make sure you never miss important updates from Apple.
Before You Start: A Few Quick Prep Steps
Before diving in, let’s make sure you’re set up for a smooth experience:
- Stay signed in on the device you’ll use to change your Apple ID.
- Sign out of your Apple ID on other devices (iPad, Mac, Apple TV, Apple Watch, etc.).
- Have access to your new email address—you’ll need to verify it.
- Back up your data if you can, just in case.
- Heads up: After you change your Apple ID, you’ll need to sign in with the new email on all your Apple devices and services.
A little preparation goes a long way in making this process stress-free!
Switching vs. Changing Your Apple ID: What’s the Difference?
This can be confusing, so let’s clear it up:
- Switching Apple ID: Signing out of one Apple ID and signing in with another. This is handy if you’re sharing a device, separating work and personal accounts, or handing your device to someone else.
- Changing Apple ID: Updating the email address for your existing Apple ID. You keep all your data, purchases, and subscriptions—just with a new login.
How to Change Your Apple ID Email Address
Changing your Apple ID email is quick and easy—but it’s key to follow the steps carefully to keep access to all your Apple services. Here’s how to do it:
On iPhone or iPad
- Open the Settings app.
- Tap your name at the top to open your Apple ID settings.
- Select Sign-In & Security.
- Tap Edit next to Email & Phone Numbers.

- Tap the minus (-) button next to your current Apple ID email, then tap Delete.
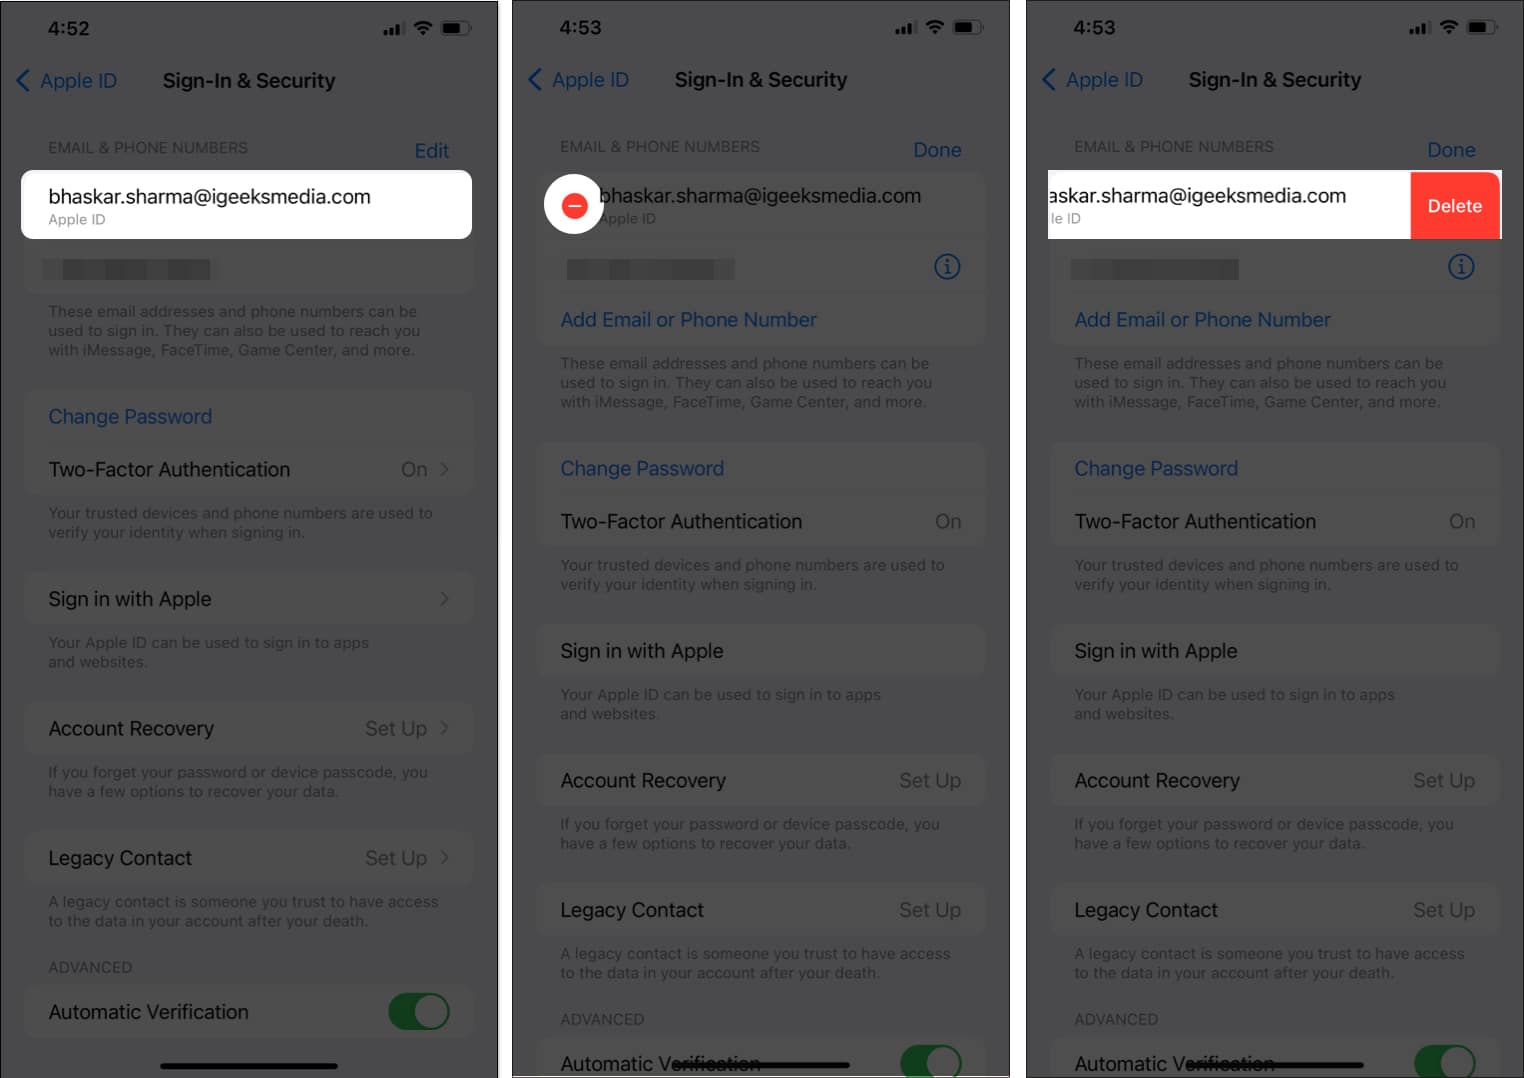
- Tap Choose Another Email when prompted, and enter your device passcode if needed.

- Enter your new email address and tap Continue.
- Check your new email for a verification code. Enter the code to confirm.


That’s it! Your Apple ID email is now updated. Be sure to use this new email to sign in to Apple services from now on.
Note:
On Mac or Web Browser
- Open your favorite web browser.
- Go to appleid.apple.com and sign in with your current Apple ID and password.

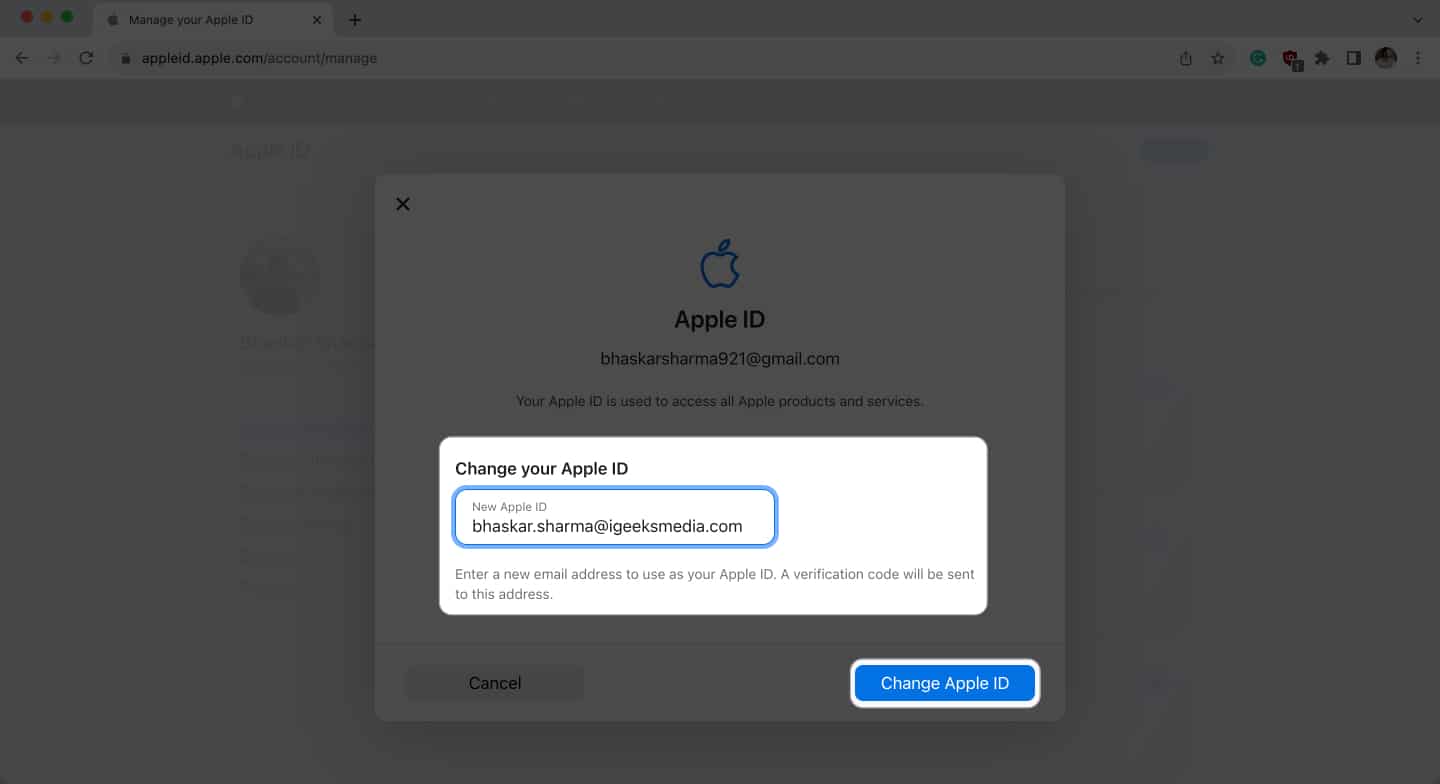
- In the Sign-In and Security section, select Apple ID.

- Enter your new email address and click Change Apple ID.
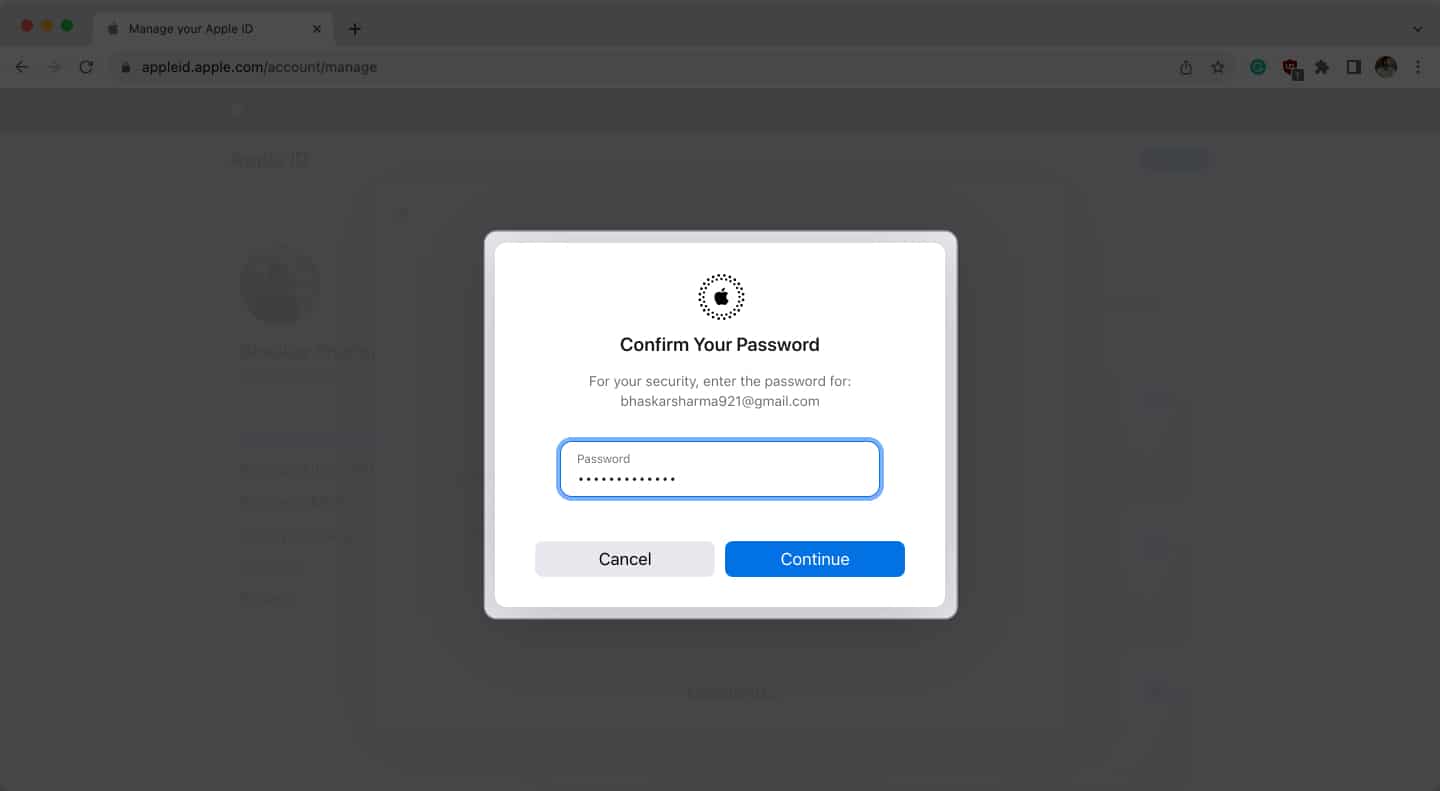
- Enter your current Apple ID password and click Continue.
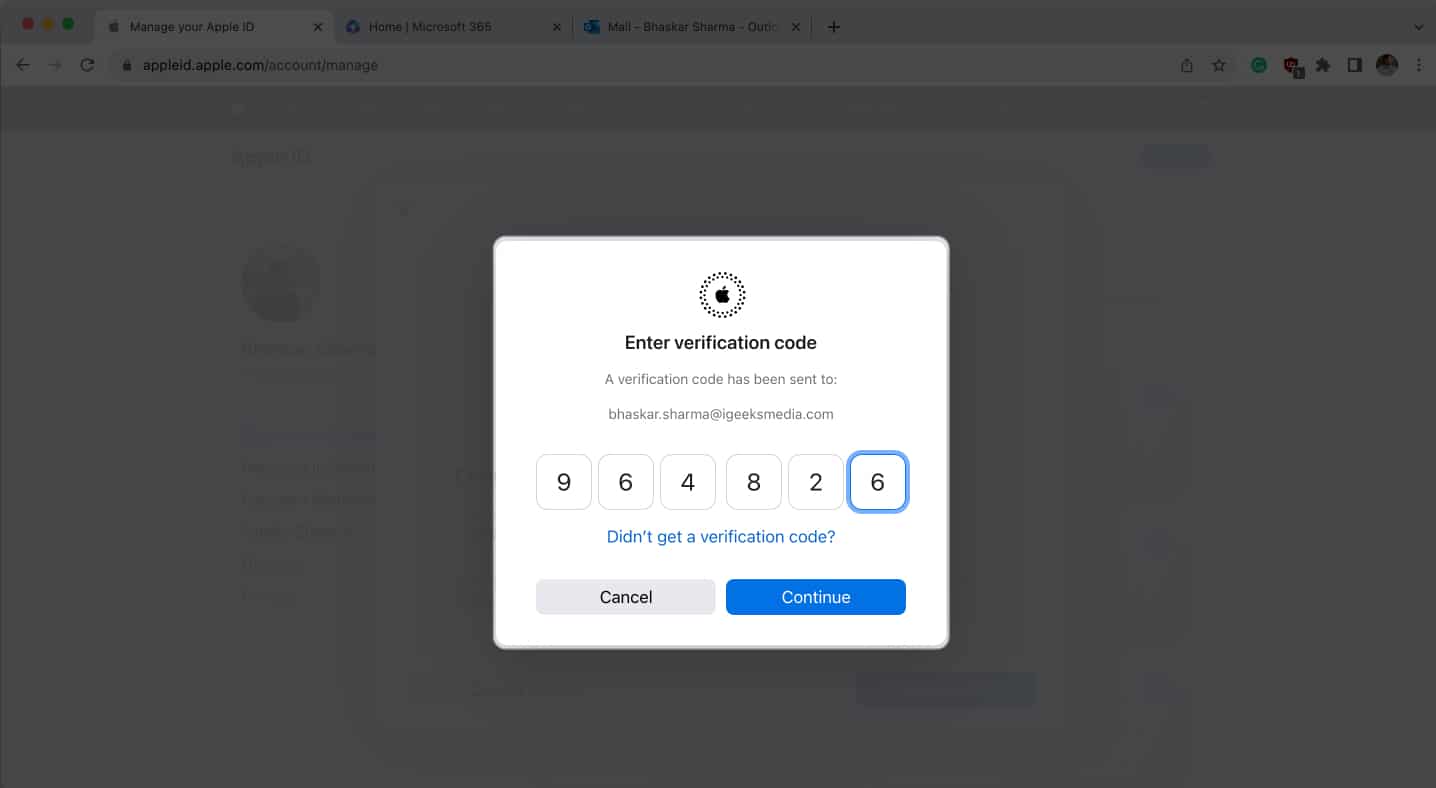
- Check your new email for a verification code. Enter the code to finalize the change.


After updating, remember to sign in with your new Apple ID email on all your devices.
Important: Some Changes Can’t Be Undone
If you change your Apple ID to an Apple email address (ending in @icloud.com, @me.com, or @mac.com), you can’t switch back to a third-party email address later. So, make sure you’re comfortable with this change before you proceed.
After Changing Your Apple ID
You’re almost done! Just a few final steps:
- Sign in with your new Apple ID on all your Apple devices (iPhone, iPad, Mac, Apple TV, etc.).
- Update sign-in info for any apps or services that use your Apple ID.
- Check your email for any extra verification steps from Apple.
- You may also want to update your payment methods linked to your Apple ID.
- Don’t forget to manage your subscriptions if needed.
Switching Apple IDs on a Device
If you want to use a completely different Apple ID on your device (maybe you’re handing it off to someone else or keeping work and personal accounts separate):
- Go to Settings > tap your name.
- Scroll down and tap Sign Out.
- Follow the prompts to sign out of iCloud and other Apple services.
- Sign in with the new Apple ID.
This removes the previous account’s data from the device and links it to the new one.
Extra Tips and Troubleshooting
- If you can’t change your Apple ID, double-check that you’ve signed out everywhere except the device you’re updating.
- Not seeing the verification email? Give your inbox a minute, or try resending.
- When in doubt, Apple Support is always there to help.
Wrapping Up
Changing your Apple ID doesn’t have to be stressful. With a few careful steps, you’ll have your account updated and secure in no time. Remember, keeping your Apple ID up to date is a smart way to protect your information and make sure you never miss a beat with Apple’s services.
If you ever hit a snag or have questions, don’t hesitate to reach out—help is always just a click away. Good luck, and happy updating!
