FaceTime Like a Pro
Get our exclusive Ultimate FaceTime Guide 📚 — absolutely FREE when you sign up for our newsletter below.

FaceTime Like a Pro
Get our exclusive Ultimate FaceTime Guide 📚 — absolutely FREE when you sign up for our newsletter below.
Apple’s new Recovery Assistant in iOS 26 and macOS Tahoe can fix iPhone, iPad, and Mac startup issues automatically — often without a computer.
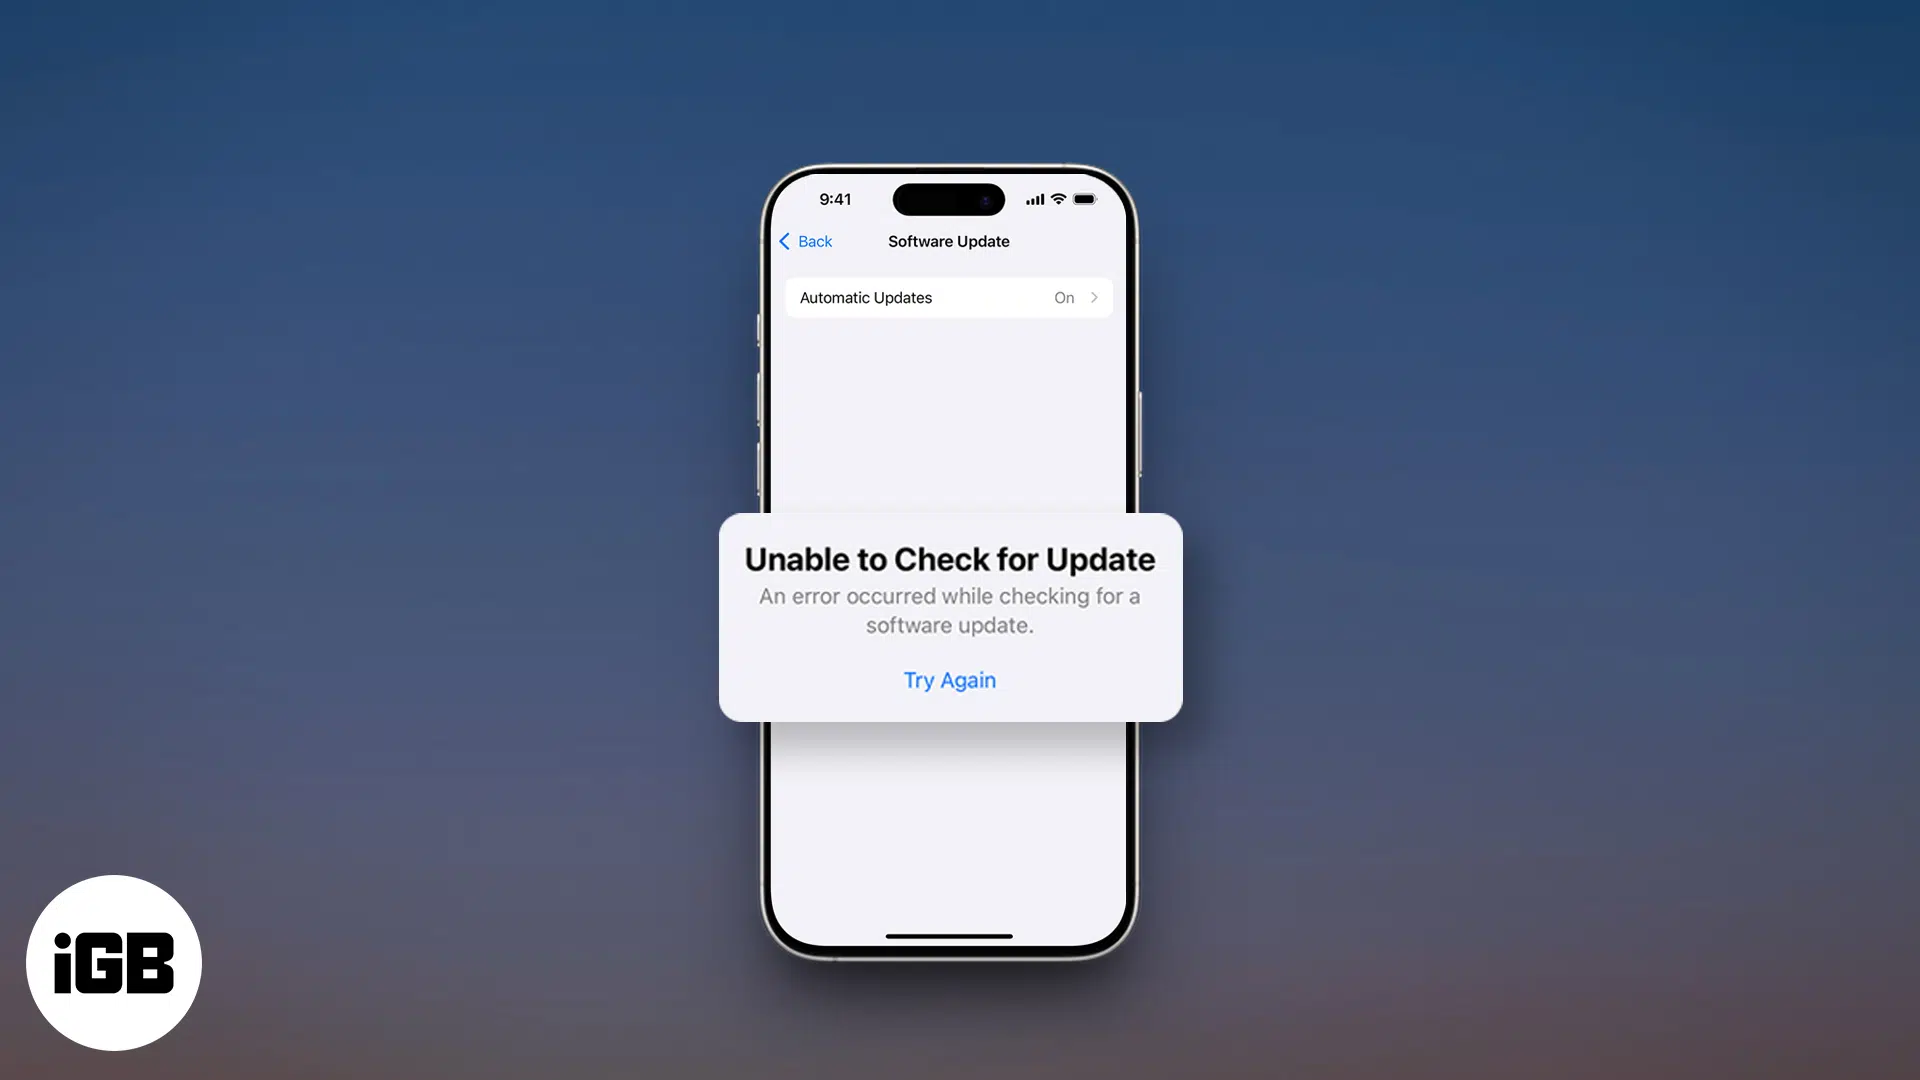
If your iPhone, iPad, or Mac suddenly refuses to start up, gets stuck on the Apple logo, or crashes at random, it can feel like a nightmare. In the past, fixing this usually meant plugging your device into a computer to reinstall the OS or restore a backup. But with Apple’s new Recovery Assistant, things are much simpler.
Now, whenever something goes wrong, Recovery Assistant can diagnose the problem and often fix it right on the spot without even needing a computer. In this guide, I’ll explain what Recovery Assistant is, how it works, and why it’s a major win for iPhone, iPad, and Mac users.
Recovery Assistant is Apple’s built-in self-recovery tool in iOS 26, iPadOS 26, and macOS Tahoe 26. It helps fix devices that can’t start up properly.
In the past, iPhones and iPads that froze or displayed the “connect to computer” screen had to be restored using Finder or iTunes. Now, Recovery Assistant automatically kicks in, booting the device into a specialized recovery mode.

When your iPhone, iPad, or Mac detects that it can’t boot normally, such as being stuck on the Apple logo or crashing repeatedly, it may automatically enter Recovery Assistant.
Here’s what it does step by step:
You’ll receive a report at the end indicating whether it worked, couldn’t be fixed, or found no issues. The report suggests fallback steps, such as reinstalling the iOS or macOS version using a computer, repairing the startup disk, or seeking service. Moreover, you can choose to share anonymized logs with Apple to receive additional assistance.
Recovery Assistant behaves a bit differently depending on whether you’re using an iPhone, iPad, or a Mac. Here are a few of the distinctions:
| Device | How Recovery Assistant is triggered | Repair options | Fallback / Next Steps |
| iPhone / iPad (iOS 26 / iPadOS 26) | Automatically when the device fails to boot or manually triggered via Recovery mode. | Self-repair, or wireless restore via another iOS / iPadOS device without a computer. | The device may need a restore via Finder/iTunes on a PC/Mac, or visit Apple Support. |
| Mac (macOS Tahoe 26 and newer) | Mac automatically boots into Recovery Assistant on startup failures or launch it from macOS Recovery. | Diagnostics, disk repair, reinstalling macOS, and recovery utilities without third-party tools. | Use advanced recovery options like repairing the startup disk, reinstalling macOS, using Internet Recovery, or seeking repair service. |
Before relying on Recovery Assistant, it’s helpful to know the prerequisites and take steps ahead of time to improve your chances of a smooth recovery.
Recovery Assistant may not work properly if the device has a severely damaged recovery partition, corrupted storage, or hardware issues that require more advanced troubleshooting.
To be best prepared:
Ensure all these are done before you proceed to trigger Recovery Assistant manually through Recovery Mode.
Currently, Recovery Assistant is enabled by default in iOS 26, iPadOS 26, and macOS Tahoe, there’s no separate toggle in Settings.
You can also trigger Recovery Assistant manually to troubleshoot problems. Follow the steps below:
Note: The file includes recent system activities, stability, software version, disk size, free space and other data from before the problem started. It may contain private or sensitive information, such as your name, device serial number, or file names. So, you may skip sharing it.
Similar to iPhone, if your Mac fails to boot normally — say, it gets stuck during startup, crashes, or otherwise can’t load macOS — Apple may automatically launch Recovery Assistant. You can also manually access it through macOS Recovery by holding down the power button and selecting Options > Continue.
If your Mac doesn’t start up, Recovery Assistant was unable to fix the problem. Now, the only way is to contact Apple for advanced solutions like repairing the disk or reinstalling the whole macOS.
Tip: You may quit Recovery Assistant and return to macOS Recovery. Press Command-Q or choose Device Recovery Assistant > Quit from the menu bar.
Recovery Assistant brings modern, user-friendly recovery features to your iPhone, iPad, and Mac:
These improvements reduce downtime and give users more control over fixing their iPhone without outside help.

If Recovery Assistant can’t fix your iPhone on its own, you can use another Apple device to help. A Reddit user noticed that there is an option to restore your iPhone with a nearby device. Here’s how:
This wireless recovery method is much faster and more user-friendly than using a computer.
Apple also added a System Recovery option in iOS 26 to restore an iPhone or iPad from a nearby iOS device rather than an iCloud or PC backup. It’s available on the iPhone 16 model or the iPad mini (A17 Pro) running iOS 18 and later.
Here’s how Recovery Assistant stacks up against older approaches to fixing broken or unresponsive devices:
| Recovery Approach | What You Need | Data Risk | Convenience |
| Recovery Assistant (built-in, wireless) | No computer required. Sometimes need another iPhone/iPad nearby. Internet required. | Lower risk of data loss if repair succeeds. But if restore is needed, data may be lost if no backup. | Very convenient, especially on the go or when no PC/Mac is available. |
| Wireless Restore via Nearby Device | A second iPhone or iPad running iOS 26+, close proximity, internet access. | Moderate risk. It tries to preserve settings/data, but it works best if you have backups. | Easier than connecting to a PC, though it still needs a second device. |
| Manual Restore via Finder / iTunes on Computer | A Mac or Windows PC with Finder or iTunes, a cable, and often a software download. | It can preserve data with a backup, but often requires wiping if there are major issues. | Less convenient, especially on the go, and requires technical steps. |
| macOS Recovery / Internet Recovery / Reinstall macOS | Mac with recovery partition or Internet Recovery, sometimes a stable internet connection. | Can reinstall macOS without losing data, but erasing is an option. | Requires a working recovery environment or internet. |
| Erase and Reinstall / Factory Reset | Recovery mode or Reset options, power, backups. | High risk wipes all user data unless previously backed up. | Drastic but thorough, returns device to factory state. |
In summary, Recovery Assistant is Apple’s more user-friendly, less technical recovery option. It can save the day when your device won’t boot and you’re not near your computer. Traditional recovery methods are more powerful but also more complex, often involving the wiping or erasing of the device.
Even though Recovery Assistant is a huge leap forward, you may encounter some issues:
| Problem | What You Can Do |
| No Wi-Fi or weak internet | Move to a stable Wi-Fi connection or ensure internet access. |
| Low battery or device shuts off mid-repair | Ensure your device is plugged in or has sufficient battery before starting Recovery Assistant. |
| Corrupted recovery partition or firmware | You may need to do a manual restore using a computer (Finder/iTunes) or visit Apple Support. |
| Wireless restore pairing fails | Try rebooting both devices, ensure they’re close, unlocked, and on stable Wi-Fi. |
| Recovery Assistant says it couldn’t fix the issue | Update iOS or restore via computer, else seek professional repair. |
| Data loss concerns | Always keep recent backups via iCloud or local computer backups. |
| Stuck in Recovery Assistant or looping on the recovery screen | Force restart the device, or try connecting it to a computer for a manual restore. |
Apple’s Recovery Assistant is a leap forward in self-healing tech. With automated recovery, wireless restoration, and zero dependency on a computer, iPhone, iPad, and Mac troubleshooting is accessible to everyone. Whether you’re traveling, working remotely, or simply not near a computer, your iPhone can now fix itself—quickly and securely.
Have you tested Recovery Assistant yet? Share your experience in the comments below!
Related articles worth reading: