If you struggle to hear calls clearly, miss dialogue in videos, or need real-time transcription, Apple’s Live Captions can solve that problem. This feature converts spoken audio into text instantly on your iPhone, iPad, or Mac, helping you follow conversations, meetings, and media without depending on traditional subtitles.
Live Captions is designed for the deaf and hard-of-hearing community, but it is equally helpful in noisy environments, during unclear calls, or when you simply prefer reading over listening. This guide explains exactly how to turn it on, customize it, and use it properly.
What is Live Captions?
Live Captions transcribes spoken audio in real time across your device. Unlike standard subtitles that are pre-written, this feature generates text instantly from live speech. You can use it for:
- Phone calls
- FaceTime calls
- Video conferencing apps
- Social media videos
- Streaming content
- Podcasts
- In-person conversations using your device’s microphone
All processing happens on your device, which protects your privacy. However, transcription accuracy may vary, and Apple does not recommend relying on it in emergency or high-risk situations.
Live Captions Requirements (Supported Devices)
Before enabling Live Captions, confirm your device supports it.
Software required:
- iOS 16 or later
- iPadOS 16 or later
- macOS Ventura or later
Hardware required:
- iPhone 11 or newer
- iPad with A12 Bionic chip or newer
- Mac with Apple silicon (M1 or later)
Availability depends on region and language support. It was limited to the United States and Canada and supported English only. The first time you enable Live Captions, your device downloads language data, so an internet connection is required.
How to Turn On Live Captions on iPhone and iPad
The setup process is identical on iPhone and iPad.
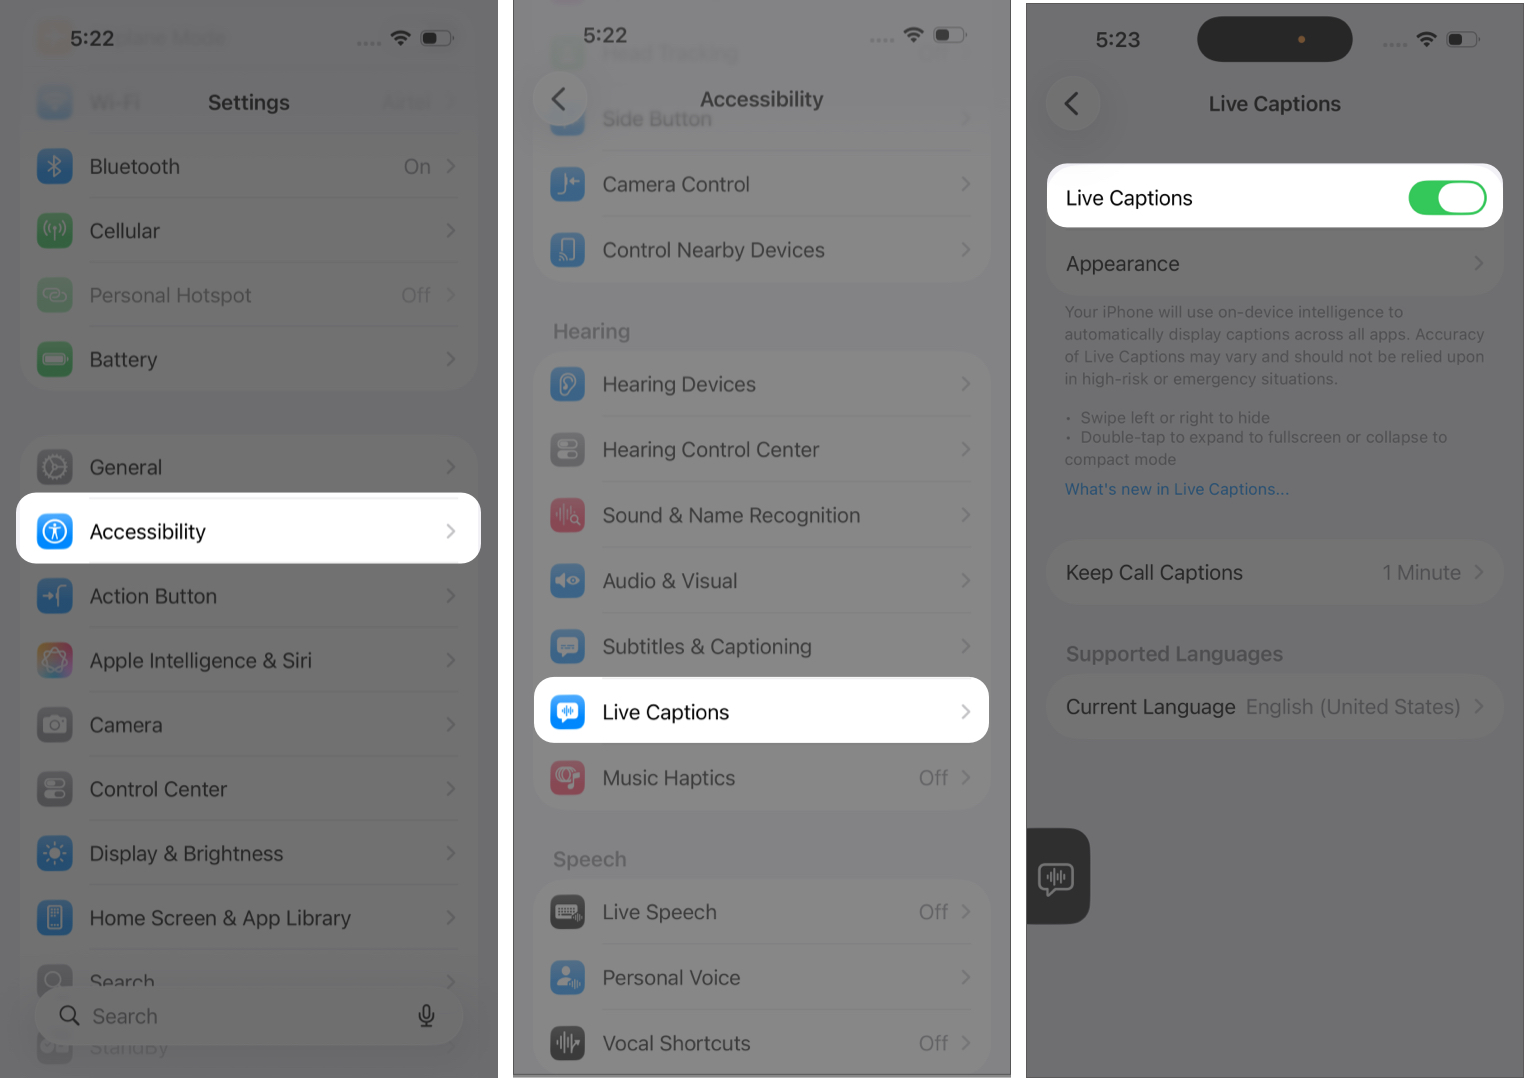
- Open the Settings app.
- Tap on Accessibility.
- Under the Hearing section, tap Live Captions.
- Turn on the Live Captions toggle.
Once enabled, a floating caption window appears automatically whenever audio is detected. To customize the appearance, follow the steps below.
- Stay in the Live Captions settings.
- Tap Appearance.
- Adjust font size, text color, background color, and text opacity.
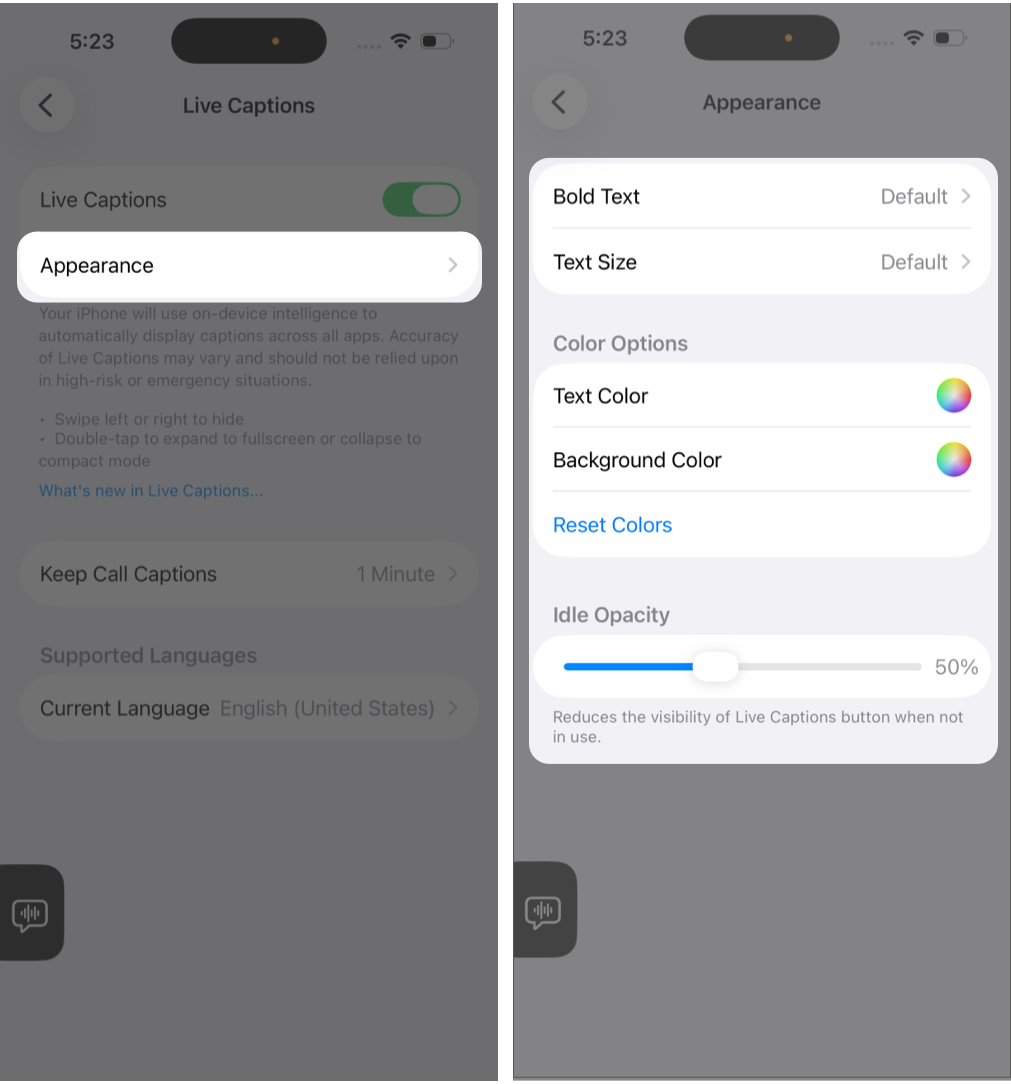
Use larger fonts for clearer reading during calls. High-contrast colors improve visibility outdoors.
Keep Call Captions Setting Explained
If you use Live Captions during calls, configure the Keep Call Captions setting carefully. There are two options for you to choose.
- 1 Minute – Captions are available only during the call and are deleted immediately after it ends. You cannot copy, screenshot, or record the transcription.
- 1 Hour – Captions remain available for up to one hour after the call. You can copy, screenshot, or screen record the transcription during that time.
When you choose the 1 Hour option, all participants hear an audio announcement stating that the call is being transcribed. If transcription stops, another announcement plays. This ensures transparency and privacy.
How to Use Live Captions on iPhone and iPad
After activation, tap the caption window to control it. You can:
- Switch between Microphone (for in-person conversations) and Device Audio (for media and calls)
- Pause transcription
- Copy captions
- Clear captions
- Expand to full screen
- Drag the window anywhere on the screen
- Swipe to hide it temporarily
The window hides automatically when no audio is detected.
To enable Live Captions during a FaceTime call, tap the information (i) button inside the call interface and turn it on directly.
For faster access, go to Settings > Accessibility > Accessibility Shortcut and select Live Captions. You can then triple-click the Side button (or Top button on some iPads) to toggle it instantly. You can also add Accessibility Shortcuts to Control Center for quick access.
How to Enable Live Captions on Mac
If you use your Mac for FaceTime calls, Zoom meetings, watching videos, or even in-person conversations at your desk, Live Captions can add a powerful layer of clarity. The Mac version offers more flexibility and works system-wide across apps.
To turn it on:
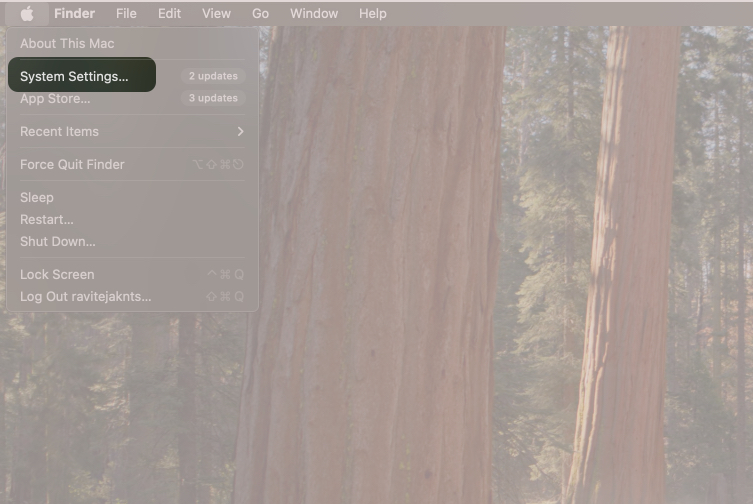
- Click the Apple menu in the top-left corner.
- Open System Settings.
- Select Accessibility from the sidebar.
- Scroll and click Live Captions.
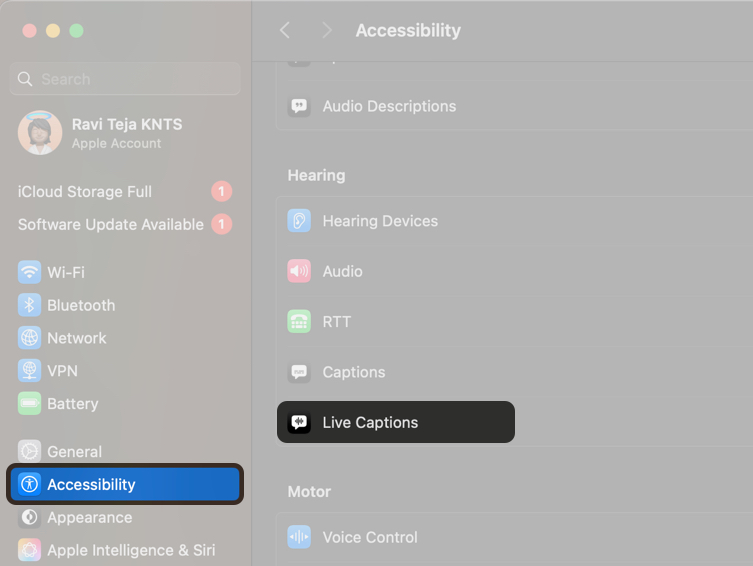
- Turn on the Live Captions toggle.
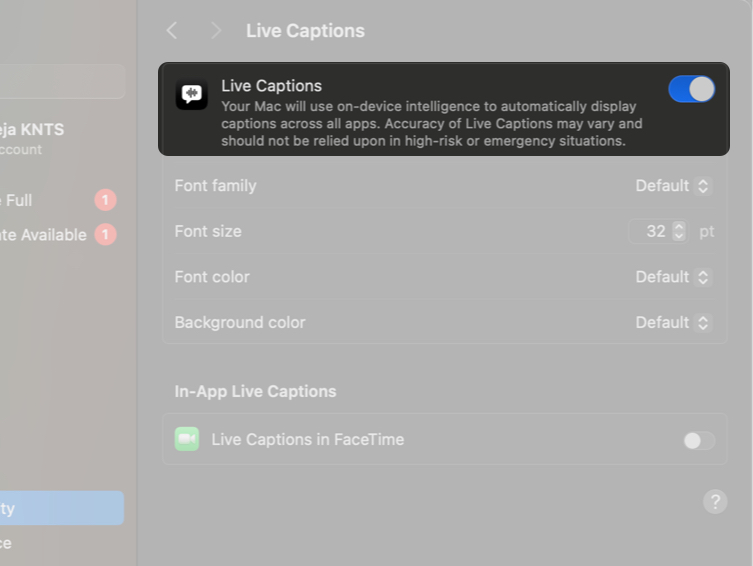


The first time you enable it, your Mac will download the required language files, so make sure you are connected to the internet. Once activated, a floating Live Captions window appears automatically whenever audio is detected on your Mac.
Once active, you can pause and resume captioning, switch between computer audio and microphone input, resize and reposition the caption window, keep it always visible, restore its default position, and use keyboard shortcuts for faster control.
Mac also includes a Type to Speak feature. In the Live Captions window, type your message and press Return. Your Mac will speak it aloud during the conversation. This is especially helpful for users who cannot speak or have limited speech.
Live Captions Accuracy and Limitations
Live Captions works well, but it is not 100% accurate. Transcription quality depends on clear audio. Background noise, multiple people speaking at once, strong accents, or fast speech can reduce accuracy.
It focuses mainly on spoken words and may not describe music, sound effects, or background sounds like traditional closed captions (CC/SDH).
You may also notice slight delays in text appearing during live conversations. Language and regional availability are limited, and not all languages are supported.
Do not rely on Live Captions in emergency or critical situations where exact wording is essential. It is designed to support everyday communication, not replace professional transcription tools.
Final Thoughts
If you are missing parts of conversations, struggling with unclear audio, or need real-time transcription support, Live Captions can significantly improve your experience across iPhone, iPad, and Mac.
Enable it once, configure it properly, and you will always have instant text support whenever you need it.