Accessibility Shortcut in the iPhone is intended to help you customize your user experience as per your personal needs. Assistive Touch, Color Filters, and Magnifier are some of the most useful features that you can regularly use. These can promptly get into action when you triple-click the Side or Home button of your iPhone. If you want to know more about it, Here we’ll show you how to use the Accessibility Shortcut on iPhone and iPad.
- How to Enable and Use the Accessibility Shortcut on iPhone
- How to Disable Accessibility Shortcuts
- How to Access Accessibility Shortcuts Using Control Center
How to Enable and Use the Accessibility Shortcut on iPhone
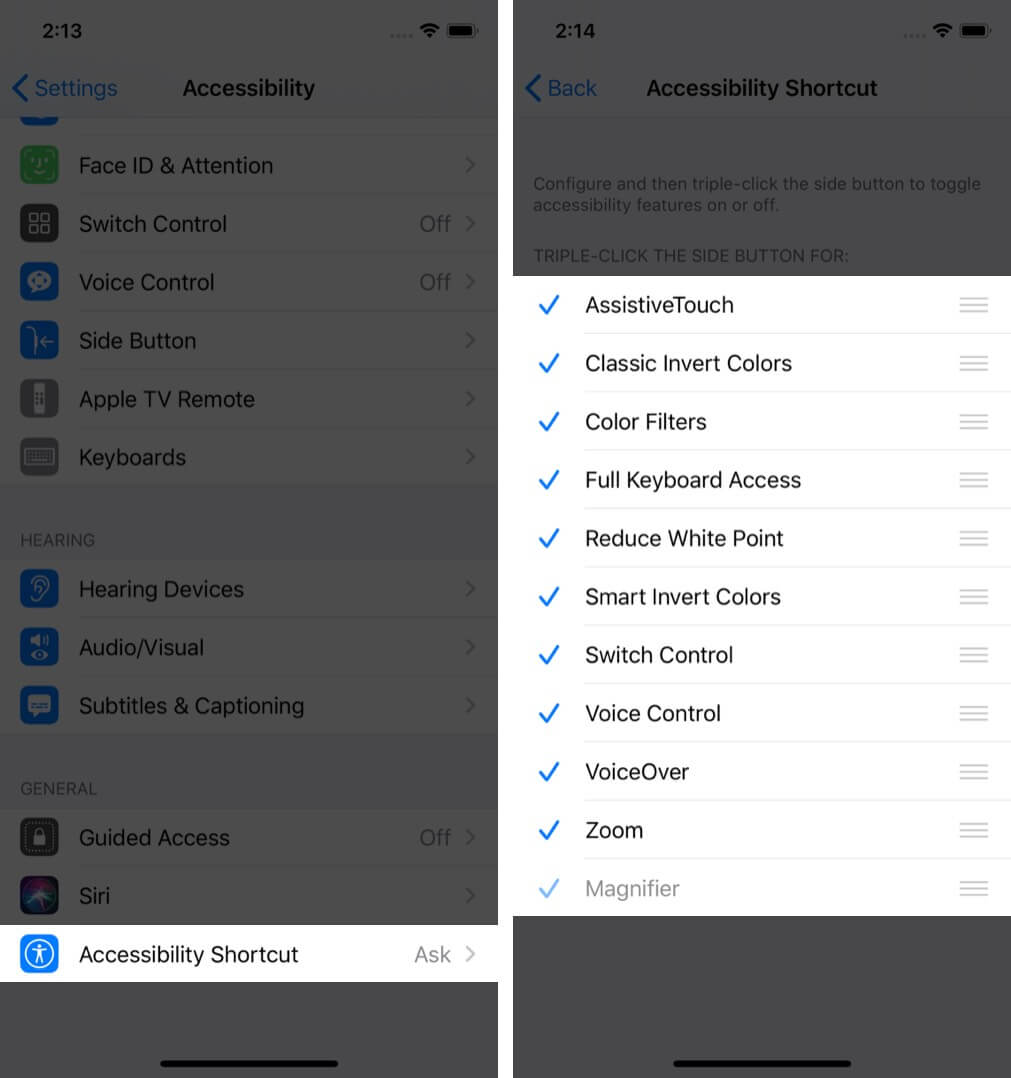
- Open the Settings app on your iPhone.
- Scroll down and go into Accessibility.
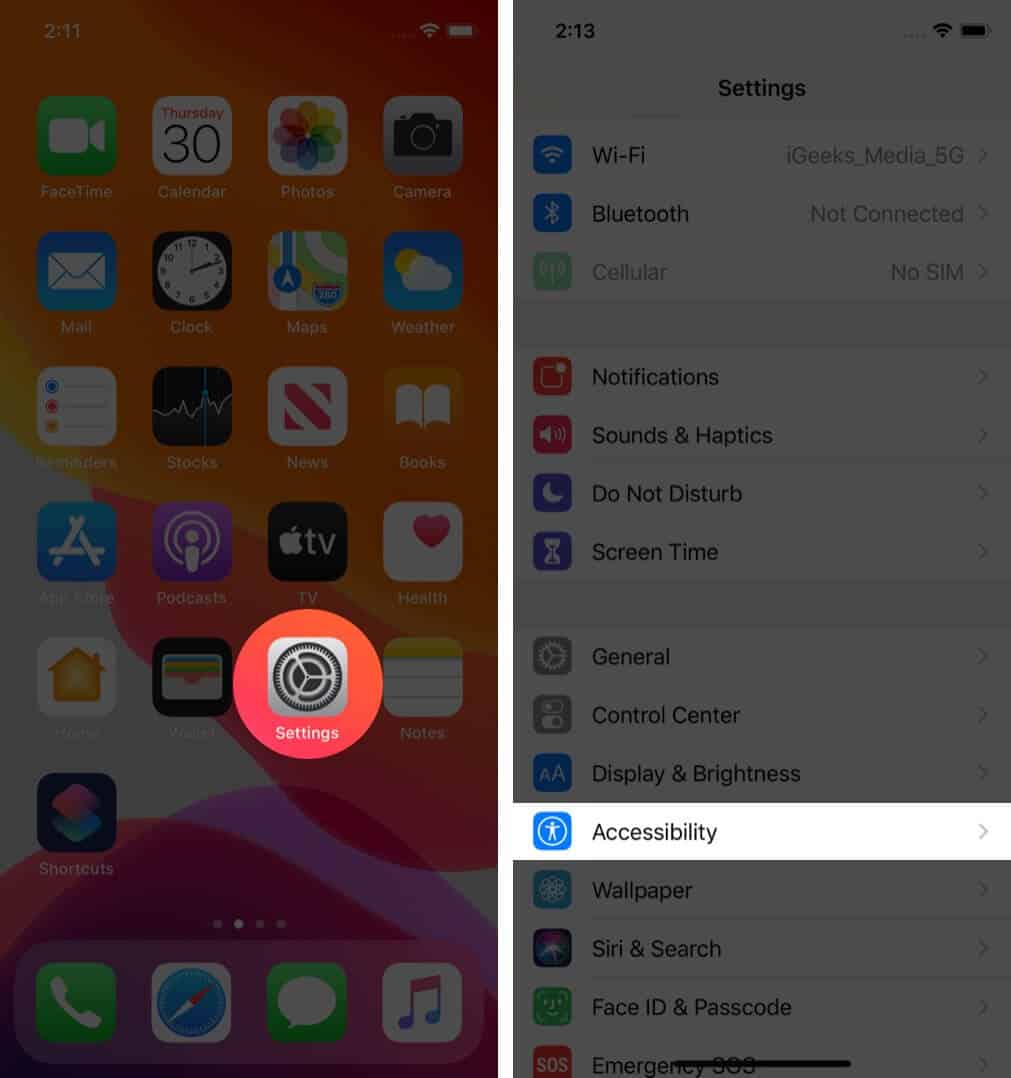
- Select the Accessibility Shortcut that appears last in the list.
- Tap on the features you want to add and use.
Let’s have a brief on Accessibility Shortcut Options.
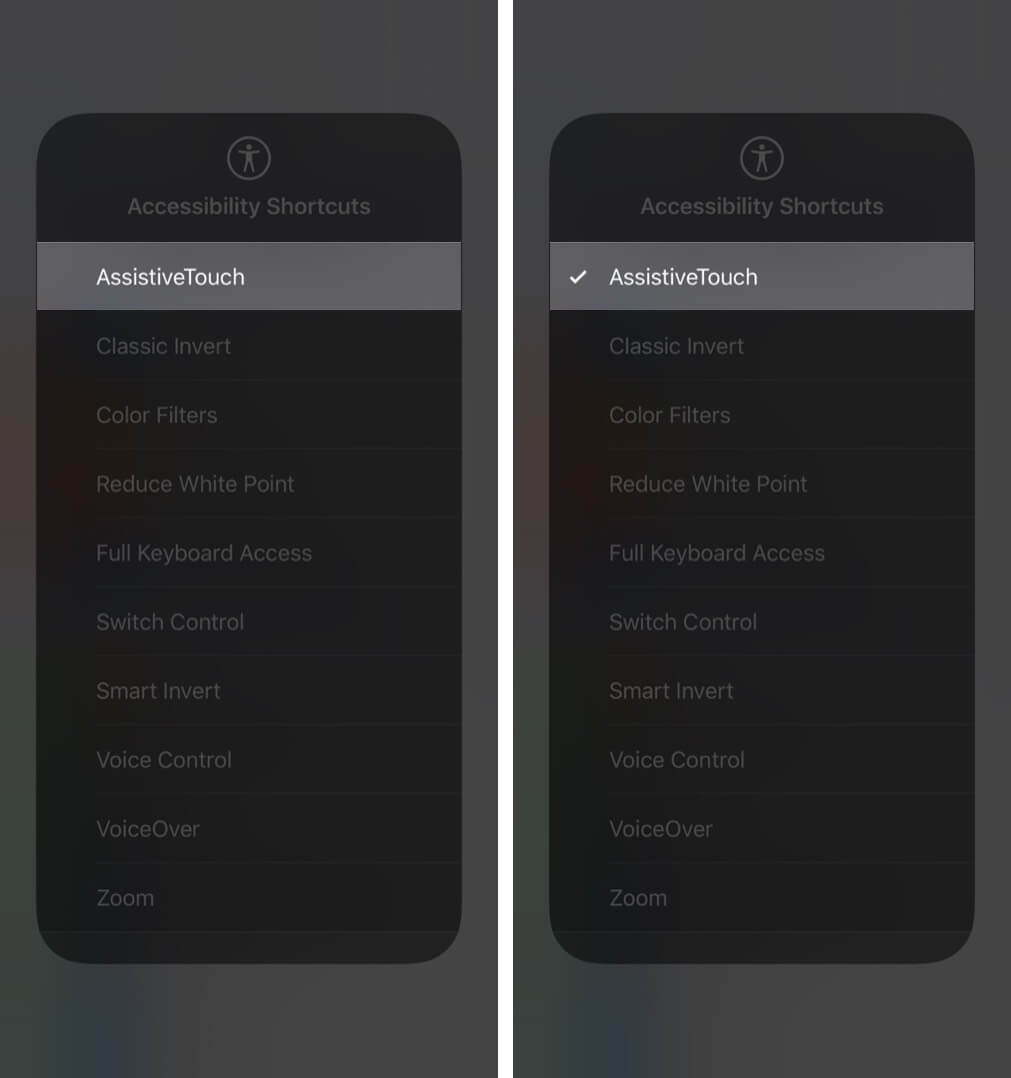
- Assistive Touch: It carries a series of controls to command your iPhone without clicking buttons like volume up and down, lock screen, screenshot, mute, and all. With assistive touch active on your screen, you can open the control center, launch Siri, and see notifications with just one tap.
- Classic Invert Colors: It transforms the colors of the display.
- Color Filters: It changes the color of the display to read texts accurately.
- Full Keyboard Access: It helps you to leverage full keyboard access on your iPad when connected with the physical keyword.
- Magnifier: It turns your iPhone into a magnifier glass.
- Reduce White Point: It reduces the intensity of bright colors.
- Smart Invert Colors: It reverses the color of the display but not when you’re watching media.
- Switch Control: It controls ability switches and other adaptive accessories.
- Voice Control: It lets you speak a command to the iPhone and iPad without touching the screen.
- VoiceOver: It speaks aloud the on-screen content.
- Zoom: It lets you zoom in on certain areas of your iPhone screen.
- Reduce Transparency: It blurs the background to read text clearly.
- Increase Contrast: It increases the contrast of the screen and makes colors sharper.
- Guided Access: It limits your iPhone or iPad device for limited use of one app when a child is using it.
Note: Long press on the three-lines next to the name of the Accessibility shortcut to drag it and put it in order as per your usage.
When you triple-click the side button of your iPhone and iPad with Face ID, the list of Accessibility Shortcuts will appear. (On iPhone and iPad models that works on Touch ID, triple-click the Home button) Make sure; if you’ve added only one function, it will be activated at the moment you triple-click the side button. Otherwise, you’ll have to choose from the list of multiple tasks that you’ve added.
How to Disable Accessibility Shortcuts
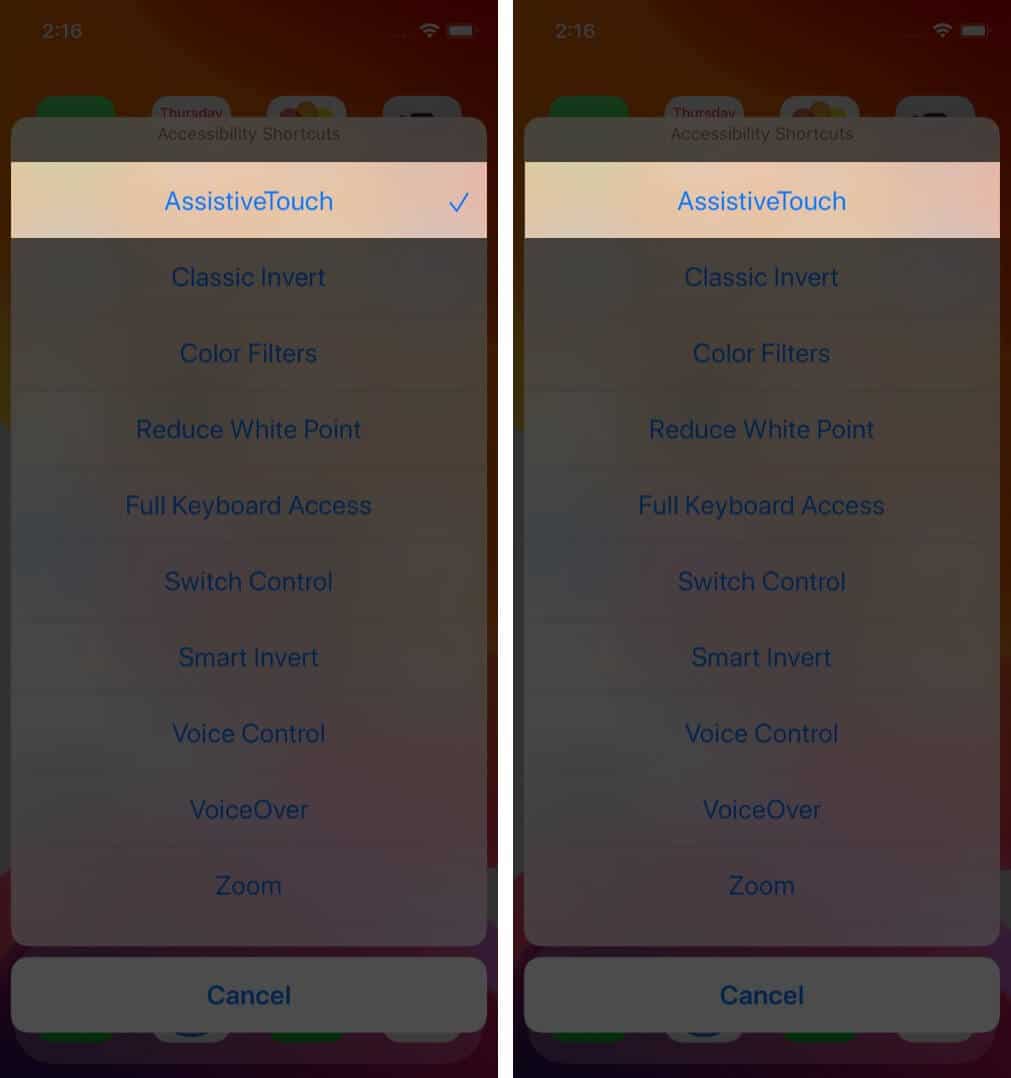
Press the side button on your iPhone thrice to get the list of Accessibility Shortcuts. From the available shortcuts, untick the function to disable its effect. Again, if you’ve added only one function, it will be deactivated when you triple-click the side button
How to Access Accessibility Shortcuts Using Control Center
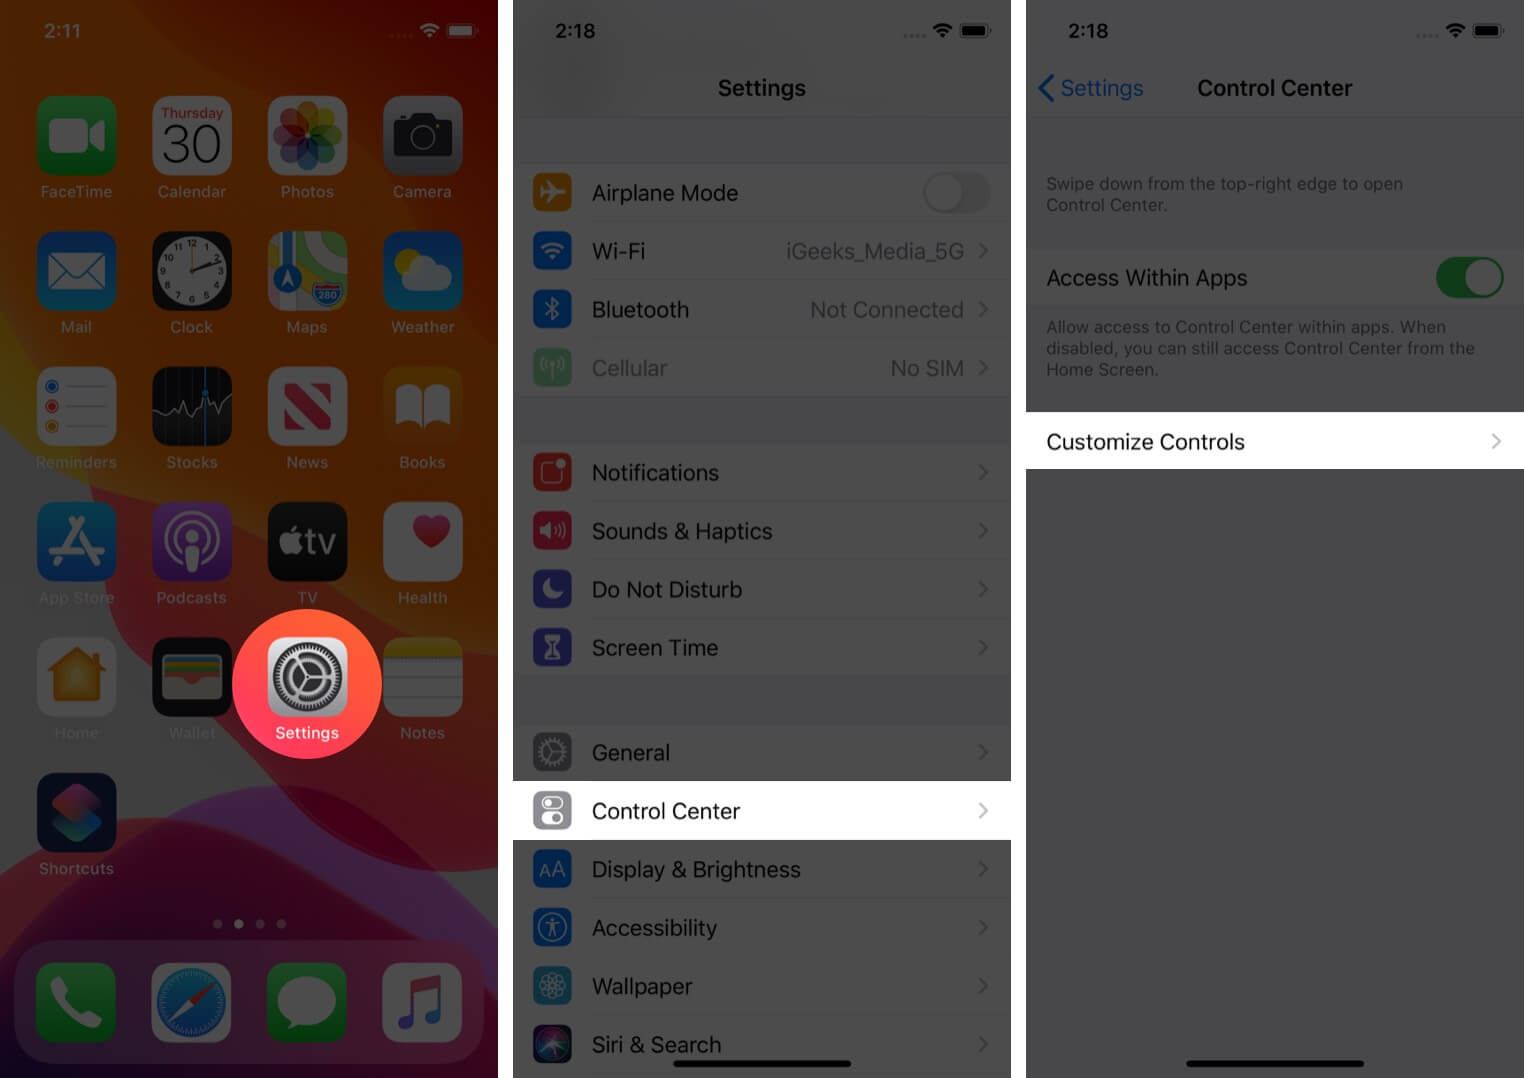
- Open Settings on your iPhone.
- Go to Control Center.
- Tap on Customize Controls.
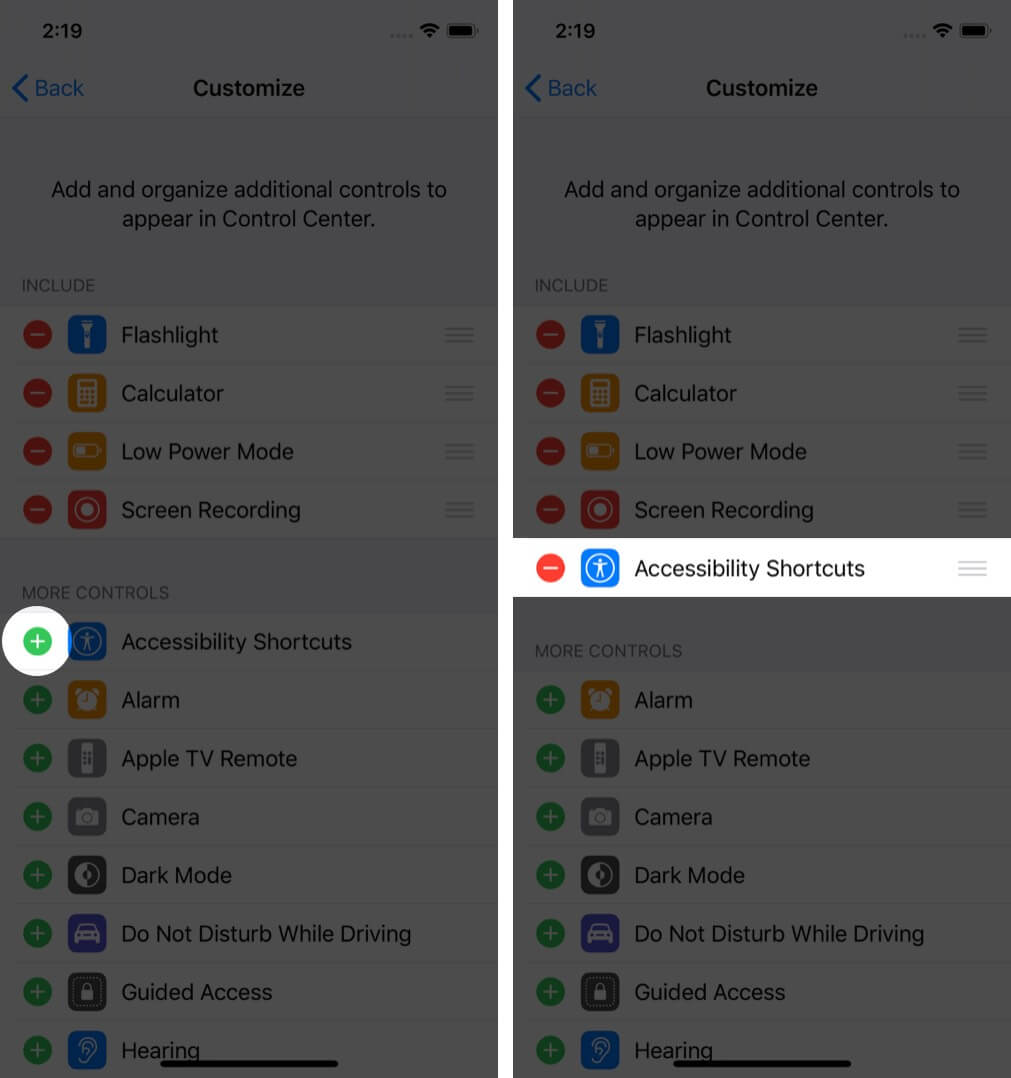
- Tap ‘+ ‘ icon to add the Accessibility Shortcut to the Control Center.
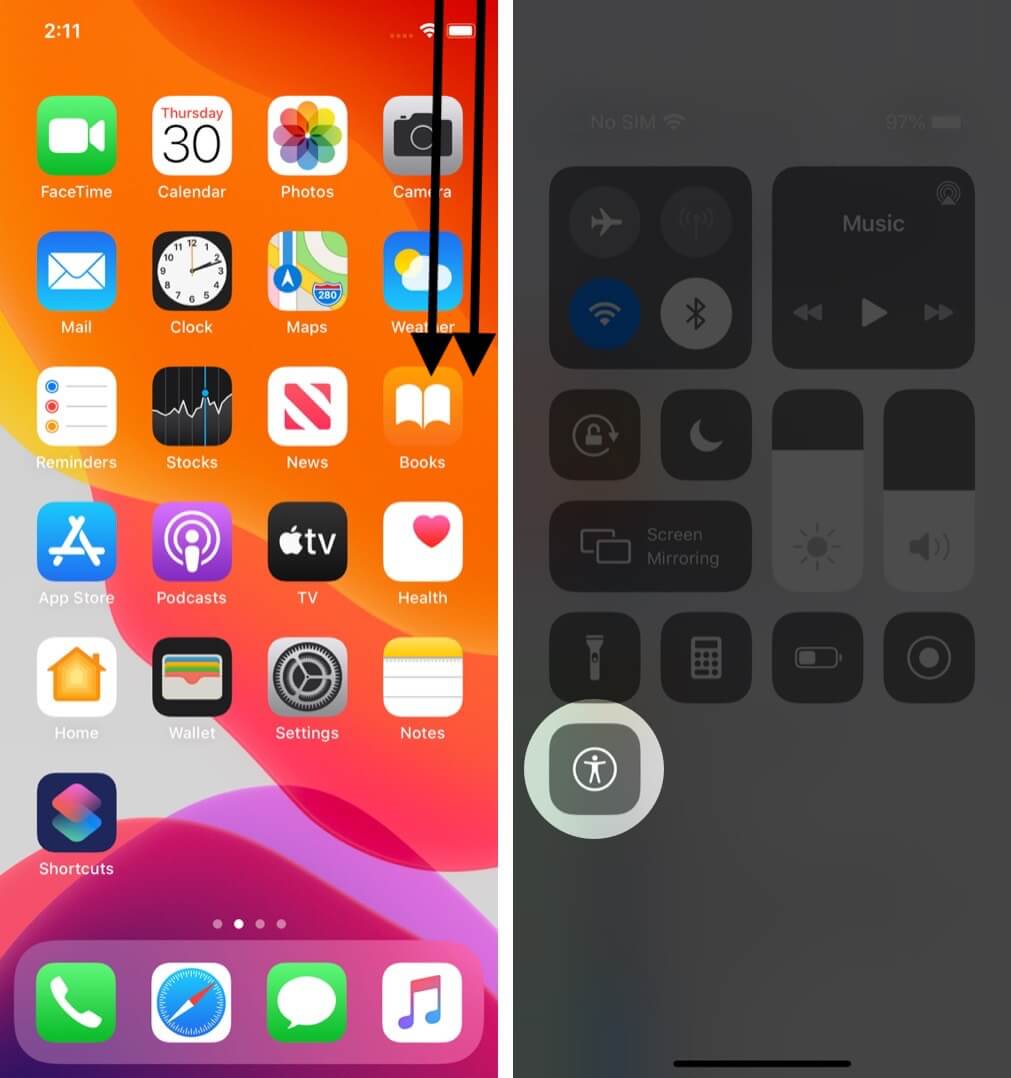
- Open Control Center and find the icon of Accessibility Shortcuts.
- Select the function to activate it.
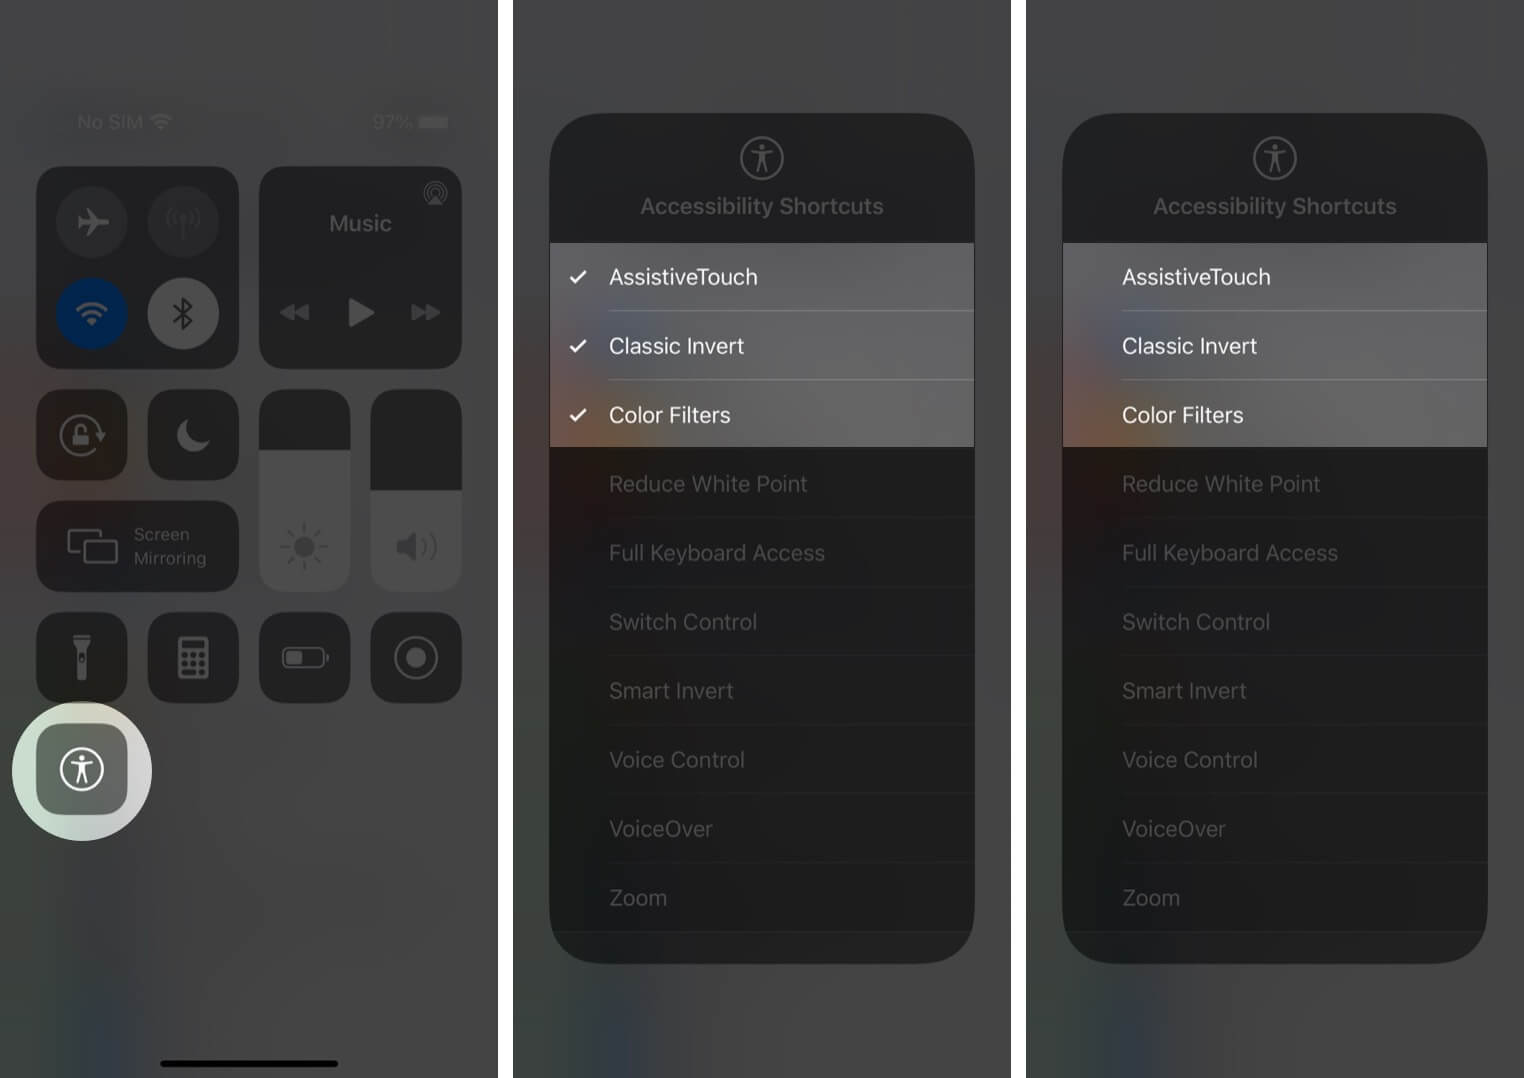
To disable the function, Open Control Center → tap on the Accessibility Shortcut icon → untick the function to deactivate it.
Wrap Up
Accessibility Shortcut remains one of the most underrated features in iPhones and iPads. So let us know which shortcut you liked the most? Tell us in the comment section below!
You would like to read these posts as well:



Leave a Reply