- Genmoji in iOS 18 creates custom emojis from text, stickers, or photos, letting you use them in Messages just like standard emojis.
- You’ll need iOS 18.4 or later with Apple Intelligence enabled, as Genmoji appears only on supported iPhones with the feature turned on.
- To make a Genmoji, open the emoji keyboard in Messages, type a description or mix emojis/photos, then generate and send your custom creation.
- iOS 26 expands Genmoji with emoji mixing and custom expressions, giving users more flexible and personal ways to design reactions.
- Keep prompts clear and simple when generating emojis, and use Messages’ live suggestions to refine ideas and spark creative Genmoji results.
Emojis are fun, but sometimes the standard set just isn’t enough to express exactly what you’re feeling. That’s where Genmoji comes in! Apple introduced Genmoji alongside Apple Intelligence in iOS 18, allowing you to generate custom emojis on your iPhone using simple text descriptions or even photos of friends and family.
With the iOS 26 update, Apple has made Genmoji even more exciting by adding new customization options, like mixing emojis, tweaking physical attributes, and more. This guide walks you through everything you need to know to create and use Genmoji on your iPhone.
What Is Genmoji?
Genmoji is an Apple Intelligence feature that lets you create customized emojis using text prompts, emojis, stickers, and your photos. For example, you can type a prompt like “happy cat wearing sunglasses” to generate a cat emoji with sunglasses, or even create an emoji of your favorite person based on their photo.
Once created, you can use Genmoji like regular emojis, adding them to messages, sending them as stickers, or even using them as a Tapback reaction.
What You Need to Get Started
Before you start creating Genmoji, make sure you have:
- Compatible iPhone: Genmoji works on iPhone 15 Pro, iPhone 15 Pro Max, or any iPhone 16 series model that supports Apple Intelligence.
- Latest iOS version: Ensure your device is updated to iOS 18.4 or later. Go to Settings → General → Software Update and install any available updates.
- Apple Intelligence enabled: Go to Settings → Apple Intelligence & Siri and toggle on Apple Intelligence.
- Supported app: Genmoji works best in the Messages app, but it also works in Notes, Mail, and other native apps that support emojis.
Note:
New Genmoji features in iOS 26 are still in beta, so behavior may vary. Apple Intelligence isn’t available in all regions (e.g., China) or on all iPhone models.
How to Create Genmoji on iPhone
Creating a Genmoji is simple and fun. Here’s how to do it in the Messages app.
Step 1: Open the Messages App
- Launch the Messages app on your iPhone.
- Start a new message or open an existing conversation.
- Tap the text field to bring up the keyboard.
Step 2: Access the Emoji Keyboard
- Tap the Emoji button (smiley face) at the bottom left of the keyboard.
- Look for the Genmoji icon in the top right corner (smiley face with a plus sign).
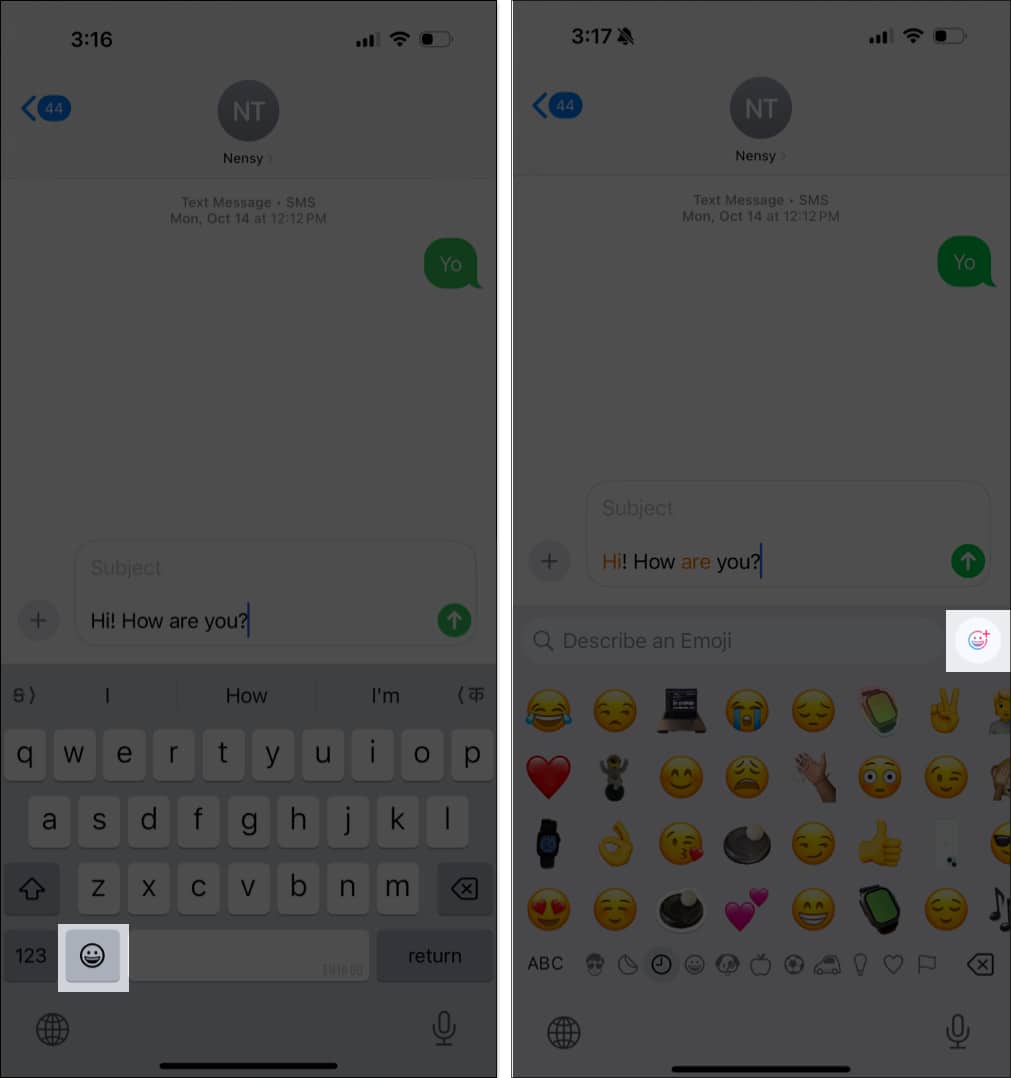
If you don’t see it, make sure Apple Intelligence is enabled and your device is updated to iOS 26.
Step 3: Describe Your Genmoji
Like generating images in the Image Playground app, you’ll need to enter a prompt.
- In the Describe a Genmoji text field, type your description (e.g., “a cat wearing sunglasses”).
- Tap Done to start generation.
- Swipe left or right to preview different versions.
- If you’re not happy with the results, tweak the description and try again.

Alternatively: Use Emojis as Prompts (New in iOS)
With iOS 26, you can now mix existing emojis to create a Genmoji without typing a description:
- In the Genmoji interface, you’ll see your most-used emojis as suggestions.
- Tap the gray smiley icon to open the full emoji keyboard.
- Select up to six emojis to combine.
- Tap Show More for curated categories like Themes, Expressions, Costumes, Accessories, or Places.
- Adjust by removing any concepts using the “–” button.
- Swipe through the results to choose your favorite.
Pro Tip: Using too many concepts can make Genmoji less clear. Stick to 2–3 for the best results.
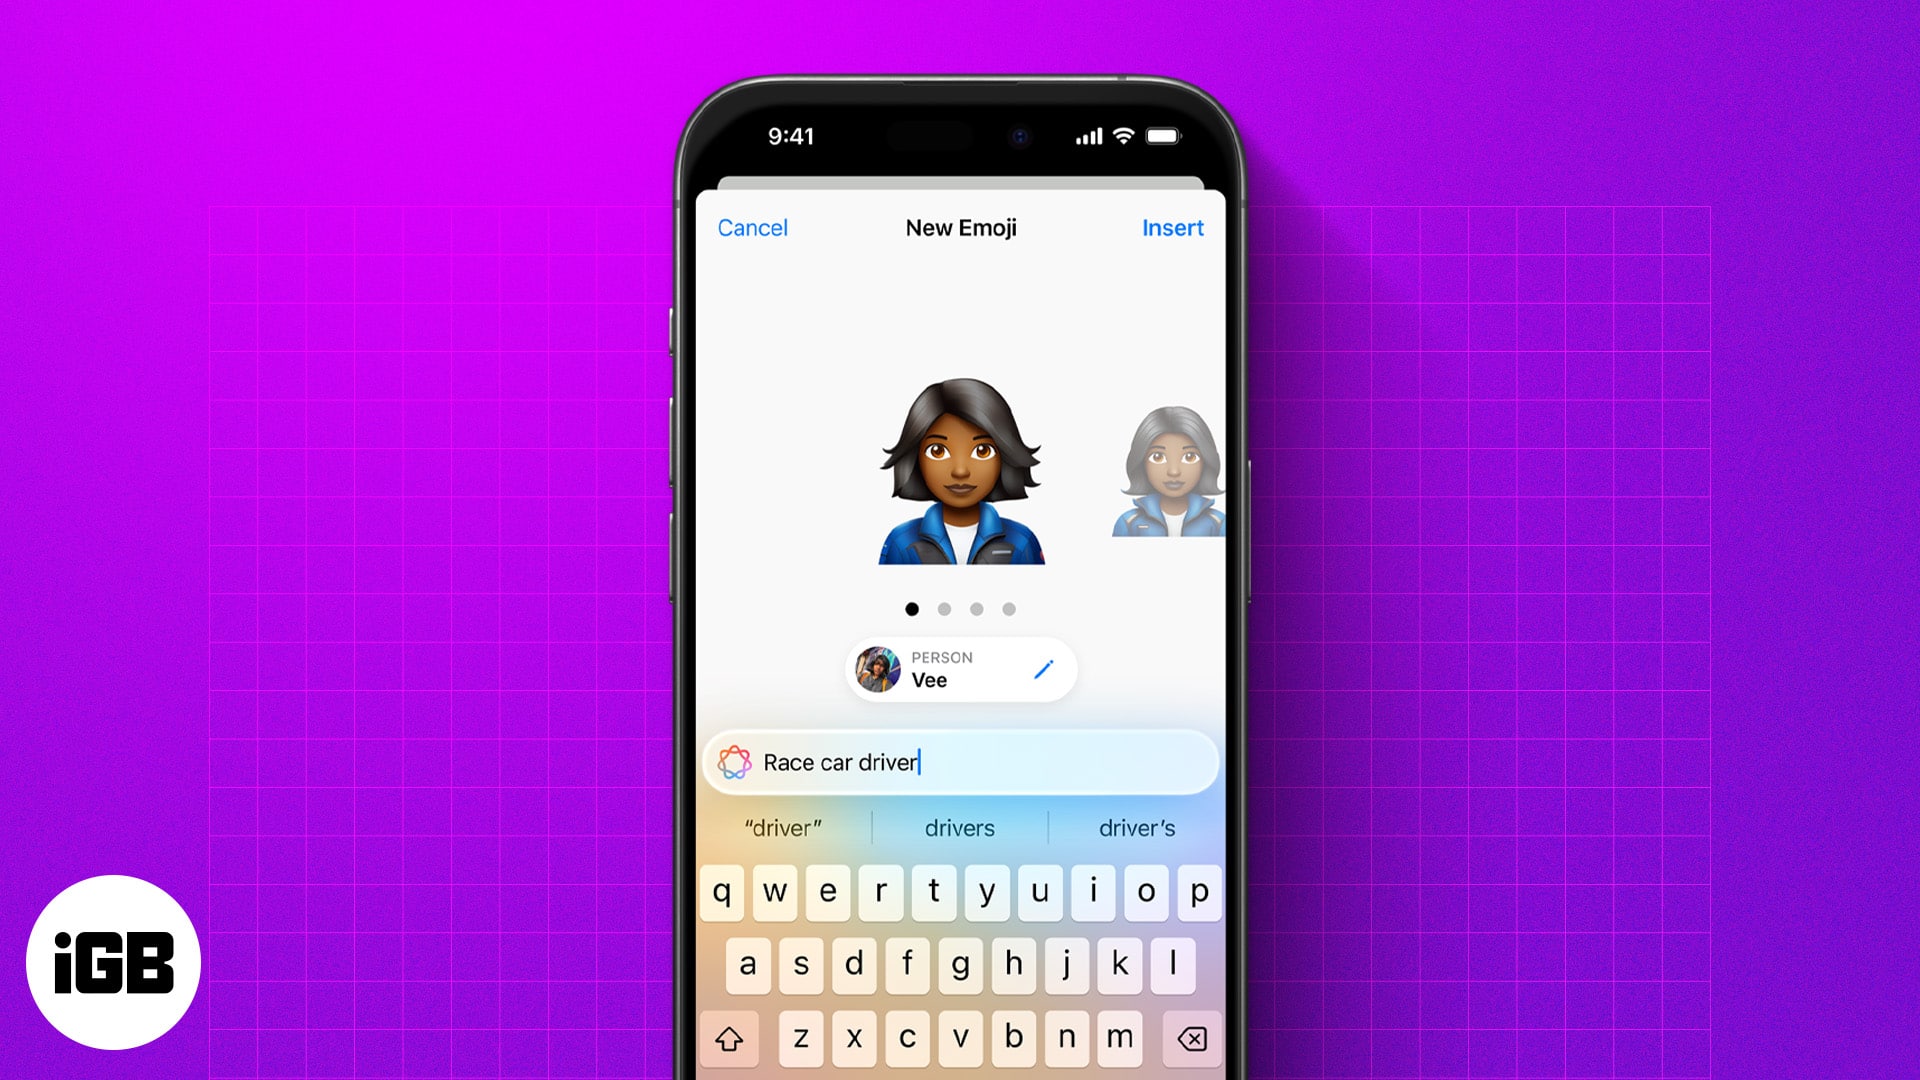
Step 5: Create Genmoji Based on Photos
You can also create Genmoji from people in your Photos app:
- In the Genmoji interface, tap the person icon next to the description box.
- Select a person from your People album.
- Apple Intelligence will create a Genmoji resembling them.
- In iOS 26, tap Customize Appearance to adjust hairstyle, facial hair, eyebrows, and more.
- Once done, you can mix it with other emojis, themes, or text prompts for your ideal Genmoji.
Step 6: Save and Send Your Genmoji
- Tap Add or the checkmark to insert it into your message.
- Tap the three-dot menu and choose Add Emoji to save it for later use as a sticker or Tapback.
- Previously sent Genmoji can be found in recent emojis or the stickers panel.
Note:
If you send a Genmoji to someone without Apple Intelligence (older iPhone or Android), it will appear as an image attachment, but they can still save it.
How to Delete a Genmoji
- Open the emoji keyboard.
- Go to the Stickers tab.
- Long-press the Genmoji and tap Delete.
- To rearrange, tap Rearrange and drag it.
New Genmoji Features in iOS 26
- Emoji Mixing: Combine multiple emojis without typing a description.
- Custom Expressions & Attributes: Adjust moods, hairstyles, accessories, and more.
- Image Playground Integration: Access categories like Themes and Places directly.
- Enhanced Customization: Change clothing, backgrounds, or facial details using text prompts.
Writing the Best Genmoji Prompts
- Be specific, detailed descriptions give better results.
- Start with basics like “happy face” or “sad dog.”
- Use verbs and mix emotions with objects, e.g., “excited unicorn with rainbow.”
- Use the Messages app’s live suggestions.
- Avoid inappropriate prompts. Apple blocks NSFW content.
Troubleshooting Common Genmoji Issues
- Genmoji Icon Missing: Enable Apple Intelligence and update to iOS 26. Go to Settings → General → Keyboard → Emoji and toggle on Stickers.
- Still Downloading: If Apple Intelligence is “Downloading…,” wait a few hours or restart.
- Region Not Supported: Check Apple’s availability list.
- Unexpected Results: Rephrase or simplify prompts; the feature is still in beta.
For more detailed troubleshooting, check out our guide on how to fix Genmoji not working issues on iPhone.
Be More Expressive with Genmoji!
Genmoji takes emojis to the next level—letting you create anything from a “T-rex wearing a cap” to a personalized emoji of your best friend. With iOS 26, mixing and customizing emojis is easier than ever.
So grab your iPhone, start experimenting, and share your favorite creations with friends and family.
More things to read: