- Their Purpose: AirPods Pro ear tips are silicone attachments that create a seal for better sound and noise cancellation.
- Importance of Fit: Choosing the correct ear tip size is crucial for sound quality, noise cancellation, comfort, and secure fit.
- How to Change Them: To remove, gently pinch the ear tip at its base. To attach, align and click the new tip on.
- Finding Your Size: Try on the different physical sizes and then run the “Ear Tip Fit Test” to confirm a good seal.
- Maintenance & Replacement: Regularly clean your ear tips with water and replace them when worn to maintain hygiene and performance.
Apple AirPods Pro are designed for comfort and performance—but only if you’re using the right ear tips. While switching ear tips seems simple, many users either struggle or risk damaging them in the process. If you’re one of them, this guide will walk you through how to safely change AirPods Pro ear tips and ensure you get the best fit for audio quality and noise cancellation.
What Are AirPods Pro Ear Tips?
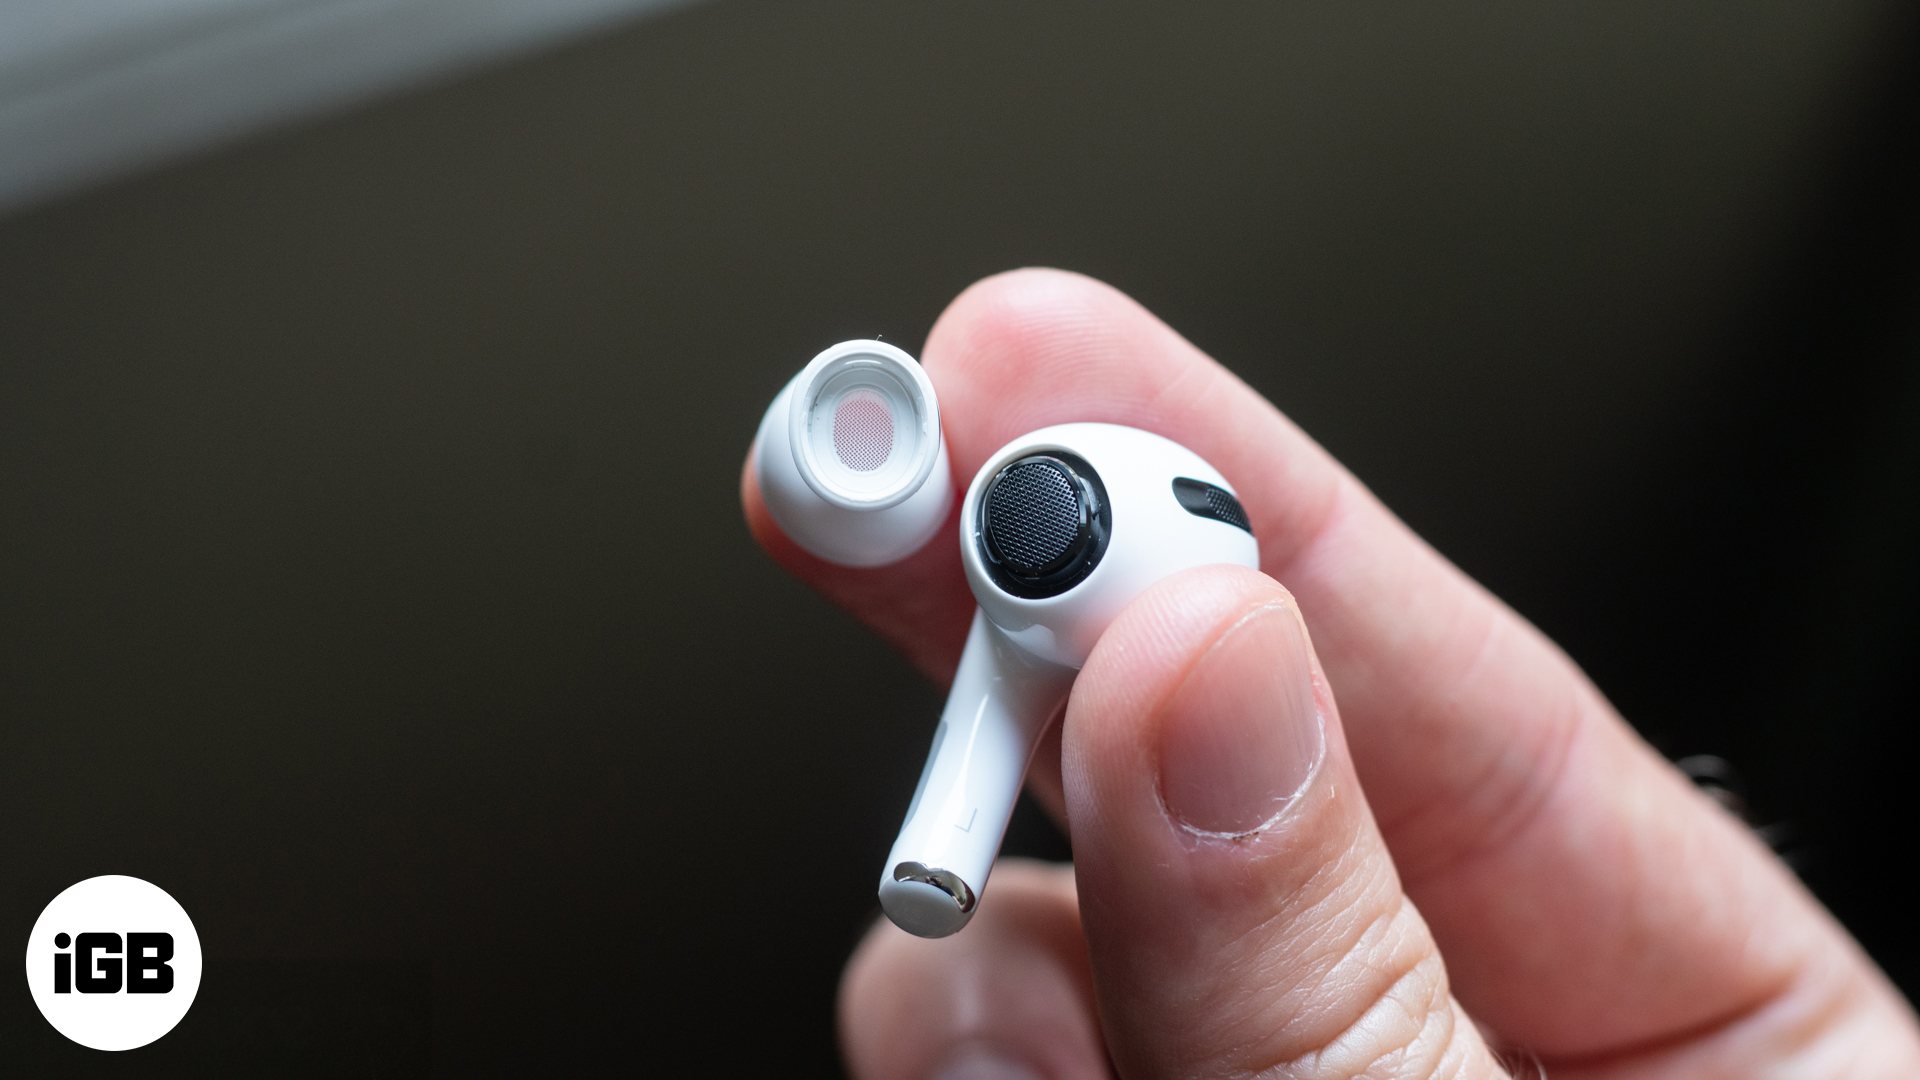
AirPods Pro ear tips are soft silicone attachments that provide a secure in-ear fit. Unlike standard AirPods, these tips offer noise isolation and improve overall sound quality by creating a better seal inside your ears.
By default, Apple includes three sizes: Small (S), Medium (M), and Large (L). The AirPods Pro 2nd generation also comes with Extra Small (XS) tips. You can check the size by unrolling the edge and looking for the marking inside.
Related: How to turn on Voice Isolation on an iPhone
Why You Should Change AirPods Pro Tips
Switching to the right tip size enhances more than just comfort. Here’s why it matters:
- Better sound and bass response
- Improved Active Noise Cancellation (ANC)
- Secure fit for workouts or long sessions
- Less fatigue or discomfort during extended wear
How to Remove AirPods Pro Tips Safely
Many users damage their tips by trying to remove them incorrectly. Follow these steps to avoid issues:
- Tightly hold the AirPod by its head.
- Gently unroll or invert the ear tip.
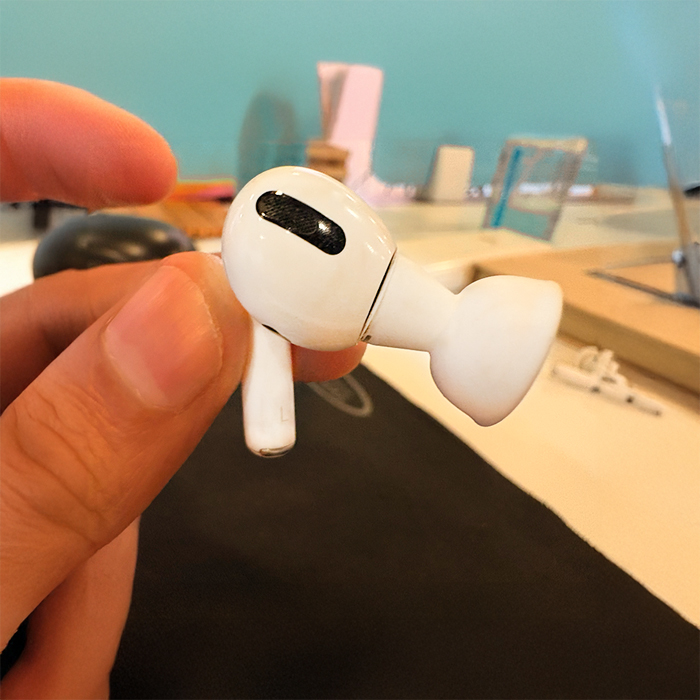
- Pinch the base of the tip with two fingers—don’t pull from the side.
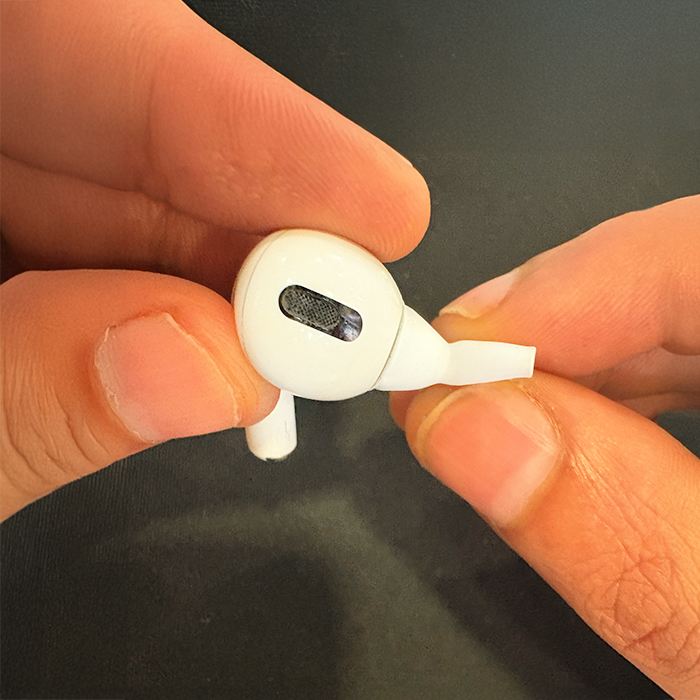
- Pull it straight off with light pressure.


AirPods Pro tips use a snap-on connector, so a little force is normal.
How to Install New AirPods Pro Tips Properly
Once removed, installing the new ear tips is easy:
Here’s how:
- Line up the oval connector on the tip with the oval edge of the AirPod.
- Push the tip in until you hear or feel a click.
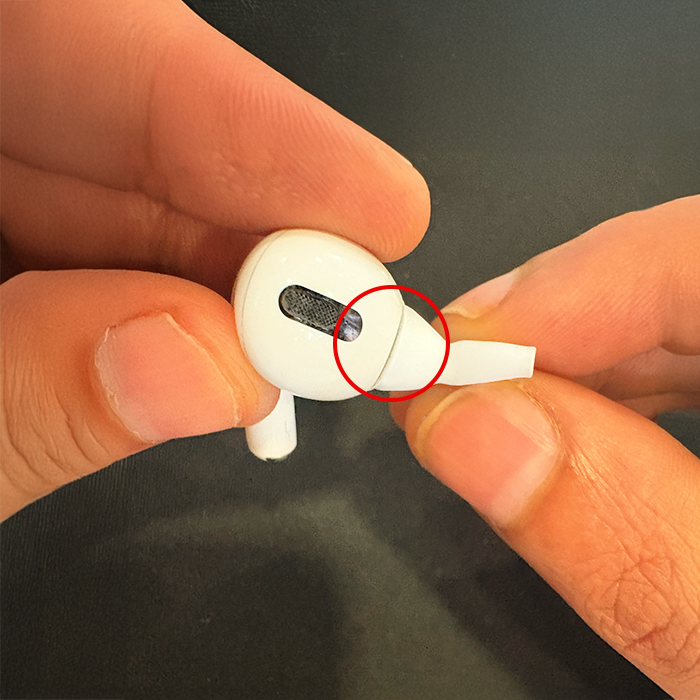

Repeat on the other AirPod and double-check for a snug fit.
How to Choose the Right Ear Tips for the Best Fit
While you may think the small-sized ear tips would suit you more than the default medium-sized ones, the case might not be true. Follow the tips below to ensure you choose the right ones and get the fit that enhances your experience:
1. Try out different ear tips
There is a reason why Apple provides different-sized ear tips with AirPods Pro. You should always try all the options before deciding which ones fit you best. This will help you get the best possible audio quality and noise cancellation from your AirPods Pro.
Simply put, if your AirPods Pro feels too loose in your ear, move a size up, and if they feel uncomfortable or hurt your ear, move a size down.
2. Use the Ear Tip Fit Test
If you can’t determine which AirPods Pro ear tips fit you the best, you can try the Apple Ear Tip Fit Test. Apple has designed this test to help you make the right decision. But before you begin, ensure your iPhone is at least up and running on iOS 13.2. If so, proceed with the Ear Tip Fit Test.
- Connect your AirPods Pro to your iPhone and wear them.
- Now, head to Settings → Bluetooth.
- Here, tap the (i) button next to your AirPods Pro name.
- Next, tap Ear Tip Fit Test and hit Continue on the subsequent screen.
- Tap the Play button to start the fit test. This will play a sound and check if the ear tips create a proper seal in your ears.
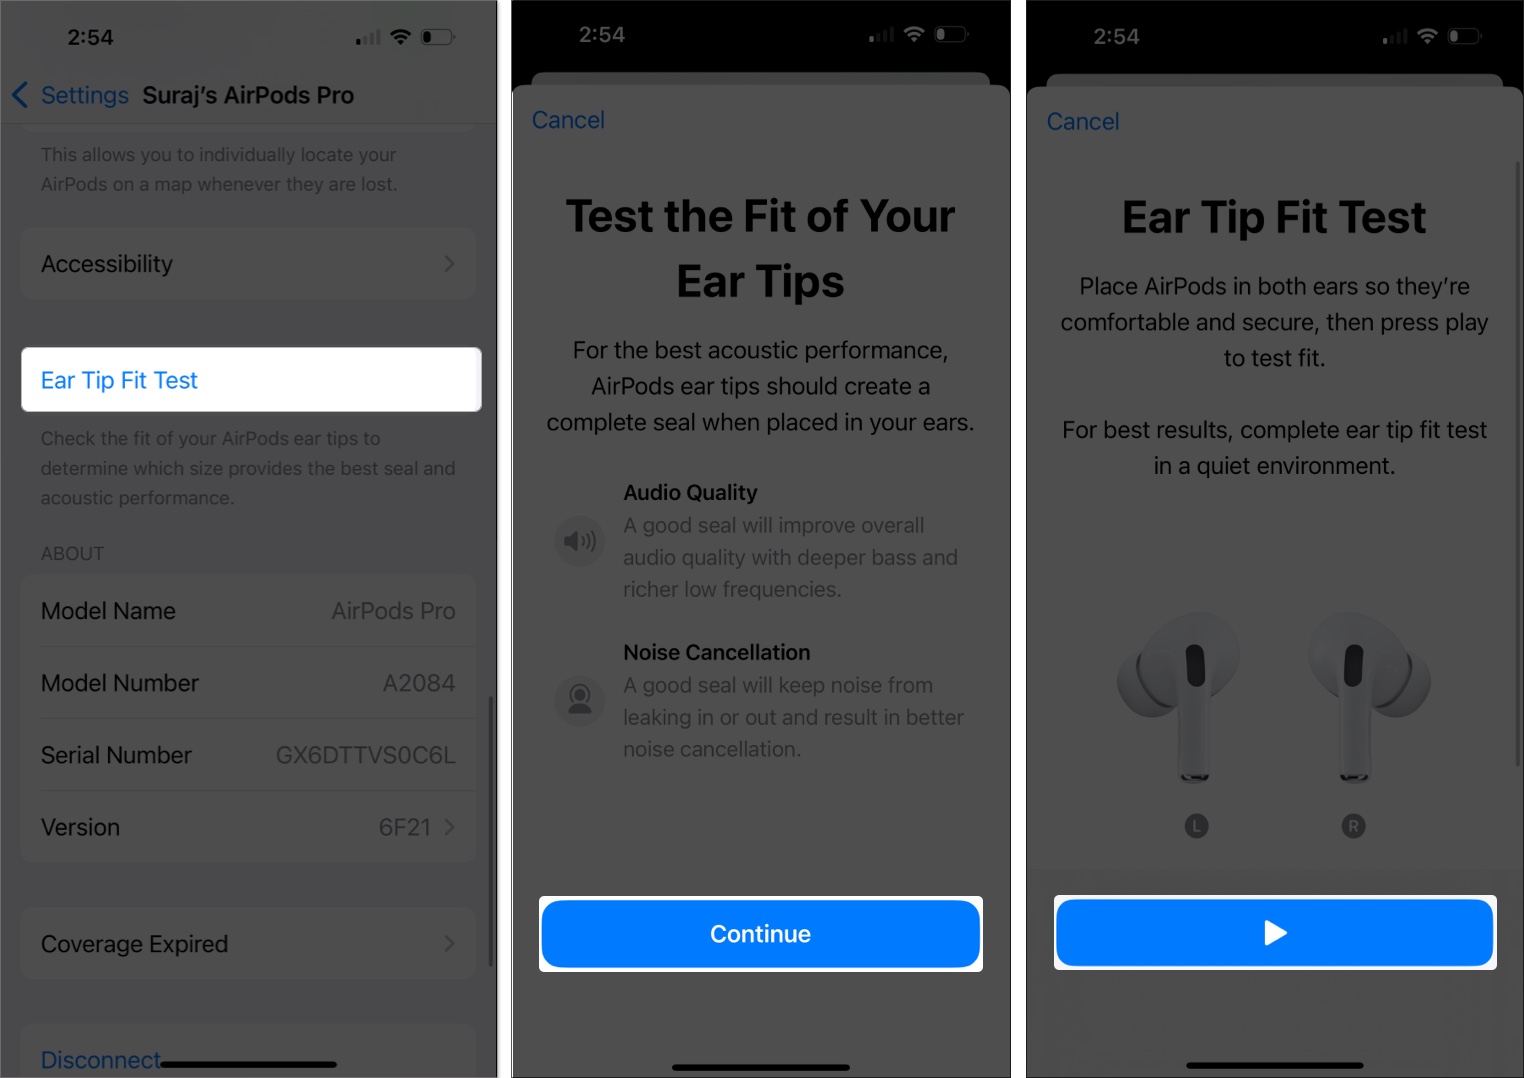
- If the results say “Good Seal,” your chosen ear tip is perfect for you! But if you see “Adjust or Try a Different Ear Tip,” it means the seal quality isn’t great, and it would be wise to switch to a different ear tip for your AirPods Pro and retake the fit test.
- Tap Done to finish.

3. Try Third-Party Foam Tips for More Comfort
If the silicone tips are uncomfortable or cause irritation, consider looking into third-party memory foam tips. These can provide a different level of comfort and noise isolation.
Common Mistakes to Avoid When Changing AirPods Pro Tips
- Don’t yank the tip off by the edge.
- Never install tips without aligning the oval connector properly.
- Avoid changing tips with dirty or wet hands.
- Always test the fit after installing new tips.
How to Clean AirPods Pro Tips
Keeping your AirPods Pro tips clean is necessary for hygiene and to get the best possible audio performance. Here’s how to keep them fresh:
- Rinse under warm water only (no soap or chemicals).
- Gently wipe dry with a soft, lint-free cloth.
- Let air dry completely before reattaching.
- Avoid sharp tools like toothpicks that can tear the silicone or damage the mesh.
Related: How to clean your AirPods and charging case
Are AirPods Pro 1st and 2nd Gen Tips Interchangeable?
Yes—both models use the same snap-on design, so you can swap them. However, Apple notes that using 1st-gen tips on 2nd-gen AirPods Pro may slightly affect ANC and Transparency Mode performance.
Where to Buy Genuine Replacement Tips
For the best fit and sound, always buy official Apple tips:
- Apple Store (online or physical)
- Authorized resellers
- Apple’s official Amazon store (look for “Ships from and sold by Apple”)
Avoid third-party listings unless clearly marked as Apple-authorized.
The Perfect Fit Starts with the Right Tips
Choosing the right AirPods Pro tips isn’t just about comfort—it impacts sound, battery efficiency, and long-term wearability. By following these steps and tips, you’ll get more from your AirPods Pro without frustration or damage.
Have questions about fit or replacements? Drop them in the comments, and I’ll help you out.