macOS has plenty of built-in fonts, but you might want to install more to change the look of texts for your projects or designs. Fortunately, the Font Book app on Mac makes it easy to install both Apple and third-party fonts. Read on to learn how to install new fonts on a Mac, manage them, and troubleshoot fonts when they aren’t working.
Where to find fonts for Mac?
Aside from the fonts available for your Mac through Font Book, you can find more—mostly free—online. Here are some popular third-party platforms worth checking out:
Note:
How to install fonts on Mac
You can either install fonts on your Mac using the Font Book app or install them manually if you downloaded them from third-party sources. Let’s walk you through both methods below.
Install fonts using Font Book
The easiest way to get cool new fonts on your Mac is to install them via Font Book. Here are the steps you need to follow:
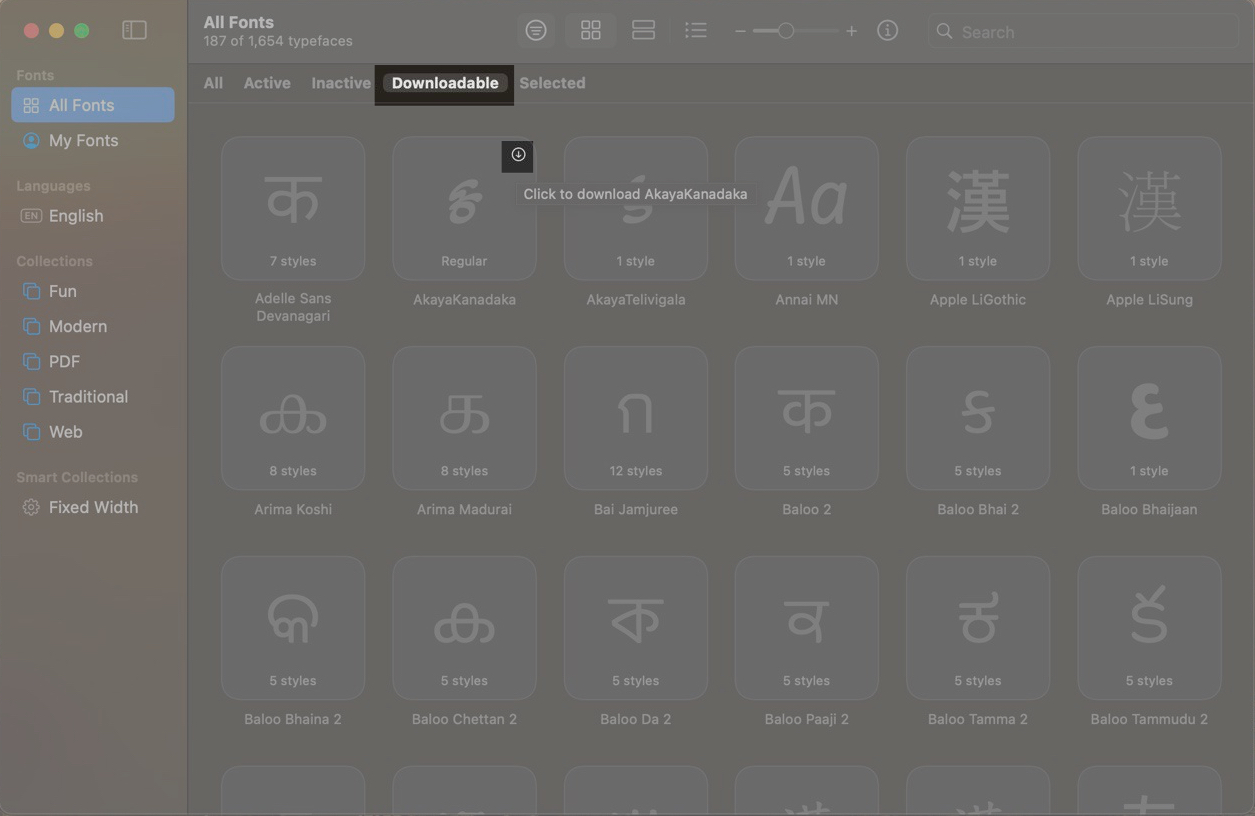
- Launch the Font Book app on your Mac.
- Switch to the Downloadable tab to browse available fonts. Or use the search box in the top-right corner to look for a specific font.
- Click the download icon (a downward arrow inside a circle) in the top-right corner of a font card to install it. You can also change the view of the downloadable fonts using the menu at the top of the Font Book window to preview each one before downloading.
Once you download the font, it will be available in your active user account across all apps that support it.
Add fonts on a Mac manually
Due to limited fonts on Font Book, you may need to download fonts from third-party sources, like the ones mentioned above. Here’s how to go about it:
- Visit a third-party font source like DaFont in your browser and download the font you want to your Mac.
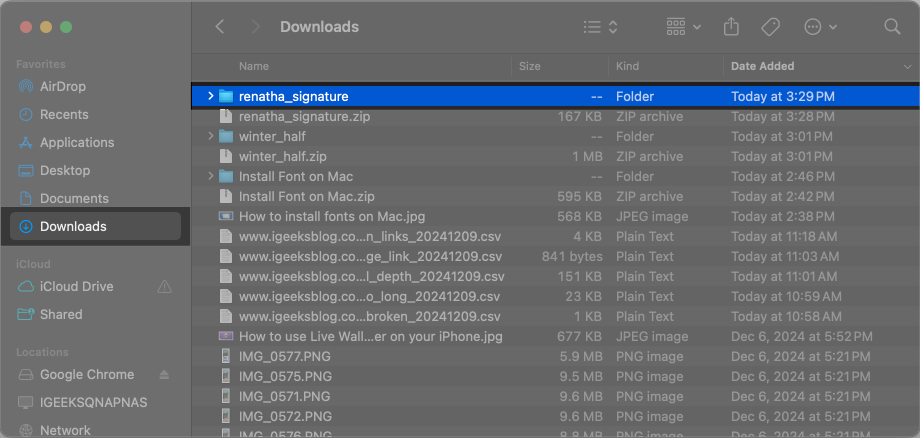
- Head to the Finder app and select the Downloads folder from the sidebar or from the Go menu in the menu bar at the top.
- Find the font you just downloaded. Font files are typically in .zip format, so unzip the file and open the font folder.
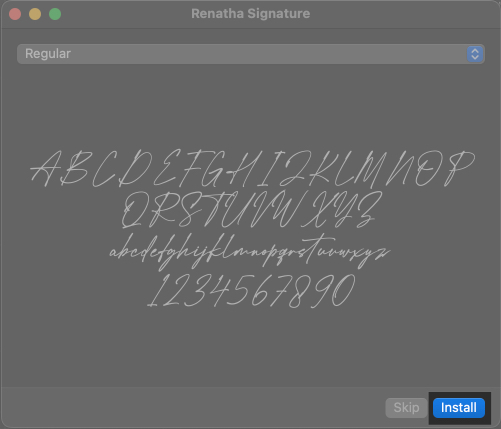
- Double-click the font file, which will usually have a .OTF or .TTF extension, among others, mentioned earlier.

- A dialog box will appear showing a preview of the font and prompting you to confirm the installation. Click the Install button to add the font to your Mac.
The Font Book app will now open, showing the installed font, which you can use across supported apps on your Mac.
Other methods to manually install third-party fonts on your Mac include:
- Dragging the font file from Finder’s Downloads folder directly into the Font Book app.
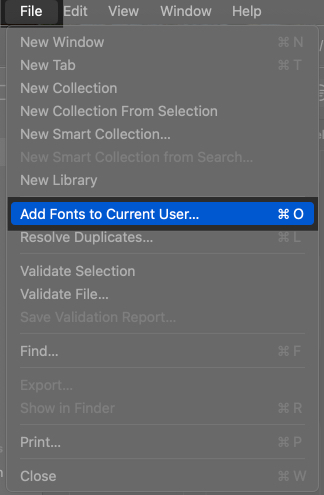
- In Font Book, click File in the menu bar and select Add Fonts to Current User. Then, select the font you want to install and follow the on-screen prompts.
How to use installed fonts on Mac
The method for using installed fonts on a Mac can vary for different apps. For example, Pages offers a native way to access fonts within the app, which is different from how designers use fonts in Photoshop.
However, a general method to use an installed font—though it may not work in all apps—is as follows:
- With the app open, press Command+T. Or from the menu bar, click Format > Show Fonts or Format > Font > Show Fonts, depending on the app.
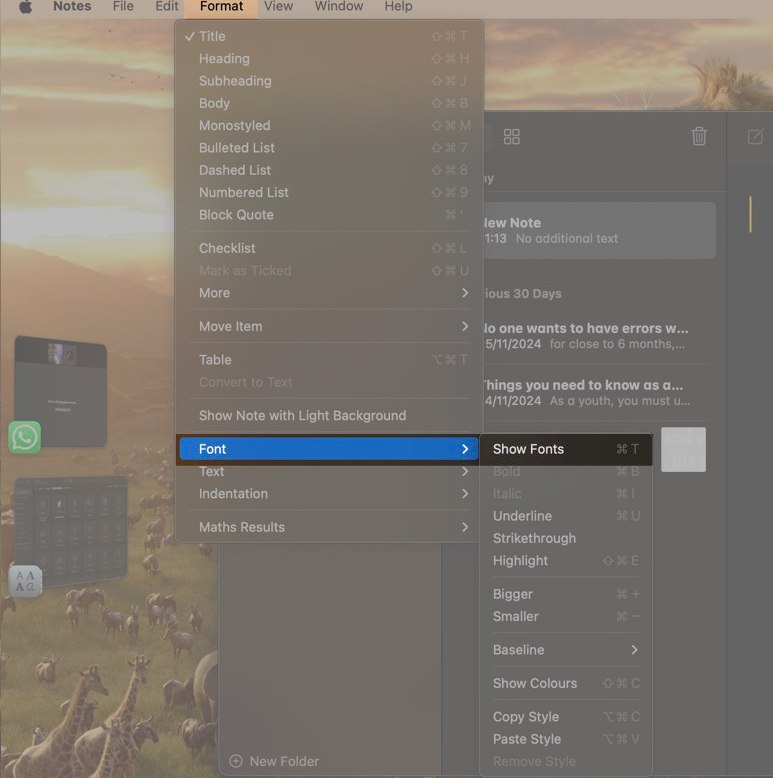
- When this opens a font window, select the text you want to change and choose your desired font.
Certain fonts you install on your Mac may be too small to read in their default size. Thankfully, you can change the font size in Finder for such fonts to improve their readability.
How to manage your Mac fonts
If you no longer need a font and want to keep your font list tidy, you can deactivate or delete it in the Font Book app, as shown below.
Deactivate a font:
- Open Font Book on your Mac.
- Select the font you want to deactivate.
- Click Edit in the menu bar and choose Deactivate, or you can simply right-click on the installed font and select Deactivate.
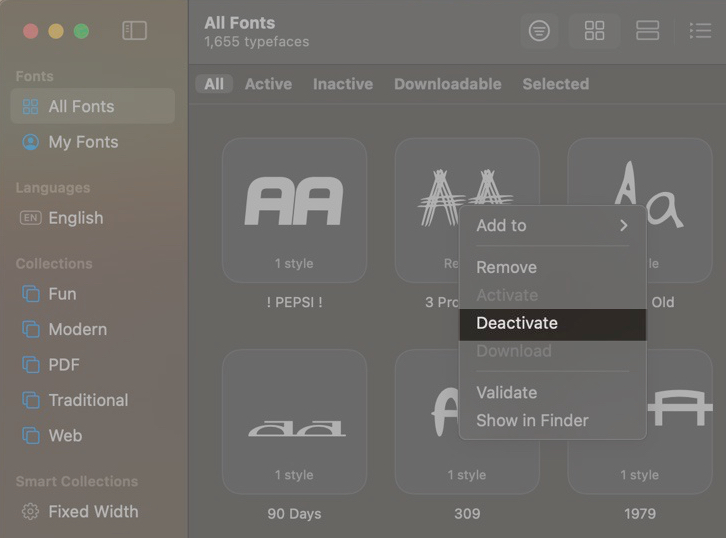
- Confirm your action by clicking Deactivate Font.
You can reactivate the font whenever you need it by following the above steps. Just select Activate instead of Deactivate from the Edit menu.
Delete a font:
- Open Font Book.
- Select the font you want to delete.
- Press the Delete key to delete the font.
- Click Remove Fonts or Remove Non-System Fonts to confirm the action.
What to do if the installed fonts don’t show up on Mac?
If a font you’ve just added to your Mac isn’t showing up in the apps you need it, here are some troubleshooting steps you can try:
- Restart your applications: Sometimes, simply closing and reopening the app you need the font in can help refresh it and make the font appear.
- Restart your Mac: If the font is still not showing up, try restarting your Mac. This will give your device a fresh start and help the font be recognized across all your apps.
- Check the font format: Review the font formats that Mac supports, which we’ve mentioned earlier. If the format of the font you’re trying to install isn’t supported, it won’t work. Download a compatible format and add it to your Mac using the steps covered above.
- Validate the font: If you’re having trouble with a font, you can validate it using Font Book. Open the Font Book app, select the font, click File in the menu bar, and then choose Validate Selection. A green icon next to the font indicates it passed the validation, a yellow icon suggests a warning, and a red icon means it failed and won’t work on your system. You can remove a failed font by ticking the box next to it and selecting Remove Ticked.
- Redownload and reinstall the font: If none of the above solutions work, try deleting the font (using the steps listed above) and then redownloading and reinstalling it on your Mac.
Signing off…
By following the simple steps in this article, you can easily install new fonts on your Mac whenever needed. Remember, when you install fonts on your Mac, they are typically added to your current user account. If you want the fonts to be available to all users, you can adjust this in the Font Book installation settings.
You can also install custom fonts on an iPhone or iPad if you’re into personalization.
Also read: