You can do much more with the Apple Notes app than many people think. Of course, it is a terrific note-taking tool, but you can also create lists and outlines using styles and headings. To help you take your next note to a new level, here’s how to change the font style in Notes on iPhone, iPad, and Mac.
How to change font style in Notes on iPhone and iPad
You can style your font with titles, headings, and lists, as well as format it with options like bold and italic in Notes on iPhone and iPad. Additionally, you can use the Quick Styles gesture to make fast changes.
Format titles, headings, subheadings, and body text
- Launch the Notes app on your iPhone → open an existing note (or create a new one).
- Select the text you want to adjust or make sure that your cursor is on the same line.
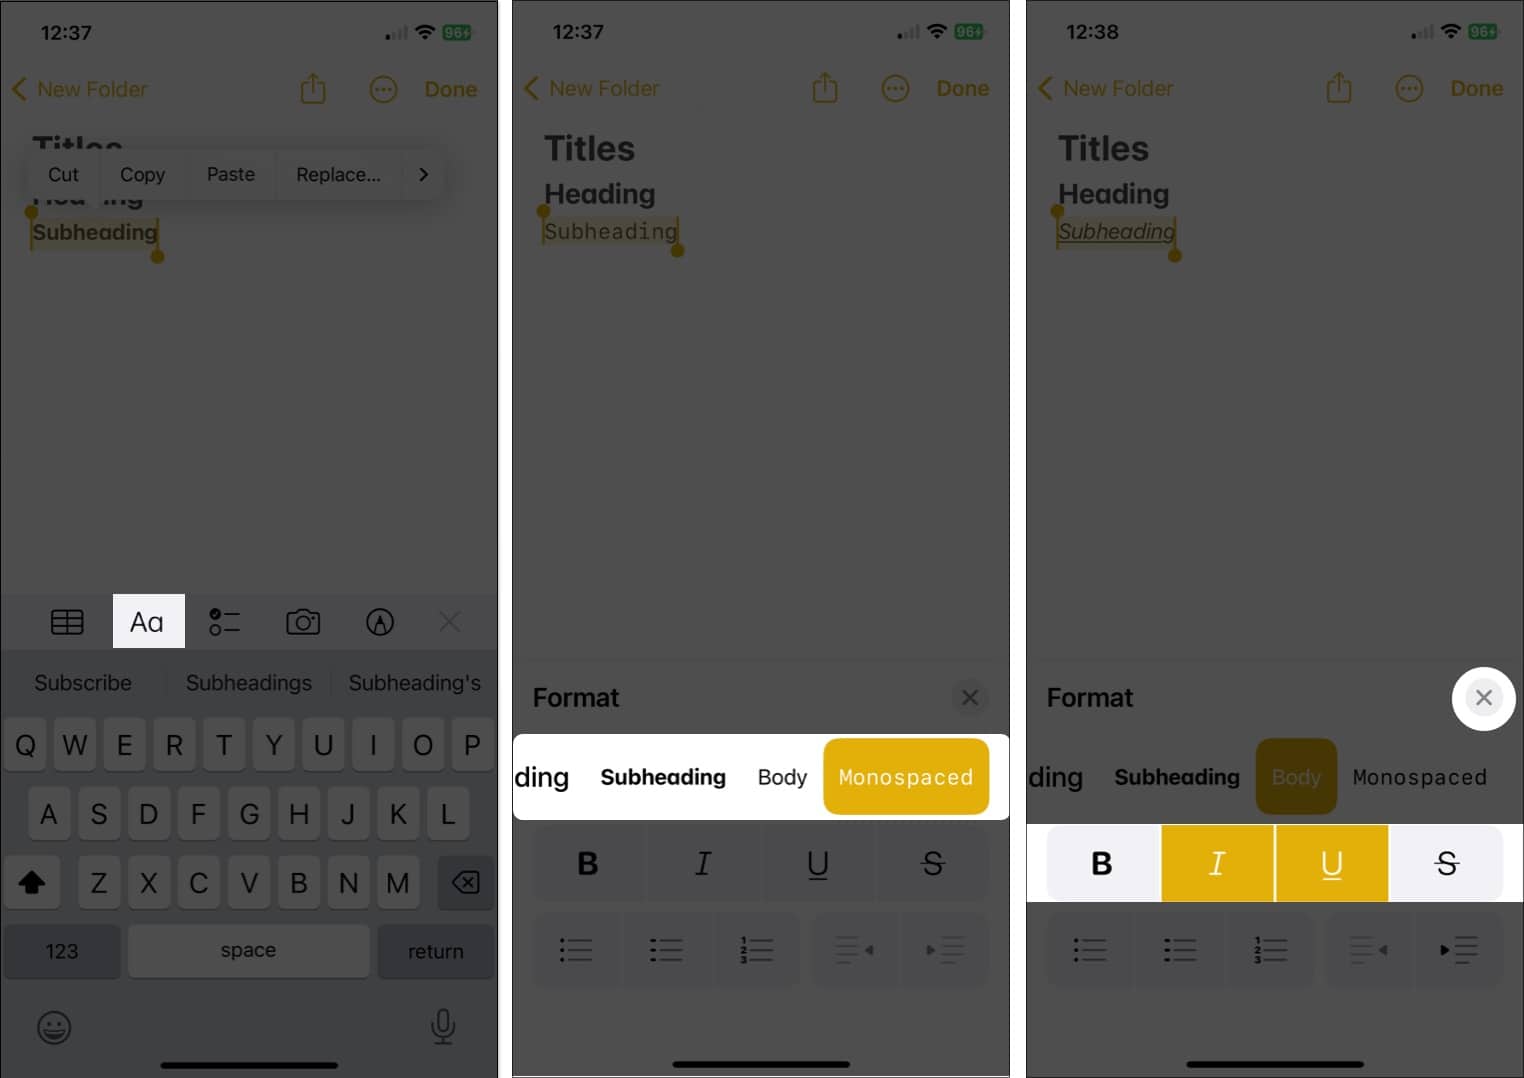
- Tap the Paragraph Styles (Aa) button in the toolbar at the bottom, which is above your keyboard.
- Choose from Title, Heading, or Subheading. You’ll see this style only for the text on that line. When you press Return, you’ll go back to the default Body text.
- For the body text, you can select Body or Monospaced. Also, like on macOS, this style then remains as you continue to type your note and press Return.
- To apply bold, italic, underline, or strikethrough, make sure to select the text first, then pick one of these options in the Format window.
- When you are done with the Format window, use the X on the top right to close it.
Format lists
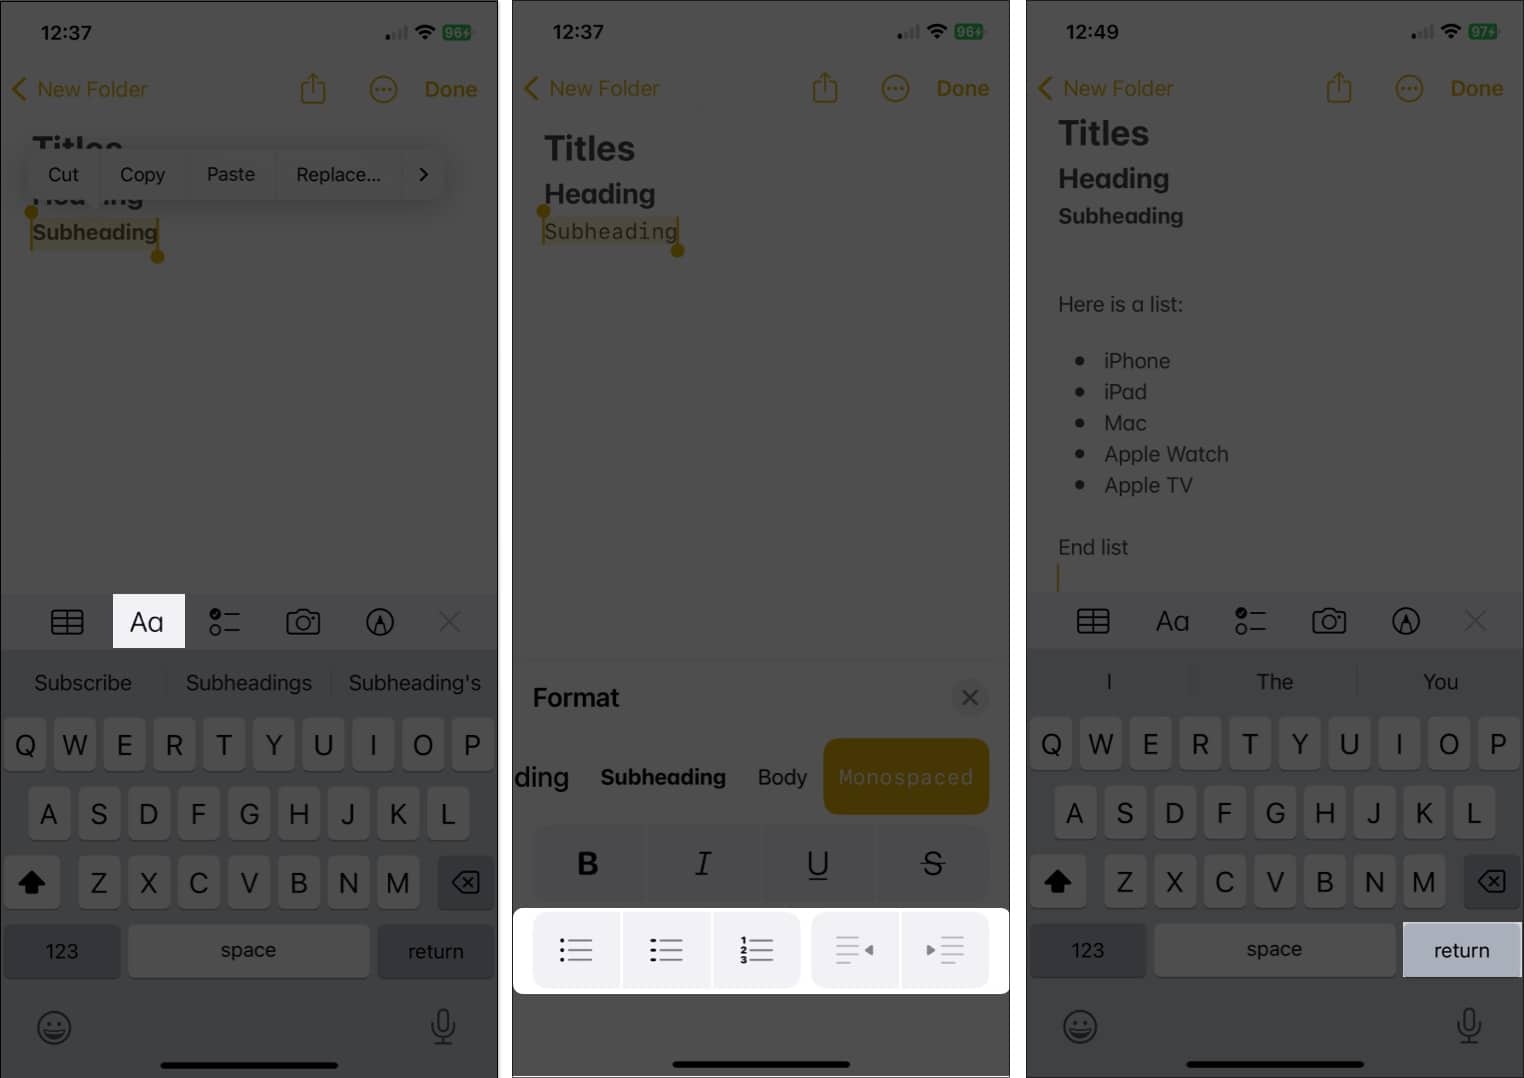
- To change existing text, select it. Otherwise, you can simply start a new list and add your items as you go.
- Tap the Paragraph Styles button in the toolbar → Select the Bulleted, Dashed, or Numbered list button on the bottom left of the Format window.
- Use the X to close the Format window and type your list items by tapping Return after each one.
- To end a list and stop the list formatting → tap Return twice.
Change the font format with Quick Styles
One lesser-known way to change font formats in Notes on your mobile device is using Quick Styles. You’ll receive the same options like titles, headings, body text, and lists, but you can apply them quicker.
- Select the text you want to change.
- Then long-press (tap and hold) the Paragraph Styles (Aa) icon in the toolbar.
- Slide your finger to the style you want to use and release.
You’ll immediately see that style applied to your text.
Change the default font style for new notes
While you cannot change the default font size for new notes on iPhone and iPad, you can pick a different Paragraph Style, like on Mac.
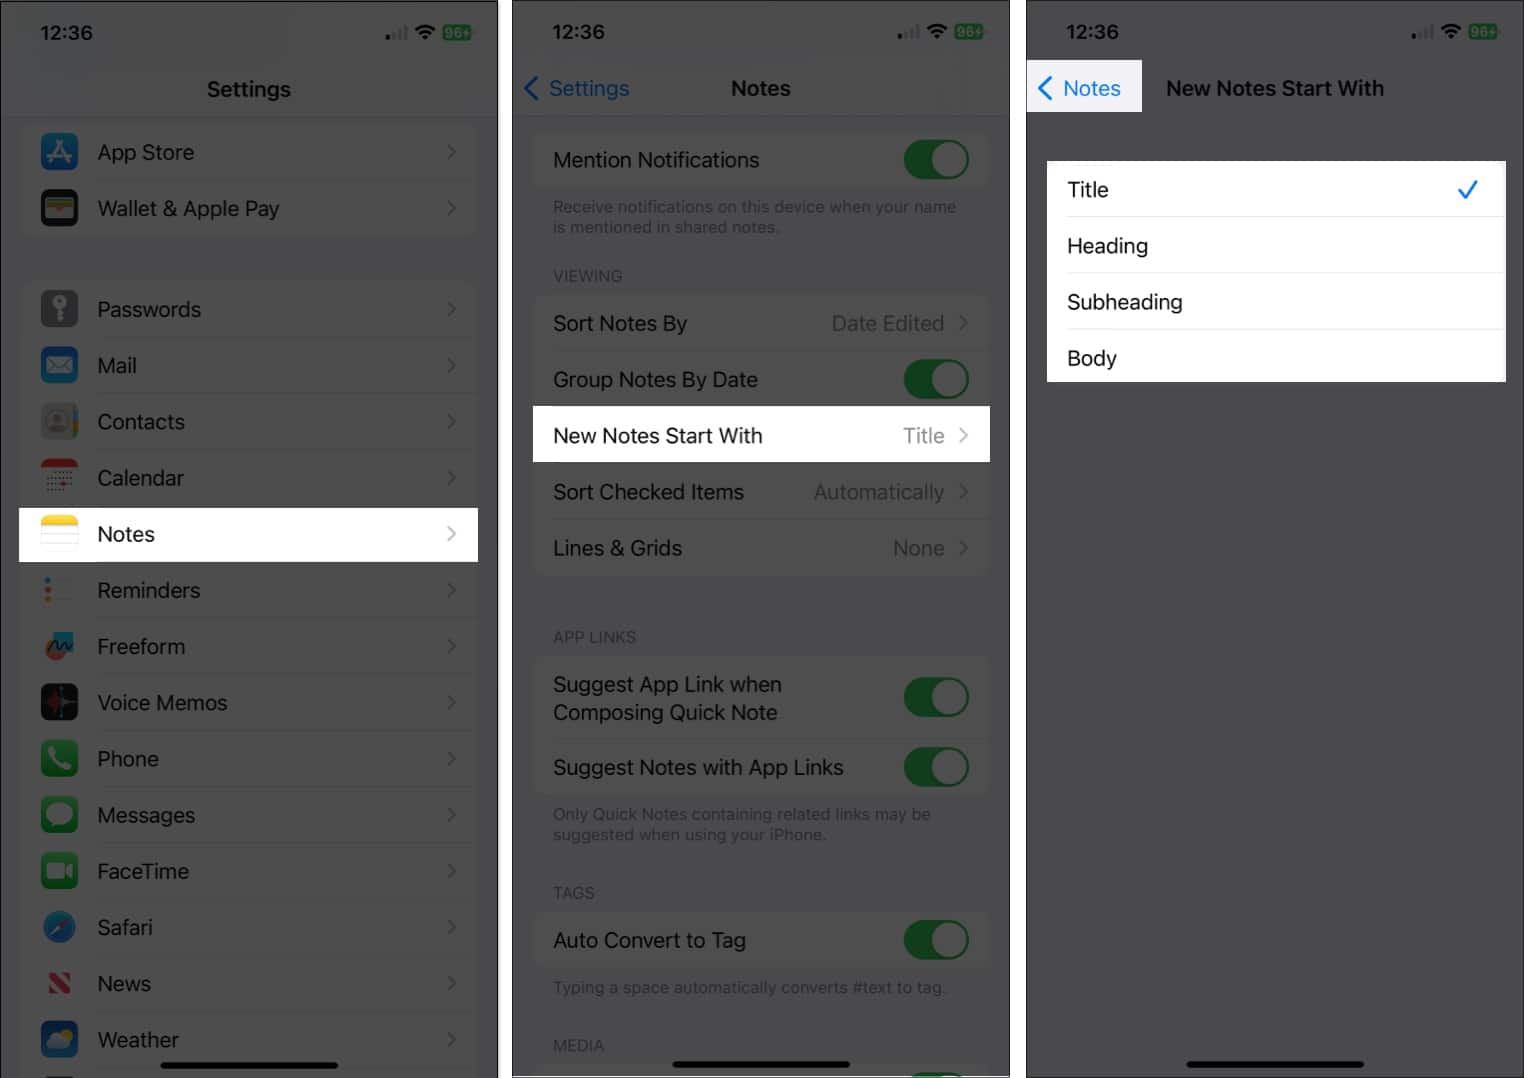
- Open the Settings app → Choose Notes.
- Move to the Viewing section and select New Notes Start With.
- Pick Title, Heading, Subheading, or Body.
- Tap the arrow on the top left to exit the settings and save your change.
Because you have more options for font formatting in Notes on macOS than you do on iOS and iPadOS, let’s get into it.
How to change the font style in Notes on Mac
From titles and headings to body text to lists, you can make several changes to the font in Notes on Mac. Plus, you have a few extras that can help you format text exactly as you please.
Format titles, headings, and subheadings
You can format existing text or set up the style before you type your text, whichever works best for you.
- If you already have the text, select it by dragging your cursor through it.
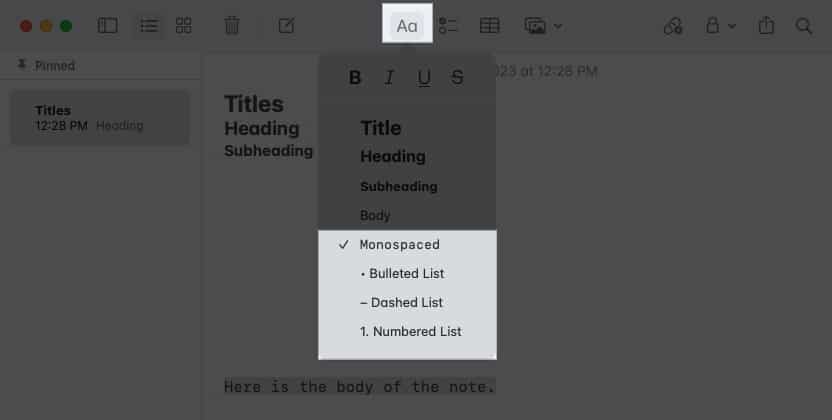
- Click the Paragraph Style (Aa) button in the Notes toolbar and choose Title, Heading, or Subheading.
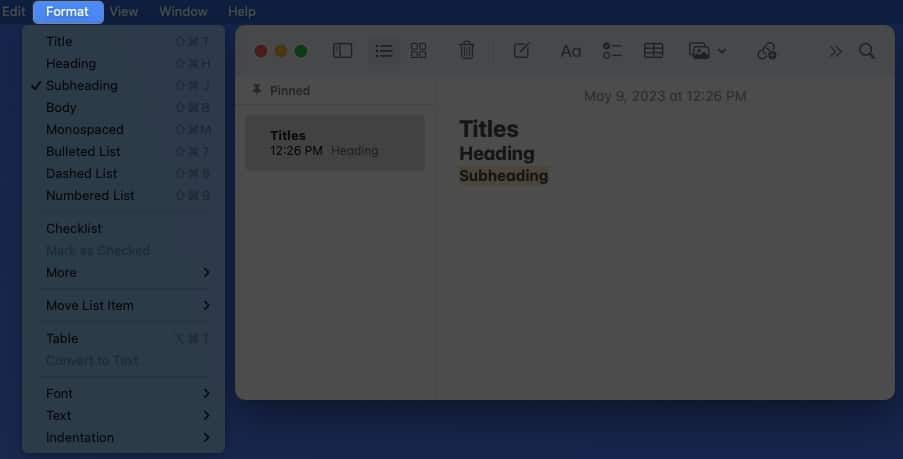
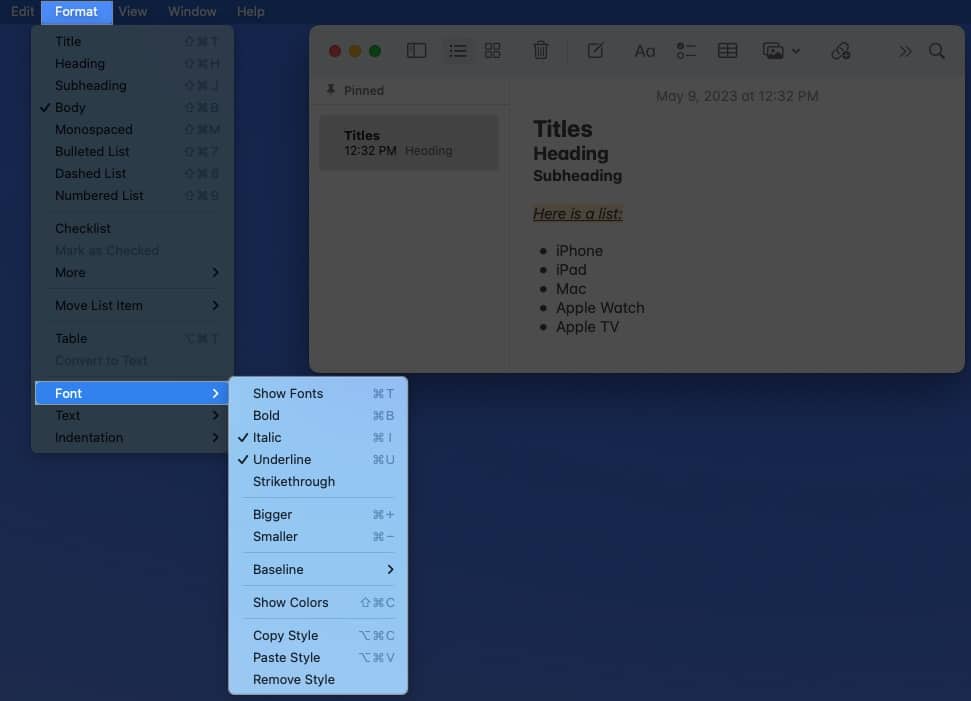
- Alternatively, select Format in the menu bar and pick an option from there.
- After you apply one of these formats and press Return, you’ll go back to the default Body font unless you manually change it.
Format body text and lists
You’ll notice that when you open the Paragraph Styles menu, you can also choose other options.
- You can pick Body or Monospaced for the font style in the main part of your note. Unlike titles, headings, and subheadings, your note continues to use this format as you press Return throughout your note unless you change it.
- You can also format your note with a Bulleted, Dashed, or Numbered list by picking one of those styles. The default font for lists is the Body style.
- When you choose a list style, enter the list item, and press Return, you’ll see another dot, dash, or number ready for your next item.
- To end a list and stop the list formatting, press Return twice.
Apply bold, italic, underline, and strikethrough
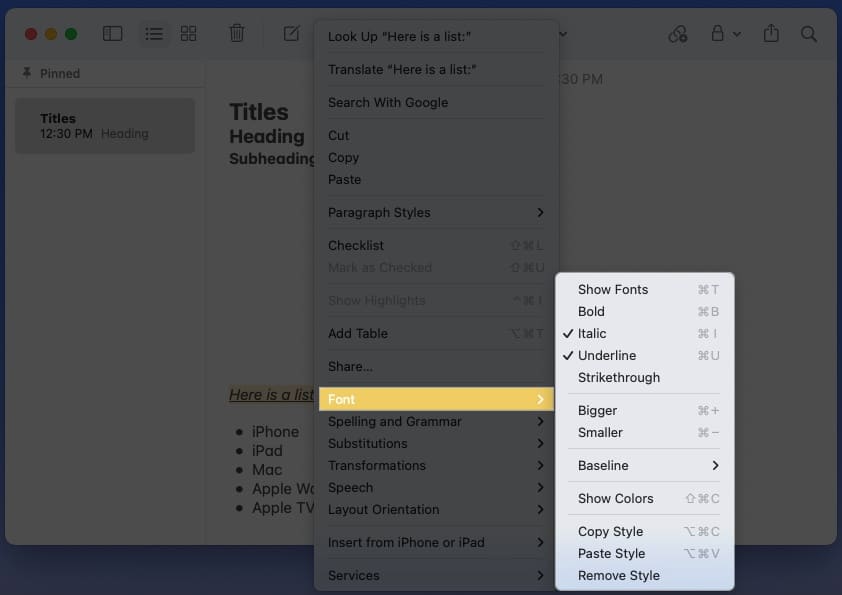
Along with the above styles, you can make your text pop by applying bold, italic, underline, or strikethrough.
Select the text and do one of the following to format it:
- Click the Paragraph Style button in the toolbar and choose an option at the top of the pop-up window.
- Right-click, move to Font, and pick an option at the top of the pop-out menu.
- Select Format in the menu bar, move to Font, and choose the format.
Change the default style and font size for new notes
The default system fonts for the Apple platform are San Francisco (SF) and New York (NY). And while you may find these fonts easy to read, which is Apple’s intent, you may simply prefer something else.
As of this writing, you can’t change the default font style in Apple Notes. However, you can change the default size as well as the Paragraph Style for starting new notes.
- Open the Notes app on your Mac.
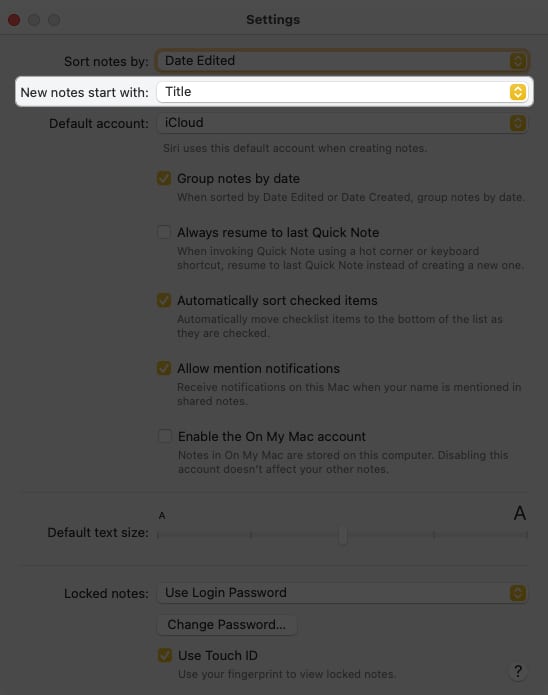
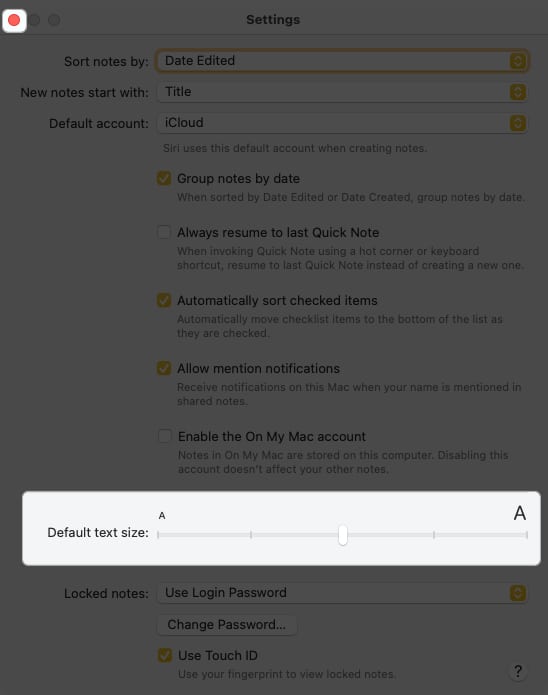
- Select Notes → Settings in the menu bar.
- Open the New notes start with drop-down box if you want to change the default style, which is currently Title.
- You can pick Heading, Subheading, or Body.
- Use the Default text size slider near the bottom to adjust the font size.
- When you finish, use the X on the top left to close the Settings.
With every new note you create moving forward, you’ll see your selected paragraph style and font size by default. If you want to change that style, just use the steps above.
Change the font style and color in a single note
While you cannot change the default font style and color, you can pick a different one for text in individual notes. This lets you use a particular style or color for an entire note or just certain text.
- Select the text you want to format differently. For all text in a note, use the keyboard shortcut Command (⌘)+ A.
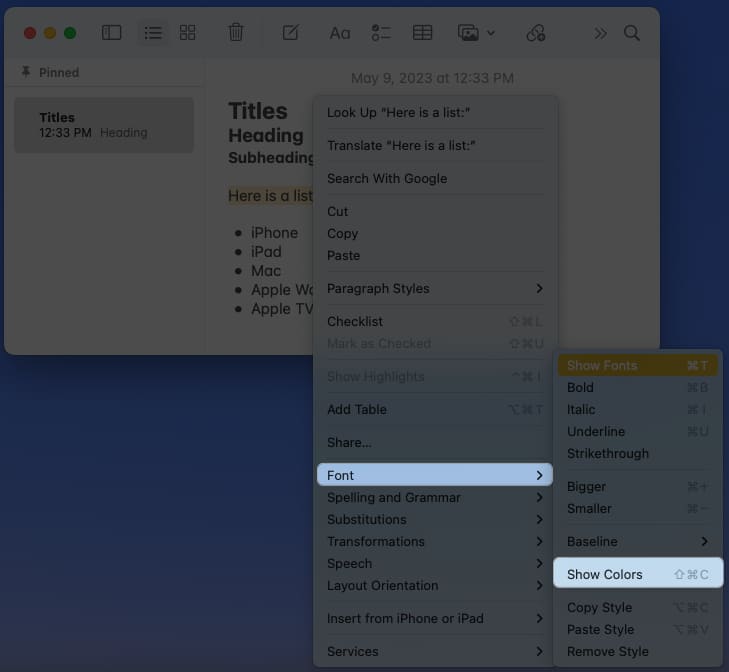
- Then, right-click, move down to Font in the shortcut menu, and do one of the following:
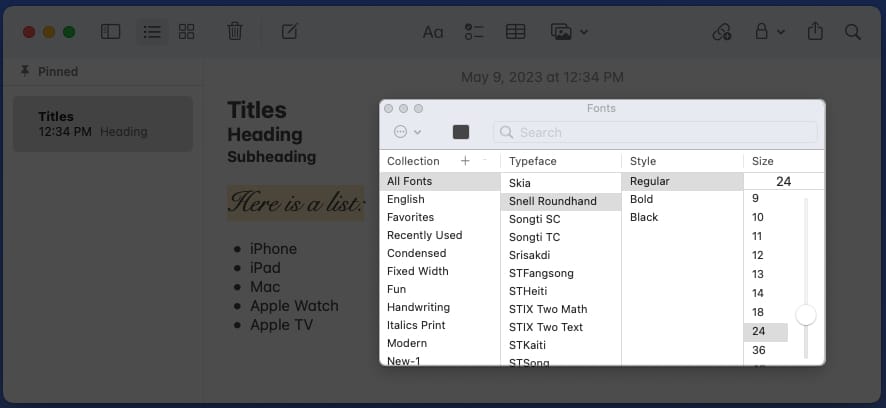
- Choose Show Fonts to change the style, format, size, and color. You’ll see the Fonts window appear and can choose from the various options. You’ll see your font update immediately.
- Choose Show Colors to only change the color of the font.
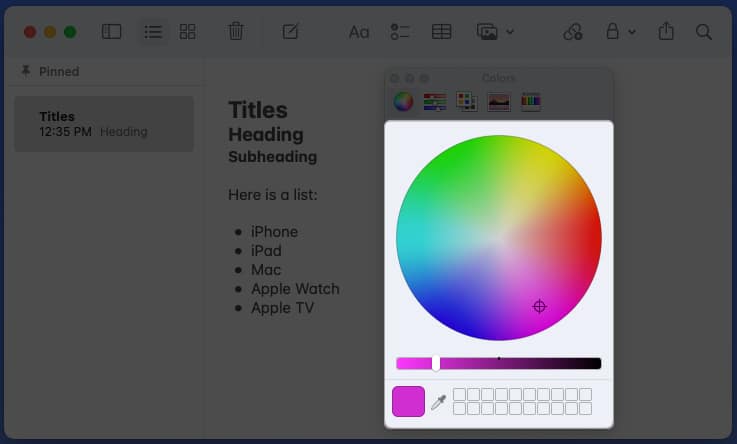
- Use the Color Wheel, Color Sliders, Color Palettes, Image Palettes, or Pencils to pick the color you want to use. Again, you’ll see your font update right away.
- Choose Show Fonts to change the style, format, size, and color. You’ll see the Fonts window appear and can choose from the various options. You’ll see your font update immediately.
Create better notes with fonts and styles!
With a few simple changes, you can format the font in the Notes app to make it stand out, easier to read, or more attractive. Each style or format takes little time but can make a big difference when reading or sharing your notes.
Will you try out a new style or format for Notes? Do you think there’s a font or format feature that’s missing? Let us know!
Read more:





Leave a Reply