- What the iMessage error means: The alert “iMessage needs to be enabled to send this message” usually appears due to poor connectivity, iOS bugs, or Apple ID sync issues.
- Check iMessage activation in Settings: Go to Settings → Messages and make sure iMessage is turned on; if activation is pending, restart your device and try again.
- Fix temporary app glitches: Force quit and reopen the Messages app to refresh its connection and clear short-term errors affecting message delivery.
- Confirm Apple’s iMessage service status: Visit Apple’s System Status page to verify if iMessage servers are down before troubleshooting further.
- Resolve network and account issues: Toggle Airplane Mode, restart your iPhone, delete failed texts, sign out and back into your Apple ID, or reset network settings if the problem persists.
iMessage usually works like a charm—fast, seamless, and smart. But sometimes, you might see an error pop up saying, “iMessage needs to be enabled to send this message.” This is especially annoying when you’re mid-conversation or just trying to send a text with emojis or effects.
This issue can occur even if you think iMessage is turned on. Don’t worry! In this guide, I’ll walk you through 10 proven ways to fix this error on your iPhone and get iMessage working again.
Why Am I Seeing “iMessage Needs to Be Enabled”?
Several issues can lead to iMessage being disabled or malfunctioning. Here are the most common culprits:
- Unstable internet: A weak Wi-Fi or mobile data signal may disrupt iMessage.
- iOS bugs: Temporary software glitches can turn off iMessage.
- Outdated iOS: Not updating your iPhone can cause compatibility issues.
- Accidental setting changes: You might have unknowingly toggled iMessage off.
- Apple ID problems: If there’s an issue with your Apple ID, iMessage could stop working.
- Activation failure: If your number wasn’t properly activated for iMessage.
- Carrier settings update: Carrier-related changes can also break iMessage.
- Parental controls or restrictions: These settings may interfere with messaging.
- Hardware issues: Rare, but possible if your iPhone is damaged.
10 Easy Ways to Resolve “iMessage Needs to Be Enabled”
Here are some proven solutions that can help you resolve this error and get iMessage working again.
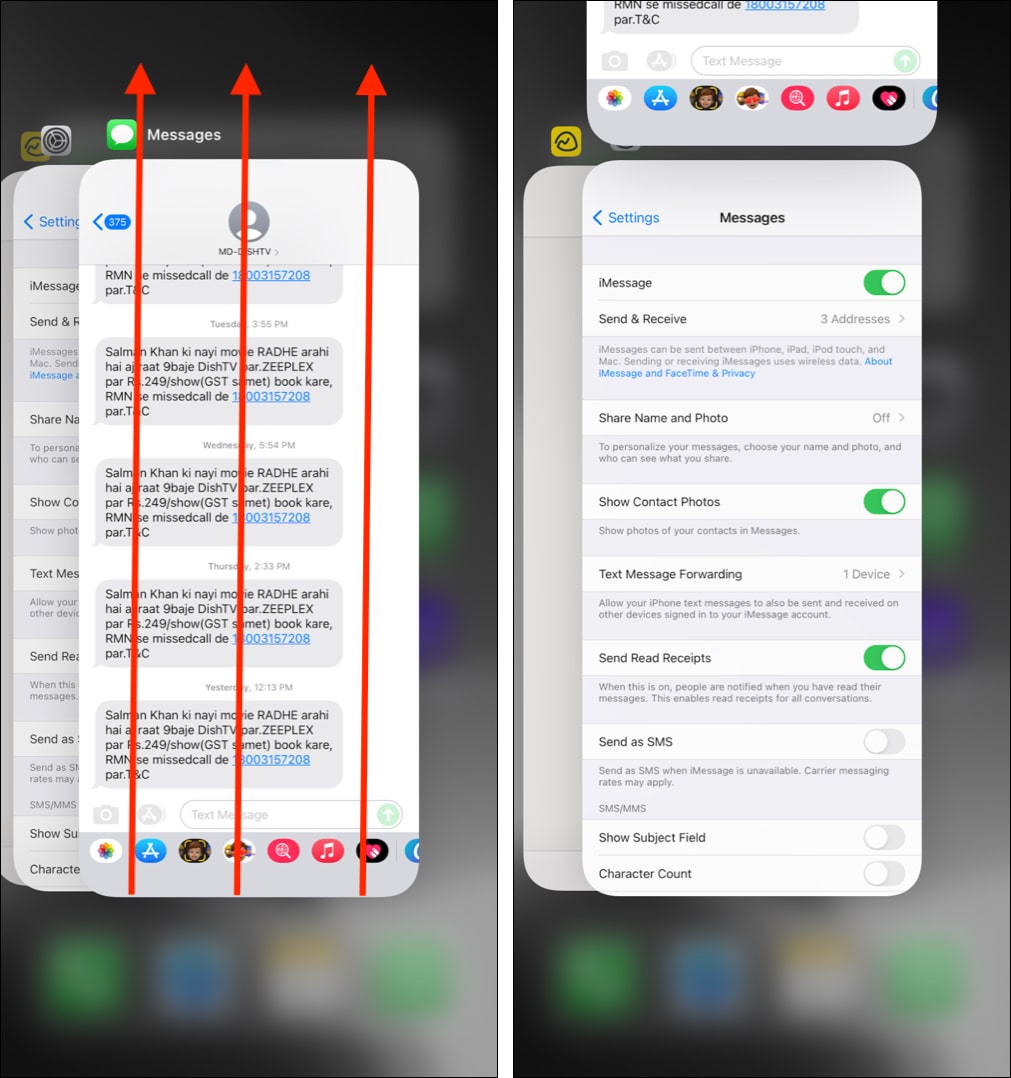
1. Make Sure iMessage is Turned On
- Open Settings → Messages.
- Toggle on iMessage (the switch should be green).
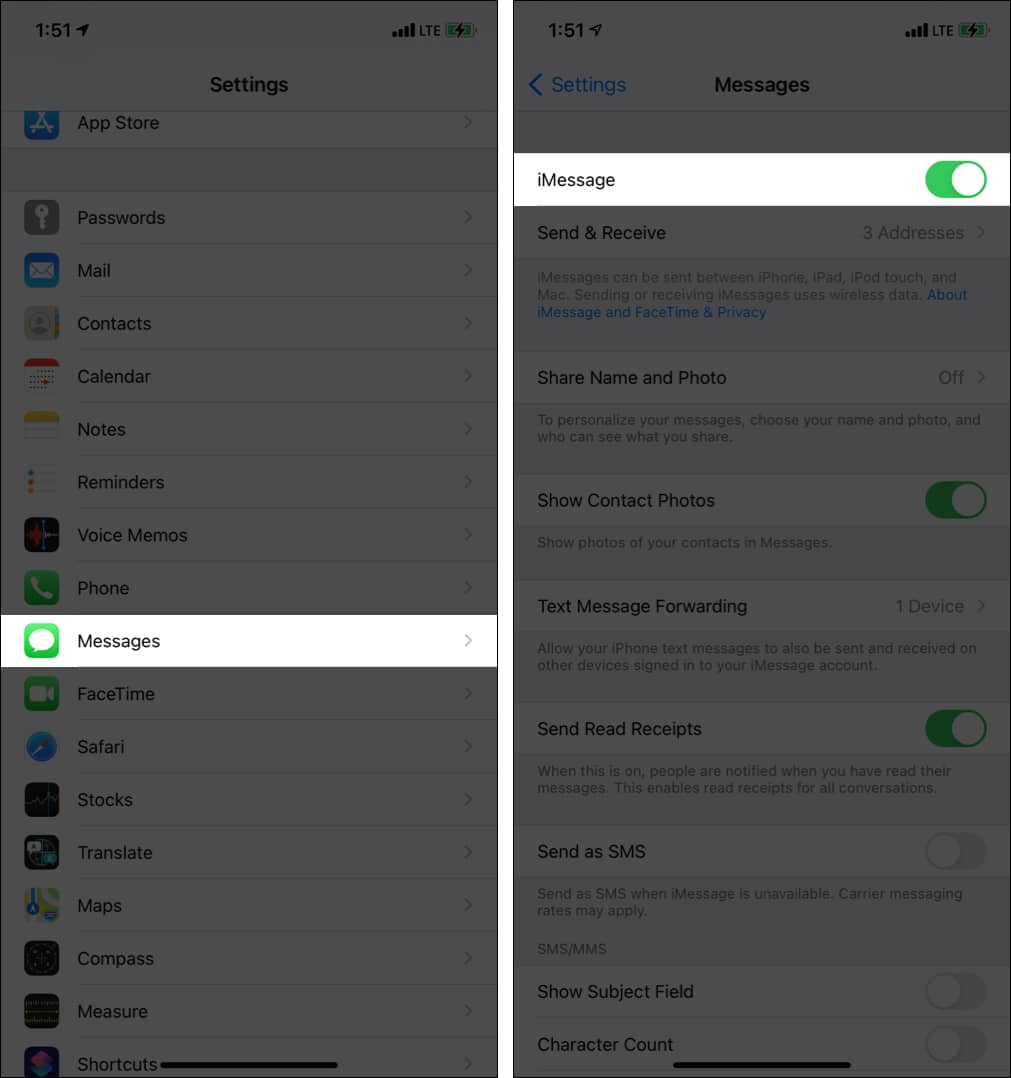
If you see “Waiting for activation,” give it a few minutes or try restarting your iPhone.
2. Force Quit the Messages App
Sometimes, the app just needs a fresh start.
- Open the App Switcher.
- Swipe up on the Messages app to close it.
- Reopen after 15 seconds and try sending the message again.
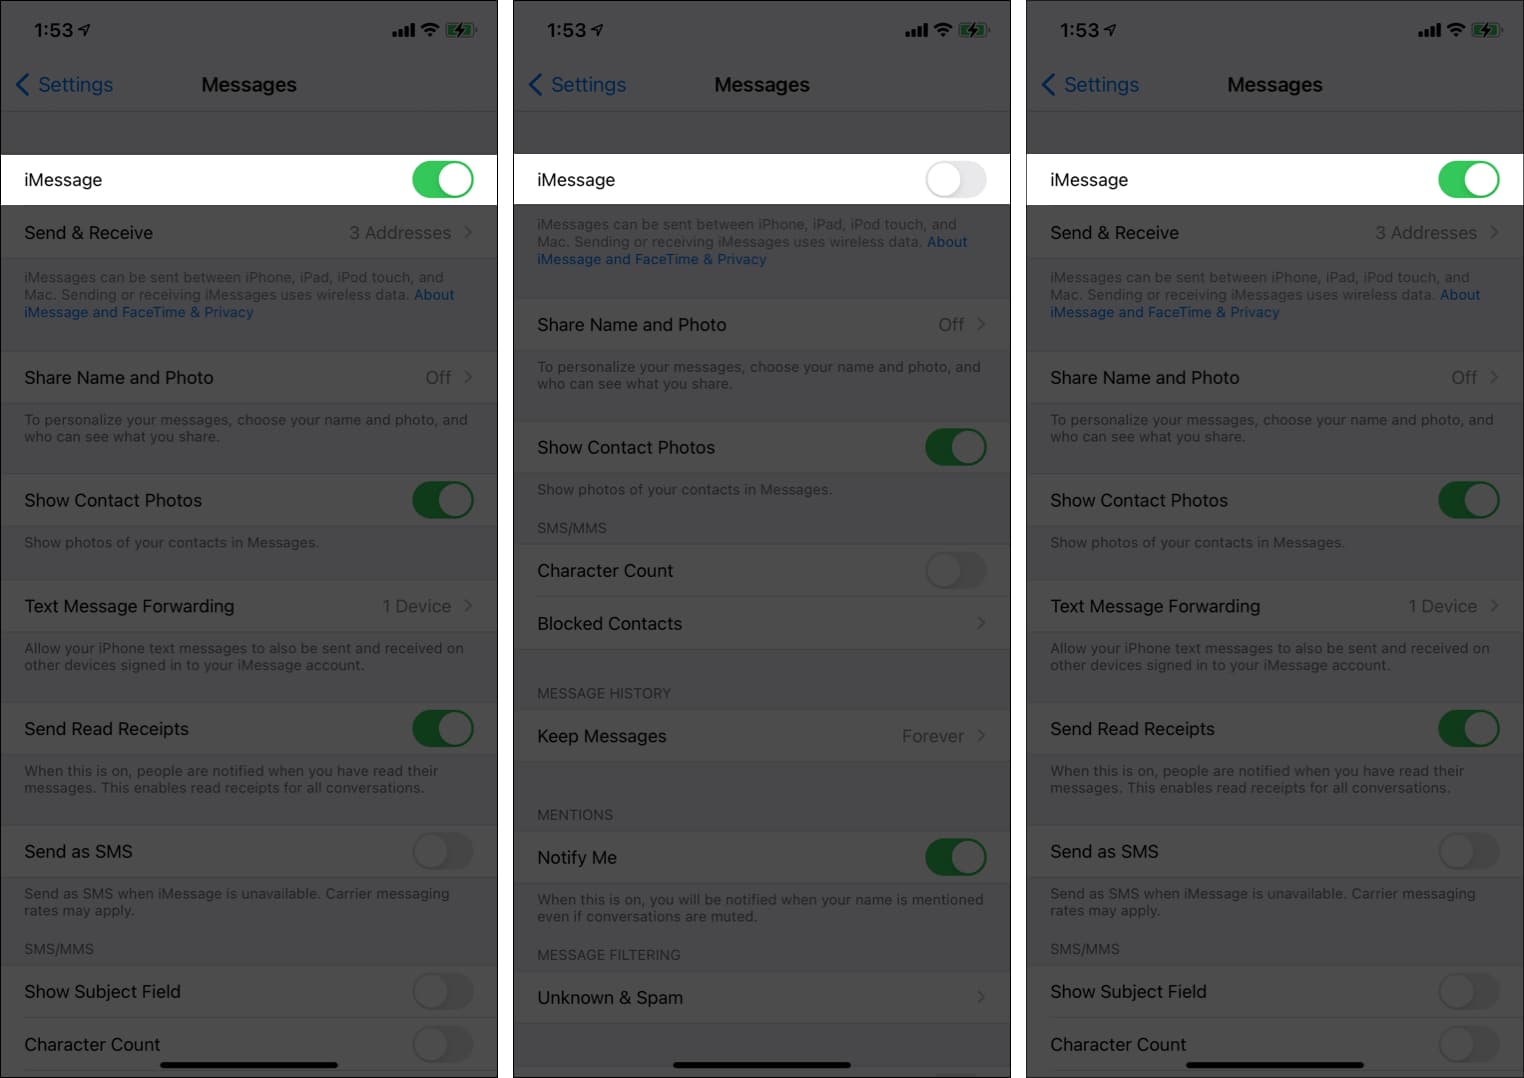
3. Turn iMessage Off and Back On
- Open Settings and tap Messages.
- Toggle off iMessage.
- Restart your iPhone.
- Toggle iMessage back on.
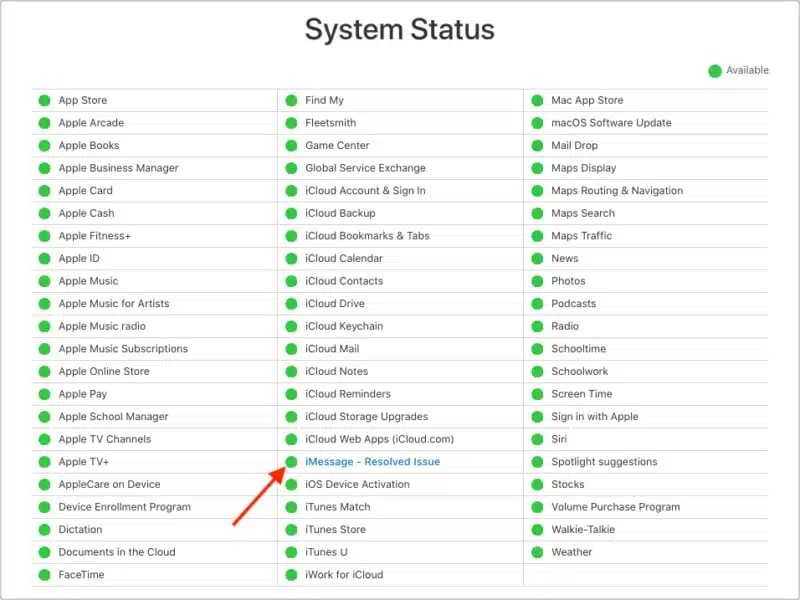
4. Check Apple’s System Status Page
Sometimes the problem is on Apple’s end. Visit Apple’s System Status page and check iMessage. If it’s yellow or red, you’ll have to wait until Apple fixes the issue.
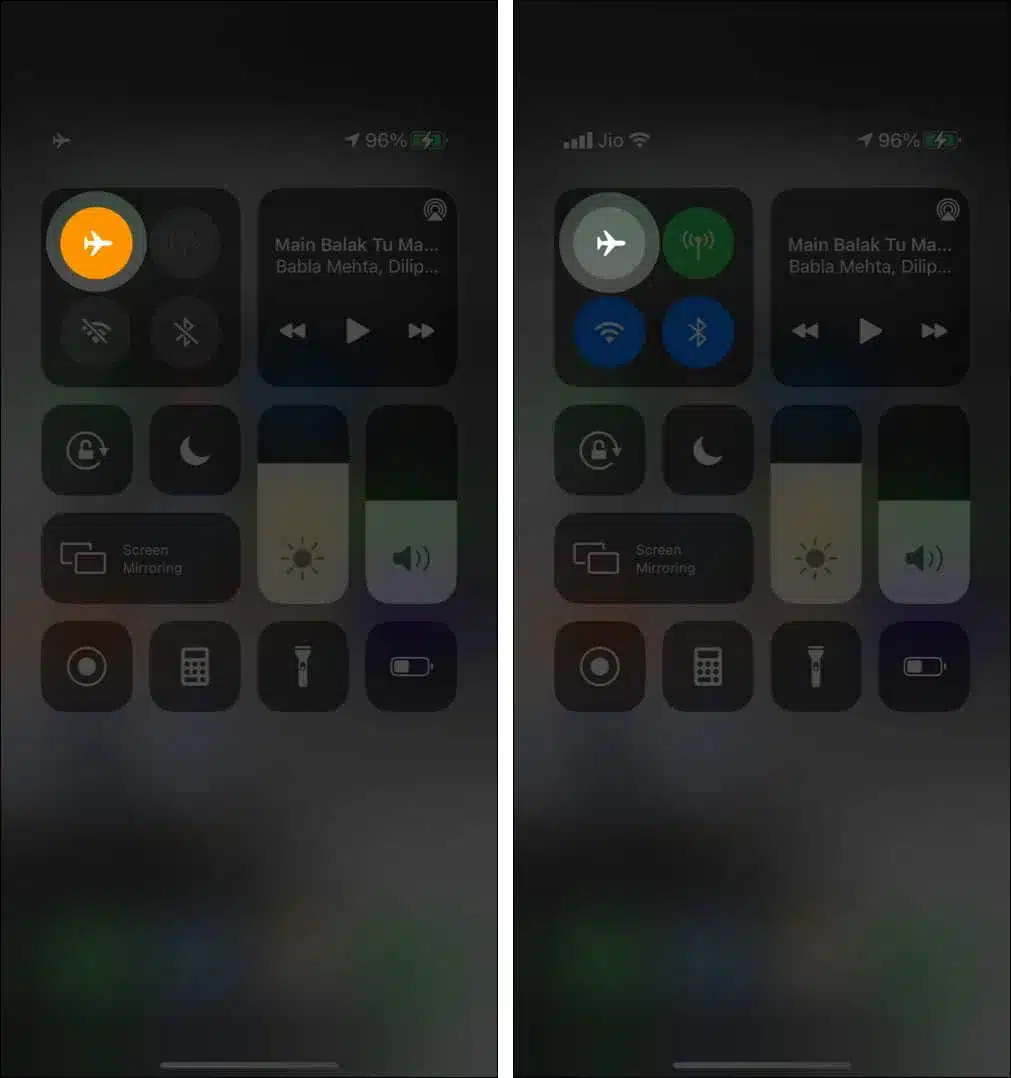
5. Enable Airplane Mode and Disable It
This quick refresh often resolves connectivity-based iMessage errors.
- Open Control Center.
- Tap the Airplane Mode icon. Wait 30 seconds.
- Tap again to disable it.
6. Restart Your iPhone
A reboot clears temporary glitches and resets background services.
To restart your iPhone: Press and hold down the Power and Volume buttons until a slider appears on the screen. Drag the slider to turn off the device. Wait a few moments for the iPhone to turn off completely and the screen to go black. Press and hold the Power button until the Apple logo appears.
7. Delete The Failed Message or Entire Conversation
- Open Messages.
- Long-press on the failed message → Tap More → Delete
If that doesn’t work, delete the entire chat thread. Also, try messaging another contact to see if the issue is isolated.
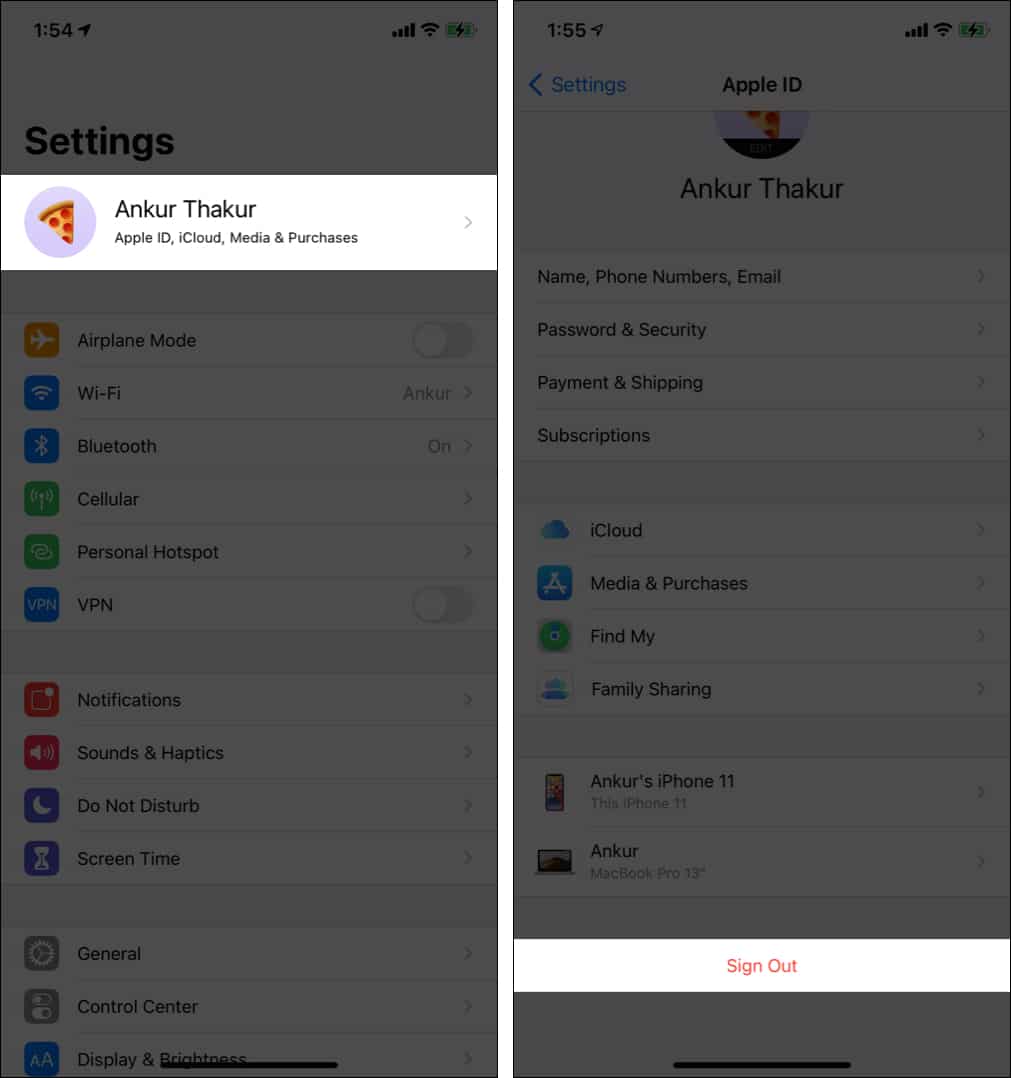
8. Sign Out and Sign in To Your Apple ID
- Go to iPhone Settings and tap your name at the top.
- Scroll down and tap Sign Out.
- Restart your iPhone.
- Sign back in via Settings.

9. Reset Network Settings
This won’t delete your files but will erase Wi-Fi, VPN, and cellular settings.
- Open Settings → General → Transfer or Reset iPhone.
- Tap Reset → Reset Network Settings.
- Enter your passcode and confirm.
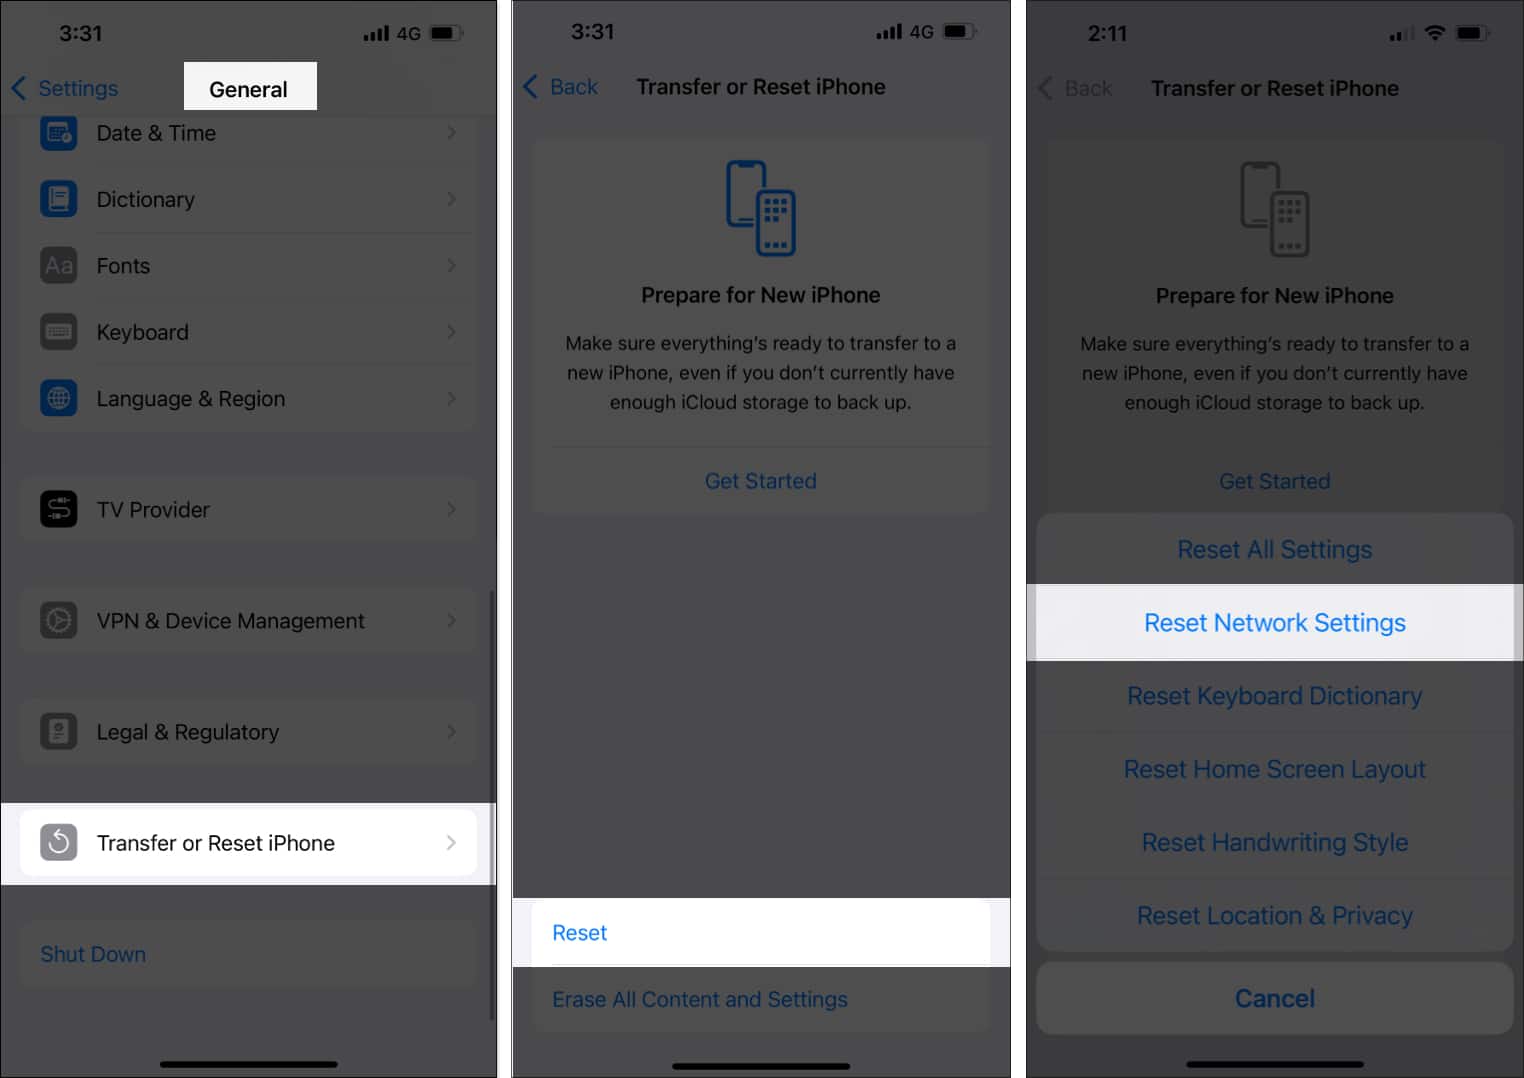

Still not working? You can try Reset All Settings instead.
10. Send as SMS and Contact Apple Support
If iMessage still won’t activate, go to: Settings → Messages → Enable Send as SMS.
Meanwhile, reach out to Apple Support. They may be able to resolve account or device-specific issues.
Signing Off
That’s how you fix the annoying “iMessage needs to be enabled” error on iPhone. One of these steps is bound to work, so go ahead and try them out. Have a question or tip to share? Drop it in the comments below!
Don’t miss these related reads: