- This error means your iPhone can’t verify a mail server’s identity—usually due to expired SSL certificates, wrong email settings, or unstable network connections.
- Try basic fixes first like restarting your device or Mail app—also double-check your date and time settings to rule out syncing issues.
- Update iOS and manage certificate trust settings—an outdated system or untrusted certificate can trigger verification errors.
- For deeper issues, remove and re-add email accounts—or reset network settings and remove third-party calendar syncs if the error keeps returning.
- Factory reset or Apple Support are your last options—if nothing else works, these steps can help resolve persistent identity verification errors.
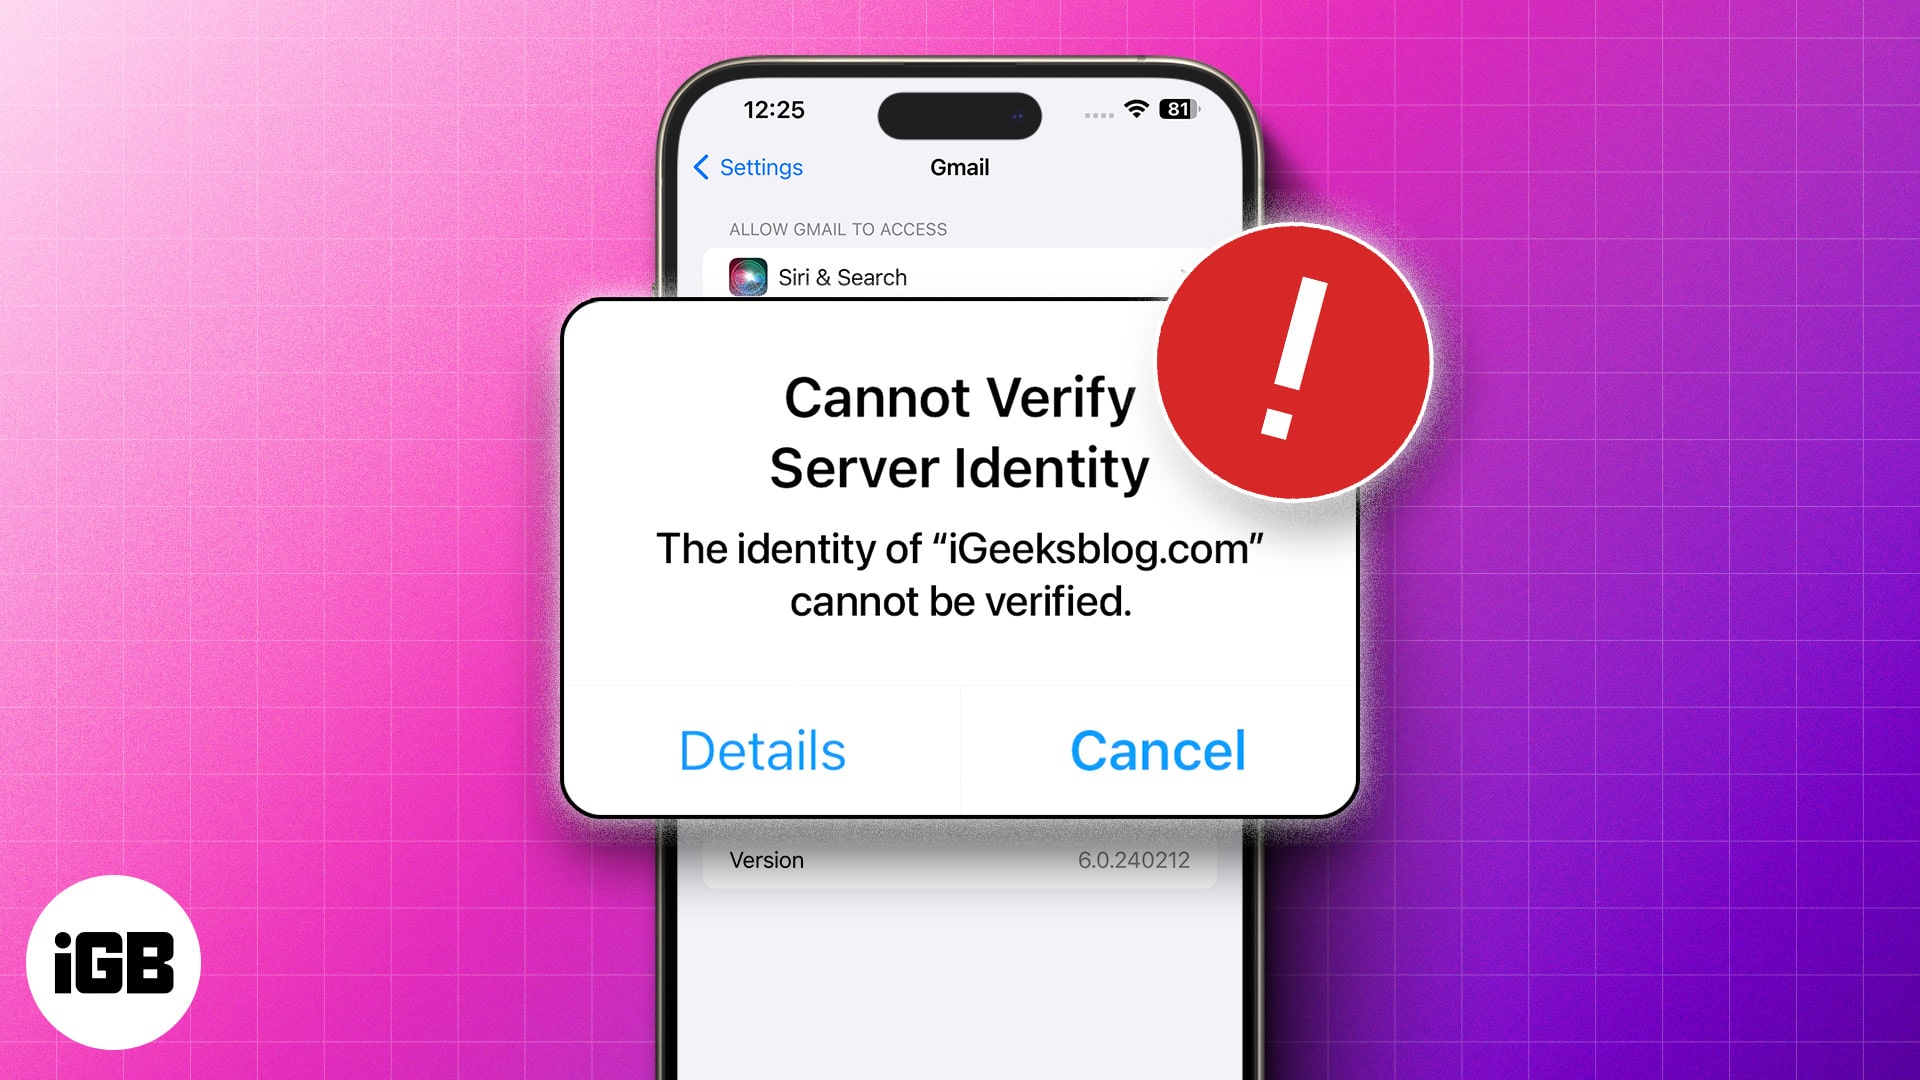
The Mail app on iPhone is reliable and easy to use—but sometimes, it throws up the frustrating “Cannot Verify Server Identity” error. This issue prevents you from accessing or sending emails and usually happens due to certificate issues, misconfigured settings, or network problems.
In this guide, I’ll walk you through 11 effective solutions to fix this error for good.
Why does my iPhone say “Cannot Verify Server Identity”?
This error typically occurs when your iPhone can’t validate the SSL certificate of your email server. It could be because:
- The SSL/TLS certificate is expired or invalid.
- You have incorrect Mail settings.
- A temporary glitch is interfering with the connection.
- There’s a network or profile configuration issue.
11 fixes for “Cannot Verify Server Identity” on iPhone
Here’s a list of tried and tested fixes that can help you get rid of this error in the Mail app:
1. Force quit and reopen the Mail app
A simple force quit can resolve minor bugs and refresh the app’s connection to your server.
How to do it:
- Open the App Switcher on your iPhone.
- Swipe up on the Mail app.
- Reopen it and try again.
2. Restart your iPhone
In most cases, force quitting and reopening the Mail app should work just fine. However, if that doesn’t work, you may want to try restarting your iPhone. Doing this will close all system processes to resolve temporary software glitches and re-establish a network connection to phase out network-related issues.
- On iPhone X and later: Long-press the Volume Up or Volume Down and Side buttons and swipe right on the power slider to shut down the device. Wait a few seconds and press the Side button to turn it on again.
- On iPhone 8 and earlier: Long-press the Side Button and swipe right on the power off slider to shut down the device. After some time, turn on the device by pressing and holding the Side button for around ten seconds.
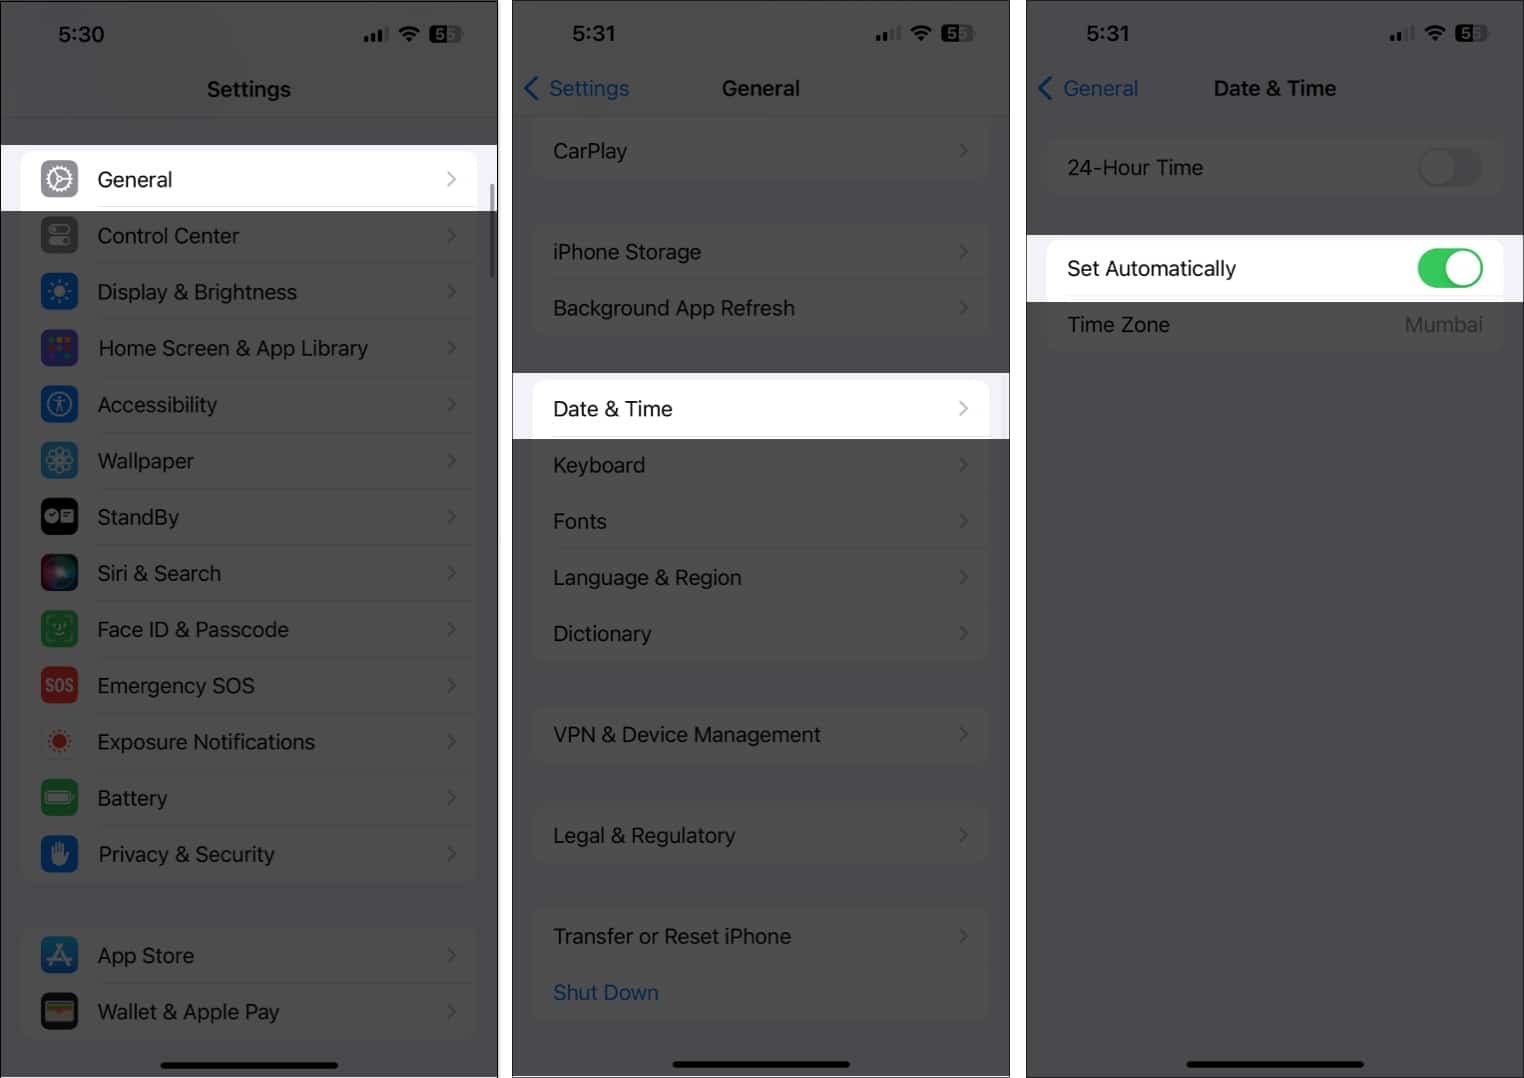
3. Check your date and time settings
Incorrect date/time can disrupt secure connections.
Steps:
- Open the Settings app on your iPhone or iPad.
- Go to General and tap on Date & Time.
- Turn on Set Automatically.
4. Install the latest iOS update
Apple regularly fixes bugs like these through updates.
- Open the Settings app on your iPhone or iPad.
- Navigate to General and tap on Software Updates.
- If an iOS or iPadOS update is available, tap Update Now.
- Enter your passcode and wait for the update to install.
Try this: How to update your iPhone
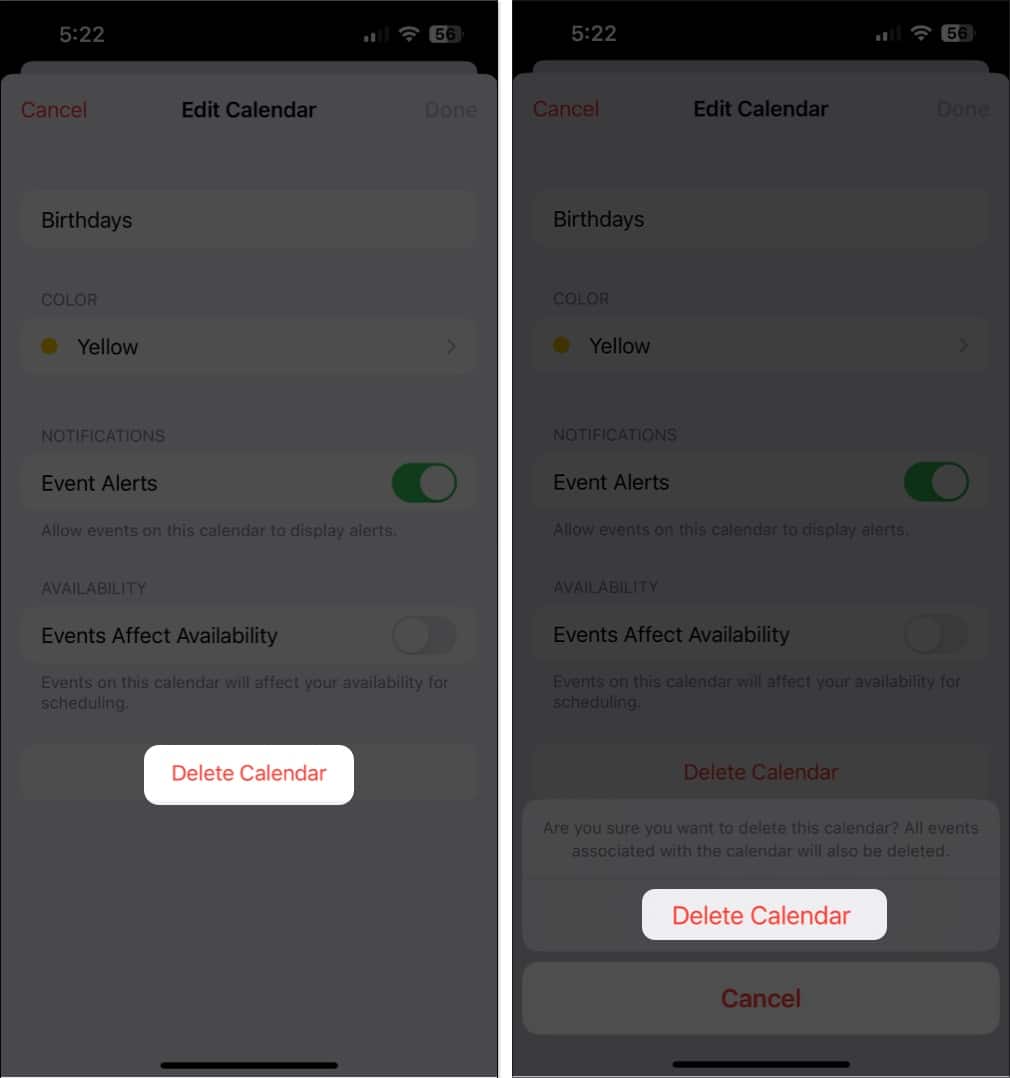
5. Unsubscribe from third-party calendars
Third-party calendar invites without proper certificates can trigger this issue.
- Open the Calendar app on your iPhone or iPad.
- Tap Calendars to view a list of subscribed calendars.
- Tap the i icon next to a calendar you want to unsubscribe.
- Tap Delete Calendar to unsubscribe from the said calendar.


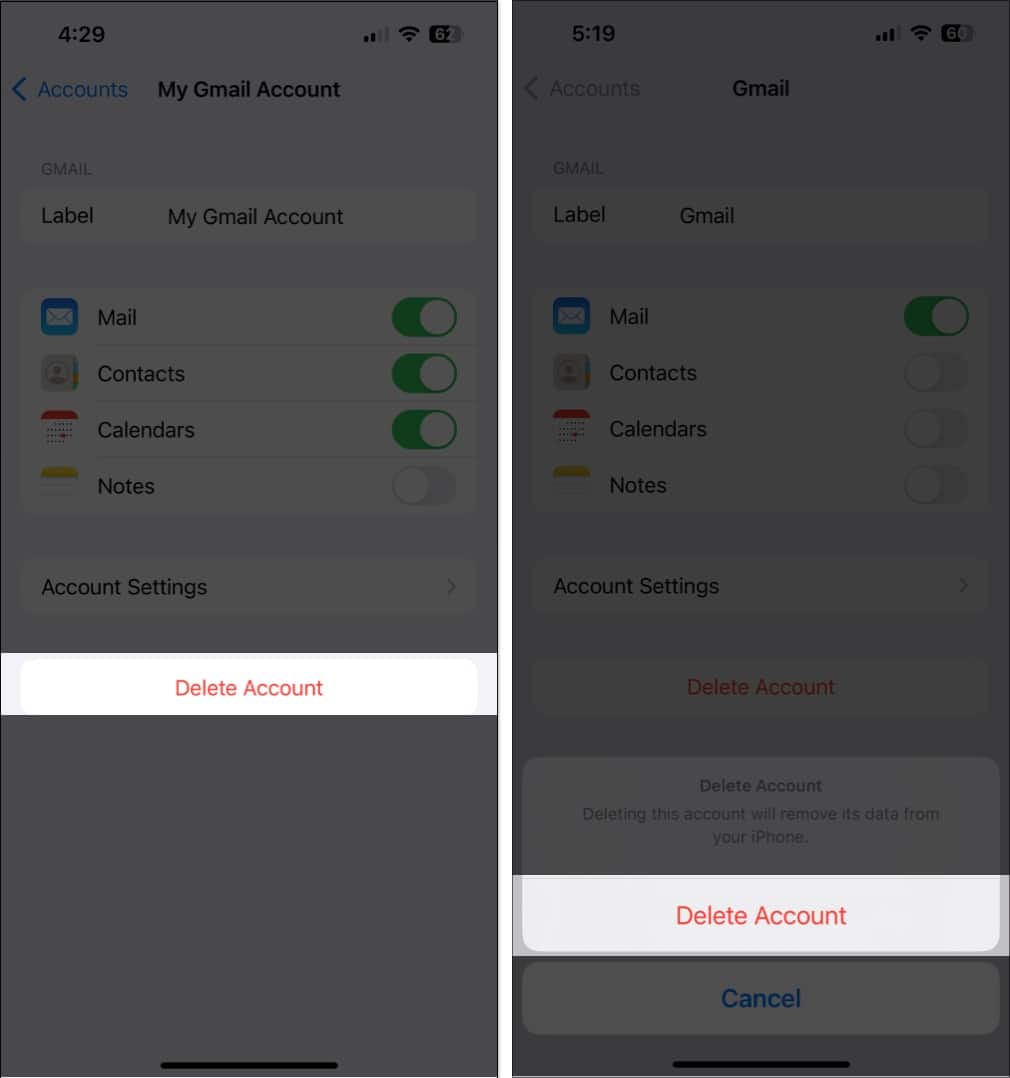
6. Delete and re-add your email account
Resetting your account can correct incorrect settings automatically.
- Open the Settings app on your iPhone or iPad.
- Scroll down, tap on Mail, and select Accounts.
- Select the account you want to delete and re-add.
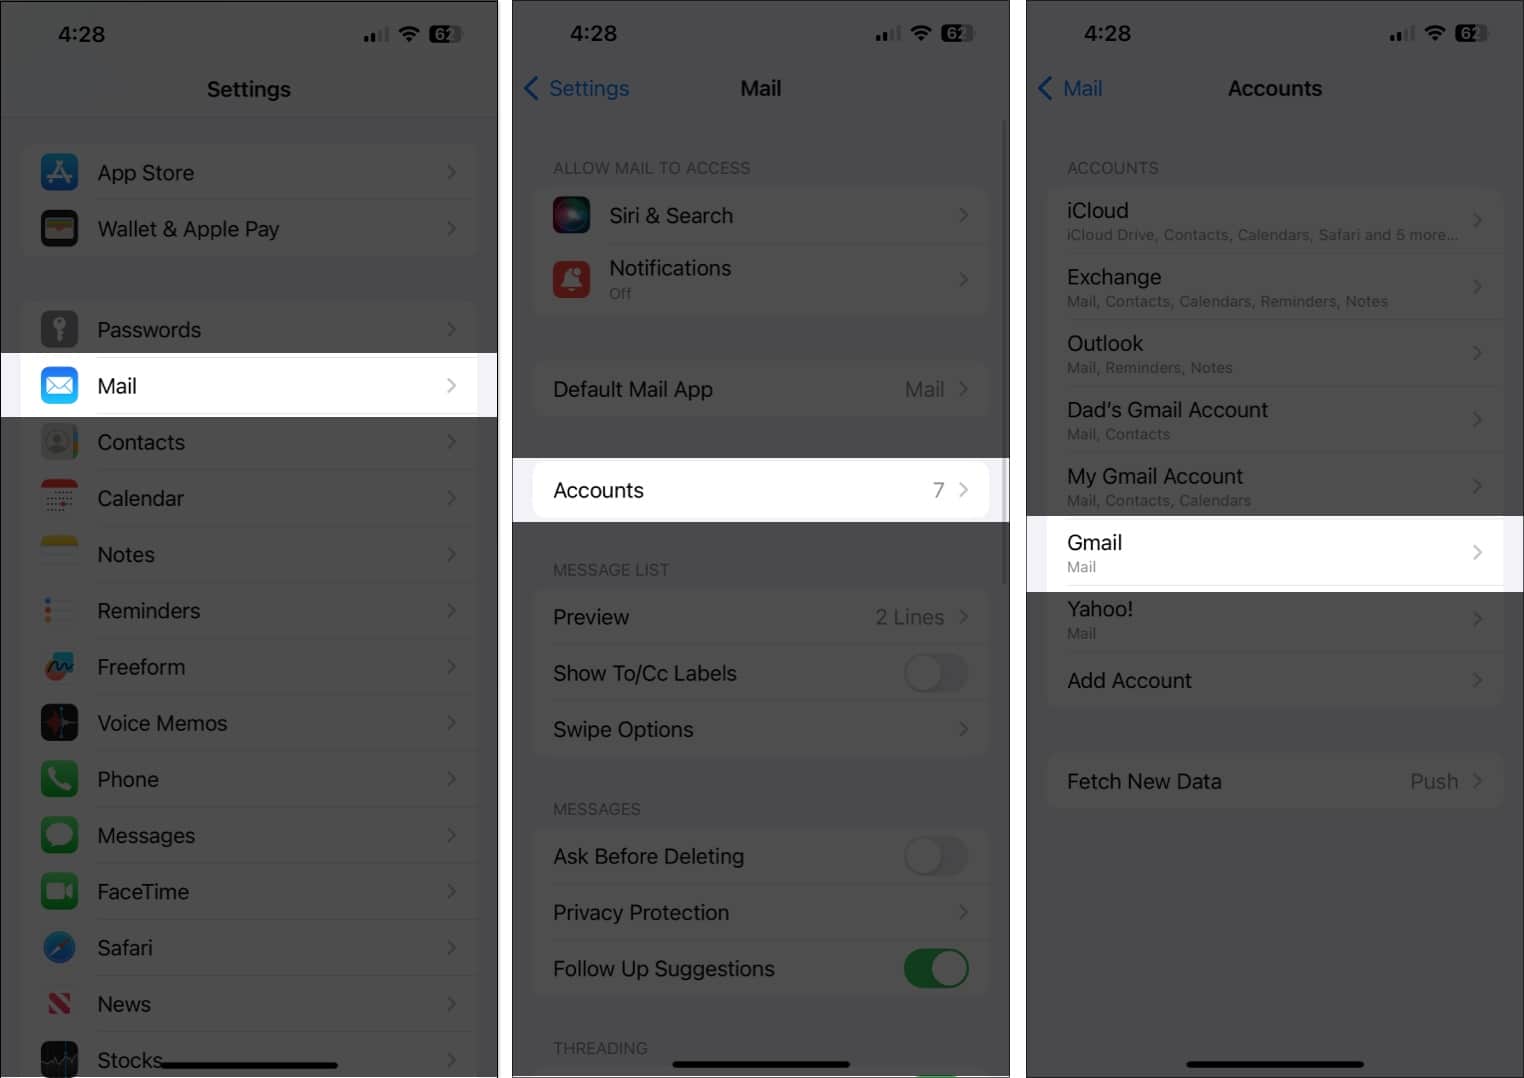
- Tap Delete Account. Then, tap Delete from My iPhone.
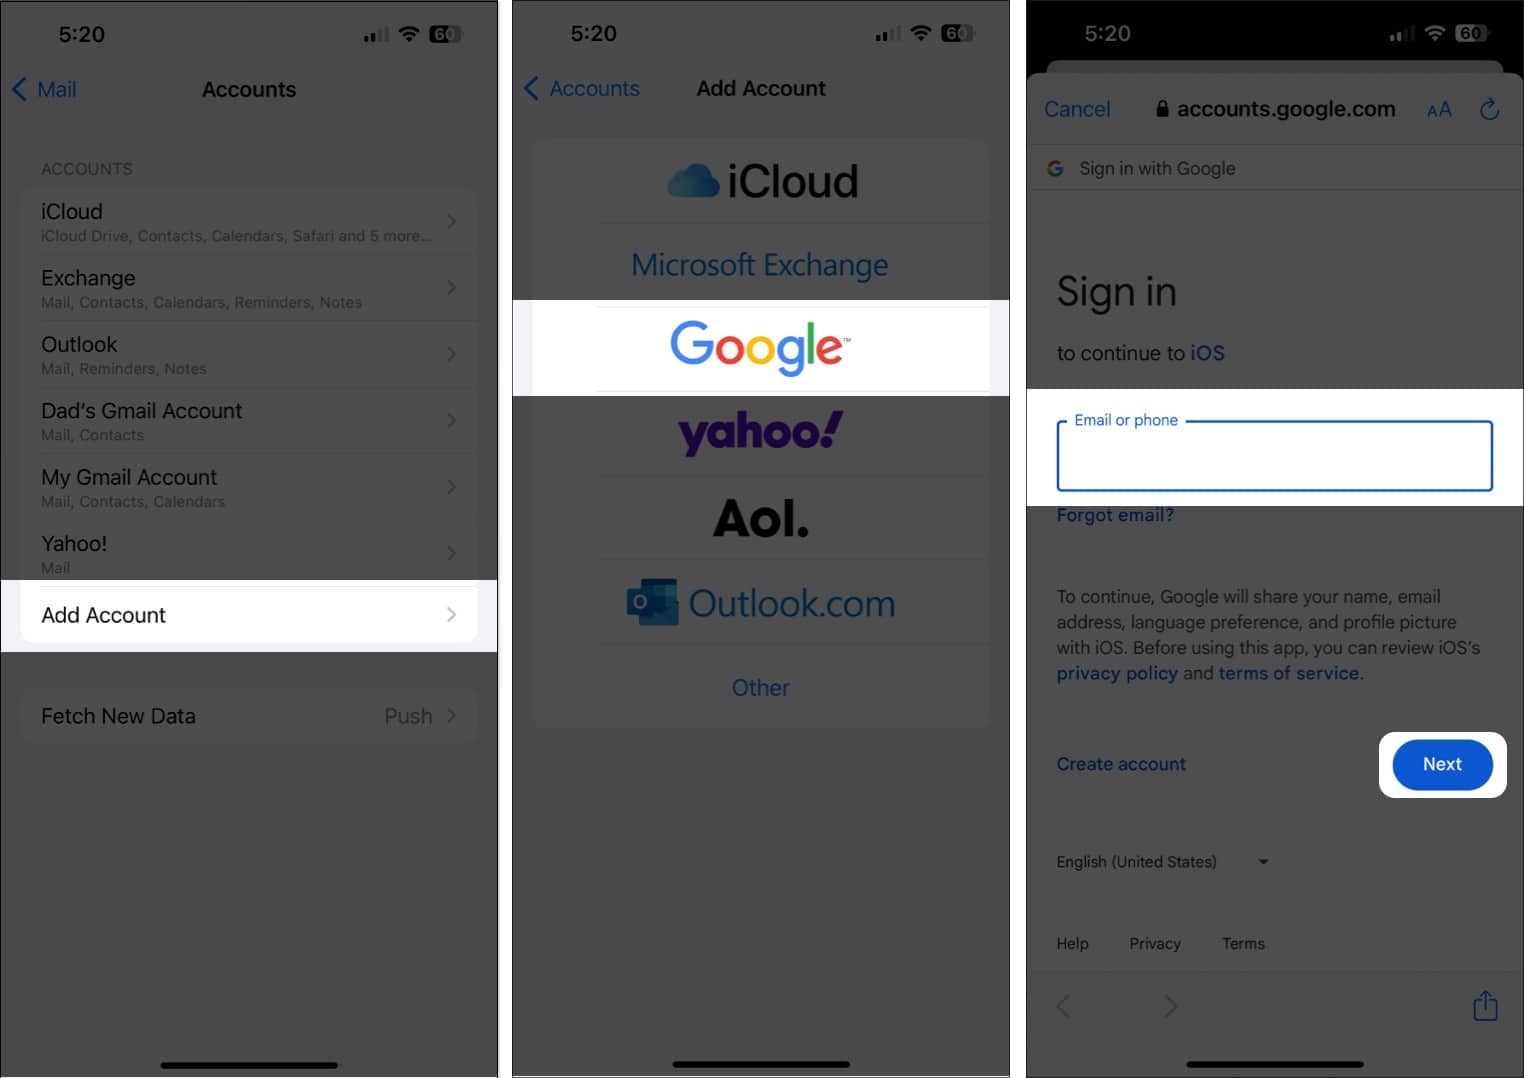
- Once you remove the email account, tap Add Account.
- Select your account provider and enter your credentials.


7. Change SSL settings in Mail
Tweaking SSL settings might help if they’re misconfigured.
- Open the Settings app on your iPhone or iPad.
- Scroll down and tap on Mail. Then, tap on Accounts.
- Tap an account for which you want to check the SSL settings.
- Now, tap Account Settings and then tap Advanced.
- Turn Use SSL on or off and check if that fixes the error for you.


8. Install an MDM Profile (for Work Emails)
Workplace emails often require an MDM profile to authenticate securely.
- Download the MDM profile provided by your employer or email service.
- Open Settings and tap Profile Downloaded or Enroll In (Organization) at the top of the screen.
- Tap Install in the top-right corner, then follow the onscreen instructions.
9. Check certificate trust settings
If the Mail app still won’t connect securely, manually enable trust for root certificates.
- Open the Settings app on your iPhone or iPad.
- Navigate to General and tap on About.
- Scroll down to the bottom and tap Certificate Trust Settings.
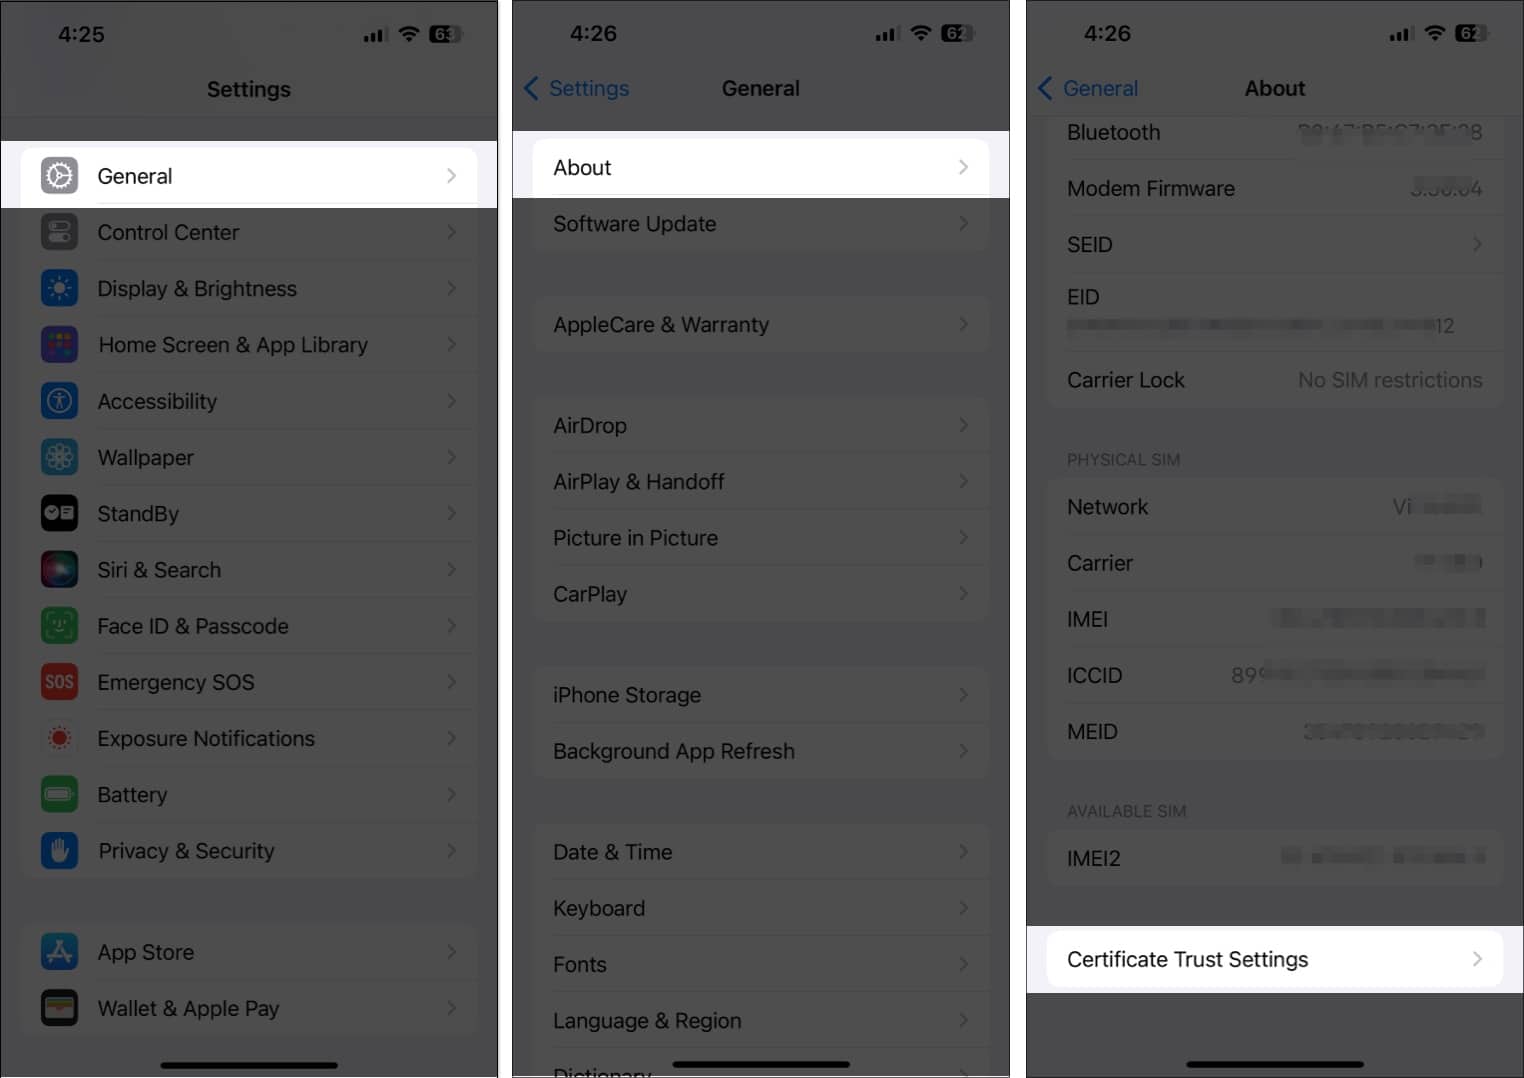
- Under Enable full trust for root certificates turn on trust certificates.

10. Reset network settings
Network glitches can break the connection to mail servers.
Go to Settings → General → Transfer or Reset iPhone → Reset → Reset Network Settings.
Explore: How to reset network settings on iPhone
11. Factory reset your iPhone (Last Resort)
If all else fails, reset your device to factory settings. Backup your data first!
Then go to Settings → General → Transfer or Reset iPhone → Erase All Content and Settings.
Also read: How to factory reset your iPhone
Video: iPhone “Cannot Verify Server Identity”? 6 Quick fixes
Wrapping up…
If you’re facing the “Cannot Verify Server Identity” error on your iPhone, the fix could be as simple as restarting the device or as complex as installing a work profile. Start with the easy solutions like restarting Mail or updating iOS, then move to account or certificate fixes if needed.
Still stuck? You can always contact Apple Support or your email service provider for deeper troubleshooting.
Also Read: