A core feature since it landed with iOS 18, message scheduling has become a quiet yet powerful tool for day-to-day chats. Think midnight birthday wishes that arrive right on the dot. Or work reminders that ping during office hours, not at 3 am.
On the latest iOS, Apple’s Messages has a built-in “Send Later” feature, simple to set up and compatible with Focus. Time zones are worth a quick check before a trip, because nobody wants to be caught off guard by a time difference in the middle of the night.
This guide walks you through the Send Later step by step, along with a couple of clean workarounds for trickier timing. You will learn how to schedule, manage, and fix scheduled messages on iPhone so important notes never slip by again.
What is Message Scheduling on iPhone?
Message scheduling allows you to write a text now and have it sent automatically at a specific future date and time. On iOS 18 and later, it is available as a built-in “Send Later” control within the Messages app. It fits the updated interface, including the new Liquid Glass look that makes iOS 26 feel fresh yet familiar. It just takes a couple of taps to set it and forget it.
Common uses include sending birthday notes at the right moment, respecting time zones when chatting with friends or coworkers far away, lining up work messages for standard business hours, and avoiding late-night pings. I often remember something important at the wrong time, save it for morning, then let the phone do the polite thing. No midnight regrets. No extra apps required.
How to Use the Native “Send Later” Feature on iPhone
Requirements and Key Limitations
The built-in scheduler works only with iMessage, the blue bubbles, not standard SMS or MMS, the green bubbles. Scheduled texts are prepared on your device, then stored on Apple’s servers in encrypted form until the delivery time you set. You need iOS 18 or later to view the control, and the current limit allows you to schedule up to 14 days in advance. If the contact switches to SMS, you will no longer see ‘Send Later’ for that thread.
How to Schedule a Message With “Send Later”
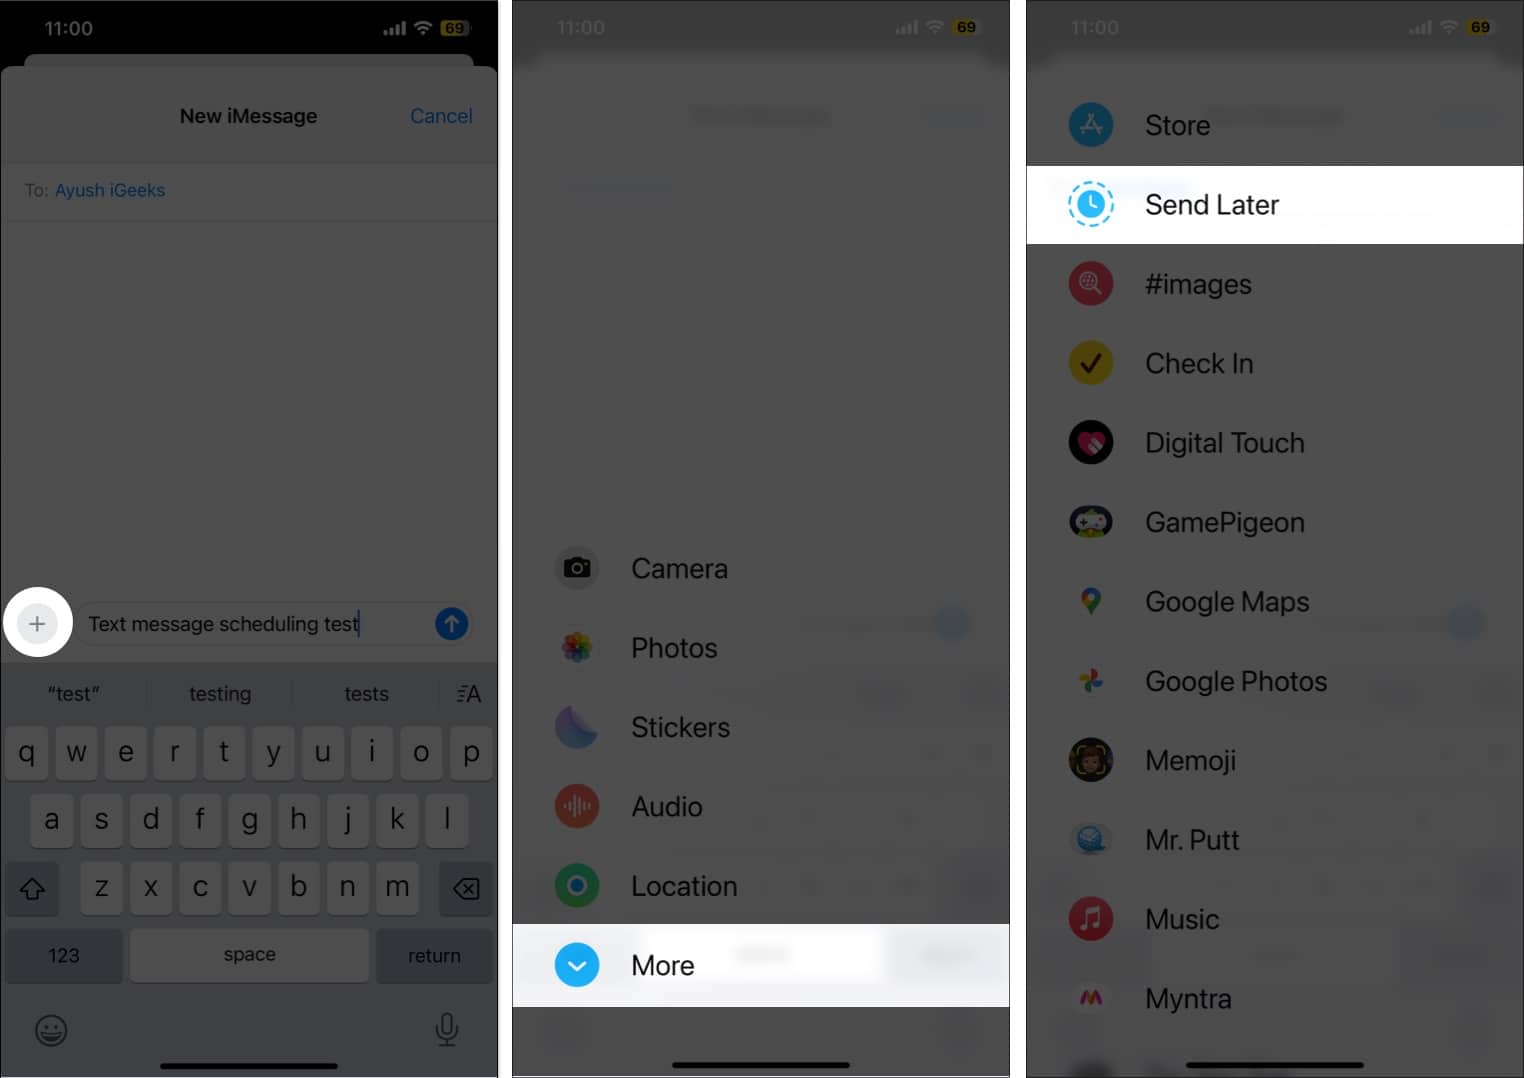
- Open the Messages app and head to an iMessage conversation to create a new one.
- Type in the Message you want to schedule.
- Next, tap the “+” button and select More in the pop-up menu that appears.
- Here, tap on Send later.
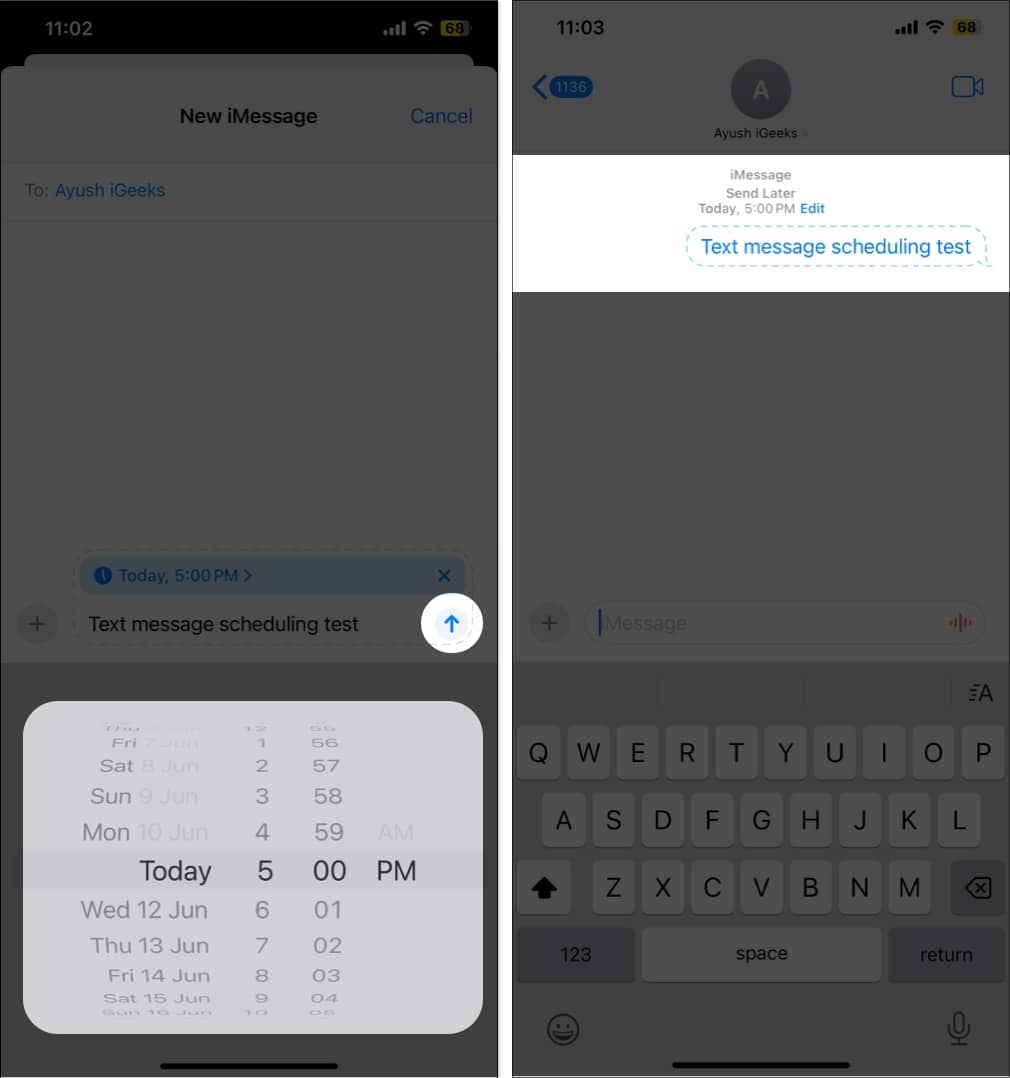
- Now, choose the preferred Time and Date.
- Once done, hit the Send (upward arrow) button next to your text to confirm text scheduling.
- You will see the scheduled message on the screen, along with a ‘Send Later’ tag displaying the date and time above it.
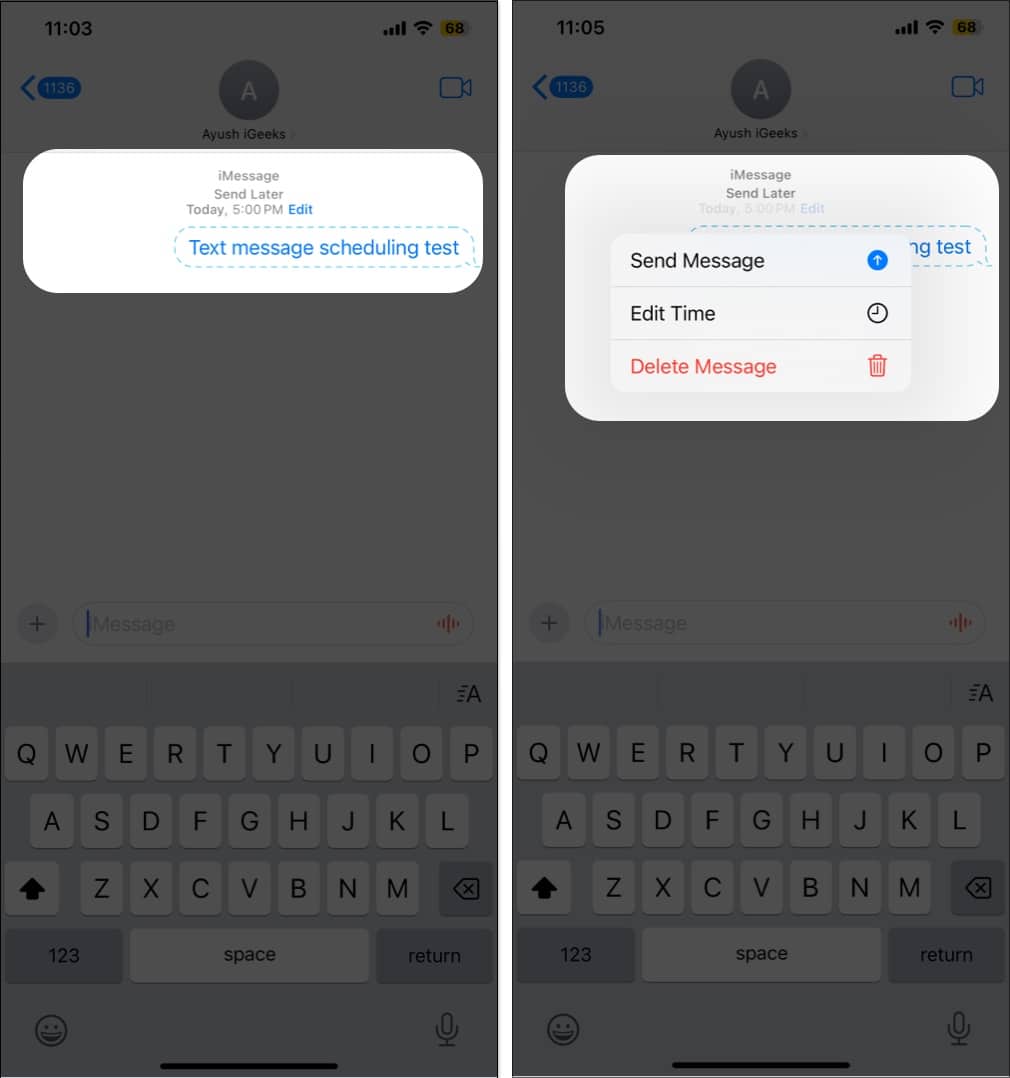
- You can also edit the date and time, send the message immediately, or delete the scheduled message if you change your mind by tapping the Edit button.
Your scheduled note sits at the bottom of the thread, marked with a dashed outline, indicating that it has not been sent yet.
How to Manage Your Scheduled Messages
- Finding Them: Scheduled items sit at the bottom of the conversation in a dashed bubble, separate from sent and received messages.
- Editing the Time: Tap “Edit” next to the scheduled time, then tap “Edit Time” to select a new delivery time. Handy when crossing time zones.
- Sending Immediately: Tap Edit, then tap Send Message to push it right away. Useful when plans move faster than expected.
- Editing the Content: Touch and hold the Bubble, then tap Edit in the pop-up menu to adjust your text.
- Cancelling: Touch and hold the Bubble, then tap More… and choose the trash can to delete it and cancel the schedule.
Alternative Method: Using the Shortcuts App for Advanced Scheduling
How to Schedule Text Messages Using the Shortcuts App
For recurring sends, such as weekly reminders or anything more than 14 days in advance, the Shortcuts app is the flexible option. Set it once, let it run. Here is the process:
- Open the Shortcuts app → Pick the Automation tab at the bottom.
- Tap New Automation → Choose Time of the day.

- Now, based on your requirements, adjust the task’s Time and Repeat parameters.
- Once done, hit Next.
- Pick Send Message under the Get Started section.

- Tap the faded Message bar (in blue) → Enter your desired text.
- Next, pick Recipients and add the receiver. You can add multiple contacts.
- Tap Done to save your preferences.


Important:
Note: For fully automatic delivery, disable the “Ask Before Running” toggle. If you leave it on, a prompt appears at send time, and you must approve it.
The best part is that since the text will be sent as an SMS, you can send it to any contact on your iPhone!
How to Delete a Scheduled Text Message Shortcut
There may come a time when the scheduled text has served its purpose, or perhaps you no longer wish to send it. In that case, here’s how you can delete the scheduled message.
- Open the Shortcuts app → Head to the Automation section.
- Swipe left on the Send message automation.
- Tap the red Delete button that appears.


Why Isn’t “Send Later” Working? (Troubleshooting)
Option is Missing
If you do not see Send Later, quickly check these requirements:
- You are on iOS 18 or later. Older versions will not show it.
- The thread is an iMessage, with blue bubbles, not an SMS or MMS, which has green bubbles. Send Later will not appear in green threads.
- Both you and the recipient have iMessage enabled in the Settings > Messages section.
Scheduled Message Didn’t Send
Scheduled texts should send even if the phone is briefly offline, since they are queued on Apple servers. Ongoing connection issues, iMessage being turned off, or the contact losing iMessage at the time of sending can block delivery. Check your connection and confirm iMessage is on in Settings > Messages. One more thing, the scheduled bubble has a dashed outline, so you can tap it and resend.
Best Practices for Message Scheduling
- Time Zone Awareness: Double-check the recipient’s local time to ensure your note arrives at a convenient hour for them. The scheduler follows your iPhone’s current time zone. Traveling? Keep Settings > General > Date & Time set to “Set Automatically.”
- Content Relevance: Before you queue it, ask if the message will still make sense later. Skip one-time codes, expiring links, or details likely to change. If plans might move, set a reminder to review first.
- Professional Communication: Line up work messages for standard business hours to respect boundaries. Weekends and holidays can wait. A small trick: schedule for 9:05 instead of 9:00 so it feels more human, not scripted.
- Privacy Considerations: Scheduled messages are stored on Apple’s servers in encrypted form until delivery. Keep that in mind when handling sensitive information. If it is truly confidential, consider using a shorter window or an alternative channel that you control.
- Review Before Sending: Give the message one last pass before tapping Send. The dashed border and time above the field help you spot it. Tap Edit to adjust the time, or touch and hold to edit the text.
Happy texting!
Apple’s native “Send Later” turns scheduling into something you barely think about on iPhone with iOS 26. With Messages in iCloud turned on, scheduled messages will also synchronize across iPhone, iPad, and Mac, so edits or last-minute time changes carry over everywhere. Use the built-in control when you just need a single, well-timed text. Use a Shortcut when you need repeats or anything more than two weeks out. The result is calmer conversations and better timing.