You can downgrade from macOS 27 beta to macOS Tahoe, but not like a normal update. You need to erase your Mac, install macOS Tahoe 26 again, and restore your files from a backup.
A Time Machine backup made before installing macOS 27 beta is the safest option. A backup made on the beta may still help you recover files, but do not rely on it for a clean full-system restore to Tahoe.
Before you downgrade
Check these before erasing your Mac:
- A Time Machine backup from before macOS 27 beta
- A copy of important files on iCloud Drive or an external drive
- Your Apple Account password
- A stable internet connection
- A USB drive or external disk if you want to use a bootable installer
Turn off macOS 27 beta updates if you do not want to erase your Mac
If you only want to stop getting future beta updates, turn beta updates off. This keeps your Mac on the current macOS 27 beta until a newer public macOS release is available.
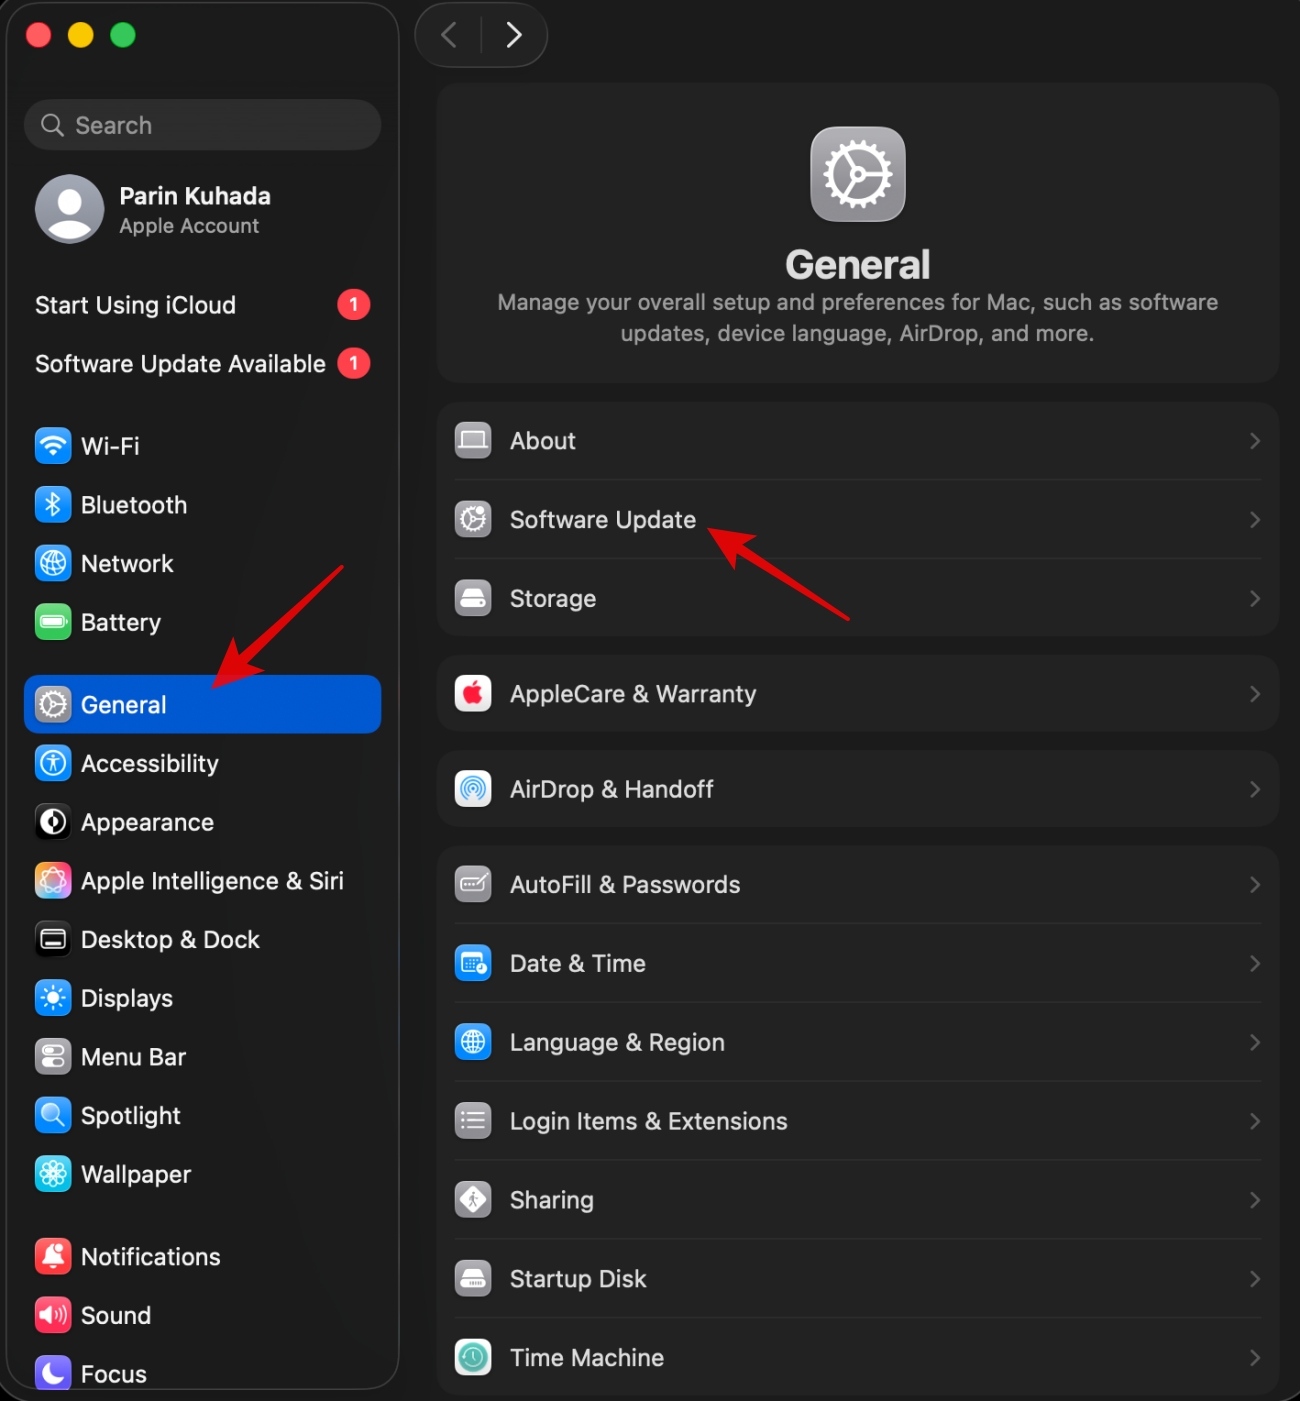
- Open System Settings.
- Go to General.
- Click Software Update.
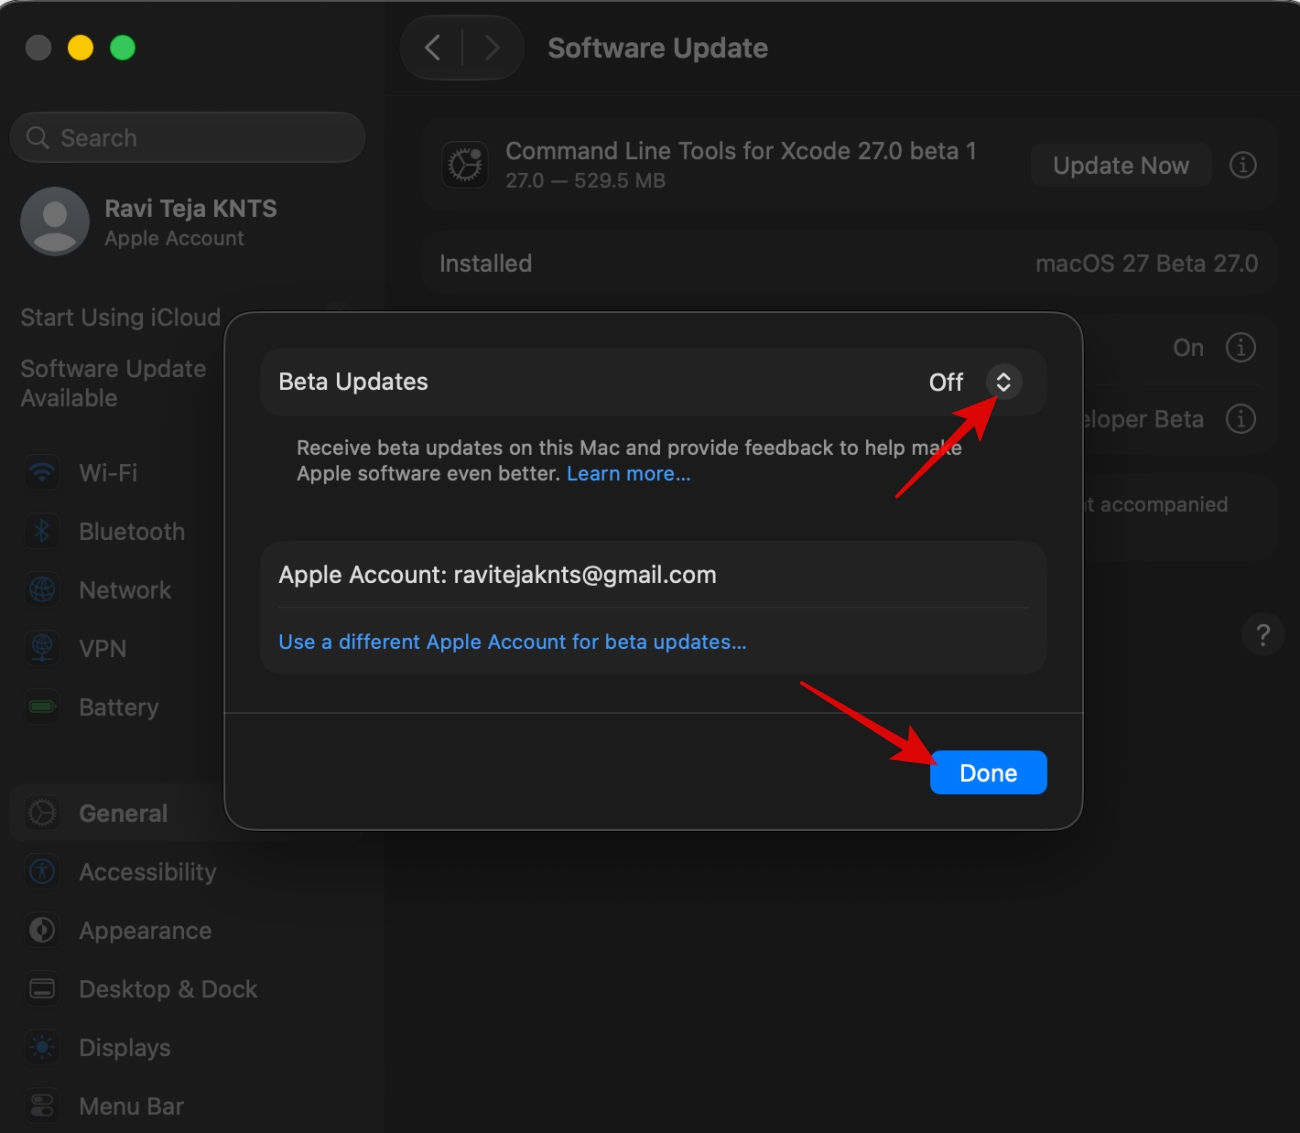
- Click the Info button next to Beta Updates.
- Choose Off.
- Click Done.
This does not downgrade your Mac to macOS Tahoe immediately. It only removes your Mac from the beta update track.
How to downgrade macOS 27 beta to macOS Tahoe
Before starting, back up your Mac and copy important files to iCloud Drive or an external drive.
Step 1: Create a bootable macOS Tahoe installer
You need the full Install macOS Tahoe.app installer in the Applications folder and an external drive with at least 32GB of space. The drives will be erased. You can follow our macOS bootable USB guide if you want the full walkthrough.
Run this command in the terminal. This is the Tahoe command:
sudo /Applications/Install\ macOS\ Tahoe.app/Contents/Resources/createinstallmedia --volume /Volumes/MyVolume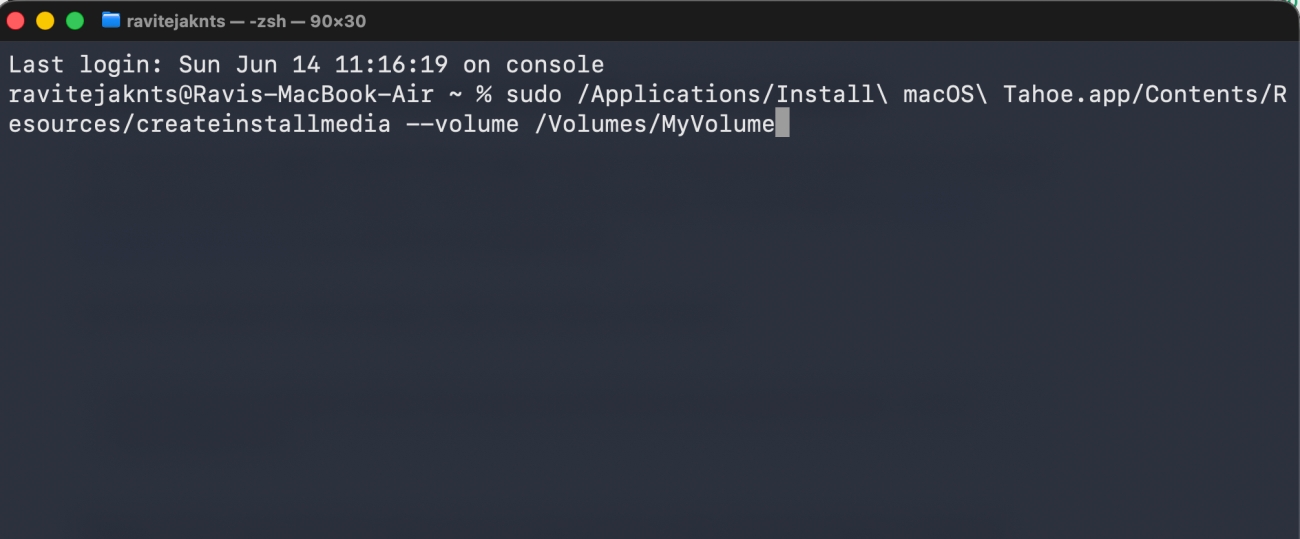
Replace MyVolume with the name of your external drive. After Terminal finishes, leave the installer connected to your Mac.
Step 2: Start your Mac from the Tahoe installer
On a Mac with Apple silicon:
- Shut down your Mac.
- Press and hold the power button until startup options appear.
- Select the macOS Tahoe installer.
- Click Continue.
On an Intel Mac:
- Restart your Mac.
- Immediately press and hold the Option key.
- Select the macOS Tahoe installer.
- Press Return or click the arrow.
Step 3: Erase macOS 27 beta and install macOS Tahoe
Once your Mac starts from the installer, erase the beta before installing Tahoe.
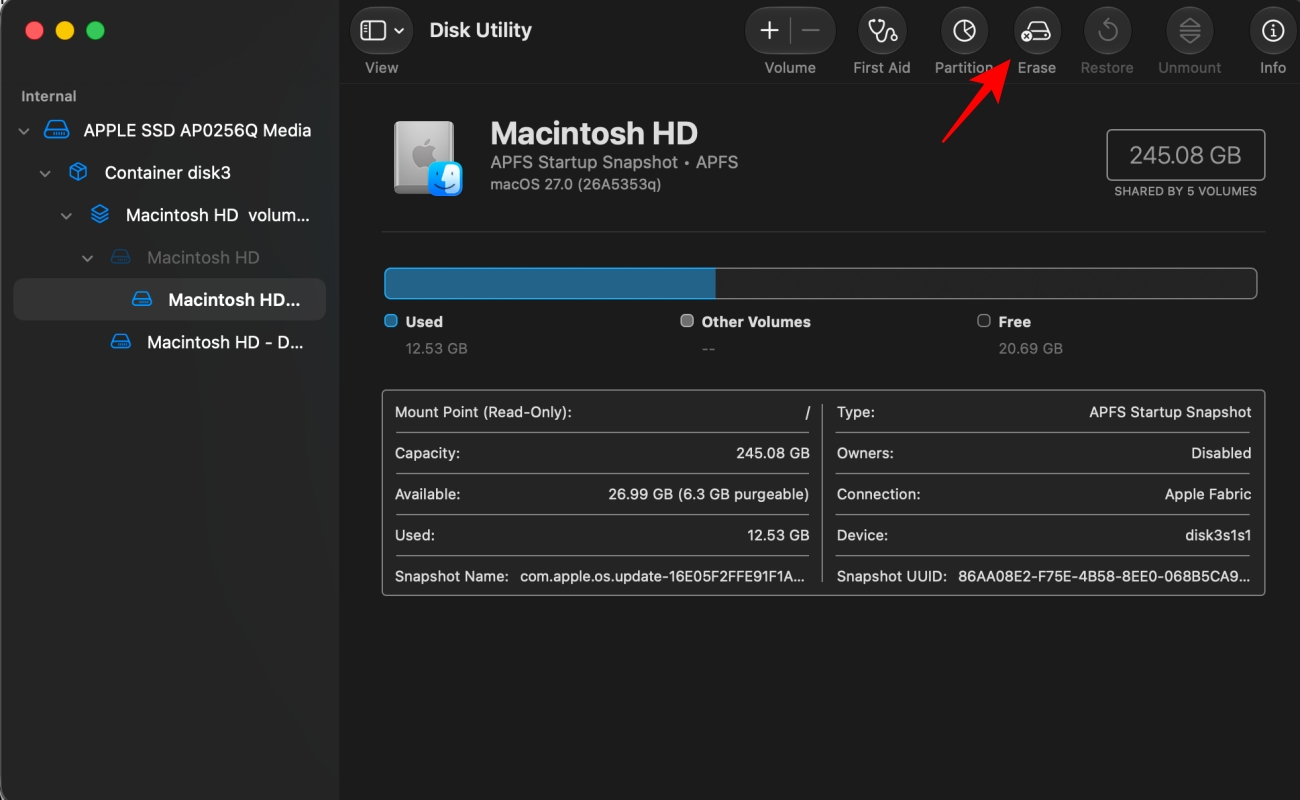
- Open Disk Utility.
- Choose View > Show All Devices if you do not see the full internal drive.
- Select your internal Mac drive.
- Click Erase in the top menu.
- Name it Macintosh HD.
- Set the format to APFS.
- Choose Erase Volume Group if you see that option.
- Click on Erase.
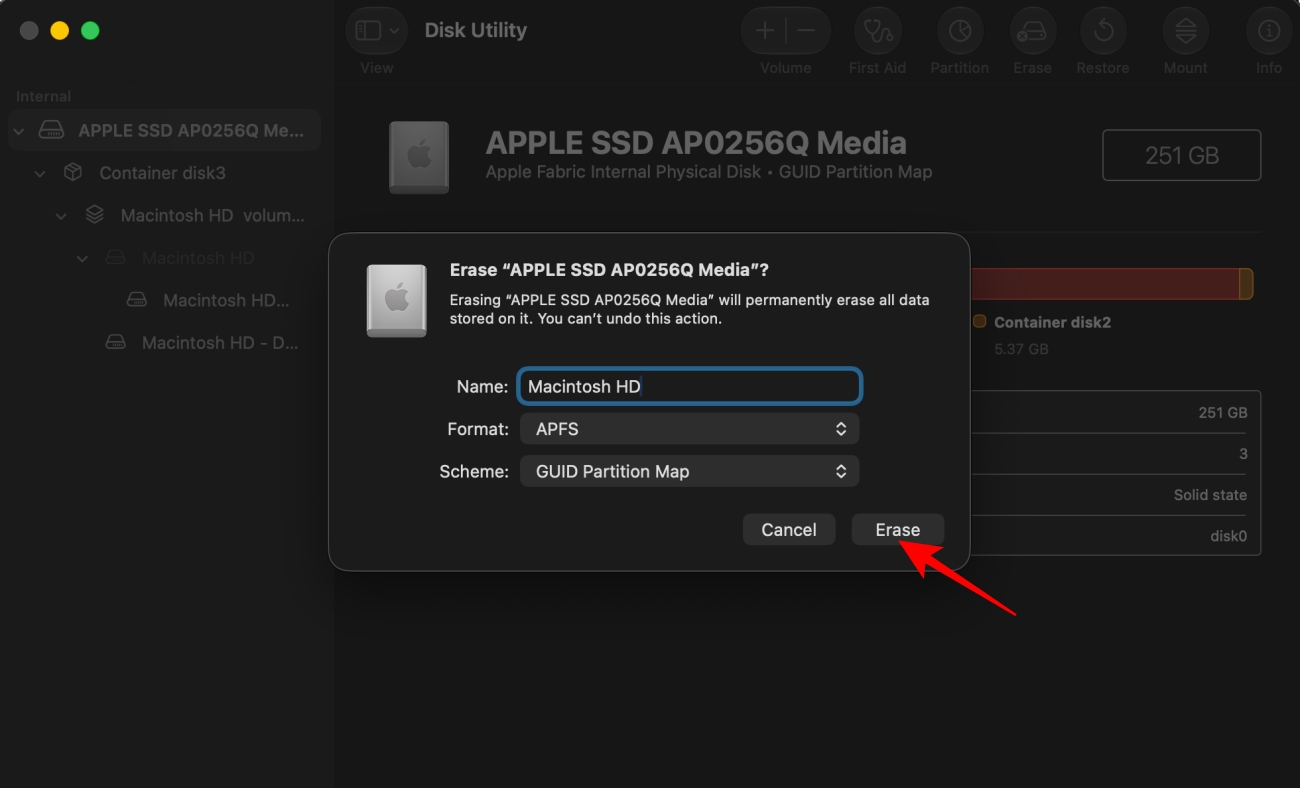
- Quit Disk Utility when the erase is complete.
- Choose Install macOS Tahoe.
- Select Macintosh HD and follow the on-screen steps.


This removes macOS 27 beta, your user accounts, apps, local files, and settings. That is why the backup step matters.
Step 4: Restore your data
During setup, choose the option to restore data from a Time Machine backup. Pick the backup made before you installed macOS 27 beta.
If you only have a macOS 27 beta backup, set up Tahoe as new. Then sign in with your Apple Account, let iCloud sync your data, and manually copy important files from your backup or external drive.
If the installer method does not work
On Intel Macs, you can also try Internet Recovery by restarting and holding Option-Command-R or Option-Shift-Command-R. If it installs an older macOS version, update to Tahoe from System Settings > General > Software Update after setup.
On Apple silicon Macs, a deeper restore may need another Mac, Apple Configurator, and a USB-C cable that supports data. Use this only if your Mac will not boot properly, Recovery is broken, or the installer path fails.
Avoid third-party downgrade tools. They are not worth the risk when your Mac and data are involved.
