
- Understanding Mac Backup Options: Know if you used Time Machine, iCloud, or disk clones, as each affects how and what you can restore.
- How to Restore Using Time Machine: Time Machine enables full macOS recovery or individual file restores directly from macOS Recovery or a backup disk.
- Restoring Mac from iCloud Backup: iCloud only restores synced content like files and photos, not the full system, and it depends on your storage plan.
- Using External Disk Clones for Restore: Bootable clones let you restore or run macOS directly from the external drive, offering the fastest path back online.
- No Backup? Recovery Options: If no backup exists, try iCloud-synced apps or recovery software. Data loss risk rises fast, so act quickly or get Apple support.
Losing data on your Mac sucks. Whether your system crashes, your drive decides to give up, or you accidentally nuke something important, it’s never a good feeling. But if you’ve got a backup, you can roll things back to a previous date and recover your stuff – files, apps, settings, the whole deal.
I’ll walk you through all the ways I’ve used to restore a Mac. That includes Time Machine, iCloud, bootable clones on external drives, and even what to try if you’re staring down a disaster without any backup at all.
Understanding Mac Backup Options
Before you jump into restoring anything, it helps to know how your Mac was backed up. Not all backups are created equal, and depending on which one you’ve been using, the restore process can look pretty different.
Here’s a quick rundown of the main types:
| Backup Type | What It Is | Why I Use It | Why It’s a Pain |
| Time Machine | Built-in Mac backup that saves hourly, daily, and weekly snapshots of your system | It’s automatic, has a nice history view, and I can grab specific files or restore the whole system | Needs an external drive plugged in, and restoring large systems can be slow |
| iCloud | Syncs your Desktop, Documents, Photos, and app data to Apple’s cloud | Great for keeping stuff available across all my devices, and I don’t need to plug anything in | Doesn’t back up the full system. Also, you’ll hit storage limits fast without iCloud+ |
| Disk Clones (like CCC or SuperDuper) | A full, bootable copy of your Mac on an external drive | Fastest way to get back to a working Mac if something dies — just plug in and boot | Setup takes some effort, eats a lot of disk space, and isn’t super beginner-friendly |
Figuring out which kind you’ve got is the first step. If you’re not sure: Look for an external drive labeled “Time Machine” in Finder or Disk Utility
Check iCloud settings under System Settings > Apple ID > iCloud to see if Desktop & Documents syncing is on.
If you’ve used Carbon Copy Cloner or SuperDuper, you’ll probably see an external drive with a complete mirror of your system.
How to Restore Using Time Machine (Step-by-Step)
Best for: Anyone who wants a built-in, no-fuss way to recover their Mac. Time Machine is native, automatic, and honestly, the first thing I rely on when things go sideways.
Time Machine lives inside macOS Recovery and handles everything from a full system rollback to plucking a single lost file from the void. Here’s exactly how I use it when things go south.
Restoring Your Entire Mac with Time Machine
This is what I do if the drive totally fails, I’m replacing my Mac, or I’ve just made some mistake I can’t undo. It’s a full restore from the ground up.
- Start by connecting the external drive (or network storage) that holds your Time Machine backups. If you’ve been backing up regularly, you’re already ahead of the game.
- Shut down your Mac completely.
- Apple Silicon Macs: Press and keep holding the Power button until you see “Loading startup options.” When that shows up, click Options.
- Intel Macs: Power it on, then immediately press and hold Command + R until you see the Apple logo.
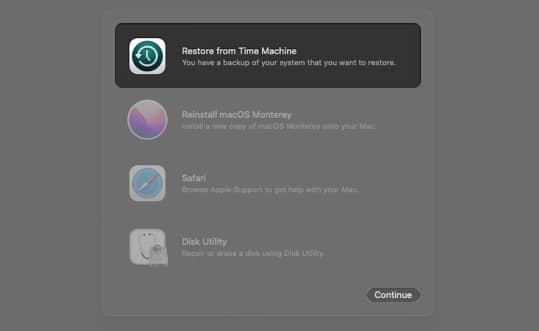
- Once the Recovery screen loads:
- Select your user account and enter your password.
- On the macOS Utilities screen, choose Restore from Time Machine Backup, then click Continue.
- Pick your backup disk. If it’s encrypted, it’ll ask for the password.
- Time Machine will now show you a timeline of backups. I usually pick the most recent one unless I know a specific point I want to rewind to.
- Select the backup date, then click Continue.
- Choose the internal drive (or new replacement drive) as the restore target.
- Hit Restore and go grab coffee. This can take a while, especially if your backup is large.
When it’s done, your Mac will reboot into that backup, with all your apps, settings, and files right where you left them.
And that’s pretty much it. Your Mac’s back, just like it never broke.
Note:
Get Back Lost or Deleted Files with Time Machine on Mac
This is the move when I just need one specific file, an older version of something, or I accidentally trashed a folder.
- Open Finder at the location where the file used to be.
- Connect your backup drive, then click the Time Machine icon in the menu bar and select Enter Time Machine.

- Scroll through the timeline on the right to go back to older backups. The one in red is the selected backup you’re browsing.
- Click the file to preview it and ensure it’s the right one.
- Select the file, folder, or the entire disk, then click Restore. It will return to its original location on your Mac.
Tip:
Related: How to fix Time Machine stuck on preparing backup
Restoring Mac from iCloud Backup
iCloud isn’t like Time Machine, so it won’t give you a full system backup of your Mac. But it can absolutely help when you need to bring back specific files, your photos, or data from apps like Notes, Contacts, or Calendar. It handles the essentials, just not the whole OS.
To see what’s being synced, open System Settings, then tap on your Apple ID. Go to iCloud, then hit See All under Apps Using iCloud. That’ll show you what iCloud is actually handling.
Restore files from iCloud Drive:
I usually jump into Finder and click iCloud Drive from the sidebar. Anything actively synced shows up there.
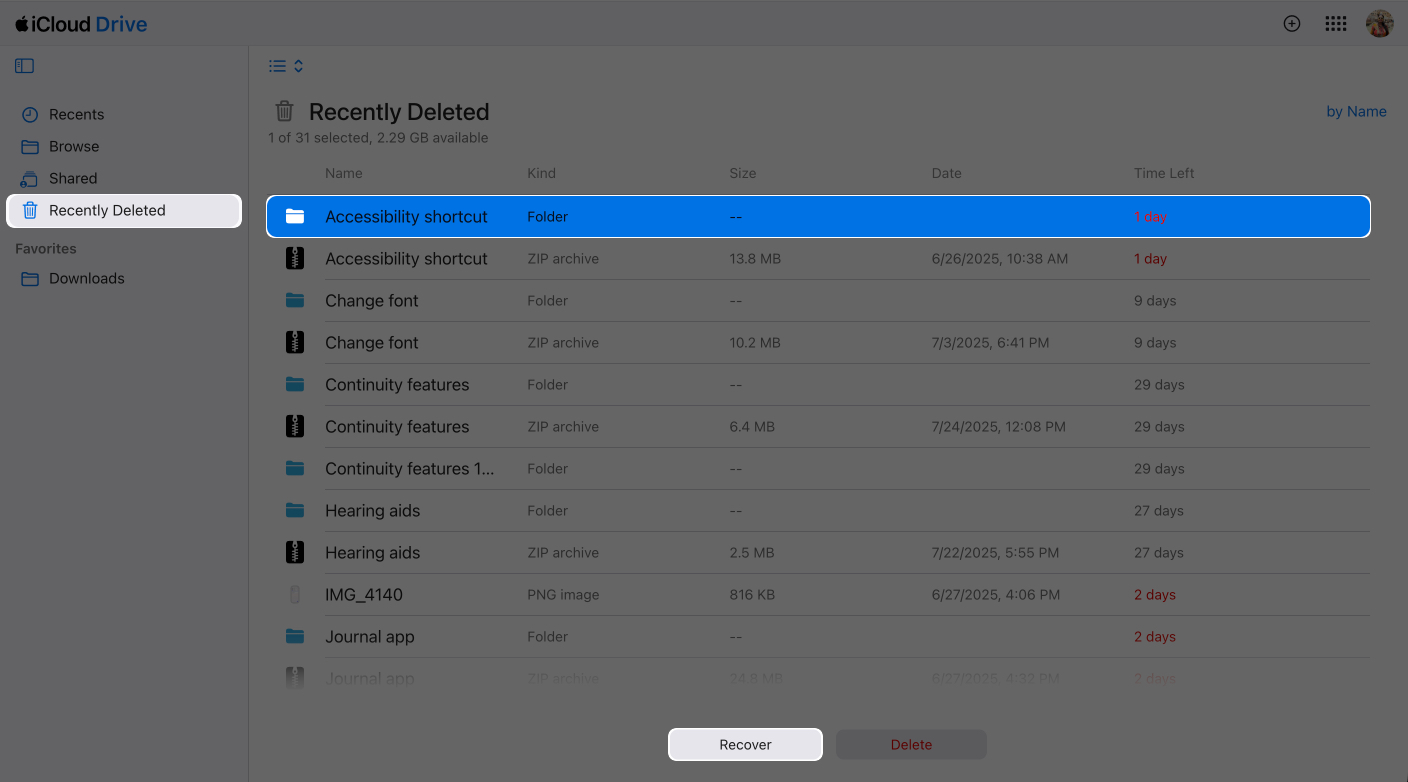
If something was deleted, you can still recover it:
- Head to iCloud.com in any browser and sign in with your Apple ID.
- Click on Drive.
- Check the Recently Deleted section in the sidebar.
- If the file was trashed in the last 30 days, it should still be there. Just select it and hit Recover.

Recover Photos:
I keep iCloud Photos turned on, so everything syncs automatically. But if a photo goes missing, here’s what I do:
- Open the Photos app on your Mac.
- Look in the Recently Deleted album. Anything you deleted stays there for 30 days.
- Select the photo and click Recover to bring it back.
If you’ve got iCloud Photos turned on, everything just syncs from the cloud automatically. You don’t need to think about it too much.
Restore Bookmarks, Contacts, Calendars, or Files:
This one’s a bit hidden, but super useful:
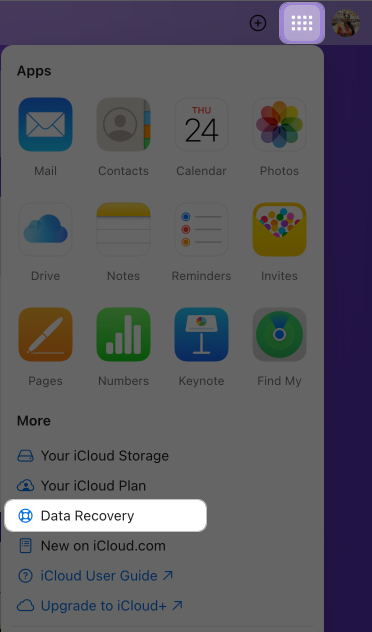
- Go to iCloud.com and log in.
- Click the menu icon next to your profile picture.
- Choose Data Recovery.
- From there, you can pick Restore Files, Restore Bookmarks, Restore Contacts, or Restore Calendars. It pulls from previous snapshots.
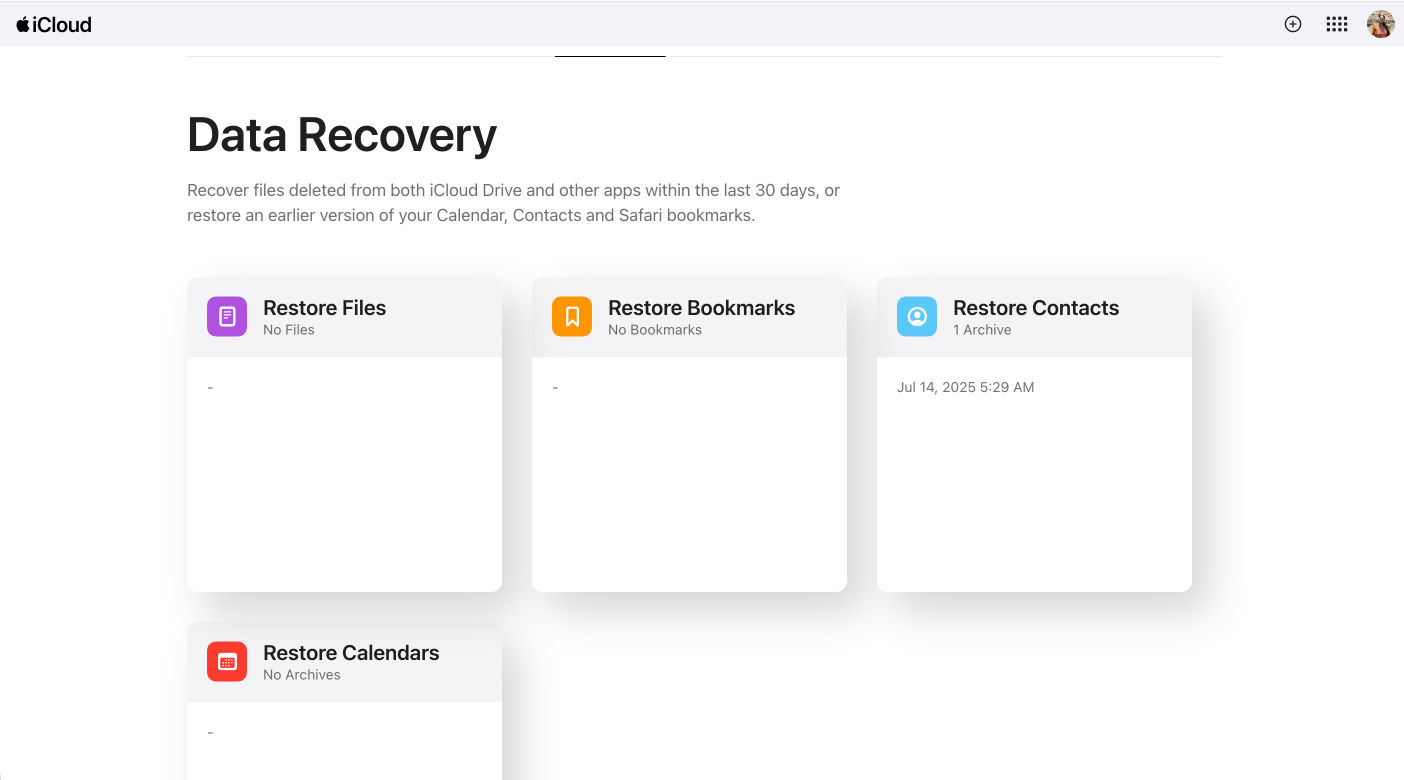

Just know that restoring something this way replaces what you currently have with the backup version, and that syncs across every device using your Apple ID. So don’t hit restore unless you’re sure.
One thing to remember: iCloud doesn’t restore your entire macOS system, any installed apps, or your custom settings. It’s great for data, not for full recovery.
And storage is tight by default. You only get 5GB free, which fills up fast if you’re syncing across your iPhone, iPad, and Mac. I bumped up to iCloud+ for more space (you can go for 50GB, 200GB, or 2TB).
You could also stash backups with other cloud storage tools. Some of them even support uploading your Time Machine backups to the cloud, which feels a bit more complete.
How to Use External Disk Clones for Restore
Best for: Power users and anyone who wants a full, bootable backup
Disk clones are basically a carbon copy of your entire Mac drive. I use third-party backup apps like SuperDuper! or Carbon Copy Cloner to make them. What’s great is that these clones are bootable, so you can actually start your Mac straight from the external drive.
Here’s how I do it:
- Plug in the external drive that holds your clone.
- Shut down your Mac.
- Press and hold the Power button until Startup Manager shows up.
- Pick the clone drive and click the arrow to boot from it.
Once you’re booted into the clone, you can restore your Mac back to how it was.
- Launch the cloning app from the clone.
- Choose the clone as the source, and your Mac’s internal drive as the destination.
- Start the clone. It’ll overwrite your Mac with the copy from the external drive.
After it finishes, restart your Mac and hold the Power button again to boot back into your internal drive.
Another option: You can boot into Recovery Mode, open Disk Utility, and click Continue. Pick your Mac’s internal drive, go to the Restore tab, then choose your external drive as the “Restore From” and your Mac’s drive as the “Restore To.” Hit Restore.
Some cloning tools need you to erase your internal drive first or install macOS Recovery onto the external drive before it can boot properly. Definitely check the instructions from the app you’re using.
Honestly, this method is quicker than Time Machine when you need to get everything back. It just takes a little more prep and know-how to set up.
No Backup? Here’s What You Can Try
If you’re stuck without a backup, don’t panic just yet. There’s still a chance you can recover some files if you move fast.
- Check your cloud apps: If you use anything like Dropbox, Google Drive, or OneDrive, open up their web apps and poke around. A lot of them keep deleted files in a trash folder for 30 days, sometimes even longer if you’re on a paid plan.
- Try macOS recovery tools: There are a bunch of apps that scan your Mac’s drive and try to bring back deleted stuff. I’ve used them in a pinch when a drive got wiped or corrupted. It’s not magic, but it can help more than you’d think.
- Go to the Genius Bar: If you’re totally stuck, you could bring your Mac to an Apple Store and ask the Genius Bar if they can pull anything. It’s pricey, and there’s no guarantee, but if the files are that important, it might be worth a shot.
Warning:
Seriously. Once data gets deleted, your Mac might overwrite it just by running normally. Power it down or disconnect the drive if you’re trying to recover something.
Pro Tips to Prevent Future Data Loss
Don’t wait for a scare to sort out your backup setup. I’ve learned this the hard way, and now I keep multiple backups running at all times.
- Use a mix of backups: I combine Time Machine with iCloud, and I also keep a bootable clone on a separate SSD. That way, even if one fails, I’ve got something else ready.
- Automate everything: Time Machine runs every hour by default, so make sure it’s turned on. iCloud takes care of docs, photos, and notes in the background.
- Use services with version history: Time Machine keeps hourly, daily, and weekly snapshots. Some cloud apps do versioning too, which can be a lifesaver if you accidentally overwrite something.
- Test your backups sometimes: Just restore a file or two now and then to make sure your backup isn’t quietly failing.
- Lock down your backups: I always encrypt my Time Machine drive and use FileVault. For iCloud, I use a long passphrase with two-factor. Not just for hackers also in case the drive gets stolen.
- Watch your storage space: Time Machine needs room to breathe. I usually keep a backup drive that’s at least 2 to 3 times bigger than my Mac’s used storage. And yeah, I pay for extra iCloud space.
- Update macOS regularly: New updates often fix little bugs with Time Machine and backup reliability. I don’t always update on day one, but I don’t put it off too long either.
Final Thoughts
Recovering your Mac is actually pretty chill, if you’ve planned ahead. Personally, I lean on Time Machine for set-it-and-forget-it backups, iCloud for syncing everything across devices, and clones when I want to get up and running again instantly. Whatever you go with, just don’t wait. Back up now, not later.
Stuck or confused? Drop a comment and I’ll try to help.


