FaceTime Like a Pro
Get our exclusive Ultimate FaceTime Guide 📚 — absolutely FREE when you sign up for our newsletter below.

FaceTime Like a Pro
Get our exclusive Ultimate FaceTime Guide 📚 — absolutely FREE when you sign up for our newsletter below.
iCloud Tabs helps you continue browsing websites across multiple devices. Here's how to setup and use iCloud Tabs on iPhone, iPad and Mac.
For users with multiple Apple devices, keeping track of all the browser tabs across devices can get cumbersome, especially if you habitually switch devices. This is exactly where the Safari iCloud tab comes in handy. With Safari iCloud tabs enabled on your Apple devices, you can access all your active Safari tabs across all your Apple devices without breaking a sweat.
So, no matter which device you were working on earlier, you can easily continue where you left off on the device you currently have. Keep reading to learn what Safari iCloud tabs are, how to set them up and use them, and what benefits they offer.
Safari iCloud tabs is an Apple Ecosystem feature that uses your available iCloud storage to sync your active Safari tabs across your Apple devices signed with the same Apple ID.
For instance, let’s say you were working on a webpage in Safari on your Mac, and the Mac ran out of battery juice. Frustrating, isn’t it? With Safari iCloud tabs enabled on your Apple devices, you don’t have to be.
As soon as your Mac’s battery runs out, you can pick up your iPhone or iPad, open the Safari app, and resume the same tab without having to navigate to it again.
The integration of Safari tabs into the Apple Ecosystem ensures that you don’t need to copy the URL links on one device and paste them into the other to access the same website; iCloud handles everything automatically.
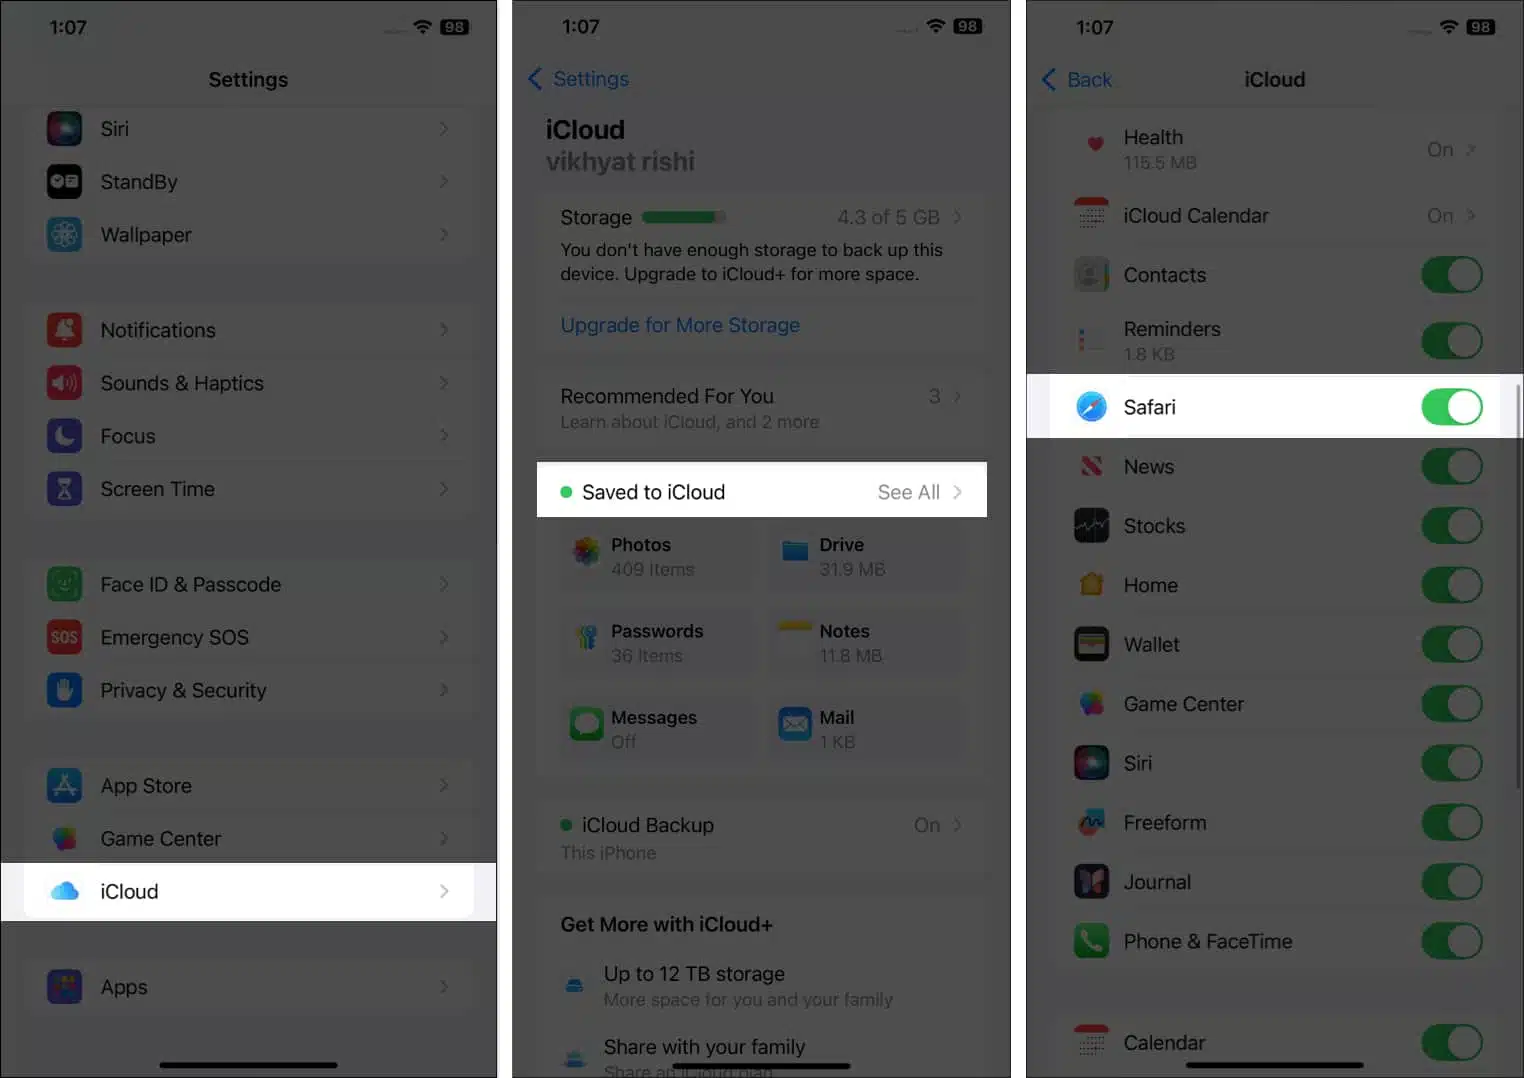
As the name suggests, the Safari iCloud tabs feature uses your available iCloud storage to sync all your active tabs across devices. This means you must allow Safari on your Apple device to sync with iCloud to use Safari iCloud tabs. Here’s how you can do this:


Now that you’ve enabled Safari iCloud tabs on your iPhone, iPad, and Mac, you’ll be amazed at how easy it is to access all your active Safari tabs across all your devices.


That’s pretty much it; by setting up and using Safari iCloud tabs on your Apple devices, you can easily keep track of all your online activities across your devices without missing a beat. So, the next time you read an article on Mac and need to head out, you don’t have to worry about sending the article’s link to your iPhone, as it will be done automatically.
You can comment below if you still have doubts, and I’ll happily respond.
FAQs
You must have enough free iCloud storage available so Safari can sync its data. If not, you won’t be able to set up iCloud tabs.
Once you set up Safari for iCloud, all your Safari data, including active tabs, bookmarks, and reading lists, is stored in iCloud and can be accessed via your other Apple devices.
Ensure you have enough iCloud space and that all your Apple devices are signed in with the same Apple ID. You can also try to toggle the feature on and off.
Read More: