Planning a weekend party, organizing a family trip, or need to send a message to multiple people at once? Lists on iPhone make it simple. Starting with iOS 16, Apple renamed Contact Groups to Lists in the Contacts app, allowing you to create a list and message or email everyone at once without using third-party apps. Your lists also sync across all Apple devices through iCloud when Contacts syncing is enabled.
In this guide, you’ll learn how to create a contact group on iPhone, add or remove contacts, manage lists, and send group messages or emails efficiently.
How to Create a Contact Group (List) on iPhone
Follow these steps to create a new list directly on your iPhone:
- Open the Phone app and tap Contacts.
- Tap on the (<) left-angle-bracket icon in the upper‑left corner. This will show all your existing lists.
- Tap Add List in the top‑right corner.
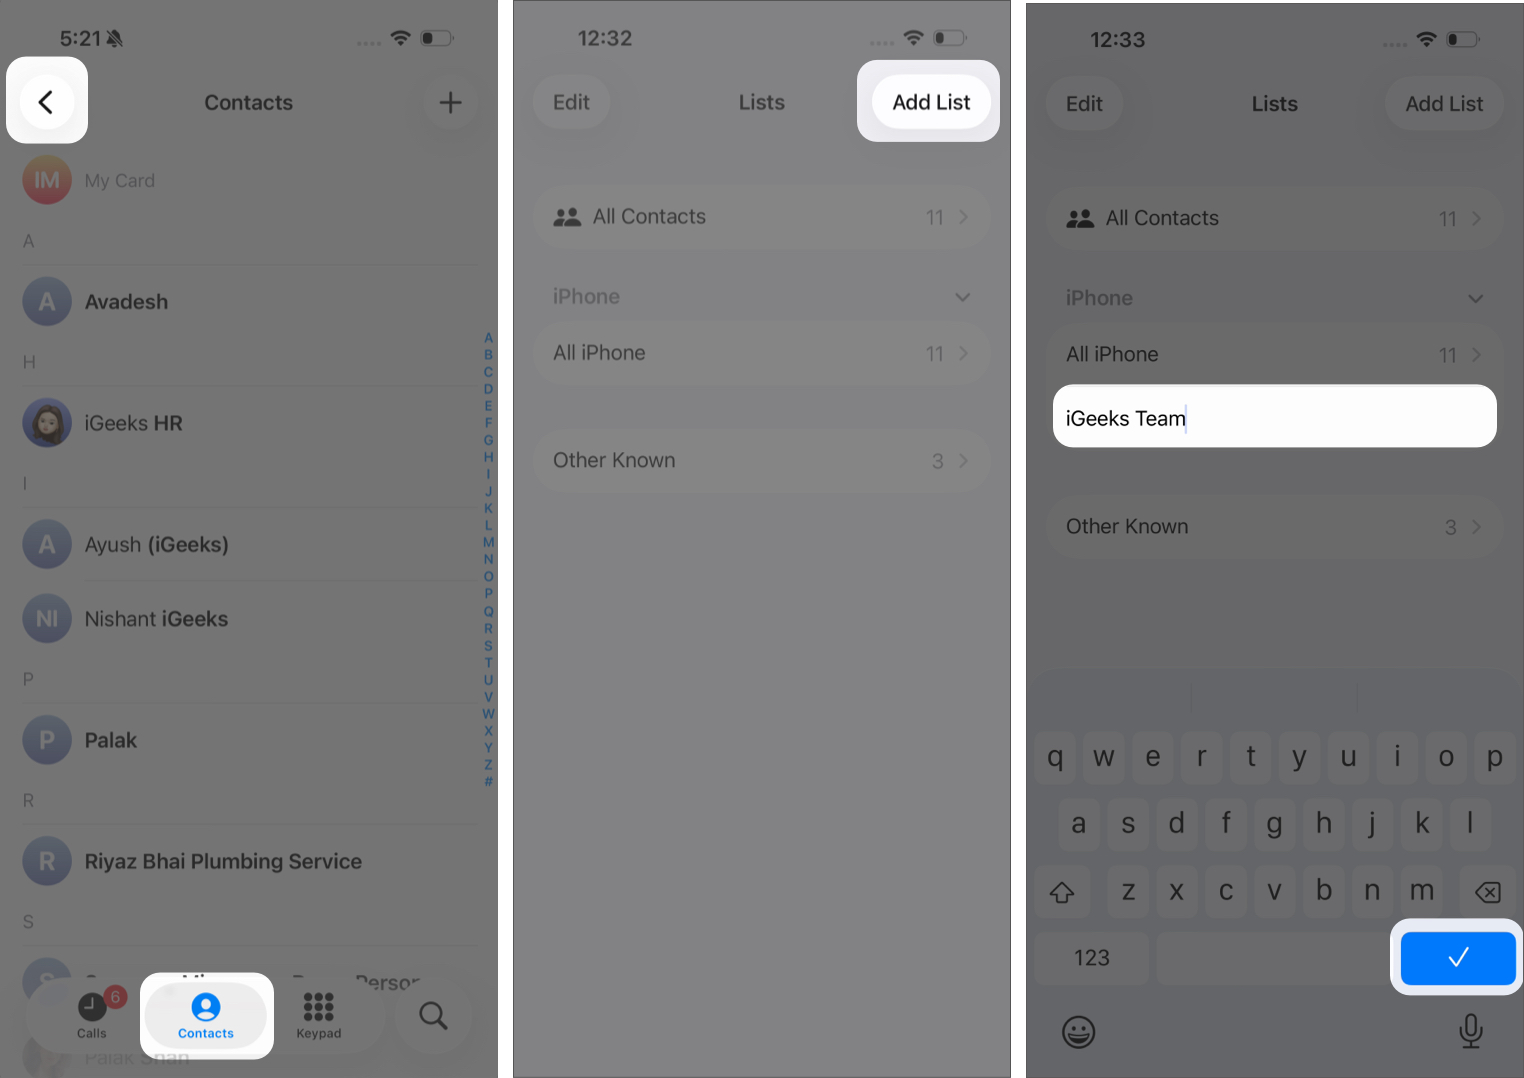
- Enter the name of your list. Write something memorable, such as Family, Work, or Weekend Team, then tap on the Check icon or Done button.
- Add Contacts to Your List:
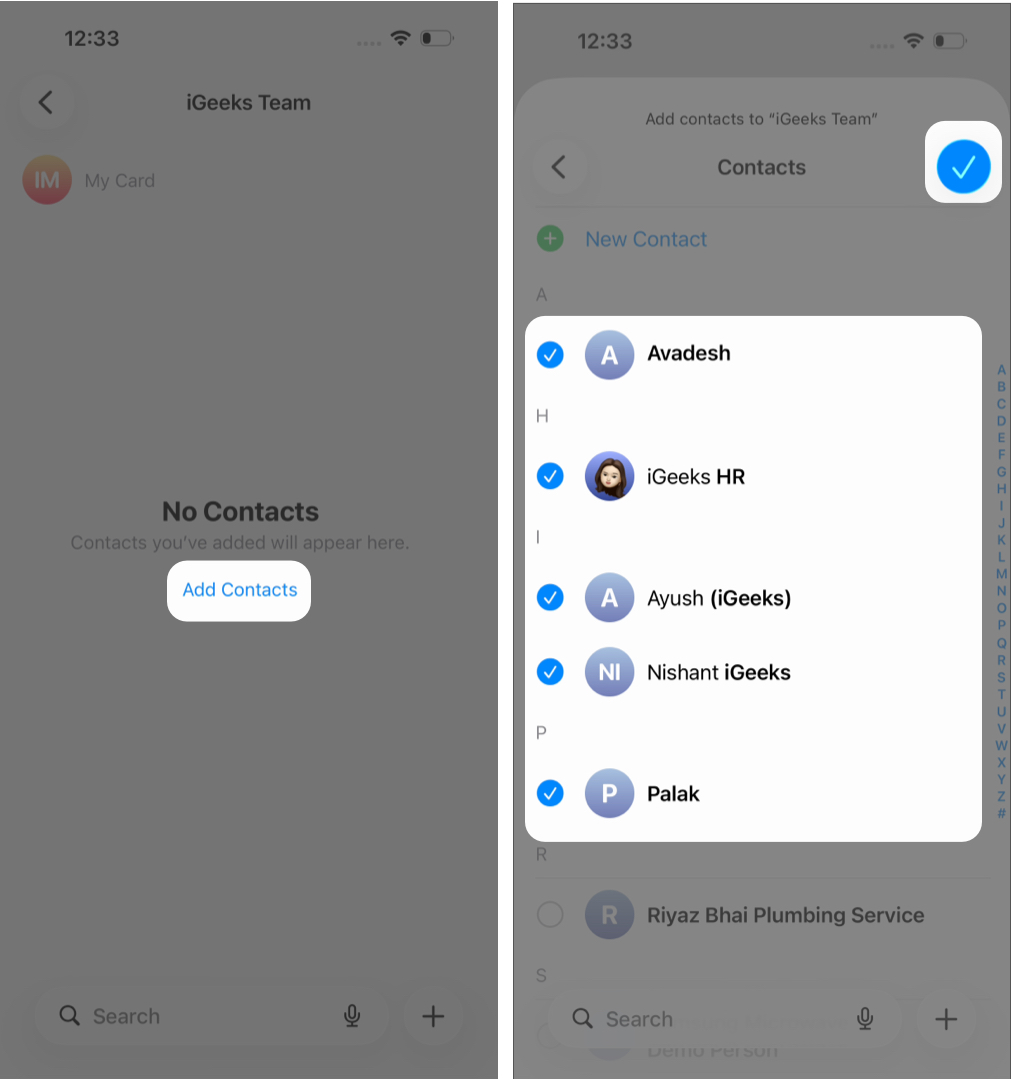
- Open your newly created List.
- Tap Add Contacts in the center of the screen.
- Select the contacts you want to include.
- Tap Done or Check icon to add to your List.
That’s it. Your contact group is ready.
How to Manage Contact Groups (Lists) on iPhone
Once you’ve created a list, you can easily update or organize it.
Add Contacts to an Existing List
If you forgot to include someone or want to add new members:
- Open Contacts → Lists.
- Select the List.
- Tap Add (+) on the top-right corner.
- Choose contacts → tap Done.
Alternative method: Open any contact card → Scroll down and tap Add to List → Select the desired list.
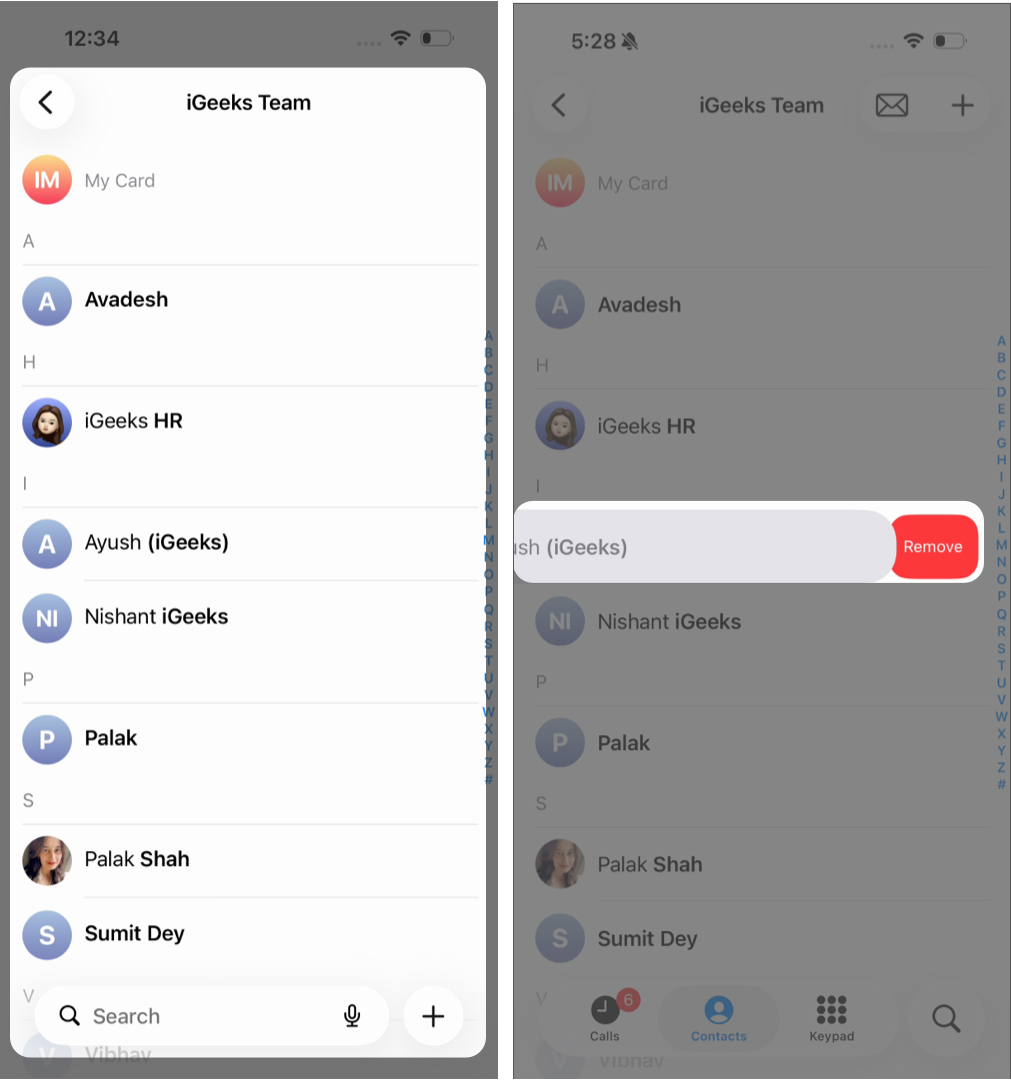
Remove Contacts from a List
Removing someone from a list does not delete them from your iPhone.
- Go to Contacts → Lists.
- Select the list.
- Swipe left on the contact.
- Tap Remove.
Delete a Contact Group (List)
If you no longer need a list:
- Open Contacts → Lists.
- Tap Edit in the top-left corner.
- Tap the red delete icon next to the list.
- Tap the trash icon that appears.
- Confirm deletion.
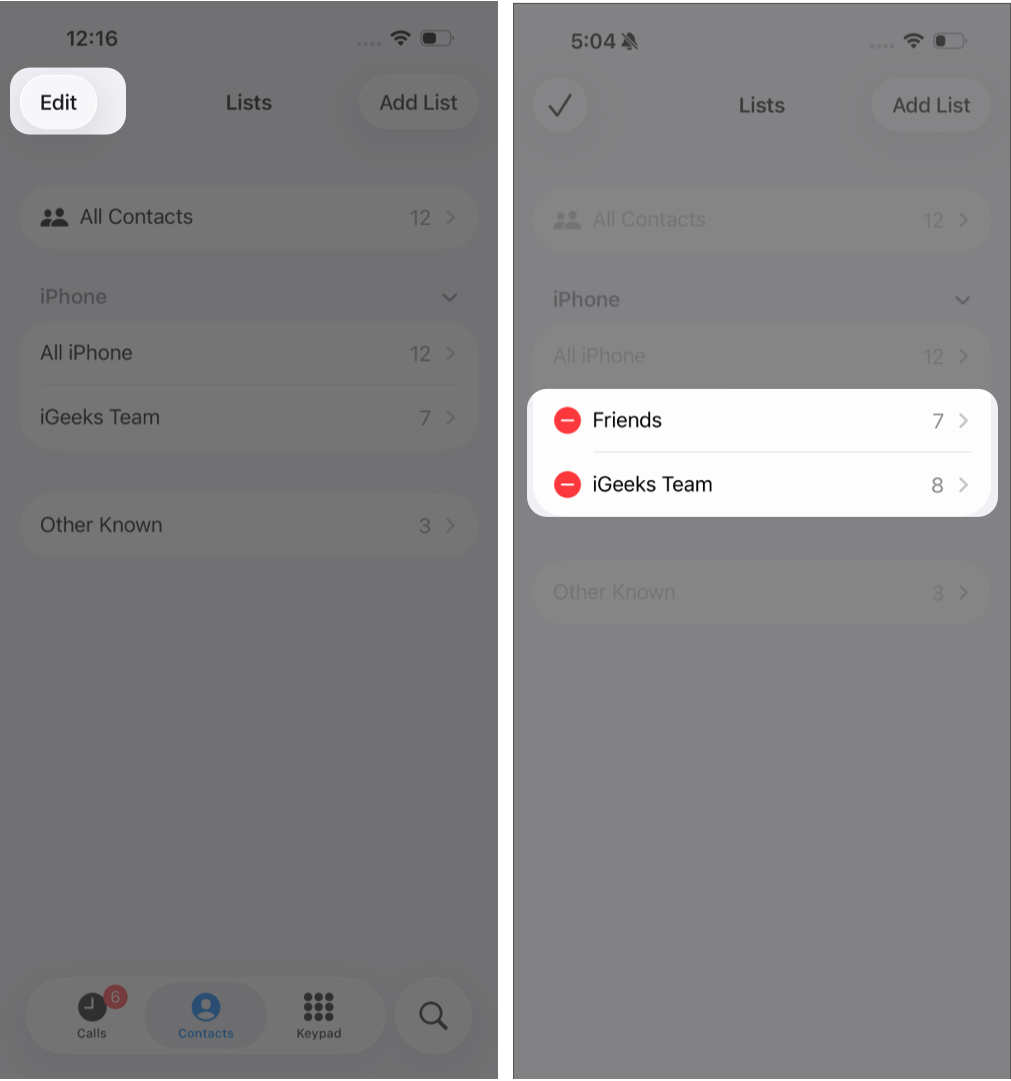

This removes the list only. Your contacts remain saved on your device.
How to Send a Group Message on iPhone
After creating a list, you can quickly send a message to everyone in it.
Method 1: Message All (iOS 17 and Later)
- Go to Contacts → Lists.
- Long-press the list.
- Tap Message All to start a group conversation.
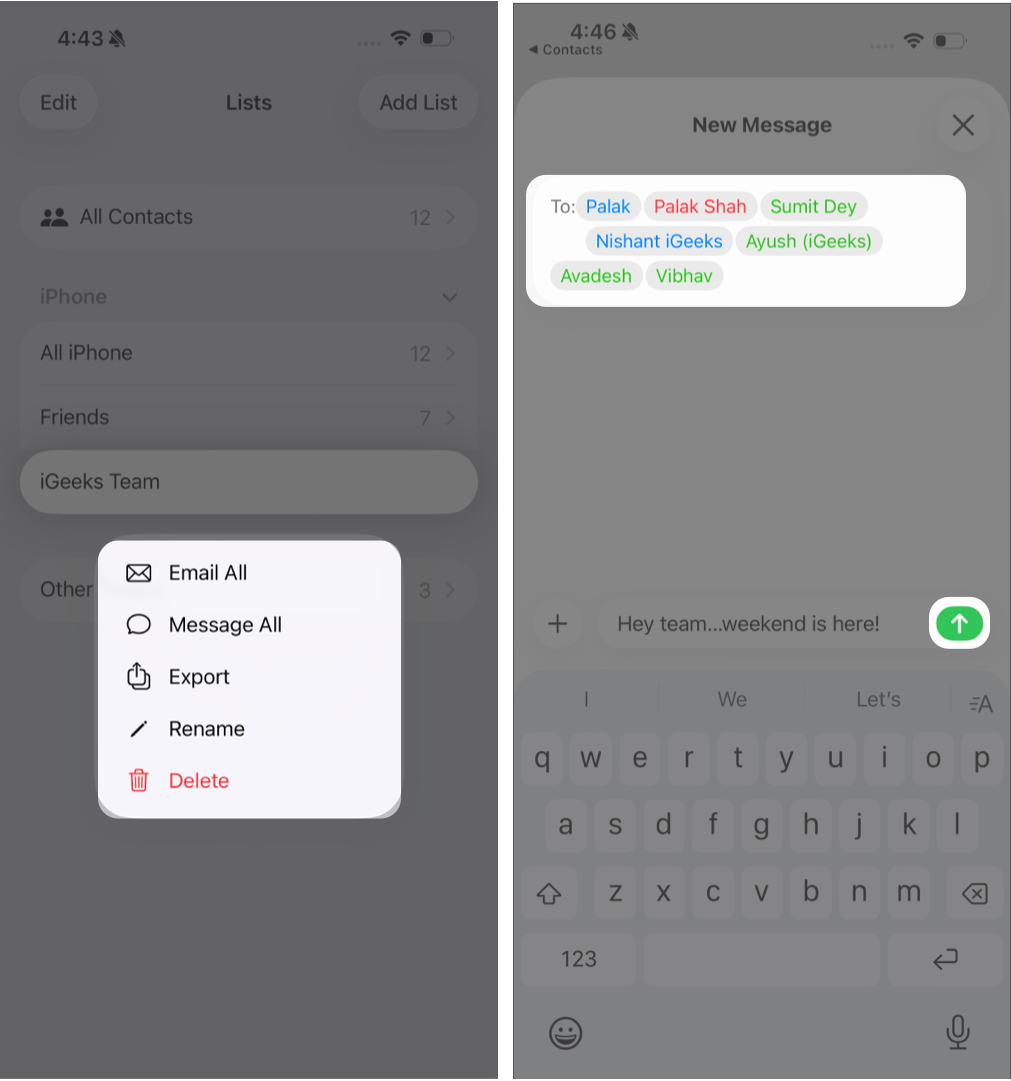

Method 2: Create a New Message Manually
- Open the Messages app.
- Tap New Message (pen icon).
- Type the list name or tap + to select contacts manually.
- Enter your message and tap Send.
Contacts who do not use iMessage will receive SMS messages (green bubbles).
How to Send a Group Email on iPhone
You can also email everyone in a list instantly.
- Go to Contacts → Lists.
- Open a list.
- Tap the Mail icon in the top-right corner.
- Compose your email and tap Send.
This is especially useful for work teams, event invitations, announcements, or customer updates.
Wrapping Up
Now you know how to create, manage, and use contact lists on your iPhone. Lists help you reach multiple people at once without selecting contacts individually each time. It’s a simple feature, but it can save you time and make communication more efficient.