- Tracking app activity helps cut distractions and boost focus, whether on iPhone or Mac, by showing where your time is really spent.
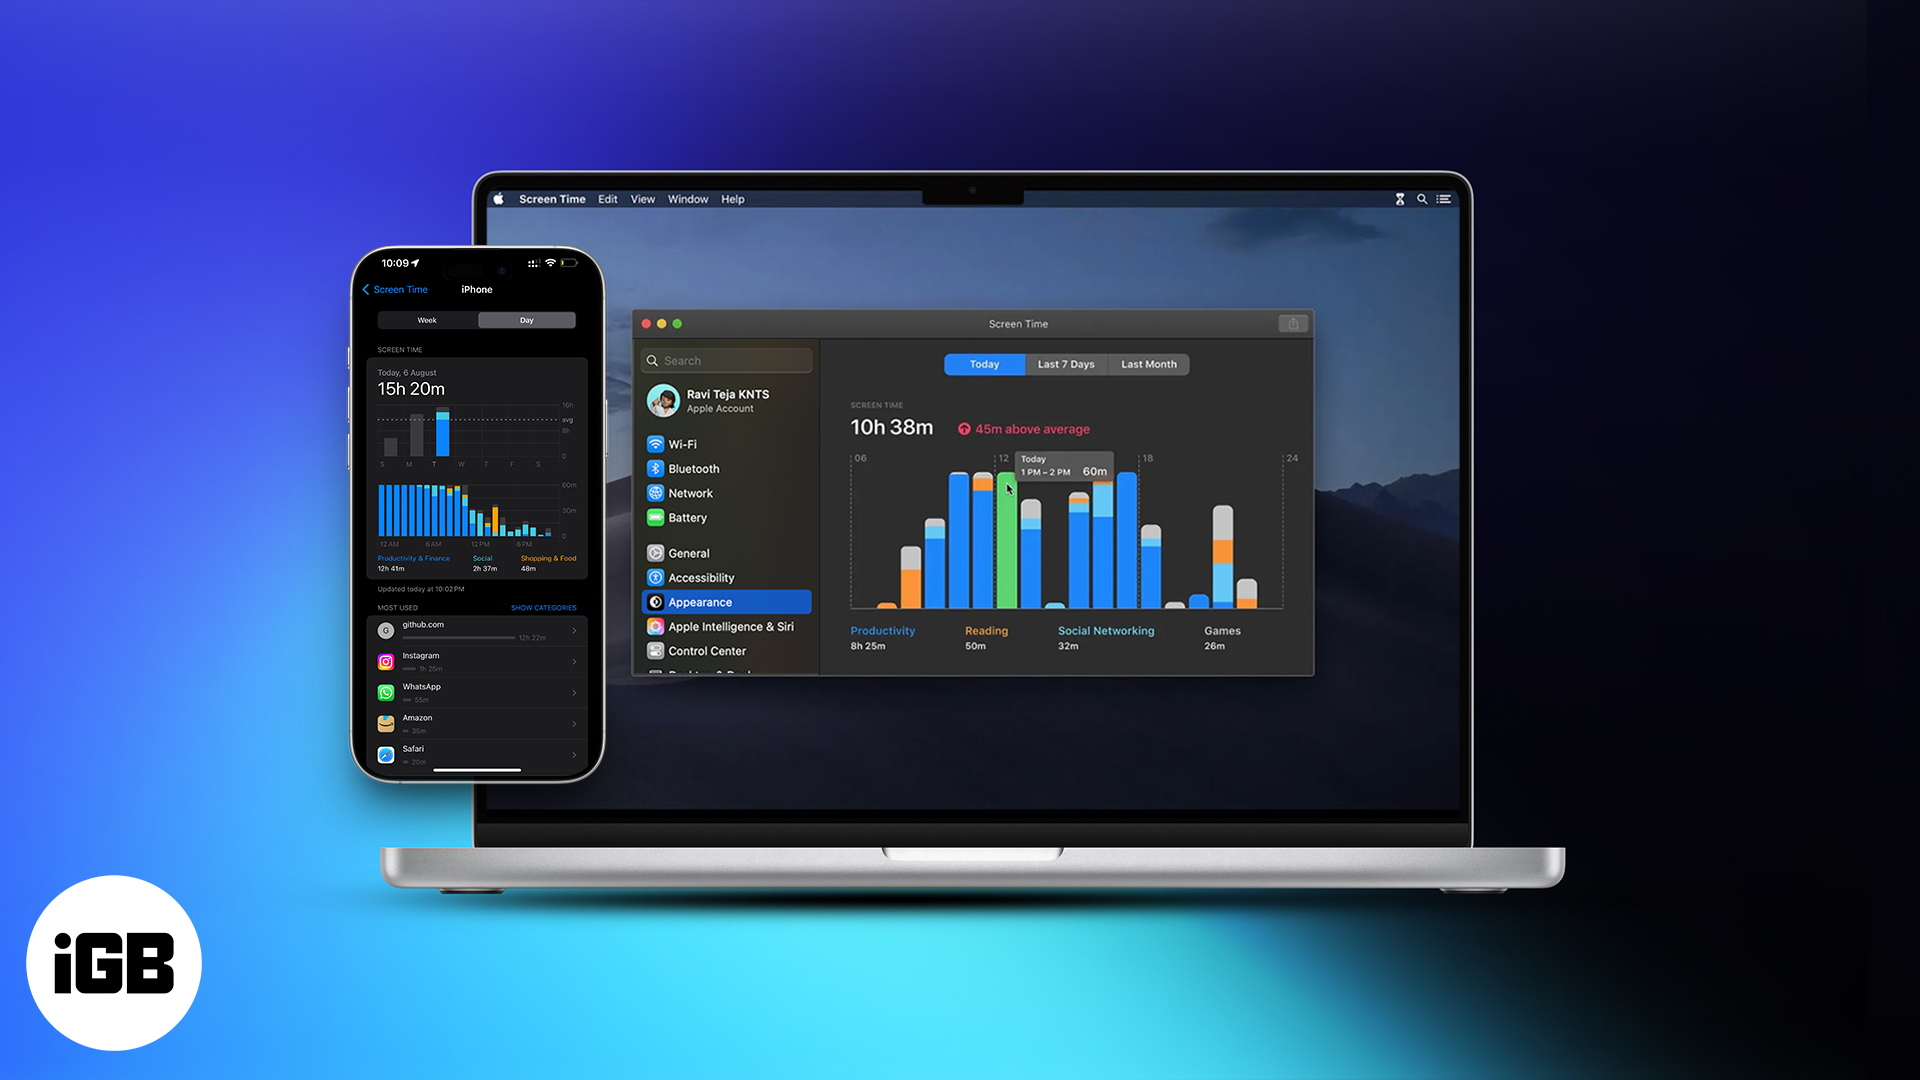
- On iPhone, go to Settings > Screen Time to check app usage, pickups, categories, and notifications with daily and weekly breakdowns.
- On Mac, open System Settings > Screen Time to see app and website activity, and set limits for better balance.
- Use Activity Monitor for live performance insights, checking CPU, memory, and network use to spot apps draining resources.
- App limits sync across iCloud devices, so a restriction set on one device may also apply unexpectedly on others.
With screen time at an all-time high, it’s more important than ever to track which apps consume most of your attention. Whether you’re looking to cut distractions or simply want to better understand your habits, Apple’s built-in tools can help.
Let’s break down how to see your most used apps on iPhone and Mac—and what to do with that information.
Why Track App Usage on iPhone and Mac?
Tracking your app activity can improve your digital habits in meaningful ways:
- Eliminate time-wasting apps
- Boost productivity by identifying focus-friendly apps
- Set app limits for work-life balance
- Manage distractions, especially while working remotely
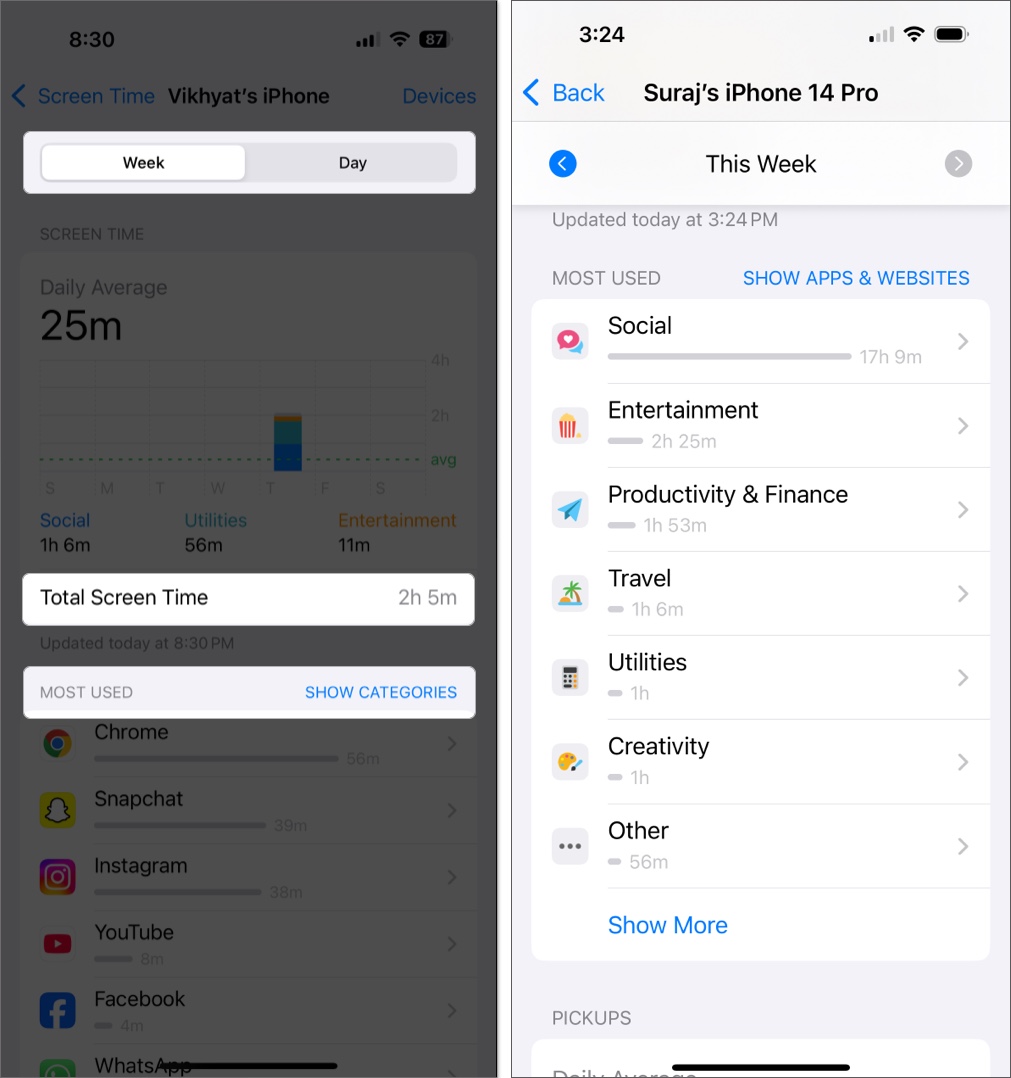
How to Know Which Apps You Use Most on iPhone
Apple introduced Screen Time in iOS 12, giving users powerful insights into their usage patterns. Here’s how to find out your most-used apps:
- Open the Settings app.
- Tap Screen Time.
- If you’ve enabled Share Across Devices, tap See All Apps and Website Activity.
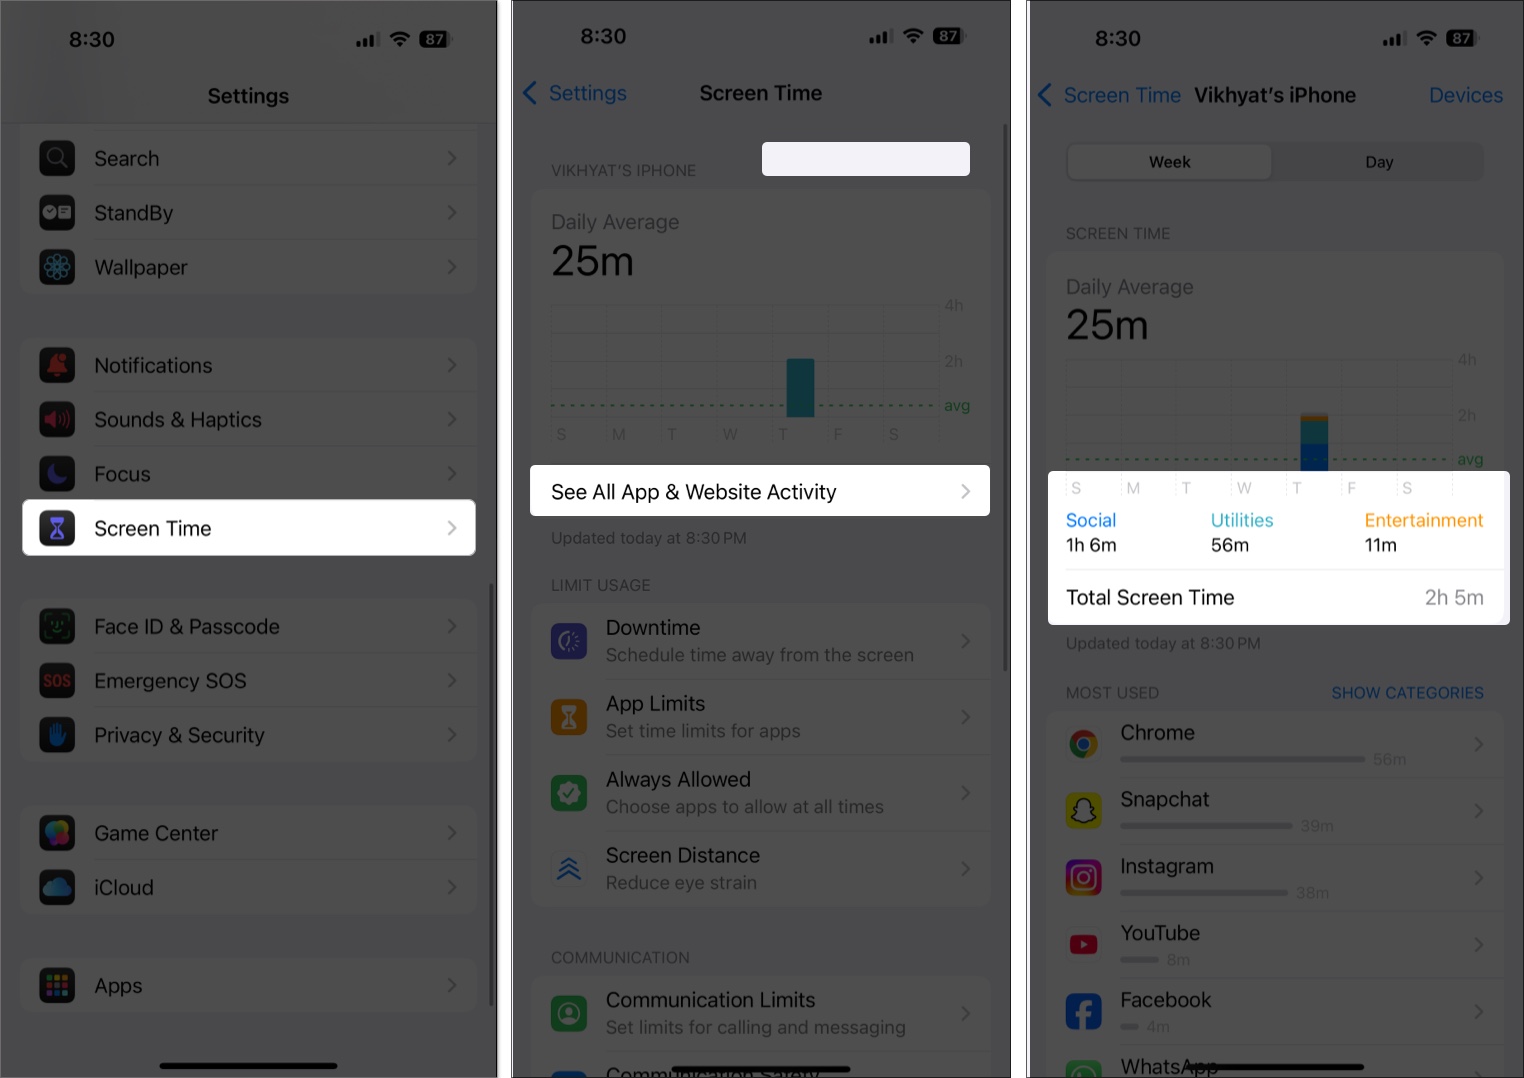
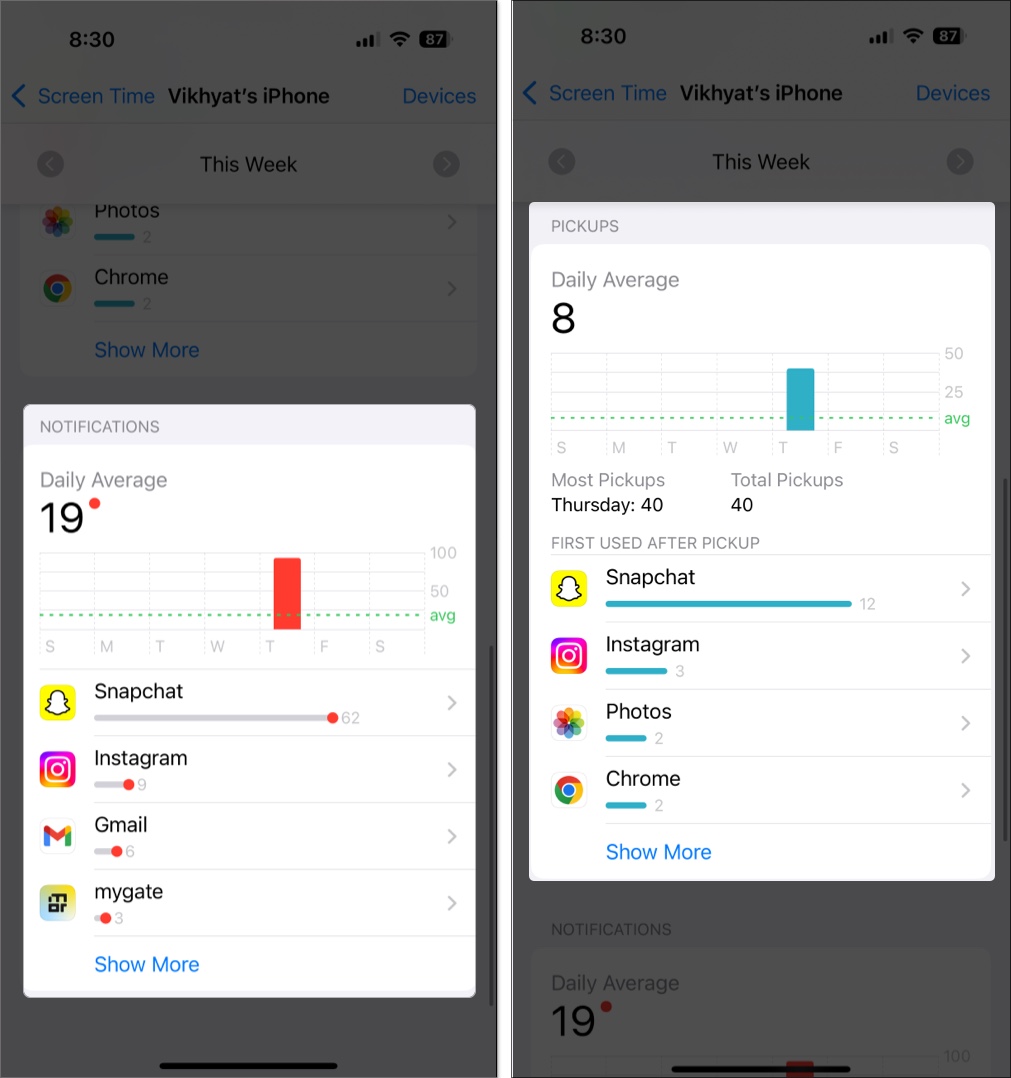
- View detailed usage data:
- Time spent on each app (daily or weekly)
- App categories like Social, Entertainment, Productivity
- Number of pickups and first-used apps
- Notification breakdown per app
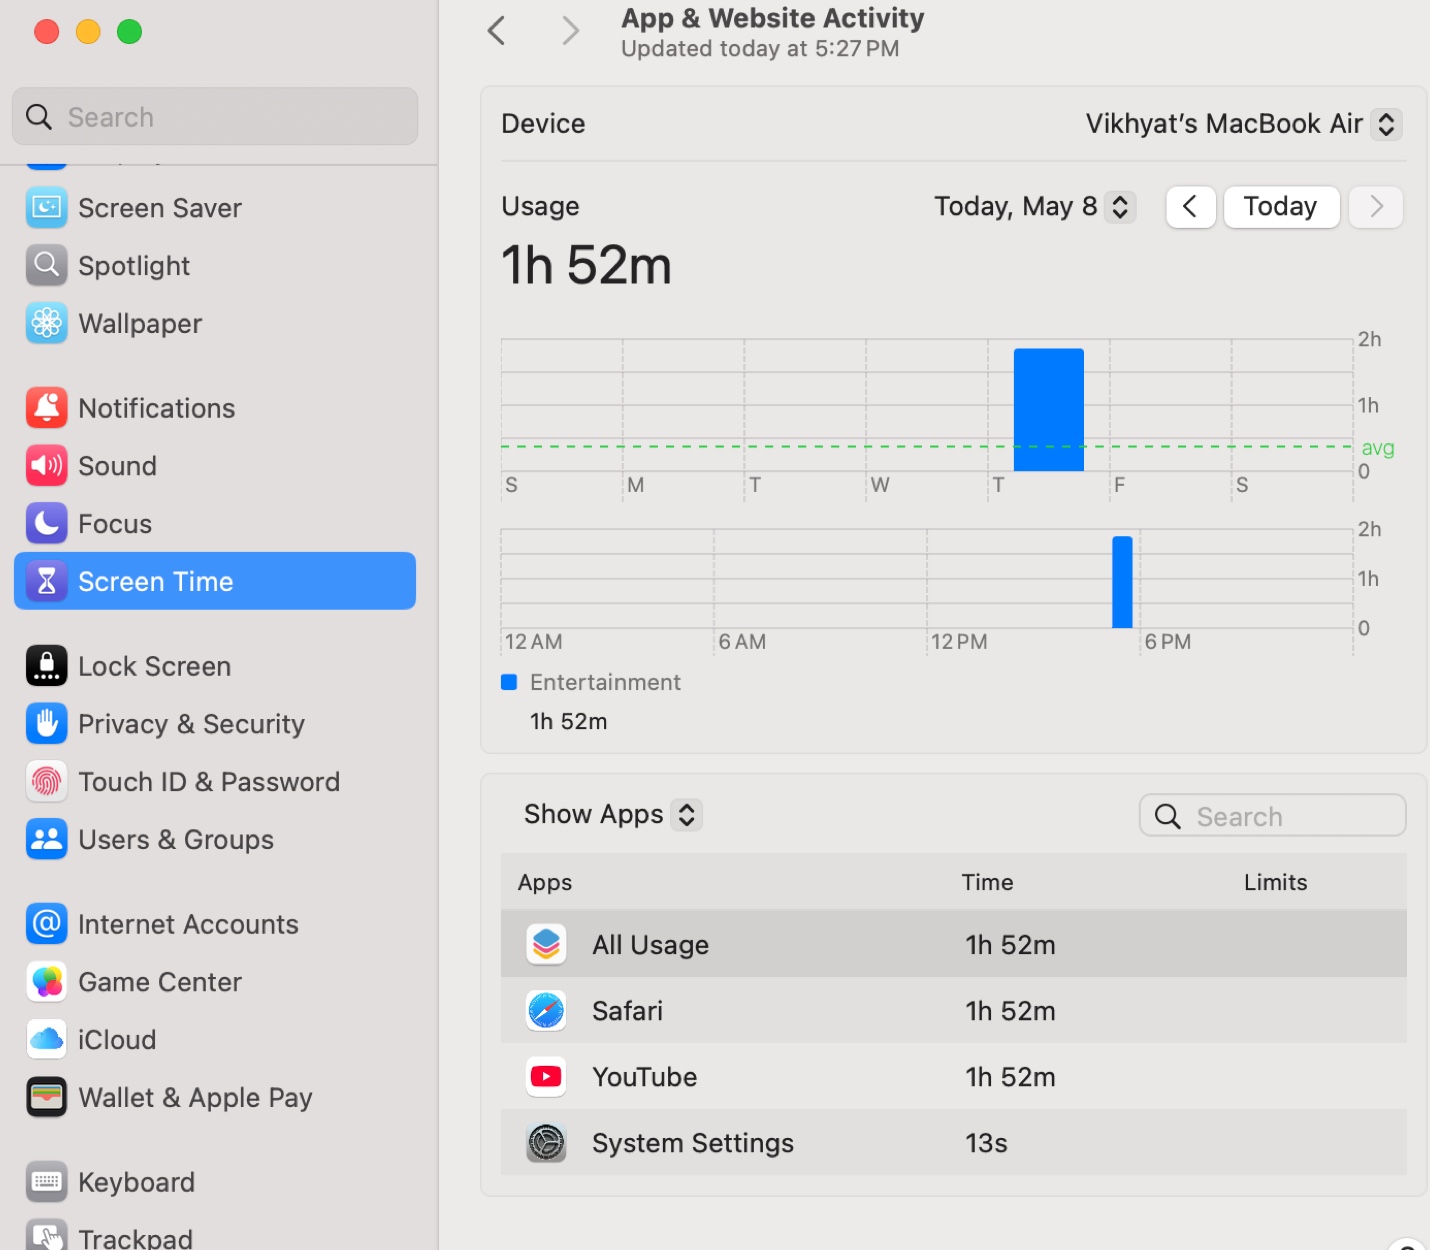
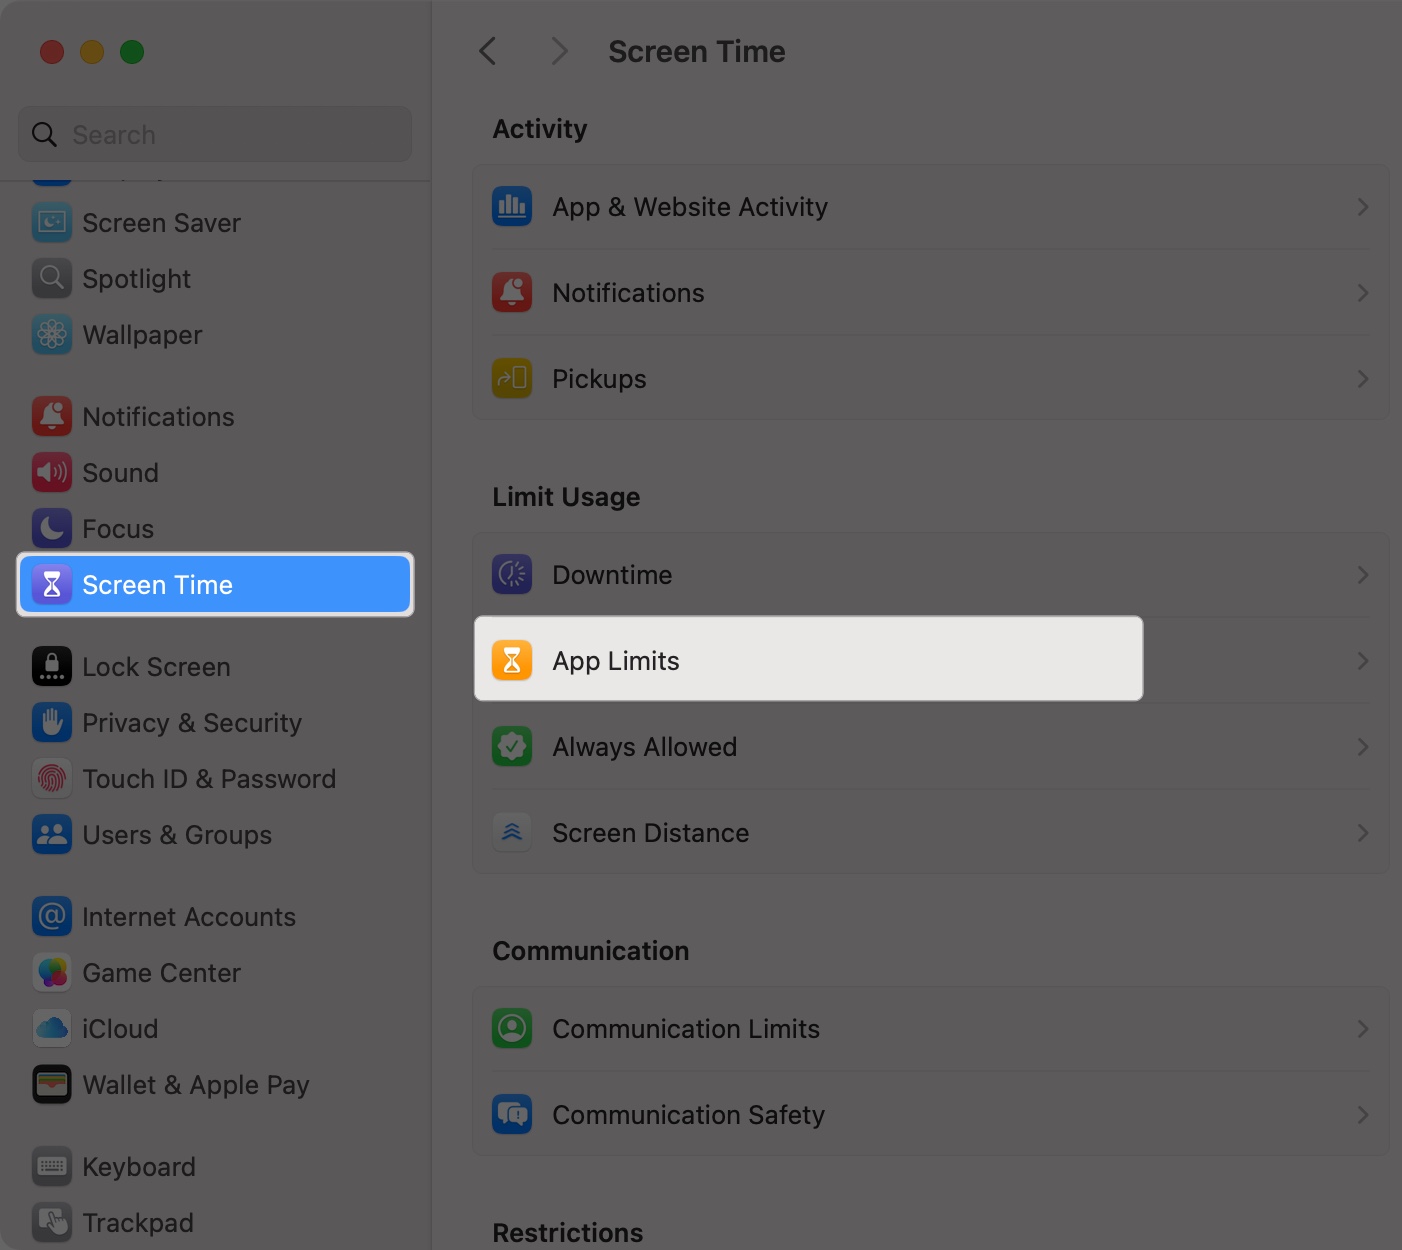
How to Know Which Apps You Use Most on Mac
macOS now includes Screen Time, giving Mac users the same visibility into their digital habits. To check your most-used apps:
- Open System Settings and select Screen Time.
- Click on Apps and Website Activity under the Activity section.
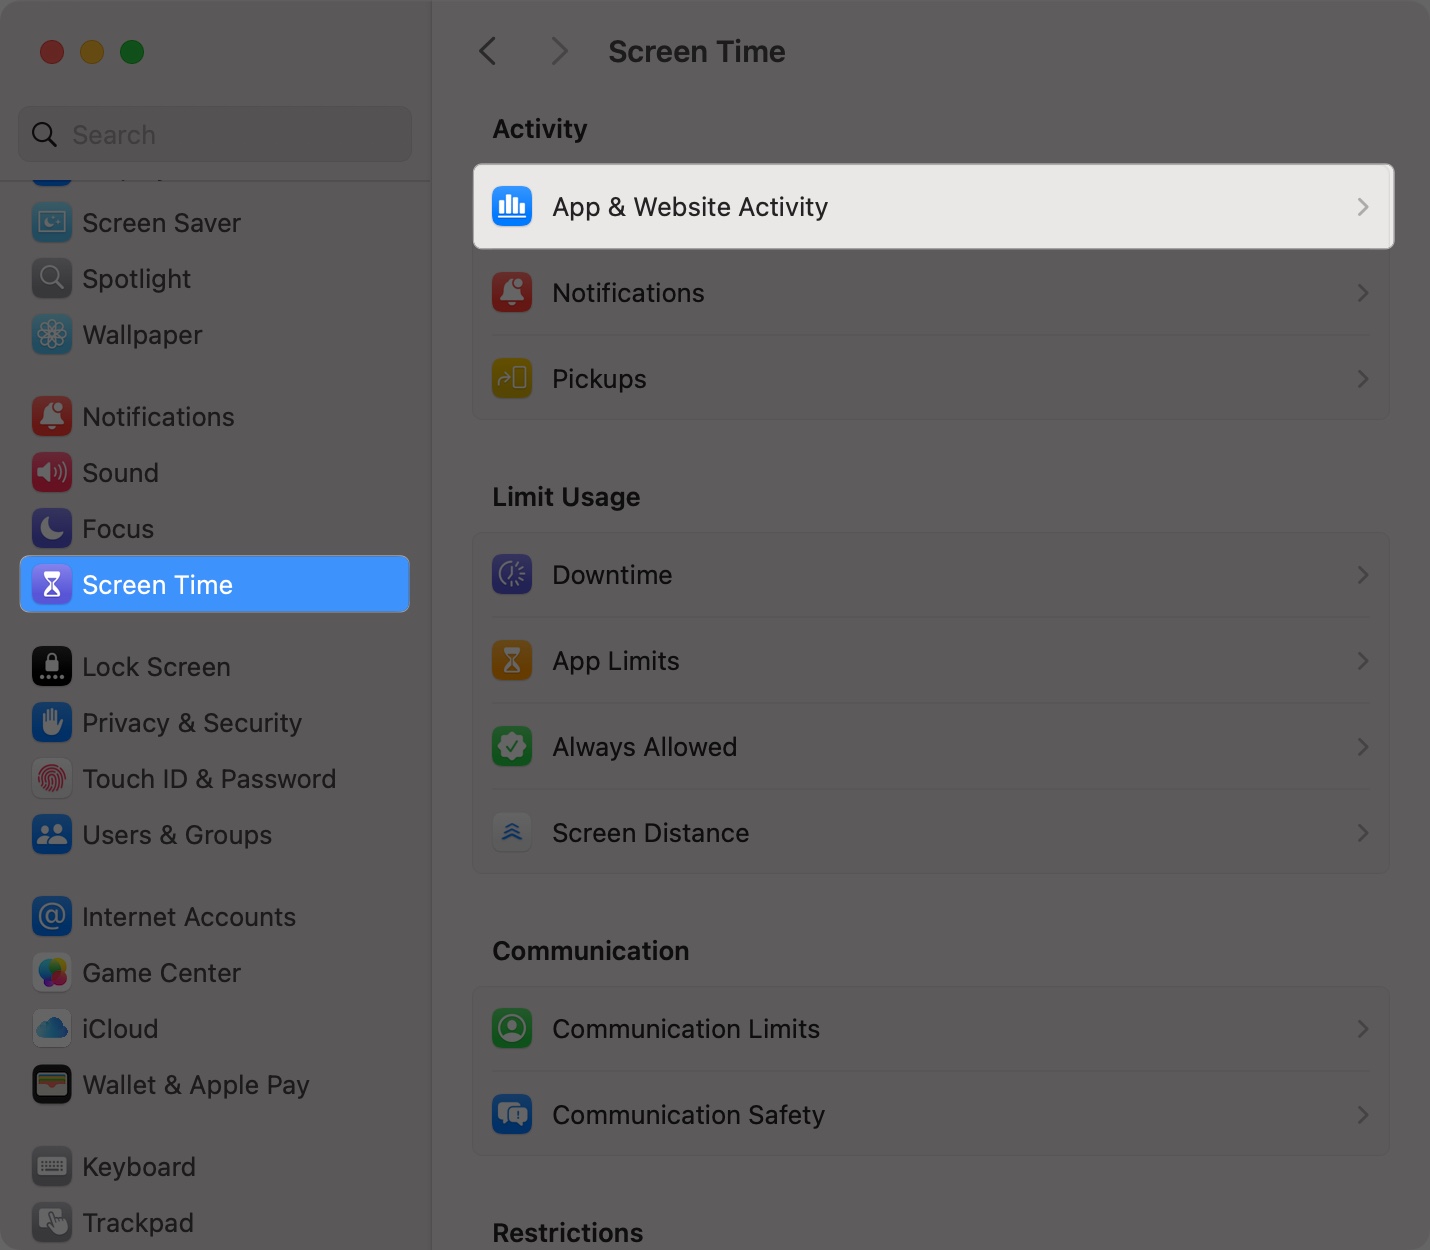
- Here, you can view your daily and weekly screen time reports, showing:
- Most-used apps
- Time spent on each website
- Daily and weekly totals

Note:
If you’ve enabled Screen Time sharing across devices, you’ll see combined data across your Apple devices for a complete view.
Use Activity Monitor for Real-Time App Insights
Want to know what’s eating up system resources right now? Use Activity Monitor:
- Open Activity Monitor (Applications > Utilities or via Spotlight).
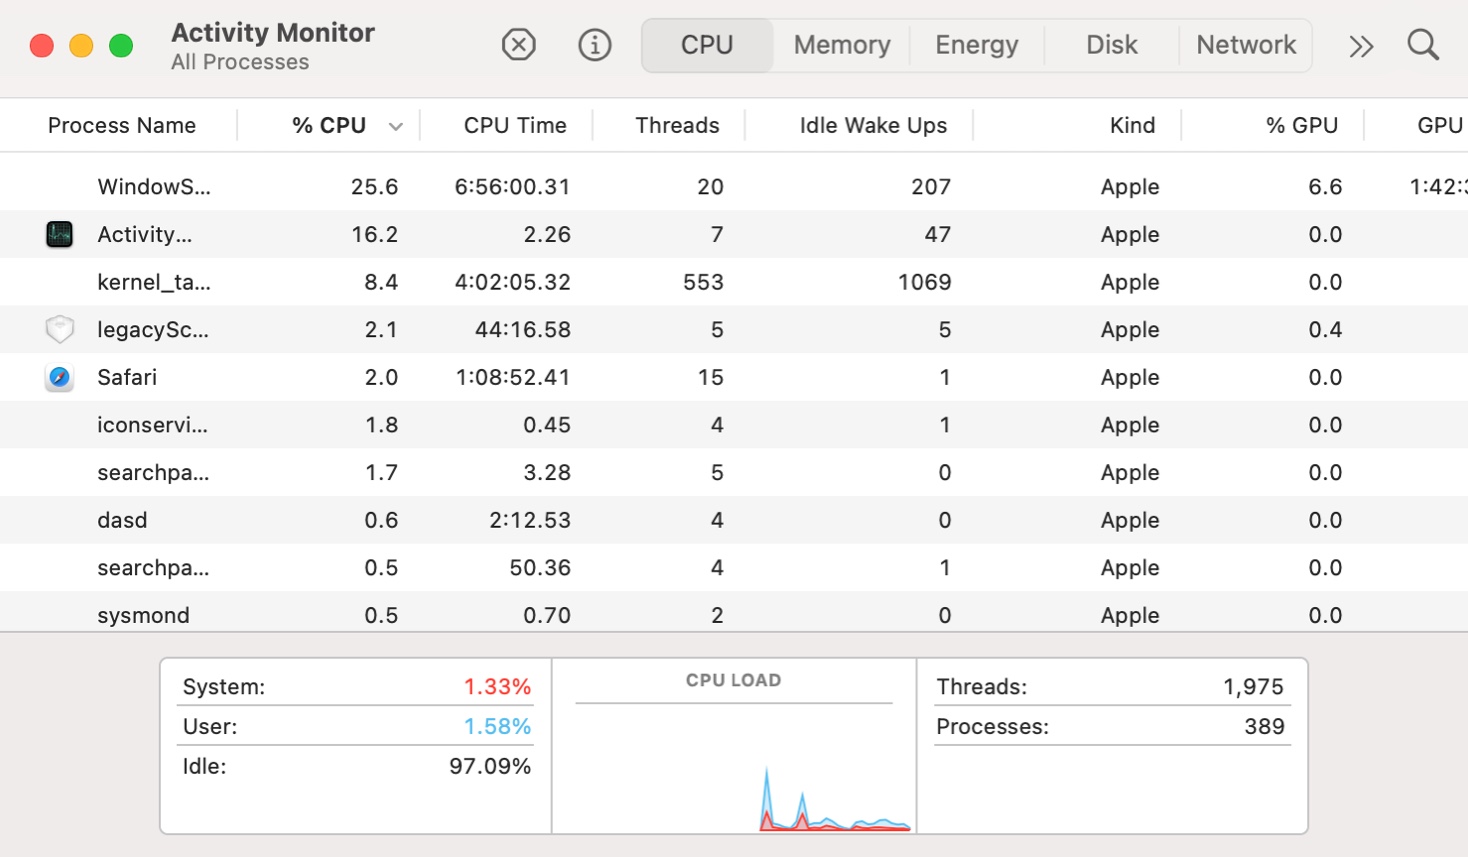
- Check the following tabs for live usage:
- CPU: shows how much processing power each app is using.
- Memory: shows how much RAM each app is using.
- Energy: helps track battery-intensive apps (especially useful on MacBooks).
- Disk: shows how much data each app is reading/writing.
- Network: displays current data upload/download per app.

This tool is especially helpful if your Mac feels slow and you want to pinpoint the culprit.
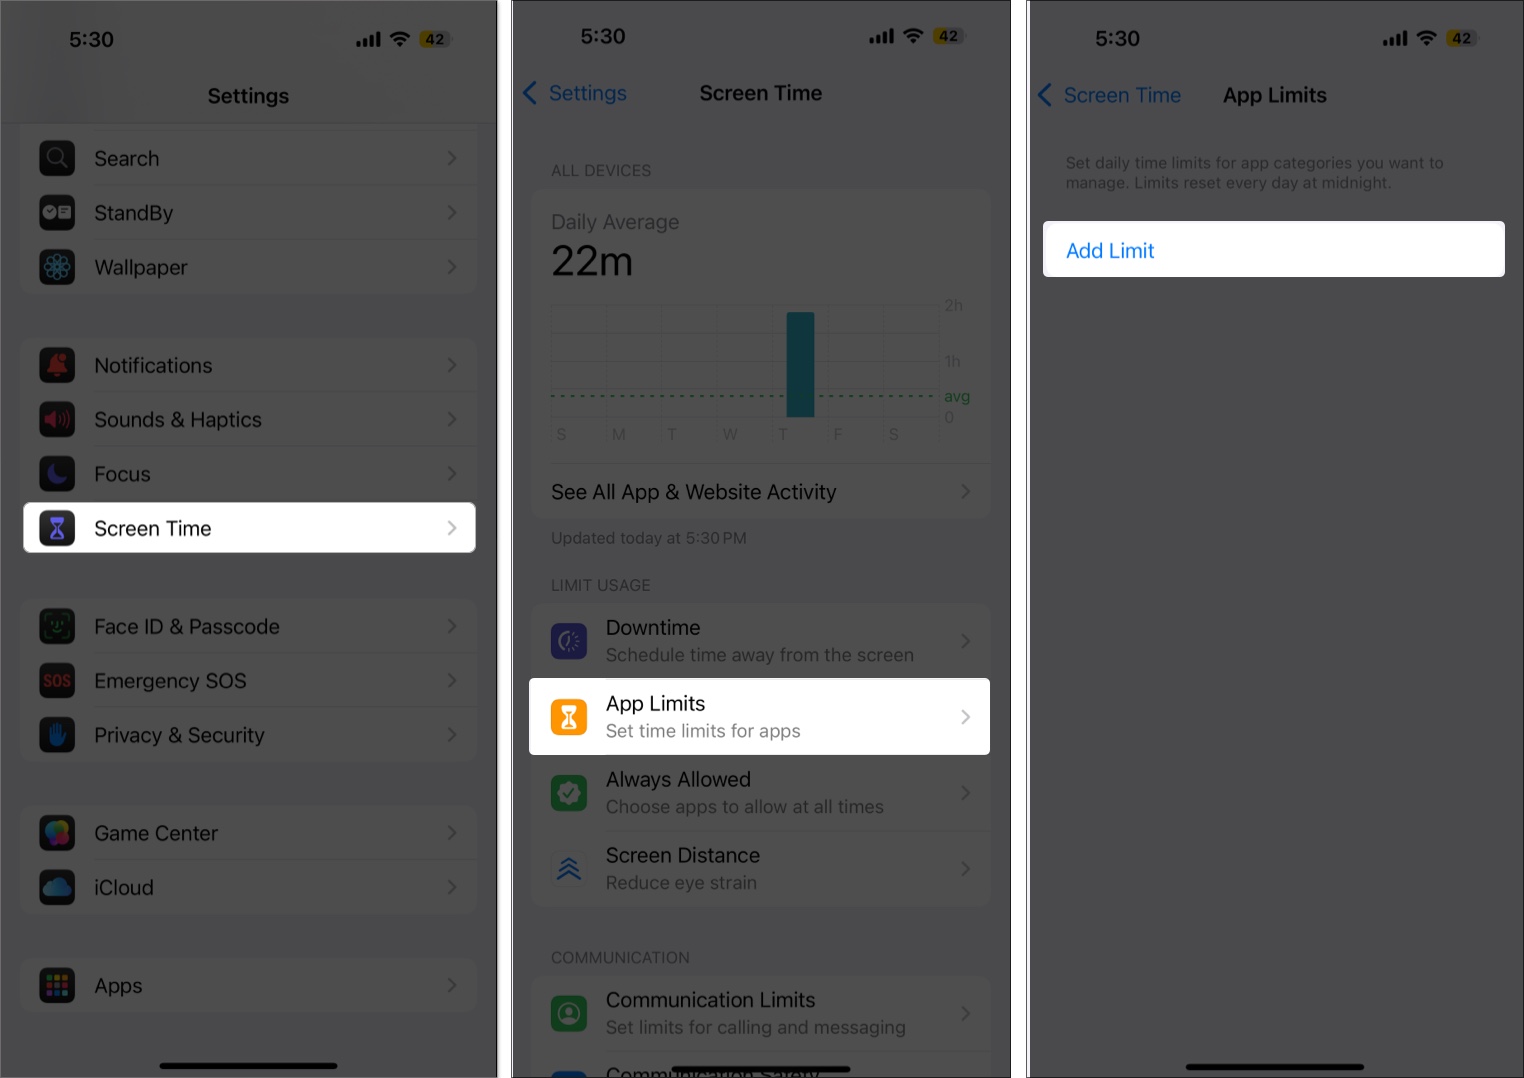
Bonus Tip: How to Set App Limits on iPhone or Mac
Analyzed your app usage habits and figured out whether your work apps are creeping into your personal time or vice versa? While your willpower might help you avoid that, you don’t have to rely on willpower alone, as Apple has a fix. Whether on your iPhone or Mac, you can set App Limits for certain apps to curb unnecessary usage automatically.
Once you exceed the app limit, the app’s icon will gray out, and you won’t be able to access it as usual. However, it’s ultimately up to you whether you ignore the time limit (with a passcode) or respect the boundary.
Now that you know the basics, here’s how you can use App Limits on your iPhone and Mac:
On iPhone:
- Open Settings → Screen Time.
- Now, tap on App Limits under the Limit Usage section.
- Tap the Add Limit button.
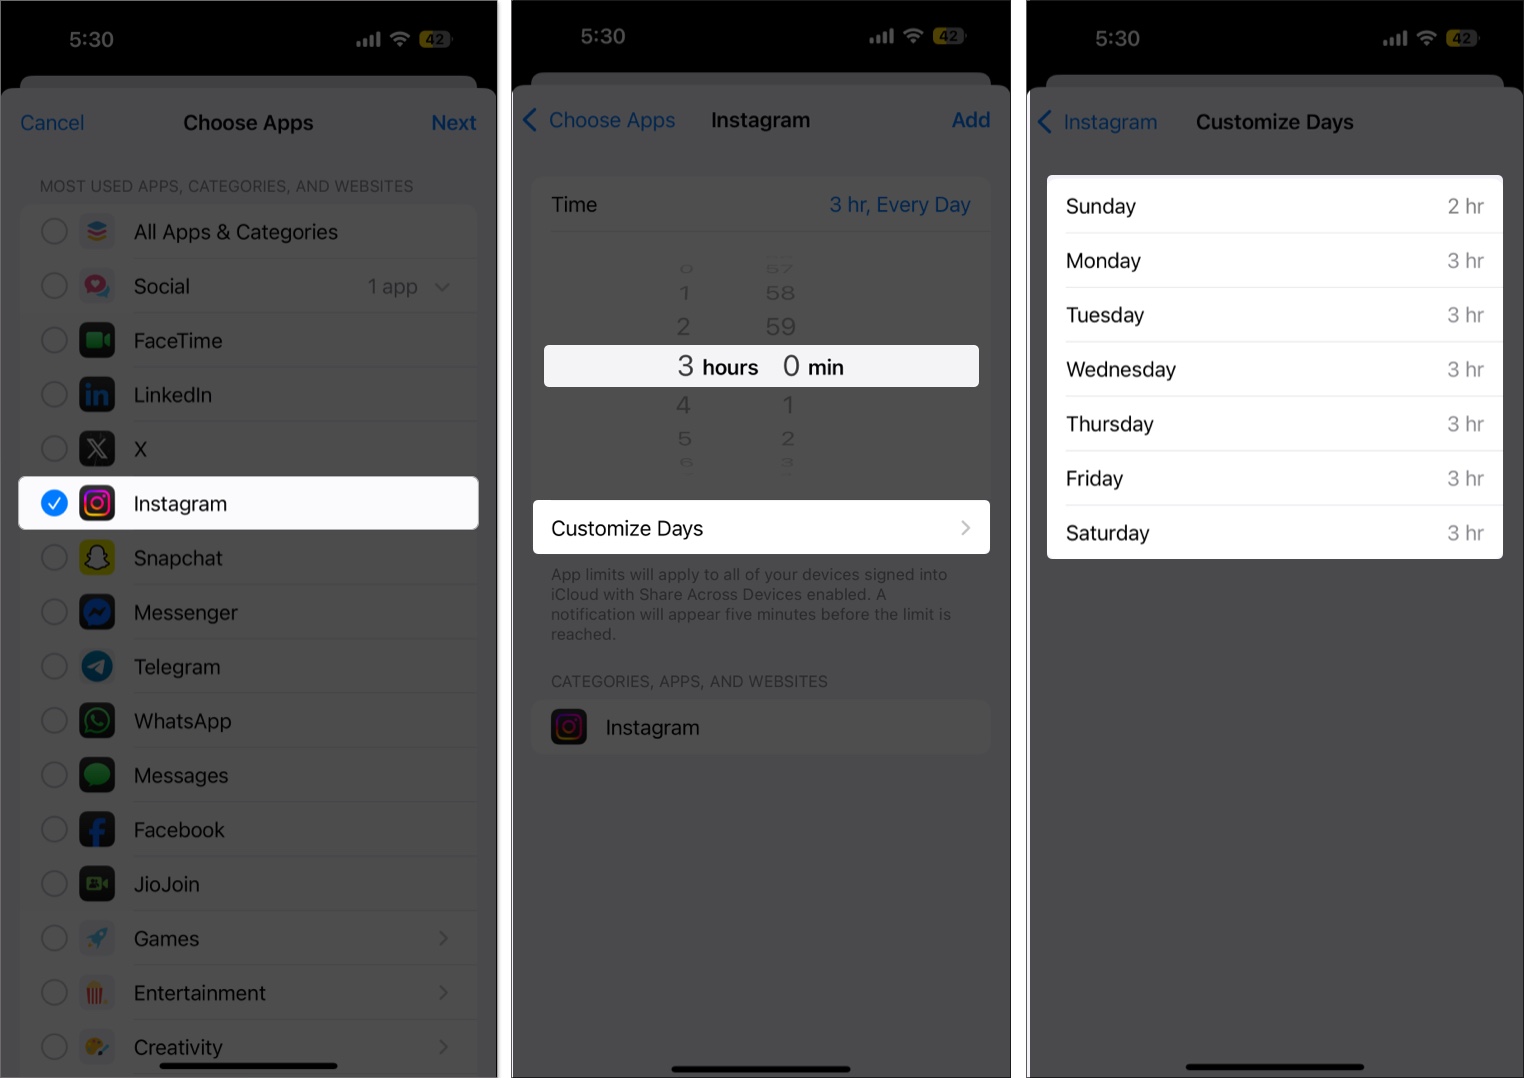
- Here, you can choose to set a time limit on the entire app category or an individual app. Choose the desired option and tap Next.
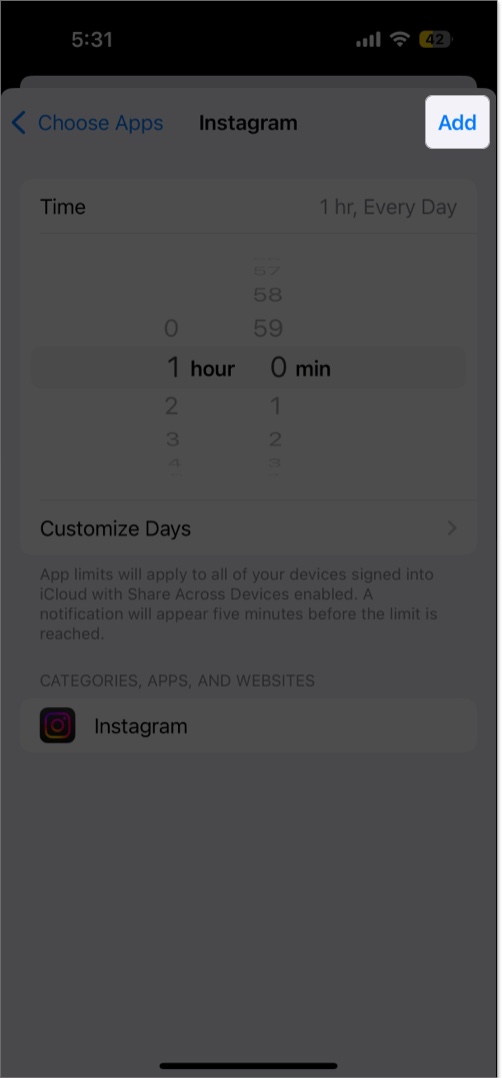
- Set the daily time limit.
- You can tap on Customize if you want to set a different time limit for different days.
- Once done, tap Add.


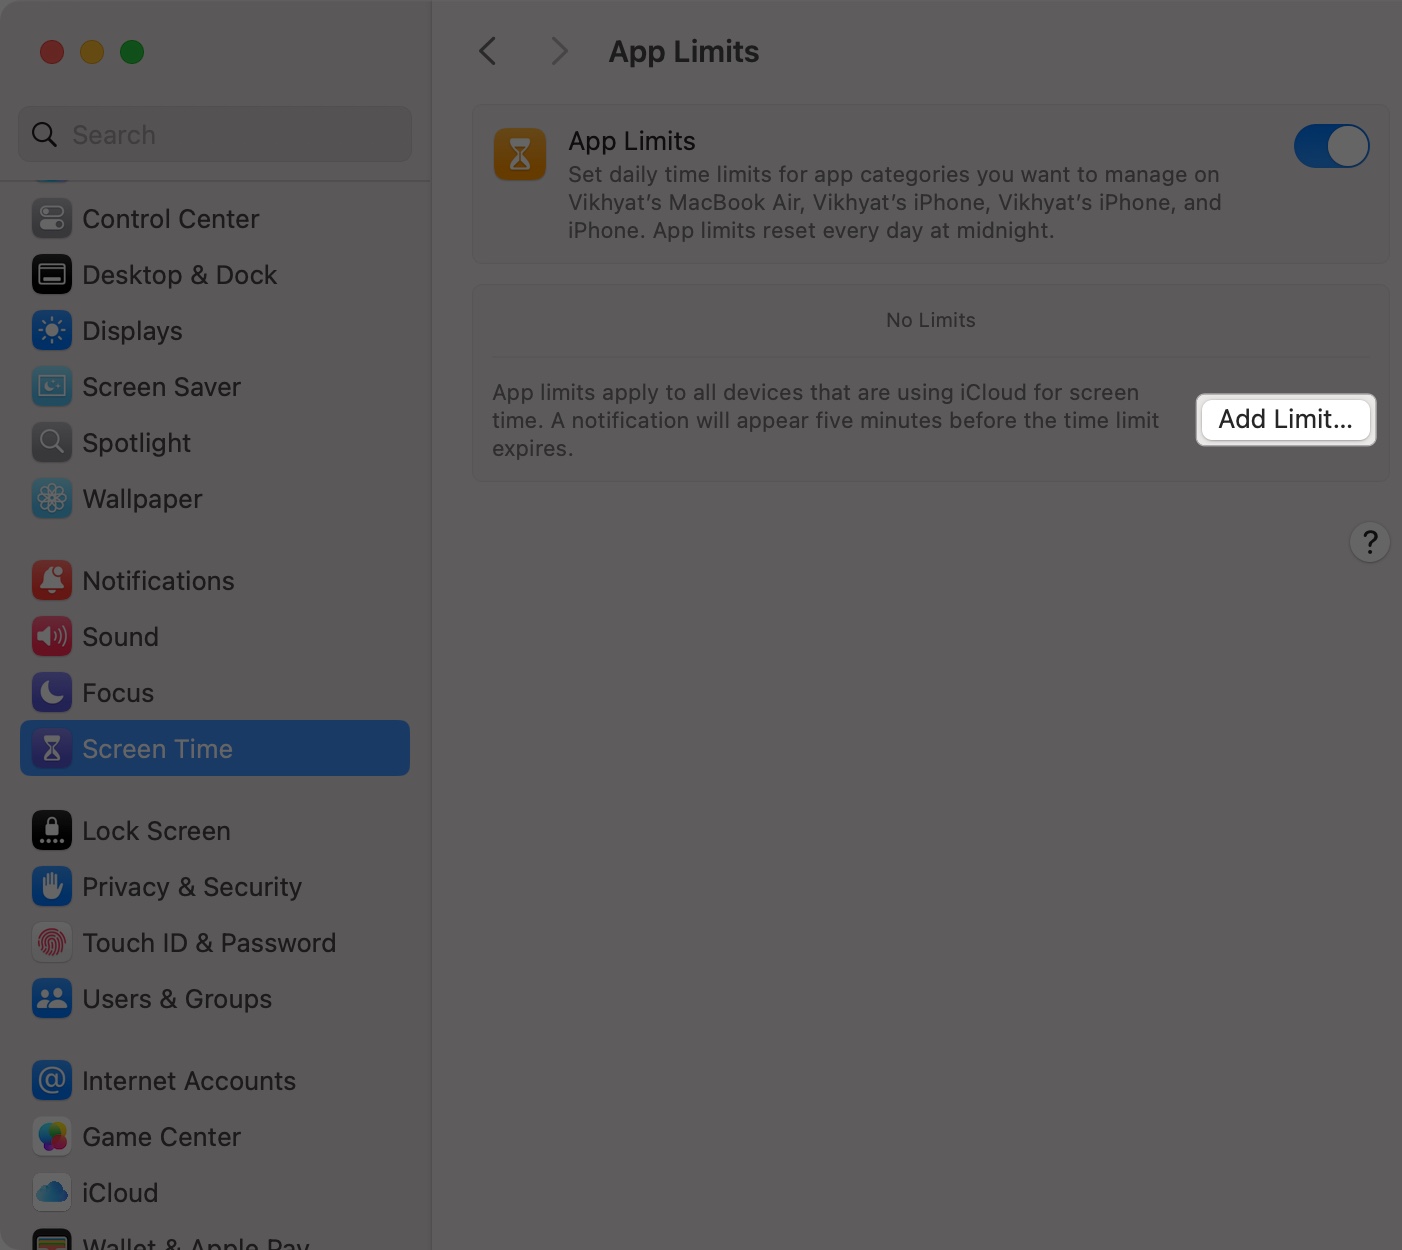
On Mac:
- Open Settings → Screen Time → App Limits.
- Click the Add Limit button.
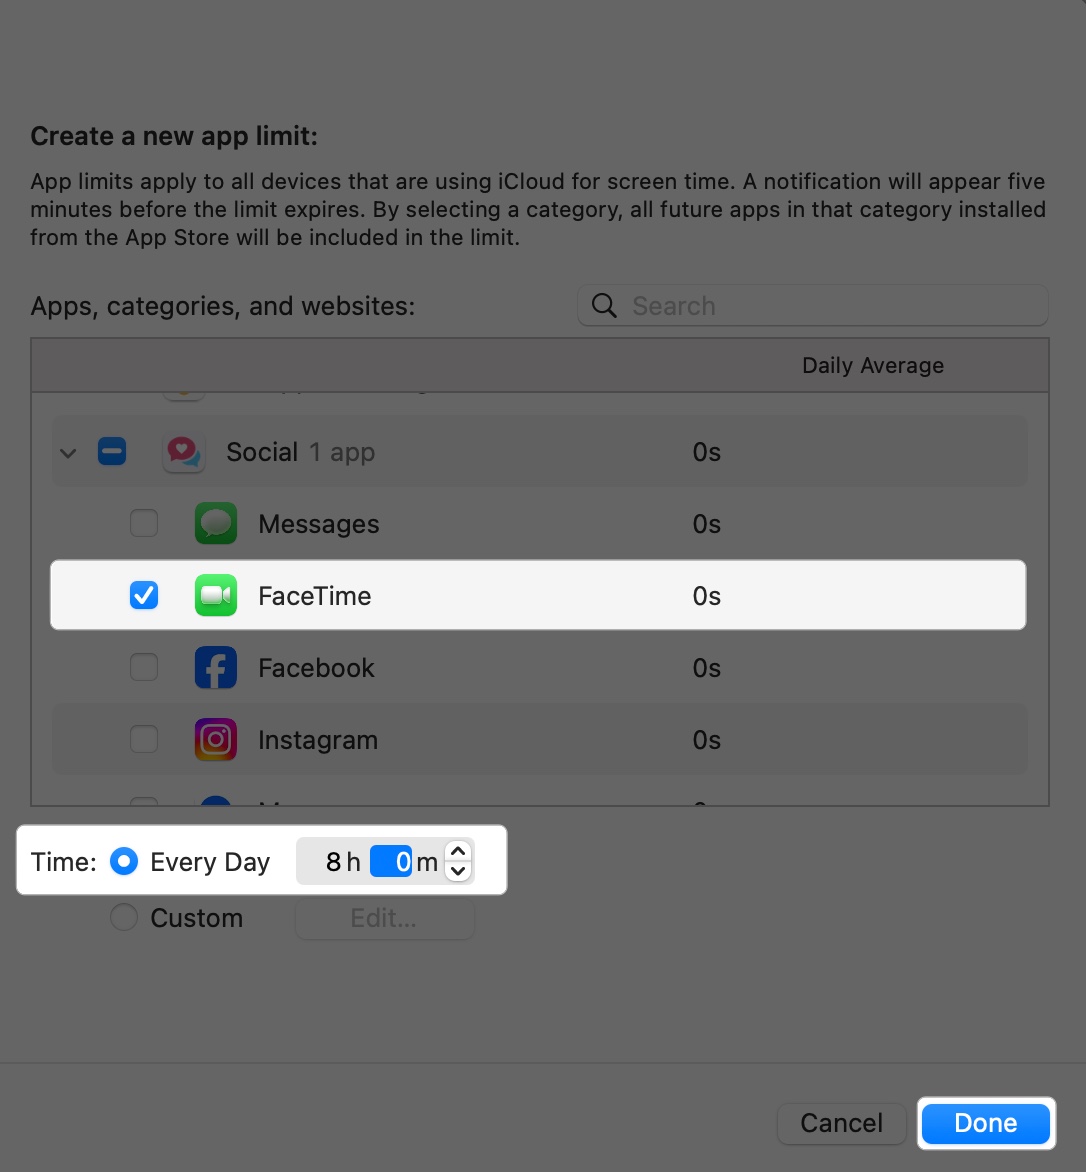
- Select the entire app category or an individual app.
- Set the daily time limit.
- Click Done.


Know Where Your Time Goes
Regularly checking your most-used apps can lead to smarter tech habits. Apple’s Screen Time makes it easy to monitor behavior, spot trends, and adjust usage accordingly—across all your devices.
Whether you’re fighting digital distraction, trying to focus more at work, or simply curious about your habits, these tools can make a big difference.