- iPhone touchscreens can stop working due to software glitches, water exposure, hardware damage, or even settings that interfere with touch input.
- A force restart often resolves minor issues—use the correct button combination for your model to reboot the iPhone when the screen isn’t responding.
- Screen obstructions reduce sensitivity—clean off dust, smudges, and try removing your case or screen protector to restore normal touch performance.
- Disconnect accessories and consider a restore—some third-party cables or docks cause conflicts, while restoring via Finder or iTunes can fix stubborn software bugs.
- Update iOS or contact Apple Support if problems continue, especially when hardware damage is likely and professional repair may be required.
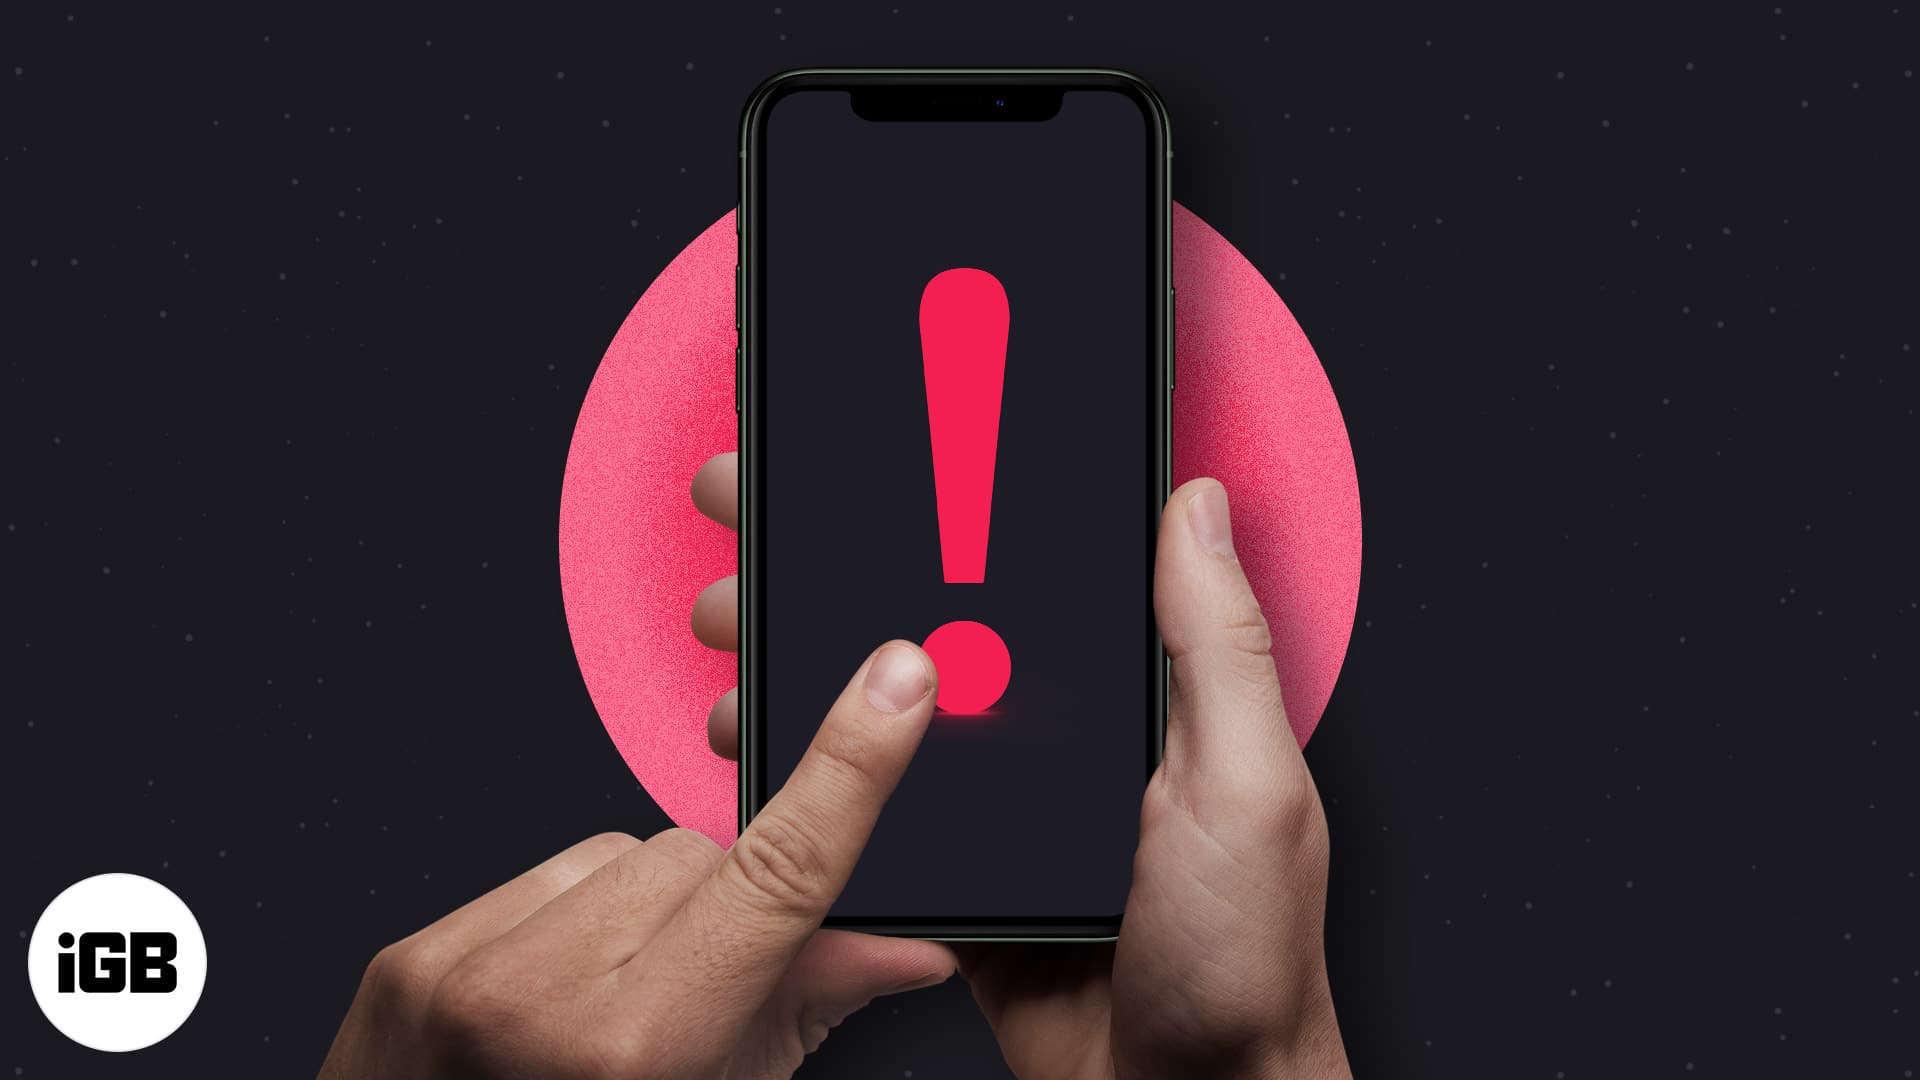
An unresponsive touch screen can turn your iPhone into an expensive paperweight. While you can always seek professional help to fix this dreadful issue, knowing the possible reasons behind it and how to fix it on your own can be a boon.
Keep reading to learn how to fix the iPhone touch screen not working issue.
Table of Contents
- Reasons why your iPhone touch screen is not working
- How to fix iPhone screen is not responding to touch
- 1. Force restart your iPhone
- 2. Clean the screen & your fingers
- 3. Remove the screen protector and case
- 4. Disconnect any accessory connected to Lightning or USB-C port
- 5. Restore using Finder/iTunes
- 6. Update to the latest iOS
- 7. Contact Apple Support
- Video: How to fix iPhone touch screen not working issue?
Reasons why your iPhone touch screen is not working
Before you proceed to the troubleshooting steps, it is important to understand the underlying issue that might have caused your iPhone’s touchscreen to malfunction or become unresponsive.
- Hardware issue – Physical damage caused by a nasty fall can disrupt the normal functioning of the touch screen.
- Software bug or glitch – A minor or major software issue caused by a buggy software update or a malicious third party might be the reason behind an iPhone’s touch screen malfunctioning.
- Water damage – While the iPhone is IP68 water resistant, prolonged exposure to water can still damage the internal components, including the touch screen.
- Accessibility settings – Accessibility options such as Guided Access can inadvertently disable or alter touch screen functionality.
With that said, let’s move on to the solutions.
How to fix iPhone screen is not responding to touch
Now that you know the potential causes behind your iPhone’s touch screen not working, you can try the troubleshooting tips I’ve detailed below to combat the issue.
1. Force restart your iPhone
While a simple restart often fixes problems, it isn’t possible in this case because you can’t right-swipe on the power slider. In that case, you can force restart your iPhone.
This method is much different than a normal reboot, as you can perform it even if the iPhone’s touch screen isn’t responding. It requires you to press a combination of volume and side buttons, and it might fix minor software bugs or glitches that prevent the touch screen from responding.
2. Clean the screen & your fingers
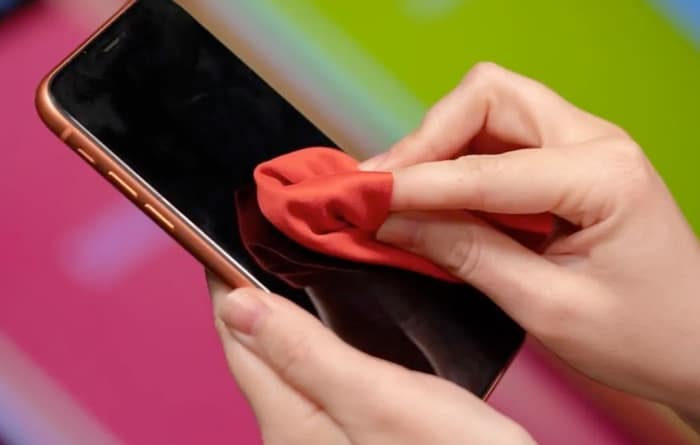
Over time, dust, debris, and smudges can accumulate over the iPhone’s screen and affect the touchscreen’s ability to detect touch accurately. In that case, clean the iPhone’s screen with a gentle, lint-free microfiber cloth and see if the touch screen starts working again.
3. Remove the screen protector and case
A low-quality or improperly installed screen protector with trapped air bubbles or a case that presses too firmly against the edges of the screen can sometimes interfere with the iPhone screen’s ability to detect touch.
Removing them both can potentially eliminate the interference and allow your iPhone’s touch screen to function without any obstruction.
4. Disconnect any accessory connected to Lightning or USB-C port
Non-compatible accessories, such as headphones, cables, or adaptors connected to the Lightning or USB-C port, can introduce electrical interference in the iPhone’s system. This electric interference can disrupt the usual functioning of the touch screen.
Disconnecting such accessories will eliminate the source of interference or compatibility issues, allowing the touch screen to return to normal functioning.
5. Restore using Finder/iTunes
There is a high chance that force restarting and cleaning the screen will fix the issue if there isn’t any physical damage. However, if the issue persists, you can restore your iPhone using the Finder on Mac or iTunes on Windows PC. Restoring your iPhone will turn the iPhone into an out-of-the-box state and remove any software glitches your iPhone is facing.
- Connect the iPhone to your Mac via an MFi-certified cable.
- Open the Finder app and select your iPhone in the left windowpane.

- Next, click on the Restore iPhone button and follow the on-screen instructions.
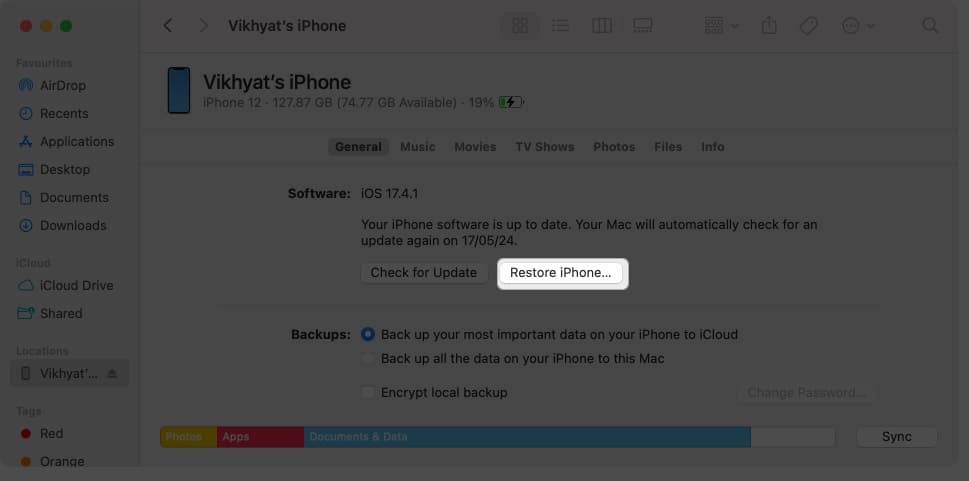


Note:
-
Find My must be turned Off on your iPhone in order to restore it.
6. Update to the latest iOS
Apple often readily listens to its user base and seeds software updates, bug fixes, and security improvements, which might fix issues like the iPhone touch screen not working.
From iPhone
If the touch screen starts working after force restarting the iPhone, I suggest you head to the settings and check whether a software update is available. If so, download and install it immediately.
- Open the Settings app and head to General.
- Here, choose the Software Update option.
- Wait while your iPhone checks for the update.
- Next, if an update is available, hit the Download & Install button.
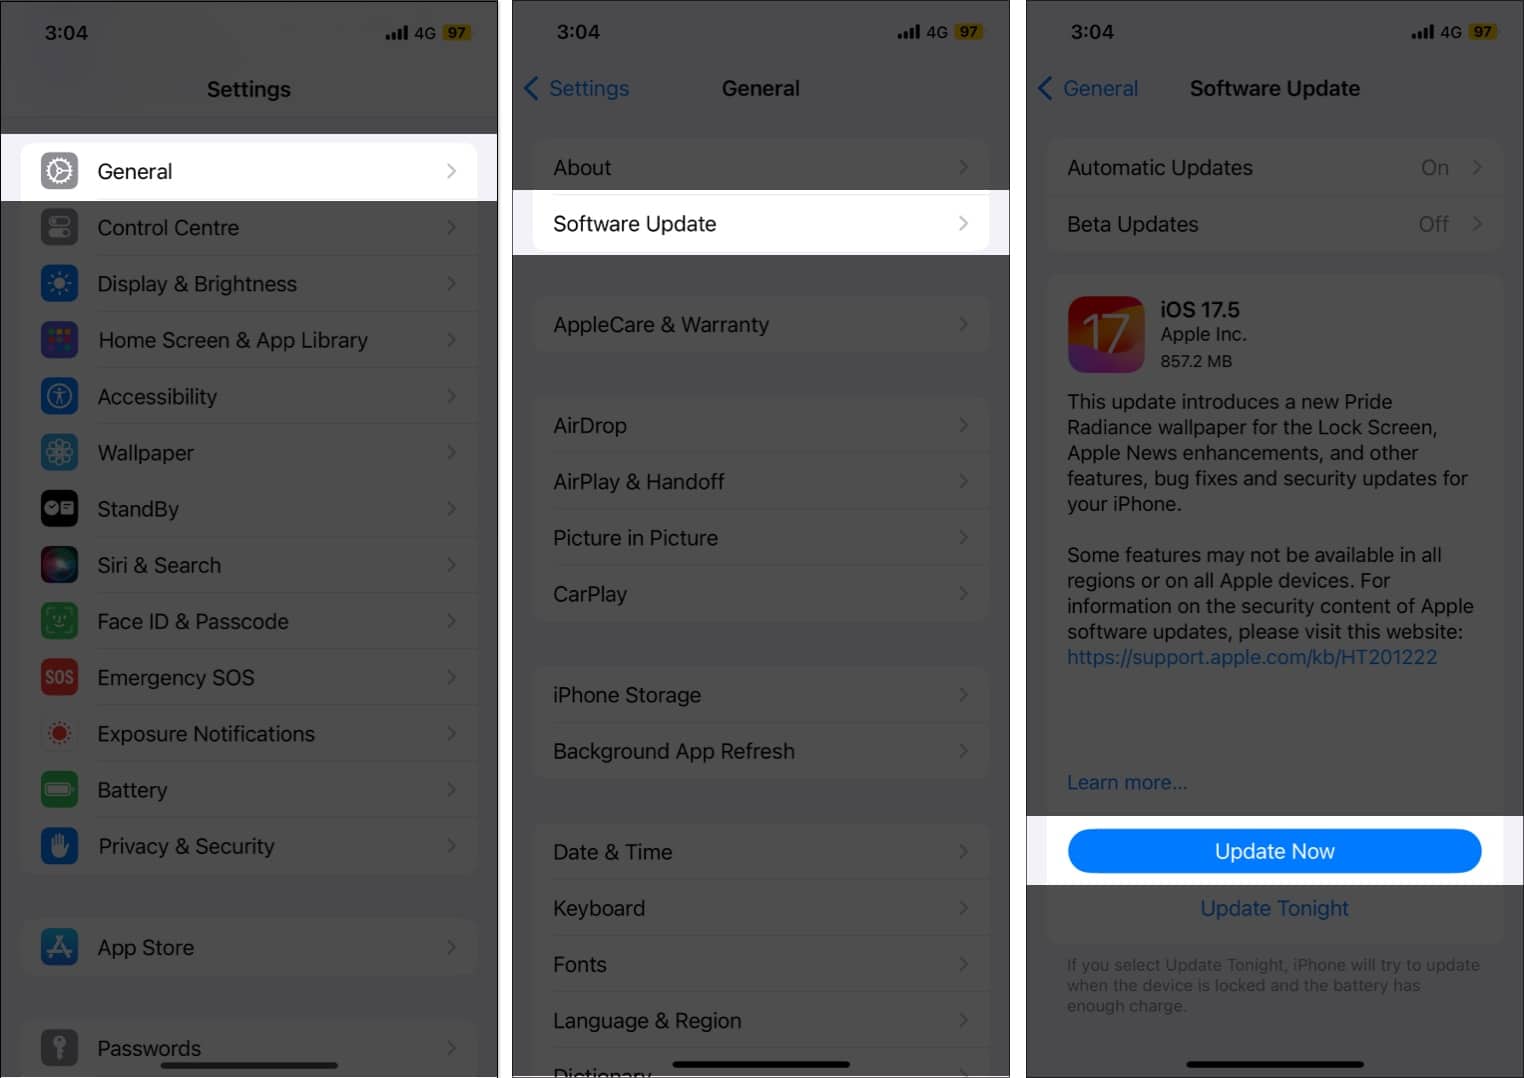

Note:
-
If you have the Automatic Updates option enabled, then instead of the Download & Install, you may see the Update Now button.
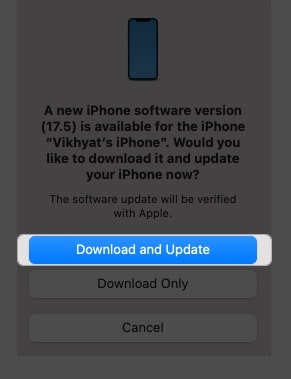
From Finder
If the issue persists even after force restarting and cleaning the screen, connect your iPhone to your Mac and update it to the latest available firmware via Finder.
- Connect the iPhone to your Mac via an MFi-certified cable.
- Open the Finder app and select your iPhone in the left windowpane.
- Next, click the Check for Update button.
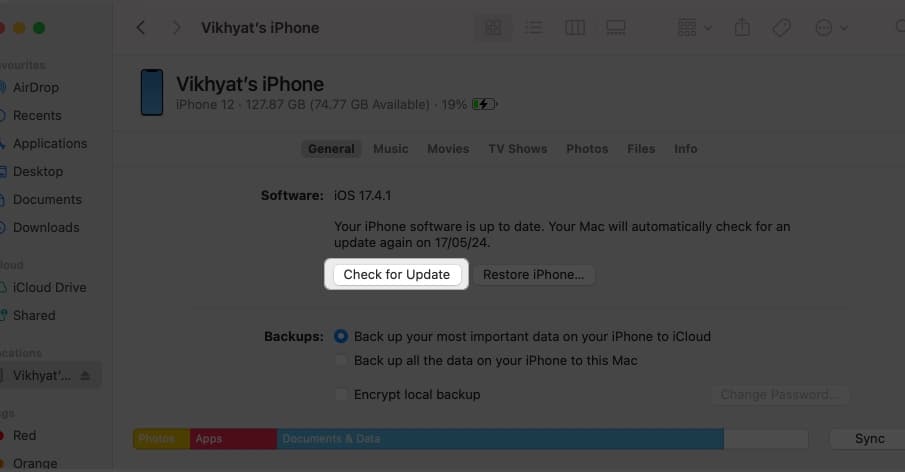
- Click on the Download & Install button in the pop-up that appears.


7. Contact Apple Support
Have you tried everything, but nothing has worked? In that case, I suggest you contact Apple Support or head to your nearest Apple-authorized repair center, as a hardware issue might be preventing the touch screen from responding to your touch.
Video: How to fix iPhone touch screen not working issue?
Signing off…
Resolving the iPhone touch screen not working issue depends on whether a software glitch, non-compatible accessories, or physical damage causes it. Patiently follow the troubleshooting tips outlined in this post; you can usually restore the iPhone touch screen to its original performance.
Feel free to comment if you still have any doubts.
Read more: