With the number of emails we send these days, it can be hard to keep up with whether or not we receive responses to them all. As a reminder, you can use the Follow Up feature in Apple Mail for the messages you sent but don’t receive a reply.
- What is Follow Up in Apple Mail?
- How to use Follow Up in Apple Mail
- How to turn off Follow Up in Apple Mail
What is Follow Up in Apple Mail?
The email Follow Up feature in Apple Mail was introduced with iOS 16, iPadOS 16, and macOS Ventura. The feature is turned on by default, giving you an effortless way to give it a shot.
When you don’t receive a response to an email three days after you send it, the email returns to the top of your Inbox. Additionally, the email includes a Follow Up option that you can select to send a follow-up message.
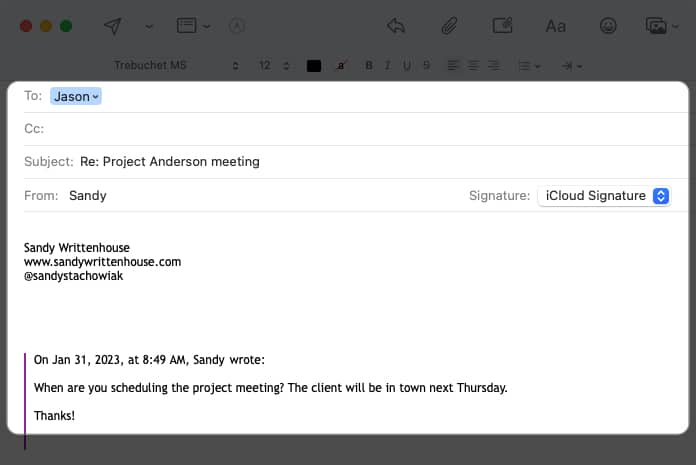
The new message then opens with the content of the previous email in the body, including the date and time it was originally sent. The recipient is automatically added to the To field and the subject line starts with “Re:”. You then simply add your new message and send the email on its way.
This feature gives you a simple reminder that you haven’t received a response so that you can follow up.
How to use Follow Up in Apple Mail
If you want to take advantage of the Follow Up feature in Apple Mail, you can easily do it on iPhone, iPad, and Mac.
Use Follow Up in Mail on iPhone and iPad
Remember, you won’t see the email in your inbox or the Follow Up suggestion until three days after you send the message.
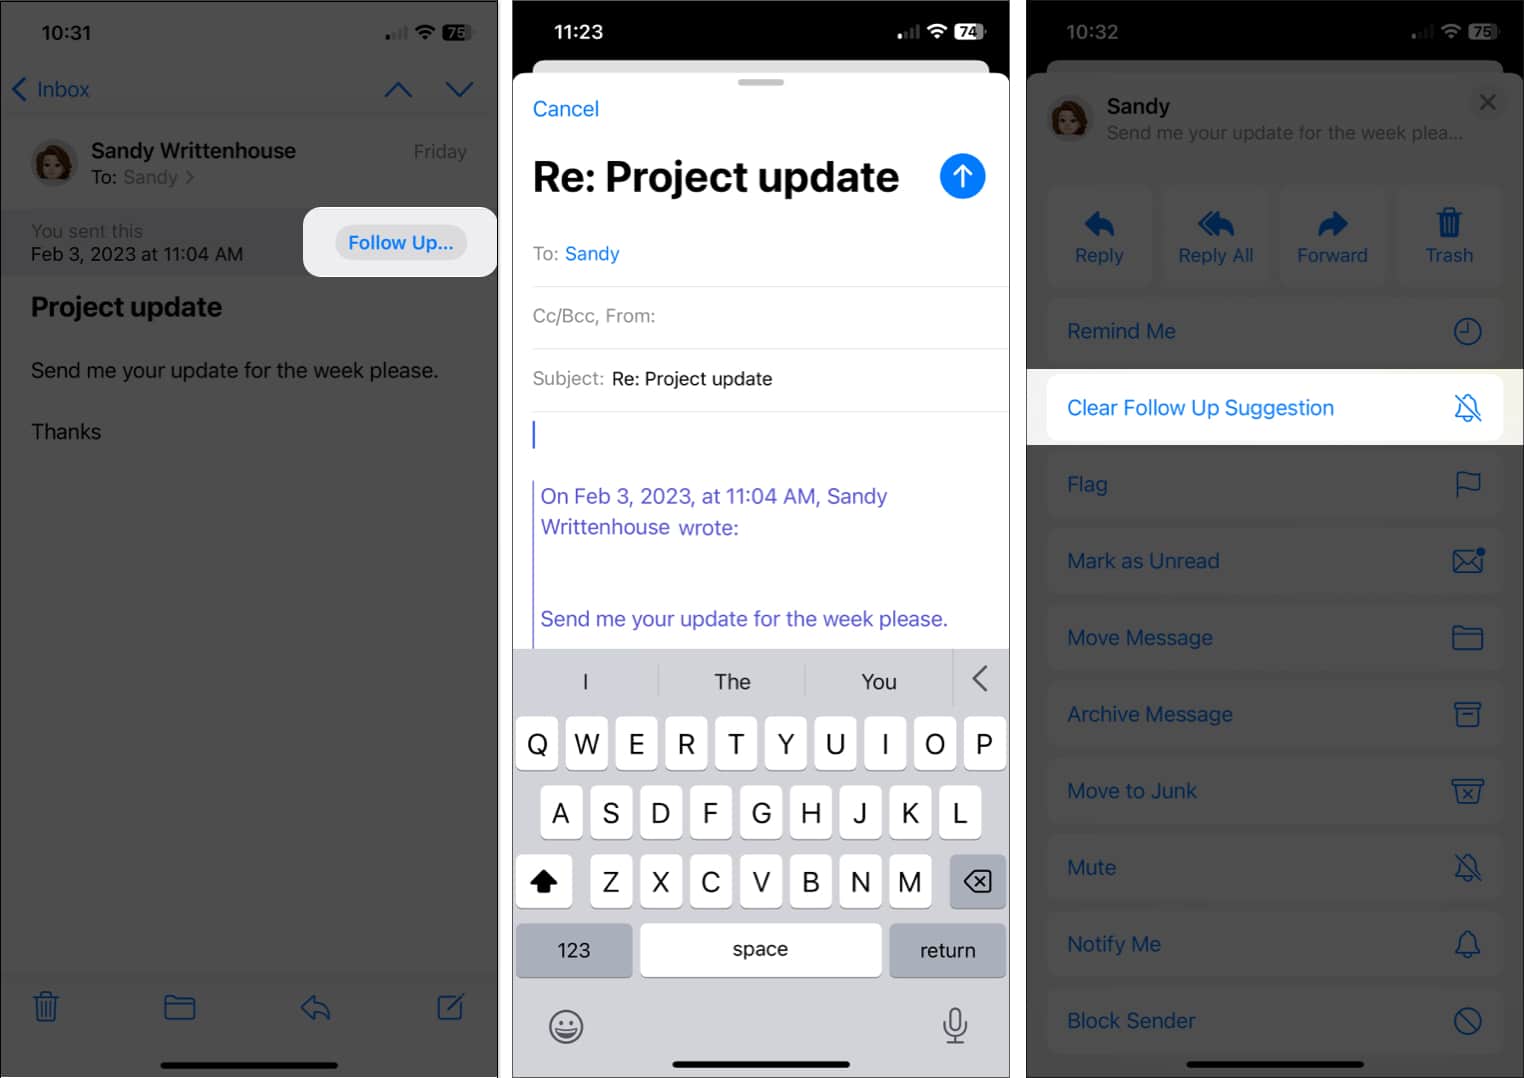
- When you spot the email, you’ll see Follow Up to the right of the message in your list and below the header in the email.
- Tap Follow Up, and a new email opens with the original message and recipient as described earlier.
- Add another message and send the email like any other. If you don’t take any action on the email, it’ll simply disappear from your inbox within a day. But you can also ignore the Follow Up suggestion if you like.
- Swipe from right to left on the message in your list and tap the three dots. Then, select Clear Follow Up Suggestion.
Use Follow Up in Mail on Mac
The Follow Up feature in Mail on Mac works the same way as on iPhone and iPad.
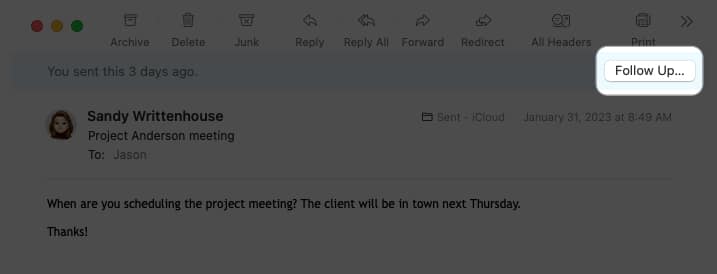
- After three days without a response, you’ll see the email you sent at the top of your inbox with a Follow Up button above the header in the shaded area.
- Click Follow Up, add your message to the email, and send it. Again, you’ll see the original message in the body and the recipient in the To field.
- You can ignore the Follow Up suggestion, and the email will be removed from your inbox within a day. Alternatively, swipe right on the message in your list to officially disregard it.
How to turn off Follow Up in Apple Mail
If you find that the Apple Mail Follow Up feature isn’t helpful, you can disable it on one or all of your devices.
Turn off Follow Up on iPhone and iPad
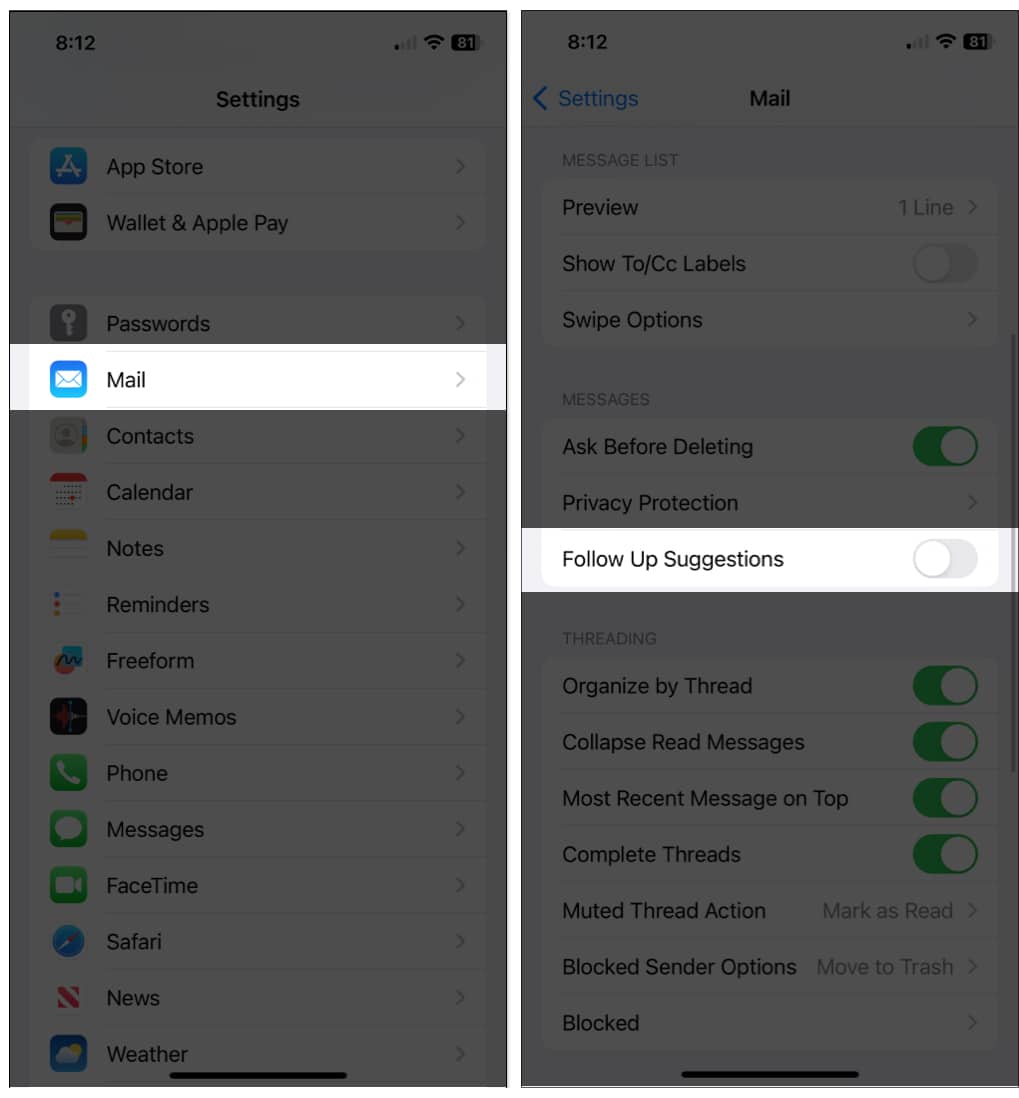
In just a few steps, you can turn off the Follow Up suggestions on iPhone and iPad.
- Open the Settings app.
- Select Mail.
- Turn off the toggle for Follow Up Suggestions in the Messages section.
Turn off Follow Up on Mac
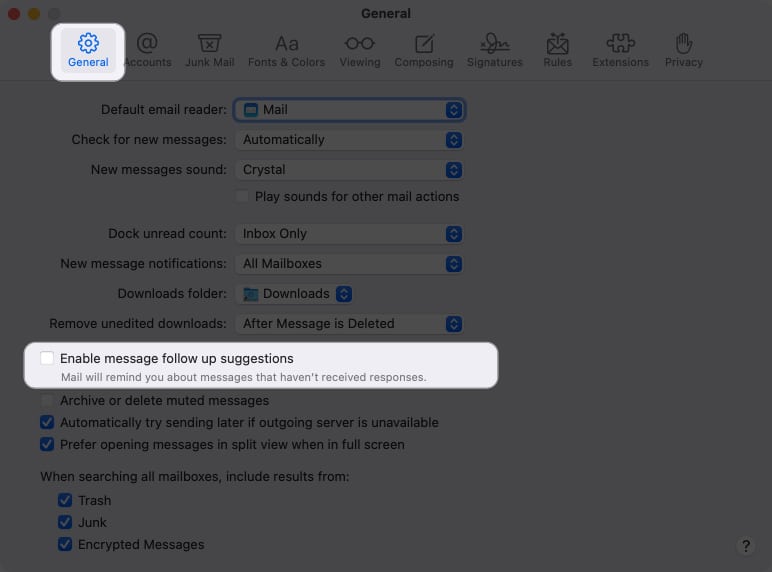
It’s just as simple to disable the Follow Up feature in Mail on Mac.
- Open the Mail app.
- Select Mail in the menu bar → pick Settings.
- Go to the General tab.
- Uncheck the box for Enable message follow up suggestions.
Follow up with a handy reminder!
If you regularly need to follow up on emails you send, the Apple Mail Follow Up feature gives you a handy way to remember when it’s time.
What do you think of the Follow Up feature in Apple Mail? Will you keep it enabled and give it a try, or will you turn it off and follow up on your own? Let us know!
For other Mail app features, check out our tips for using Apple Mail like a pro.
Read more:





Great tips! I had no idea about the Follow Up feature in the Mail app. This will definitely help me stay on top of my emails better! Thanks for sharing!
Great tips! I never knew about the Follow Up feature in the Mail app. It’s going to help me keep track of my emails so much better. Thanks for sharing!