Your iPhone, iPad, and Mac often hold more than just pictures—they’re home to your most personal memories. Whether it’s sensitive documents, private moments, or personal videos, Apple gives you built-in tools to protect them.
In this detailed guide, I’ll show you how to hide and unhide photos and videos on your iPhone, iPad, and Mac—plus tips to keep them private and secure.
Why Hide Photos or Videos on Your iPhone, iPad, or Mac?
Your devices are packed with memories—some you don’t want others to stumble upon. Here’s why you may want to hide specific content:
- Keep personal moments and documents away from others’ eyes.
- Avoid accidental exposure when handing your device to someone.
- Remove clutter from your main gallery.
- Prevent sensitive content like IDs or bank information from being visible.
Apple’s Hidden album lets you store this content safely—and lock it with Face ID, Touch ID, or a passcode.
How to Hide Photos and Videos on iPhone or iPad
Hiding pictures and videos on your iPhone or iPad is easy with the built-in Photos app.
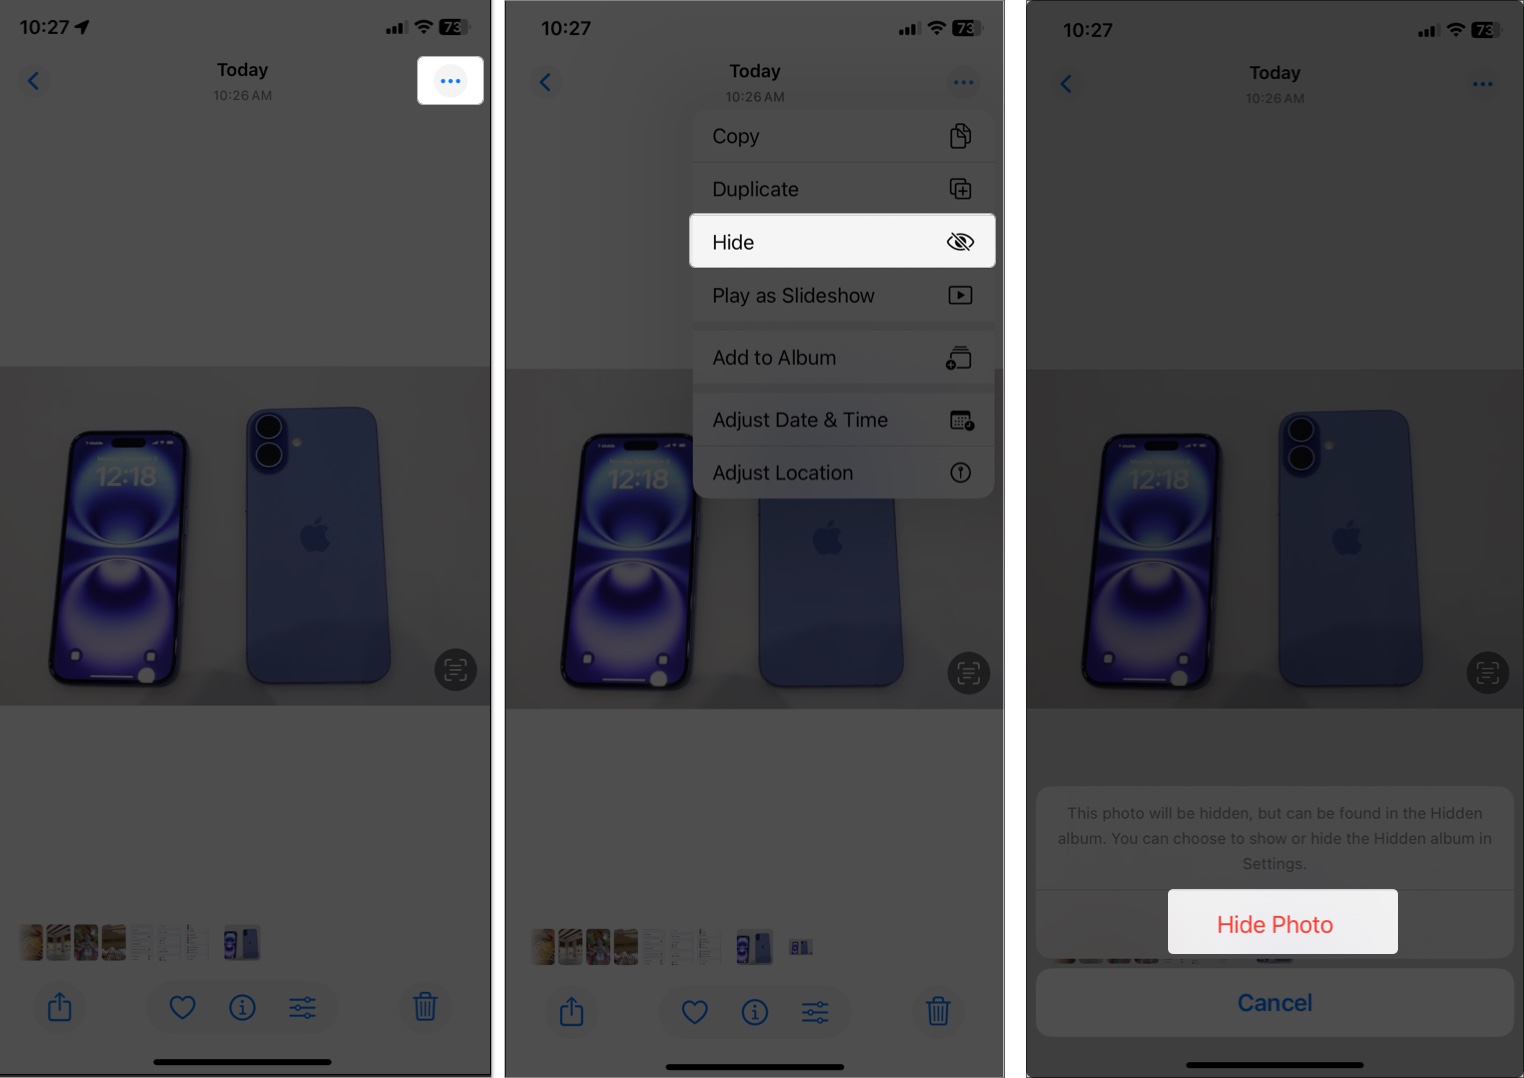
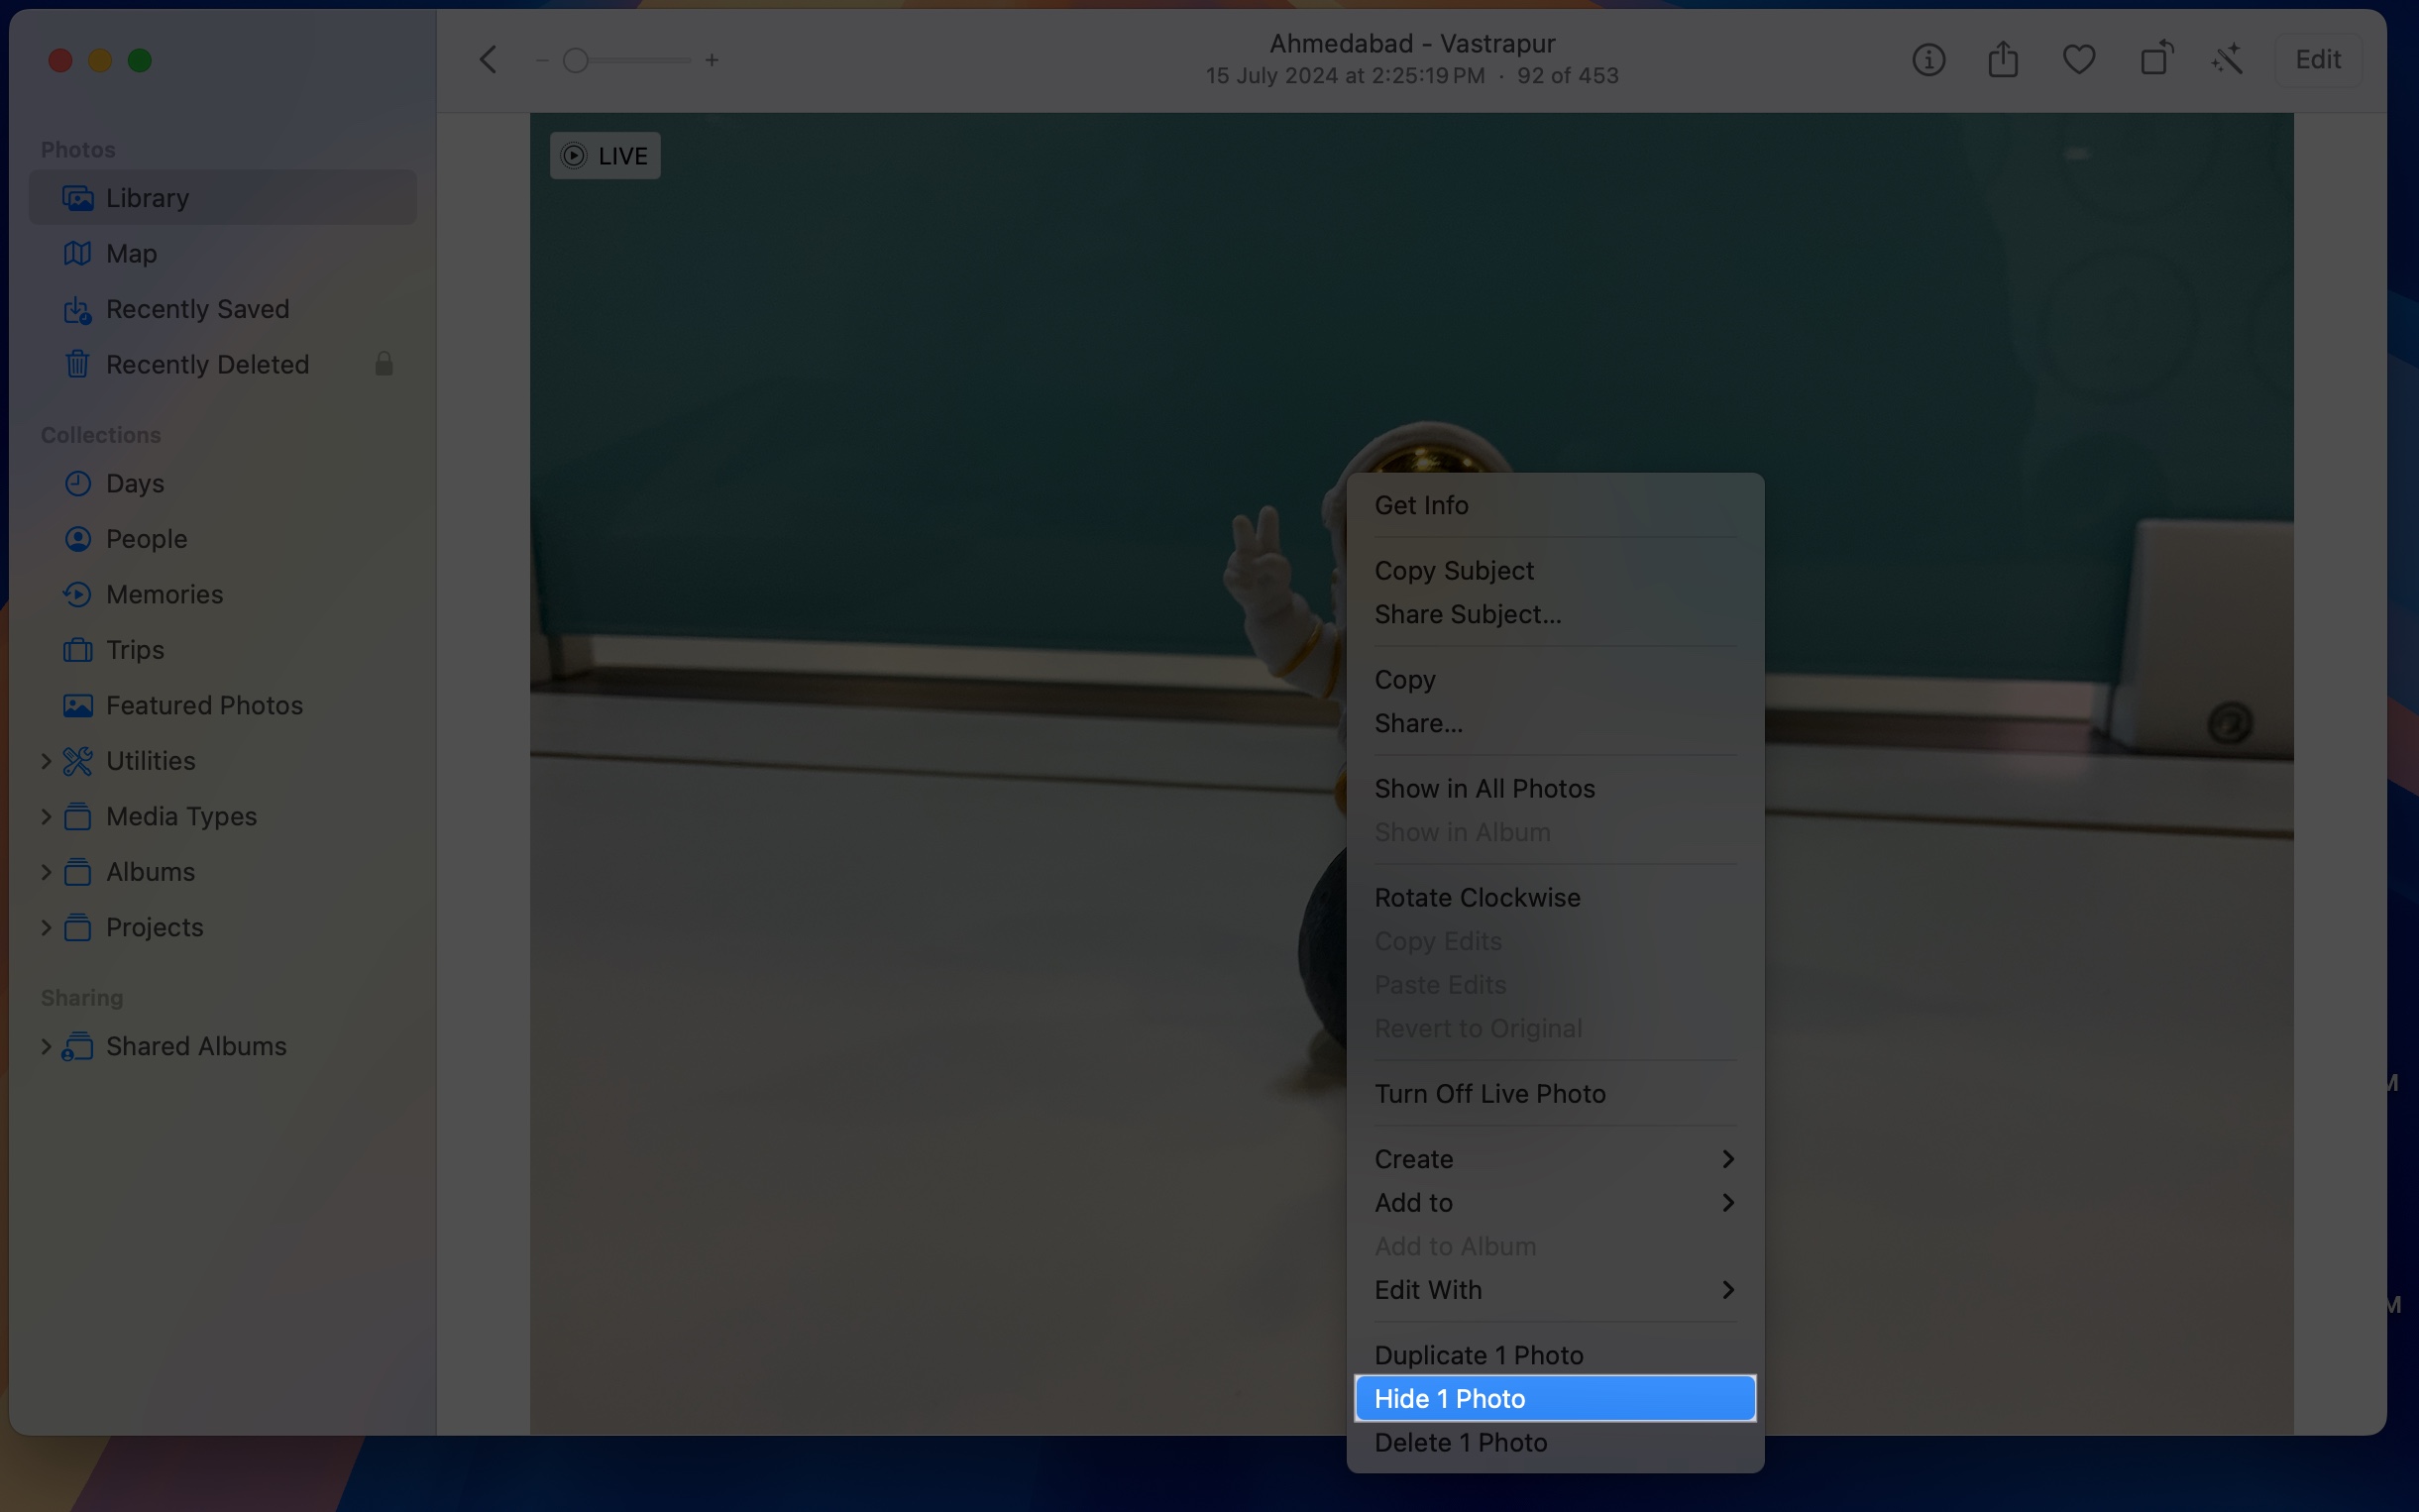
Hide a Single Image or Video:
- Open the Photos app and select the image or video you want to hide.
- Tap the More icon (three dots) in the top-right corner.
- Select Hide, then confirm.
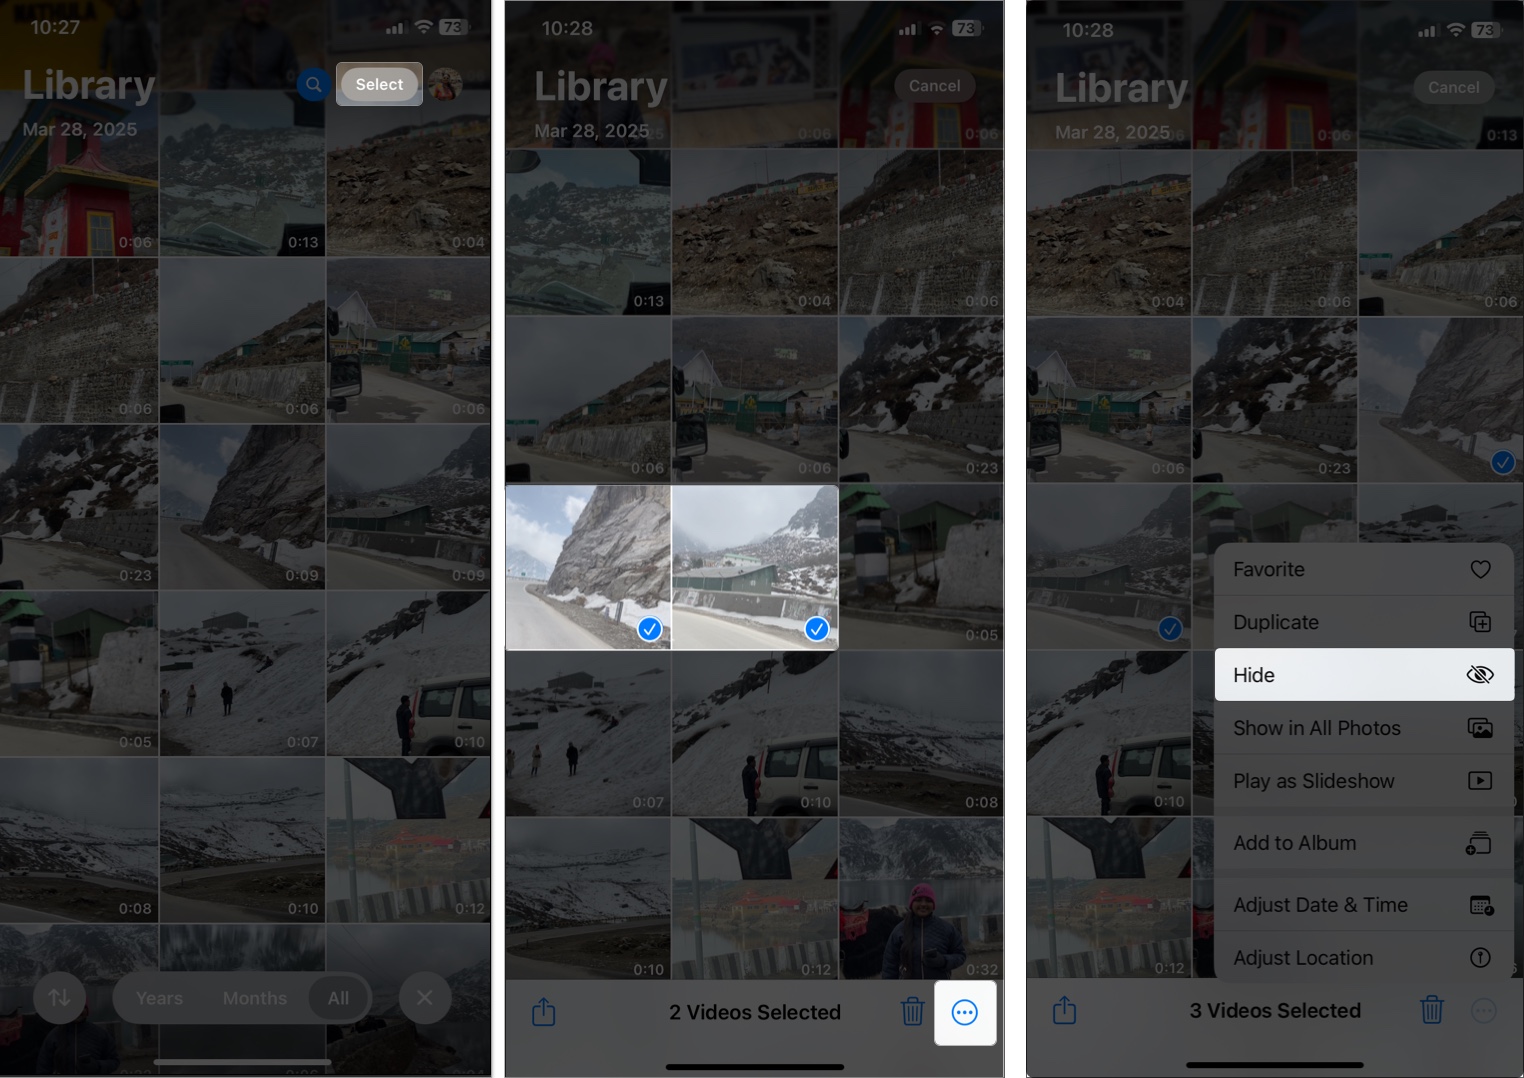
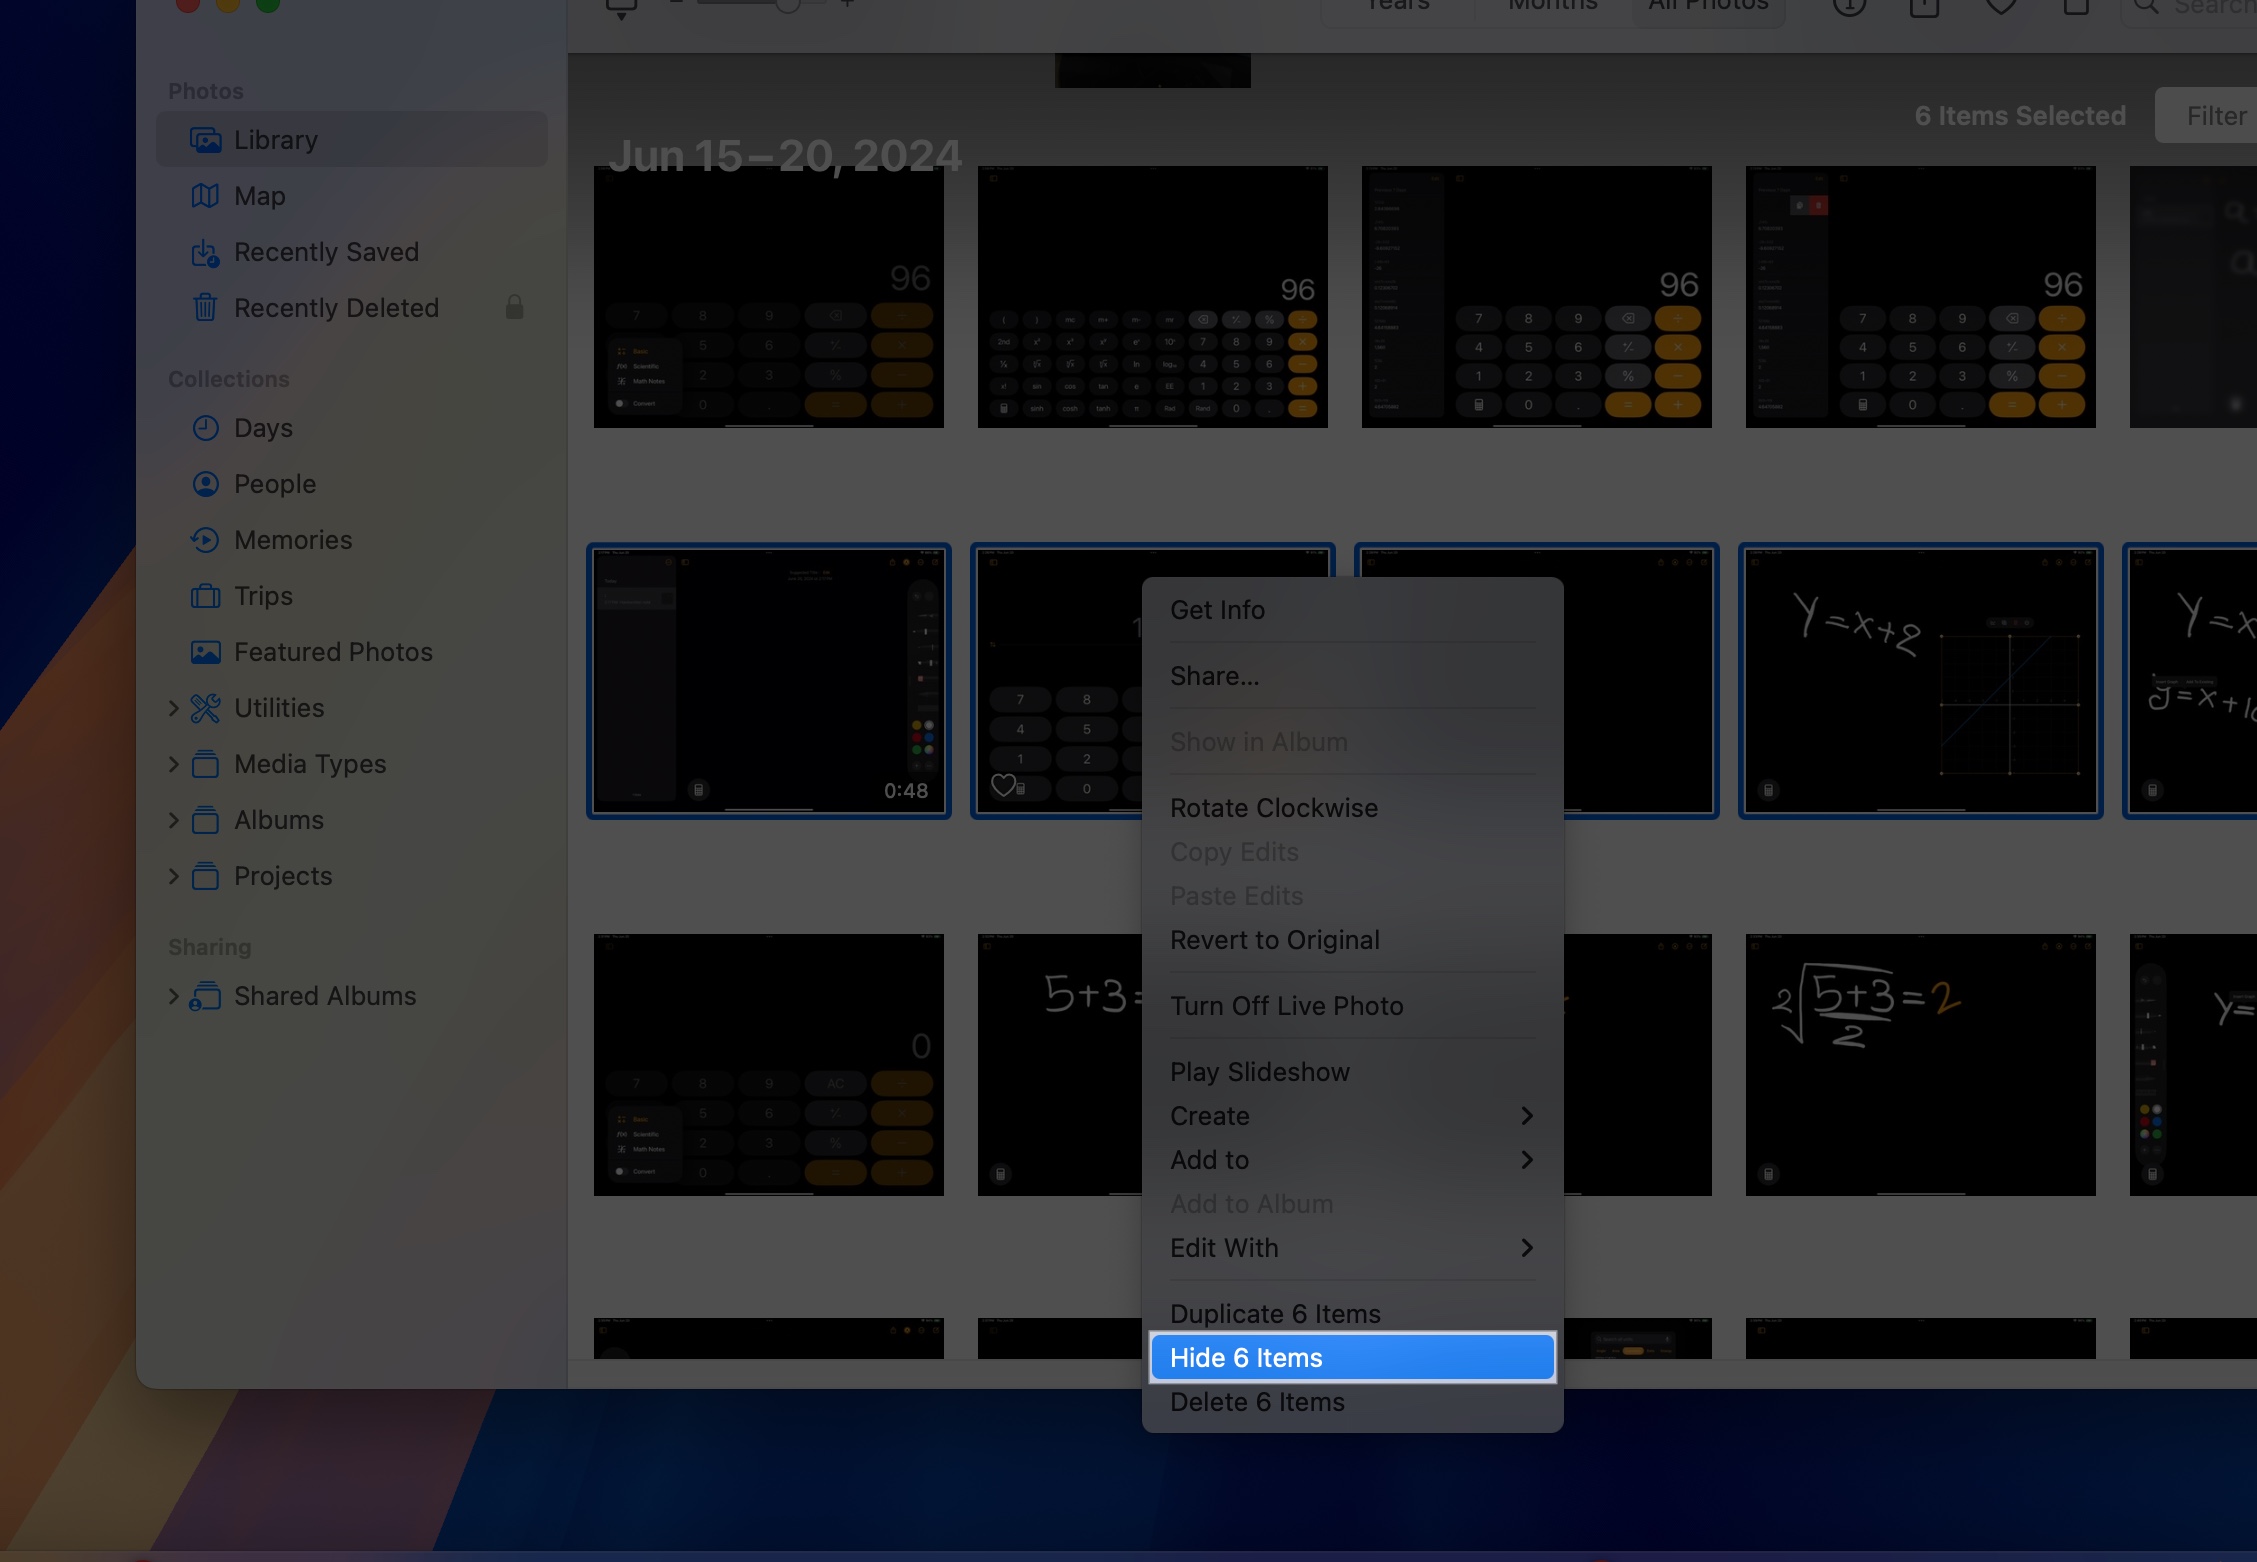
Hide Multiple Images or Videos:
- Open Photos, then tap Select.
- Select all the images or videos you want to hide.
- Tap the More icon at the bottom-right corner.
- Select Hide, and confirm.
Access the Hidden Album:
The Hidden album is where all your hidden photos and videos are stored. To access and manage it:
- Open the Photos app.
- Scroll to Utilities, then tap Hidden.
- Tap View Album and authenticate with Face ID, Touch ID, or your passcode if the album is locked.

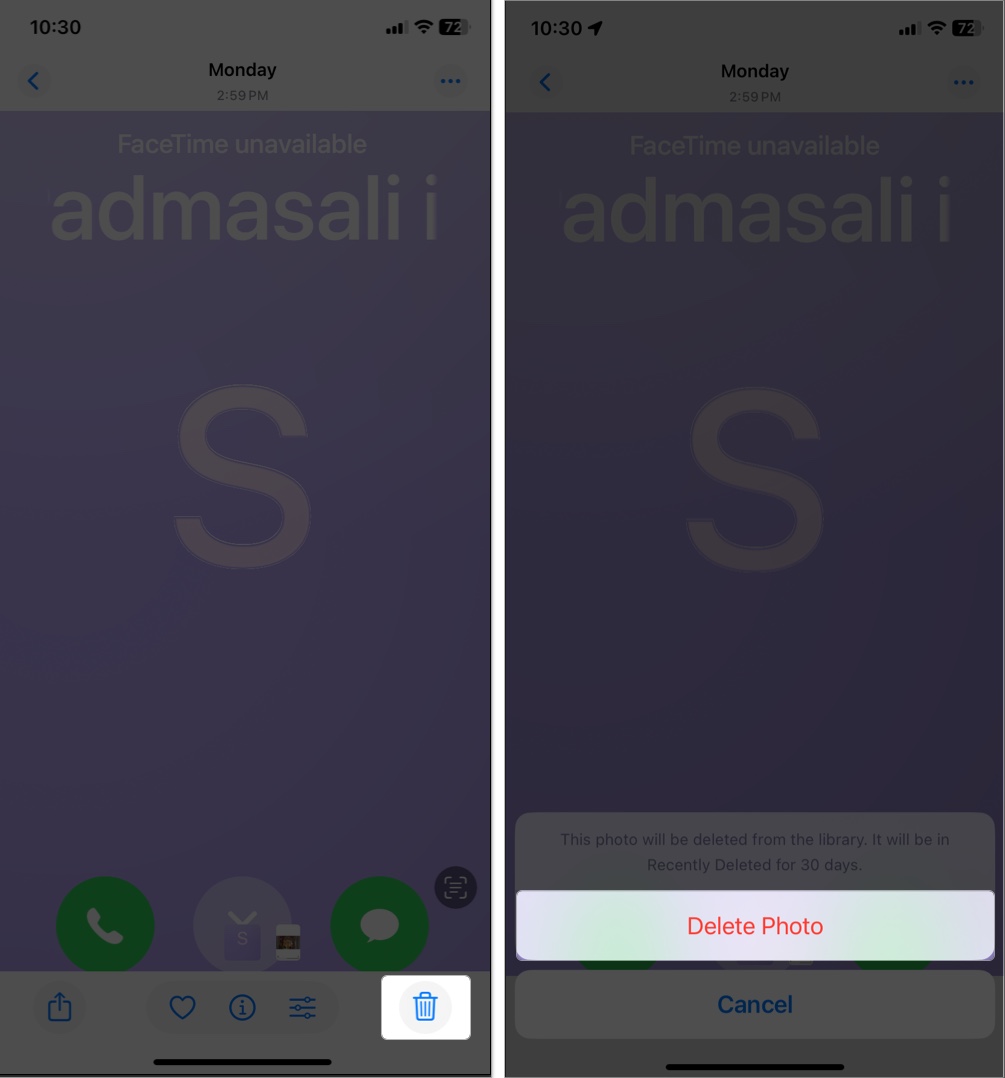
- View or delete a photo from your Hidden items:
- To view a photo or video, tap it to open.
- To delete an item, select it, tap the Trash icon, and confirm.

To Unhide a Photo or Video:
- Go to the Hidden album, tap Select.
- Select the photo or video to unhide.
- Tap the More icon and select Unhide.
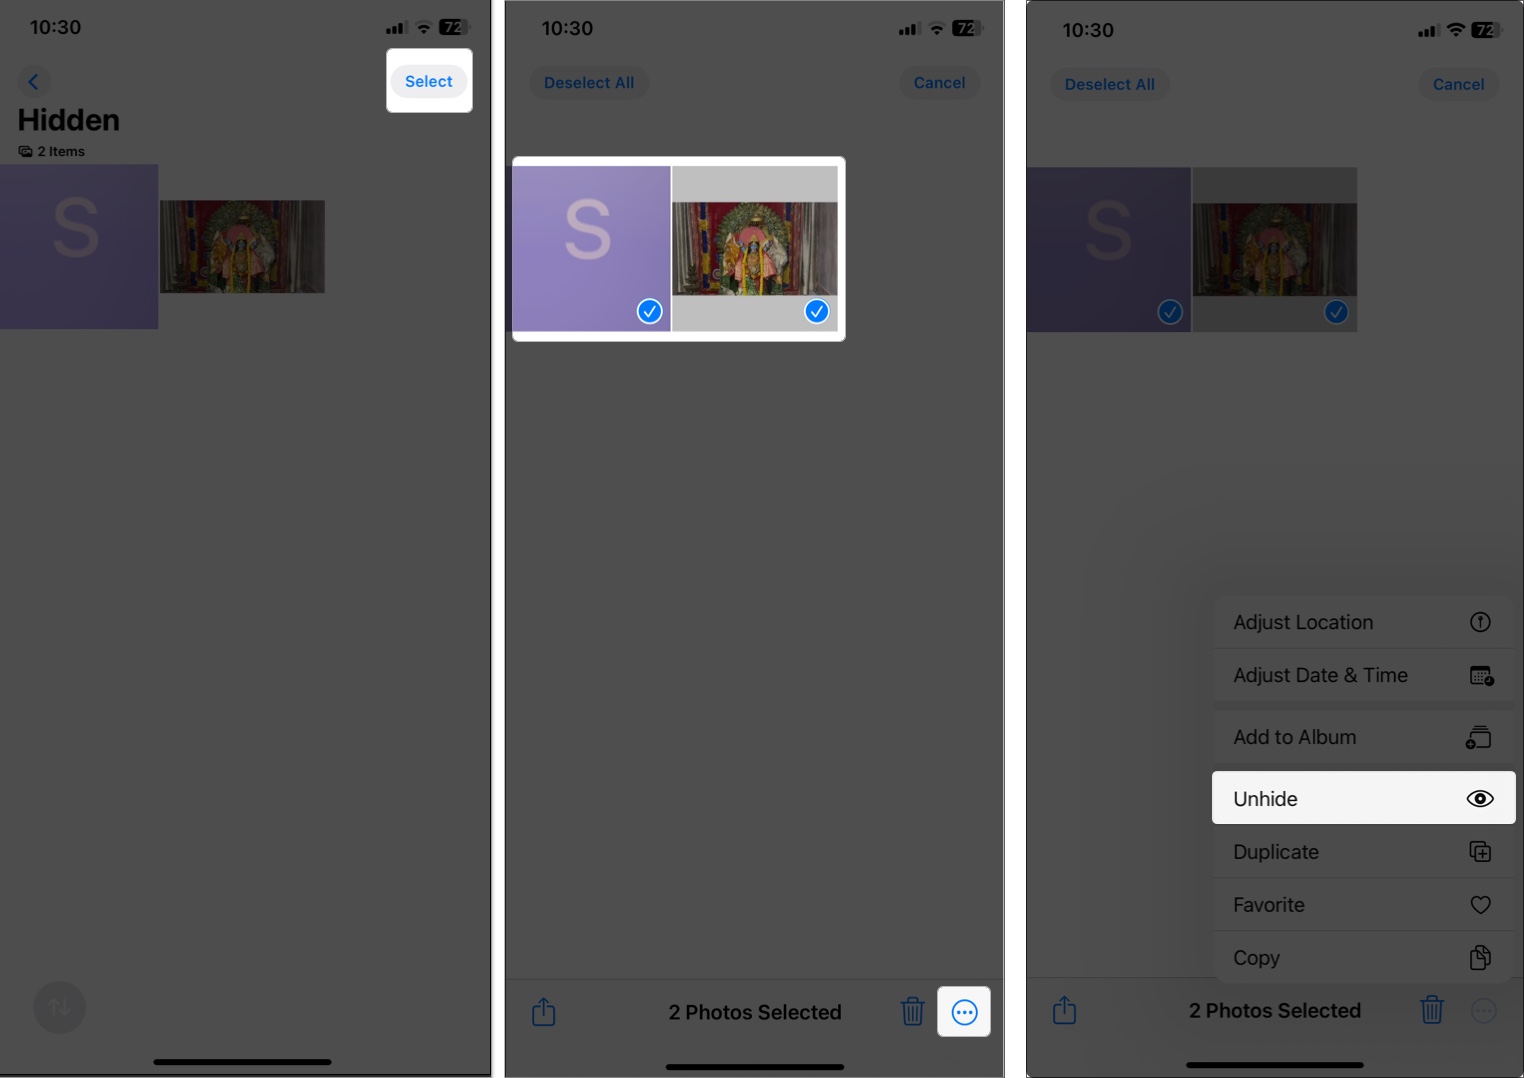
It will reappear in your main Photos library.
How to Hide Photos and Videos on Mac
Hiding photos or videos on a Mac is just as easy using the Photos app.
Hide a Single Item:
- Launch the Photos app on your Mac.
- Find the photo or video you want to hide and double-click to open it.
- Control-click the image or video, or click the Image menu at the top.
- Select Hide 1 Photo or Hide 1 Video and click Hide.

The item will move to the Hidden album.
Hide Multiple Photos and Videos:
- Open the Photos app.
- Hold the Command (⌘) key and click each photo or video you want to hide.
- Control-click any selected item or go to the Image menu.
- Choose Hide [number] Photos/Videos and confirm your choice.
The selected items will move to the Hidden album.
Access the Hidden Album:
To view or manage your hidden photos on a Mac:
- Go to the Photos app.
- Click View in the menu bar and select Show Hidden Photo Album.
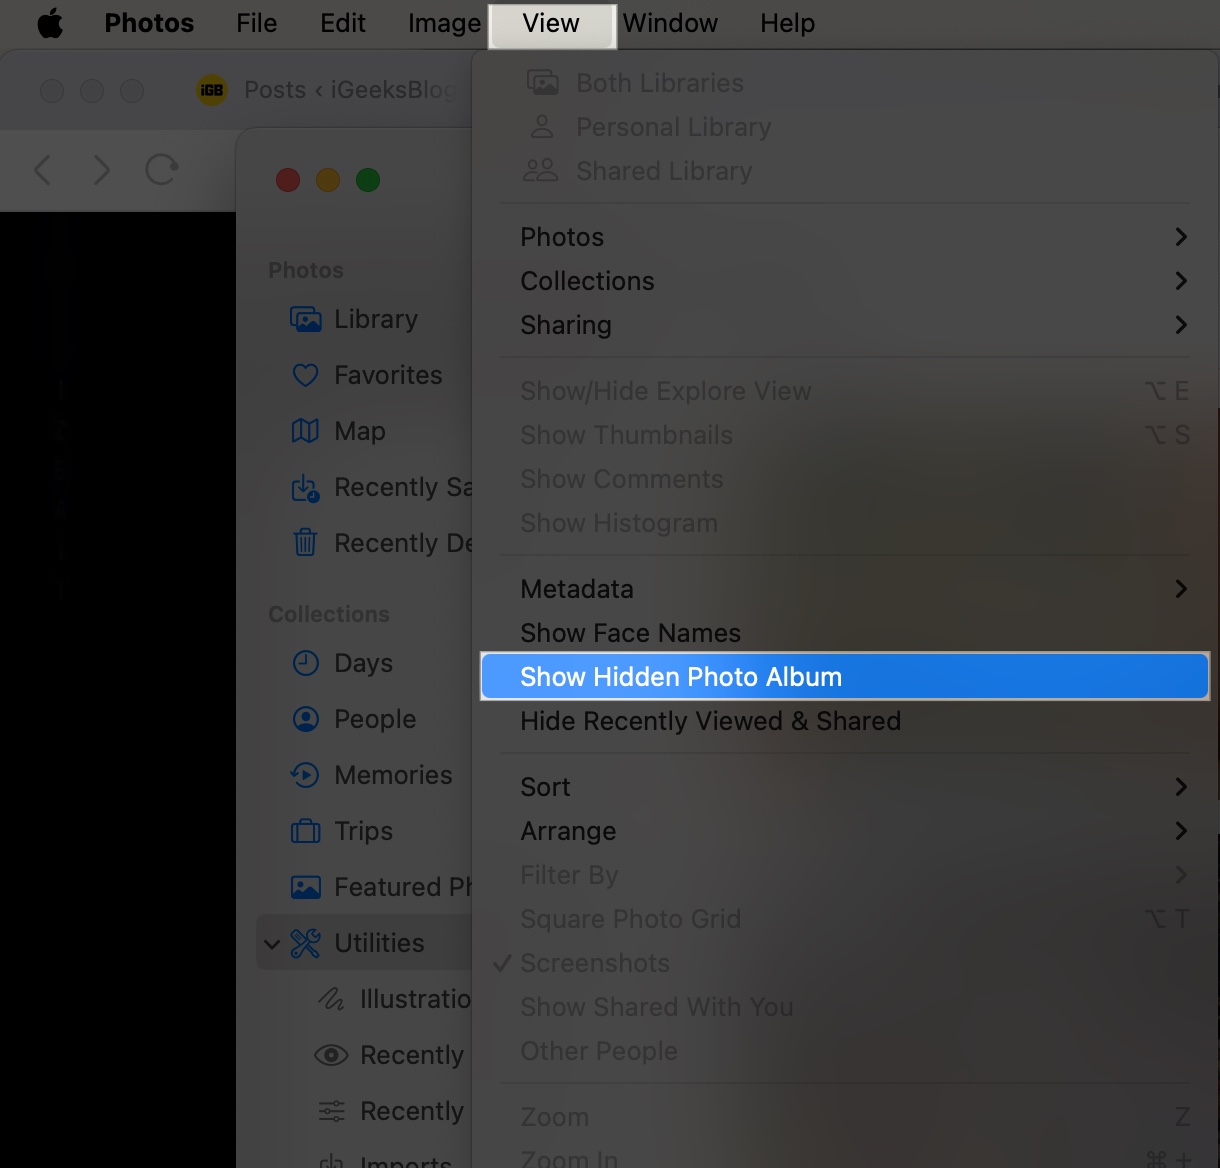
- The Hidden album will appear in the sidebar under Utilities.
- Click View Album on the right and use your Touch ID or Mac password.
- Now, you can view your hidden photos or videos.

To Unhide a Photo or Video:
- From the Photos app, navigate to the Hidden album.
- Select the photo or video you want to unhide.
- Control-click and choose Unhide 1 Photo, or go to the Image menu and select Unhide Photo.
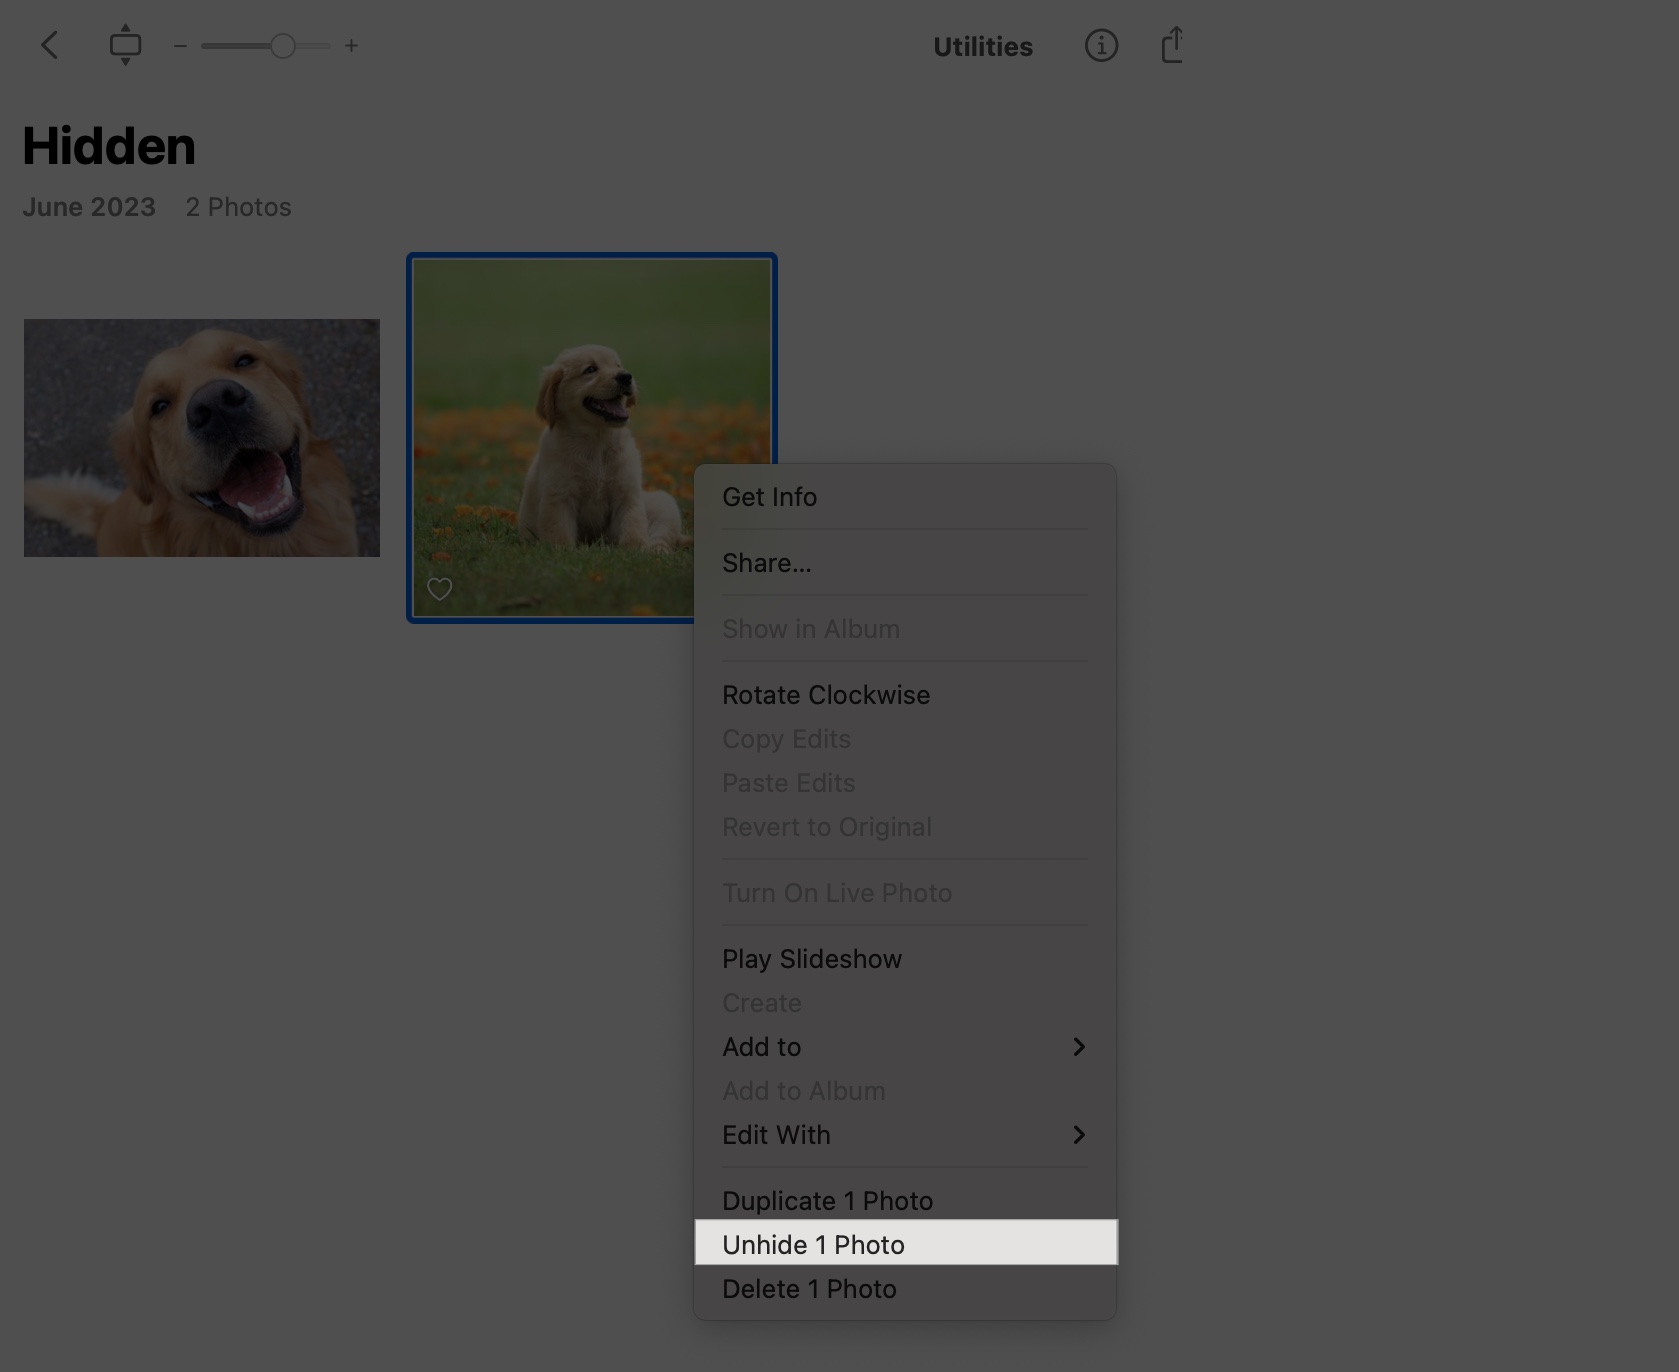
The item will return to your main library.
How to Lock and Hide the Hidden Album
Apple gives you the option to lock and even hide the Hidden album for extra security.
On iPhone or iPad:
- Go to Settings > Apps > Photos.
- Ensure Use Face ID is turned on.
- Toggle off the Show Hidden Album option to remove it from the Photos app view.
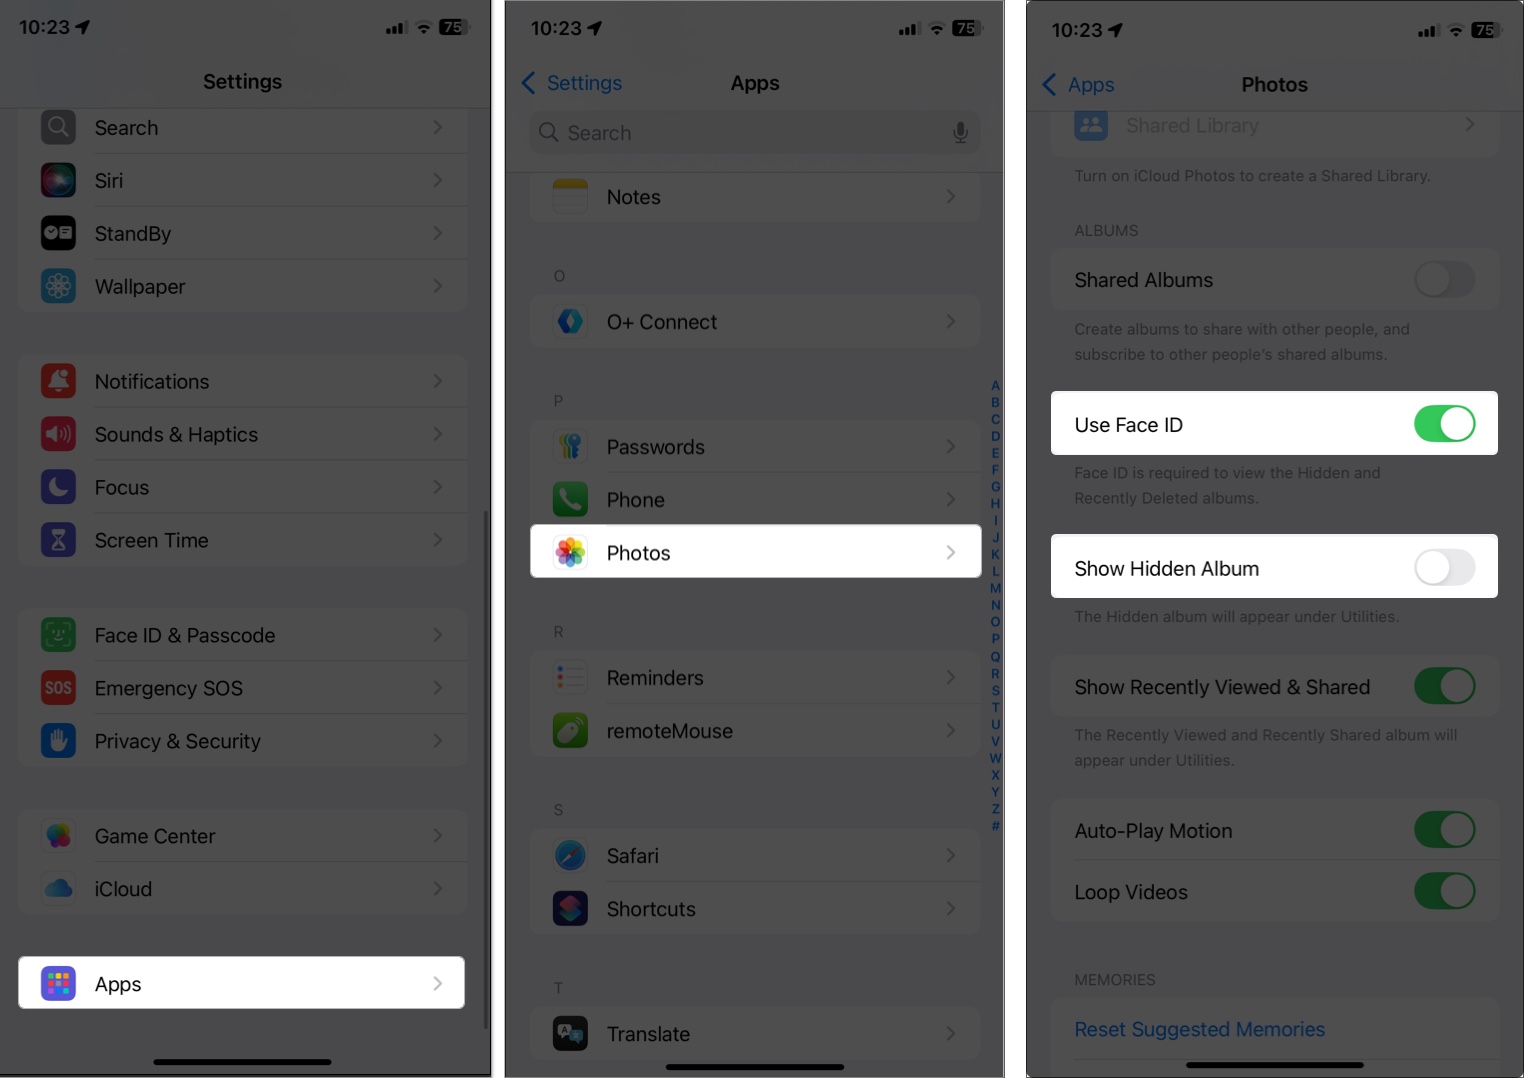
To access it again, you need to toggle on the option. It’s best when you lend your phone to someone, and they know your device’s passcode.
On Mac:
- The Hidden album is protected by your system password or Touch ID.
- You won’t see it in the sidebar unless you enable it from the View menu.
Important Tips to Keep Photos Truly Private
- Hidden Album Visibility: It’s still accessible unless you toggle it off. Use with caution.
- iCloud Sync: Hidden photos sync across devices but remain hidden.
- Backups: They’re included in backups—so keep your backups secure.
- Search: Hidden items don’t appear in the search unless accessed directly.
- Not Encrypted by Default: For full encryption, use locked Notes or third-party apps.
Bonus Tips to Secure Your Private Content
- Use Locked Notes: Move sensitive photos to a locked note in the Notes app.
- Enable two-factor authentication for your Apple ID.
- Use privacy apps like Private Photo Vault for encryption.
- Review your Hidden album regularly and clean it up as needed.
- Lock the Photos App itself using iOS 18’s new app lock features.
Troubleshooting: Hidden Album or Unhide Option Not Working?
If you’re having trouble:
- Hidden Album Not Visible:
- On iPhone/iPad: Go to Settings > Photos and toggle on Show Hidden Album.
- On Mac: In the Photos app, go to View > Show Hidden Photo Album.
- Can’t Access Hidden Album: Ensure you’re using the correct Face ID, Touch ID, or passcode. If you’re locked out, reset your device passcode via the Settings menu.
- Unhide Option Missing: Make sure you’re in the Hidden album and have selected the photo or video. Try force-quitting the Photos app and then reopening it.
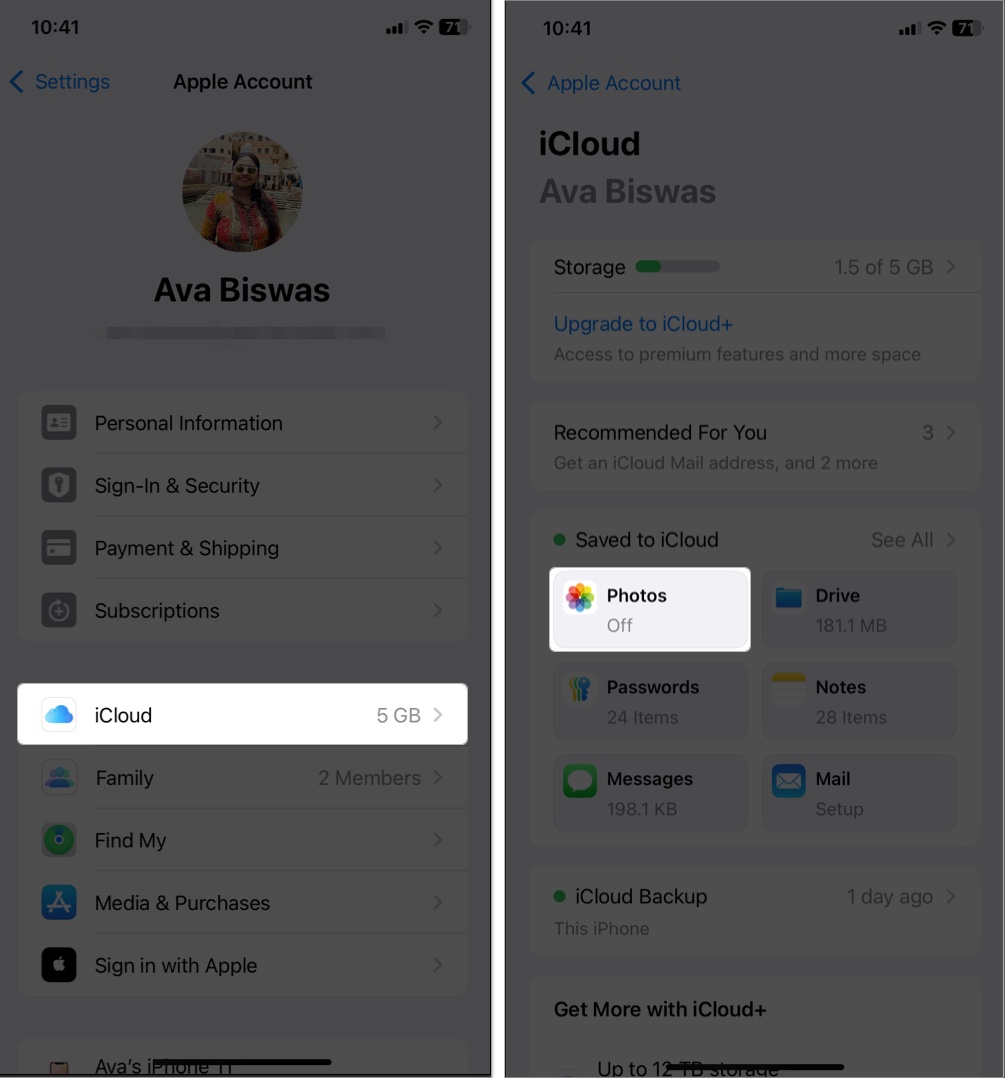
- Sync issues: If hidden photos aren’t syncing across all your devices, ensure that iCloud Photos is turned on. To do this, go to Settings > [Your Name] > iCloud > Photos.
Protect Your Privacy with Hidden Albums!
Hiding photos and videos on iPhone, iPad, and Mac is a simple yet powerful way to keep your private moments secure. Whether you’re concerned about accidental exposure or want to keep your personal media under wraps, Apple makes it easy.
It’s worth taking a few minutes to lock down your memories—you’ll thank yourself later.


