I used Microsoft OneDrive, like most people do, as basic cloud storage. Upload, download, forget about it. Until I reached storage limitations, lost a file version, and couldn’t find documents when needed.
That’s when I decided to stop using OneDrive just for file storage and actually started exploring its capabilities. Surprisingly, a few small features ended up changing my work routine. It felt like unlocking pro upgrades.
Below are the hidden OneDrive features I genuinely wish I had started using earlier.
6 hidden OneDrive features you must know about
After testing for a month, I realized most of the “pro features” people look for in third-party apps are already built into OneDrive. They’re just buried.
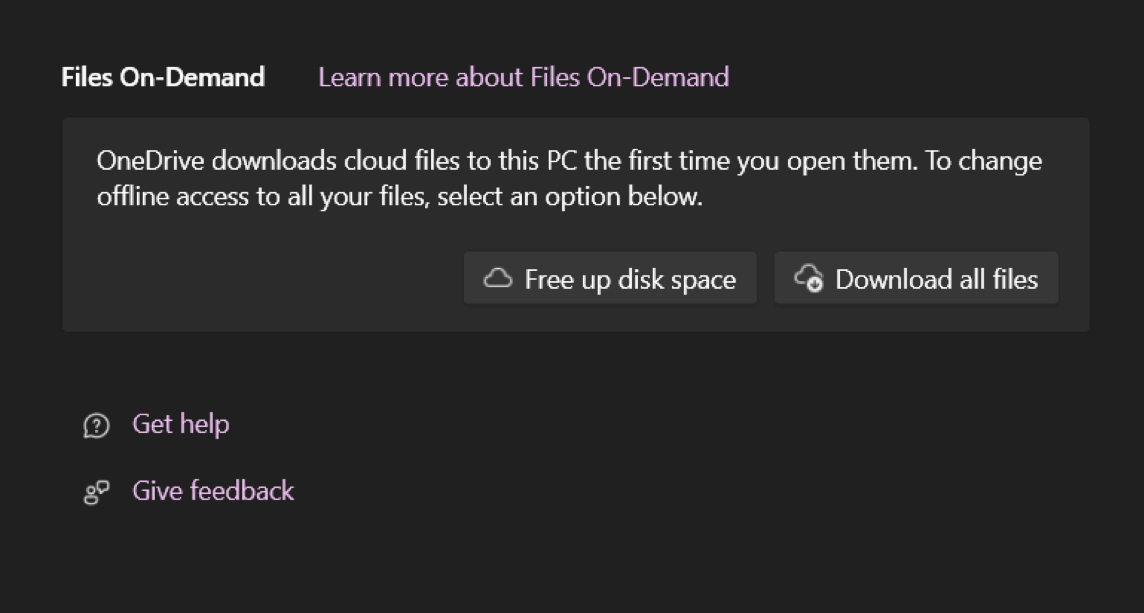
1. Files On-Demand: Instant storage expansion
This is the feature that made my laptop feel unlimited.
Before discovering it, I was constantly managing storage by deleting files, moving things around, and thinking twice before downloading large files. But with Files On-Demand, that entire mindset disappeared.
Instead of downloading everything, OneDrive shows all files neatly organized in File Explorer but only pulls them when needed. So, they don’t take up space on your PC. When you are online, you can use those online-only files like regular ones.
It’s a subtle shift, but it completely changed how I work. If you are using the latest OneDrive (build 23.066), Files On-Demand is already enabled and shows a cloud status symbol next to the files.
If not, follow these steps:
- Click the OneDrive cloud icon in your system tray.
- Select the gear icon at the top right and choose Settings.
- Ensure you are in the Sync & Backup menu, scroll down, and click Advanced settings.
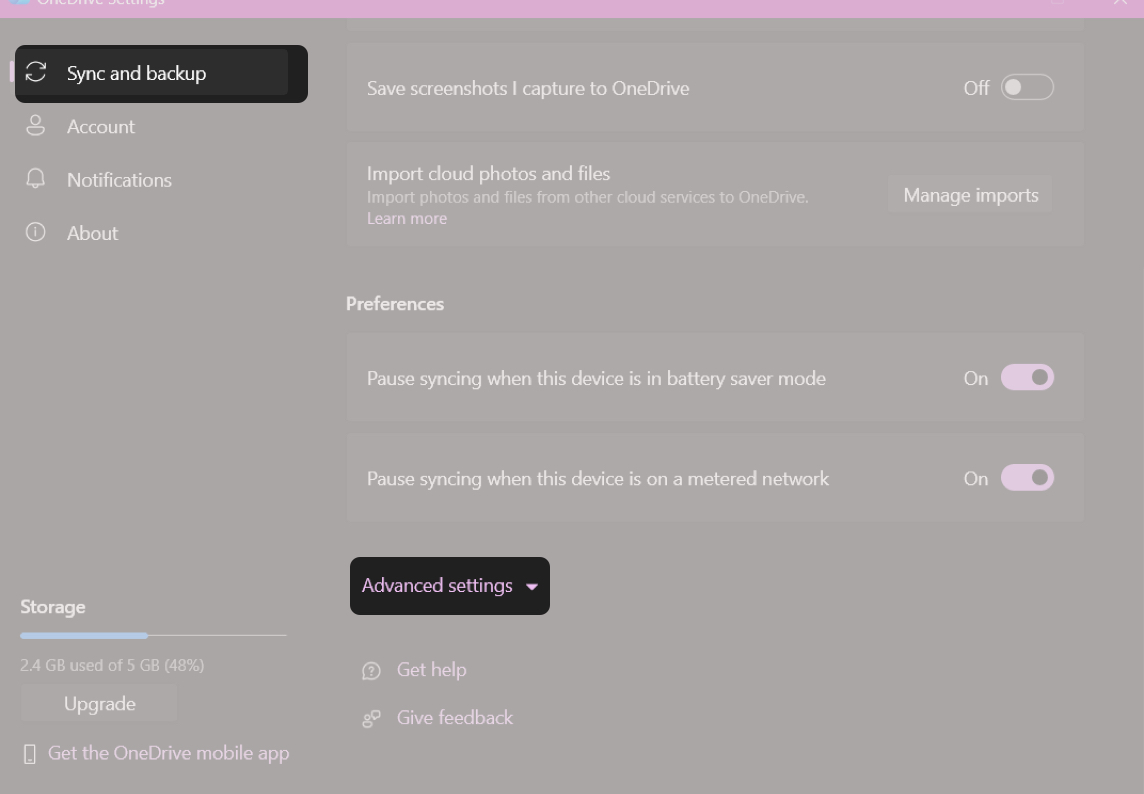
- Toggle on Files On-Demand.
Instead of thinking, “Do I have space for this?”, I now think, “Do I need this right now?” That difference matters more than it sounds.
2. Version History: My silent backup system
Once, I accidentally overwrote an important file while editing and thought it was gone because there were no backups. That’s when I discovered OneDrive had been quietly saving versions the whole time. Every change, every save, it keeps snapshots you can go back to. The best part is that Version History is enabled by default.
To restore previous file versions:
- Open File Explorer and go to any folder under OneDrive.
- Right-click the file and select Show more options.
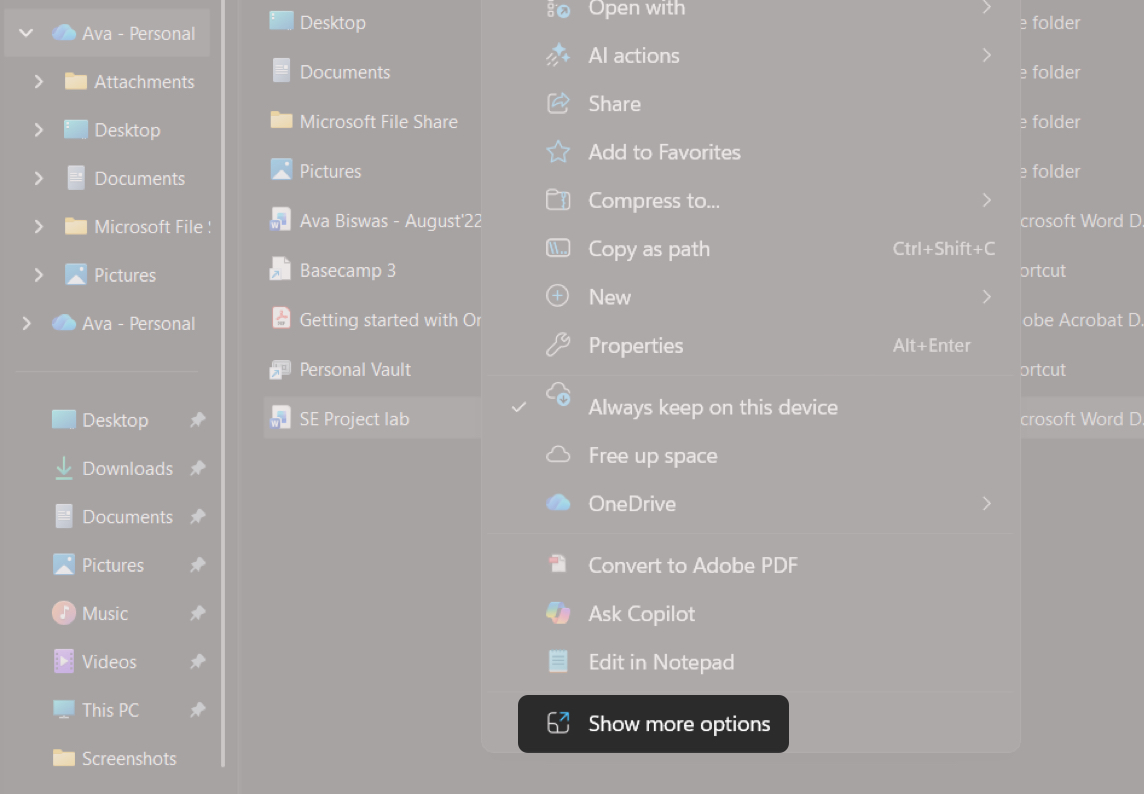
- Click Version history from the context menu.

- You will now see all the saved versions. Select the three-dot icon next to the version and click Restore.
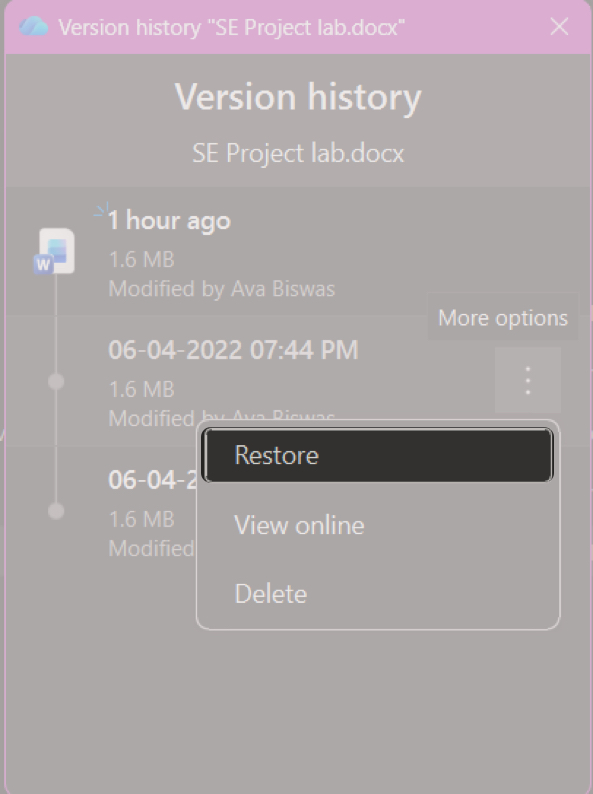


That’s all!
And then there’s Restore OneDrive, which takes it further. You can rewind your entire OneDrive to a previous point in time. It undoes deletions, overwrites, corruption, or even malware-related changes from the last 30 days.
It feels less like storage and more like having an undo button for your entire cloud.
If you have a Microsoft 365 subscription:
- Click the OneDrive icon and select View Online. It will open OneDrive on the web.
- Log in to your Microsoft account.
- Click the gear icon at the top and go to Settings > Options.
- Select Restore your OneDrive ” in the left pane.
- Choose a date and review the activity chart.
- Finally, click Restore.
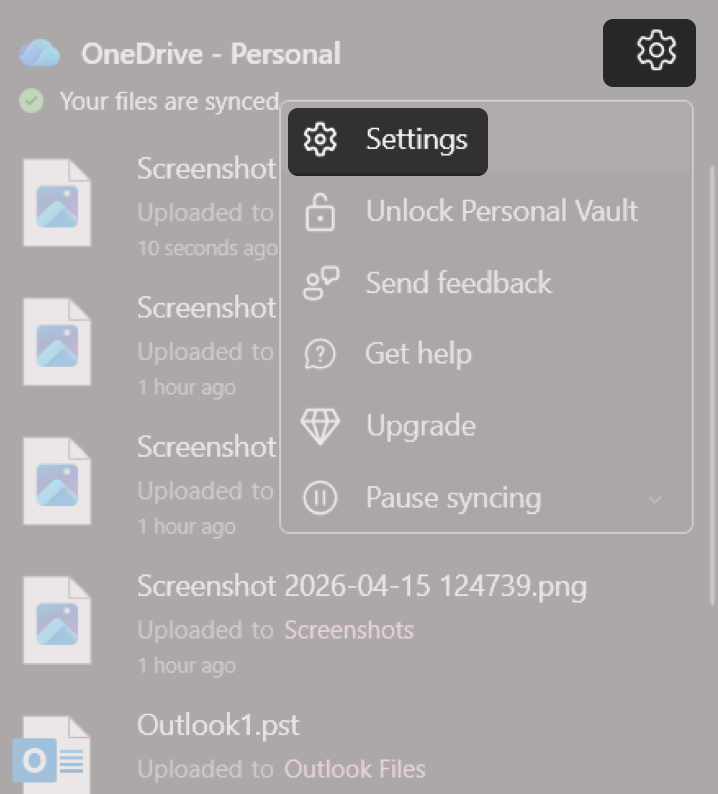
3. Personal Vault: For the stuff you can’t risk losing
I used to store sensitive files like everything else, just in a folder with a “do not touch” name. Not exactly secure.
Personal Vault changed that. It locks your files, logs you out automatically after inactivity, requires re-authentication, and keeps them isolated. It feels inconvenient at first, but then you understand why.
To set it up:
- Click the OneDrive icon and select the gear icon > Unlock Personal Vault.
- Now, click Next, then Allow to start the setup.
- Enter your device PIN and verify your account using OTP or an authenticator.
- Once set up, move sensitive files into the vault.
- To access it, open File Explorer > [your name] Personal and select Personal Vault. Verify your identity.
What I didn’t expect was the built-in ransomware protection tied to it. If something suspicious happens, OneDrive flags it and helps you recover files.
4. Always Keep On This Device: Saved me more than once
If Files On-Demand gives you flexibility, this gives you certainty.
There were many times when I had unreliable internet, and accessing cloud files became a problem. This lets you keep important files available offline.
- Right-click any file or folder.
- Select Always keep on this device from the menu.
- Wait for the green check icon.


Now I only keep active files offline, while older ones stay in the cloud. My system feels faster and more organized.
5. Folder Sharing With Permission Control
I used to avoid sharing via OneDrive because I assumed it was limited. That turned out to be wrong.
OneDrive gives you full control over permissions.
- Right-click the file or folder.
- Click Share on top of the menu.
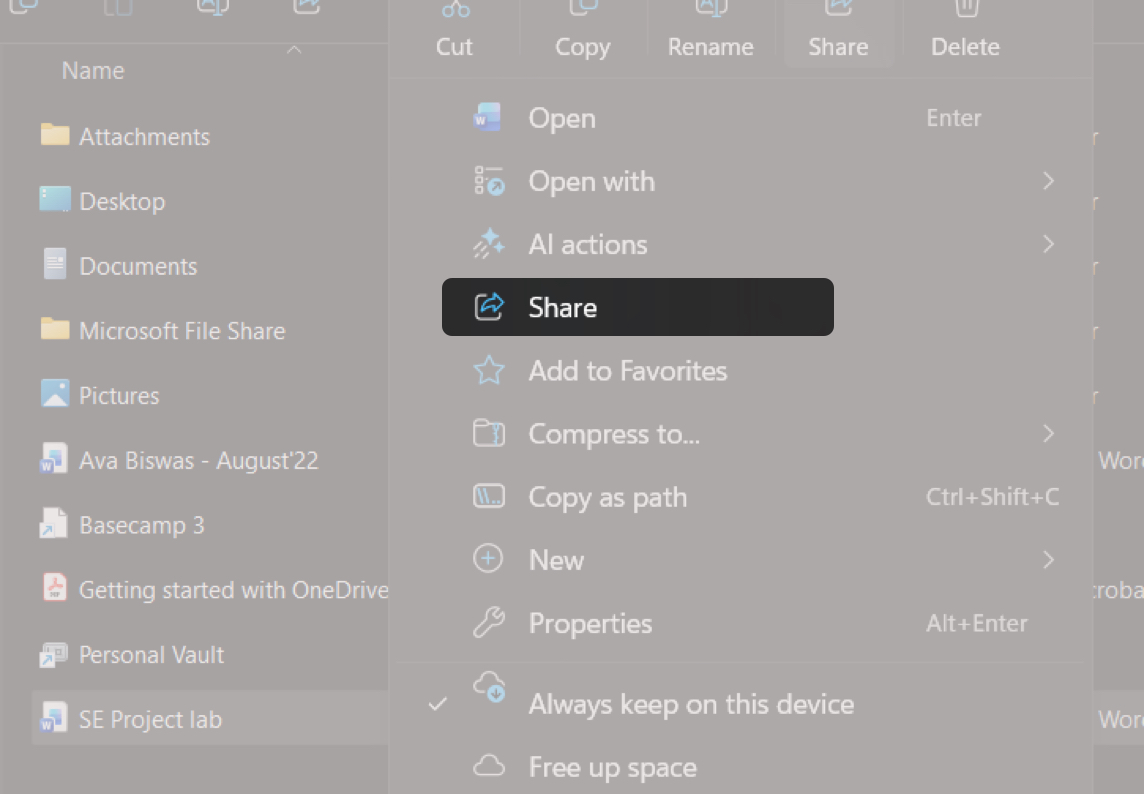
- Now, you can add the email addresses of the contacts.
- Click the pen icon next to it and select choose Can edit or Can view.
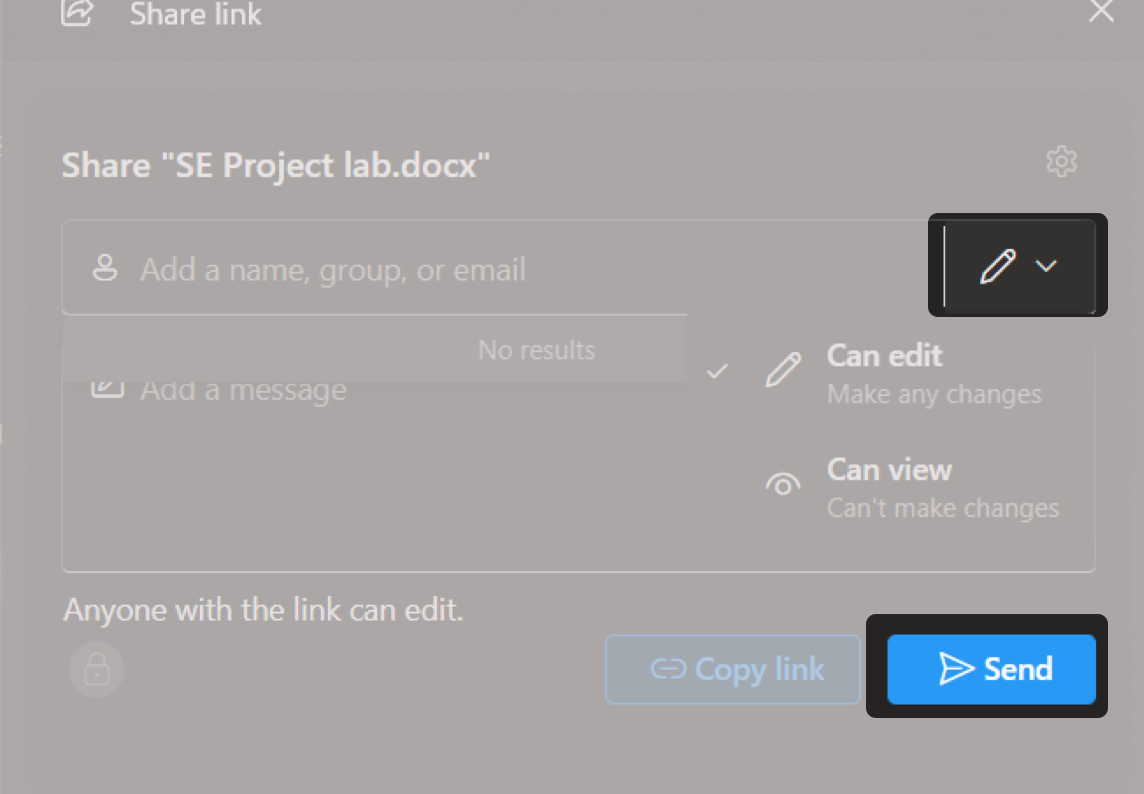
- Optionally set link expiration or a password
- Once done, send or copy the link.


You can also revoke access anytime, which is something you only appreciate when you actually need it.
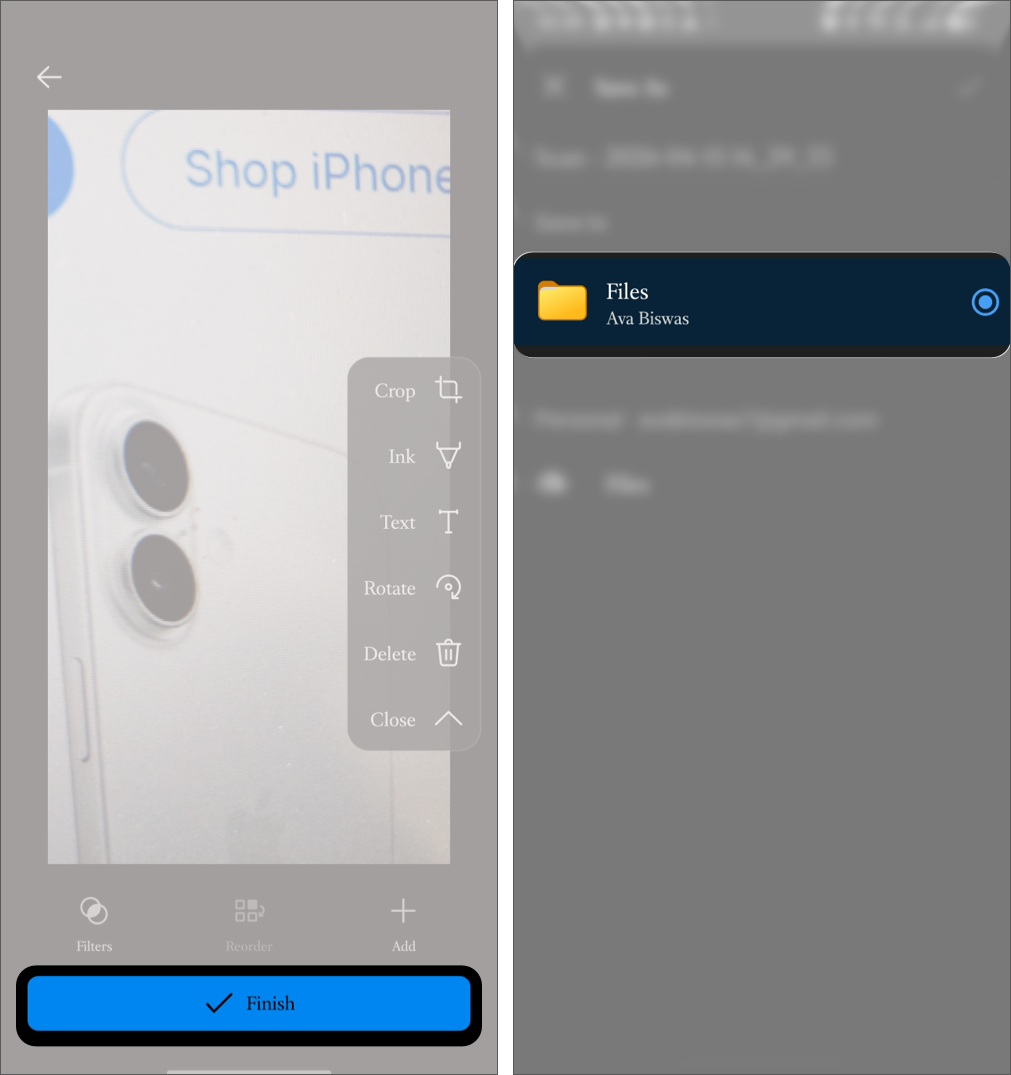
6. Built-in mobile document scanner
This quietly replaced document scanner apps for me.
The scanner in the OneDrive mobile app is fast, accurate, and saves directly to your cloud.
- Open the OneDrive app.
- Tap the + (Add) button.
- Select Scan.
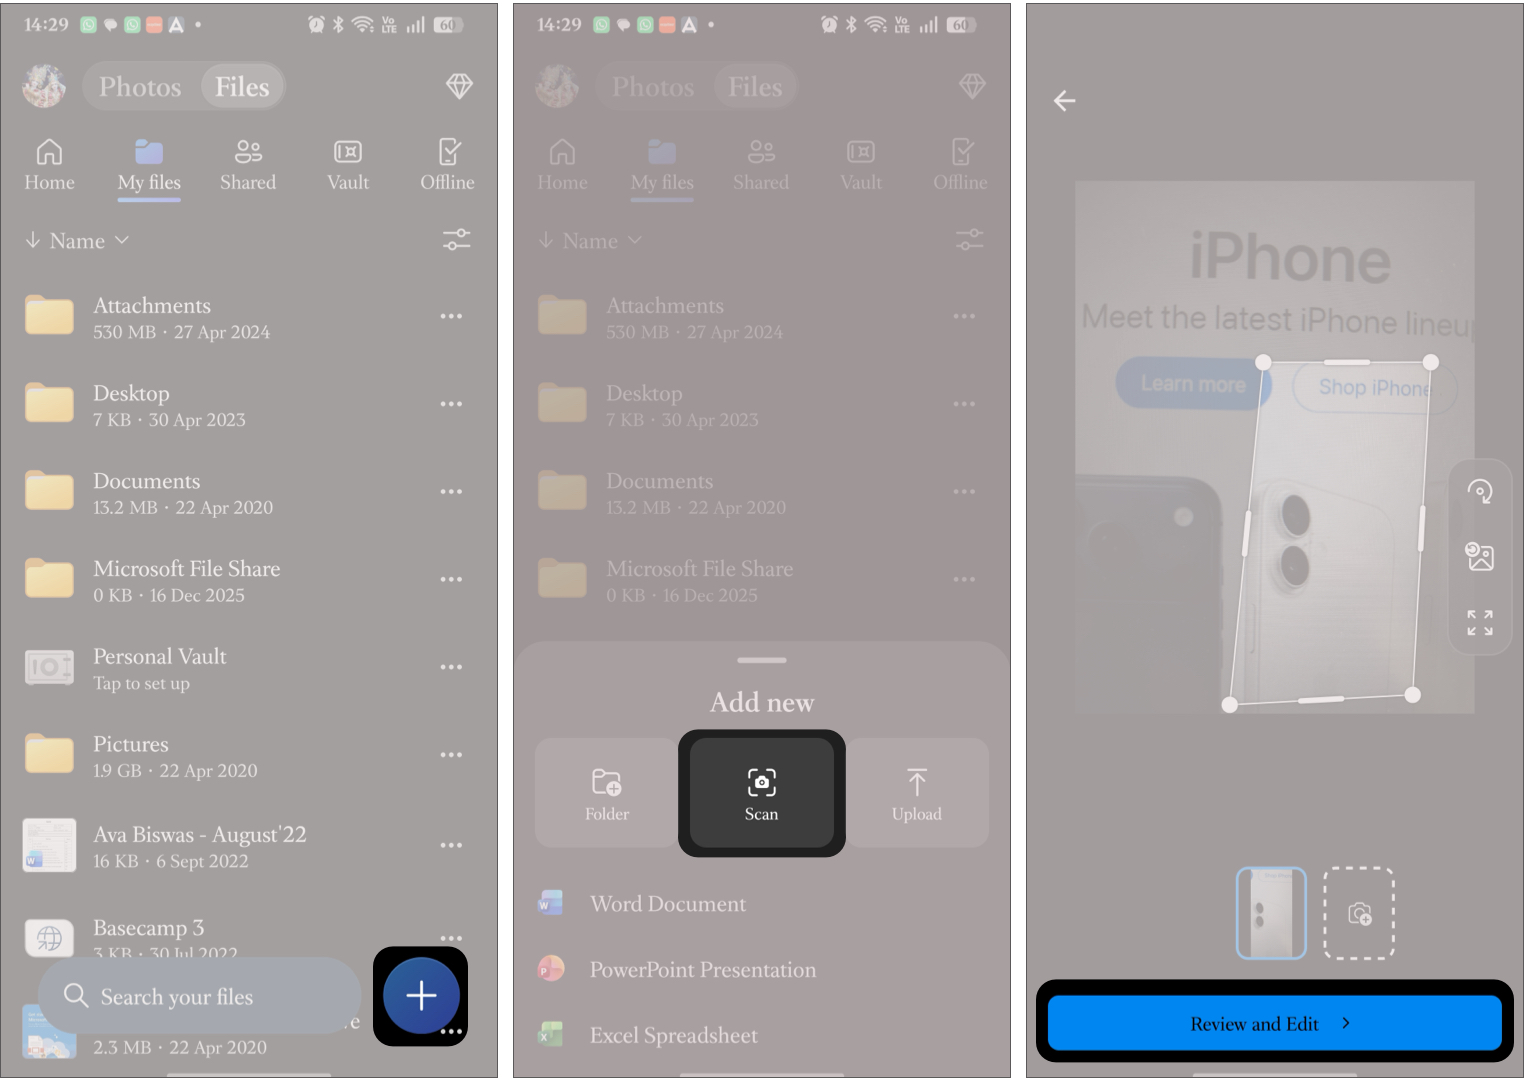
- Capture document, then adjust edges.
- Tap Review and edit. Here, you can add filters, add text, and more.
- Save as PDF directly to OneDrive.


What I like most is how seamlessly it fits into my workflow. Scan, save, done.
How I manage OneDrive storage efficiently
My approach to storage has completely changed.
I no longer treat storage as something to constantly fight. Files On-Demand keeps things lightweight, while selective offline access ensures I always have what I need.
File organization also became more intentional. Active work stays offline, while older files remain in the cloud.
What surprised me most is that storage issues are often about habits, not limits.
Should you use OneDrive over Google Drive?
I’ve used both extensively, and the difference comes down to workflow.
OneDrive integrates deeply with Windows. Features like Files On-Demand and system-level recovery make it feel like part of the OS.
Google Drive is better for collaboration, especially with Docs and Sheets. And if you use an iPhone, iCloud works better for syncing.
For me, OneDrive reduced more friction in daily use.
Final thoughts
OneDrive used to be just a place where files sit. Now it feels different.
These features didn’t just improve things. They removed small, constant frustrations I didn’t even notice before. And once those are gone, everything feels smoother.
The surprising part? None of this is new. It was always there. I just wasn’t using it properly.
And if you’re only using OneDrive to upload and download files, chances are you aren’t either.