
Screen recording has quietly become one important task in my daily workflow. Be it explaining an issue to tech support, saving a web conference call, or even creating work-related videos, this process is much faster than writing long explanations nobody wants to read.
What surprised me is how many Windows 11 users still think they need to install a third-party app just to record their screen. I used to think the same thing. But after testing Windows 11’s built-in tools, I found multiple ways to screen record, and some of them even capture audio.
Here’s the best screen recording method on Windows 11 you can try without installing anything extra. I have compared how fast they were and shared what they could record, so you can choose based on your requirements.
Method 1: I used Xbox Game Bar for the fastest recording shortcut
The most interesting part about the Game Bar was how most Windows users perceived it to be exclusive to Xbox games. I never bothered to try it out due to the very same reason. But after actually using it, I realized it’s the fastest screen recorder on Windows 11.
The key shortcut is what makes it so good. Instead of opening an app and hunting for a record button, I just press: Windows + Alt + R. That instantly started recording whatever app I had open. The recording widget appeared in the corner, showing recording time and microphone controls.
Pressing the same shortcut again stopped recording and showed a pop-up banner saying Game clip is saved. Tapping it opens the Gallery with all your recordings.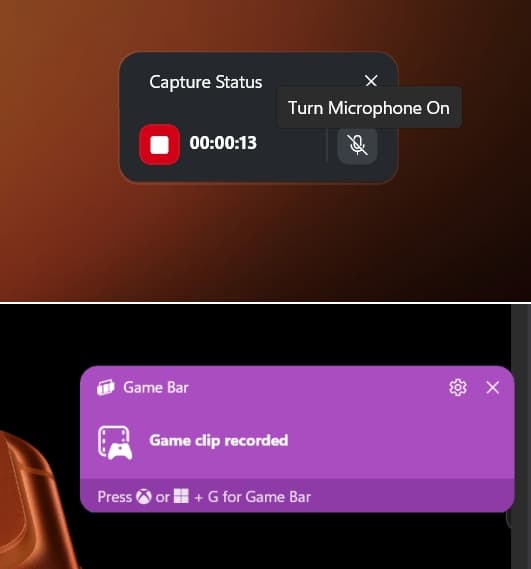
You can also open the full overlay with Windows + G. From there, I could access the Capture widget manually. The best part is that Windows automatically stores the MP4 video inside File Explorer > Videos > Captures folder instead of a random hidden place.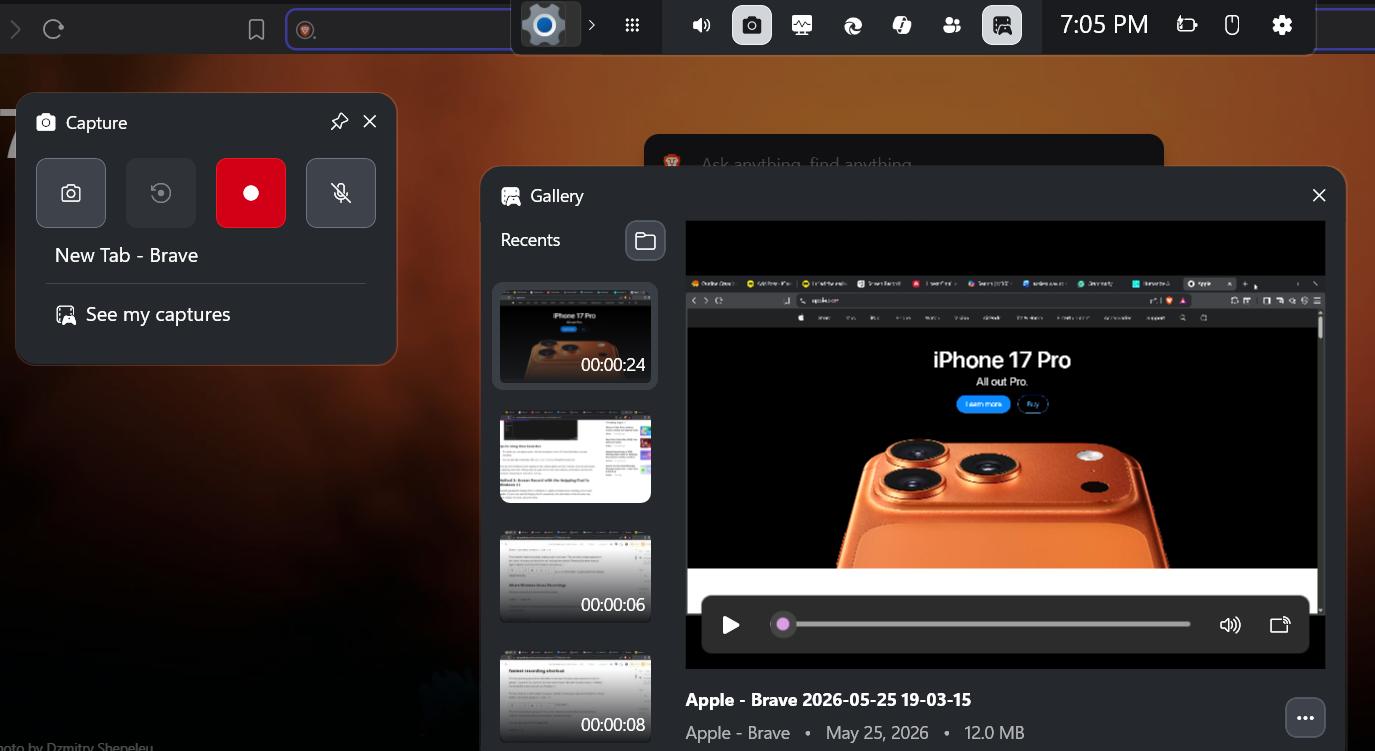
- Keyboard shortcut launches it instantly.
- It captures system audio reliably.
- The microphone recording works well.
- Performance impact was surprisingly low.
- Xbox Game Bar cannot record the Windows desktop or File Explorer.
- Not as flexible for selecting a custom screen area.
- Only good for recording one app quickly.
Tip:
I customized Game Bar recording to capture smoother and higher-quality video. For that, go to Settings > Gaming > Captures. Change the Video frame rate and Video quality. You can even enable recording for the last 10 minutes to avoid missing important scenes.
Method 2: Snipping Tool lets me record a selected area
This was the method that felt least intimidating because I already used Snipping Tool for taking screenshots. Unlike the Xbox Game Bar, this one can record specific portions of the screen and works in File Explorer and on the desktop. That instantly made it more useful for me.
- Press
Win + Shift + Rshortcut to open Snipping Tool in recording mode.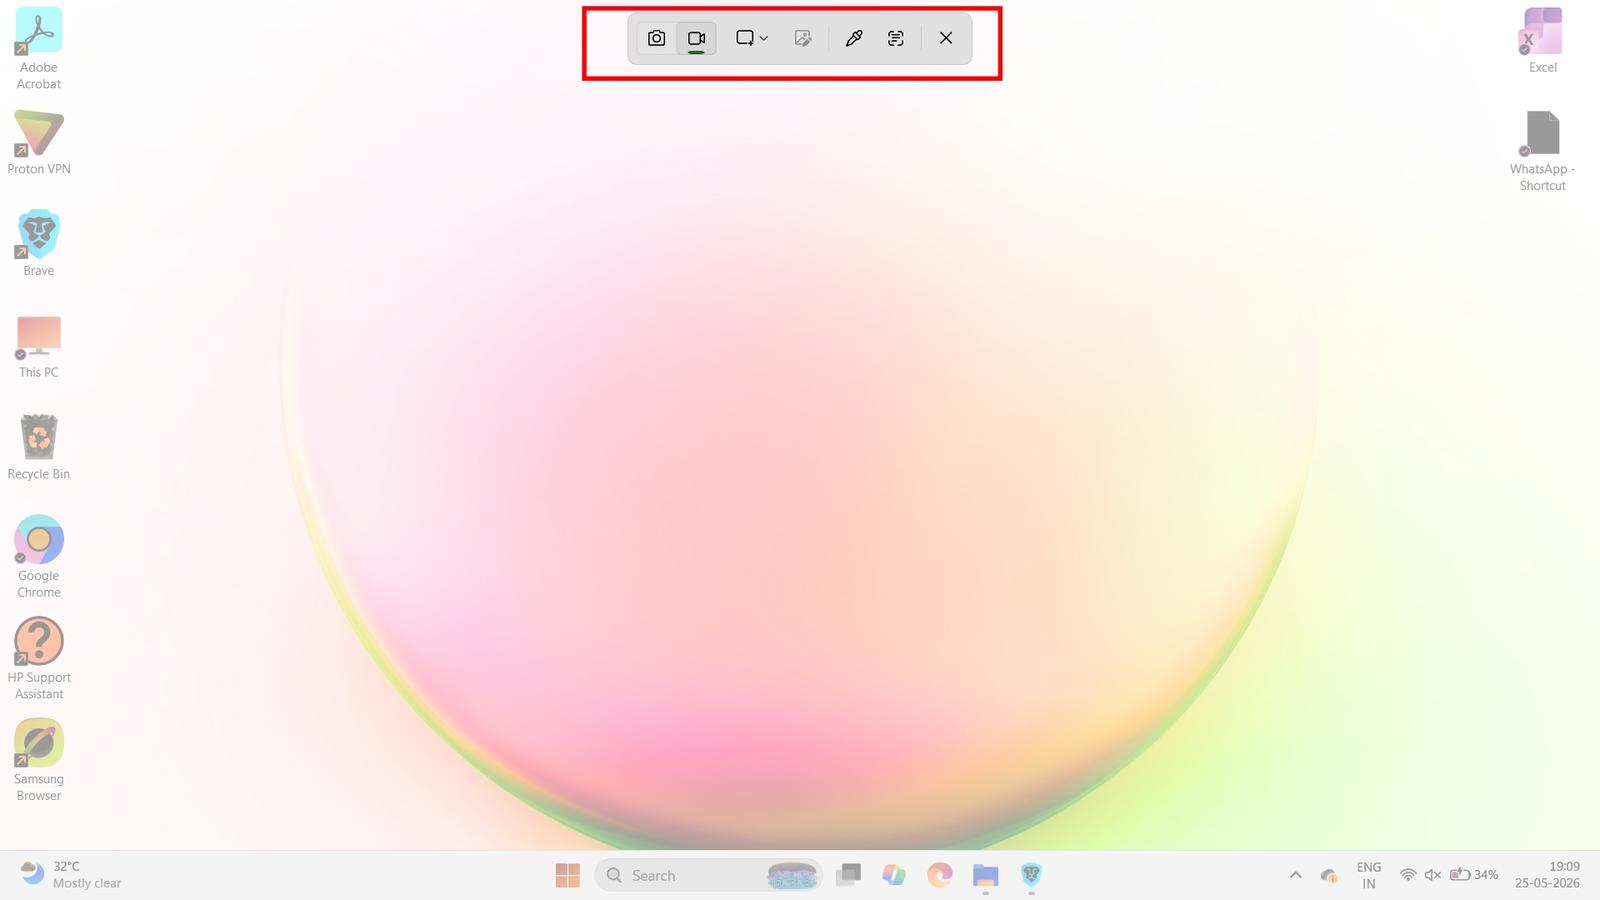
- After that, drag a box around the exact part of the screen you want to record.
- If you want to record audio, click the mic icon and select the mic option. You can also enable/disable the system sound.
- Then hit the Start button.
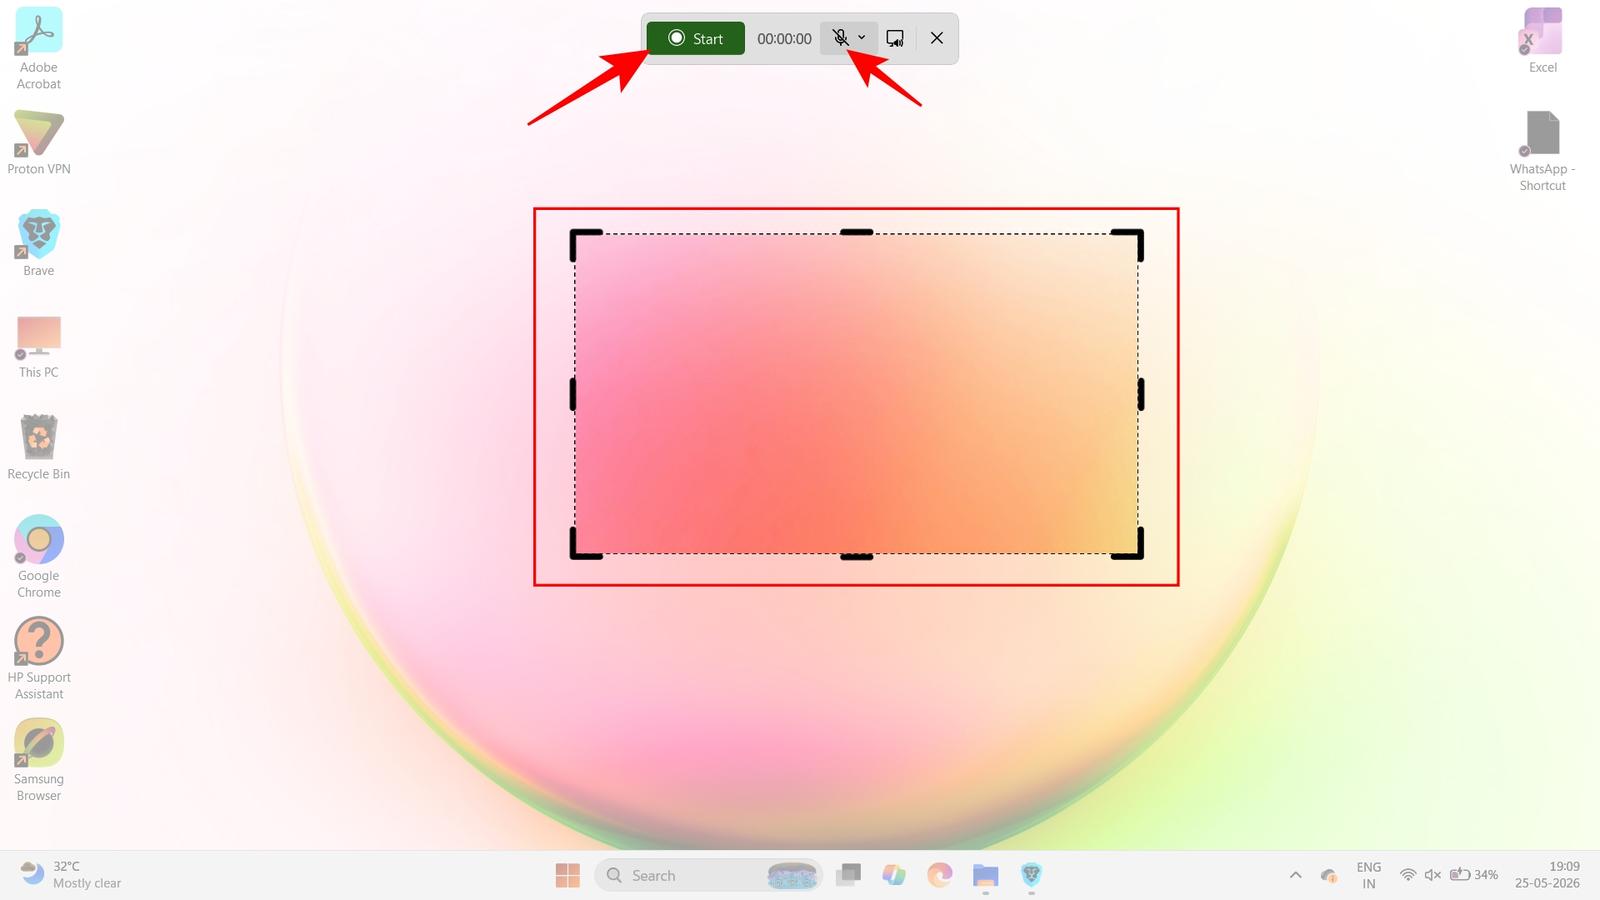
- A three-second countdown appears, and the recording begins. Do the screen activity you want to capture.
- To stop the recording, click the red square icon at the top. You will see a preview, and the video will be saved in the Videos > Screen Recording folder.
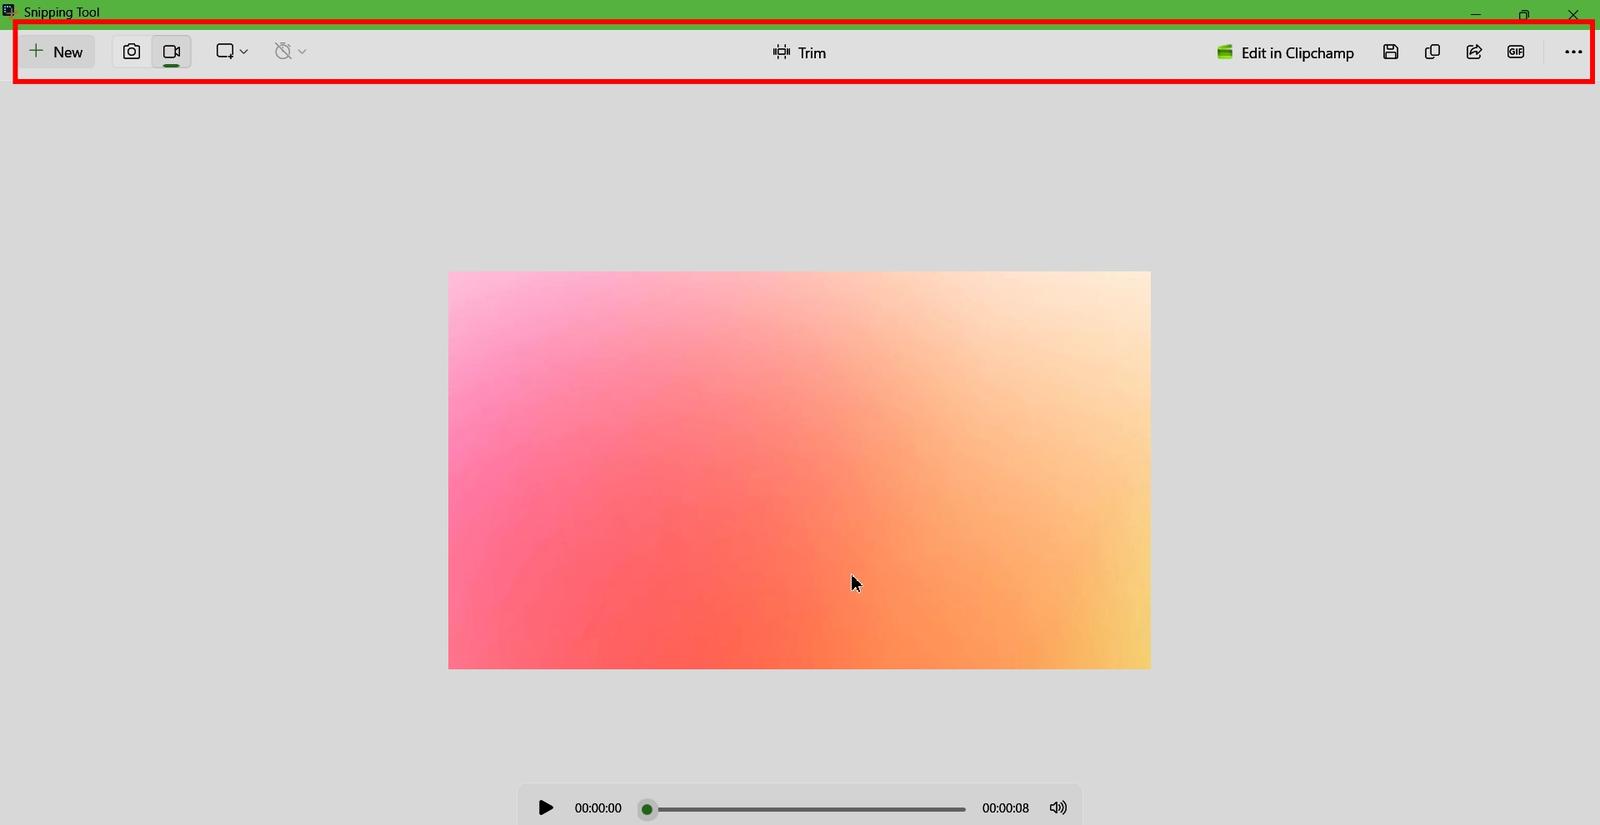
From the preview window, you can trim the screen recording, create a GIF from it, or share the video with others.
- It’s best for focused demonstrations where you don’t want to show everything.
- Easy to understand even for beginners.
- Works across the system.
- Not as fast as a one-key shortcut like Game Bar.
- Can’t adjust video or audio capture quality.
- You may need Clipchamp if you want trimming, text, effects, or a more polished final video.
Method 3: I tried Microsoft Clipchamp for professional recording
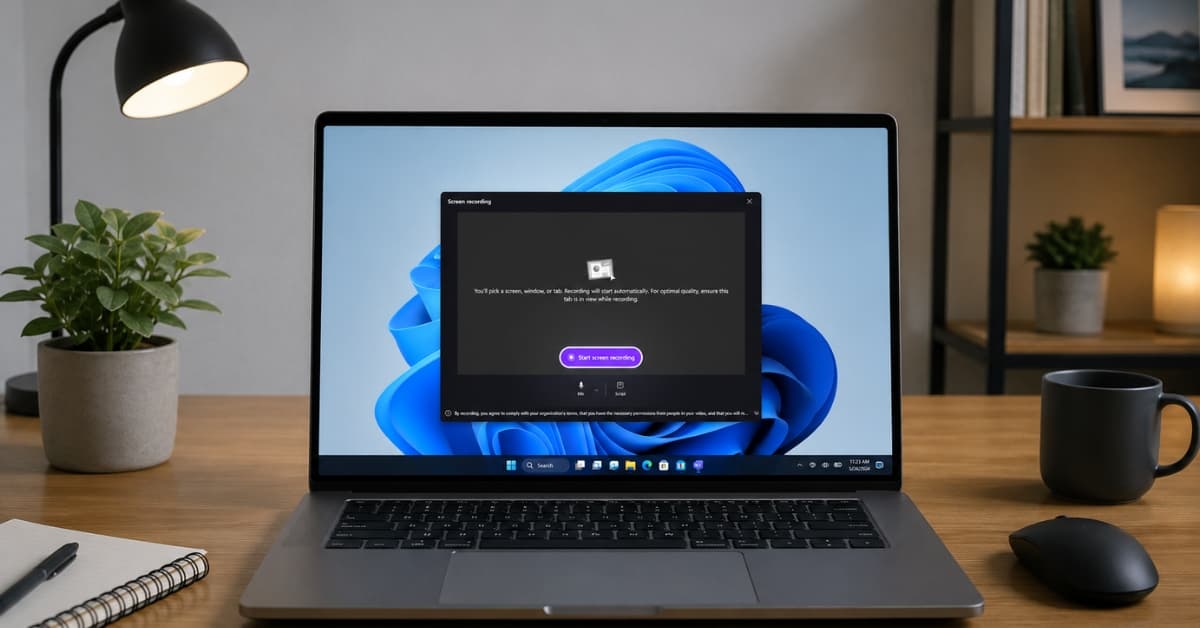
If you want to record your screen with webcam overlays, such as YouTube tutorials or gaming scenes, you can use the Microsoft Clipchamp. I like its built-in editing and Script overlay for smoother recording and a polished outcome.
- Click the Start menu and select Microsoft Clipchamp.
- Now, sign in with your Microsoft account and wait for it to load.
- Select Create a new video. It will open the editing window.
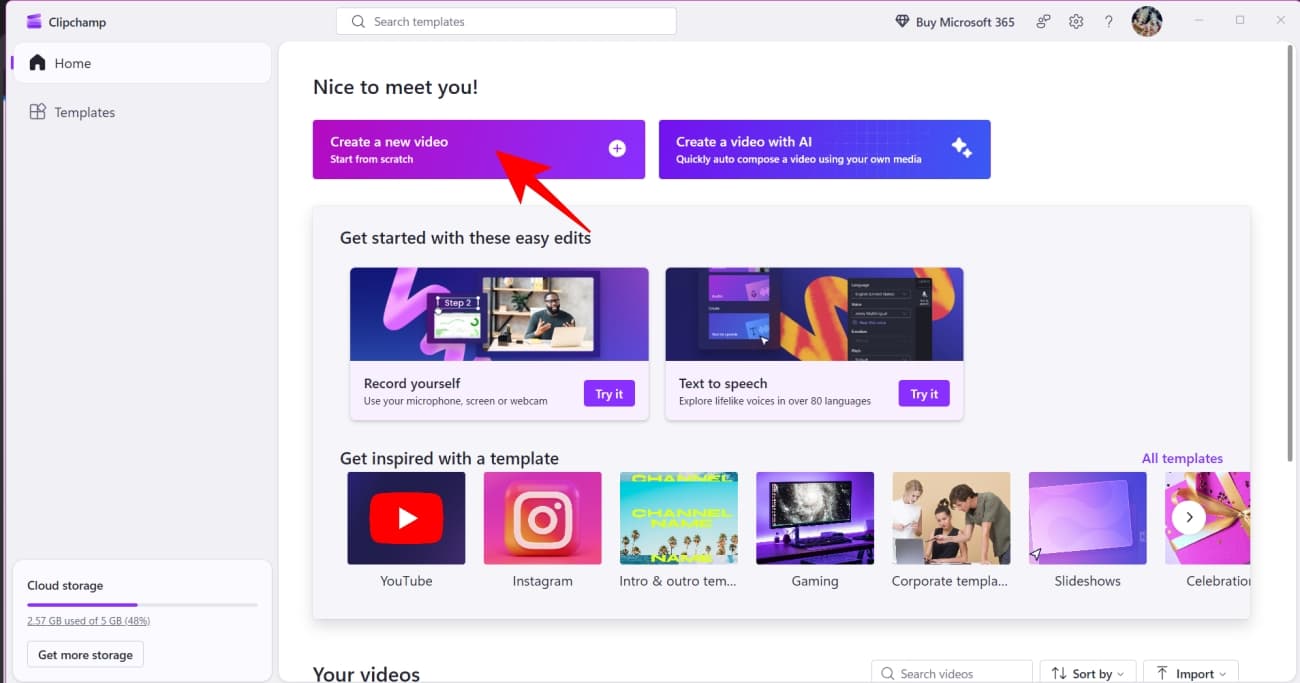
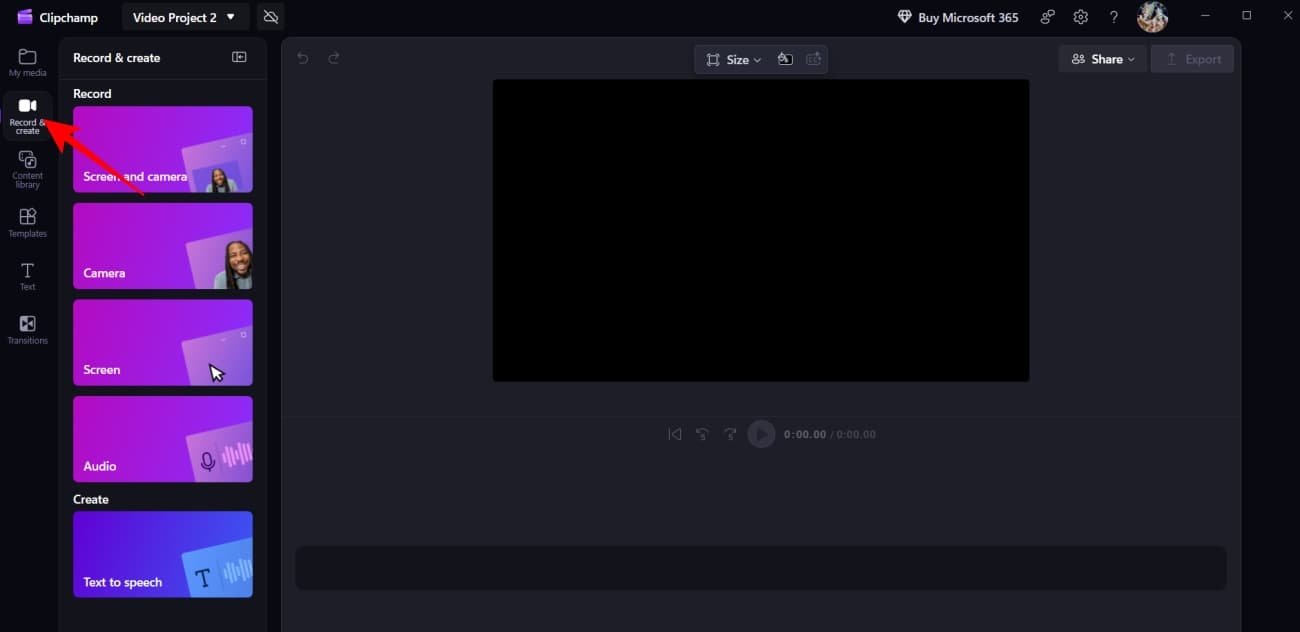
- Choose Record & create from the left panel and select Screen or Screen and camera.
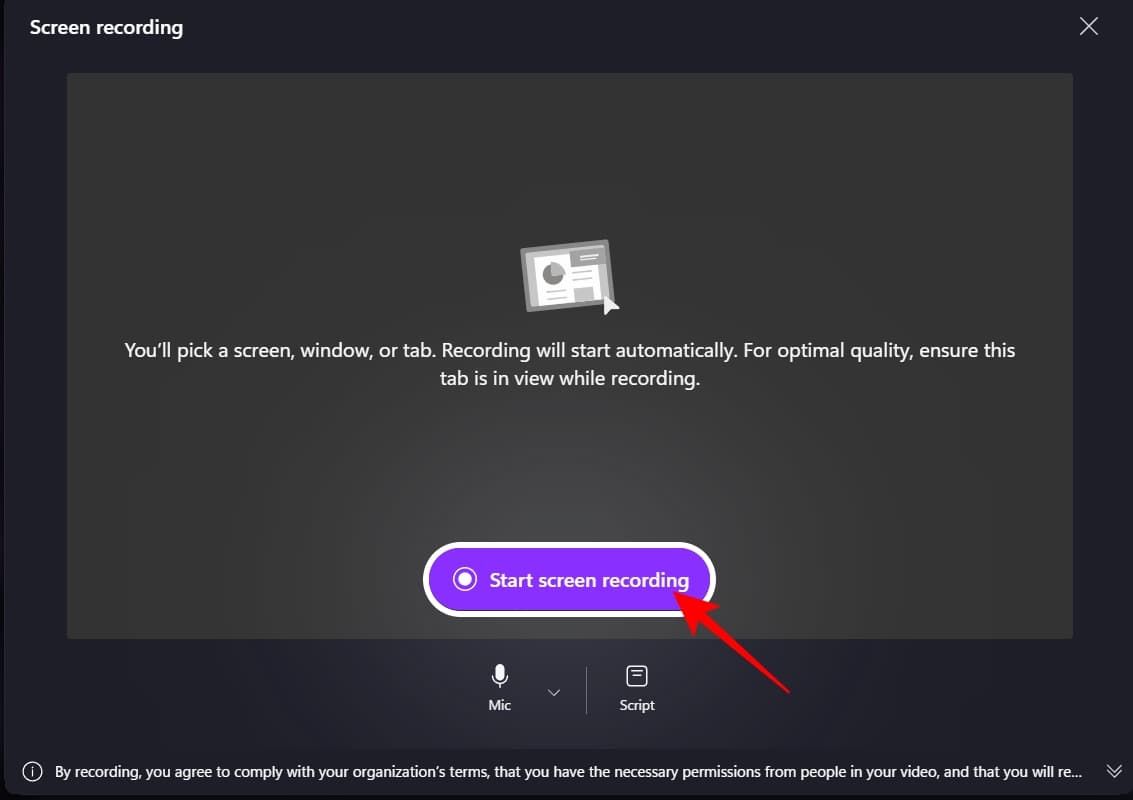
- Enable or disable the mic and type your script if required.
- Click Start screen recording.
- Choose between specific windows or the entire screen, and hit Share. The recording will begin after a countdown.
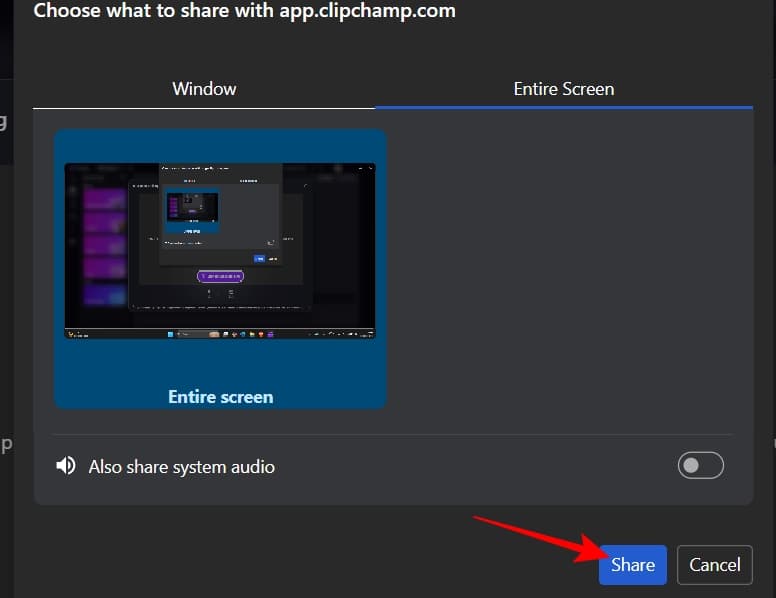
- Once done recording, click Stop sharing at the bottom.
- Click Save and edit.
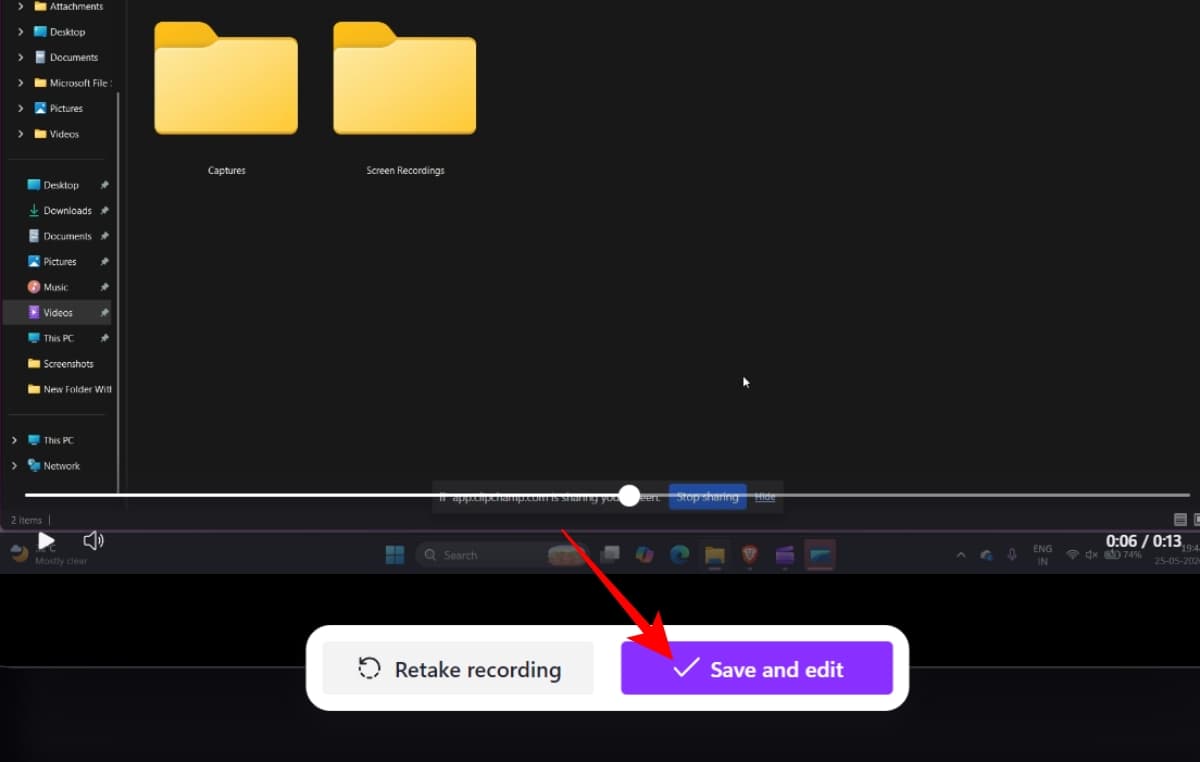
Clipchamp lets you crop the frame, add background music, transitions, and text overlay, use templates, export in higher quality, and more.
Certainly, it can’t compare to OBS screen recorder or pro video editing apps like Adobe Premiere Pro. But for most people who need polished screen recordings without learning complicated editing software, Clipchamp is probably the closest thing Windows 11 has to an all-in-one creator tool.
- Editing is dramatically better.
- Timeline controls are beginner-friendly.
- Exporting is easy.
- Webcam + screen recording is supported.
- Many template upsells.
- It’s functional, but not especially fast.
- Some features are behind a paywall.
Common problems I ran into
After testing all three methods, I kept hitting the same issues repeatedly.
| Issues | Solutions |
|---|---|
| The audio wasn’t recorded | Go to Settings > Gaming > Game Bar and make sure the options are enabled |
| Audio wasn’t recording | Check microphone permissions, verify audio toggles before recording, and confirm the correct input device is selected. |
| Recordings looked choppy | I noticed stuttering mainly during browser-heavy sessions and gaming. Lowering the frame rate or closing background apps helped immediately. |
| Game Bar felt limited for longer videos | Windows only allows a maximum of 4 hours of recording via Game Bar. |
| Can’t find screen recording in Snipping Tool | Update Windows 11 and try Windows + Shift + R. |
Which built-in Windows 11 screen recorder should you use?
After testing everything, here’s my honest breakdown.
Use Xbox Game Bar if you are:
- Looking for the fastest shortcut.
- Recording one app or gameplay.
- Want to start and stop recording quickly.
Use Snipping Tool if you:
- Want the easiest method.
- Record a selected part of the screen.
- Making a quick tutorial.
Use Clipchamp if you:
- Need editing tools to add text, effects, or camera footage.
- Create content regularly.
- Want webcam + screen recording together.
Final verdict: The easiest way is Snipping Tool, but I’d keep all three
The funniest part of testing all this is realizing most Windows users are still downloading third-party screen recorders for tasks Windows 11 already handles well. Xbox Game Bar is fast but oddly limited. Snipping Tool is cleaner than expected. Clipchamp is far better than its reputation suggests.
If I had to choose just one for everyday use? I’d pick Snipping Tool.
Which screen recorder tool do you use on Windows? Let me know, and I will surely give it a try!
You might also like: