
iCloud is the default backup location for your device’s data, downloaded apps, and files. So it’s necessary to free up iCloud storage on your iPhone or iPad when it gets full.
There are several things you can do to manage your iCloud Storage and free up available space. You can choose exactly what you want to store there and what you’d rather keep out. Let’s take a closer look.
- Why is my iCloud Storage full?
- How to check your iCloud Storage on iPhone and iPad
- Delete old backups from iCloud
- Choose which apps to backup on your device
- Delete Photos and Videos from iCloud Photos
- Delete Files in iCloud Drive to free up iCloud Storage
- Delete Email, Messages, and Attachments
Why is my iCloud Storage full?
Apple offers just 5 GB of free iCloud Storage. This is quite meager and can fill up pretty quickly. This is especially true if you’re backing up multiple devices such as your iPhone and iPad. You can always buy more storage, but if you’d rather not, here are a few steps you can take to clear some space and decide exactly what to keep on your iCloud Storage.
How to check your iCloud Storage on iPhone and iPad
To see details about how much iCloud storage space you’ve used up:
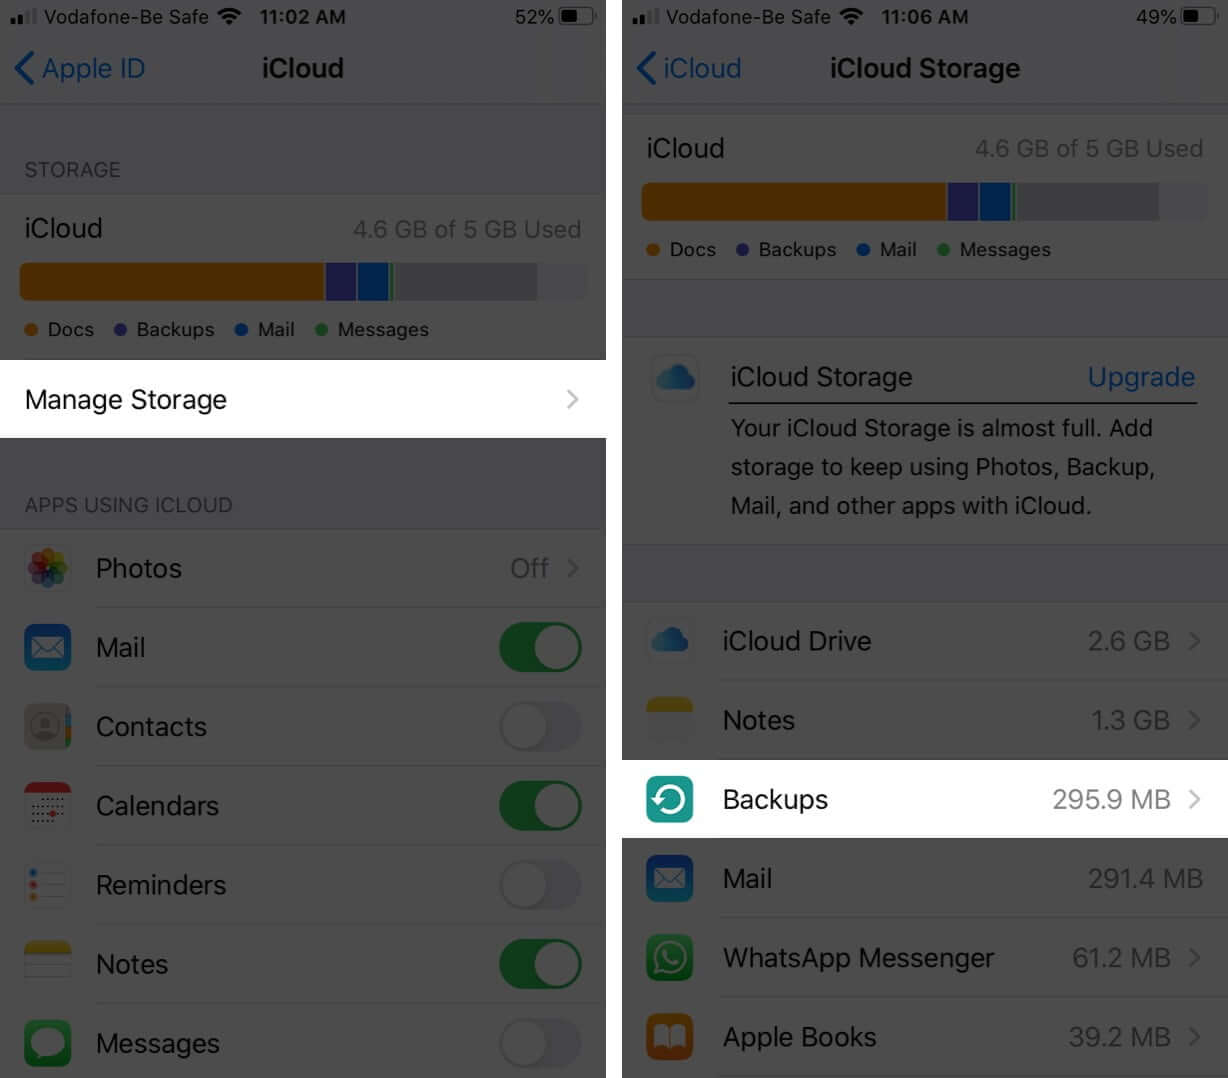
- Go to Settings → [your name] → iCloud.
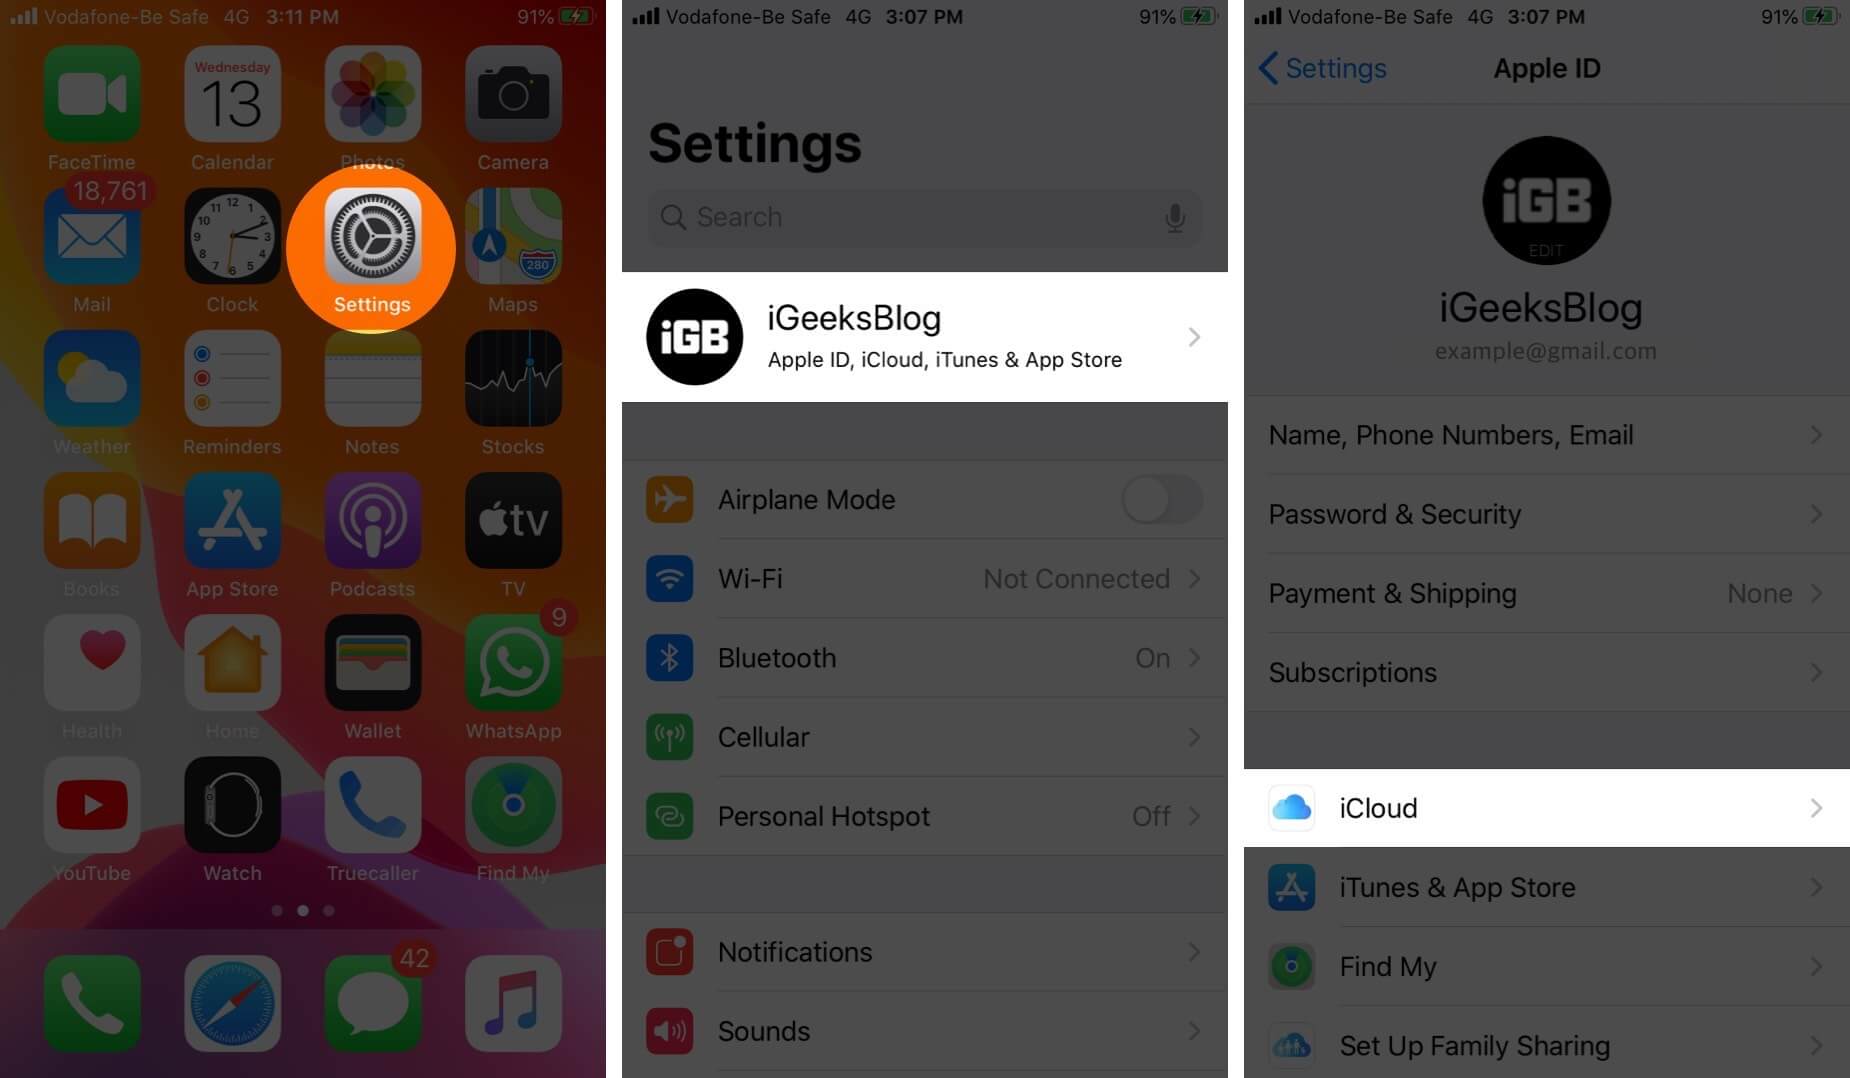
- Tap Manage Storage.
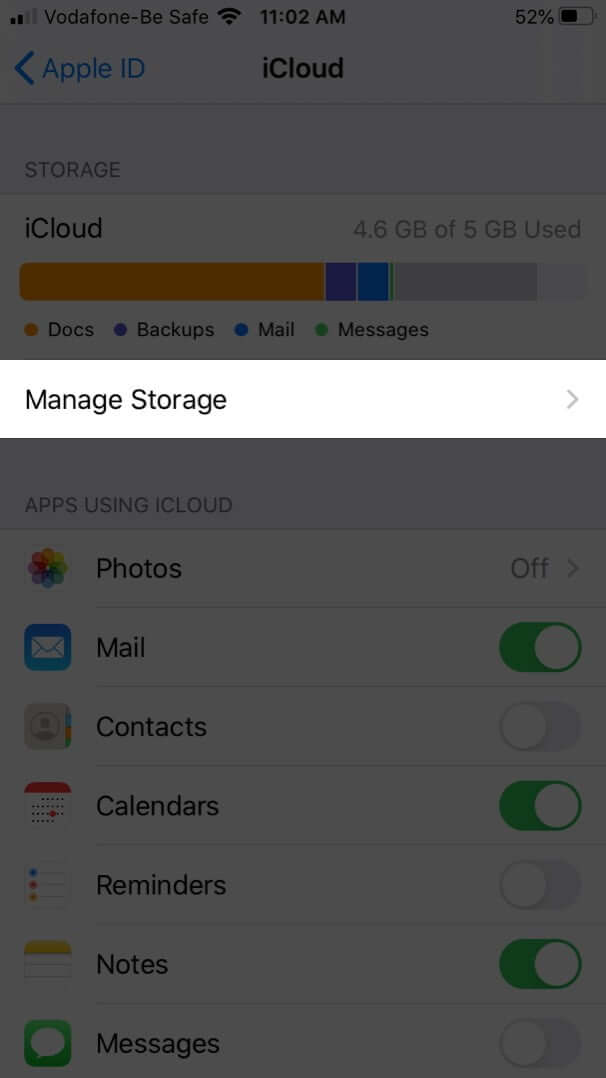
Here, you’ll see details on how different apps and services are using the available space. There are several things you can do to free up some iCloud storage, as explained below.
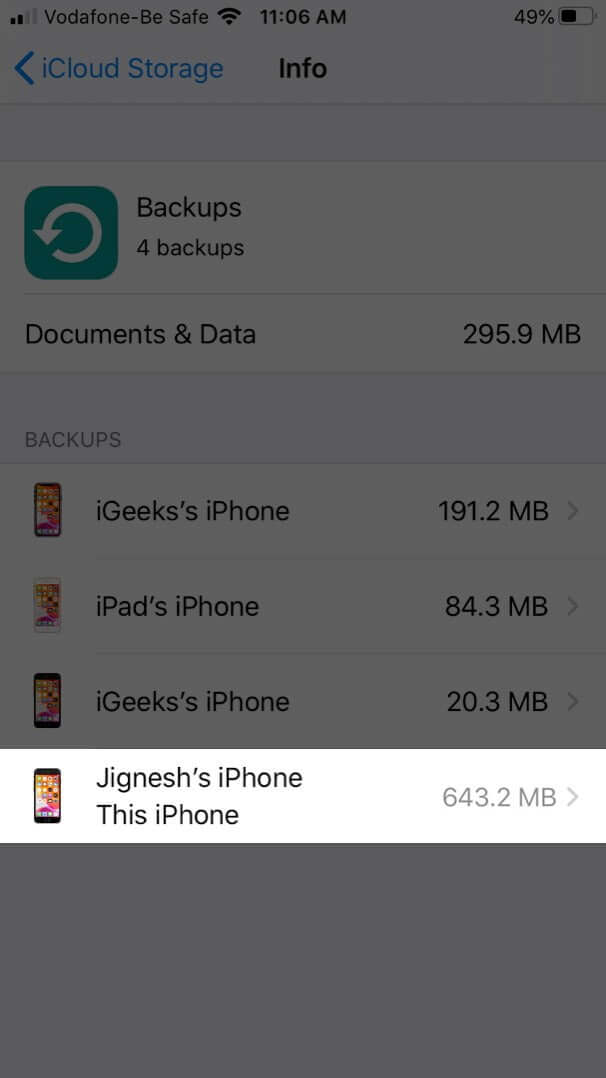
Delete old backups from iCloud
Backups of your devices take up a significant chunk of space on iCloud. So it’s a good idea to get rid of the old backups you don’t need. Here’s how:
- Go to Settings → [your name] → iCloud.
- Select Manage Storage → Backups.
- Select the name of the device whose backup you no longer need and want to get rid of.
- Select Delete Backup and then choose Turn Off & Delete.
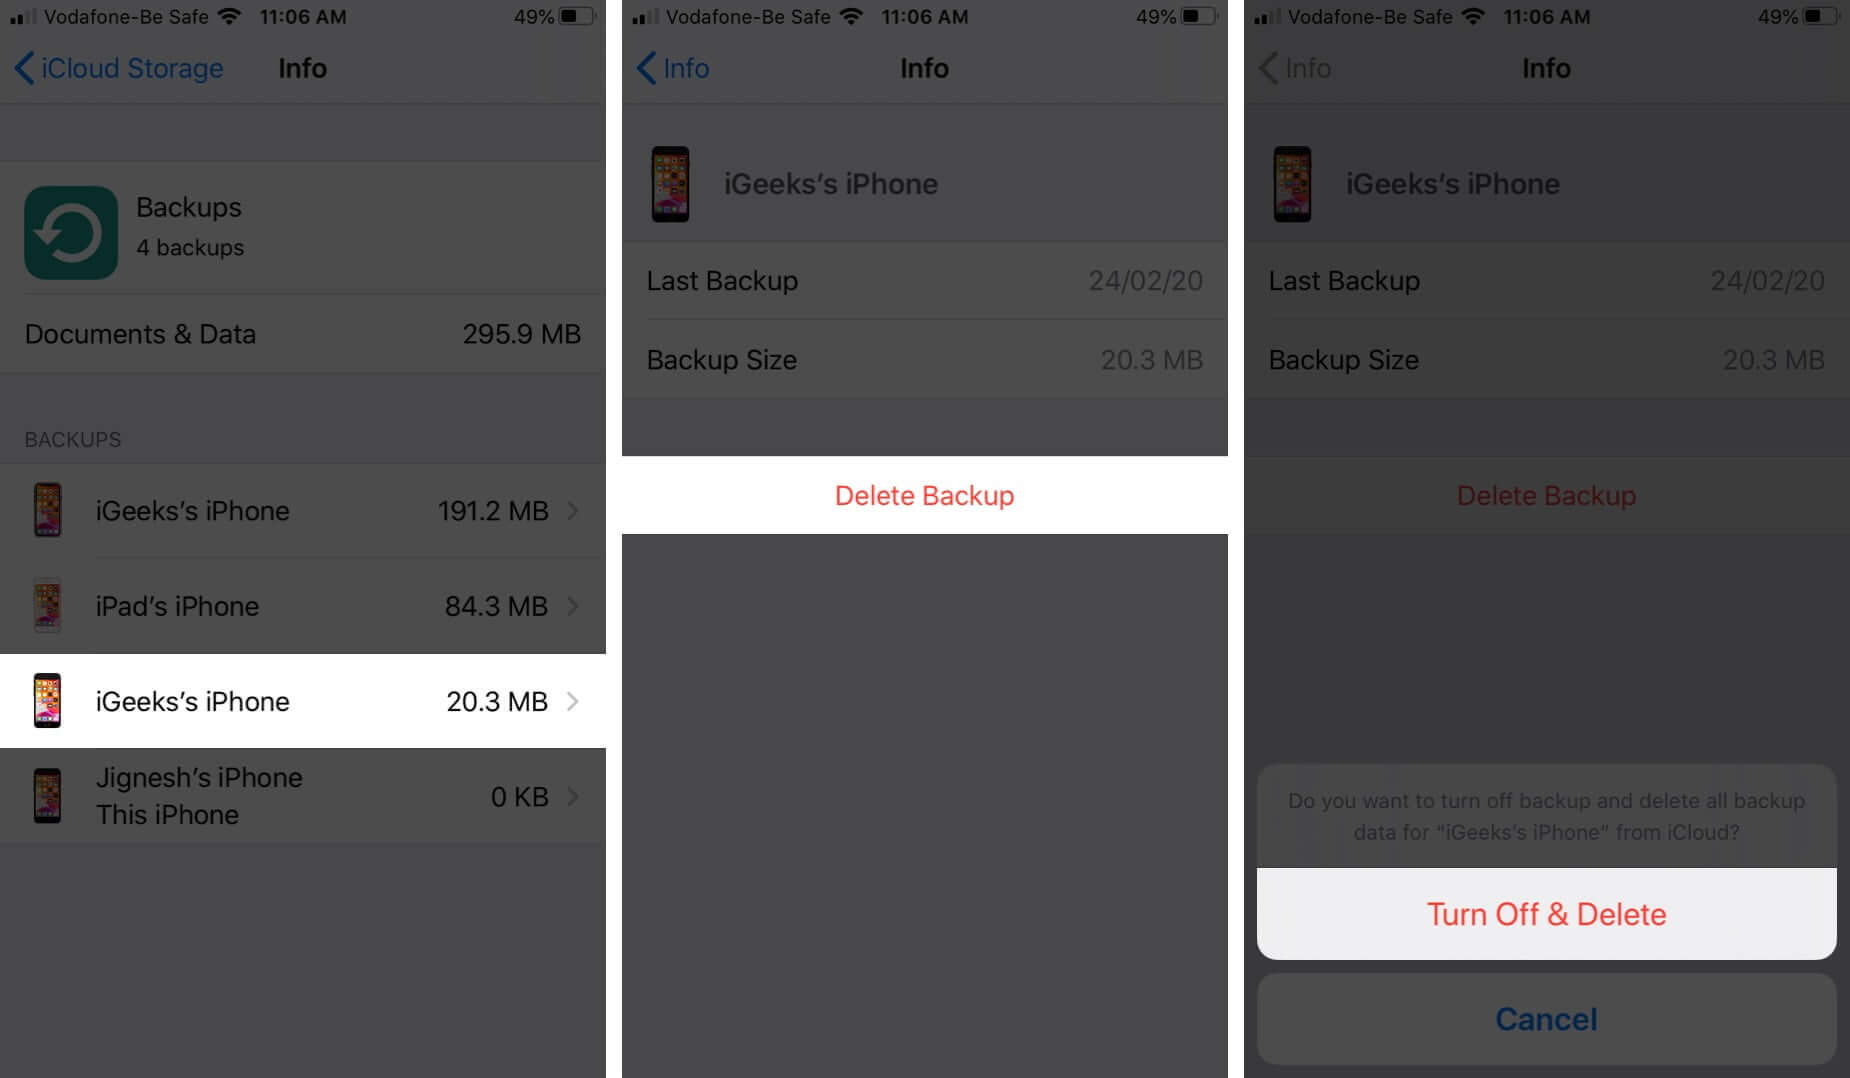
Note: Deleting a backup will also disable iCloud backups for the selected device until you manually enable it again.
Choose which apps to backup on your device
A lot of apps installed on your iPhone or iPad automatically backup to iCloud. You can turn this off for any apps that you don’t use often to free up some space on your iCloud. Here’s how:
- Go to Settings → [your name] → iCloud.
- Select Manage Storage → Backups.
- Select the name of the device that you’re currently using.
- Below Choose Data to Back Up, toggle OFF apps that you do not want to back up.
- Select Turn Off & Delete.
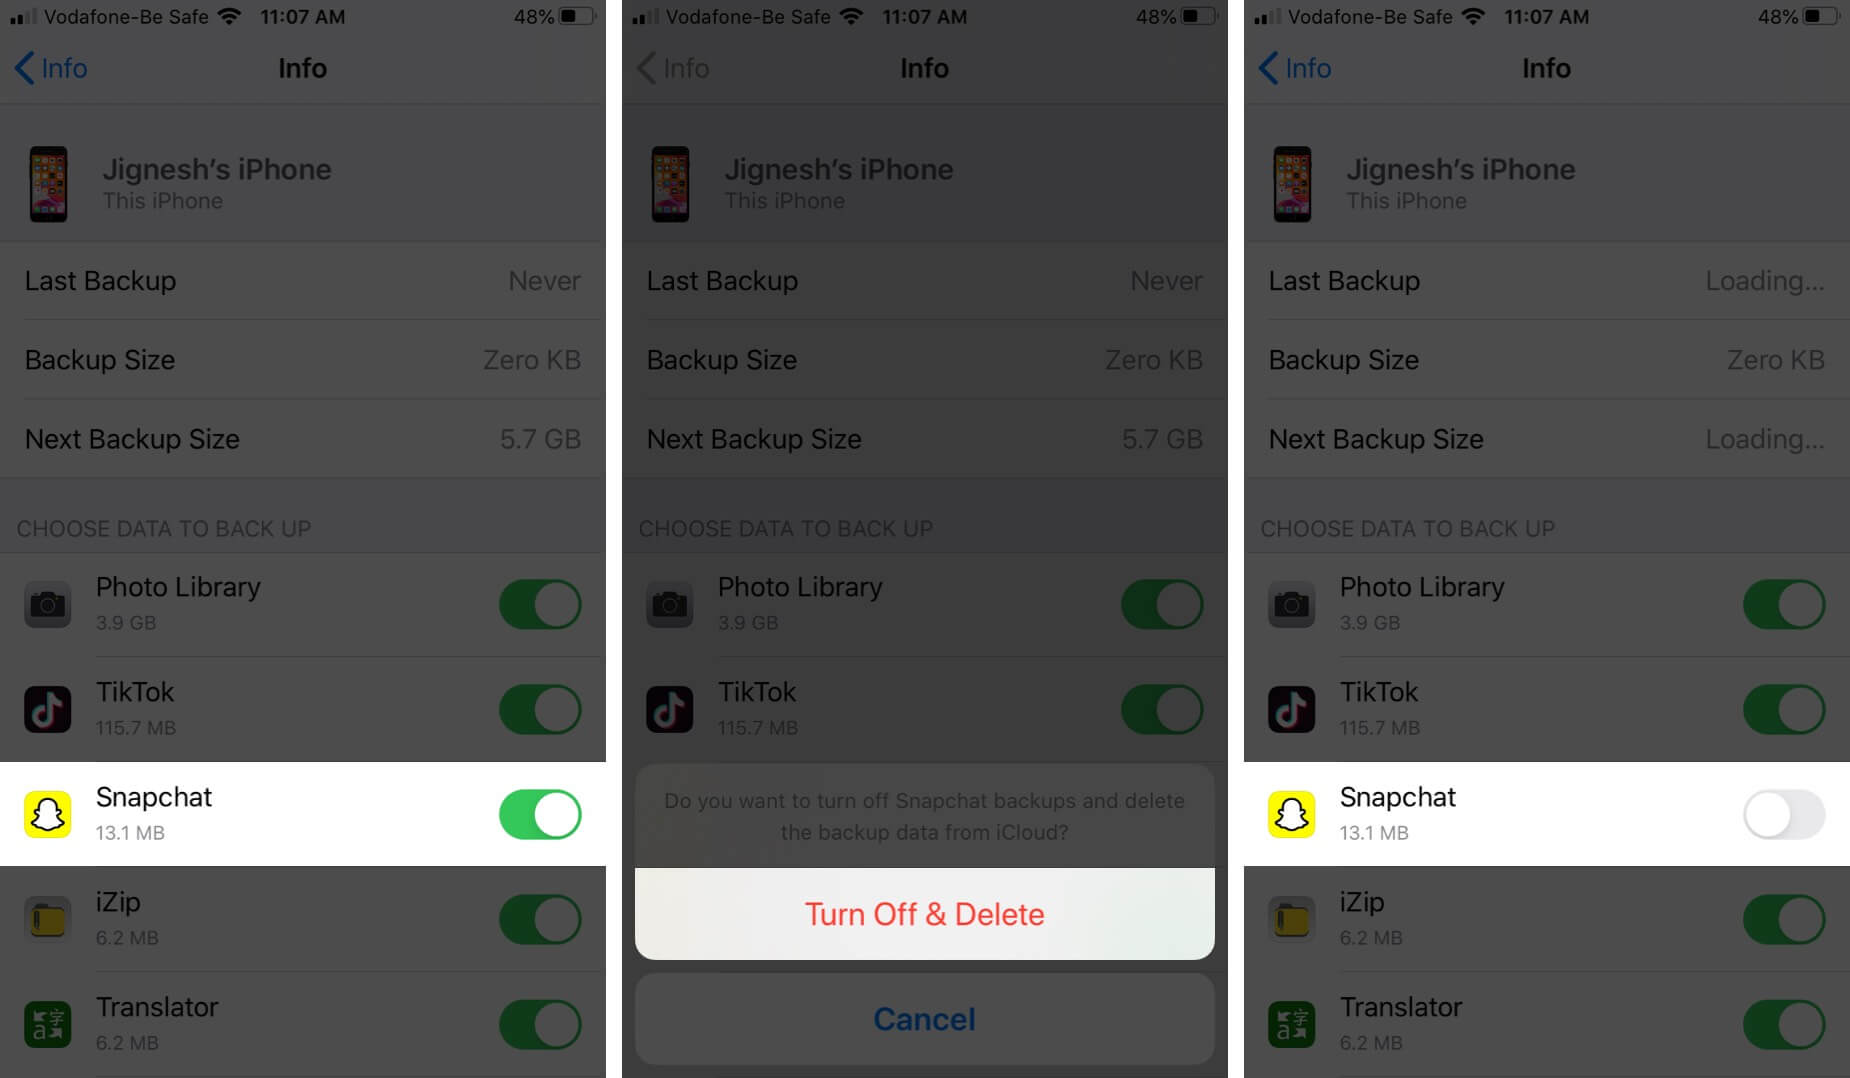
This will turn off iCloud Backup for the selected apps and also remove all their information from iCloud.
Note: This option is not available for some apps that always need to be backed up.
Delete Photos and Videos from iCloud Photos
Choosing to store photos and videos from your iPhone or iPad on iCloud Storage can quickly eat up space. So, I’d advise you to transfer and save these files somewhere else. For instance, you can download your iCloud photos to your Mac or PC. Then, you can put them on an external hard disk or on another cloud service such as Google Drive or Dropbox.
Once you’ve saved your photos and videos to another location, here’s how you can delete photos and videos to clear up space on your iCloud Storage:
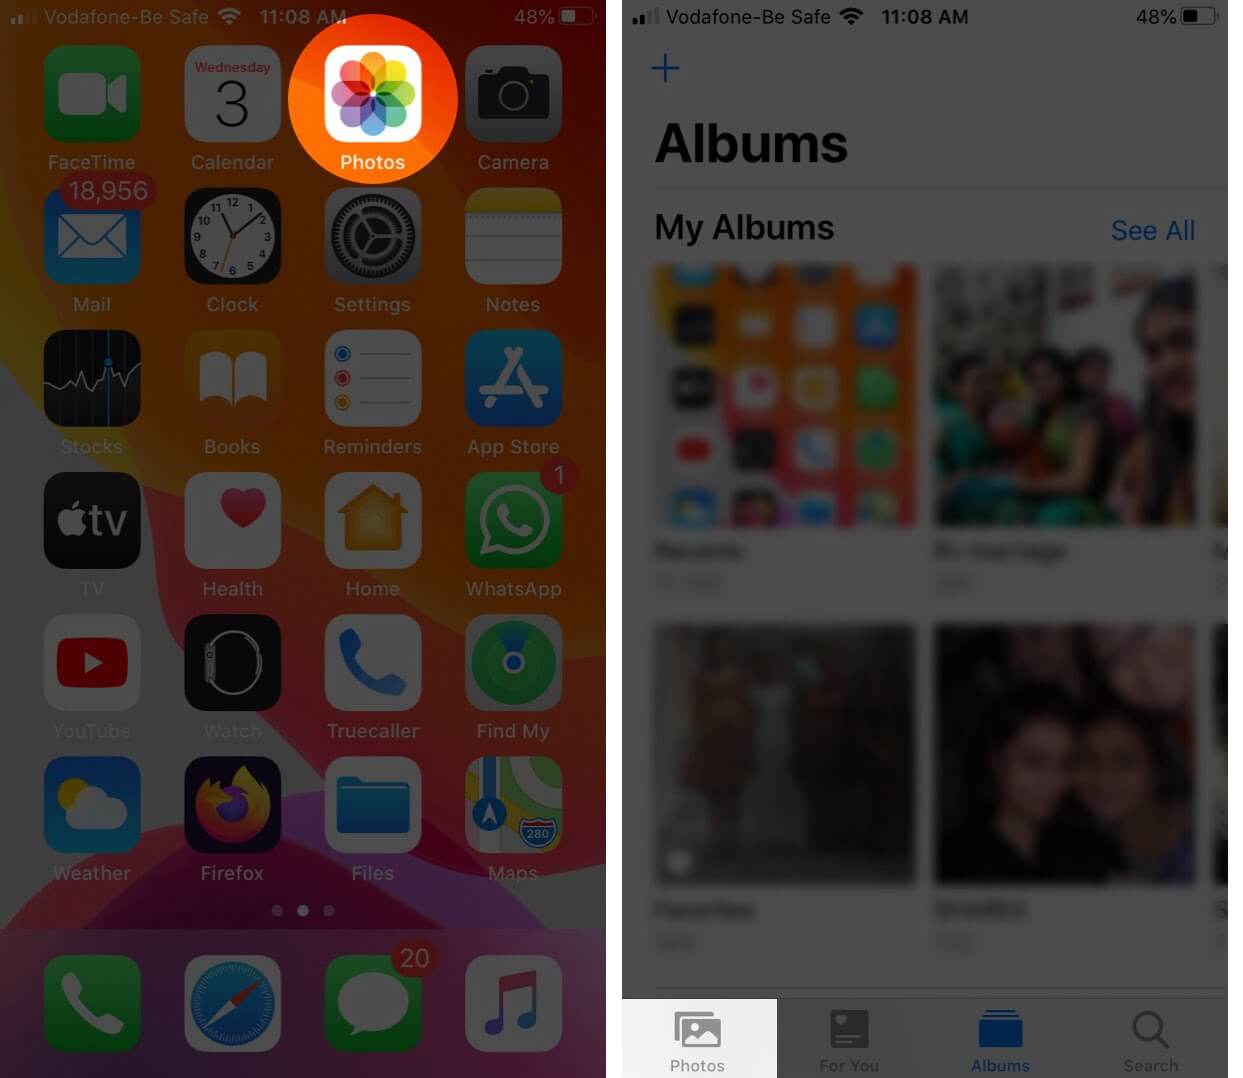
- Open the Photos app on your iPhone or iPad
- Tap on Photos at the bottom of the screen.
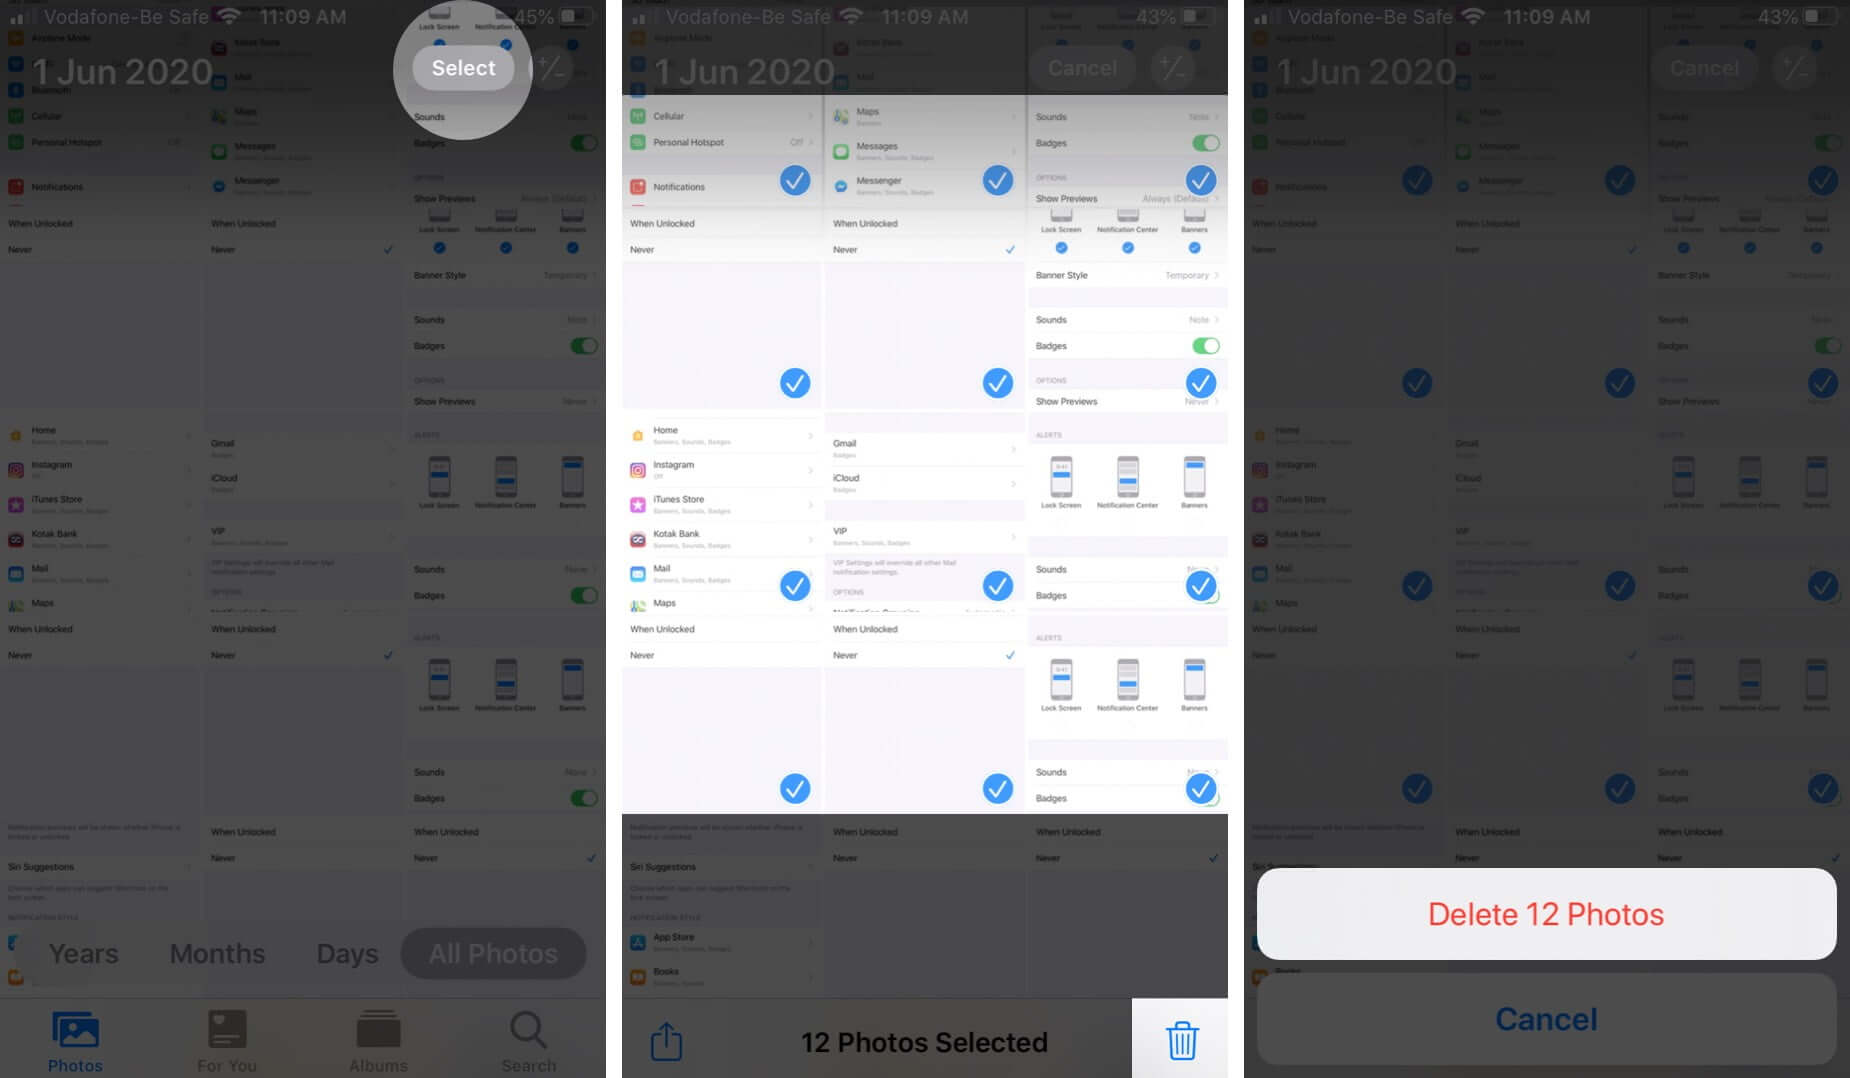
- Tap Select and choose all the photos and videos you want to delete.
- Next, tap the trash can icon and then select Delete Photo.
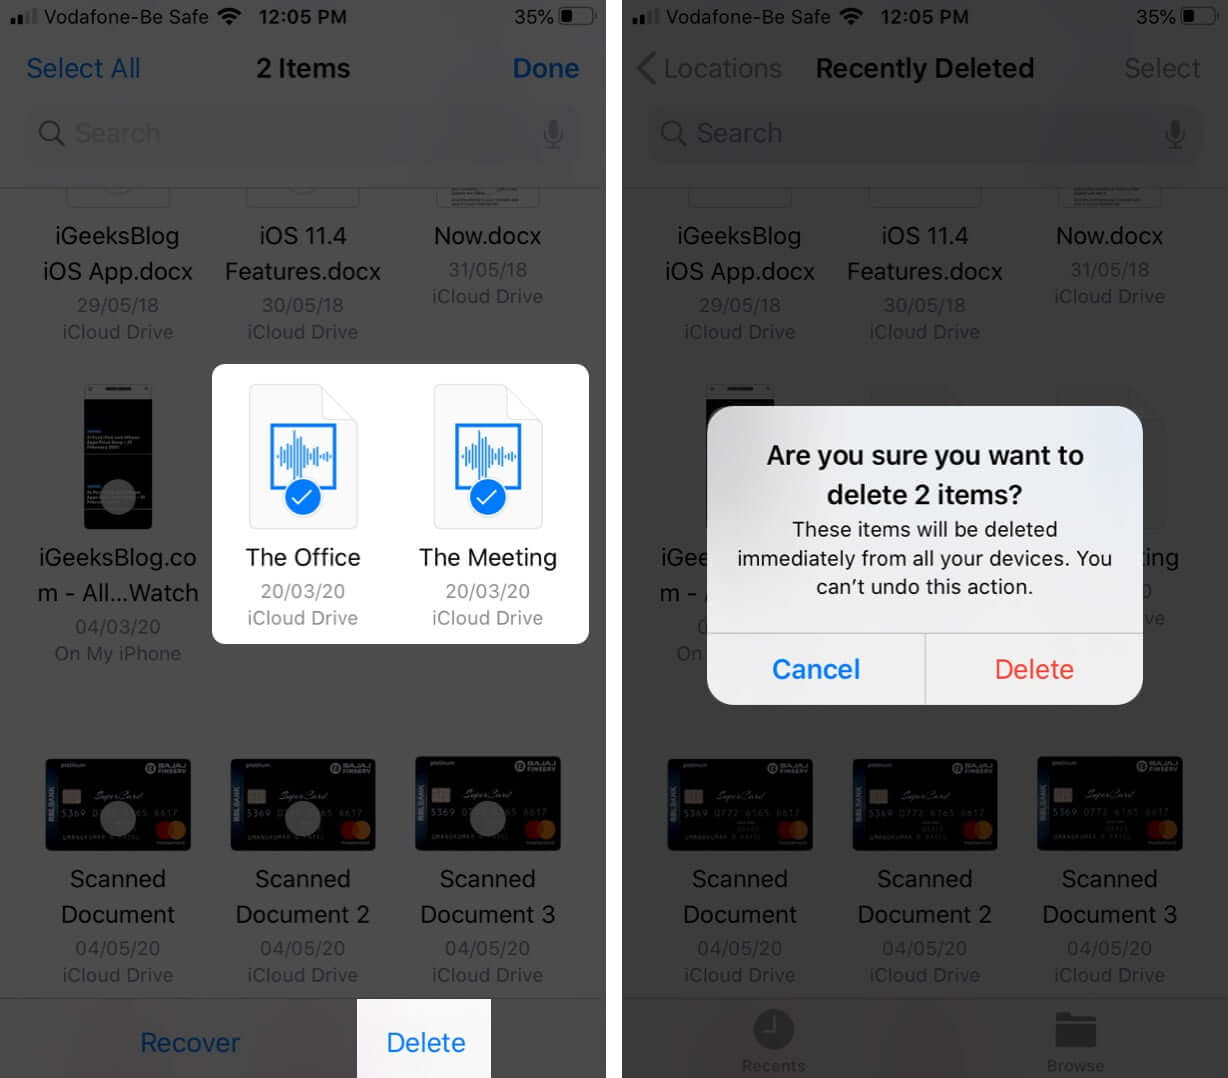
Delete Files in iCloud Drive to free up iCloud storage
Similar to photos and videos, you can also get rid of your iCloud Drive files and folders to clear up some storage space. However, if other people have shared folders with you, those don’t take up any of your storage space.
You can only delete your own folders and files via the method below. Make sure you’ve already saved any important data in another space (external disk or a different cloud service) before you remove them from your iCloud Drive.
- Open Files on your iPhone or iPad
- Tap on Browse.
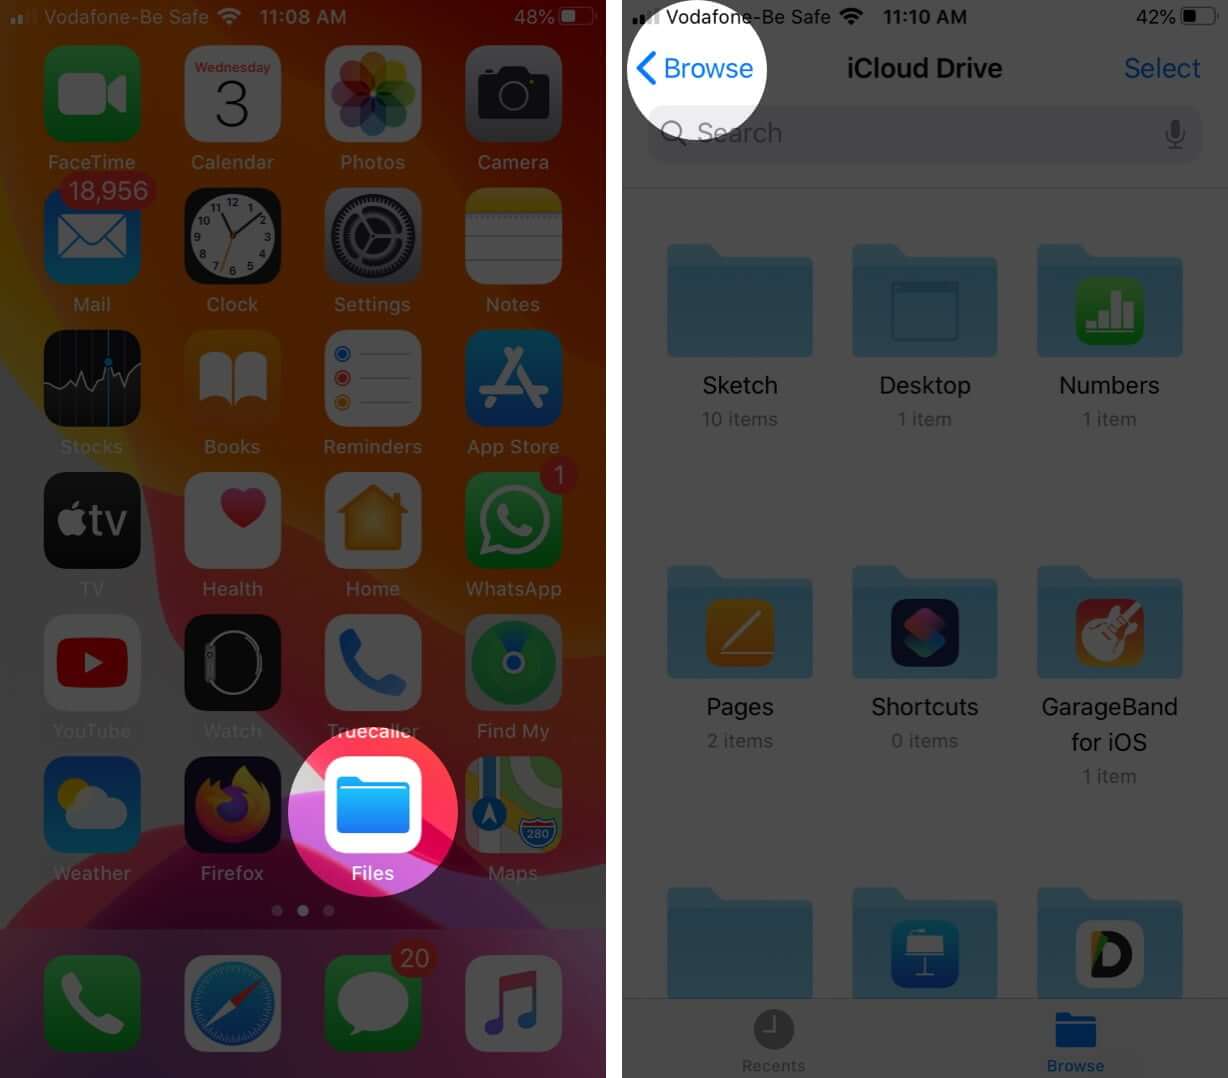
- Under Locations, tap iCloud Drive and then tap Select.
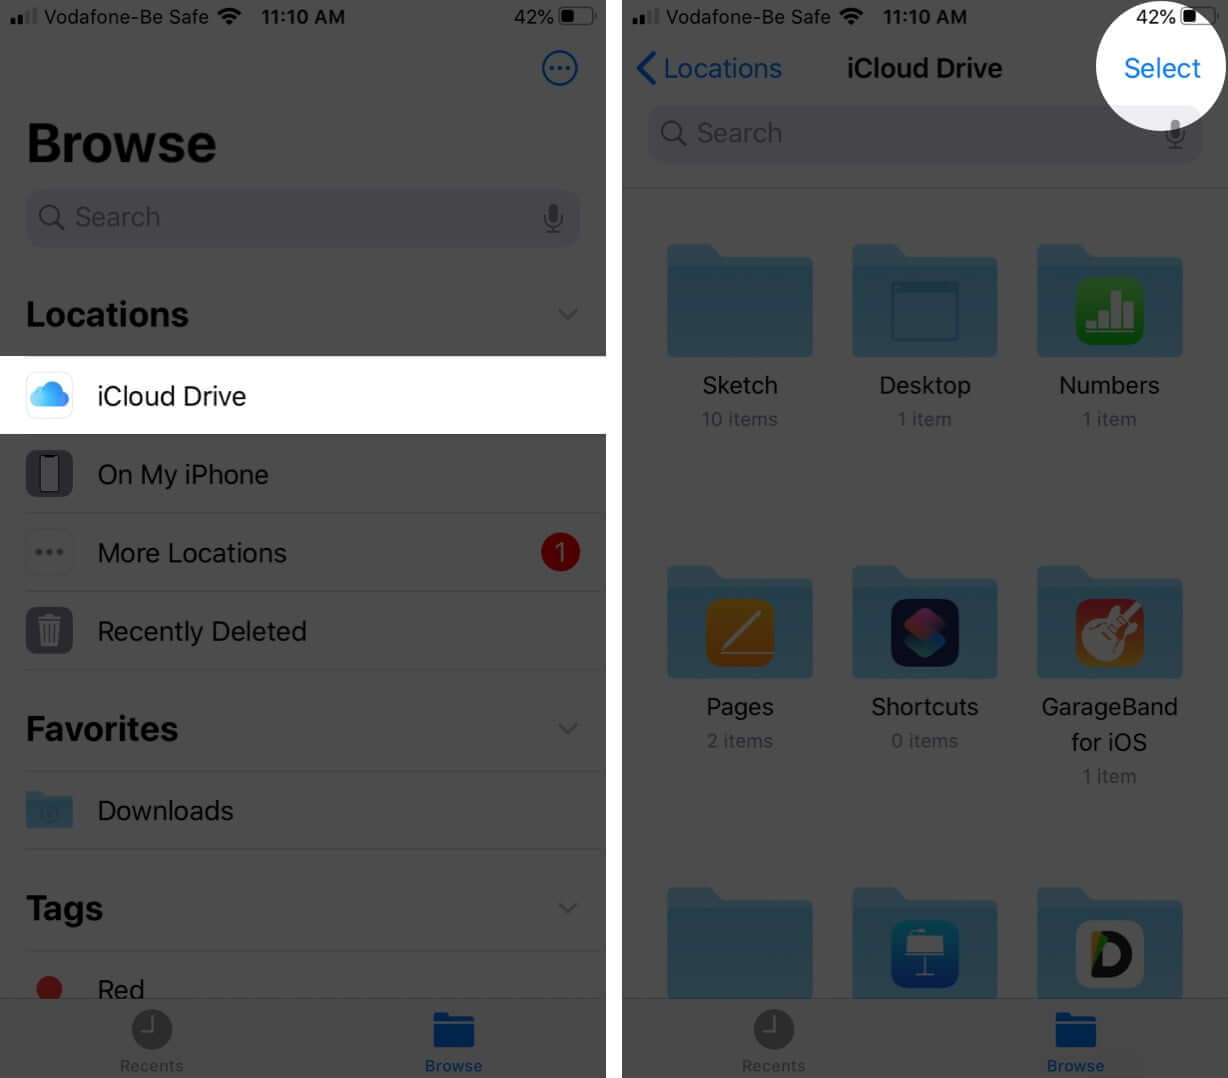
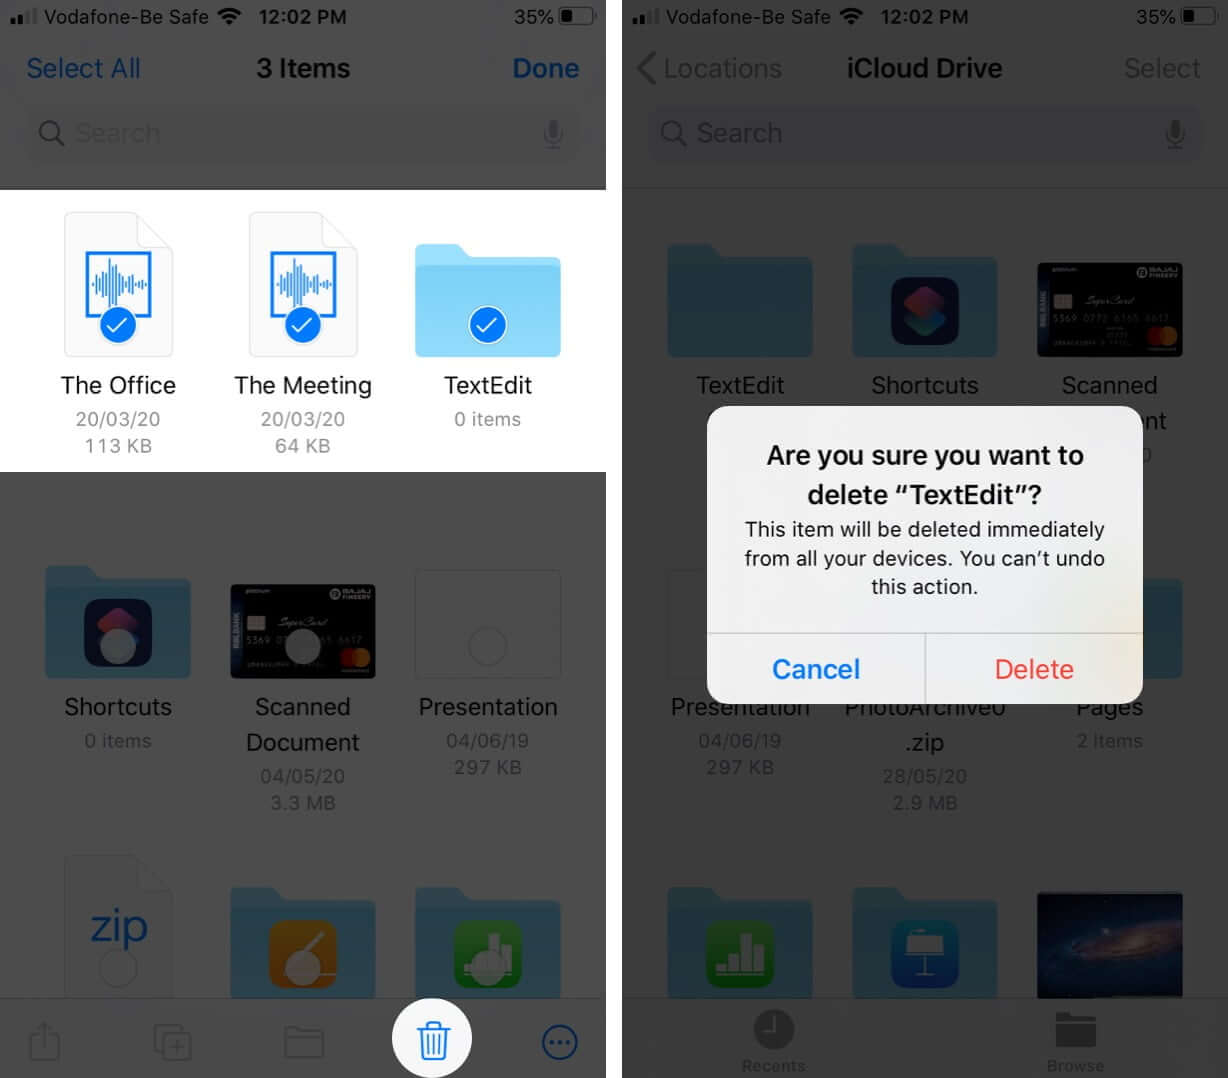
- Choose all the folders and files that you want to delete.
- Tap the trash can icon.
- Now, again under Locations, tap Recently Deleted and then tap Select.
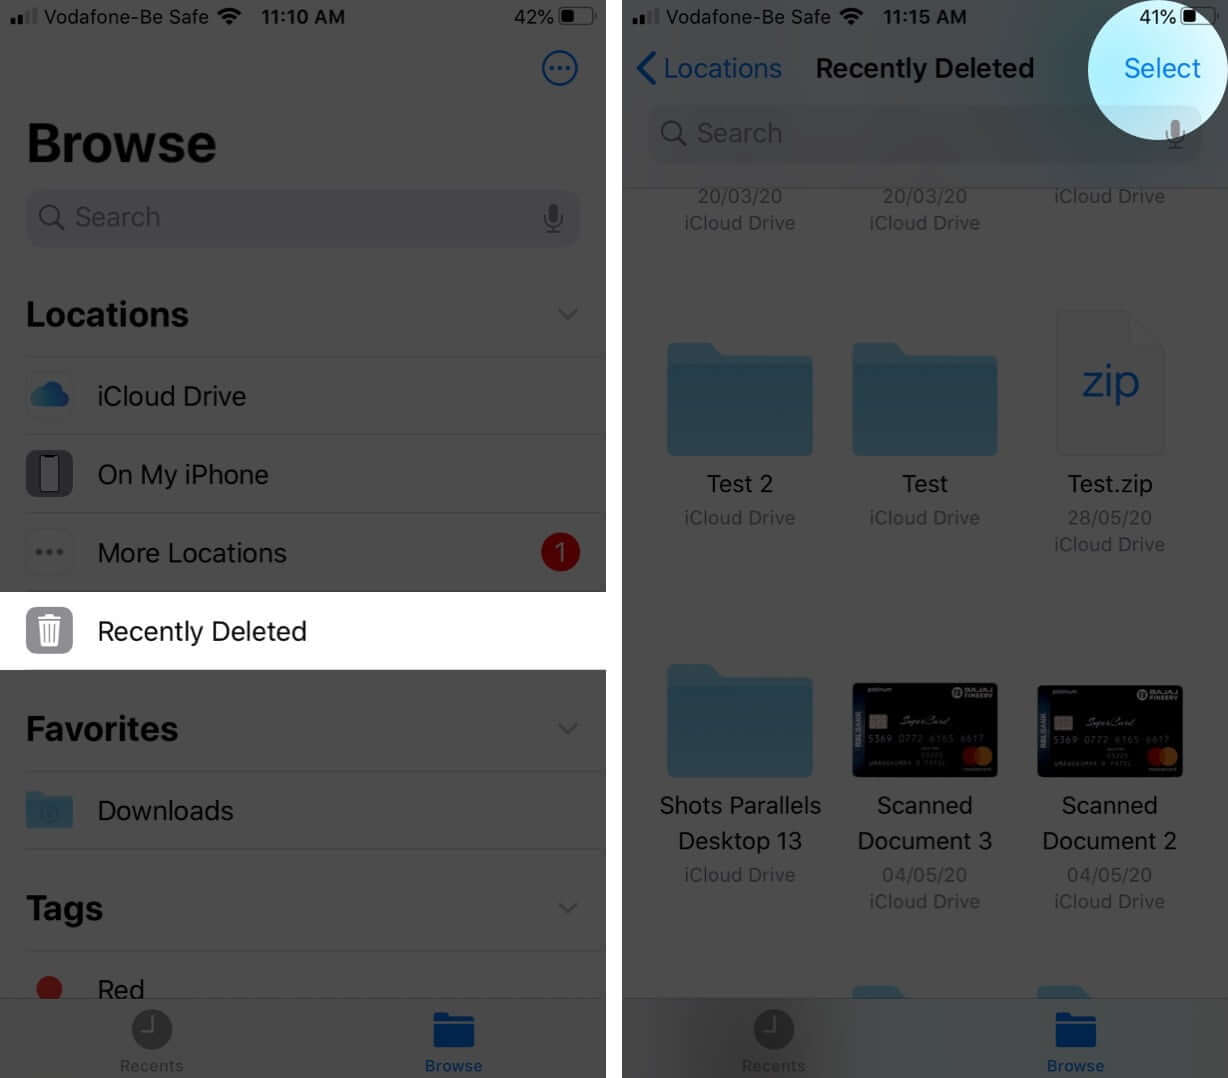
- Choose all the files that you want to delete permanently.
- Tap Delete.
Delete Email, Messages, and Attachments
You can free up iCloud Storage by routinely deleting emails from your iCloud email account. Mail with large attachments are notorious for taking up space, so get rid of all that you don’t need.
Similarly, if you save Messages to iCloud so you can sync your messages across devices, all your texts and attachments will take up space on your iCloud Storage. So it’s a good idea to delete iMessage photos and attachments as well as text messages.
Routinely following these steps will help you free up iCloud storage and keep it clear. Did you find these tips helpful? Share your thoughts in the comment section below. We want to hear from you!
You would like to read these posts as well:
- Delete Photos from iCloud Backup on iPhone
- Best iCloud tips and tricks
- How to Recover Deleted Files from iCloud
- What is Apple iCloud+?: New features, pricing, and more
Author
🗣️ Our site is supported by our readers like you. When you purchase through our links, we earn a small commission. Read Disclaimer.