Photos take up considerable storage space as they accumulate rapidly in your iCloud. However, deleting photos from your iCloud backup is easier than you think. Walk through this step-by-step guide to learn how you can delete iCloud photos from your iPhone or iPad. It’s time to free up space in your iCloud storage and make space for new memories!
How to delete photos from iCloud storage on iPhone and iPad
There are two ways to delete iCloud Photos.
The best way to delete photos from iCloud is to access iCloud via the web browser since it’s generic and more straightforward. You can also delete iCloud photos via your iPhone if iCloud Photos is active on your device. The steps for both are outlined below.
Delete iCloud photos from a web browser
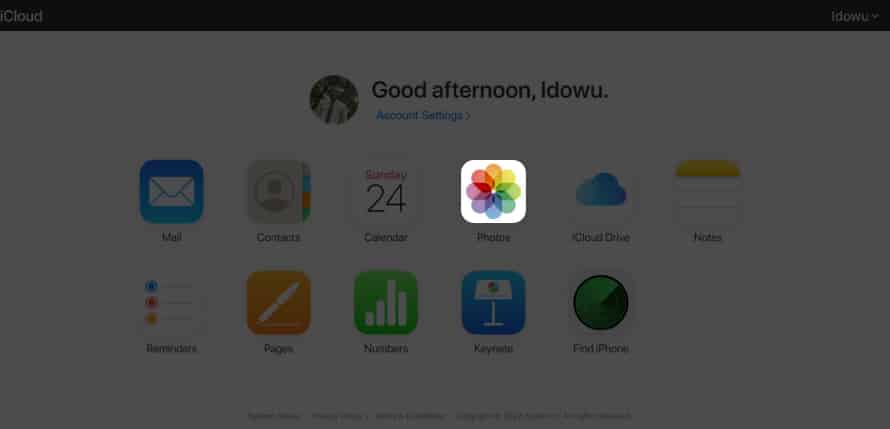
- Go to your account on iCloud → Sign in with your Apple ID.
- Select Photos.
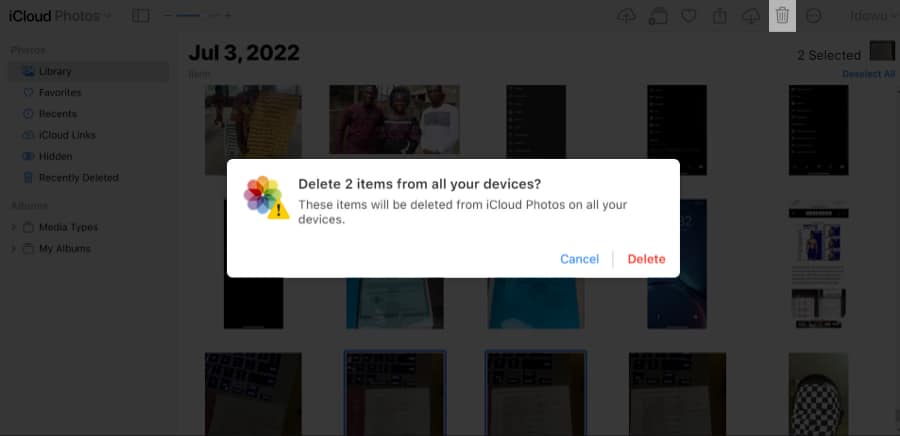
This will load all the photos backed up to iCloud. - Select the photos you want to delete.
- Next, select the delete icon at the top-right.
- Finally, choose Delete to confirm your choice.
Caution: You can’t recover photos deleted from your iCloud backup anymore if you don’t have a copy on your iPhone. As a result, if you delete a backup of your photos from iCloud, you won’t find them on any linked device anymore. If you don’t have a copy of your images in local storage, you’ll delete your photos forever.
2. Delete iCloud photos on the iPhone or iPad
If you’ve backed up all your photos to iCloud automatically, then you only need to delete them from your iPhone’s Photos app to remove them from iCloud.
- Open the Photos app.
- Long-press the pictures you want to delete or tap Select at the top-right to choose many at a time.
- Tap the delete icon at the bottom right.
- Select Delete Photo.
How to delete photos from iCloud but keep them on your iPhone
You can prevent your iCloud deletion from reflecting on your iPhone by turning off sync between iPhone and iCloud photos. So when you delete a picture on iCloud via the web, that picture remains on your iPhone.
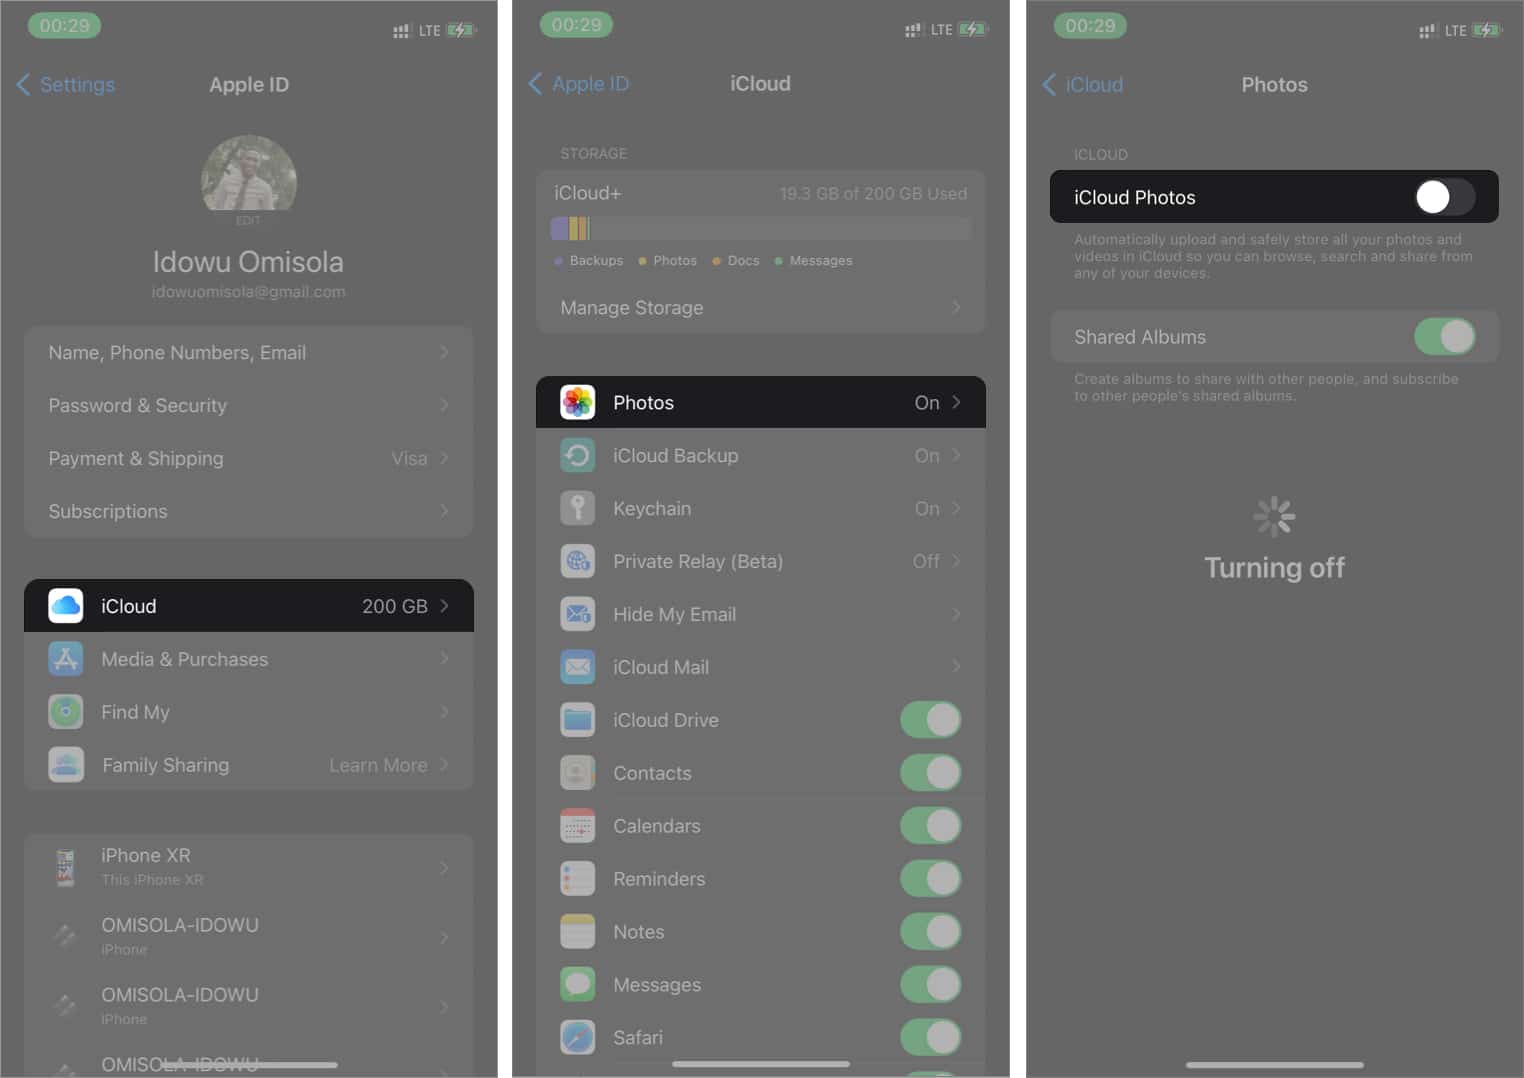
To disable iCloud Photos on your iPhone:
- Go to Settings.
- Tap your Apple ID banner at the top → iCloud → Photos.
- Toggle-off iCloud Photos.
Yes. As described earlier, you can do this by deactivating iCloud Photos via your iPhone Settings to disconnect your iPhone Photos app from iCloud Photos. However, when you enable the sync, things will return to square one.
Yes. Like the iPhone’s Photos app, iCloud keeps deleted photos in its Recently Deleted folder for 30 days. To recover, go to your iCloud account on the web → iCloud Photos→ Click Recently Deleted on the left sidebar. Tap a photo or long-press Command + tap all the photos you want to recover to select multiple pictures. Next, click Recover at the top-right.
Conclusion!
Undoubtedly, iCloud is handy for stashing files and photos you don’t want to keep on your local storage. But chances are these files, especially photos, end up cluttering your iCloud storage. Although the story might be different if you’re on iCloud+.
There are just some images you do not want to keep on your local or cloud storage. So the best bet is always to delete them from iCloud backup so your iPhone doesn’t recover them during a backup restore.
Got any questions or comments? Let me know in the comments section below.
Read more:


Leave a Reply