Whether you’re upgrading your iPhone, switching devices, or simply looking to access your photos offline, understanding how to download your iCloud photos is crucial. In this simple tutorial, we’ll provide you with the easy steps to download the iCloud photos to your iPhone, iPad, Mac, or PC. Using this technique, you can access your favorite photos without worrying about internet connectivity. Let’s get started!
- How to download photos from iCloud to iPhone and iPad
- How to download photos from iCloud to Mac
- How to download photos from iCloud to PC
- How to download pictures from iCloud.com on Mac and PC
How to download photos from iCloud to iPhone and iPad
If you’re looking for a traditional way to download photos and videos from iCloud, this approach is perfect.
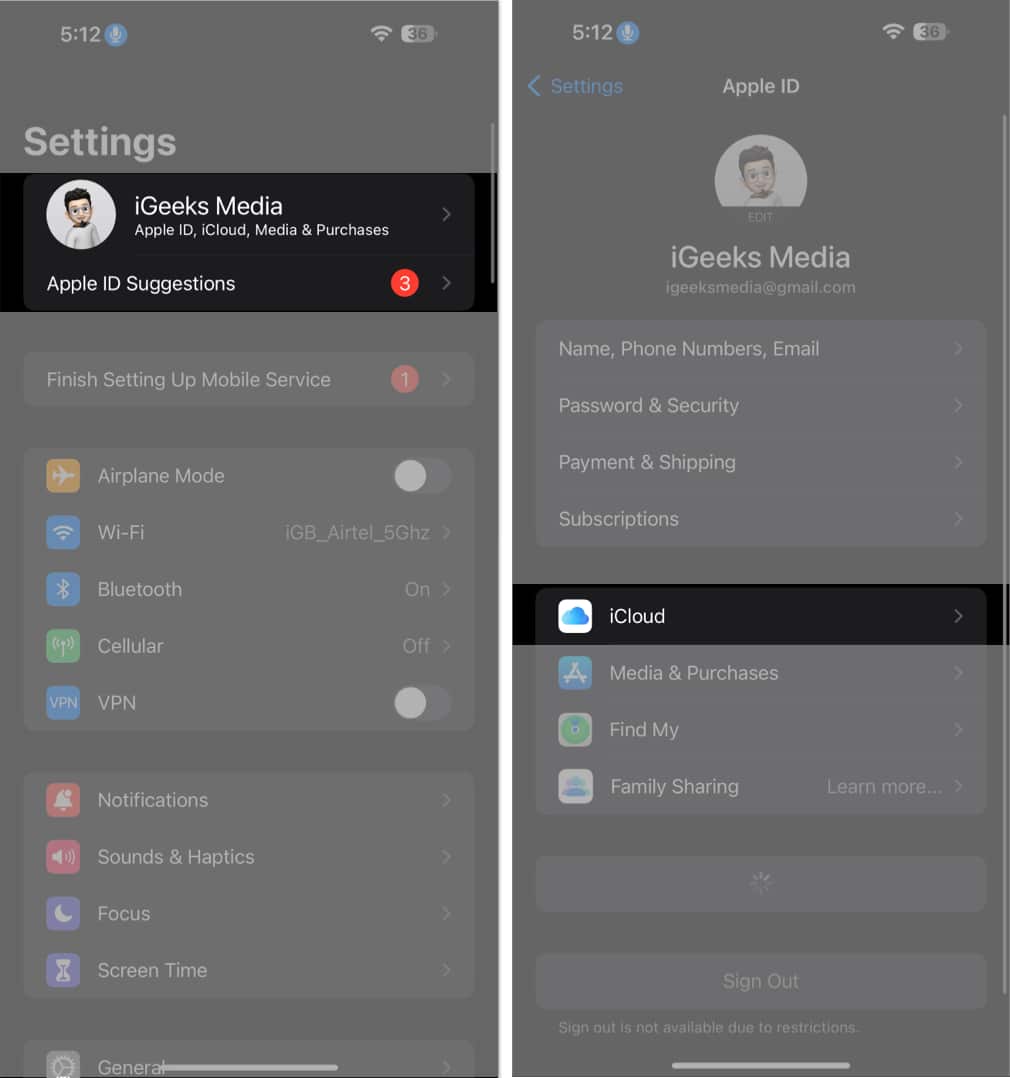
- Launch Settings → Access your Apple ID → Select iCloud.
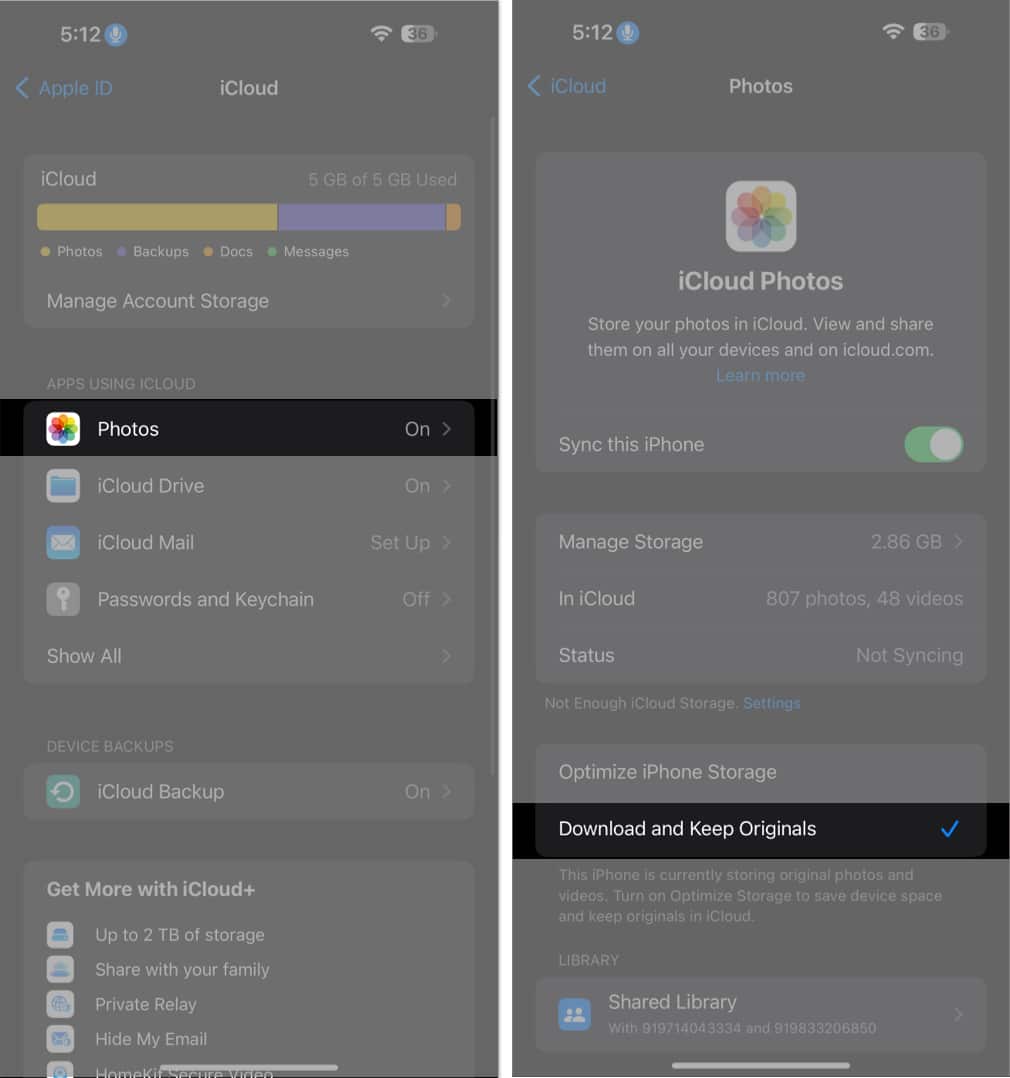
- Tap Photos → Download and Keep Originals.
It will download all photos and videos in full resolution to your iPhone or iPad. The time required for this method can vary based on the data size in the Photos app.
Download select photos and videos on iPhone or iPad
On the other hand, if you prefer to download selected pictures only, then follow the steps outlined below:
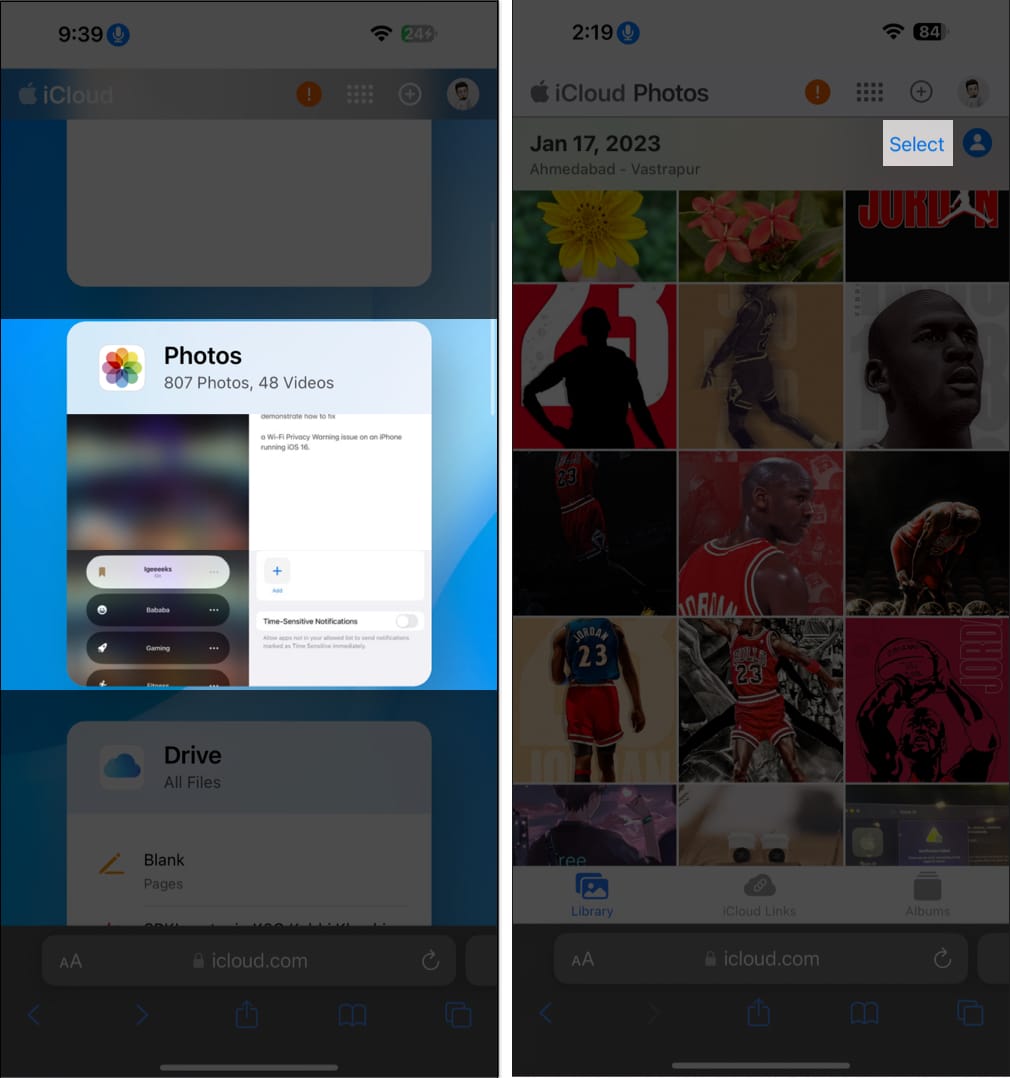
- Access the official website icloud.com via any browser.
- Enter your credentials to access your account.
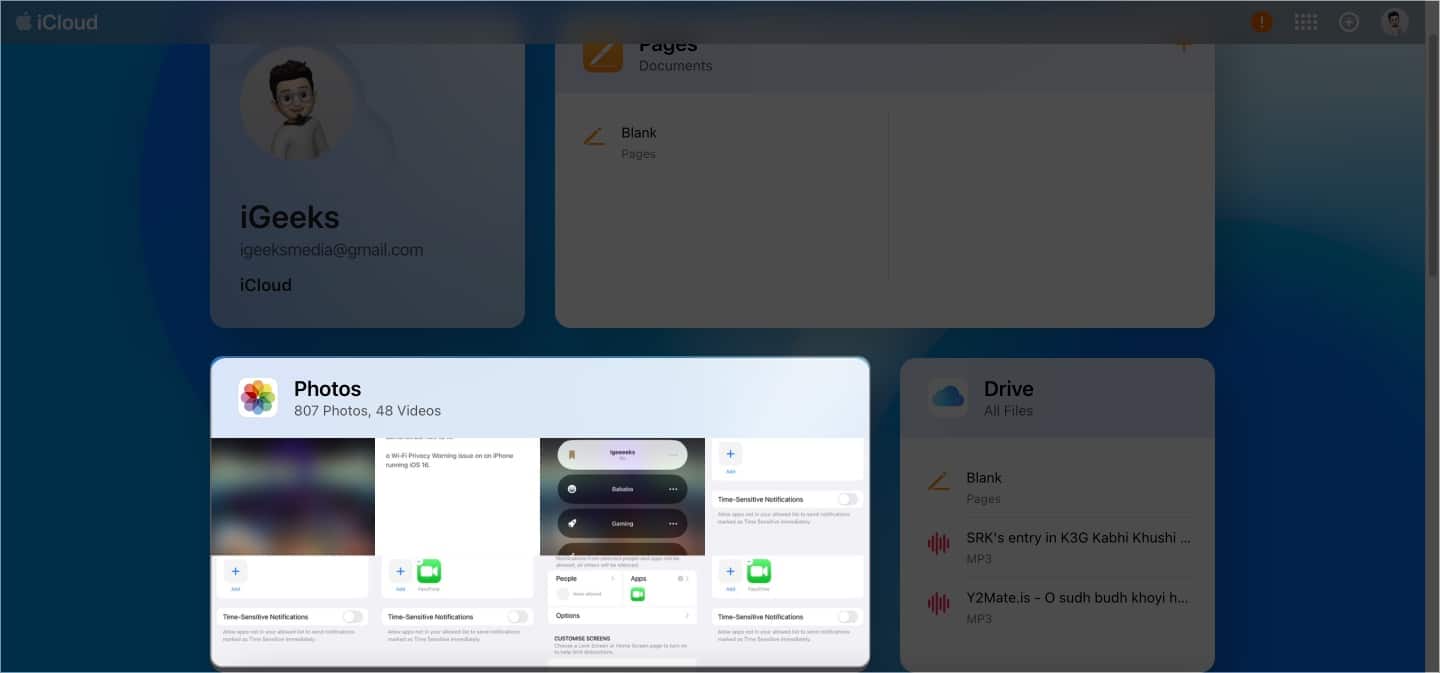
- Select Photos from the listed apps.
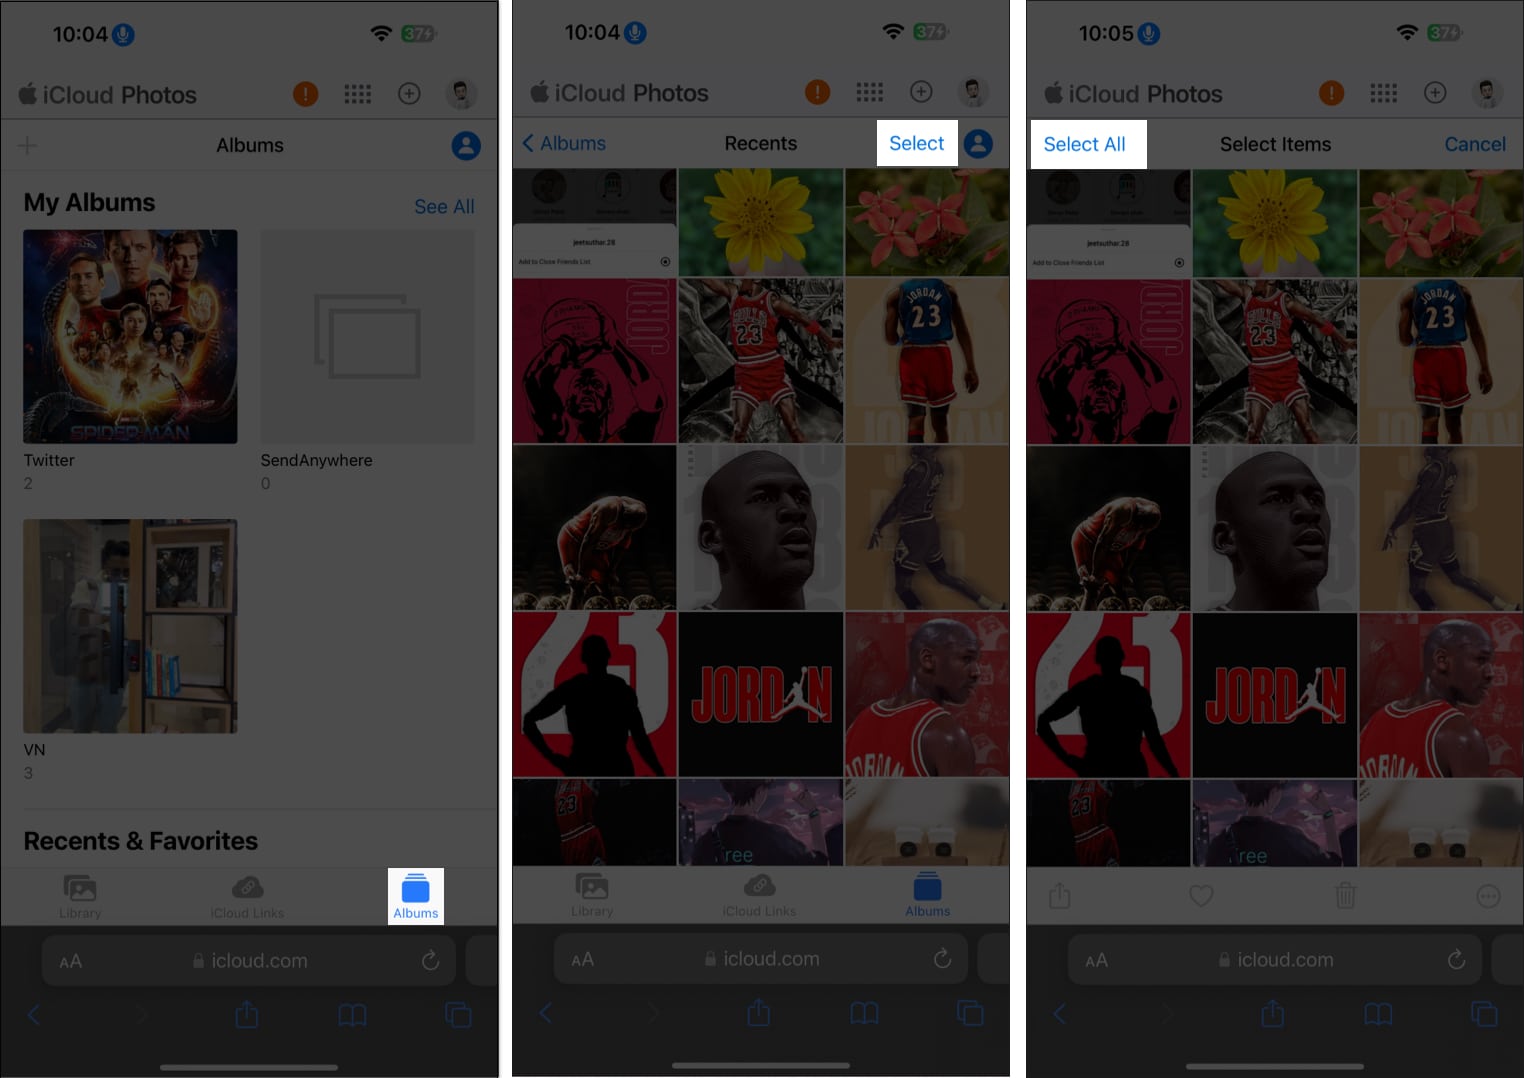
- Tap Select → Choose photos or videos you wish to save offline.
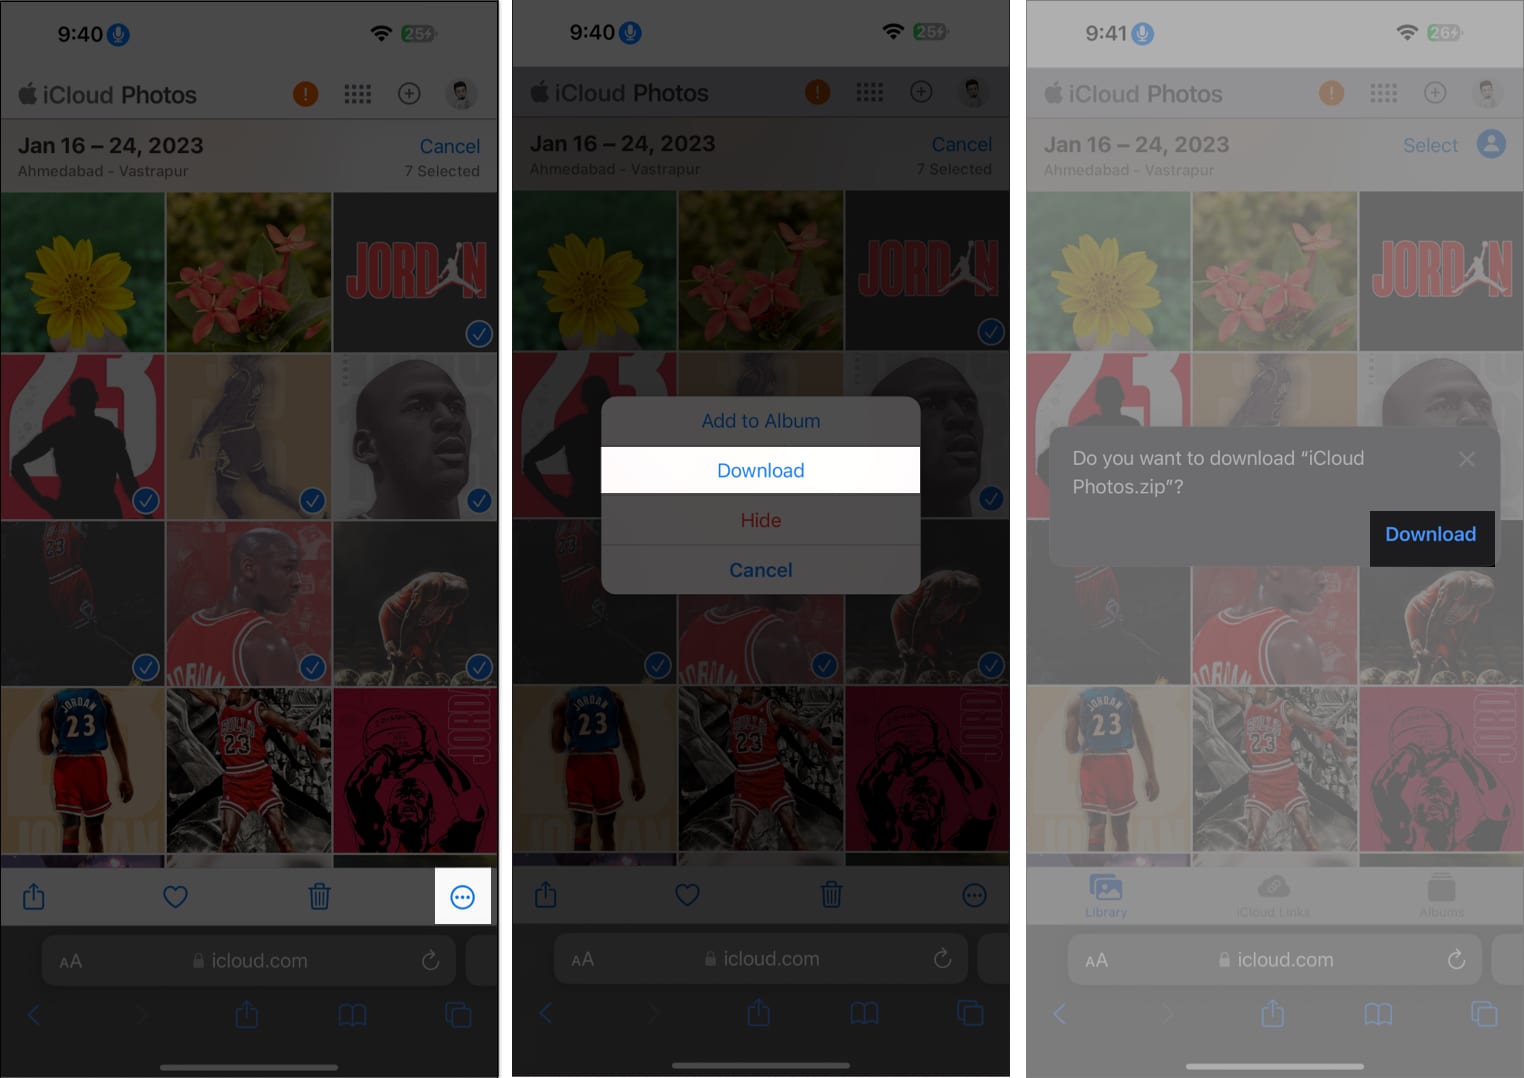
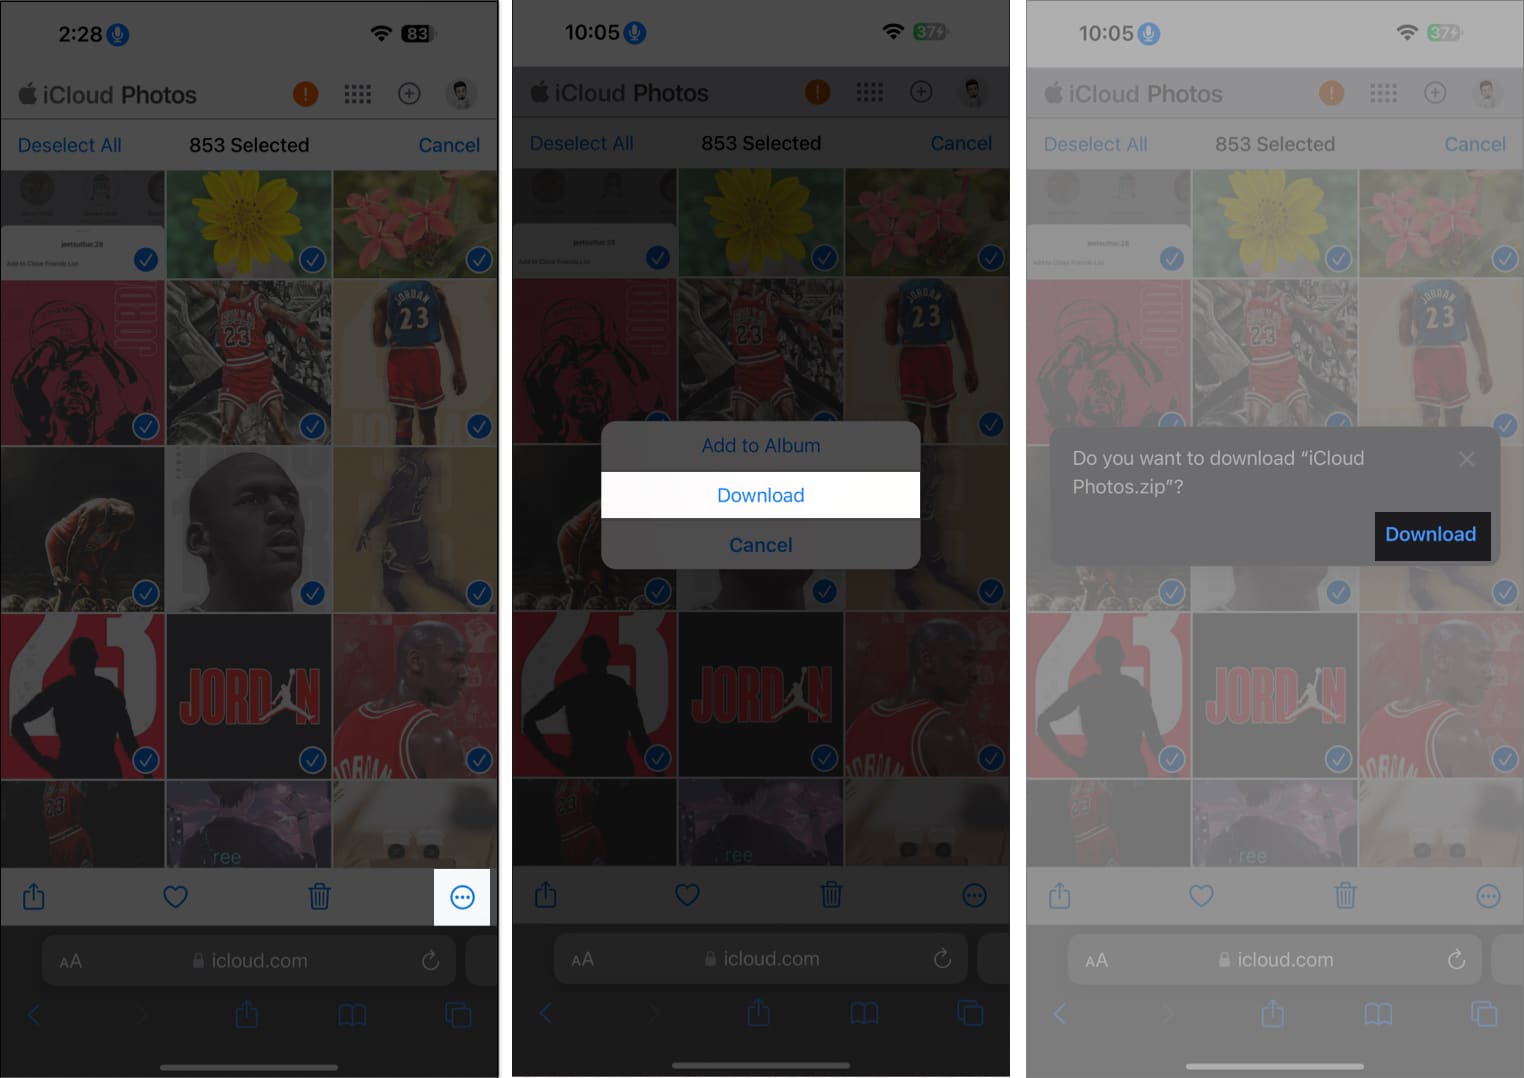
- Hit the three-dot icon → Press Download.
- Tap Download to save the selected files in a Zip format.
- Alternatively, you can download an entire album using the Albums option.
- Open an album → Tap Select → Select All.
- Tap the three-dot icon → Press Download → Download.
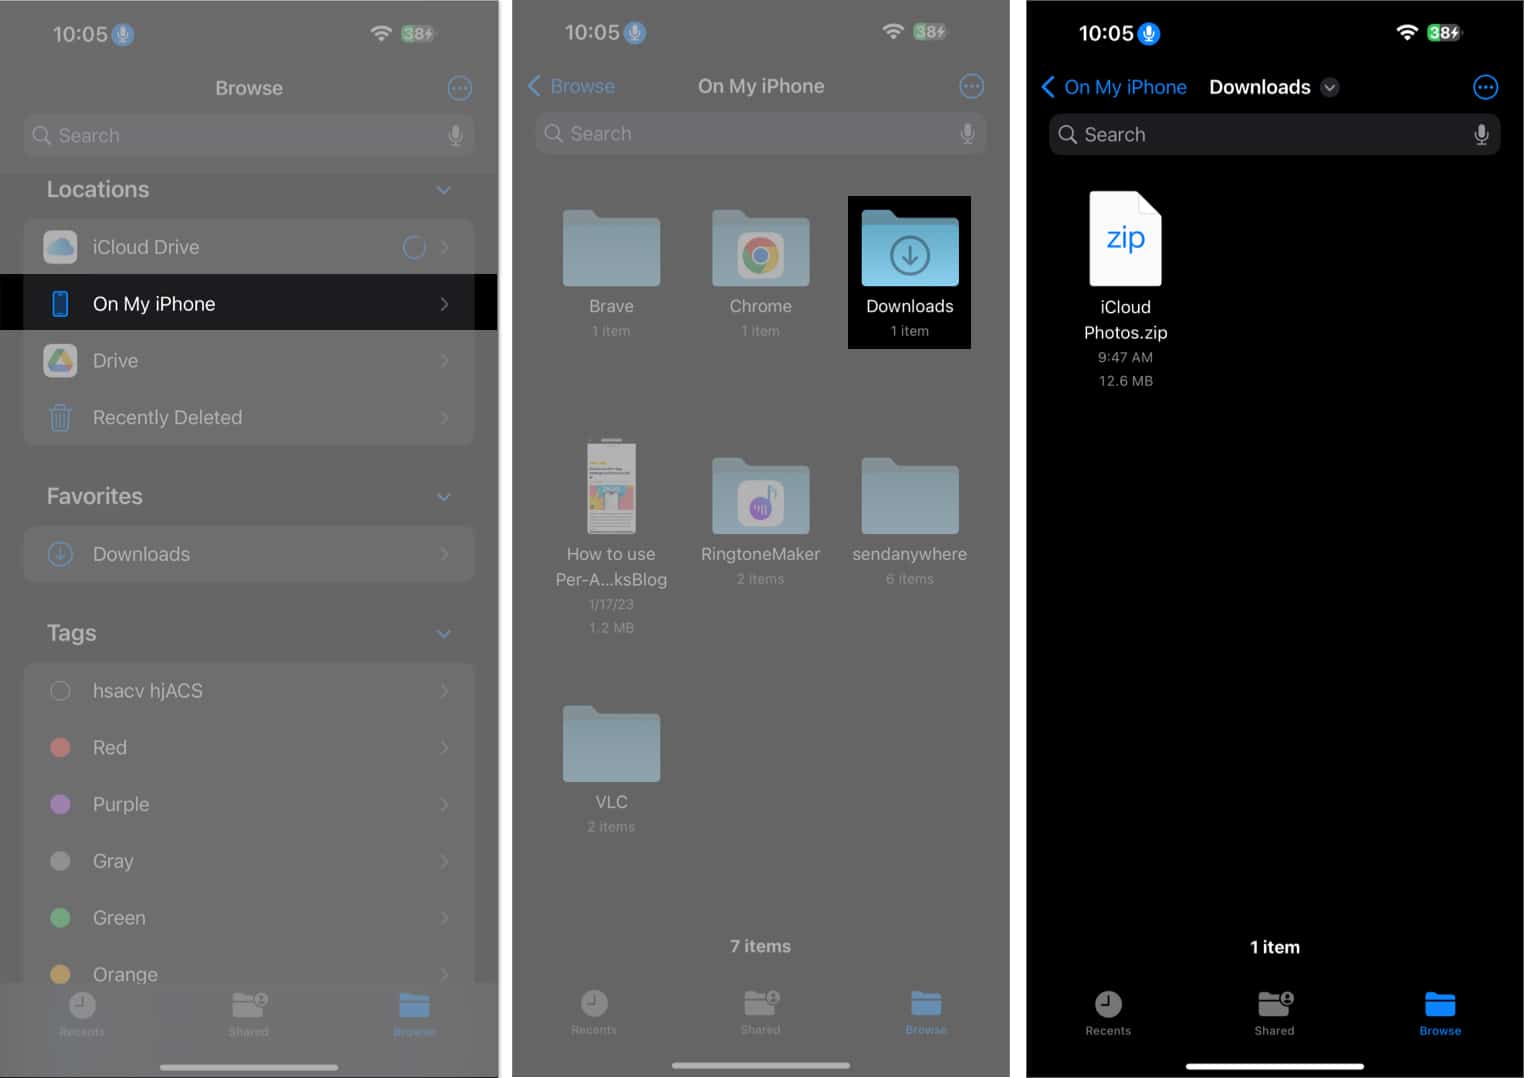
- Now, launch the Files app → Go to the Browse menu.
- Navigate to On My iPhone → Downloads to locate the file you just downloaded.
As the last step, you must unzip the downloaded files on your iPhone to access all images and videos within.
How to download photos from iCloud to Mac
- Launch Photos on your Mac.
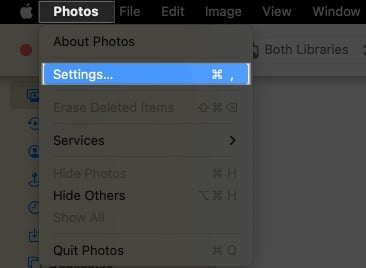
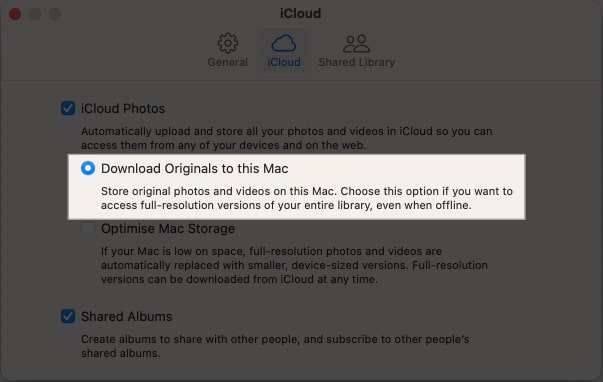
- Click Photos on the menu bar → Select Settings.
- Go to iCloud settings → Select Download Originals to this Mac.
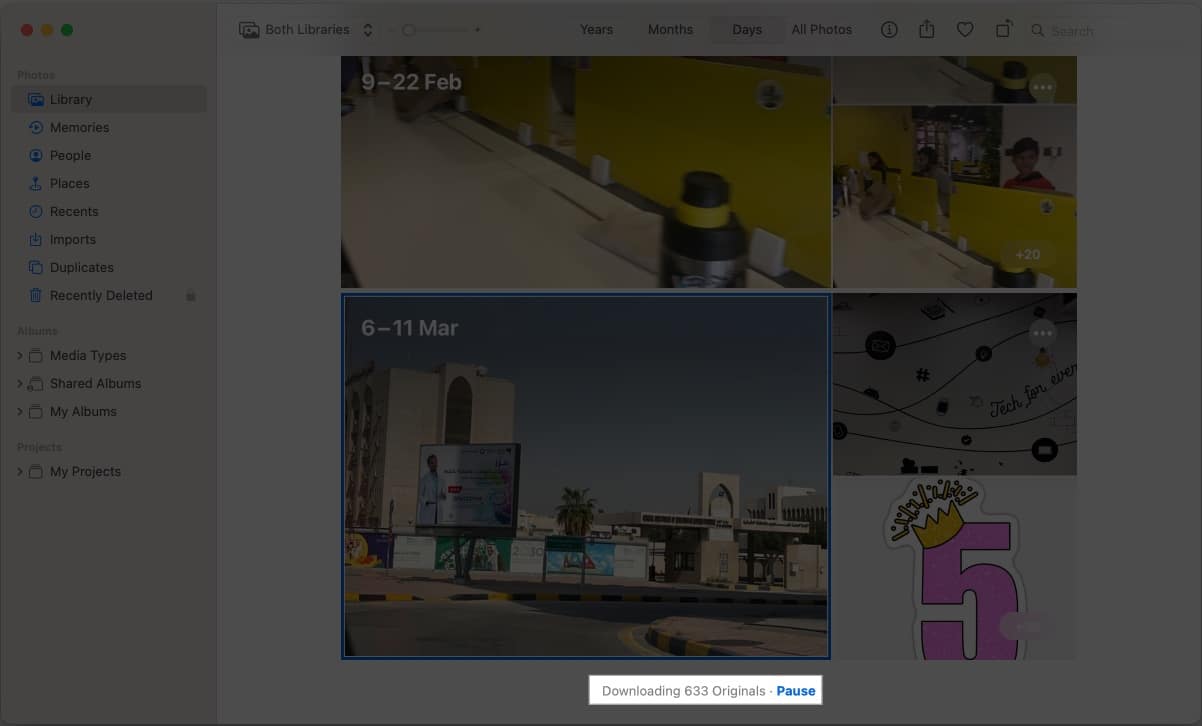
- In this instance, you can see the files downloading from the center-bottom of the Photos app.
How to download photos from iCloud to PC
If you’re an iPhone user looking for a way to save photos and videos on your PC, follow these steps to accomplish your goal.
- Open iCloud for Windows on your PC.
Enter log-in credentials if not already logged in. - Click the Options feature adjacent to the Photos app.
- Ensure iCloud Photo Library is enabled and set a designated path for the downloaded files on your PC. Click Done → Apply.
As a result, whenever you click a photo from your iPhone, it’ll be directly saved to the respective folder.
- Ensure iCloud Photo Library is enabled and set a designated path for the downloaded files on your PC. Click Done → Apply.
- To download previously backed-up iCloud photos and videos, search for iCloud Photos and open it.
- Select the photos and videos and right-click them.
- Press the Always keep on this device option.
Wait for the file to be prepared. - Opt for the files categorized by year and click Download.
- Once the zip file is loaded, access it from the Downloads folder of your PC.
How to download pictures from iCloud.com on Mac and PC
Well, downloading software on your system and following through with the process can be a hassle sometimes. But don’t worry! I’ll share an ultimate and easy technique for those looking for a straightforward way to download photos and videos from iCloud.
- Open iCloud via any browser you desire.
- Enter your Apple ID and Password to verify your identity.
- Navigate to Photos.
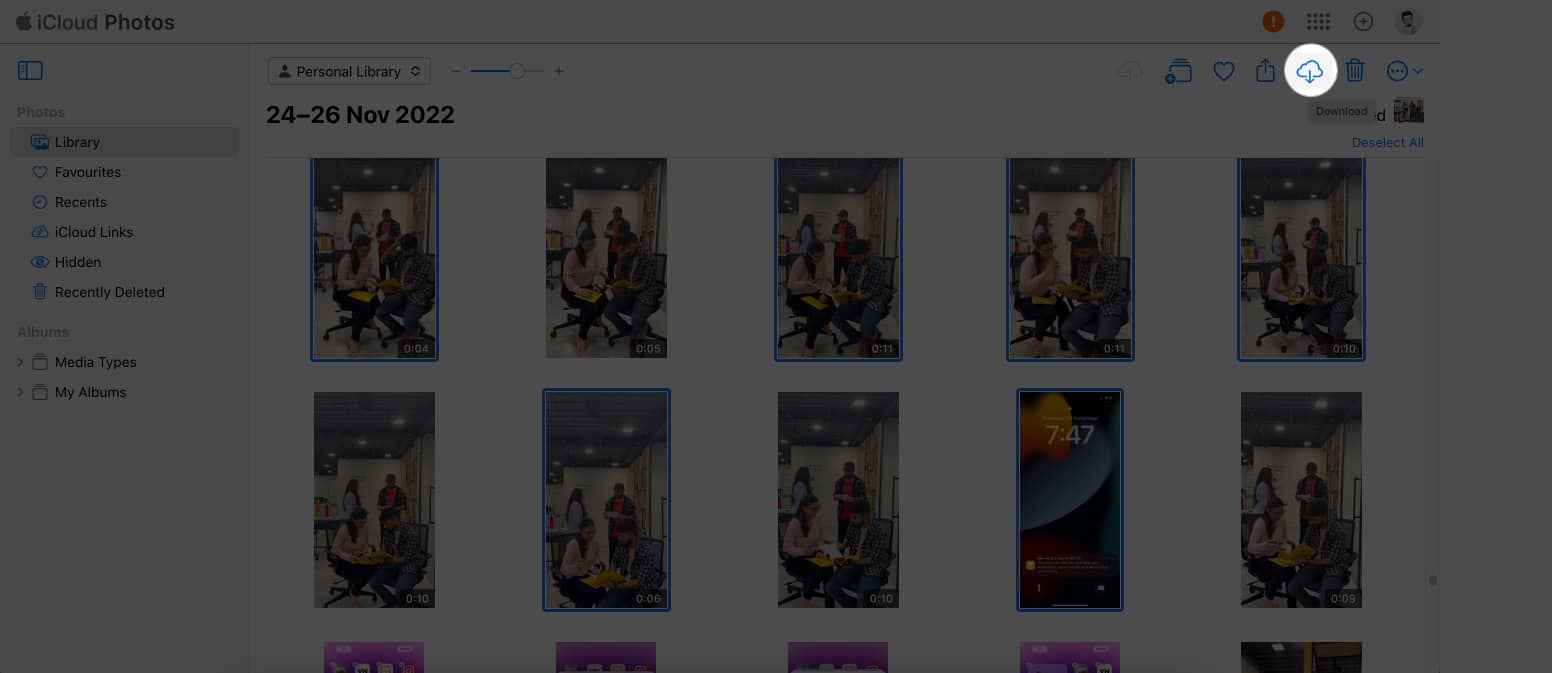
- Now, select the photos and videos to download.
- To select multiple files, press and hold the CMD key on Mac or the ctrl key on PC and click the respective files.
Or use the CMD/ctrl + A key combination to select all files in the library. - Click the Download option.
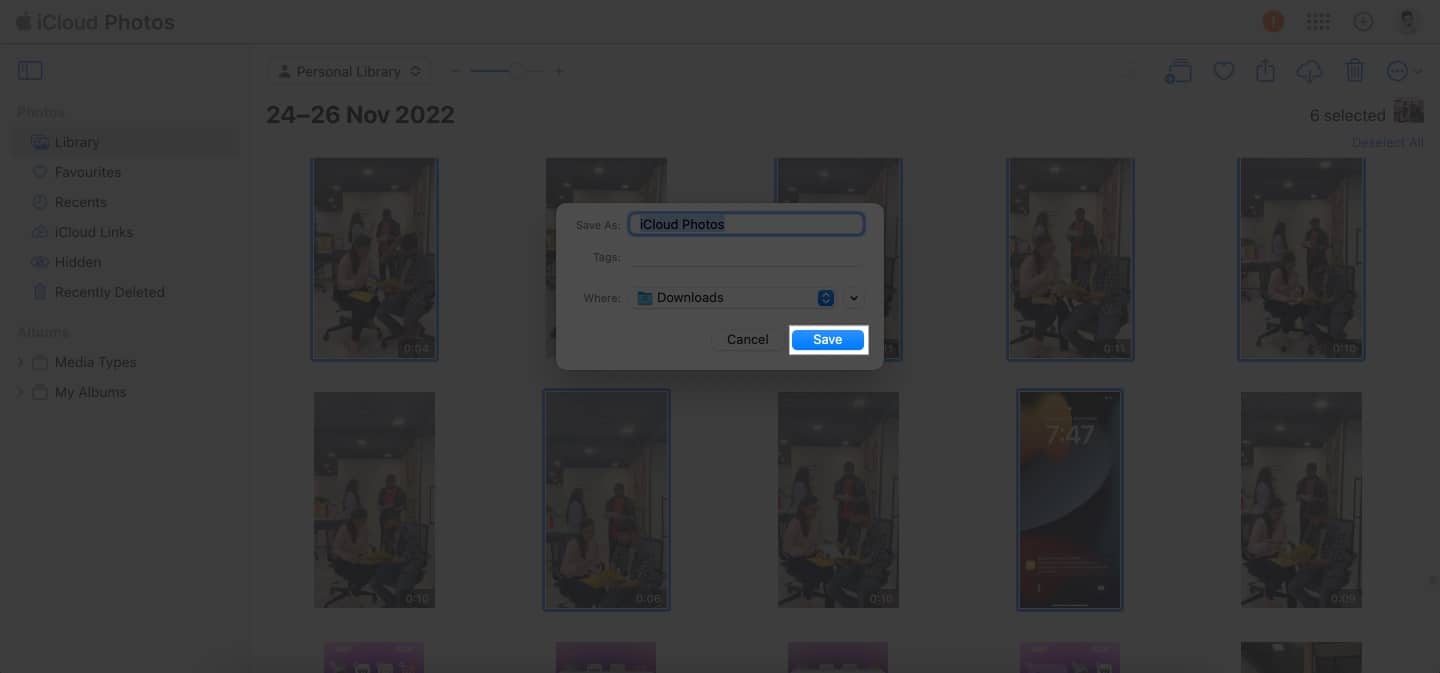
- Set a preferred location in your device → Click Save.
Note: The file will be saved in a zip format, so you need to unzip the same to access the content within.
Voila! You’re done!
Now that you’ve learned how to get photos and videos from iCloud, you can access your media anywhere and anytime. It’s a great way to keep your memories close at hand and share them when necessary. With all the options available, downloading photos and videos from iCloud is quick and easy.
I hope you find this guide helpful. Also, don’t forget to leave your thoughts below.
Read more:

