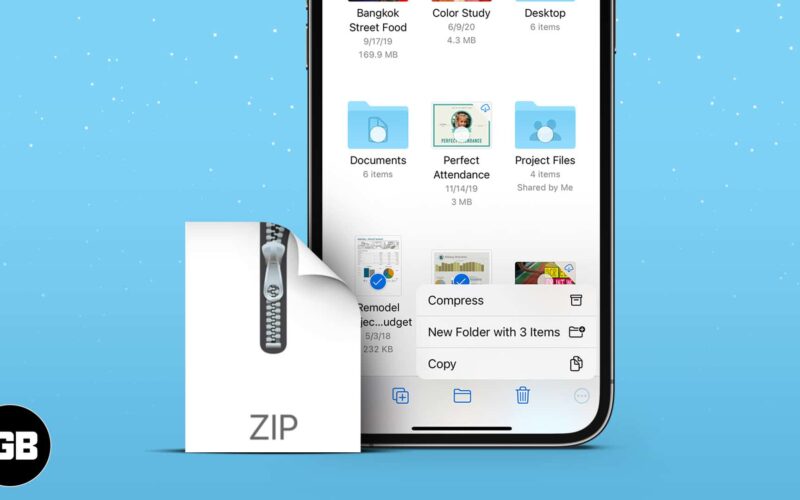
Sharing multiple files, especially larger ones, can be a time-consuming job. Moreover, most email applications don’t allow you to send attachments above 25MB. Fortunately, you can compress those files and create a zip file on your iPhone to send it with a single click, which is smaller in size.
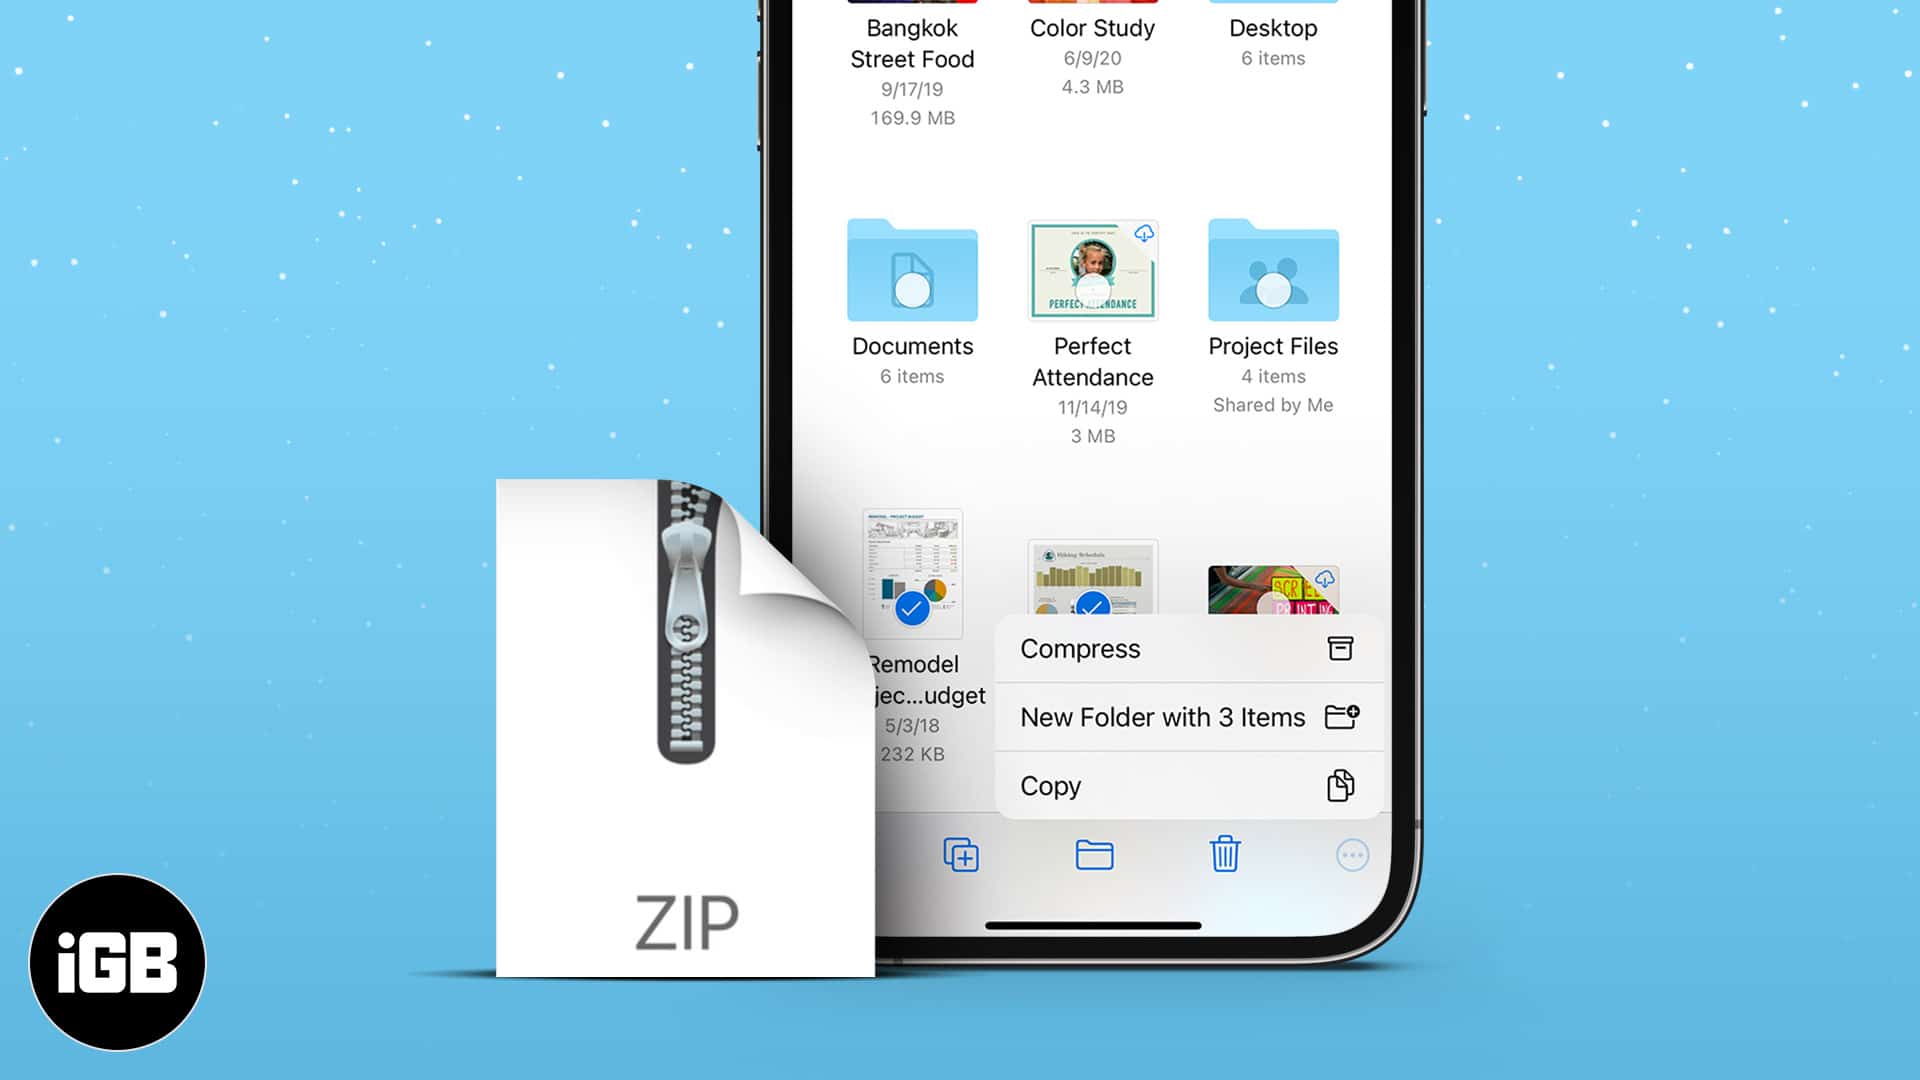
This helps you share files without compromising on the quality and content of any files. Similarly, you can also unzip files received from others. Let me show you how to zip and unzip a file on iPhone and iPad quickly.
How to zip multiple files on iPhone
- Open the Files app.
- Go to the file location that you want to zip.
Note: If you haven’t originally saved the file in the Files app, then you’ll have to save it in the app first. Additionally, if you download any file from Safari, it’ll be saved directly in the Files app. - Tap three dots at the top right.
- Tap Select.
- Now, select the file you want to zip.
You can also choose multiple files after following the above step. - Once chosen, tap three dots at the bottom right.
- Tap Compress.
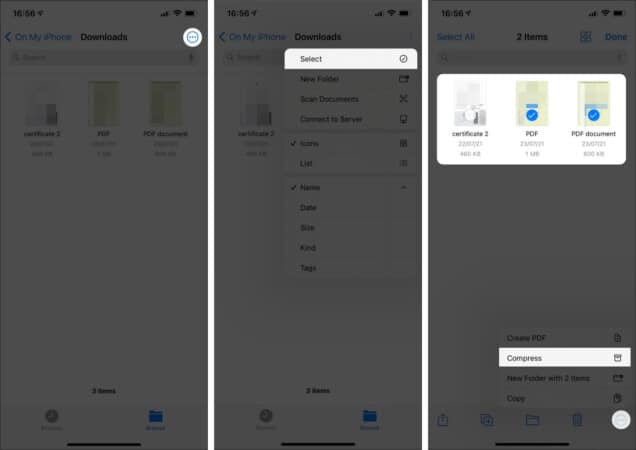
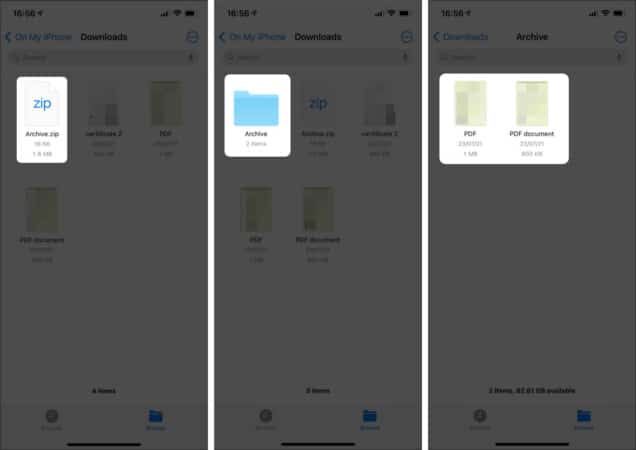
That’s it! A Zip file with the same file name as the one you selected is created. Alternatively, if you select multiple files, a zip archive called Archive.zip is created.

How to unzip files on your iPhone
- Open the Files app.
- Search for the zip file or archive that you want to open.
- Tap the particular zip file or archive.
- A new folder will be created containing the files.
- Simply tap the folder to open it and check all the files.
Bonus: Compress files on iPhone using Shortcuts
Another great alternative to zipping and unzipping files on iPhone is via the Shortcuts app. Shortcuts can get almost all of your job done on Apple devices once you create them successfully.
You can straightaway download the shortcut. So, let’s first understand how to create a shortcut to zip files.
How to create a zip file using Shortcuts
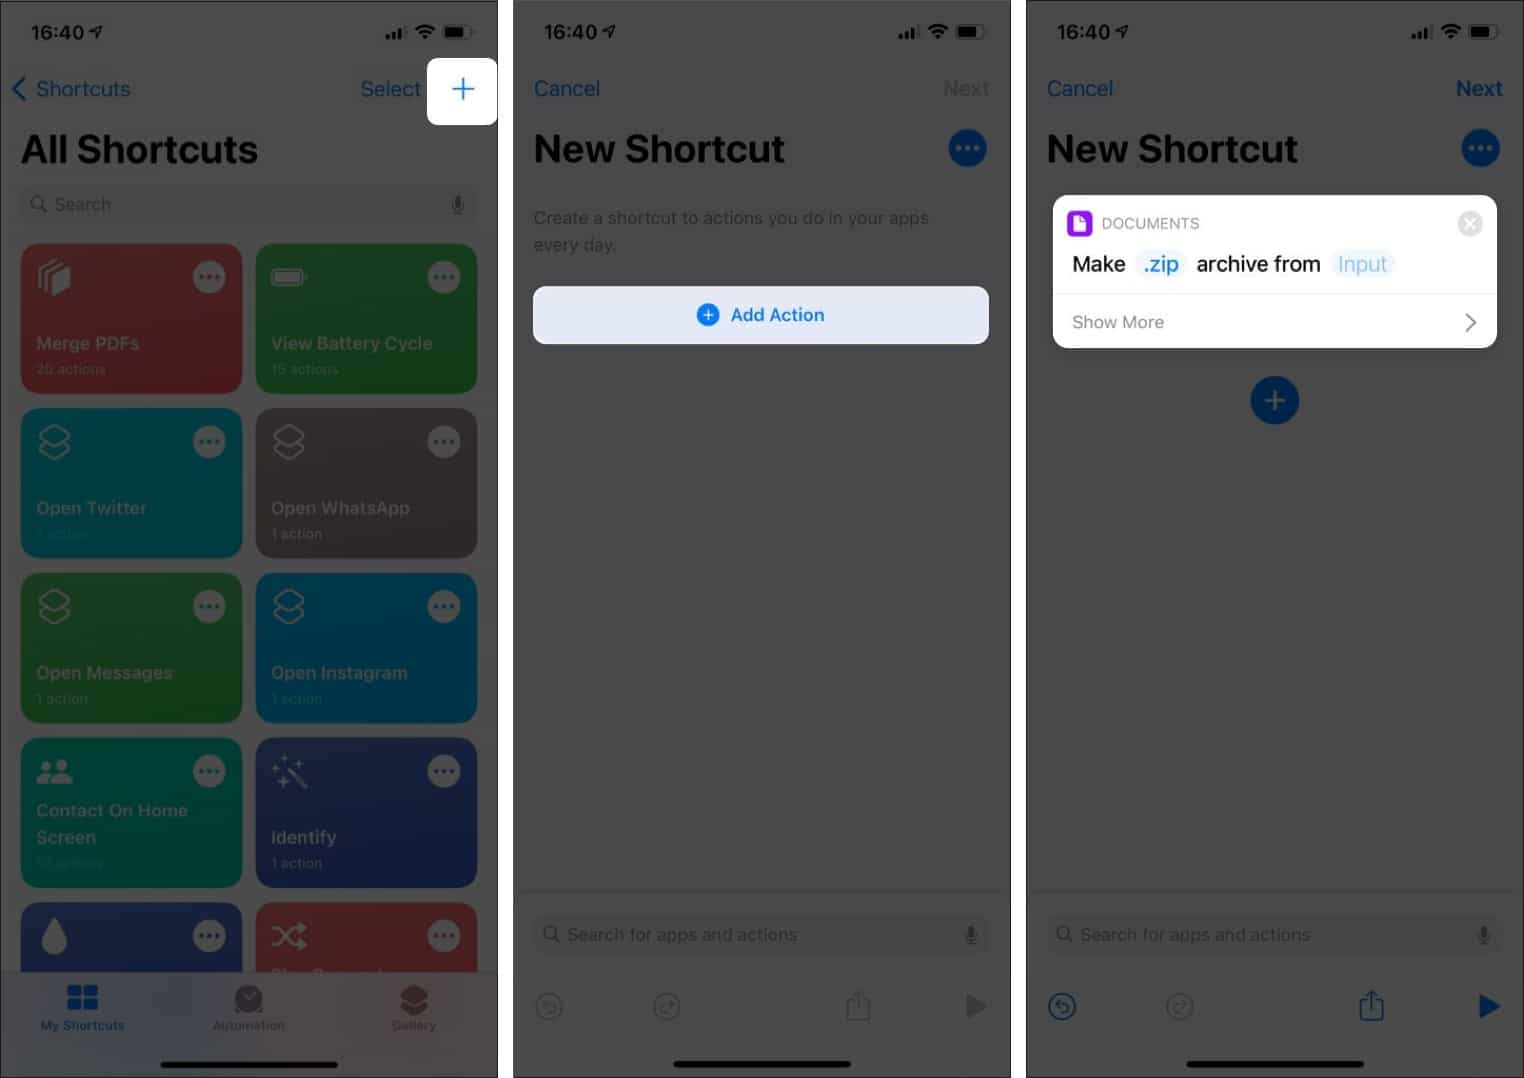
- Open the Shortcuts app.
- Tap + icon in the top right.
- Tap Add Action.
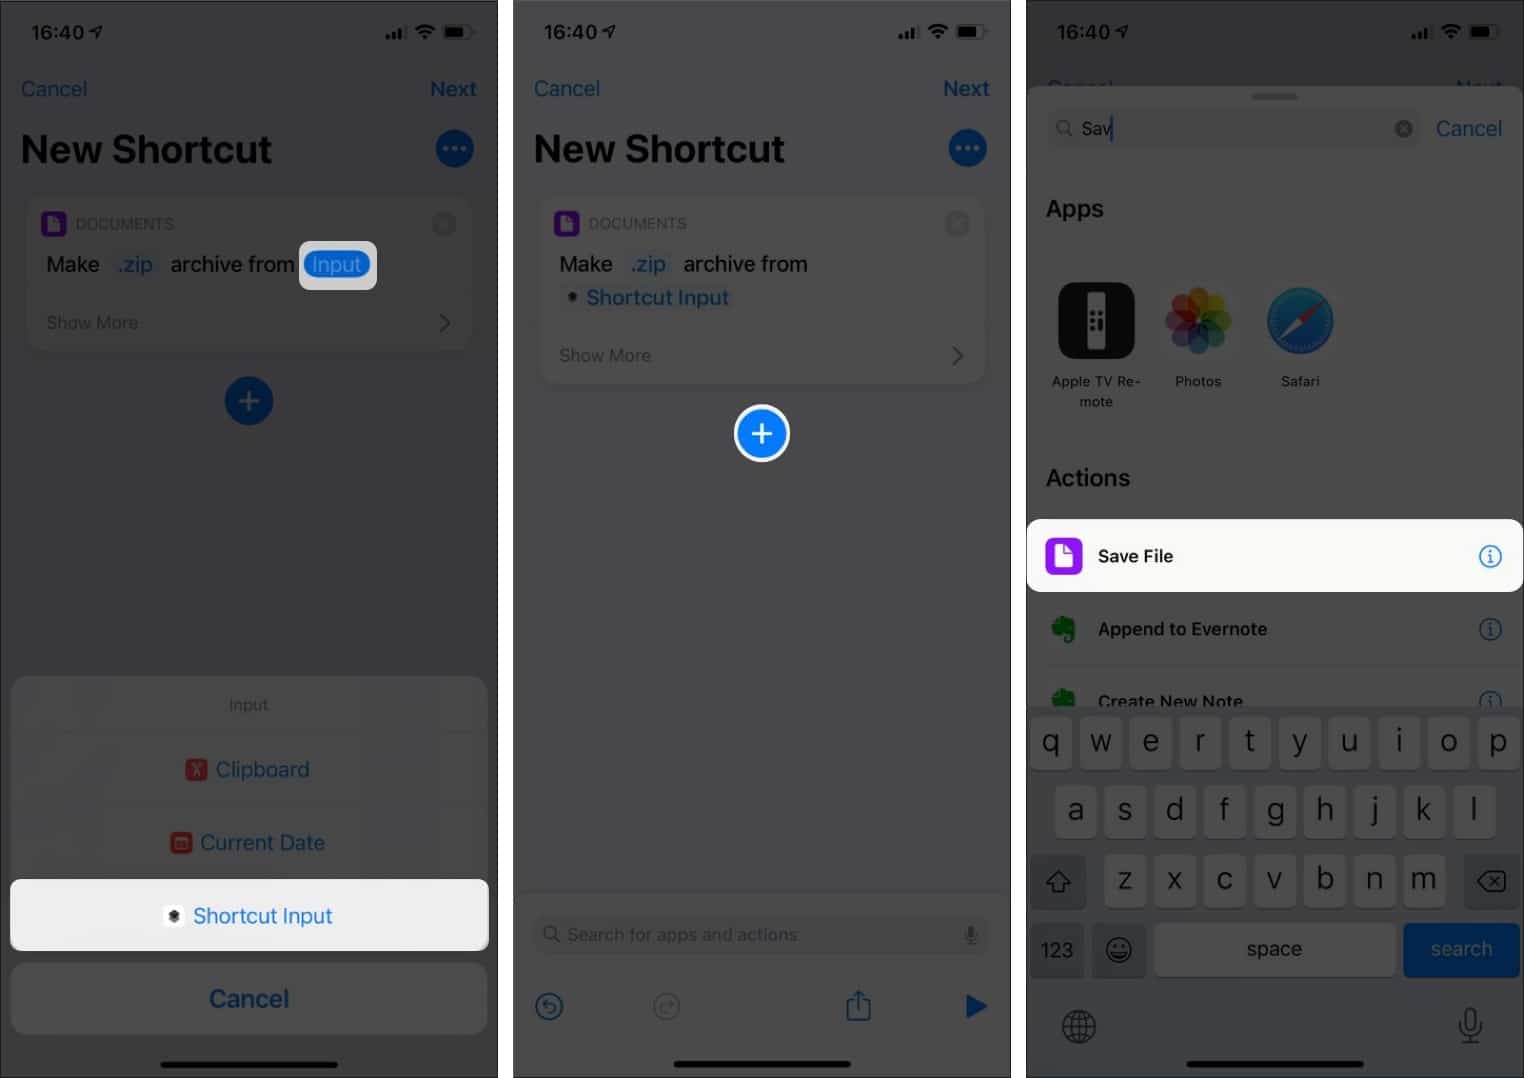
- Search for Make Archive in the Search field and tap it.
- Now, hit input and select Shortcut Input.
- Next, tap +.
- Search for Save File and tap it.
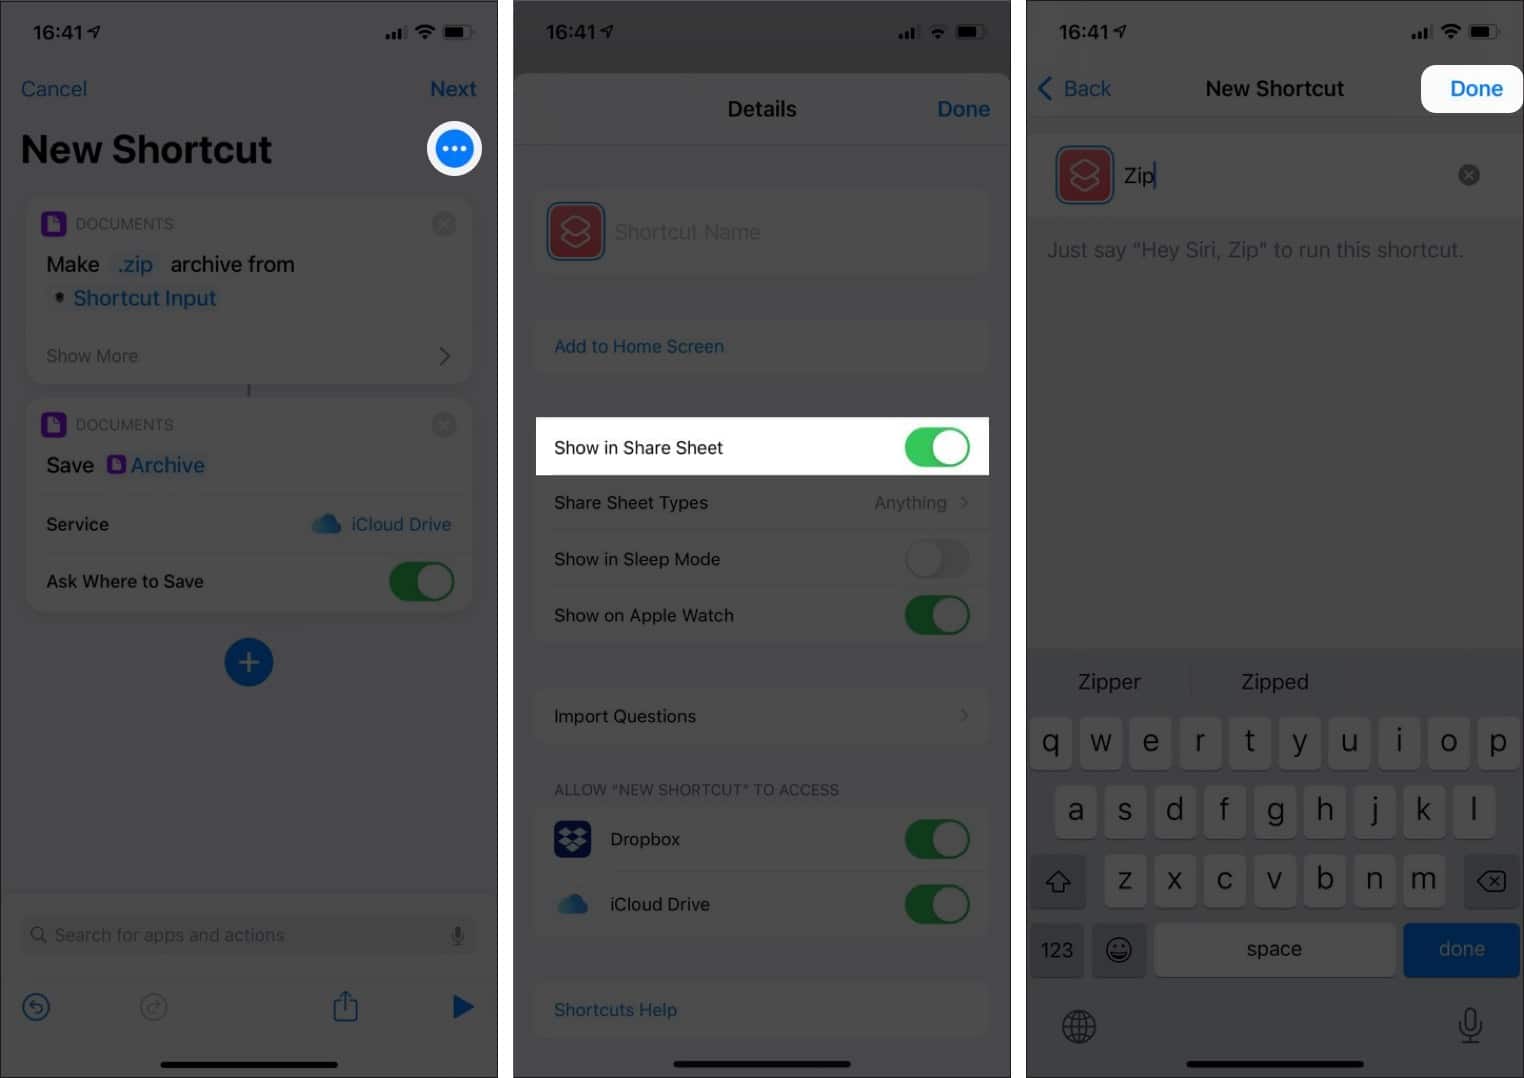
Note: you can select where do you want to save your file by tapping Service under save archive shortcut. - Now, tap three dots at the top left.
- Toggle on Show in Share Sheet.
You can also add the shortcut to the Home Screen if you want! - Tap Done.
- Tap Next and name your shortcut.
- Finally, tap Done.
This is how you can create a shortcut to compress files in a tap. Now, let’s get the job done with this shortcut.
How to use the shortcut to zip files on iPhone
- Open the Files app and go to the file location.
- Tap three dots at the top right and hit Select.
- Choose the files you want to zip.
Note: You can either choose multiple or a single file. - Now, tap share at the bottom left.
- Tap the shortcut in the list and choose the location to save your file.
- Hit Save.
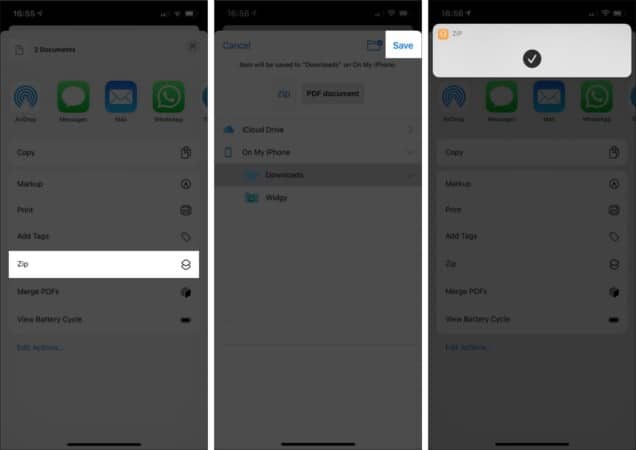
That’s it! Now just remove the share sheet from the screen by tapping the x at the top right and then tap Done again. You’ll then find your zip file in the location where you chose to while saving the file.
Note: You can also create a shortcut to unzip files and follow the above steps to execute it. However, it’s unnecessary as you can unzip a file by simply tapping it on your iPhone.
This is how you can zip and unzip files and folders on your iPhone and iPad. Have any related queries? Share in the comments below.

