

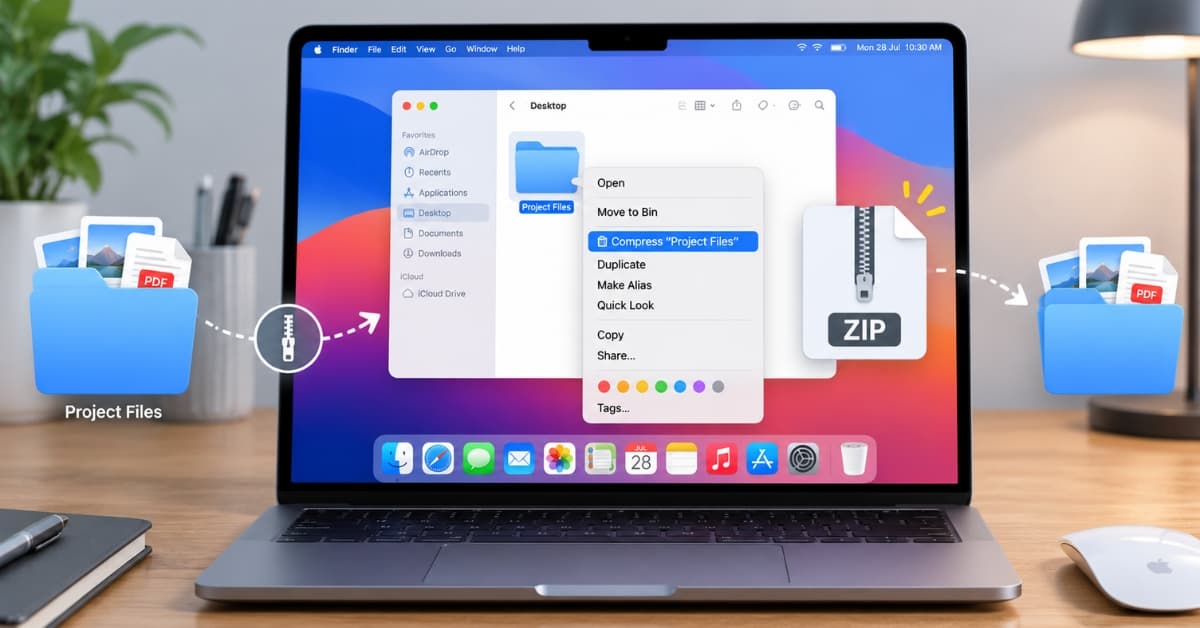
- What zipping does on a Mac: Compressing files into a .zip archive reduces their size and groups them together for easier sharing and storage, without losing any data.
- Why creating ZIP files is useful: Zipping helps save disk space, speeds up file transfers, keeps content organized, and maintains folder hierarchy during sharing.
- How to zip and unzip using Finder: Right-click files or folders in Finder and select Compress to create a ZIP file; double-click any ZIP to extract its contents.
- Using Terminal for advanced control: Run commands like
zip -rto create archives orunzipto extract them, offering more customization and automation options. - Creating password-protected ZIP files: Use the Terminal command
zip -erto encrypt archives with a password, securing sensitive data during transfers.
Zipping and unzipping files is one of those simple yet essential tasks that both beginner and seasoned Mac users should know how to do. It helps you organize projects, share multiple files in one package, and save valuable storage space.
The good part is that you don’t need any complicated third-party apps, as your Mac has everything you need. From Finder to Archive Utility to Terminal, there are several quick and reliable ways to manage ZIP files on a Mac. This post details how to zip and unzip files and folders on your Mac.
What Does Zipping a File or Folder Do on a Mac?
When you zip a file or folder on a Mac, macOS compresses its contents into a single archive with the .zip extension. This process reduces the overall file size and bundles multiple items into one package for easier sharing or storage.
The compressed file contains all the original data, but in a more efficient format. When you unzip it, macOS restores the files exactly as they were, without any loss of quality or structure.
Zipping is handled automatically by the built-in Archive Utility, which uses standard ZIP compression that’s fully compatible with Windows, Linux, and other operating systems.
Benefits of Creating Zip Files or Folders on Your Mac
Zipping files on your Mac has several practical advantages:
- Saves storage space: You get more disk space or can store more files on external drives, as compression reduces file size.
- Simplifies sharing: Sending one ZIP file is faster and easier than sending multiple attachments or folders.
- Keeps files organized: You can package related documents, images, or projects together for easy access later.
- Speeds up uploads and backups: Smaller archives transfer faster to cloud services like iCloud Drive, Google Drive, or Dropbox.
- Preserves structure: Zipping keeps the folder hierarchy intact, so everything stays organized when the recipient unzips it.
How to Zip and Unzip Files on a Mac Using Finder
The Finder offers the fastest and easiest way to zip and unzip files on a Mac without involving any technical steps. Here’s how:
Zip Files Using Finder:
- Open Finder and head to the folder containing the file or subfolder you want to compress.
- Now, Control-click the item and select Compress [File Name] or Compress if you’ve selected multiple files in the drop-down menu.
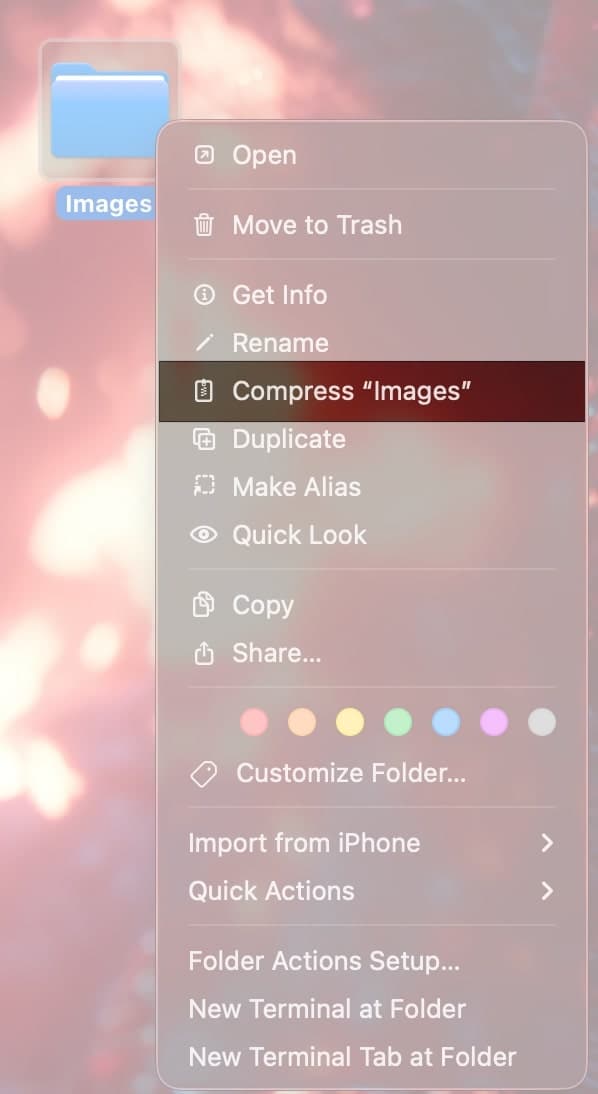
- Once done, macOS will create a new .zip file in the same location.
Your original file or folder remains untouched; you can keep or delete it if you want. The created .zip file has the same name as your original file. You can rename it later if you want.
Note:
Unzip Files Using Finder:
Unzipping files or folders on a Mac is as easy as zipping them. Here’s how:
- Locate the .zip file or folder you want to unzip, then double-click it.
- Once done, macOS will extract the contents into a new folder next to the original archive.
How to Zip and Unzip Files Using Terminal
For users who prefer precision and flexibility, macOS includes Terminal commands that give more control over how files are zipped and unzipped.
Zip Files Using Terminal:
- Open Terminal.
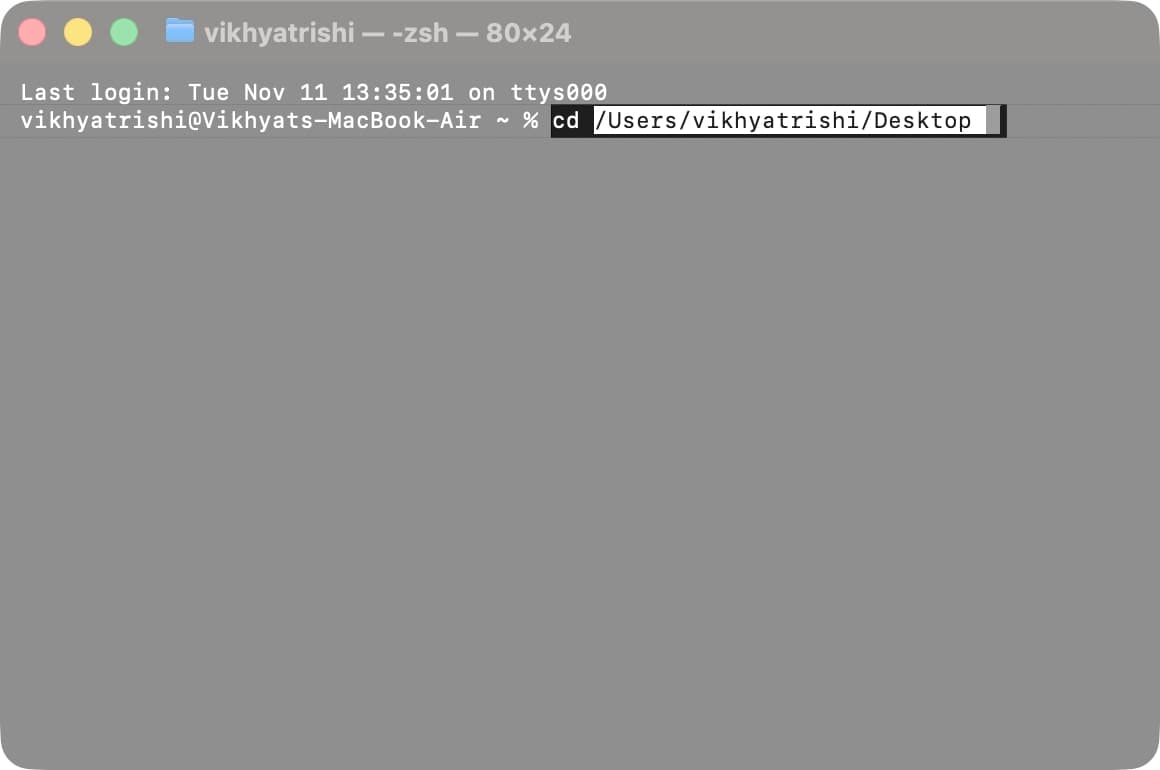
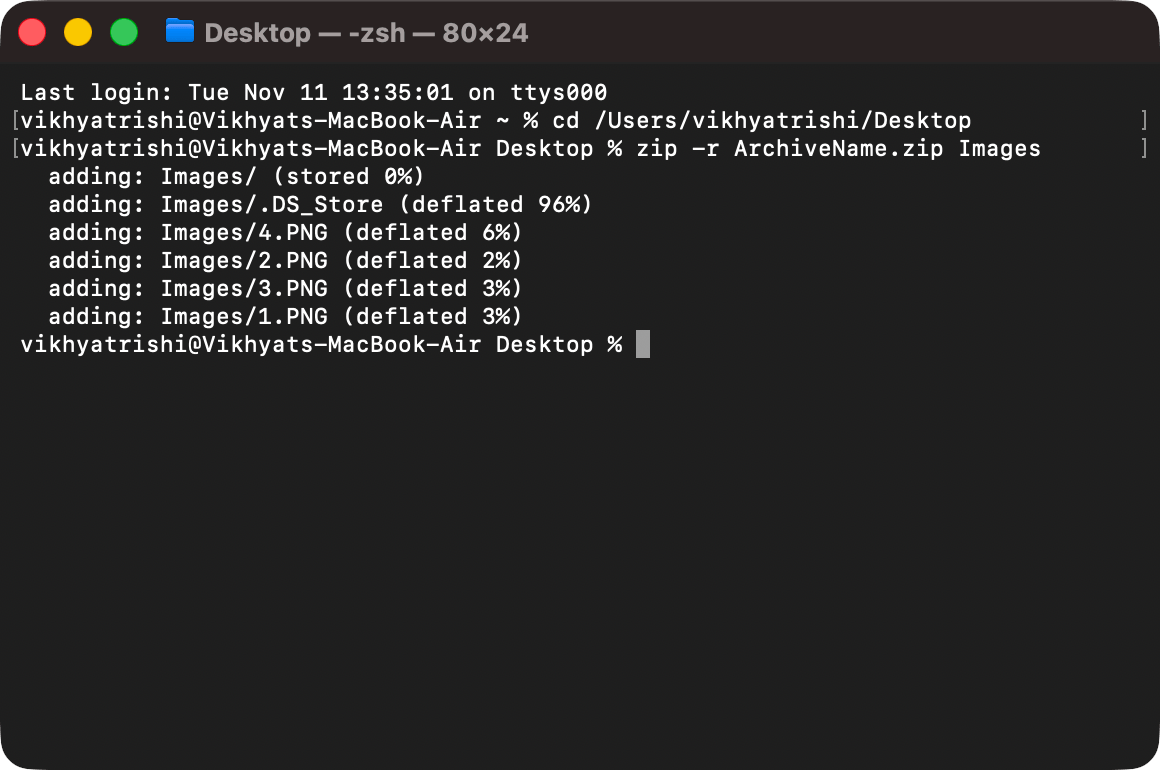
- Here, type in “cd” and drag & drop the folder that contains the file or subfolder you want to compress in the Terminal window and hit Return. This ensures you’re in the right directory before compressing.
- Now enter the following Terminal command code: zip -r ArchiveName.zip FolderName
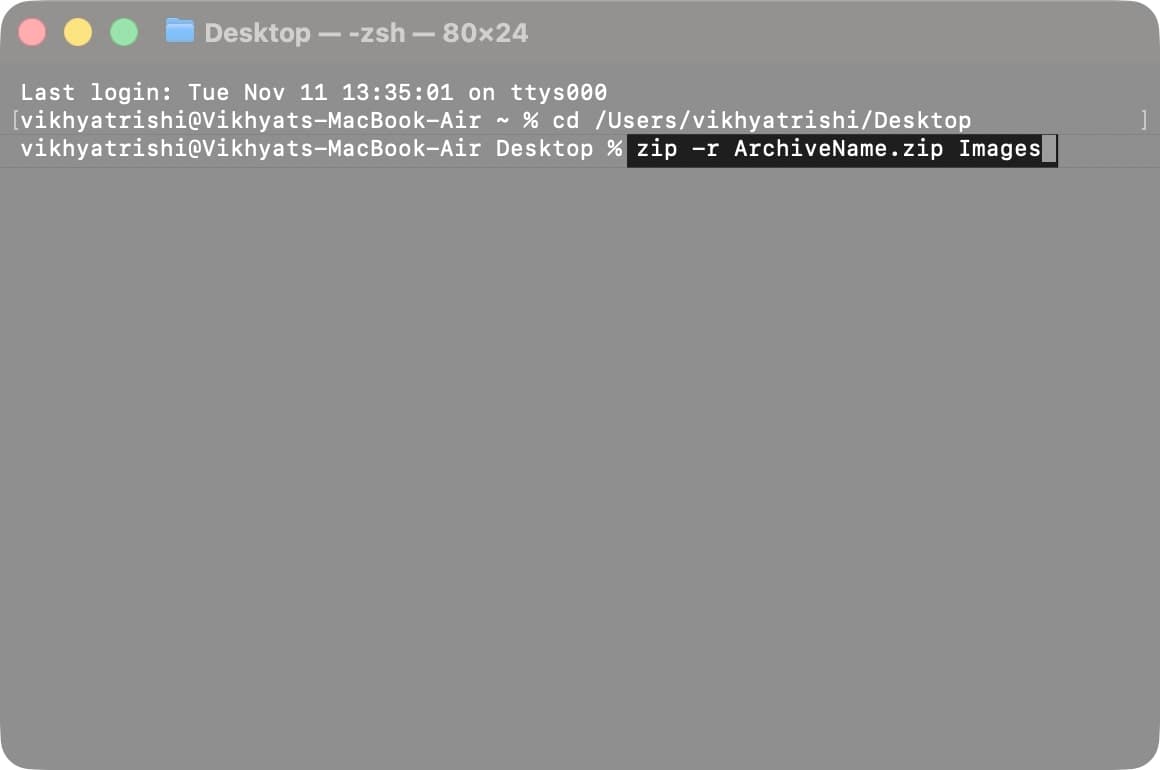
- Replace ArchiveName with the name you want for the ZIP file.
- Replace FolderName with the exact name of the folder (case-sensitive).
- Press Return, and the Terminal will create the ZIP file or folder in your current directory.
Unzip Files Using Terminal:
- Open Terminal, type in “cd“, enter the folder path, and hit Return.
- Now, enter the command: unzip ArchiveName.zip
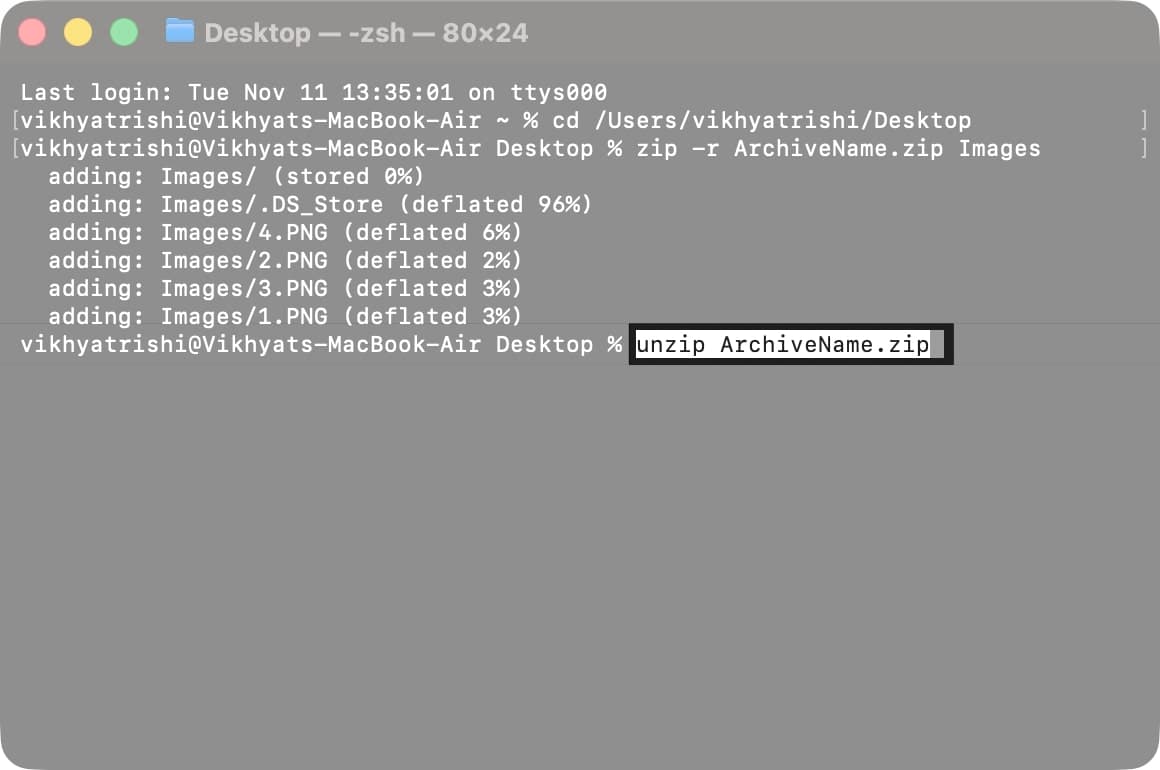
- Press the Return key.
The unzipped file will appear in the same directory; just ensure the original file is no longer there. Otherwise, the “replace Images/.DS_Store? [y]es, [n]o, [A]ll, [N]one, [r]ename:” prompt will appear asking whether you want to: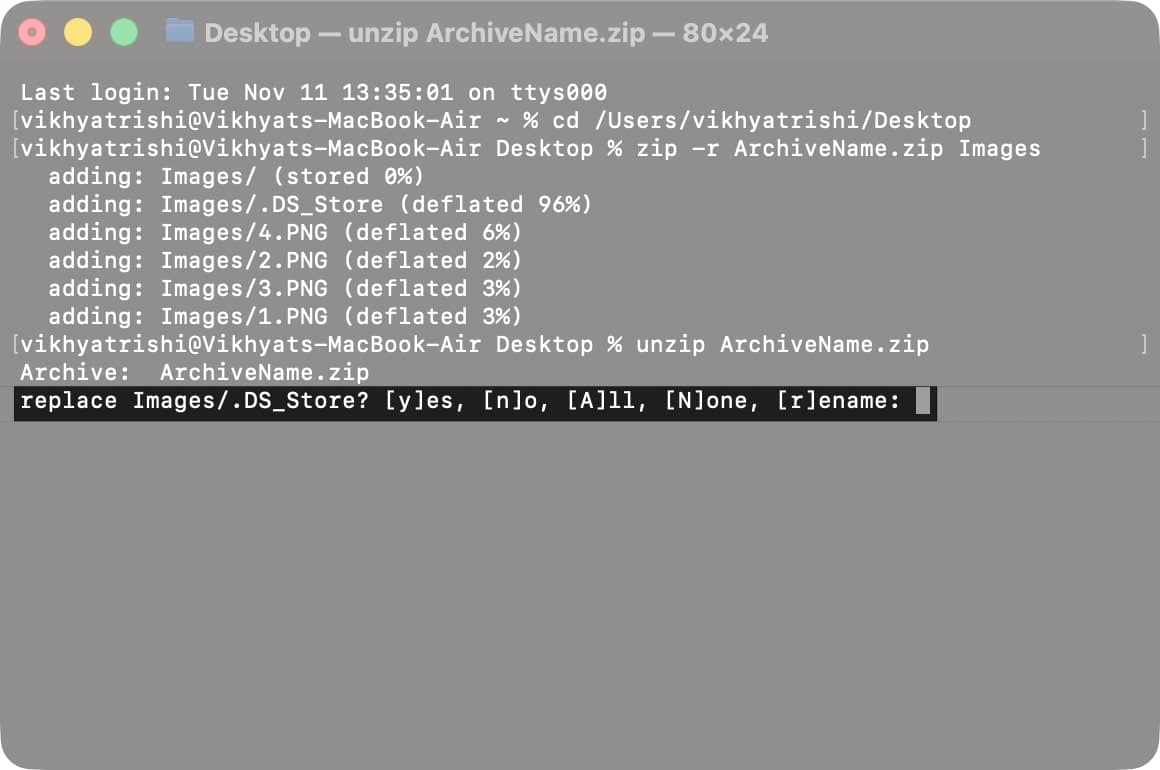
- Overwrite any existing file.
- Extract, but do not overwrite existing files.
- Overwrite all existing files automatically without asking again.
- Skip all existing files, leaving them unchanged.
- Rename the extracted file to prevent overwriting the existing one.
How to Create a Password-Protected ZIP File
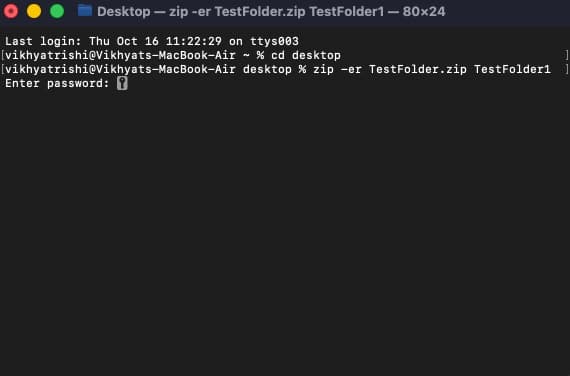
While Finder offers the fastest way to zip files, it cannot create encrypted ZIP archives. That’s where Terminal proves most useful, as it lets you create encrypted ZIP archives. Here’s how:
- Open Terminal, type in “cd“, enter the folder path and hit Return.
- Now enter the command: zip -er ProtectedFolder.zip FolderName
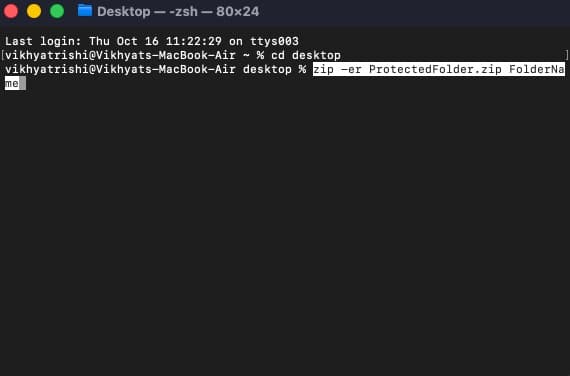
- Replace SecureArchive with the name you want for the password-protected ZIP file.
- Replace FolderName with the exact name of the folder (case-sensitive).
- Press Return.
- Enter the desired password, then press Return.
How to Zip and Unzip Files Using Archive Utility
Archive Utility is the built-in macOS tool that handles all compression and extraction tasks. It works quietly in the background whenever you create or open ZIP files using Finder. You can also use it directly, although it doesn’t have a visible interface.
Zip Files Using Archive Utility:
- Open Archive Utility on your Mac. The app will appear in your Dock but won’t display a window.

- Now, simply drag and drop the file or folder you want to compress onto its Dock icon.
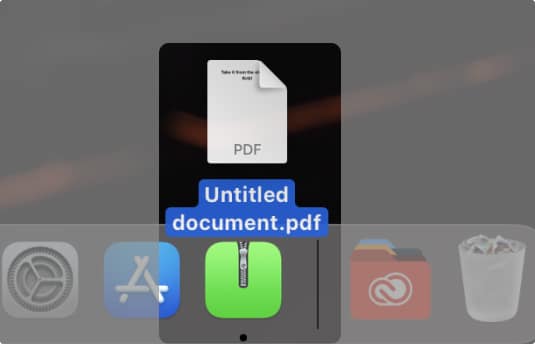
- A ZIP file is instantly created in the same folder as the original item.
Unzip Files Using Archive Utility:
The fastest way to unzip a file on a Mac is still by double-clicking it. But, if you want to do so via Archive Utility, all you need to do is drag and drop the Zip file onto its Dock icon, and the app automatically expands the file into the same folder.
Your Mac, Your Workflow…
Now you know how straightforward it is to zip and unzip files on a Mac. In addition to the methods mentioned earlier, you can use third-party apps such as Keka or The Unarchiver to compress files and save them more effectively.
Have you tried using Terminal or Archive Utility for file compression? Tell us which method works best for you in the comments below.
Read more: