While writing how-to guides for you guys, I can’t even count how often I hit the Delete key. So, I can understand your plight if the Delete key is not working on your Mac. However, fixing your Delete key is easier than you think.
Here, I will show you different methods to troubleshoot the issue. But, before I start, let’s understand why you are facing the problem in the first place.
Why is Delete key not working on my Mac?
The Delete button may stop working on your Mac due to various reasons, such as:
- Software glitches
- Physical damage
- Misconfigured keyboard settings
- Dirt and debris on the Keyboard
- Wired or Bluetooth Keyboard issues
How to fix delete button not working on Mac
Now that you have a better insight, let’s learn how to deal with this jarring issue effectively.
- Clean your Mac keyboard
- Restart your Mac
- Enable Keyboard Viewer
- Check connection for wired keyboard
- Un-pair and pair the Bluetooth keyboard again
- Use the correct key combination
- Verify delete permissions
- Check the Keyboard settings
- Turn off Slow Keys
- Delete Keyboard PLIST file
- Reset PRAM or NVRAM on your Macbook
- Update macOS
- Reset your Mac
1. Clean your Mac keyboard
Depending on your working conditions, dust and debris can accumulate over and underneath the keyboard’s keys. So, it can cause a hindrance when you press the Delete key.
So, before trying any drastic fixes, thoroughly clean your Mac’s keyboard with a microfiber cloth or soft-bristled cleaning brush. Ensure no dust is left under the keys.
Now, check whether the Delete key is working fine. If not, move on to other solutions.
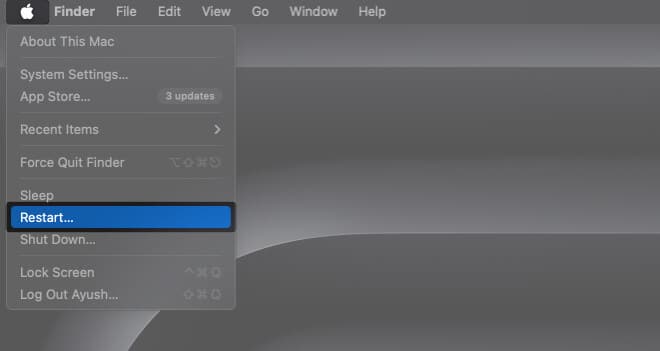
2. Restart your Mac
A simple restart can fix any underlying minor software glitches or bugs, causing the Delete key to malfunction.
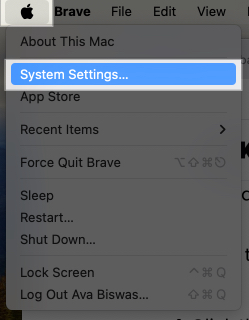
- Click the Apple logo at the top left of the desktop.
- Select Restart from the drop-down menu.
3. Enable Keyboard Viewer
Now that cleaning and restarting Mac is out of the way, it’s time to handle this problem professionally. When the delete key on your Mac starts to give you a hard time, Keyboard Viewer can serve as an effective solution. This feature allows you to see a virtual representation of your keyboard on the screen, highlighting pressed keys as you type.
Follow the steps discussed below to enable Keyboard Viewer for your Mac:
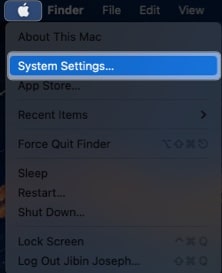
- Click the Apple logo () → System Settings.
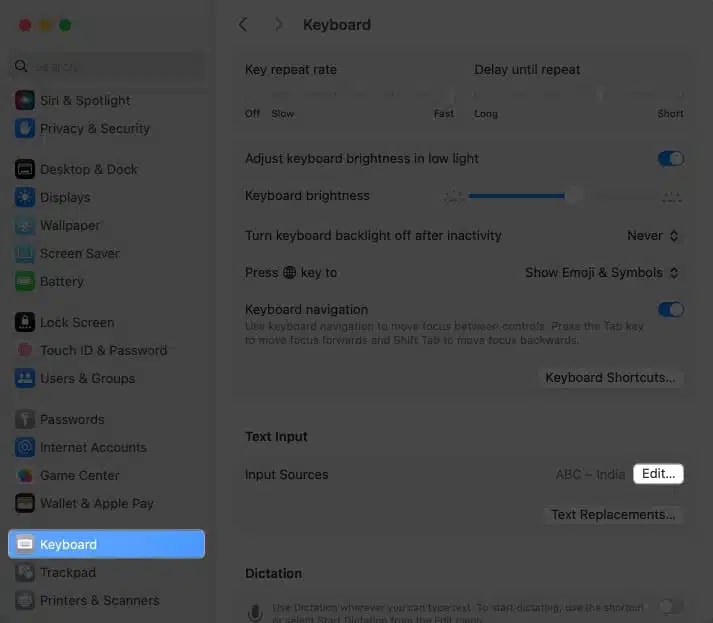
- Choose the Keyboard option from the menu.
- Hit Edit next to the Input Sources tab.
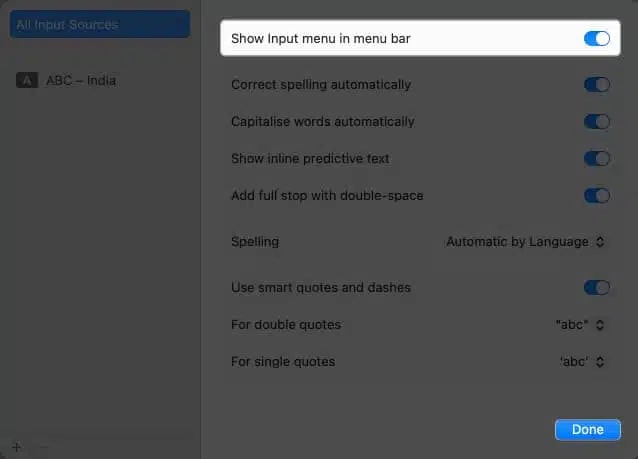
- Finally, toggle on the Show Input menu in menu bar.
- Select Done to exit the interface.
- Now, click the Keyboard icon from the menu bar.
- Choose Show Keyboard Viewer.
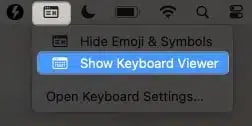
- Doing so, a virtual keyboard will appear on your screen.


If your Mac’s Delete key is working fine, it will be highlighted in the virtual keyboard. If not, check the same using any external Keyboard. Even if that fails, get your Mac checked at Apple Genius Bar.
4. Check connection for wired keyboard
If you are using a wired keyboard with your Mac, the problem may lie in the wired connection instead of the Delete key. In that case, check the wire for any wear and tear. If not, do this:
- Unplug the Keyboard from your Mac.
- Clean the USB port to remove any dust or debris.
- Connect the keyboard to your Mac, and check whether the Delete key works.
- If not, try plugging the keyboard into another USB port, as the issue can also be with your Mac’s USB port.
5. Un-pair and pair the Bluetooth keyboard again
A connectivity issue between your Mac and the Bluetooth keyboard can be the main culprit behind the Delete key not working. Try disconnecting the Bluetooth keyboard and pairing it again to see if this solves the problem.
- Open the Bluetooth settings on your Mac.
- Click Disconnect next to the paired keyboard.
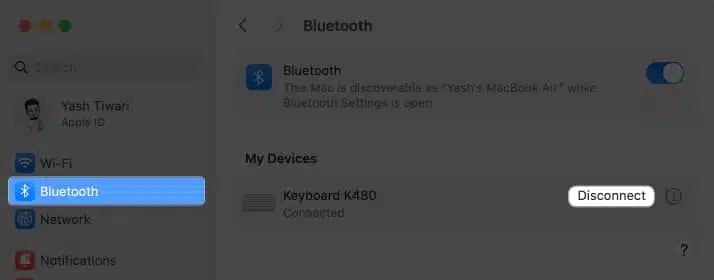
- Now, click the “i” (info) button next to the Connect button.
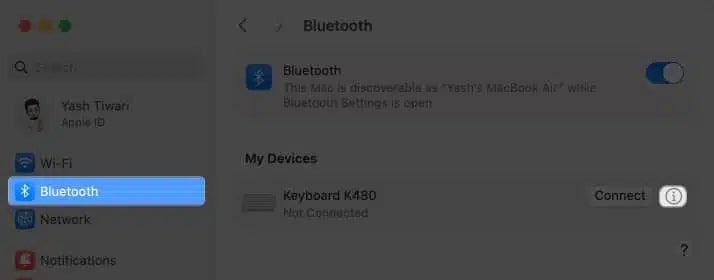
- Choose Forget This Device → Forget Device when prompted.

- Wait for a few seconds and put your keyboard in the pairing mode.
- Locate the Keyboard under Nearby Devices list → Click Connect next to it.
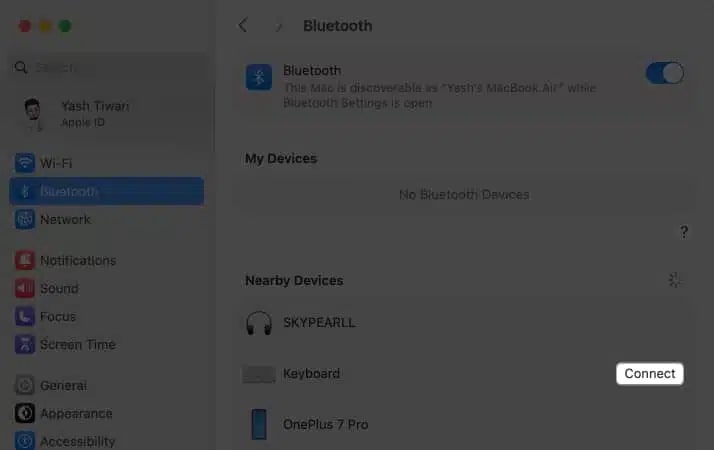


Once the process is complete, try using the Delete key again.
6. Use the correct key combination
If the Delete key can remove a typed word but can’t delete a file or item, you might be using the wrong key combination.
If you simply hit the Delete key after selecting an item, it won’t do anything. This is because deleting an item requires pressing the “Command + Delete” or “Shift + Command + Delete” key combination.
7. Verify delete permissions
If, even after using the correct key combination, you can’t delete the selected file or folder, you might not have the necessary permissions to do so. Here’s how to verify:
- Right-click on the file or folder you want to delete.
- Click on the Get Info.
- Check whether you have the Read and Write permissions.
8. Check the Keyboard settings
Sometimes, the problem might not be particularly with the Delete key but with the Keyboard settings itself. To check this:
- Open the Keyboard settings on your Mac.
- Here, ensure the Key repeat rate and Delay until repeat is set to your preference.

9. Turn off Slow Keys
Like the above Keyboard settings, there is a chance that you might have activated the Slow Keys accessibility. This feature delays the time between pressing the physical key and your Mac registering the input.
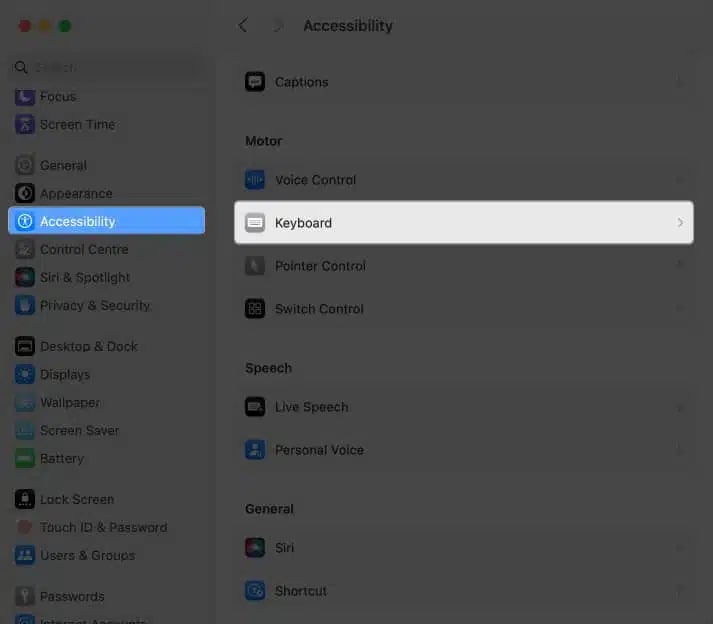
- Navigate to Apple logo () → System Settings.
- Head over to the Accessibility menu.
- Choose the Keyboard option.
- Disable Slow Keys if enabled.
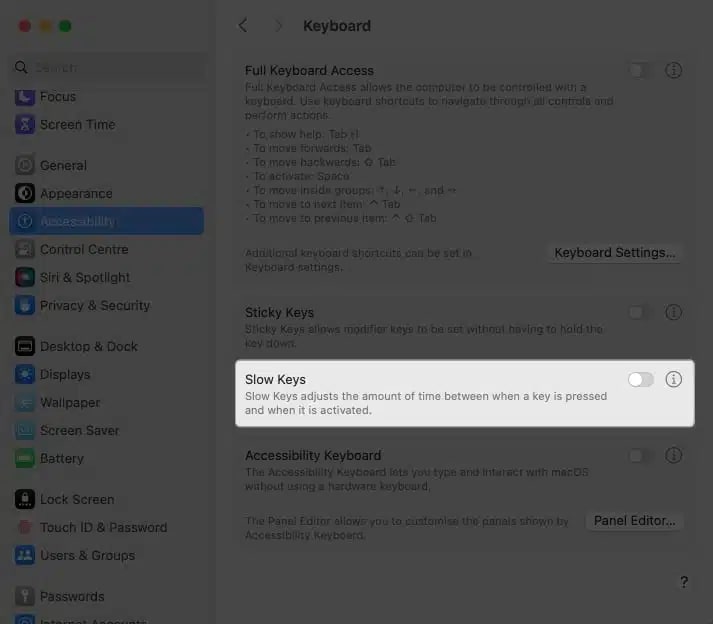


Keep in mind that this solution may be applicable if you are using an older MacBook model or have enabled this particular accessibility feature intentionally.
10. Delete Keyboard PLIST file
If the issue persists, deleting the Keyboard Property List (PLIST) file may help. These files store your Mac’s keyboard settings, including keyboard preferences.
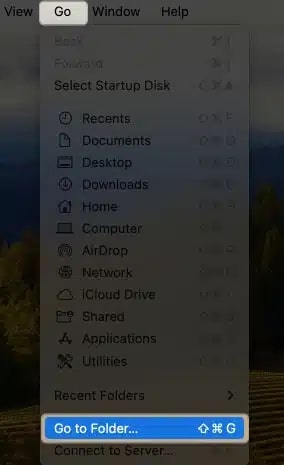
- Open Finder → Click Go in the menu bar.
- Select the Go to folder option.
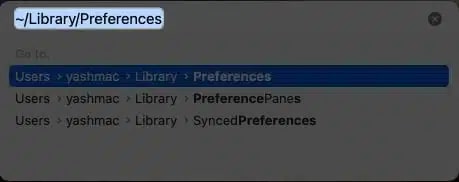
- Type in ~/Library/Preferences and hit return.
- Now locate the following files:
- apple.Keyboard-Settings.extension.plist
- com.apple.keyboardservicesd.plist
- Select both and Move to Bin.

- Close Finder and restart your Mac.


11. Reset PRAM or NVRAM on your Macbook
Resetting your Mac’s PRAM (Parameter Random Access Memory) can often fix the hardware issue your Mac is experiencing. To do this:
- Shut down your Mac.
- Now, turn it back on and immediately press & hold the “Command + P + R” keys until you hear the startup sound for the next time.
12. Update macOS
Apple regularly pushes new macOS updates to resolve various issues. So, check if an update is available. If yes, update macOS on your Mac.
Simply, go to System Settings → General → Software Update → Click Upgrade now.
13. Reset your Mac
If nothing works, factory resetting your Mac is your last resort. It can help resolve various hardware and software issues your Mac might be experiencing and will return it in out-of-the-box condition.
Bonus: Delete text without using Delete key on your Mac
If the factory reset method doesn’t work, you can use several key combinations to delete the typed text.
Here’s a set of commands you can use for your convenience.
- To delete the character before the cursor, press Ctrl+H.
- To delete the character before the cursor, press Ctrl+D.
- To delete text, highlight it and right-click the same → Select Cut.
- To delete from the cursor to the end of the line or paragraph, Press Ctrl+K.
These should come in handy until you find a permanent resolve.
Restore and recover!
I hope you have successfully fixed the Delete key not working on Mac issue with the troubleshooting steps I have listed and can delete text, files, and more. However, if the issue persists after trying everything, contact Apple Support.
Also, if you know another solution, do comment below.
Read more:


