
Find My app on iPhone, iPad, and Mac lets you check your device’s location, put it in lost mode, erase the contents, and more. It is an essential security feature that you should use. This tutorial explains how you can add an iPhone, iPad, Apple Watch, or Mac to Find My app.
Also, when you stop using any of your devices, it is advisable to remove it from Find My app. This turns off the Activation Lock and ensures that the other person can use their Apple ID on it. So, take a look and learn how to add or remove a device from Find My App.
What is the Find My iOS app?
The Find My app on iPhone helps you locate Apple devices. It offers essential features to track various device locations and activities.
- It is possible to see live the location of your lost or stolen device.
- You can mark the device’s location and receive notifications whenever it moves.
- Also, you can play a sound on your device to help you find it.
- In an emergency, you can lock and erase all the data on your device remotely.
- You can share your location with your friends and family.
Yes, it sounds fantastic. So, let me shown you how to set up the Find My app, followed by adding or removing devices from the same.
How to set up the Find My app on iPhone
Setting up the Find My app is not as complicated as it seems. However, before jumping into the setup, ensure you’ve enabled the location services on your device.
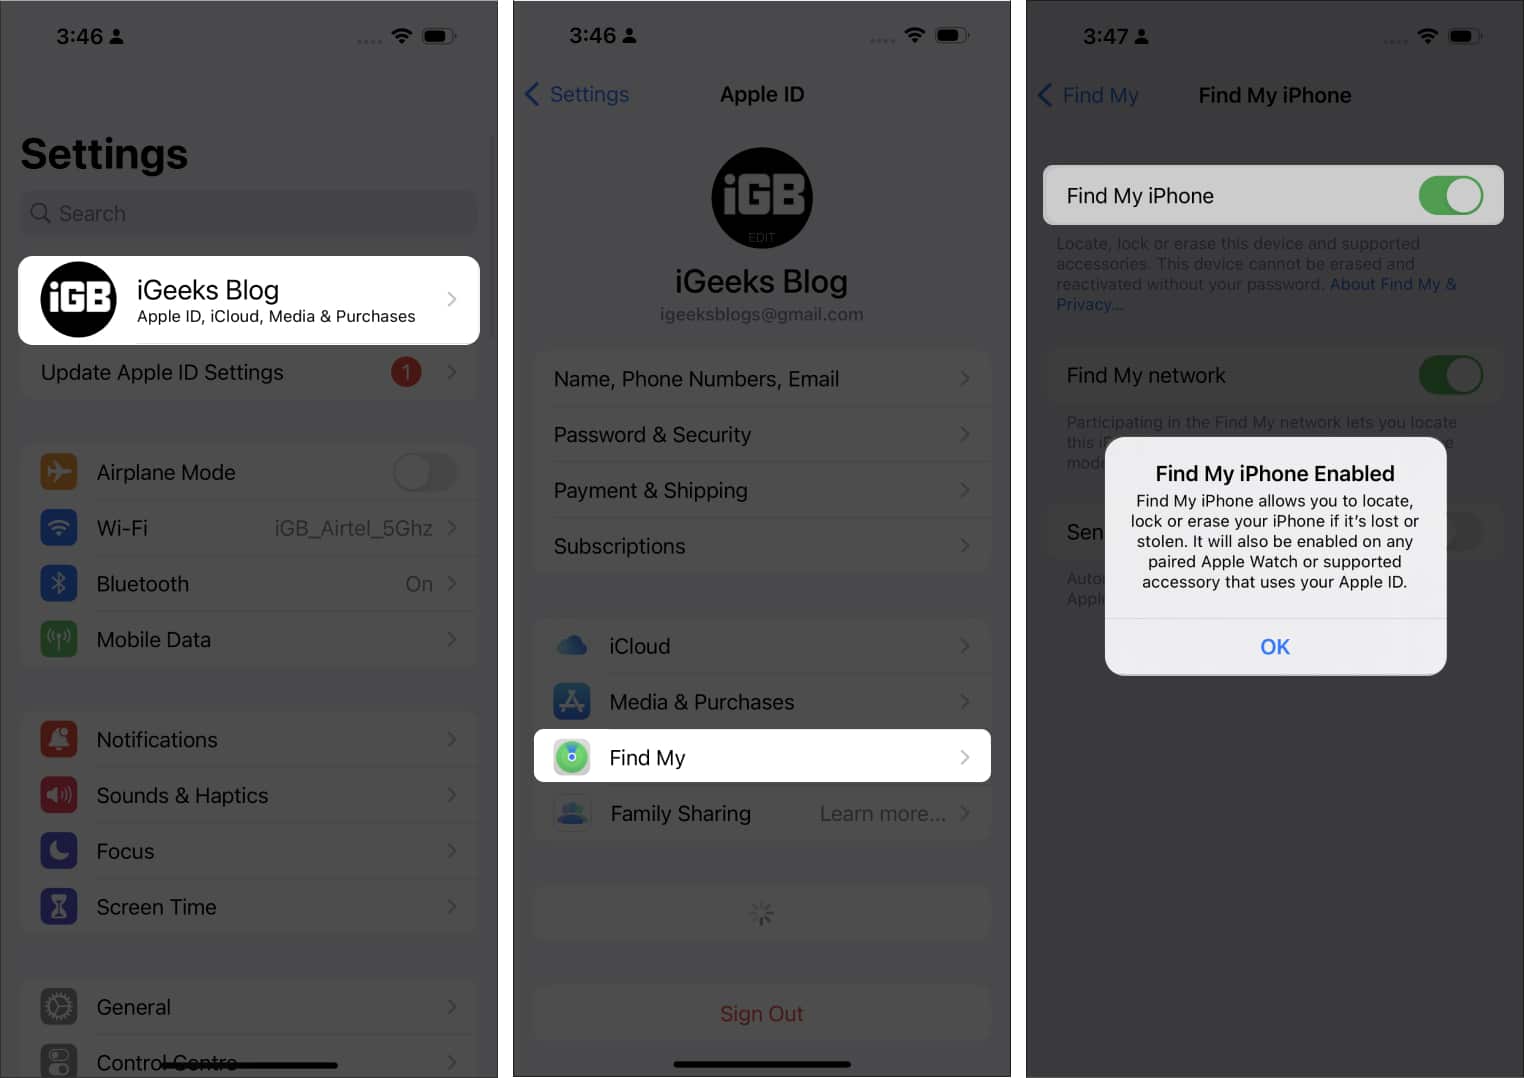
- Launch Settings → Tap your name → Navigate to Find My.
- Toggle on Find My iPhone → Tap OK.
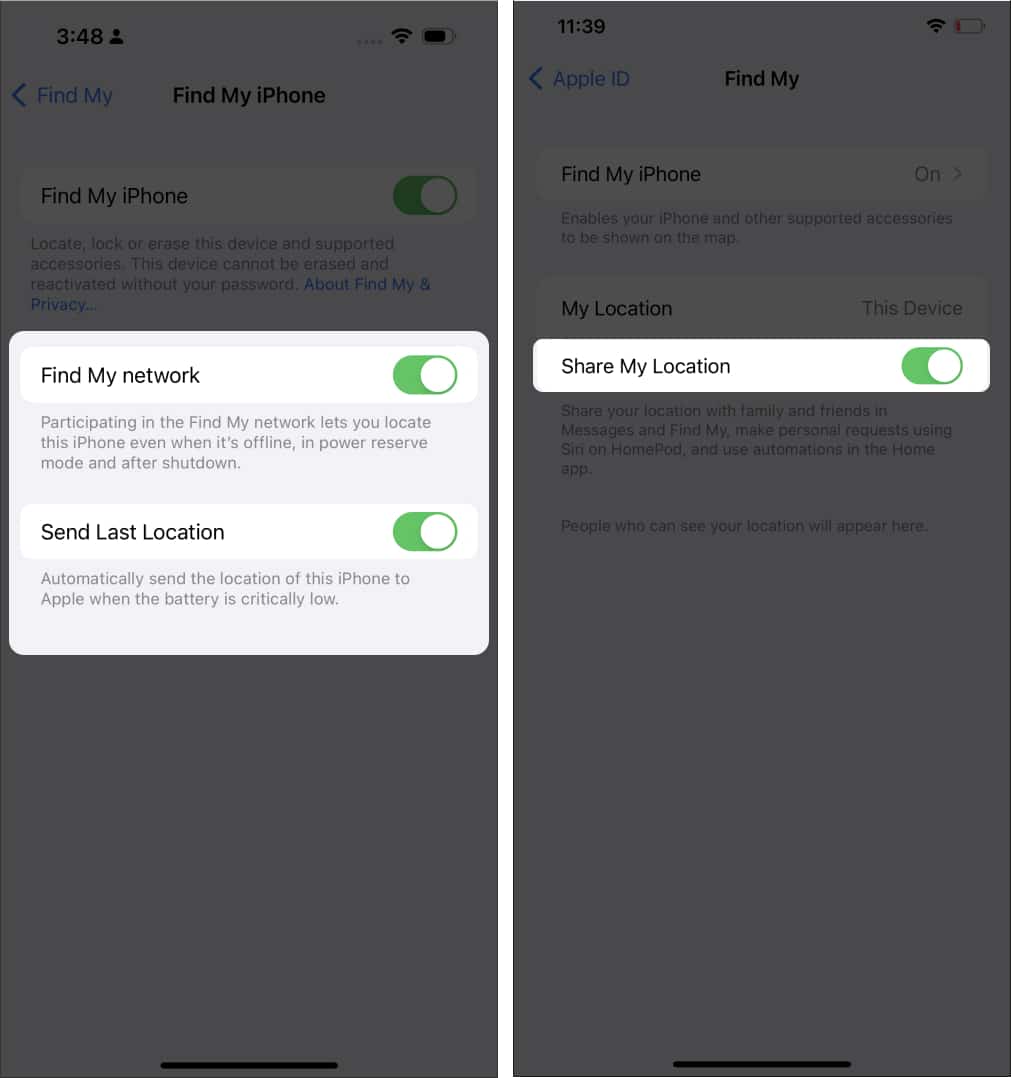
- Turn on the Find My Network and Send Last Location.
- Now, get back and toggle on Share My Location.
In this instance, you’ve successfully paired your device with the Find My app. Now, when you access the same from your iPhone or iCloud, your device will be listed among the other devices you might have paired earlier.
How to add a device to Find My on iPhone
As mentioned, every device signed with the same Apple ID will automatically be listed in the Find My app. However, if you still can’t find your device or are looking to add an AirTag to the app, then follow the below-mentioned steps:
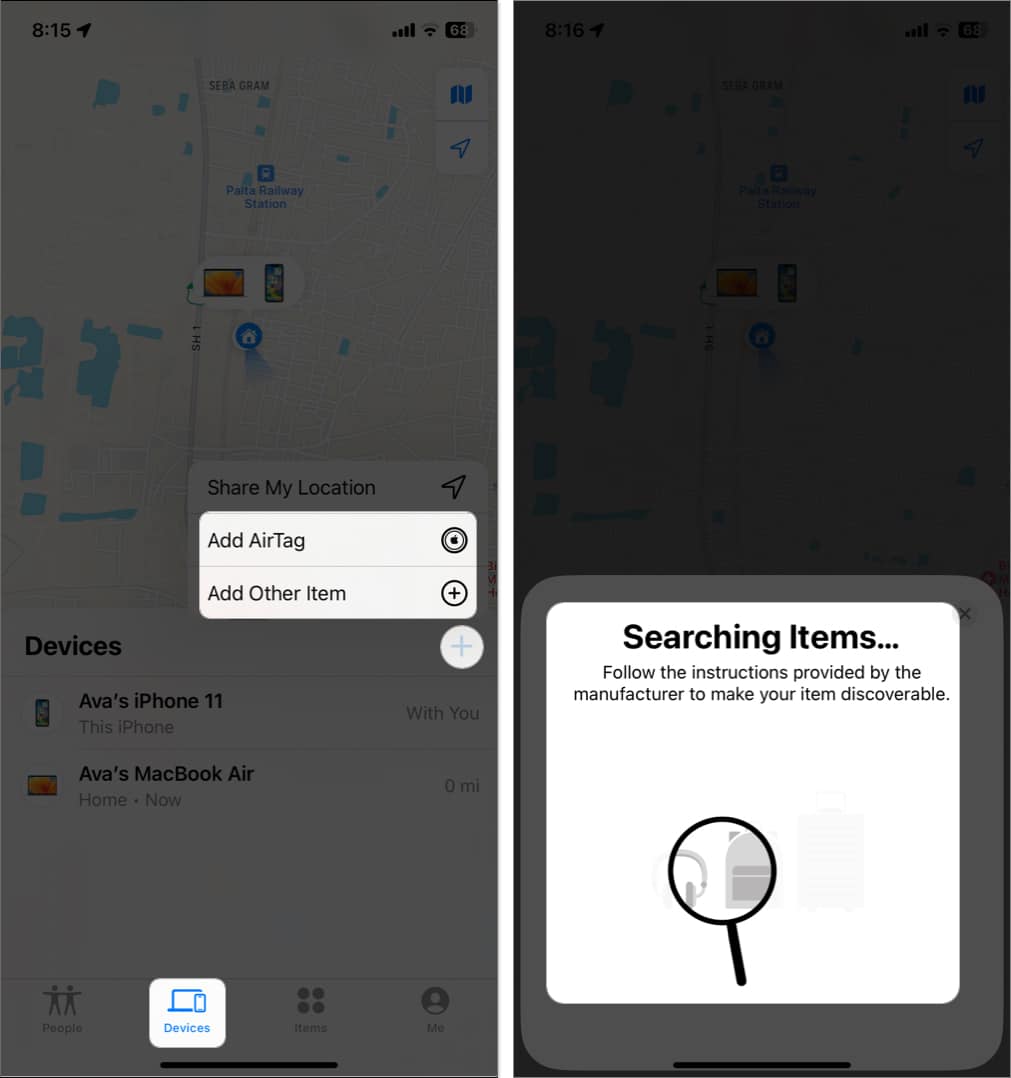
- Open the Find My app.
- Shift to Devices → Tap the plus icon → Select Add AirTag or Add Other Item.
- Wait for the scan to complete and identify your device.
- Tap your device and enter the password of your Apple ID.
- Now, your added device will appear on the Map.
Add an Apple Watch or AirPod to Find My app
Upon successfully setting up your device with the Find My app, there is no rocket science to pair the Apple Watch or AirPod with the same. The process is pretty simple and straightforward.
- Apple Watch: Simply follow the steps to pair your Apple Watch to your iPhone. As the watch is added and synced with your iPhone, it’ll automatically get listed among the paired devices in the Find My app.
- AirPod: Upon pairing the AirPods to your iPhone, you can observe the same in the Find My app.
How to remove a device from the Find My on iPhone
Before removing a device from the Find My feature, you must switch it off to go offline. For AirPods, put them back in the charging case and close the lid to turn it off.
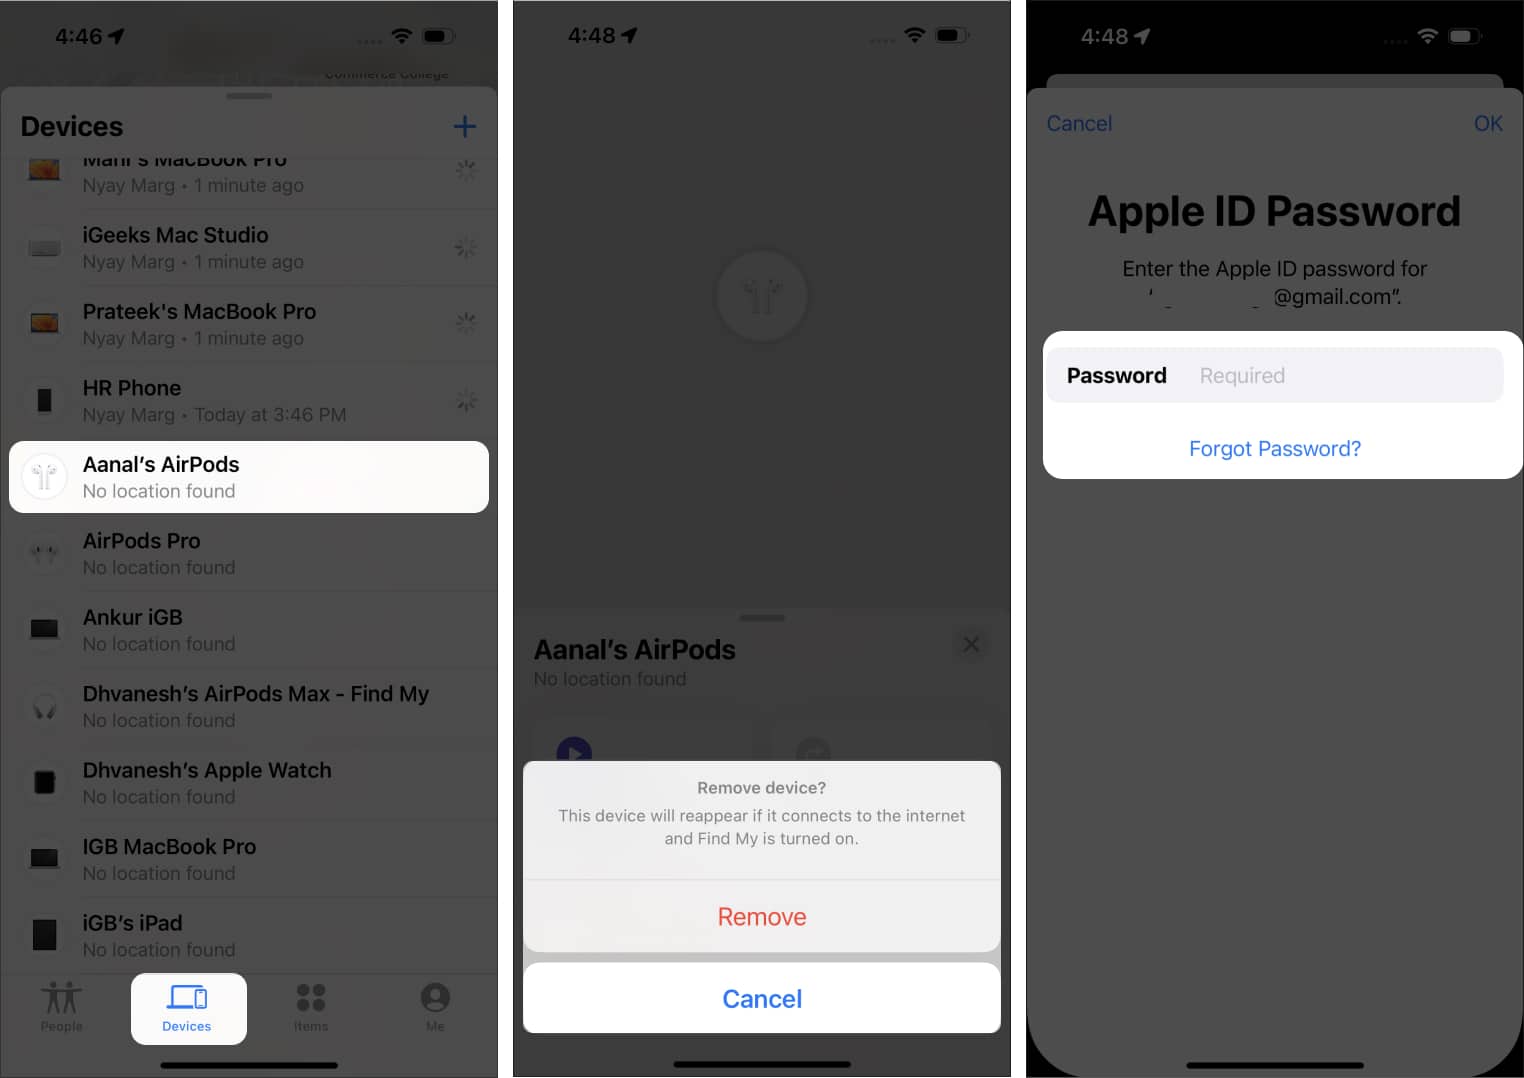
- Launch Find My → Select Devices → Choose the accessory you seek to remove.
I have opted for my AirPods. - Tap Remove This Device → Remove.
- Enter the Password of your Apple ID → Tap OK.
Your device will get unpaired from the Find My app. Also, you may turn off Find My on that device so it will not resurface in your Find My list after connecting to a network. However, you won’t be able to trace or remotely wipe the device.
Now, if you desire to sync the removed device with Find My again in the future, you’ll have to manually add the same in the app.
How to erase a device from the Find My iOS app
This feature is handy if you lose your device and want to protect your data from getting into the wrong hands. Also, in case of theft or robbery, you can save your personal information and all contents of the device by completely erasing it from the device.
- Launch Find My → Choose Devices.
- Select your device → Select Erase This Device.
- Tap Continue.

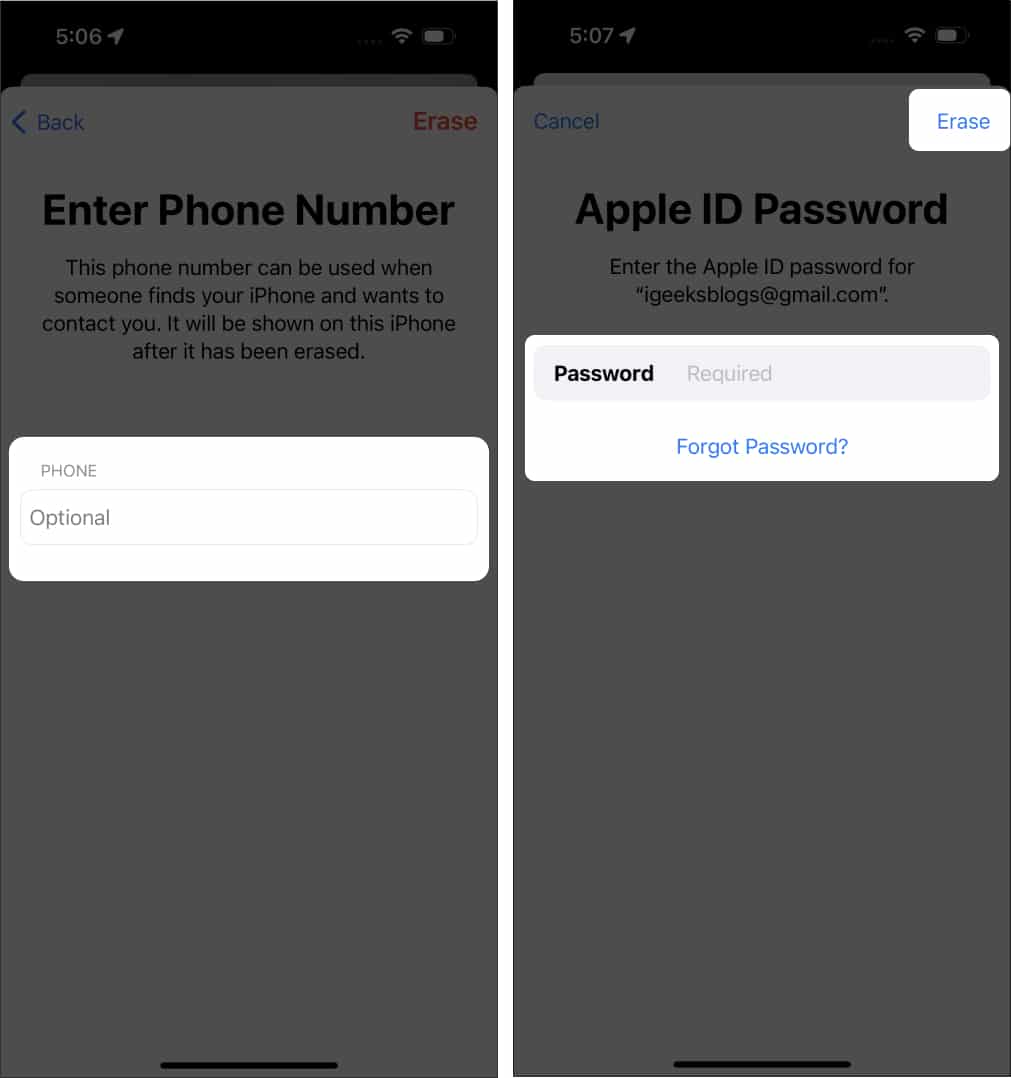
- Add your phone number if you feel it’s necessary or skip it → Hit Erase.
- Enter the Password of your Apple ID → Tap Erase.
However, erasing your device will not disconnect it from your Apple ID.
Remove added Apple devices via iCloud
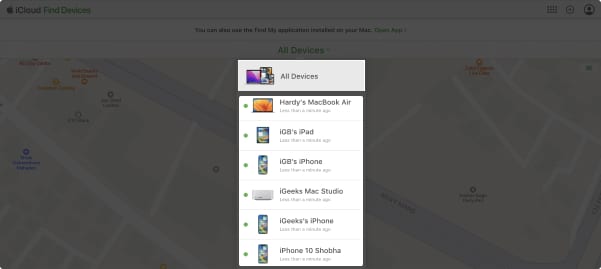
- Visit the official website of Find My.
- Click Sign In and enter your Apple ID and Password.
- Click My Devices to view a list of all connected devices.
- Select the device or accessory.
- As mentioned above, you can remove the same by disconnecting or erasing the device by following the on-screen instructions.
Fix common issues with Find My app
If Find my is not working properly, do the following:
- Ensure that your device is connected to a Wi-Fi or cellular connection and that the app is set to accurately show your location.
- Verify that you use the same Apple ID and iCloud account on your device and the Find My app. If not, switch to the same account and try again.
- Old versions of the Find My app may cause several issues. Go to the App Store, check for updates, and install them if available.
- You may not get notifications if the app’s permission to send notifications is disabled. Go to Settings and enable it.
- The cause of the battery drain may be preventing you from finding the device. Try putting it into Lost Mode to lock the device and receive notifications when it returns online.
No, if the device is turned off, the Find My app will fail to locate it.
No, you cannot add someone else’s device to the Find My app without their permission. Additionally, the device must use the same Apple ID as yours to be added to the Find My app.
Keep track of your device’s status!
The Find My App is a great tool to track your Apple devices, ensuring they’re always within reach. Whether you’re just starting to add devices to your account or want to remove a device you no longer own, follow the steps outlined in this article and keep everything organized.
Thank you for reading. Feel free to drop your concerns below.
Read more:
- Apple’s Find My network: How to use it and opt out of it
- How to erase your Mac remotely using Find My or non-Apple devices
- How to share your location from Apple Watch
- How to turn on Stolen Device Protection on iPhone
Author
🗣️ Our site is supported by our readers like you. When you purchase through our links, we earn a small commission. Read Disclaimer.