At times, you may come across a situation when your iPhone is connected to Wi-Fi, but there is no internet access. You will even notice the Wi-Fi icon at the top of your screen, signifying everything is fine. However, when you open the Settings app and tap Wi-Fi, you may see ‘No Internet Connection’. At times, you may not even get this error message. Still, Wi-Fi won’t work. The following are eight ways to fix it.
- Turn OFF/ON Wi-Fi on iPhone
- Enable Airplane Mode and Disable it on iPhone
- Restart Your iPhone and Wi-Fi Router
- Forget Wi-Fi and Reconnect It
- Switch Off Wi-Fi Assist
- Check Location Services
- Disable VPN
- Reset All Network Settings
1. Turn OFF/ON Wi-Fi on iPhone
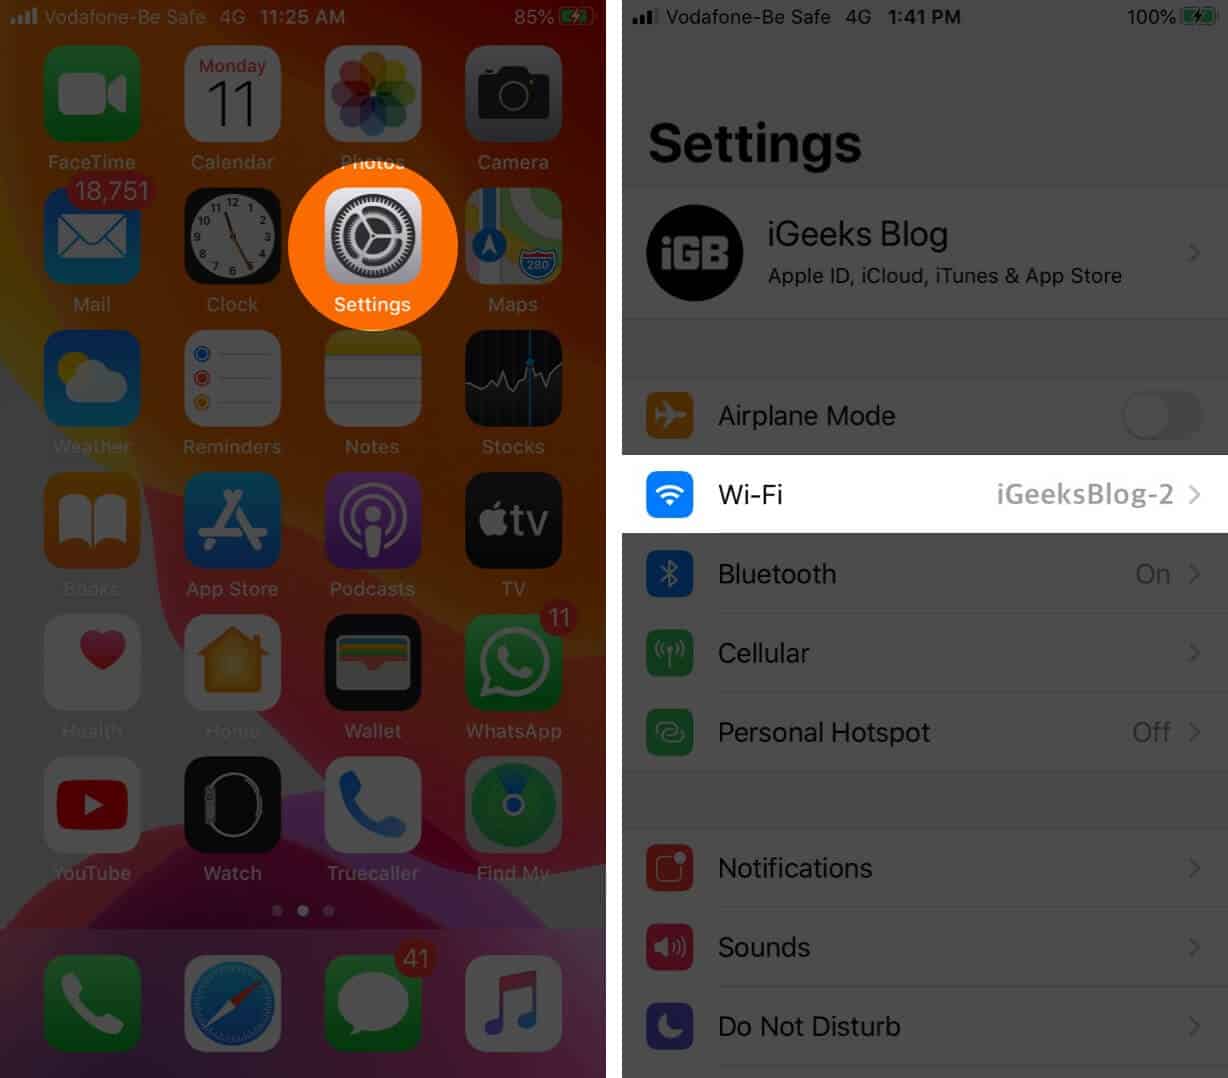
The first basic thing to do is to turn off Wi-Fi and turn it back on. For this do not use the Control Centre. Instead, open the Settings app, tap on Wi-Fi
Turn Off the toggle for Wi-Fi.
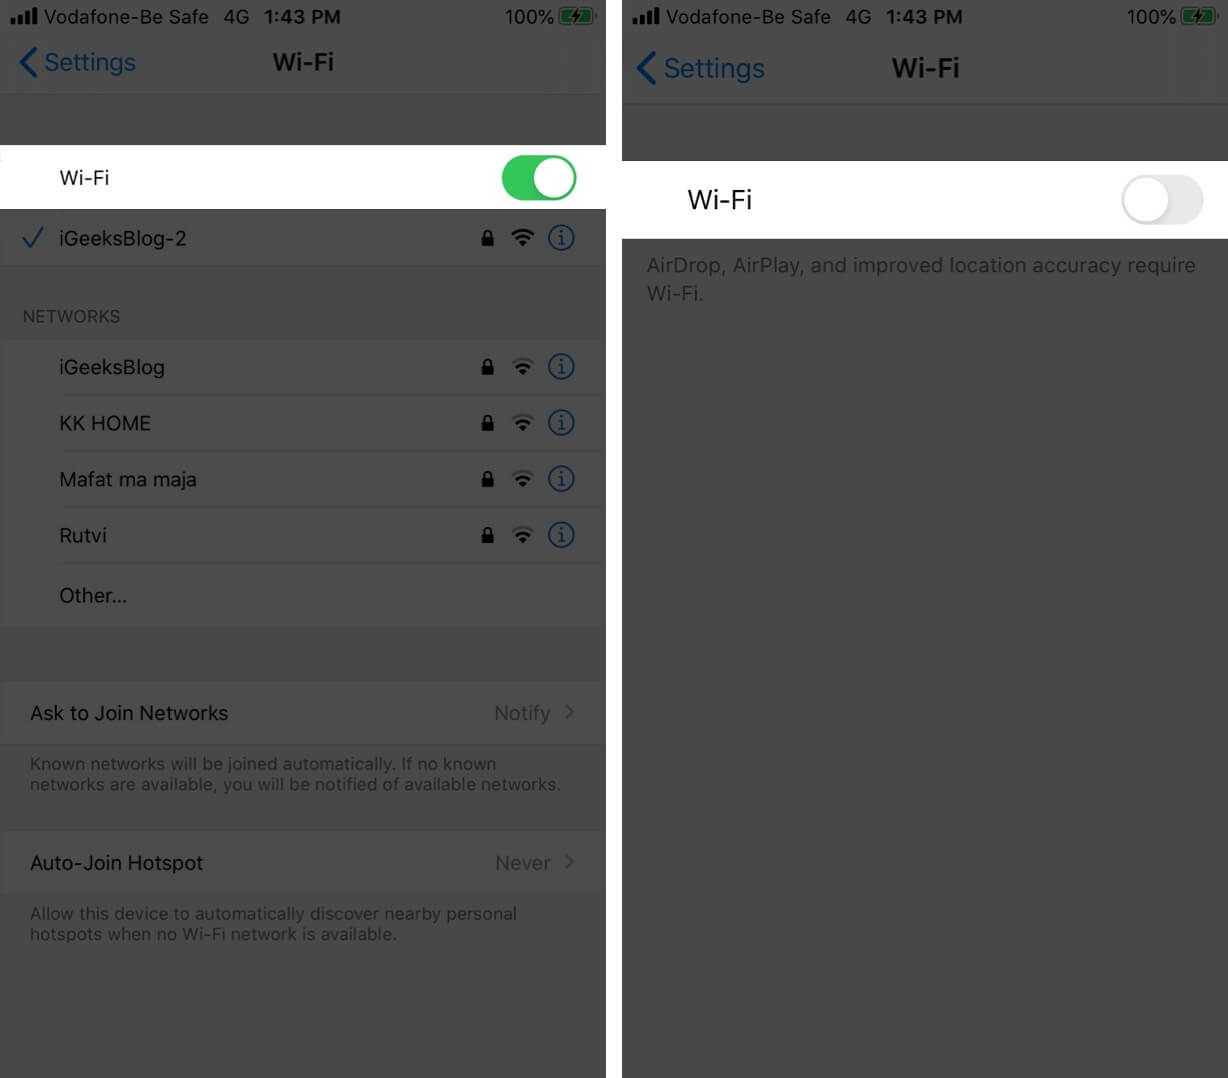
After a minute, tap the same toggle and let your iPhone connect to the Wi-Fi network.
Next, open Safari and try to visit a site like Google or Wikipedia. If it doesn’t load, move on to the next solutions.
2. Enable Airplane Mode and Disable it on iPhone
This is again a simple solution akin to the first one. For this, you can use the Control Centre or open the Settings app and tap on Airplane Mode toggle to enable it. After 30 seconds, tap it again to disable Airplane mode.
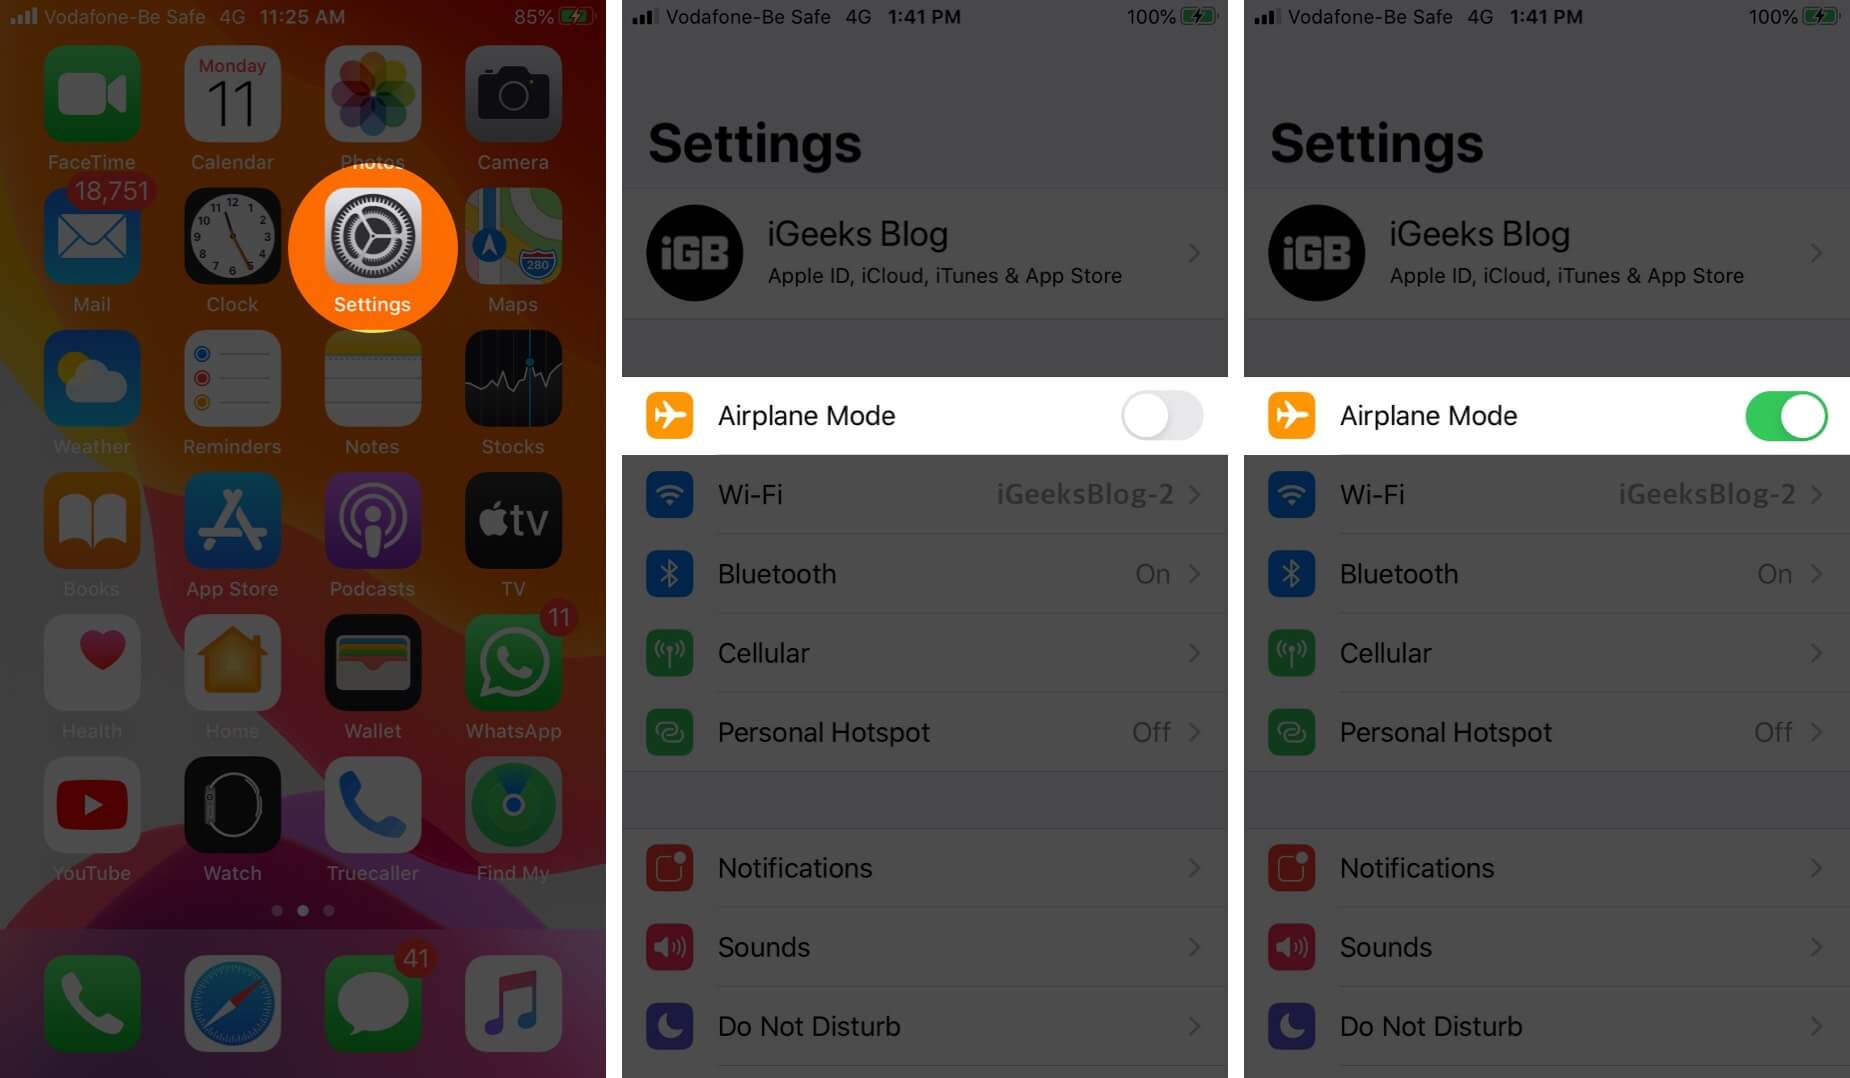
Once your iPhone reconnects to Wi-Fi, try visiting a website and see if it loads or not.
3. Restart Your iPhone and Wi-Fi Router
Open the Settings app → General, and then tap Shut Down.
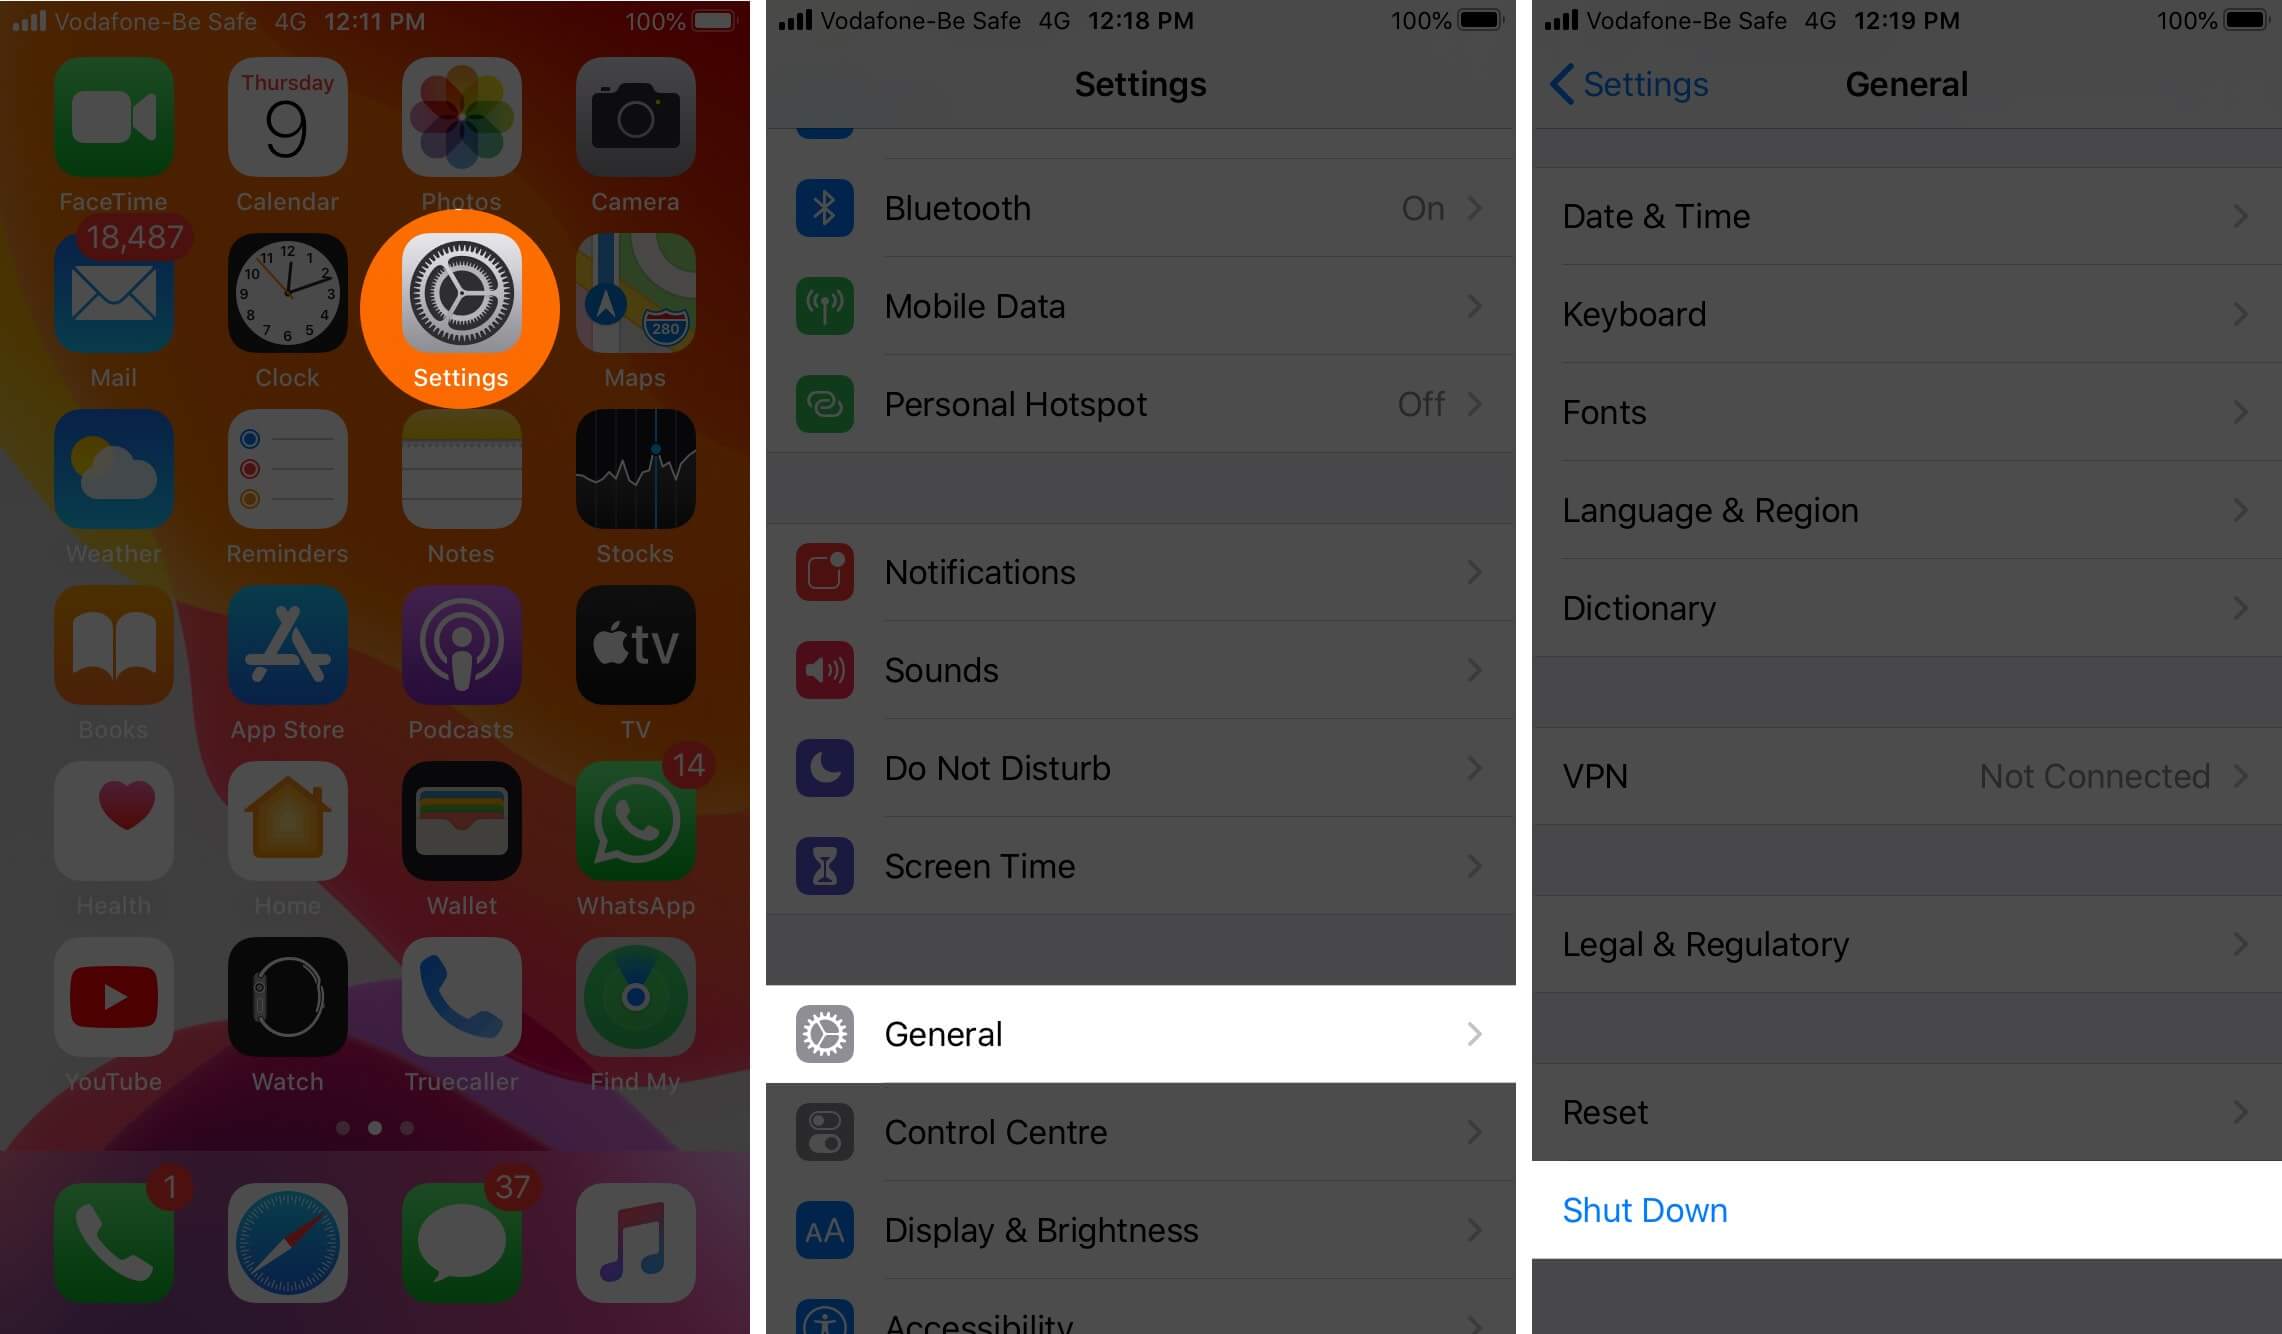
Next, use the physical button on your router or use the main wall switch to power off your Wi-Fi router.
After a minute, switch on your iPhone and router. Most likely, the Wi-Fi issues will no longer be there.
4. Forget Wi-Fi and Reconnect It
Before following this step, make sure you know the Wi-Fi password. If you do not know it, then skip this solution for the moment and read the next ones.
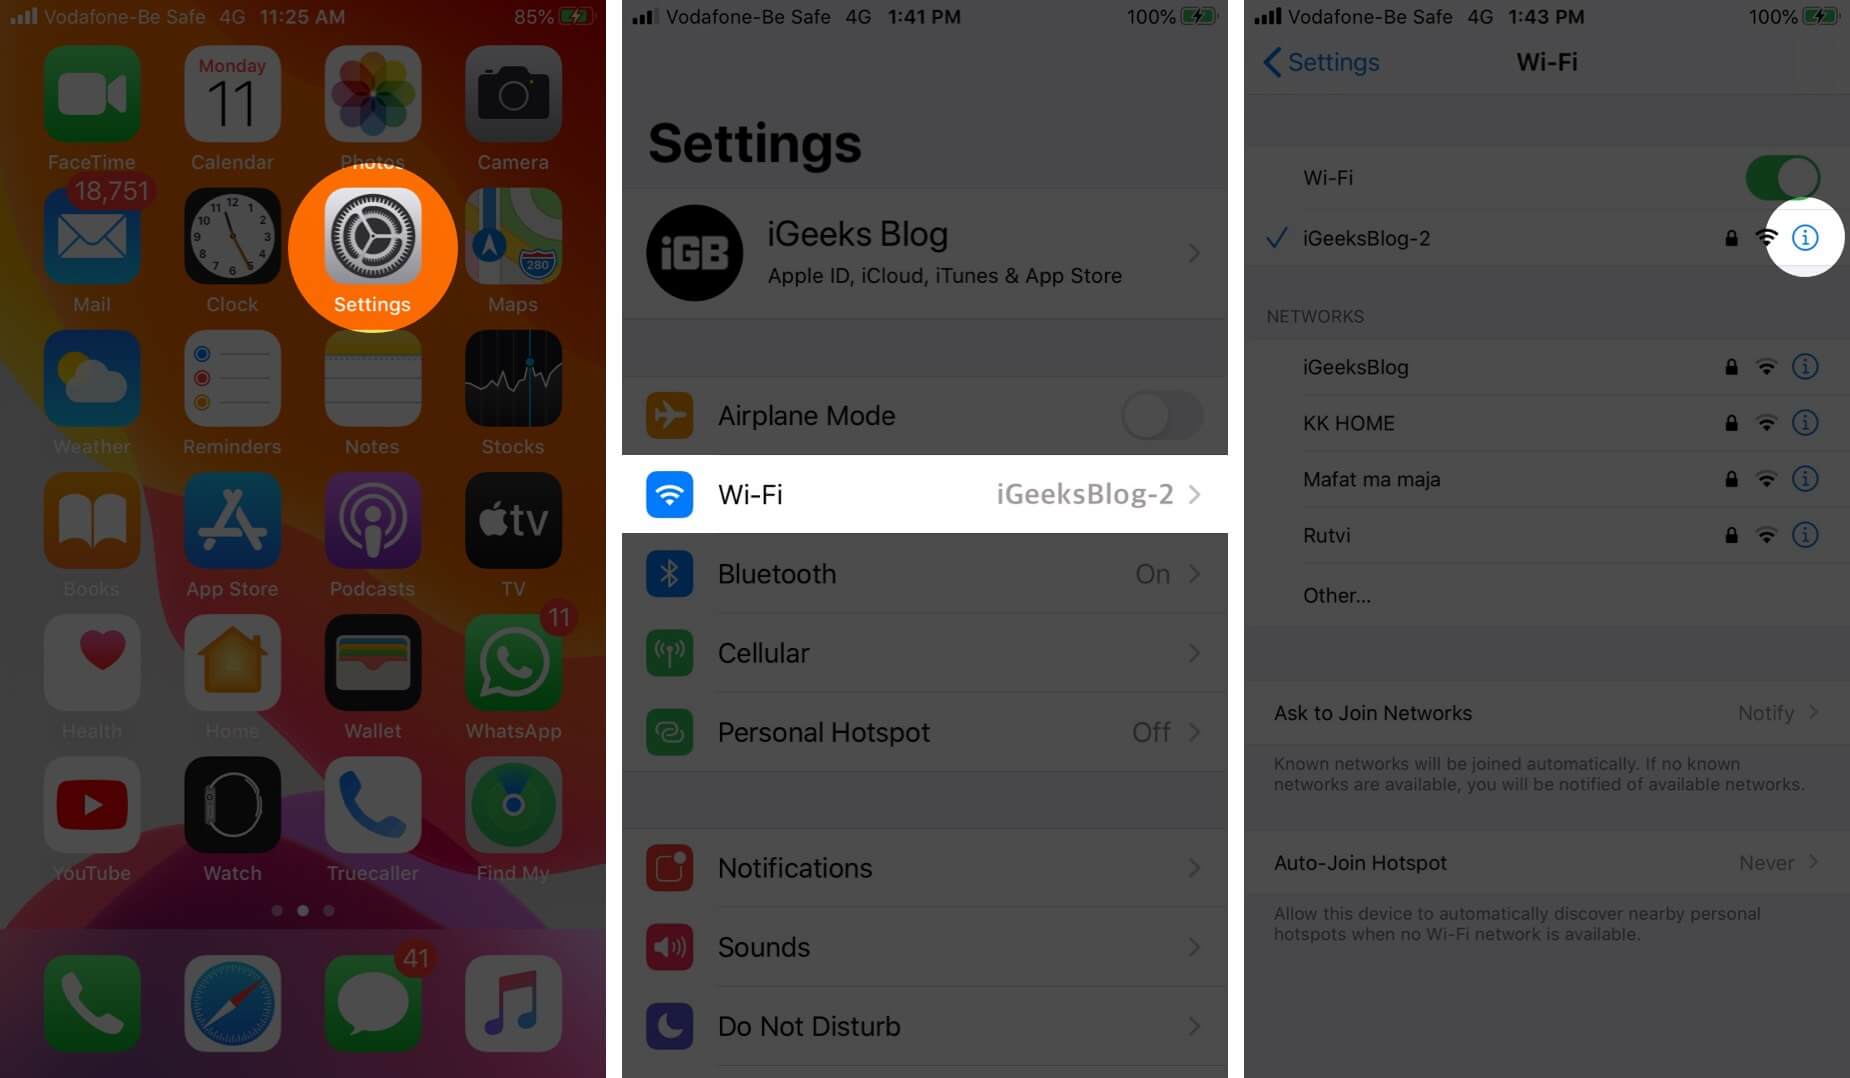
Step #1. Open the Settings app on your iPhone.
Step #2. Tap on Wi-Fi.
Step #3. Tap on (i) next to the Wi-Fi name.
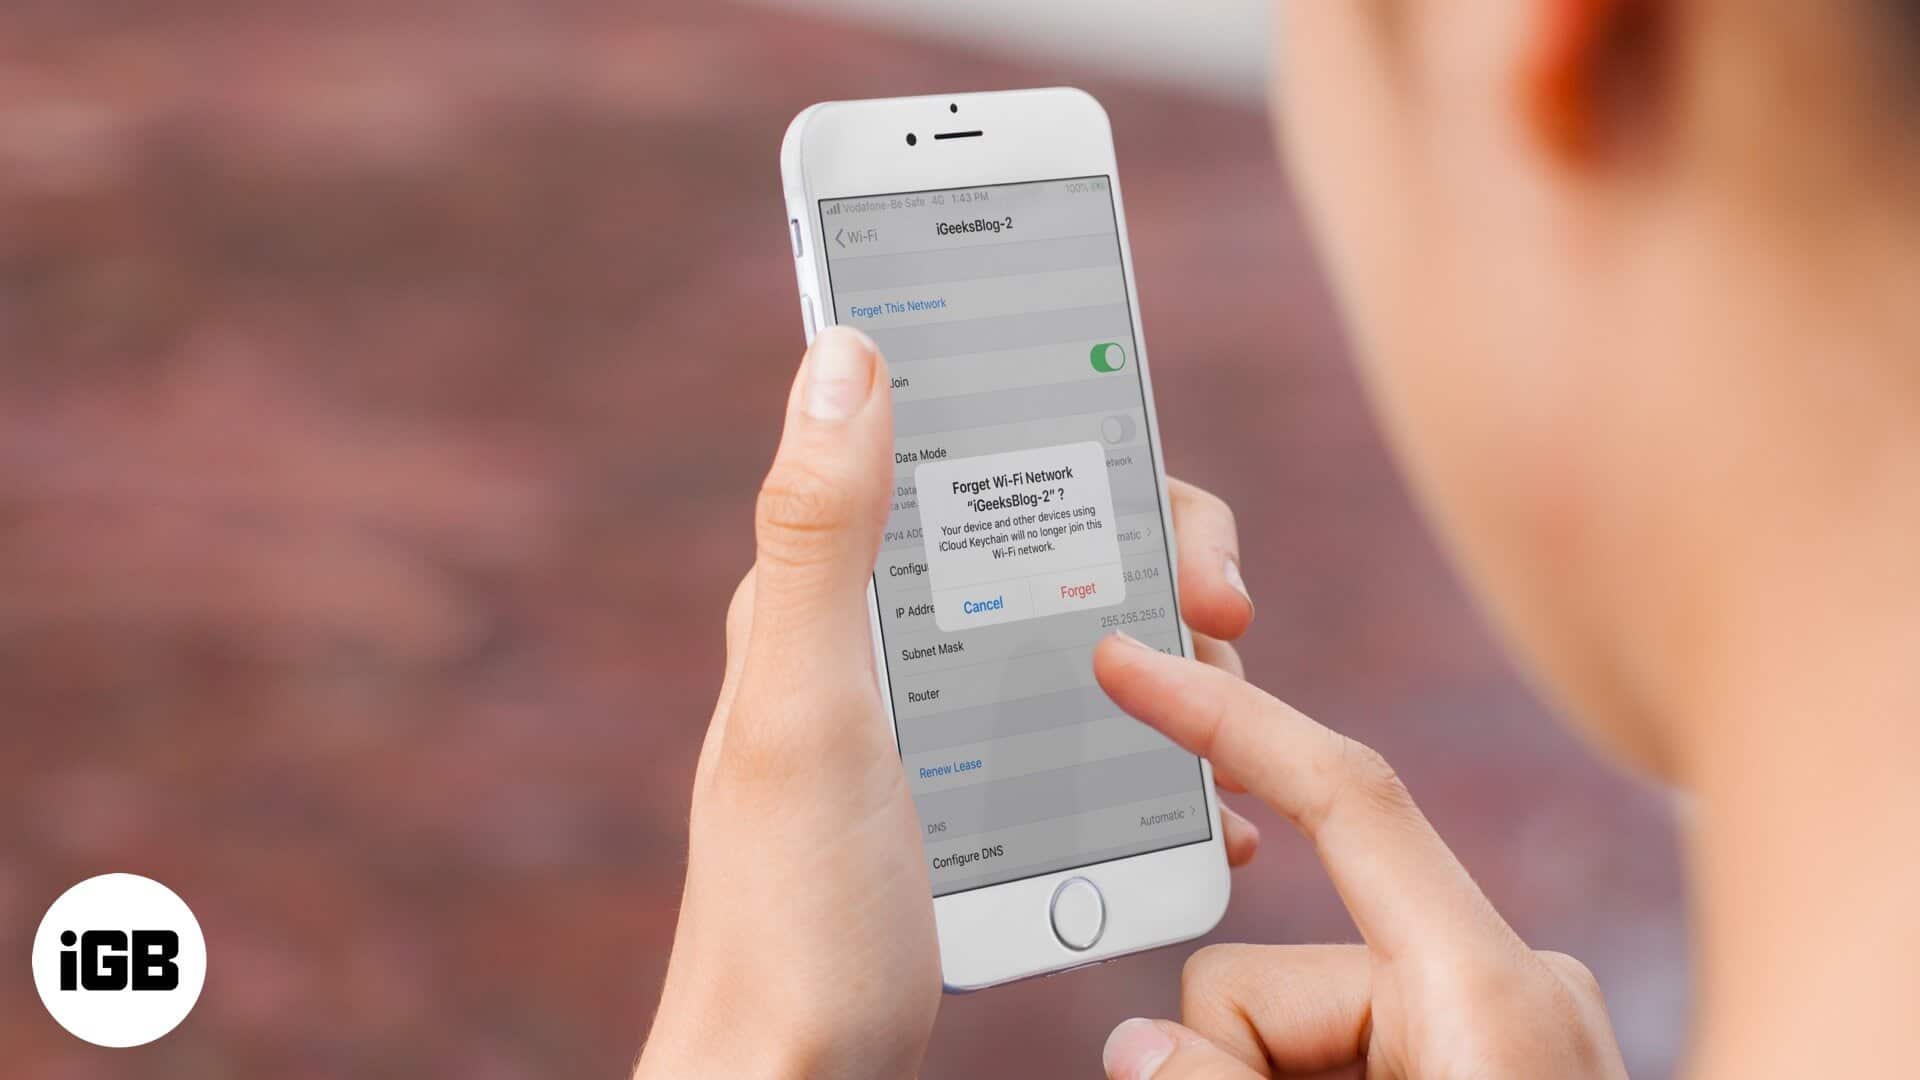
Step #4. Tap on Forget This Network and confirm.
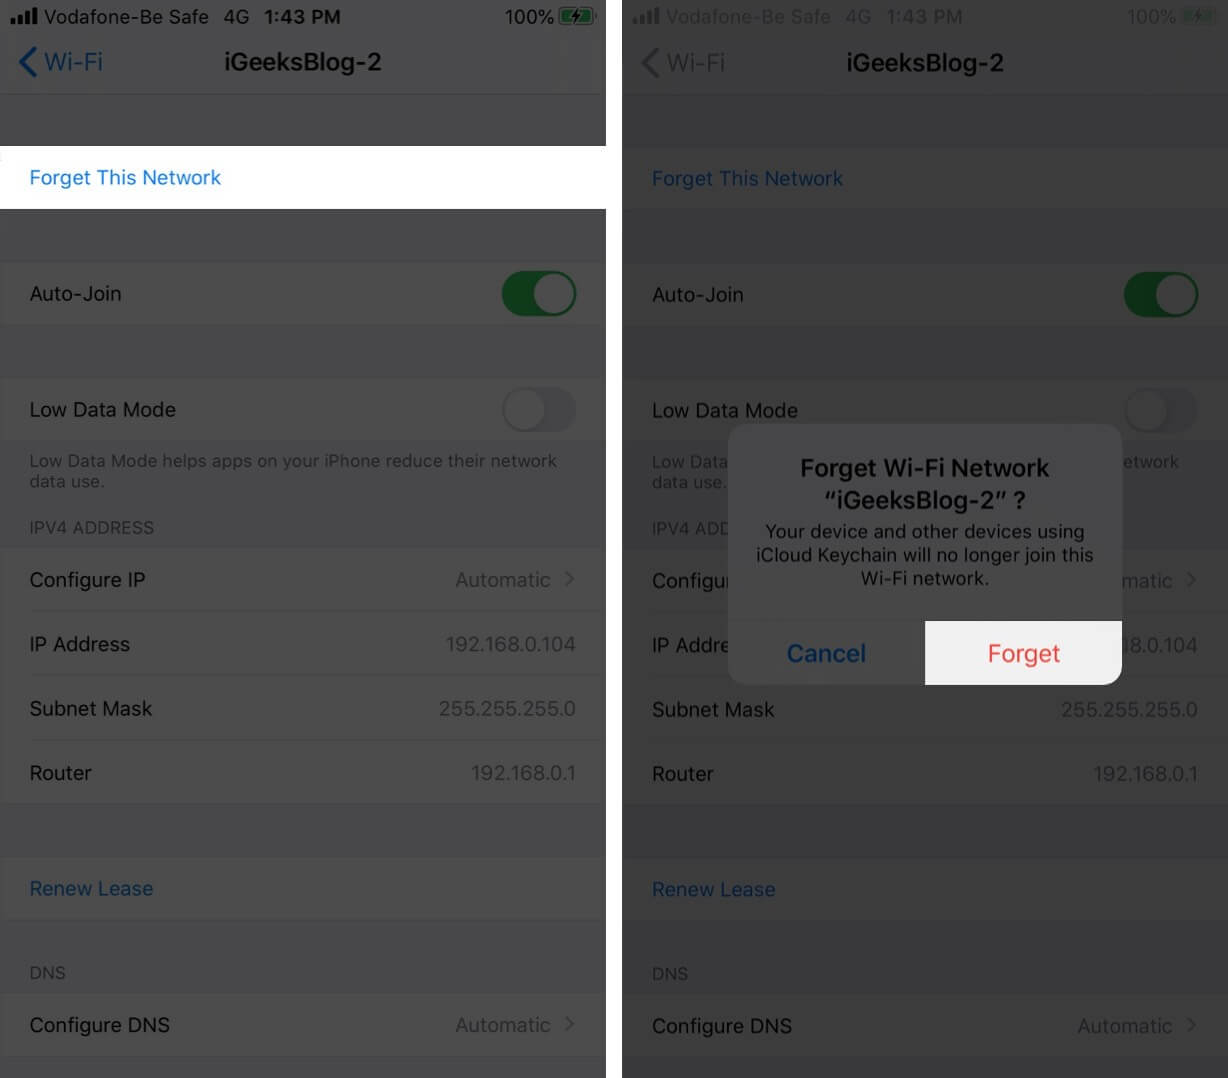
Step #5. Next, tap on the Wi-Fi name from the list of NETWORKS, enter the password and reconnect it.
5. Switch Off Wi-Fi Assist
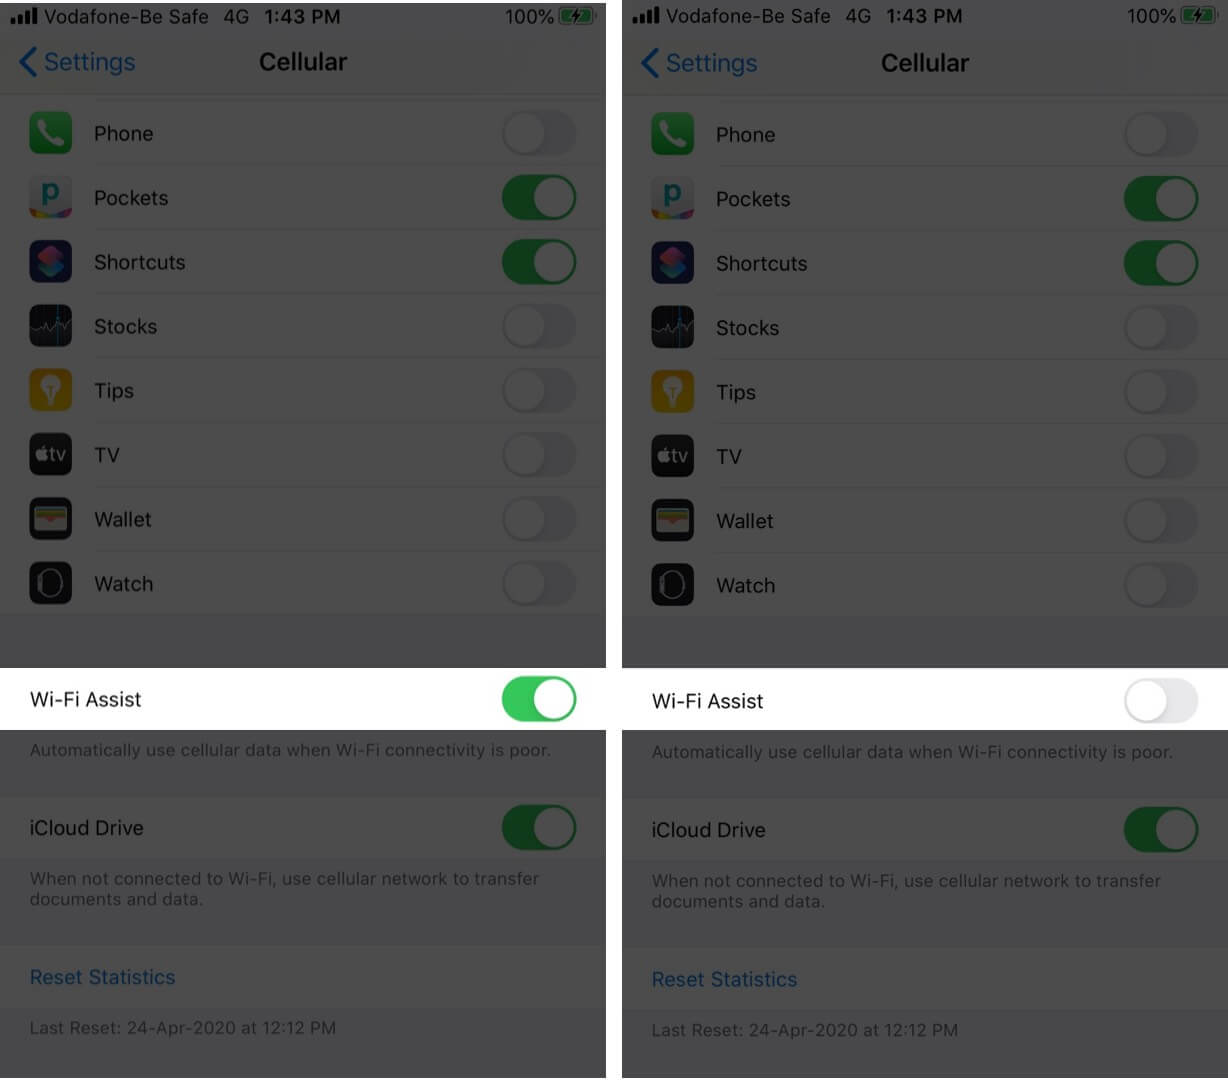
Wi-Fi Assist automatically uses cellular data when Wi-Fi connectivity is poor. At times this may cause some hindrance in proper working of Wi-Fi. So go ahead and switch off this feature.
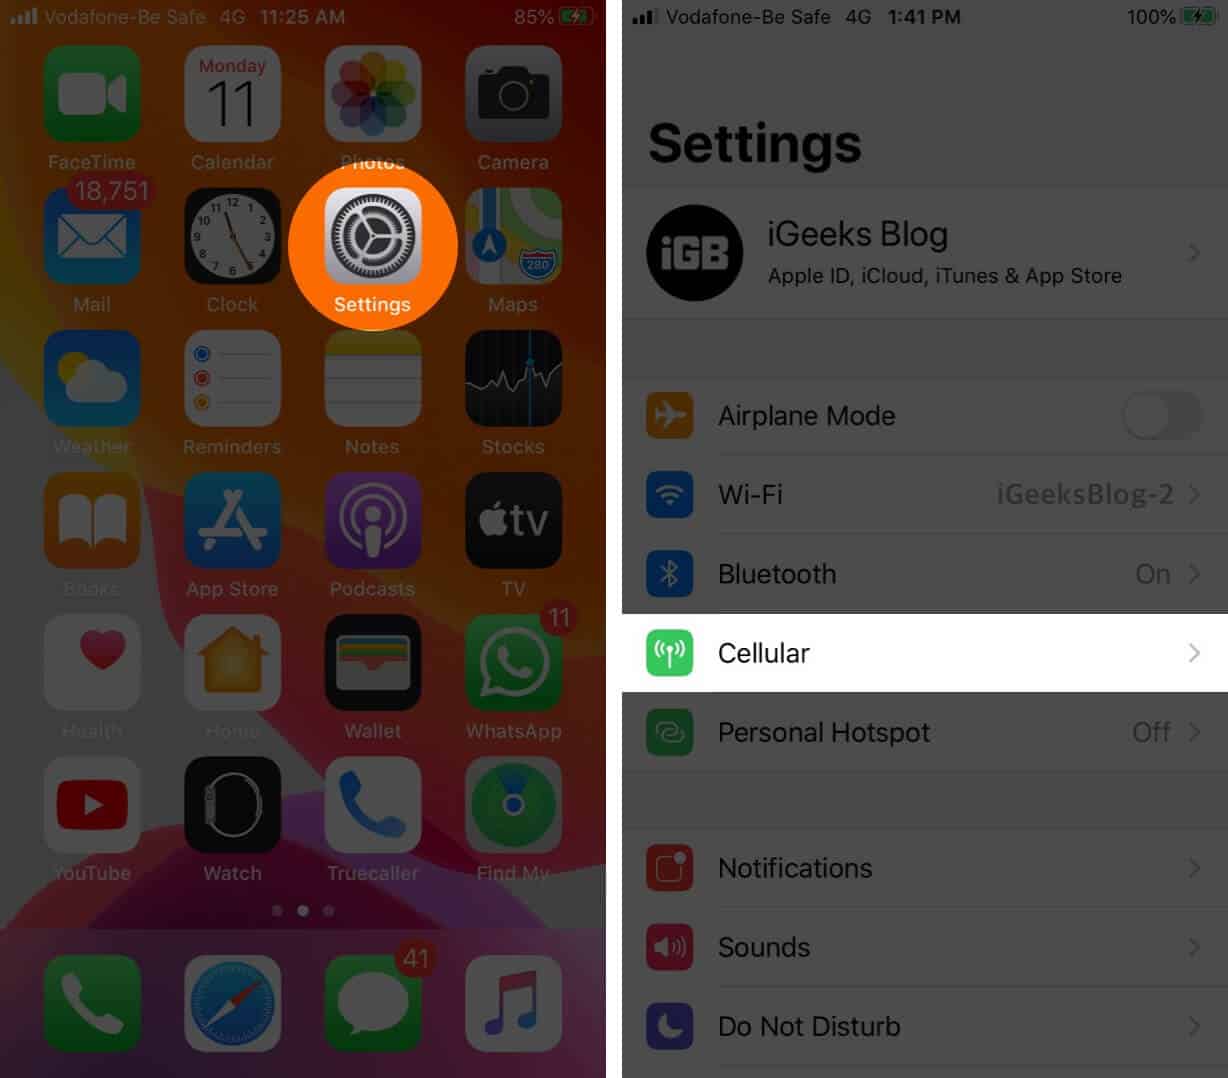
Step #1. Open the Settings app on your iPhone and tap on Cellular.
Step #2. Scroll to the end and turn off Wi-Fi Assist.
6. Check Location Services
At times, and in some places, your iPhone needs Location Access for the proper functioning of Wi-Fi. Let us ensure that the appropriate location setting is enabled for Wi-Fi.
Step #1. Open the Settings app on your iPhone and tap Privacy.
Step #2. Tap on Location Services.
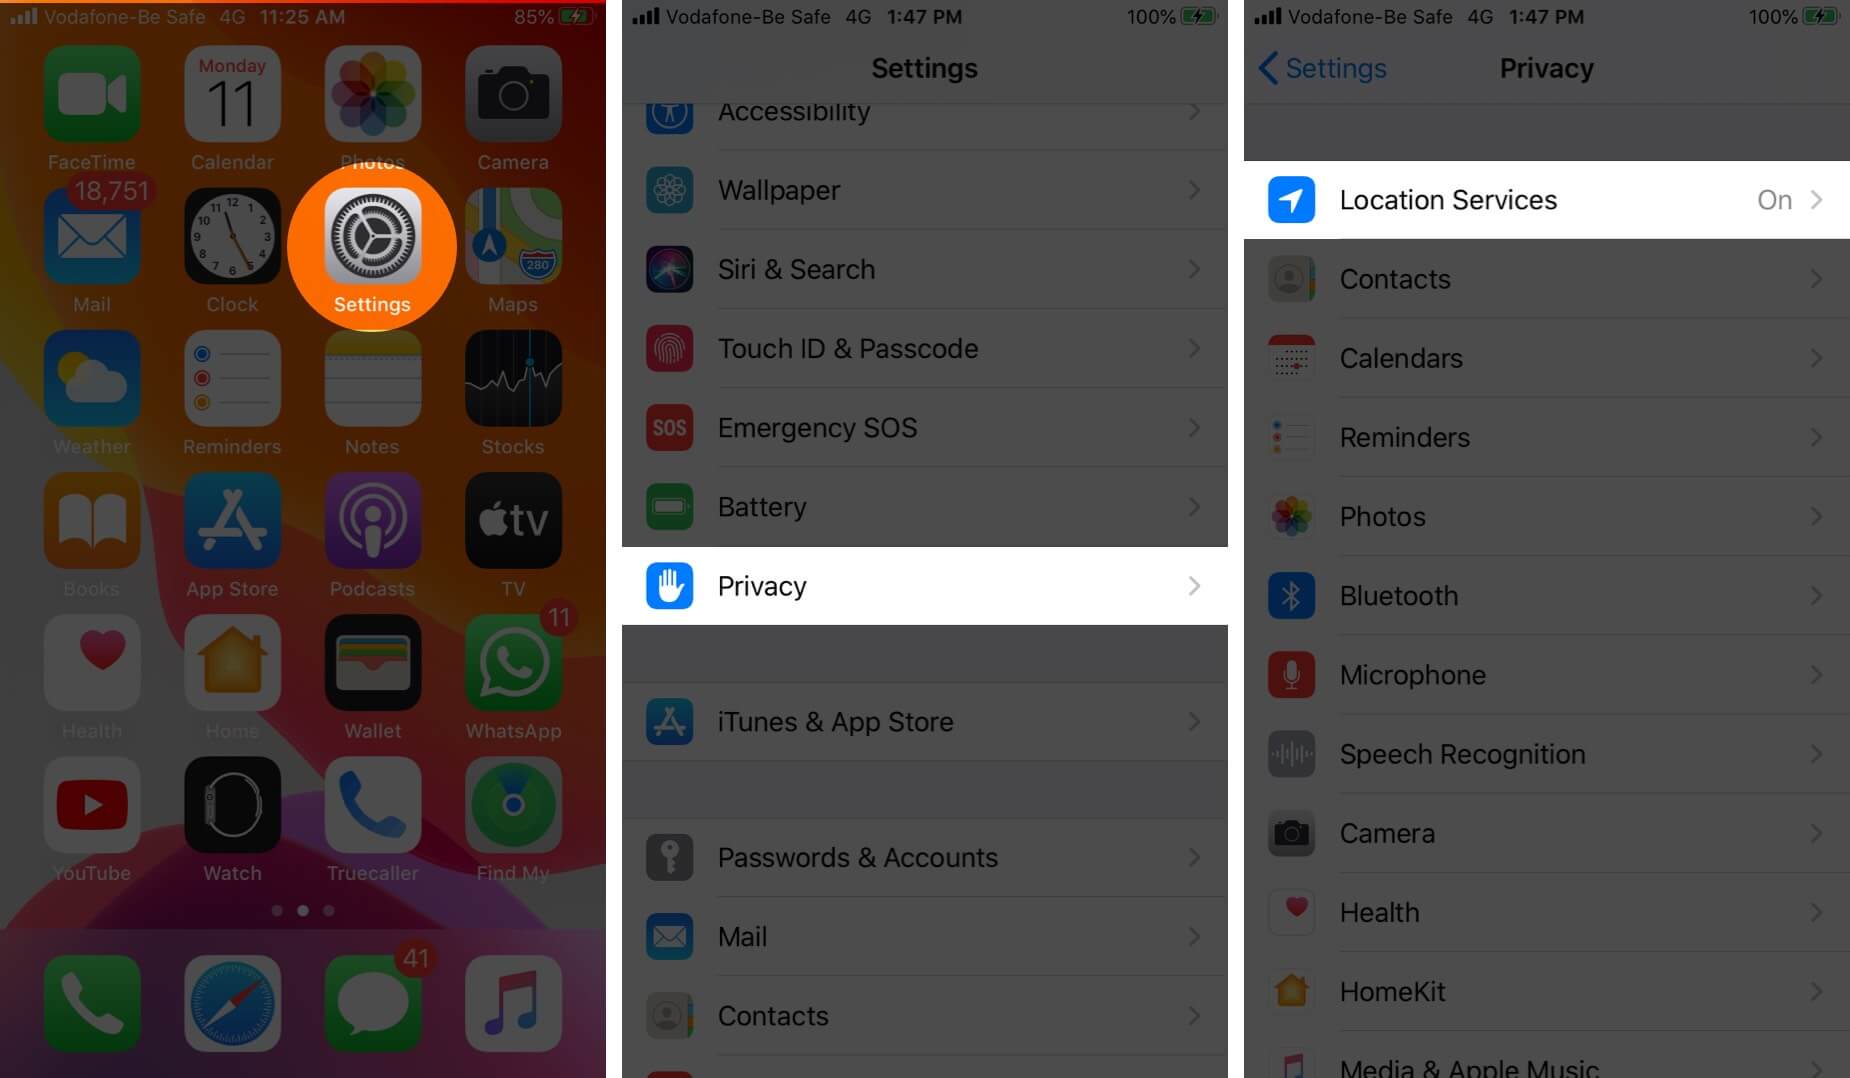
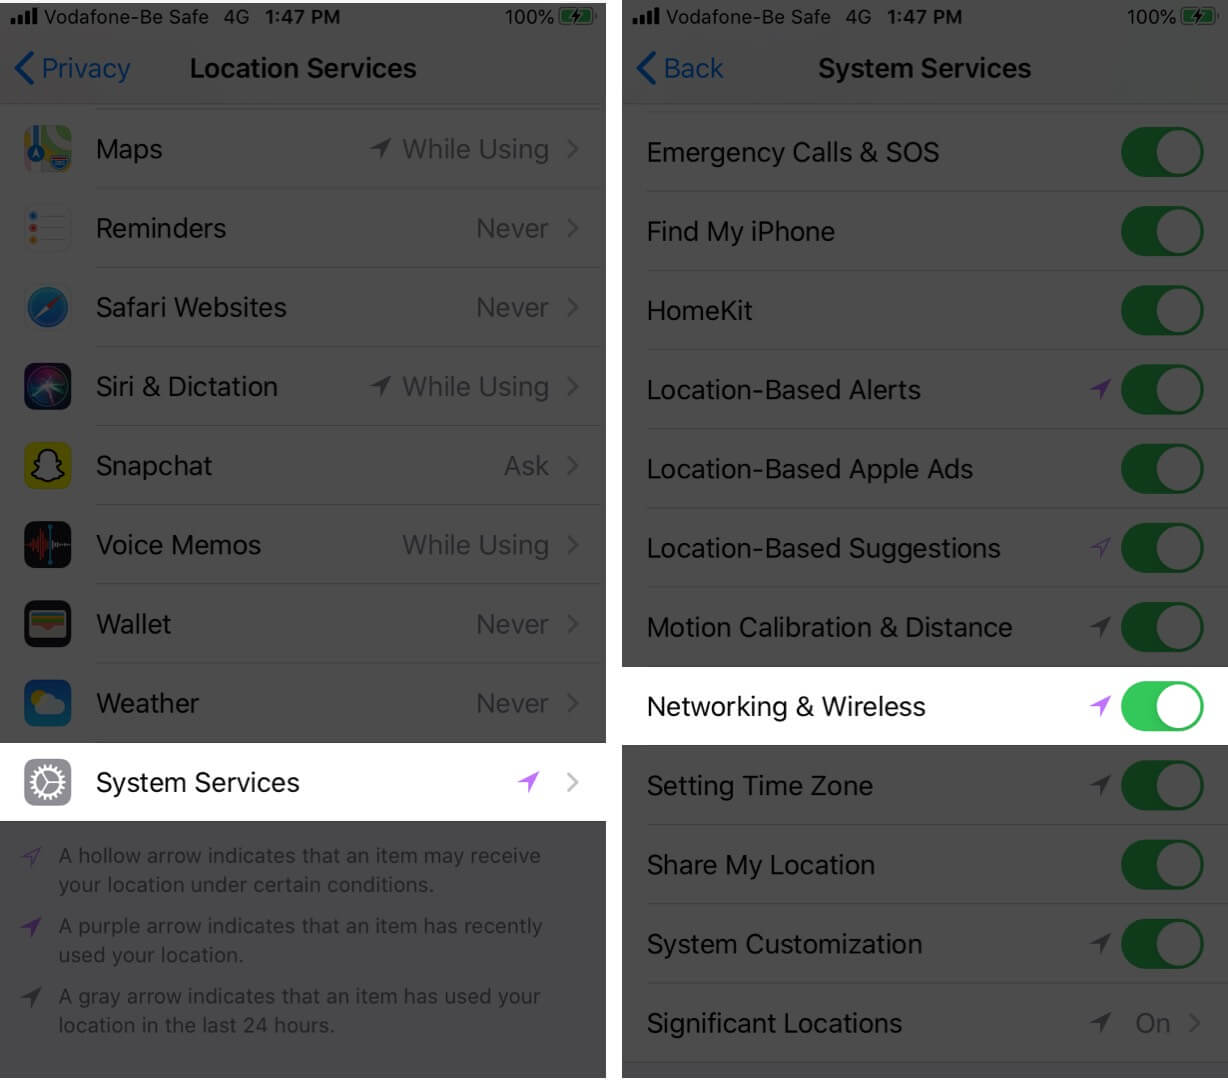
Step #3. Tap on System Services.
Step #4. Make sure the toggle for Networking & Wireless is enabled.
7. Disable VPN
In rare situations, a VPN may cause issues with the Wi-Fi connection on your iPhone. If you have a VPN enabled, open the VPN app and turn it off. You may also open the Settings app and tap on the VPN toggle.
Additionally, if you have many unnecessary VPN apps, try uninstalling a few. This will also delete their VPN profiles.
8. Reset All Network Settings
Step #1. Open the Settings app and tap on General.
Step #2. Tap on Reset.
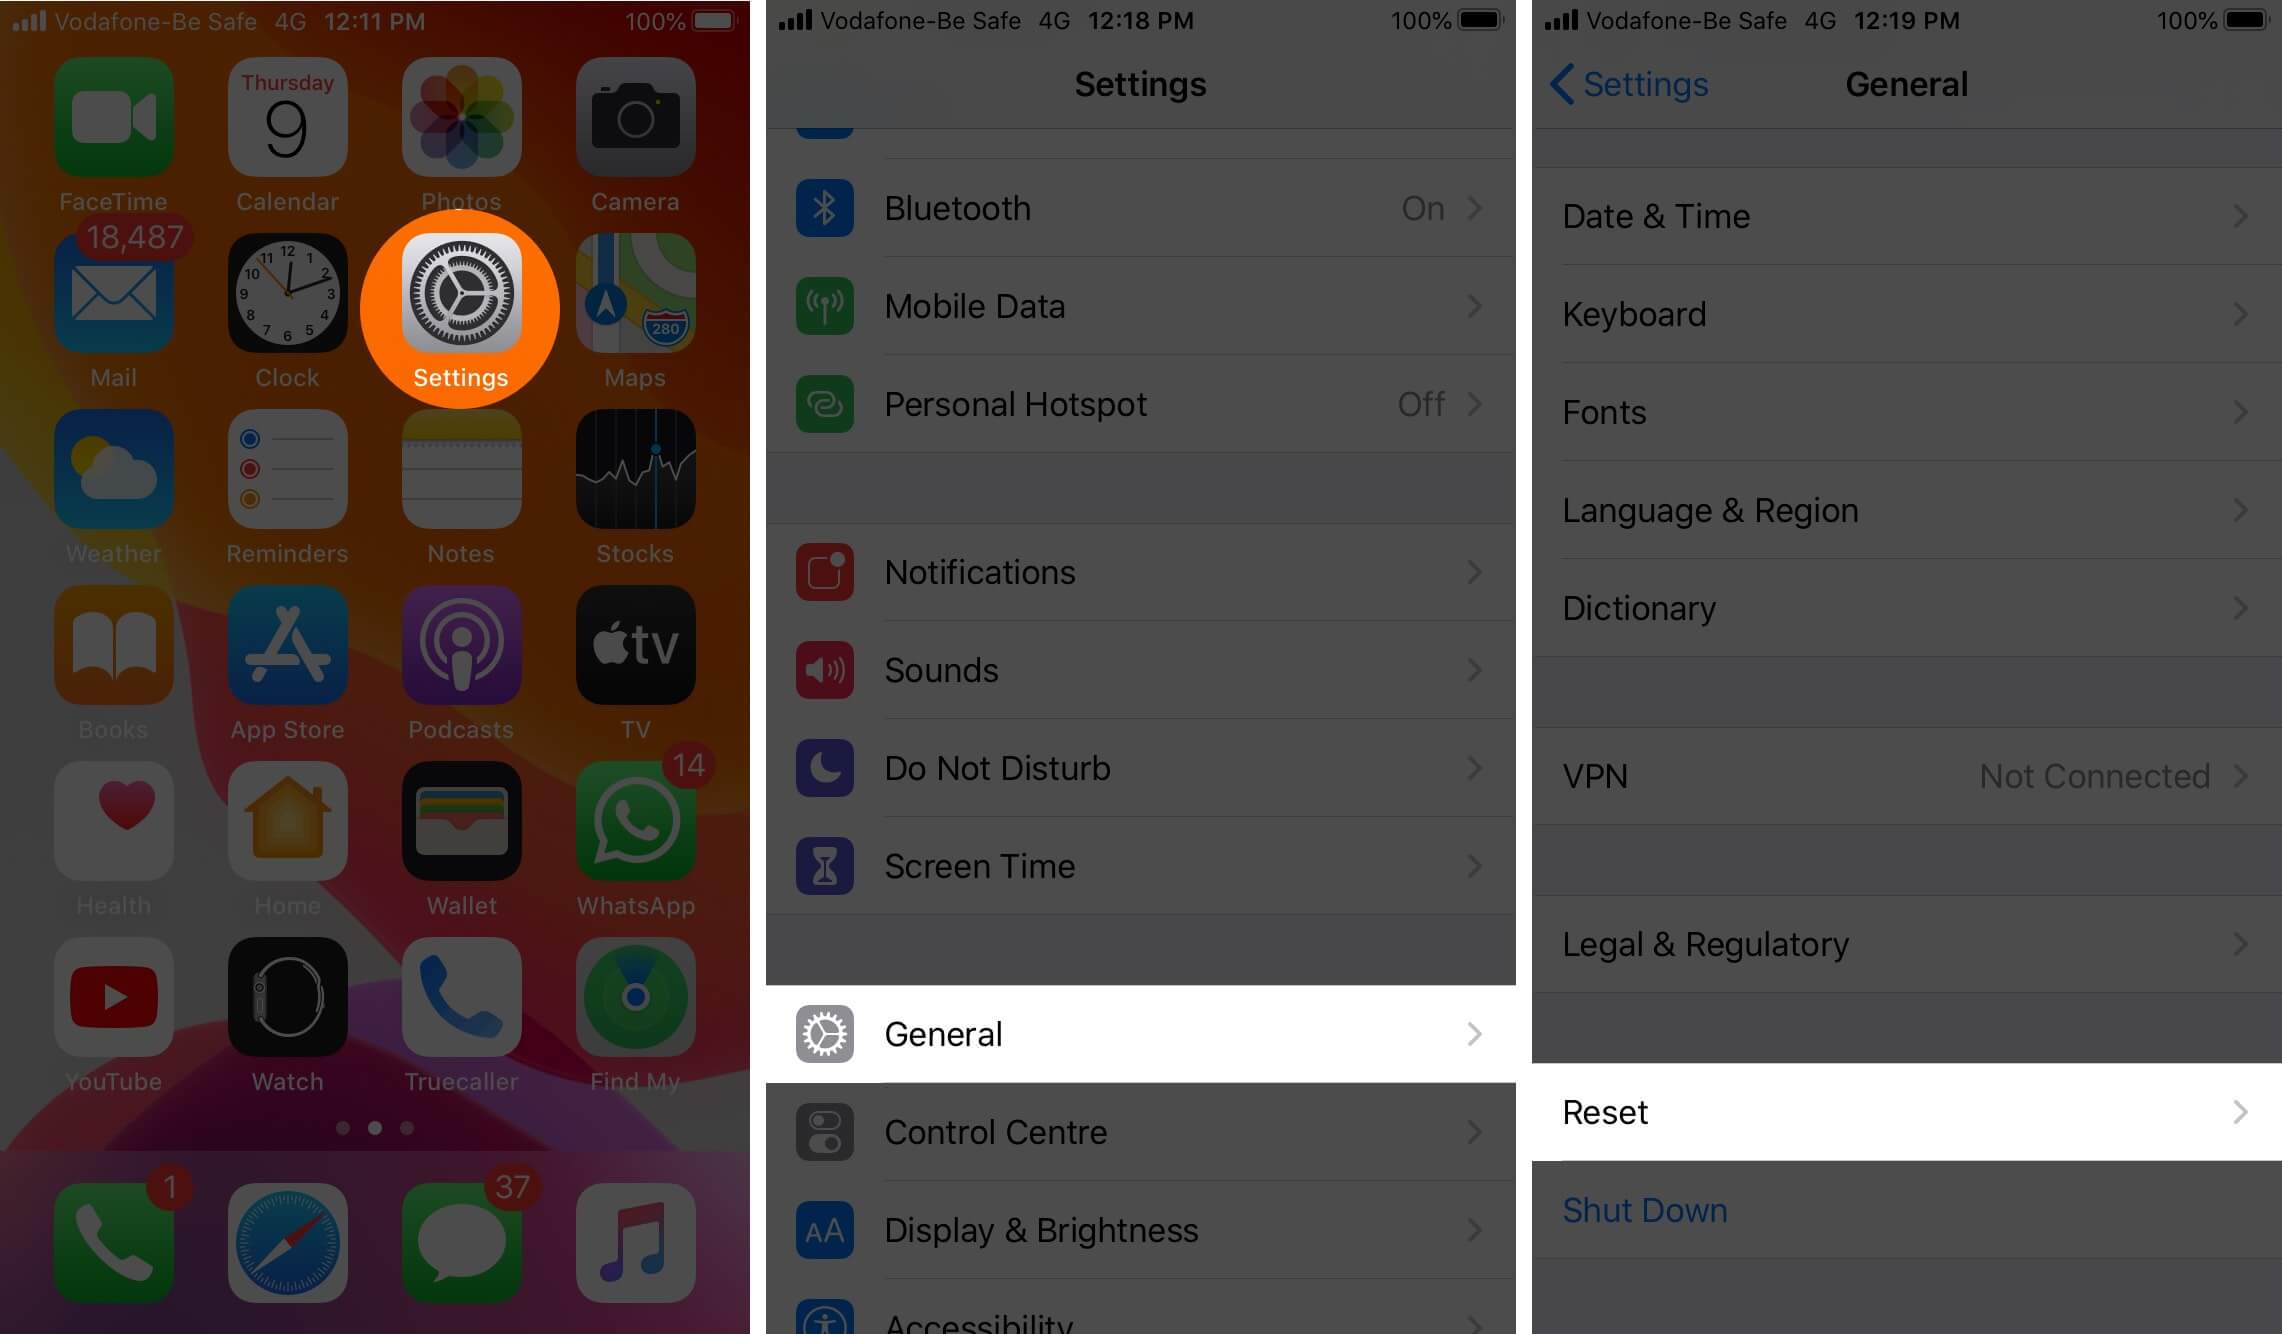
Step #3. Tap on Reset Network Settings.
Step #4. Enter your iPhone’s passcode and confirm.
After the process ends, reconnect to Wi-Fi, and it will most likely work like a charm.
Summing Up
I hope one or a combination of these solutions worked for you. Finally, if nothing helps, you may try to change the DNS on your iPhone. That might do the trick. Also, did you know that it’s possible to automatically turn off Wi-Fi on your iPhone or iPad when you leave home? If you’re looking for any more help with your iOS devices, let us know in the comments below.
You would like to read these posts as well:



Leave a Reply