Gone are the days when you used the Safari feature “pinch-to-zoom” to increase the font size of a website on iPhone or iPad. With the latest features of iOS 13, Safari has got revamped! Right from managing your downloads to closing Safari tabs automatically, it just got easier to use Safari. And now, to make the text bigger on Safari is not a pinch-to-zoom game anymore!
While you can still read the content by zooming in or zooming out, you need to scroll either way as it doesn’t fit on your screen. But with the recent changes in Safari, you don’t need to scroll or zoom in to increase the font size of a website on the iPhone or iPad. Today, I am going to share a simple method through which you can make the text bigger on Safari.
How to Make Text Bigger in Safari on iPhone and iPad
Step #1. Launch Safari app on iPhone and open a website of your choice, say, for example, iGeeksBlog.com
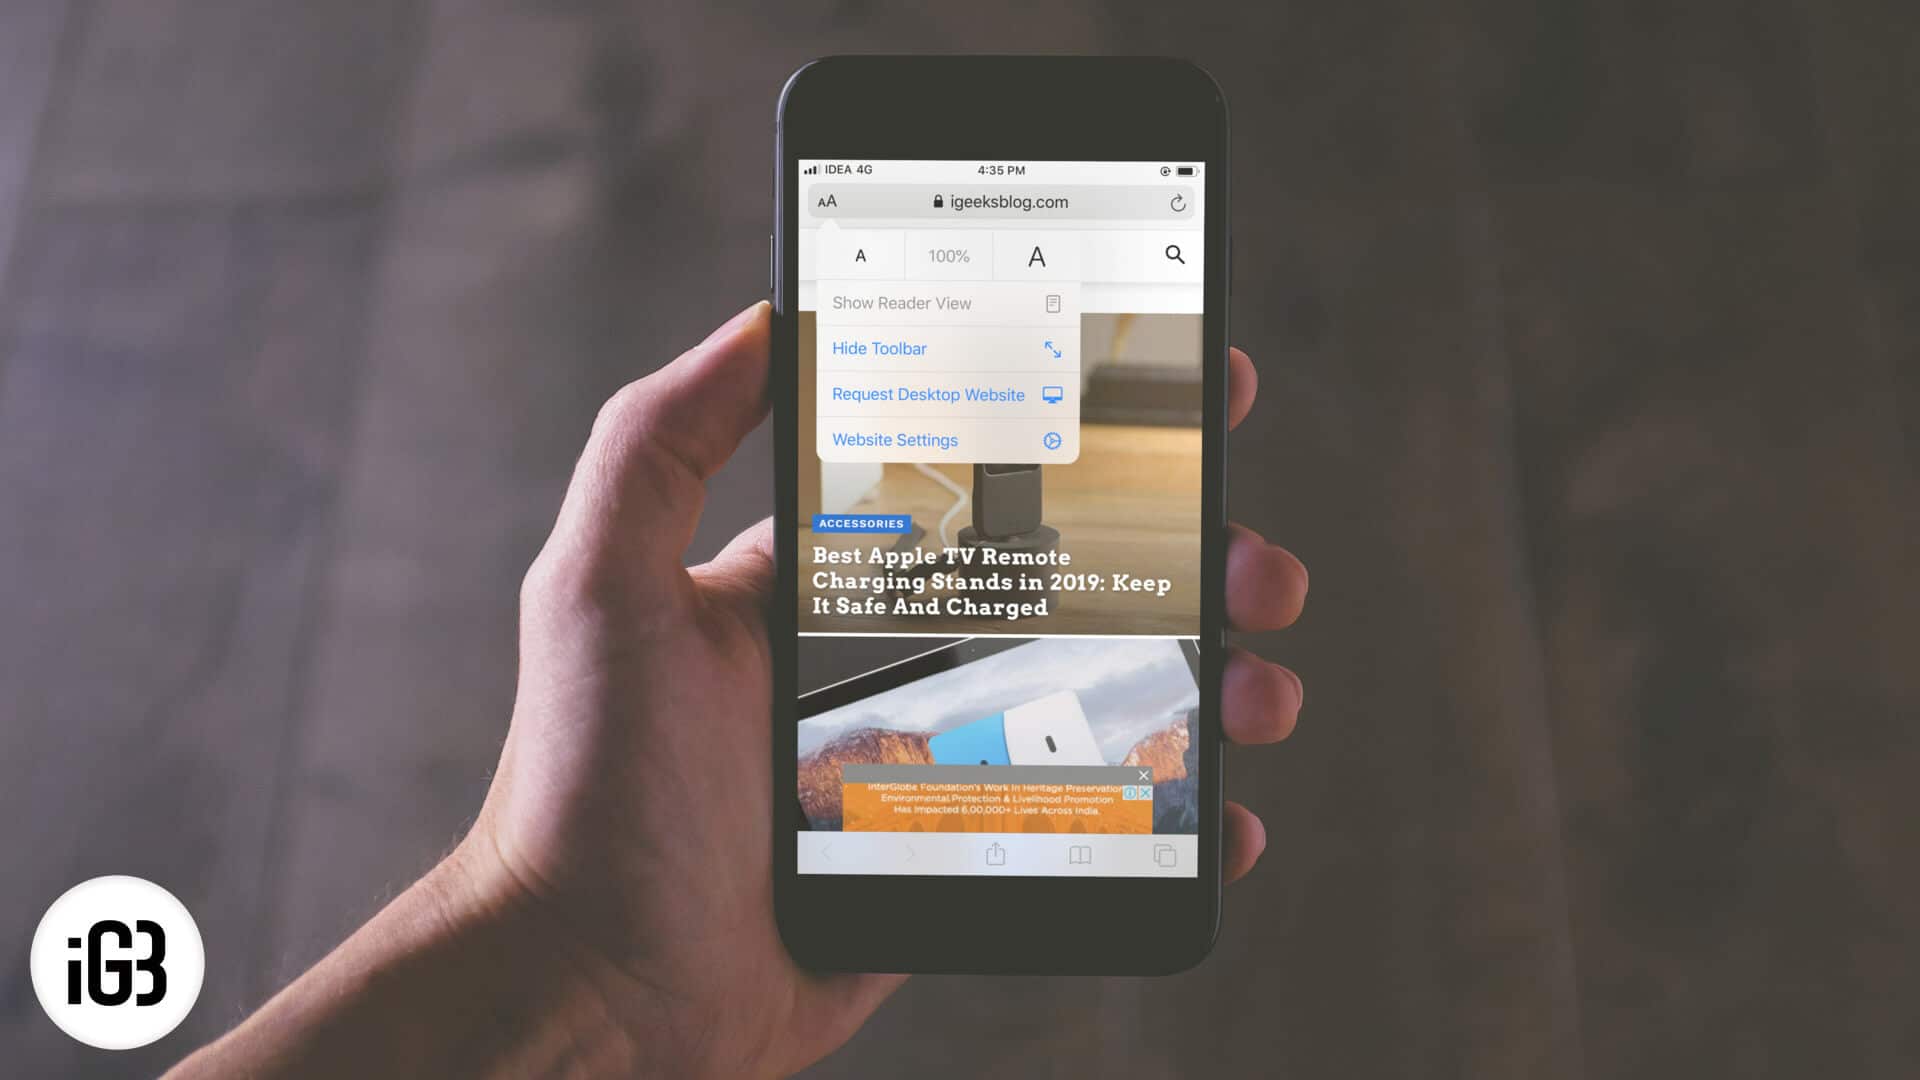
Step #2. On the left top corner in the address bar, tap on “aA” symbol.
Step #3. Now tap on the larger “A” that appears on the right side and keep tapping on it until you get the text size of your desire. It can zoom in up to 300%.
Step #4. You can also decrease the font size of the web page by tapping on smaller “A” which is on the left side. It can zoom-out up to 50%.
That’s how simple it is to increase and decrease the font size in Safari on your iPhone and iPad running on iOS 13 and iPadOS 13 respectively.
If you do not want to repeat the same process for all the websites, you can simply specify a fix zoom percentage for all the websites you want to read regularly.
How to Set a Bigger or Smaller Text Size for All Websites in iOS 13 Safari App
You need not use the above method every time to make a text smaller or bigger in Safari. You can set a fixed zoom percentage for all the websites by just changing a few settings given below. Here you go!
Step #1. Open Settings App and head over to Safari option.

Step #2. Scroll down to “Settings for Websites” section and tap on Page Zoom option.

Step #3. Firstly, you’ll find a list of websites under “Page Zoom ON” which you have already zoomed-in or zoomed-out. Tap on that website to set font size.

Or head over to “Other Websites” section and tap on 50% or 100% or 200% or 300% whichever is suitable for better reading.

If you select a smaller font size, it might be difficult to read. So it’s recommended to always go above 100% font size for best reading experience in Safari on your iPhone or iPad.
Closing Thoughts!
This is so far the best feature I loved in Safari as it enhances my overall experience when I select a font size of my choice. Did you try this feature on your iPhone or iPad? If not, try it now by using the above-given guide.
Related Posts To Make Your Safari Experience Better!
- How to Manage Website Settings in Safari on iPhone and iPad
- Save a Webpage as PDF in Safari on iPhone and iPad
- How to Change Safari Download Location on iPhone and iPad
- How to change font size in Finder on Mac (Easiest way)
Do let us know in the comments if you face any issues while using this feature.


Leave a Reply