Safari browser on iPhone lets you customize website settings to ensure a comfortable experience. For example, you can change text size, use Reader Mode, request the desktop version of a site, set privacy permissions, etc., even for an individual website. You can also sync these Safari settings across your devices. Here, I will explain each feature and help you access, customize, and sync website settings in Safari.
Why you should customize and sync Safari settings on your iPhone?
Customizing and syncing Safari settings can enhance your browsing experience in several ways. Here’s why you should take advantage of these features:
- Personalized browsing experience: Some sites may have small text that’s hard to read, while others may load distracting pop-ups. Safari allows you to increase text size, block ads, and prevent auto-playing videos.
- Better privacy and security: Some websites request access to your location, camera, or microphone. You can customize Safari settings to control which sites have access to your data, helping protect your privacy.
- Seamless experience across Apple devices: If you use multiple Apple devices, syncing Safari settings through iCloud ensures your preferred settings for specific websites are available everywhere.
- Faster and more efficient browsing: By setting site preferences in advance, Safari will load websites just the way you like them every time—saving you time and effort. No need to adjust zoom levels or enable Reader Mode manually on each visit.
By customizing and syncing Safari settings, you gain more control, privacy, and convenience while browsing on your iPhone. Now, let’s explore how to do it step by step!
How to access website settings in Safari on iPhone
- Open iPhone Settings, select Apps and tap Safari.
- Scroll down to the Settings For Websites section. Here you have several settings that you can manage for all websites. Let’s understand those.

These are the Safari settings you can change:
- Page Zoom: If you have difficulty seeing standard webpage text and images, you can set the zoom level for all the websites. Note: If you had individually set the zoom for a page, it would be listed here. You may tap Edit to clear that and set a page zoom level for all websites you visit.
- Request Desktop Website: This lets you access the computer version of a website. You may have to pinch out with two fingers to see the content.
Note: Several websites do not let you access the desktop version even if you use this feature. - Reader: Websites are full of ads and distractions like email popups, offer banners, and more. Reader Mode removes all these and lets you focus on the meaningful text and images on a website. From here, you can enable it for all websites.
- Profiles: If you have customized any websites under a profile, you can them here.
- Camera, Microphone, Location: From here, you can allow, deny, or force all websites to ask your permission before accessing the iPhone camera, microphone, or your current location.
You can either customize the Safari settings from iPhone Settings or do it directly from Safari.
Tip:
You can also modify Safari’s accessibility settings. In Settings, go to Accessibility, scroll down, and select Per-App Settings. Tap Add App, then choose Safari. Here, you can adjust text size, disable Auto-Play Video Previews, enable Reduce Transparency, and more for a smoother browsing experience.
How to change Safari settings for individual websites on iPhone
In the steps above, you will see how to apply these settings to all websites. However, for most people (myself included), it doesn’t make much sense to use them universally. Fortunately, Safari allows you to customize these settings on a per-website basis. Let me show you how.
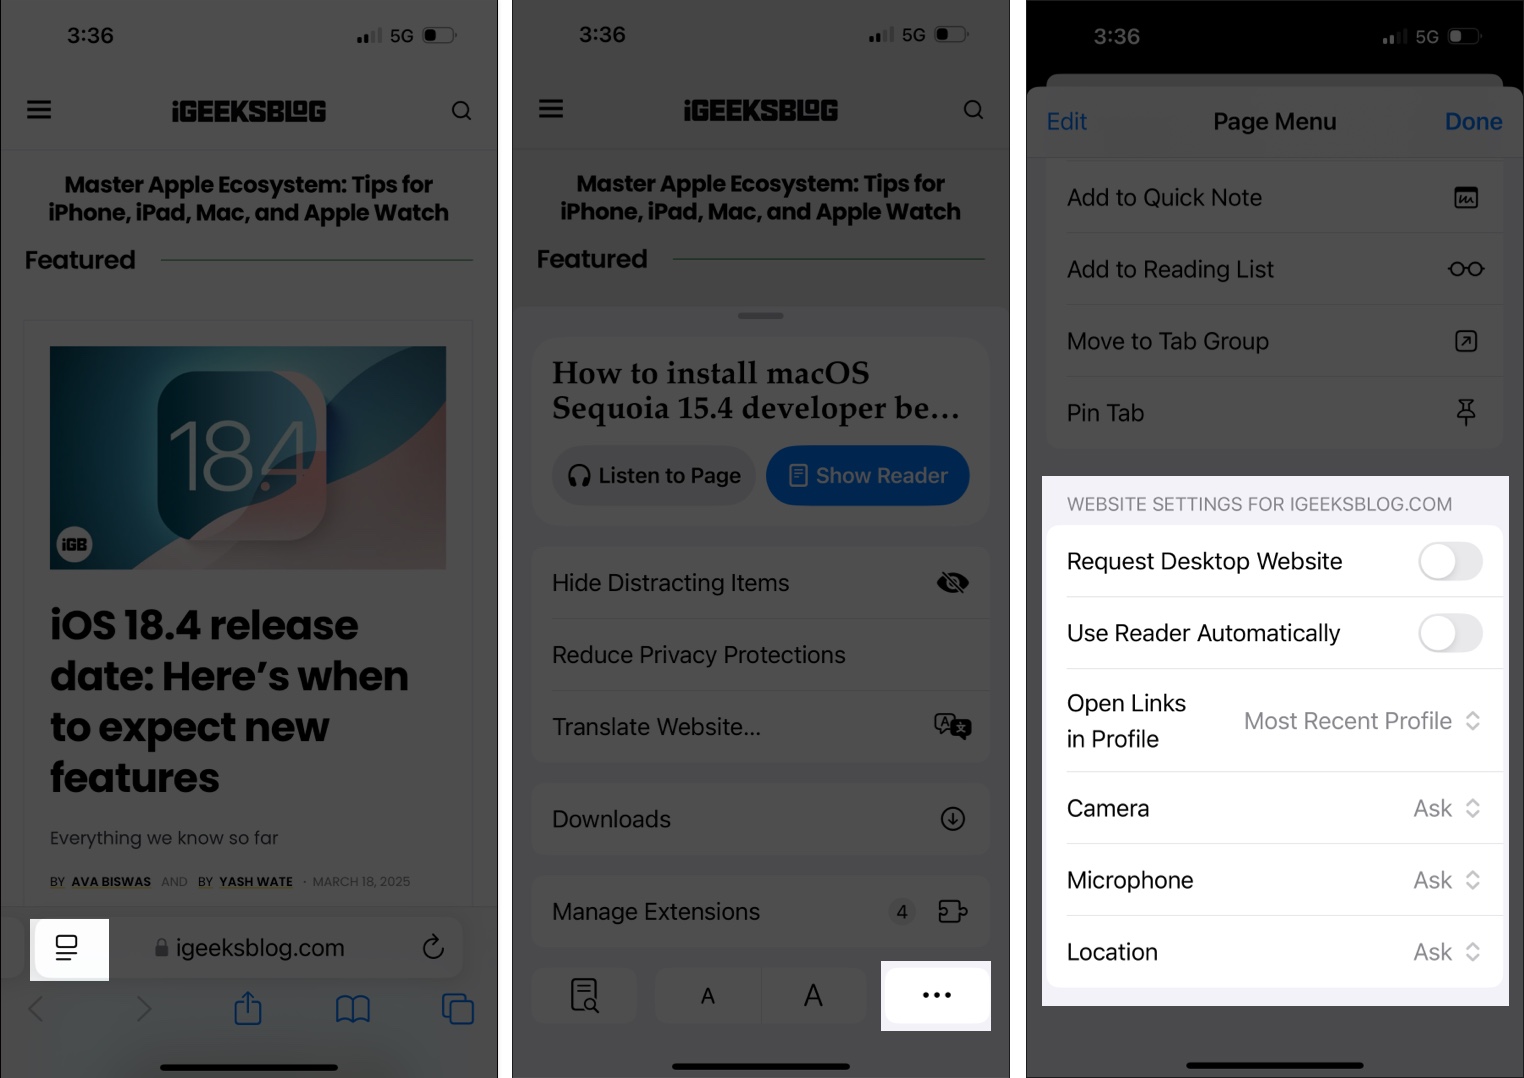
- Launch the Safari app and visit the website.
- Tap menu icon on the left side of the address bar.
- Tap three–dot icon.
- Scroll down and customize Website Settings such as Use Reader Automatically, Open Links in Profile, etc.
This will set the default for the active website. To change or set the default page zoom for the current website, tap the ‘A’ at the bottom of the options menu.
Tip:
You can also hide unnecessary sections of a website by tapping the Hide Distracting Items option in the menu. Go through our guide on how to use Safari’s Distraction Control feature.
How to sync Safari website settings across Apple devices
Now that you’ve configured all the necessary website settings, you can sync your customizations across all your devices. Just ensure you’re signed into the same Apple account on each device and that iCloud is enabled for Safari.
- Open Settings → Apps, and go to Safari.
- Scroll down to Settings For Websites.
- Toggle on Share Across Devices.

And just like that, your website settings are now shared across all devices synced via iCloud.
If you have customized the Safari Start Page, you can also sync it. To do so, go to Safari, tap the tab icon at the bottom right corner, and select the plus sign. It will open the Start Page. Now, scroll down and select Edit. Finally, toggle on “Use Start Page on All Devices.” From here, you can also edit the Start Page.
Signing off…
This is how you can manage website settings in Safari on iPhone and iPad. These ensure that you have a pleasant experience browsing the web via Apple’s in-house mobile browser. If you have any further questions, I am just a comment away.
You might like:


