How to use Low Power Mode on Apple Watch
For what the Apple Watch Series 9 and 8 offer, their battery life is remarkable. However, if you’re planning to go on a trip or won’t be able to access its charger for a couple of days, then you might have to be cautious of the battery life on your Apple Watch.
Apple announced the Low Power Mode for Apple Watches to solve this issue during the Far Out 2022 event, allowing your Apple Watch to last up to 36-hours.
It might seem like a minor feature to you, but it makes a massive difference. So let’s get straight into it and see how you can use the new Low Power Mode on your Apple Watch.
- What is Low Power Mode on Apple Watch?
- Low Power Mode vs. Power Reserve Mode
- Which Apple Watch models will receive Low Power Mode?
- How to enable Low Power Mode on your Apple Watch
What is Low Power Mode on Apple Watch?

This feature boosts your Apple Watch’s battery up to 36 hours when connected to an iPhone, which is twice the average battery life of an Apple Watch. It can vary depending on your situation.
And while features like fall detection and activity tracking will be available even when you enable the Low Power Mode on Apple Watch, some core features and sensors will be disabled.
What features will the Low Power Mode affect?
Features that are turned off:
- Always-On-Display
- Workout detection
- Heart rate notifications
- Start workout reminder
- Background blood oxygen measurements
- Background heart rate measurements
Features that’ll be affected:
- It might take longer to make a phone call
- Siri will take longer to respond and process a request
- Background app and complications refresh will happen less frequently
- Scrolling and animation will become smoother
Does Low Power mode affect Wi-Fi/cellular connections or notifications?
Yes, the Low Power setting will significantly affect these features when your iPhone isn’t nearby.
- Wi-Fi or cellular connections – When you access an app that requires a data connection, Apple Watch will turn on Wi-Fi or cellular. However, that would affect the battery significantly.
- Incoming phone calls and notifications – You’ll not get real-time notifications. However, Apple Watch will periodically retrieve missed calls and other notifications.
Low Power Mode vs. Power Reserve Mode

You might ask what’s the difference between the new Low Power Mode and the existing Power Reserve Mode. The problem with Power Reserve mode is that it only lets you see the time when you press the side button.
At the same time, it also disables access to other Apple Watch features and communication with the iPhone to preserve the battery. On the other hand, the Low Power Mode will let you access your Apple Watch entirely and communicate with your iPhone.
To preserve the battery, it’ll decrease the core functionality of the Apple Watch. I would call the Low Power Mode a balanced trade-off compared to the restriction of features with the Power Reserve Mode.
Note:
Apple has replaced Power Reserve with Low Power Mode in watchOS 9. Users using Apple Watch 3 or earlier or WatchOS 8 or earlier can use the Power Reserve alternative.
Which Apple Watch models will receive Low Power Mode?
Since it’s a software feature, you can receive the Low Power Mode in the watchOS 9 update, as long as you’re using one of the following watches.
- Apple Watch Series 4
- Apple Watch Series 5
- Apple Watch Series 6
- Apple Watch SE (1st Generation)
- Apple Watch Series 7
- Apple Watch Series 8
- Apple Watch Ultra
- Apple Watch SE (2nd Generation)
How to enable Low Power Mode on your Apple Watch
If you’ve updated your Apple Watch to watchOS 9 or later, follow these instructions to enable the Low Power Mode from the Control Center.
- Press the Digital Crown to go to your current watch face
- Swipe up from the bottom on the watch face to reveal Control Center.
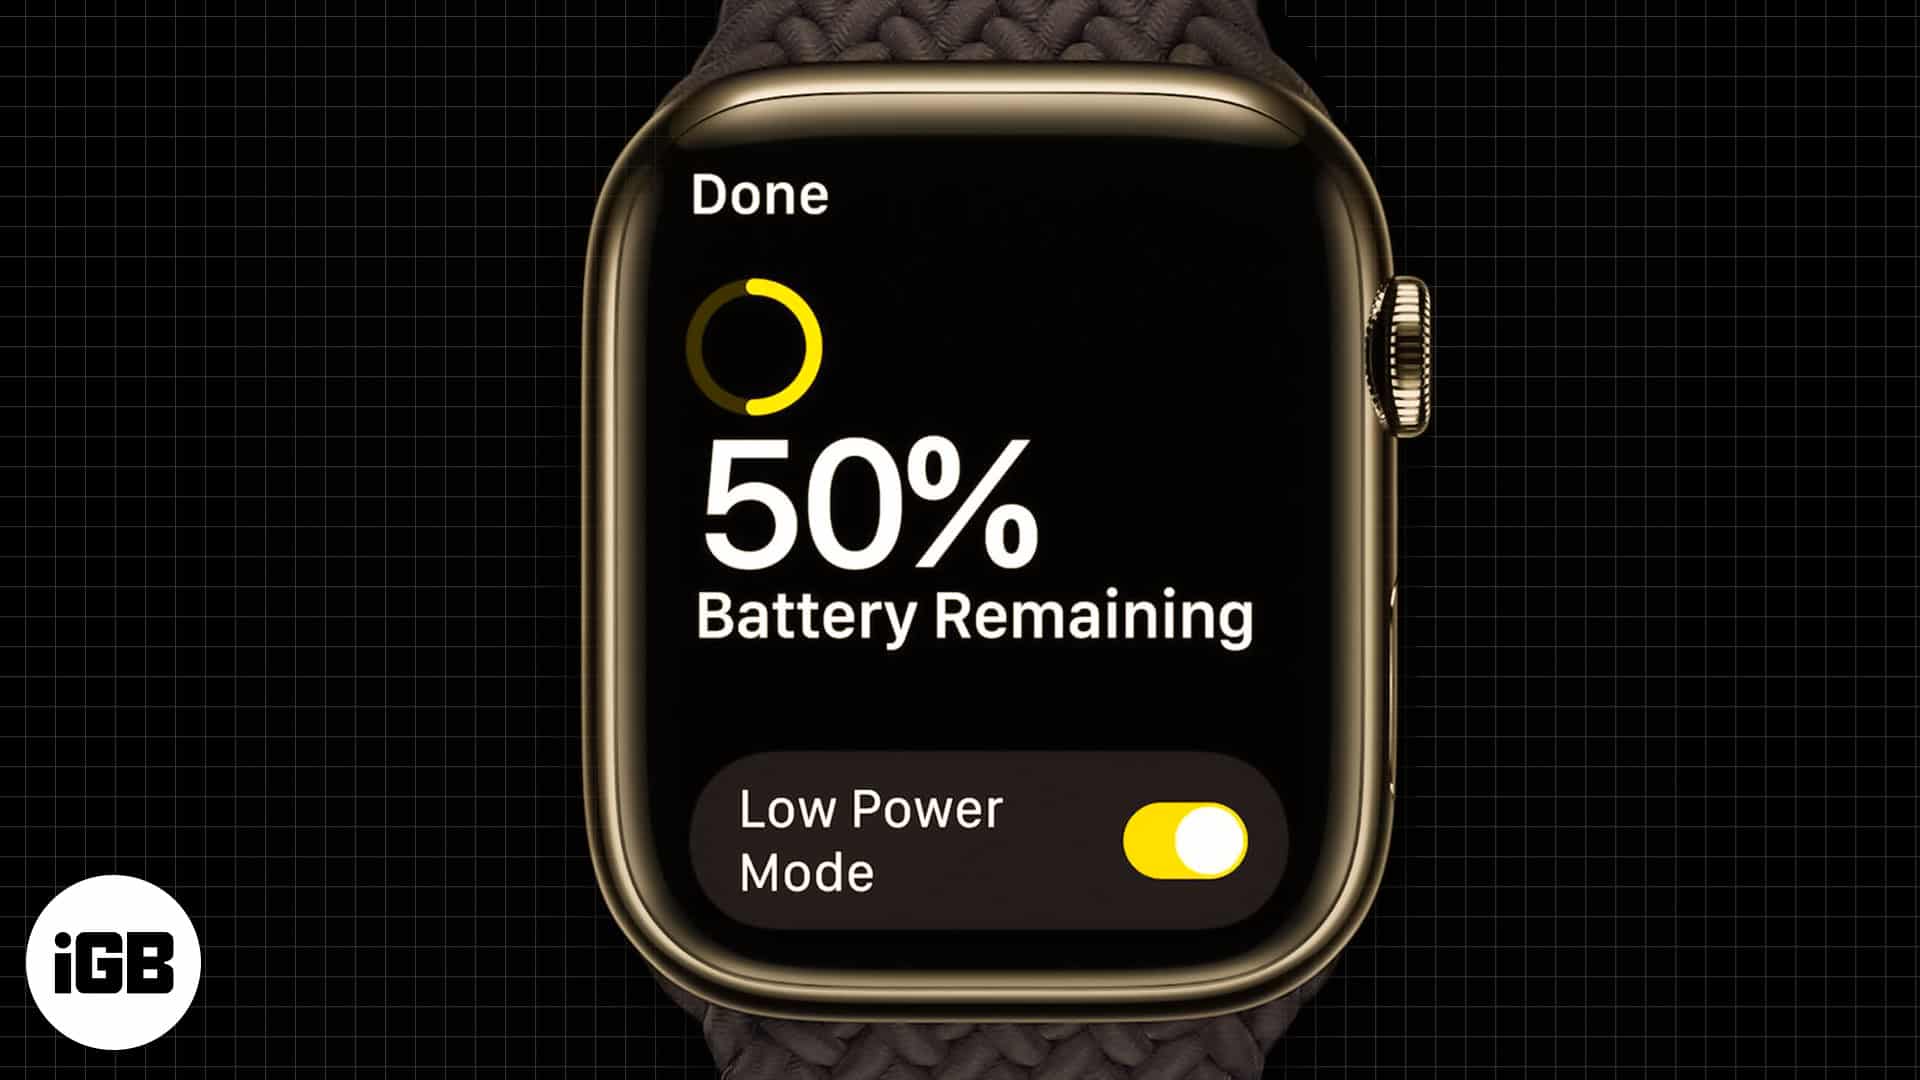
- Tap on the battery percentage button.
- Enable the toggle next to Low Power Mode.
- Scroll down and select “Turn On” to enable Low Power Mode on your Apple Watch. Alternatively, you can choose the “Turn On For…” option, which allows you to turn on Low Power Mode for a specific time like 1 Day, 2 Days, 3 Days.

You’ll see a yellow circle in the notifications indicating that your Apple Watch is in Low Power Mode. Moreover, the battery percentage button in the Control Center, the charging animation, and the Nightstand mode will all turn yellow.

You can also enable the Low Power Mode from the Apple Watch Settings; here’s how.
- Press the Digital Crown on any watch face to reveal all apps.
- Open the Settings app.
- Select Battery from the list.
- Scroll down a little and enable the toggle next to Low Power Mode.
- Select “Turn On” to enable it until you turn it off or “Turn On For…” to enable it for a specific time.

Apple Watch automatically turns on the Low Power Mode: Like the iPhone, your Apple Watch auto-alerts you when the battery goes down to 10%. You’ll get a notification asking whether you want to turn on Low Power Mode or not.
Furthermore, the setting is auto-disabled when the battery charges to 80% unless you have selected the Low Power Mode for several days.
Auto-enable Low Power Mode during workouts
- Open the Settings app on your Apple Watch.
- Go to Workout.
- Here, toggle on Low Power Mode.

Notably, even during the Low Power Mode, heart rate and pace metrics will be measured. Once the setting is enabled, your watch will turn on Low Power mode once you begin a workout.
Wrapping up…
The Low Power Mode is a giant leap from the Power Reserve feature for existing and new Apple Watch users. Although, those boasting the new Apple Watch Ultra can extend their battery life to 60 hours or even more.
It will be more helpful to those planning to spend their time without the charger in activities like camping or a short trip.
Read more:
Topics

Written by
Sajid ShaikSajid Shaik is a tech enthusiast who explains complex concepts in a clear and concise way. For the past 7 years, he has been a regular contributor to tech blogs and publications, including MakeUseOf and iGeeksBlog. Sajid also has extensive knowledge of the Apple ecosystem, which he shares with his readers through his words. He has created a wide range of content, such as How-Tos, Reviews, Listicles, and much more. Aside from that, Sajid has a degree in Electronics and Communication Engineering, which gives him an advantage in better understanding technology at hardware level. Apart from writing, you can find him fiddling with Apple products or keeping up with all things Apple.
View all posts →More from Apple Watch

Apple Watch Not Responding? 8 Fixes That Actually Work
Is your Apple Watch unresponsive or stuck on a black screen? Here are 8 proven fixes to help you unfreeze it and get it working again quickly.
How to Mirror Your Apple Watch on Your iPhone: A Simple Guide
Want to control your Apple Watch using your iPhone? This guide explains how to turn on Apple Watch Mirroring, use it easily, and fix common issues.

How to Restore Apple Watch From a Backup
Need to reset or switch iPhones? Here’s how to restore your Apple Watch from a backup, what data comes back, and how to make sure everything syncs properly.