If you like i3 on Linux, macOS window management can feel slow. You open a few apps, drag windows around, resize them by hand, and end up fighting the desktop instead of using it.
i3 feels different because every new window has a place. Instead of floating on top of everything else, it opens inside the current layout, usually beside the window you are already using. That nudges you to keep fewer apps open, move tasks to separate workspaces, and control the screen from the keyboard.
Best i3-like Window managers for Mac
There are quite a few Mac window managers, but only a few get close to the i3 feeling. Some are true tiling managers, while others are better described as window snapping or automation tools.
| App | Best for | GitHub |
|---|---|---|
| AeroSpace | Closest i3-like tiling setup on Mac | nikitabobko/AeroSpace |
| Amethyst | Easier automatic tiling with preset layouts | ianyh/Amethyst |
| yabai | Advanced tiling and scripting | koekeishiya/yabai |
| Rectangle | Keyboard shortcuts and snap areas | rxhanson/Rectangle |
| Hammerspoon | Custom window automation with Lua | Hammerspoon |
AeroSpace is the best pick if you want your Mac to feel close to i3. It is built specifically as an i3-like tiling window manager for macOS, with keyboard-driven tiling, workspaces, move/focus shortcuts, layout switching, and a plain-text config file. Most Mac window apps only resize windows into halves, thirds, or corners; AeroSpace changes the whole workflow.
Know these catches before installing it:
- AeroSpace is still in Public Beta.
- It is aimed more at keyboard-first users than casual Mac users.
- It uses its own workspace system instead of regular Mission Control Spaces.
- It is not notarized, though the Homebrew install usually handles the macOS quarantine step for you.
The basic setup is still manageable if you are comfortable pasting one command into Terminal and editing a config file later.
How to Install AeroSpace on Mac
AeroSpace needs two things before it can tile your windows properly: the app itself and macOS Accessibility permission. After that, you can copy the default config and tweak the shortcuts like an i3 setup.
Step 1: Install AeroSpace with Homebrew
The easiest way to install AeroSpace is through Homebrew. If you do not have Homebrew installed, set that up first from the official Homebrew website.
Once Homebrew is ready, open Terminal and run:
brew install --cask nikitabobko/tap/aerospace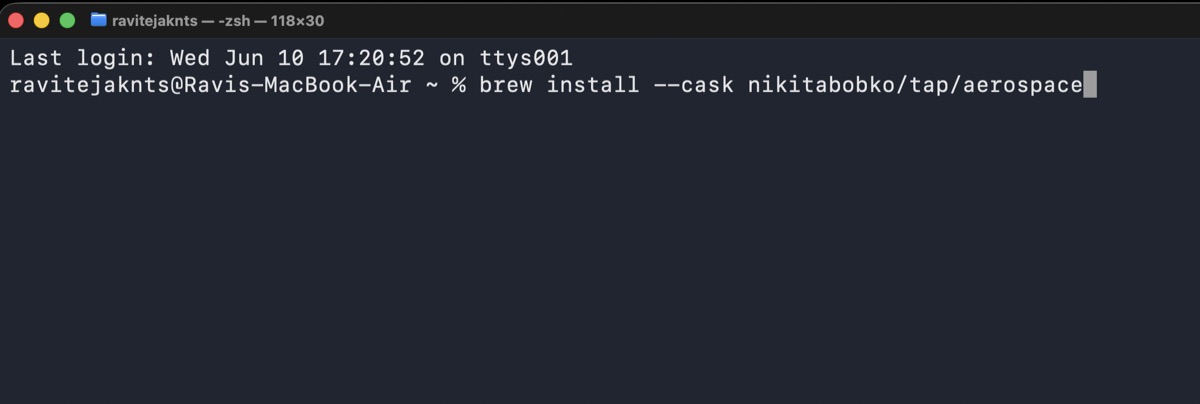
Then open AeroSpace from the Applications folder or Spotlight.
Step 2: Give AeroSpace Accessibility permission
macOS will ask for Accessibility permission because AeroSpace needs to control and move app windows. Go to System Settings > Privacy & Security > Accessibility, turn on AeroSpace, and restart the app if needed.

AeroSpace supports macOS Ventura and later. If macOS says it cannot check the app for malicious software, install through Homebrew first. If you installed it manually, right-click AeroSpace in Applications and choose Open.
Step 3: Copy the default config
AeroSpace works without a custom config, but copying the default file gives you something you can edit later.
In Terminal, run:
cp /Applications/AeroSpace.app/Contents/Resources/default-config.toml ~/.aerospace.toml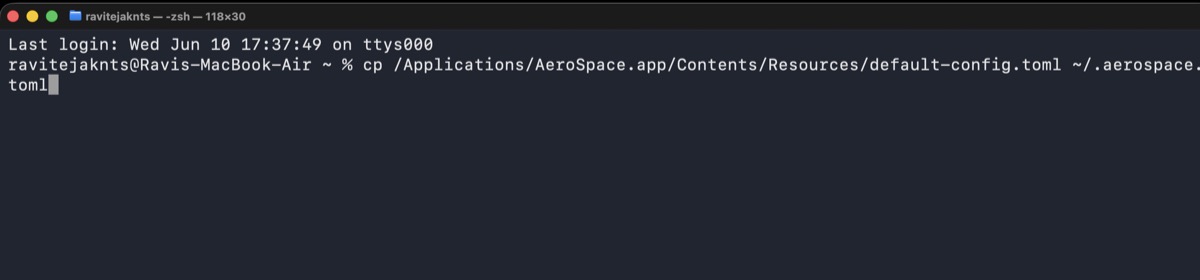
This creates a config file at:
~/.aerospace.tomlOpen it in any text editor. You do not need to understand every line on day one; start with shortcuts, gaps, and the startup setting.
Step 4: Learn the essential AeroSpace shortcuts
AeroSpace’s default shortcuts feel familiar if you have used i3 or Vim-style movement. On a Mac keyboard, the main modifier is the Option key. AeroSpace writes it as alt in the config file, but readers should press Option.
| Shortcut | What it does |
|---|---|
Option-H | Focus window on the left |
Option-J | Focus window below |
Option-K | Focus window above |
Option-L | Focus window on the right |
Option-Shift-H | Move window left |
Option-Shift-J | Move the window left |
Option-Shift-K | Move window up |
Option-Shift-L | Move the window down |
Option-1 to Option-9 | Switch workspace |
Option-Shift-1 to Option-Shift-9 | Move window to workspace |
Option-/ | Switch to tiles layout |
Option-, | Switch to accordion layout |
Option-- / Option-= | Resize the focused window |
Open three or four apps and try only these shortcuts first. Once focus, move, and workspace switching click, AeroSpace starts feeling much closer to a real tiling window manager.
Step 5: Make AeroSpace start at login
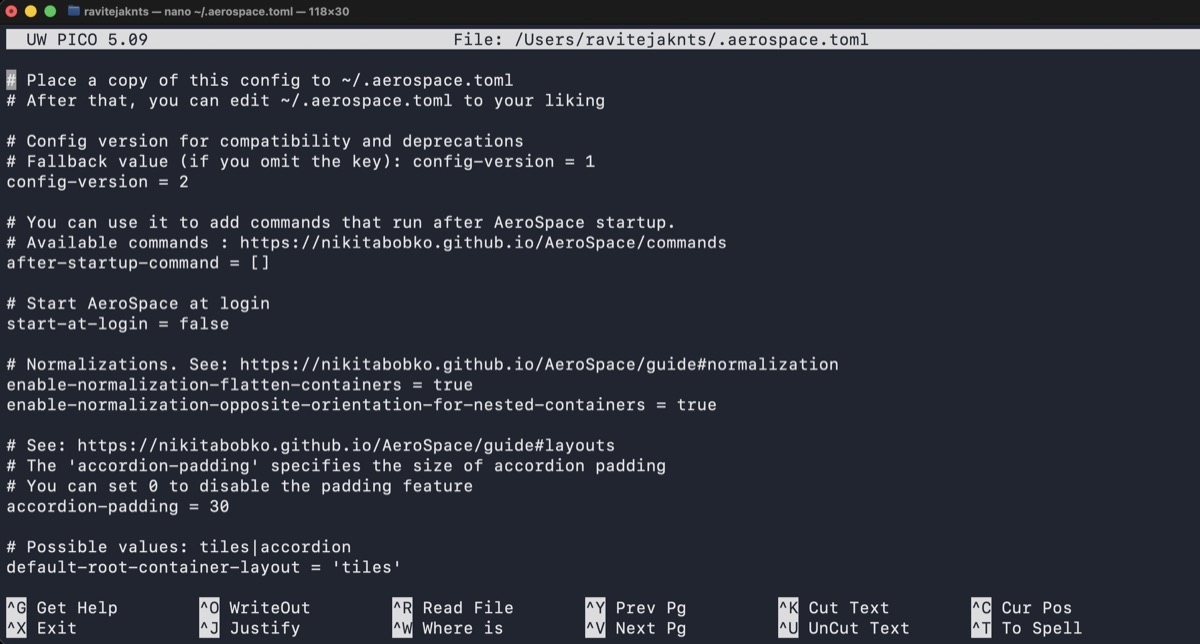
If you want AeroSpace to run every time your Mac starts, open ~/.aerospace.toml and find this line:
start-at-login = falseChange it to:
start-at-login = trueSave the file and restart AeroSpace.
Step 6: Add gaps between tiled windows
By default, AeroSpace can tile windows with no gaps, which is close to the classic i3 feel. If you prefer breathing room between windows, edit the [gaps] section in ~/.aerospace.toml.
For example:
[gaps]
    inner.horizontal = 8
    inner.vertical = 8
    outer.left = 8
    outer.bottom = 8
    outer.top = 8
    outer.right = 8
Keep the values small. Large gaps look nice in screenshots, but they waste space quickly on a MacBook display.
Step 7: Add an i3-style terminal shortcut
i3 users often expect a shortcut that opens Terminal. In AeroSpace, this shortcut belongs in the main bindings section of the config file.
Open ~/.aerospace.toml and search for:
[mode.main.binding]If you are using nano, press Control-W, type [mode.main.binding], and press Return.
Under that section, add this line if it is not already there. AeroSpace uses alt in the config, but the shortcut you press is Option-Return.
alt-enter = '''exec-and-forget osascript -e '
tell application "Terminal"
    do script
    activate
end tell'
'''
After saving the file, reload or restart AeroSpace. Pressing Option-Return should now open a new Terminal window.
Troubleshooting common AeroSpace problems
If AeroSpace does not work as expected, start with these checks.
- Open System Settings > Privacy & Security > Accessibility and make sure AeroSpace is enabled.
- Quit and reopen AeroSpace after granting permission.
- Check whether another window manager app is running and disable it.
- Make sure your shortcuts do not conflict with existing macOS or app shortcuts.
- If you use multiple monitors, arrange them correctly in System Settings > Displays.
- If you edited the config, restart AeroSpace or reload the config.
Some macOS windows will not behave perfectly because Mac apps do not all expose windows the same way. Settings panes, pop-ups, and small utility windows may float or ignore tiling.
Should you use AeroSpace on your Mac?
Use AeroSpace if you want your Mac to feel closer to a keyboard-controlled Linux desktop. It is the best fit for i3-style tiling because it changes the whole window workflow, not just individual window sizes.
If you only want quick left-half/right-half shortcuts, use Rectangle instead. If you want automatic tiling with less setup, try Amethyst. But if the goal is “i3 on Mac,” AeroSpace is the one to build around.
You might also like: