
After upgrading my PC’s RAM, I expected smoother multitasking, faster game loading, and plenty of memory for dozens of browser tabs. Instead, Windows still felt sluggish. When I opened Task Manager, I discovered that several gigabytes of RAM were marked as Hardware Reserved.
At first, I assumed Windows was simply using that memory for background processes. It wasn’t. That RAM wasn’t available to Windows at all. If you’re seeing a similar issue, here’s exactly how I got reserved RAM back on Windows 11 and increased usable RAM.
How I found Windows wasn’t using all my RAM
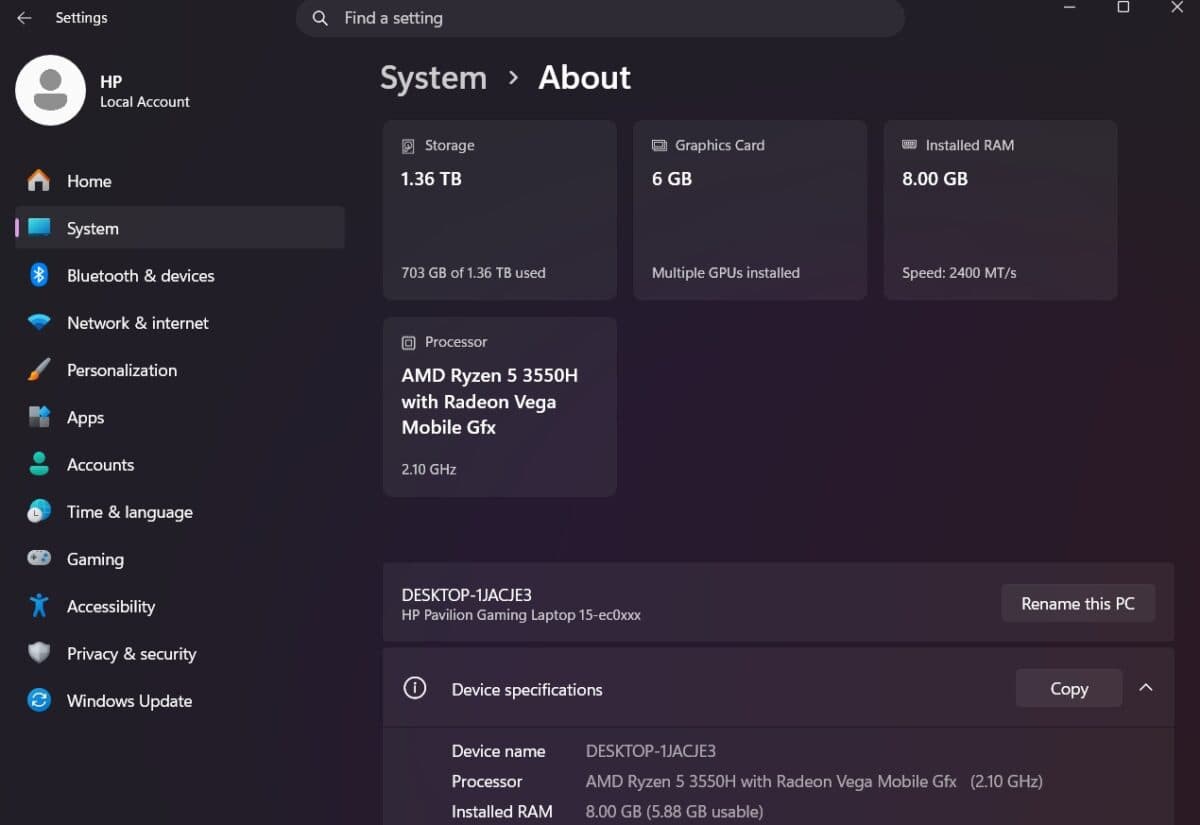
I first noticed something was off when my PC started slowing down while multitasking. I knew that I had sufficient RAM to handle whatever I was doing, so I decided to go into Task Manager and check the Memory tab to investigate further.
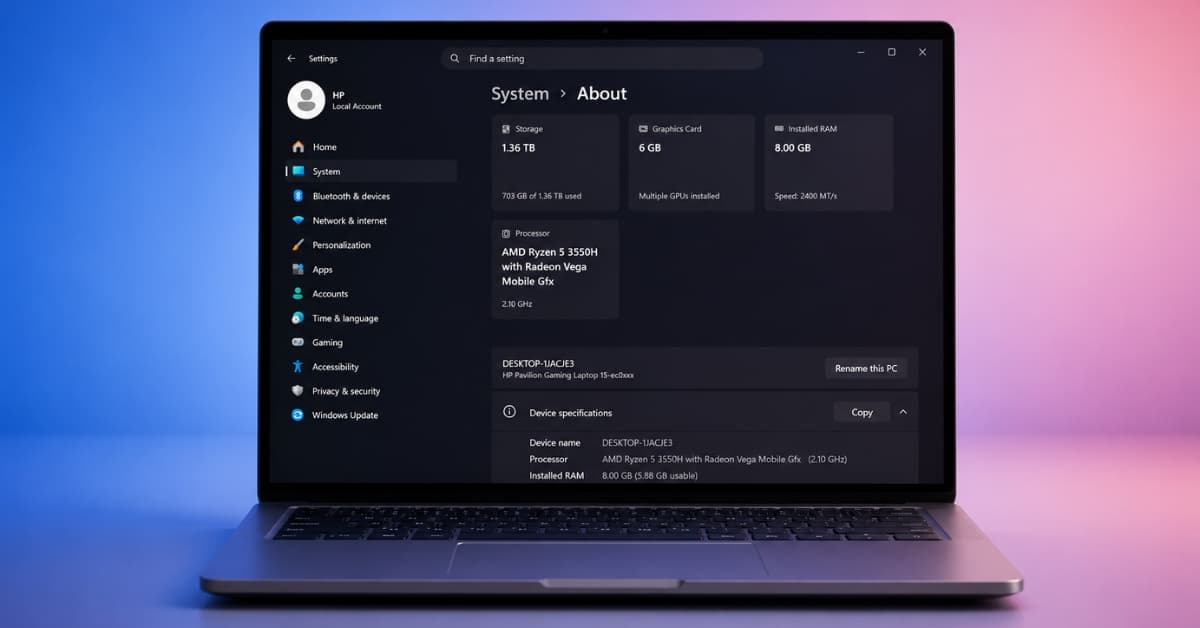
It showed that Windows had less usable memory than the amount installed in my system. For example, I had 8GB of RAM installed, but only around 5.9GB was available. The rest was listed as Hardware Reserved.
To confirm it wasn’t just a reporting issue, I checked Settings → System → About and the System Information app. Both showed that all of my RAM was installed, but Windows still wasn’t making all of it available for use.
A small amount of reserved RAM is perfectly normal. Motherboards, graphics hardware, and firmware all need a little memory to function. But when Windows reserves multiple gigabytes, something usually isn’t configured correctly.
If you’ve recently upgraded your RAM, built a new PC, or updated your BIOS, it’s worth checking whether Windows is using all of the memory you’ve installed.
What is Hardware Reserved RAM?
“Hardware Reserved” makes it sound like Windows is taking your RAM away. In reality, the memory is being reserved by hardware or firmware before Windows even loads.
Hardware reserved RAM refers to the RAM that is reserved for components that require access before being available for Windows. Such components could be:
- Integrated graphics that share system memory
- Motherboard firmware (BIOS or UEFI)
- PCI devices
- Memory mapping for hardware components
The important thing to understand is that Hardware Reserved RAM isn’t the same as Cached RAM.
| Hardware Reserved | Cached Memory |
|---|---|
| Cannot be used by Windows | Can be reclaimed whenever needed |
| Reserved by hardware or firmware | Managed dynamically by Windows |
| May indicate a configuration issue if unusually large | Completely normal |
In most cases, seeing a few hundred megabytes reserved isn’t a problem. Seeing 4GB, 8GB, or more usually means it’s time to investigate.
Check these things before trying any fixes
Before changing Windows settings, I made sure the basics were covered.
- Confirm Windows detects all installed RAM: Go to Settings → System → About or run
systeminfoin Command Prompt. If Windows reports less RAM than you physically installed, the problem may be hardware-related rather than a Windows setting. - Ensure you’re running a 64-bit version of Windows: A 32-bit version of Windows can only use about 4GB of RAM, regardless of how much is installed.
- Verify the BIOS recognizes all your memory: Restart your computer and enter the BIOS or UEFI setup. If your motherboard itself isn’t detecting all the RAM, Windows can’t use it either.
In my case, the BIOS showed the full 8GB, which told me the issue was somewhere between Windows and the firmware settings.
How to fix hardware reserved RAM in Windows
After ruling out the obvious causes, I started working through each possible fix. Not every solution applies to every PC, but these are the ones worth trying in order.
Fix 1: Disable the maximum memory limit in MSConfig
This was the first thing I checked because it’s surprisingly easy to overlook.
Here’s how:
- Go to the Start search bar or press Win + R.
- Type System Configuration (or msconfig) and press Enter to open the app.
- Move to the Boot tab and ensure your current Windows installation is selected.
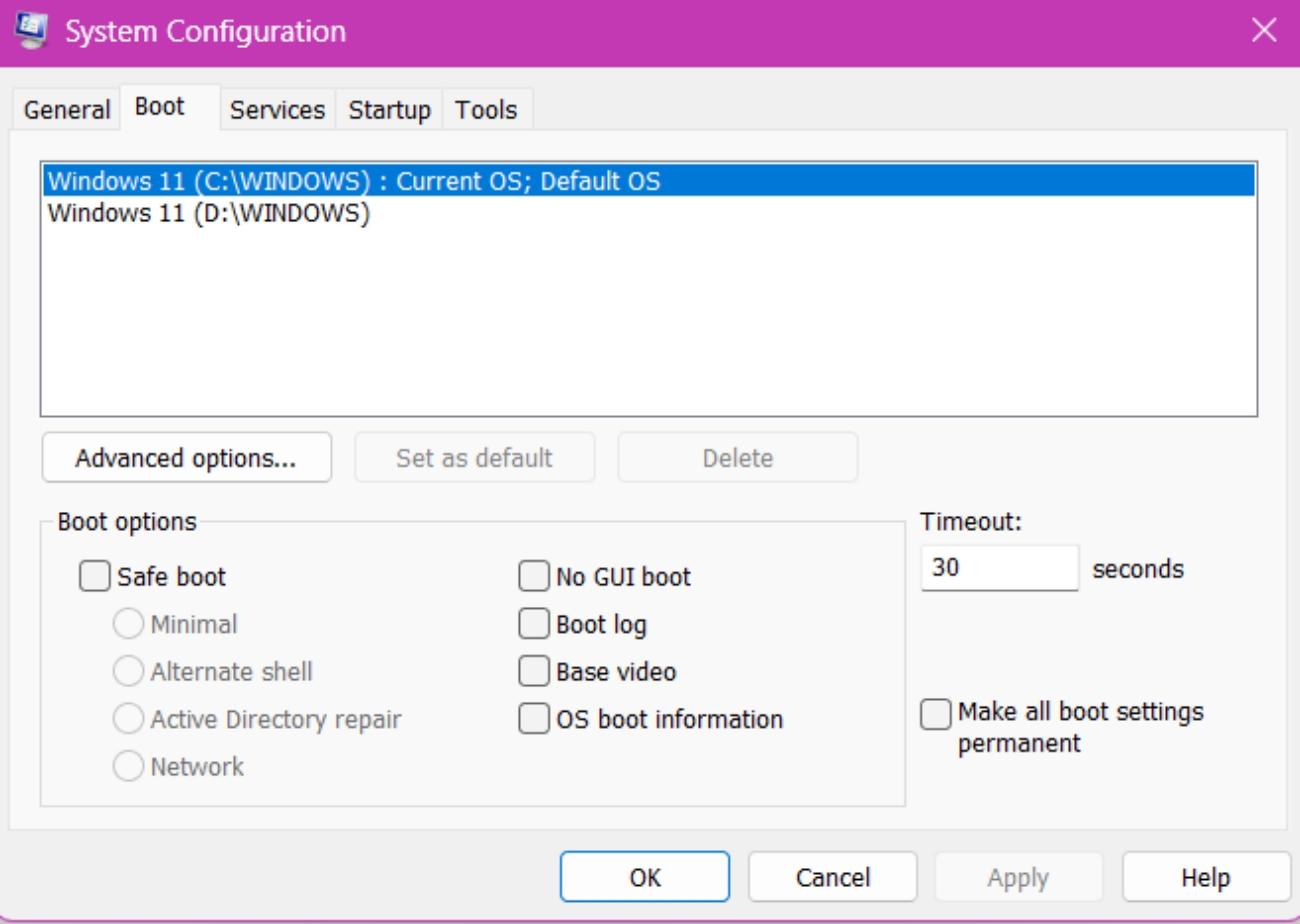
- Now, click Advanced options.
- Make sure Maximum memory is unchecked and click Ok.
- Restart your PC to apply the settings.
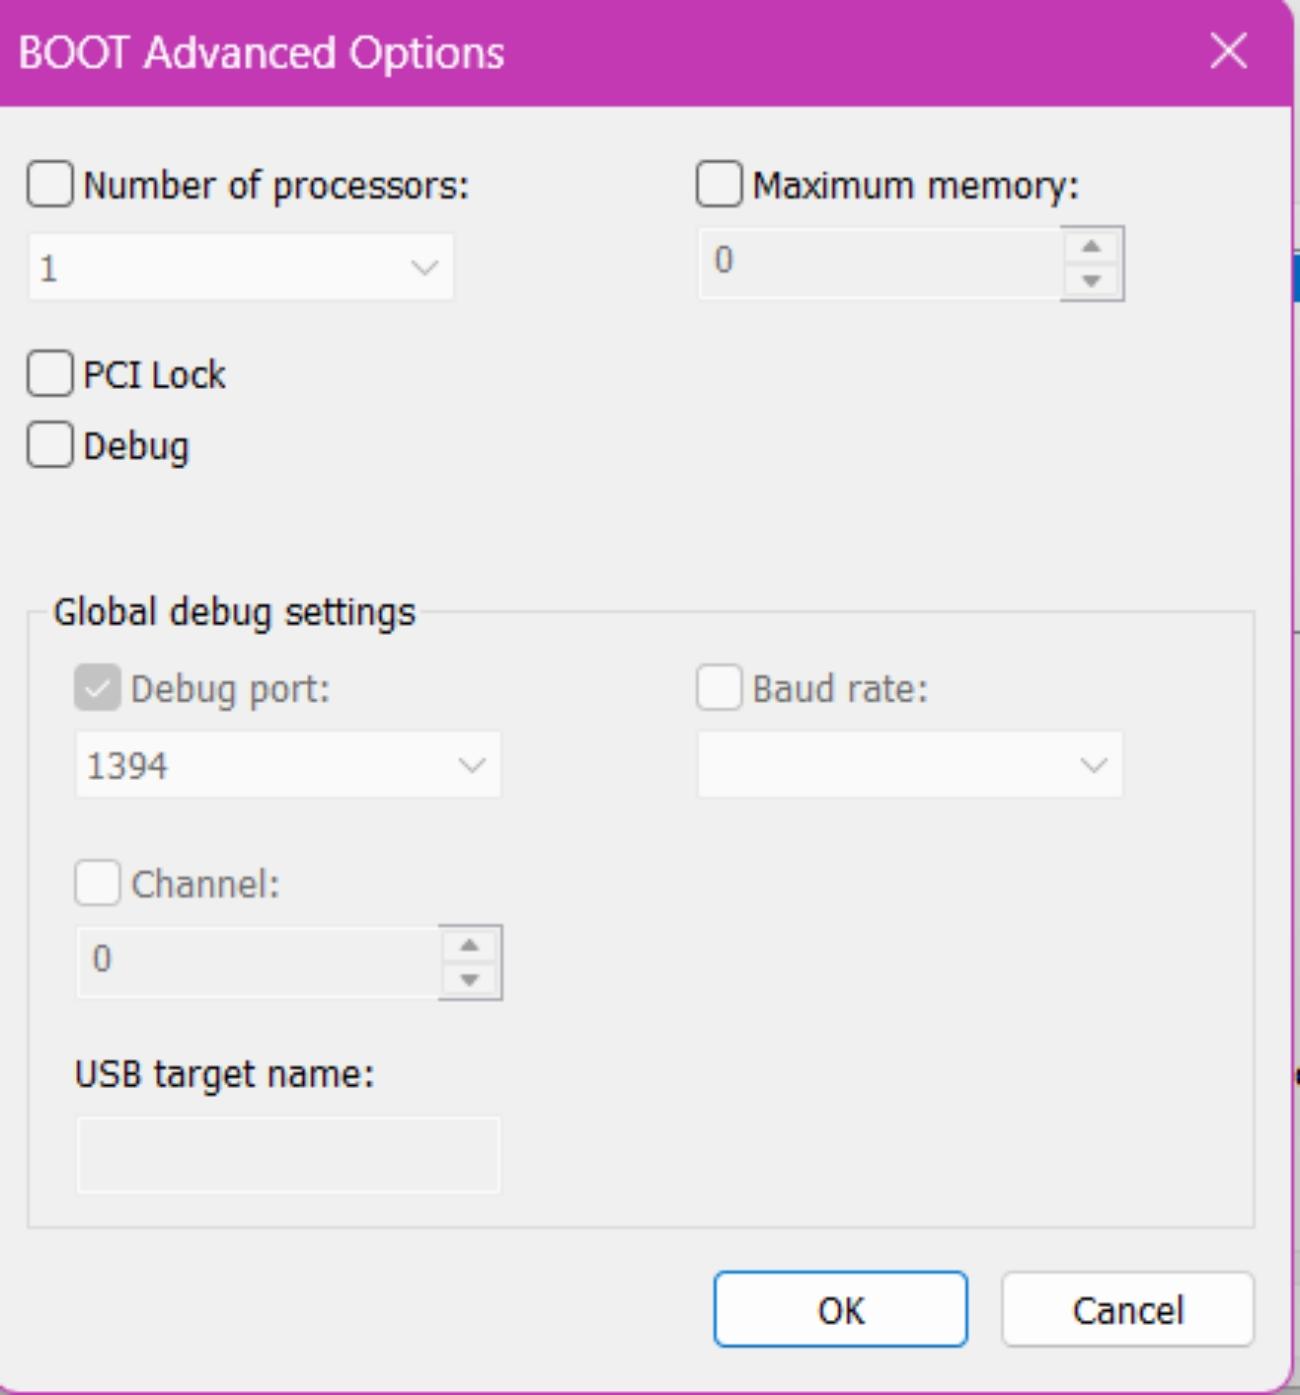
That setting is mainly intended for troubleshooting. If it’s enabled, Windows may intentionally limit the amount of RAM it uses, even if more memory is installed.
Mine wasn’t enabled, but I’ve checked it since it’s one of the most common reasons people suddenly lose access to several gigabytes of RAM after tweaking boot settings.
Fix 2: Check SysMain and reduce background resource usage
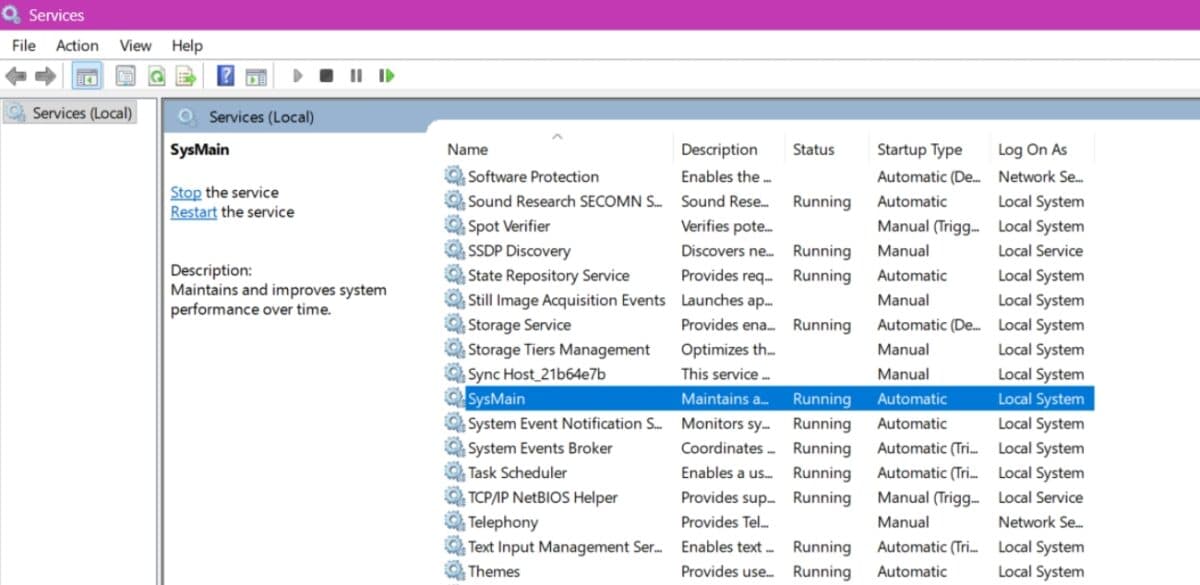
Next, look at Windows background services. One service that often comes up in RAM-related discussions is SysMain (previously called Superfetch). Its job is to learn your usage habits and preload frequently used apps into memory to make them launch faster.
On most modern PCs, SysMain works as intended and doesn’t permanently “steal” RAM because Windows automatically reclaims cached memory when applications need it. However, if you’re experiencing unusually high memory usage, constant disk activity, or performance issues, it’s worth testing whether the service is contributing to the problem.
To try it yourself:
- Press Win + R, type services.msc, and press Enter.
- Find SysMain in the list.
- Double-click it, click Stop, and change Startup type to Disabled.
- Restart your PC and monitor RAM usage in Task Manager.
If you don’t notice any improvement, or if app launches become slower, you can simply re-enable the service by changing the Startup type back to Automatic.
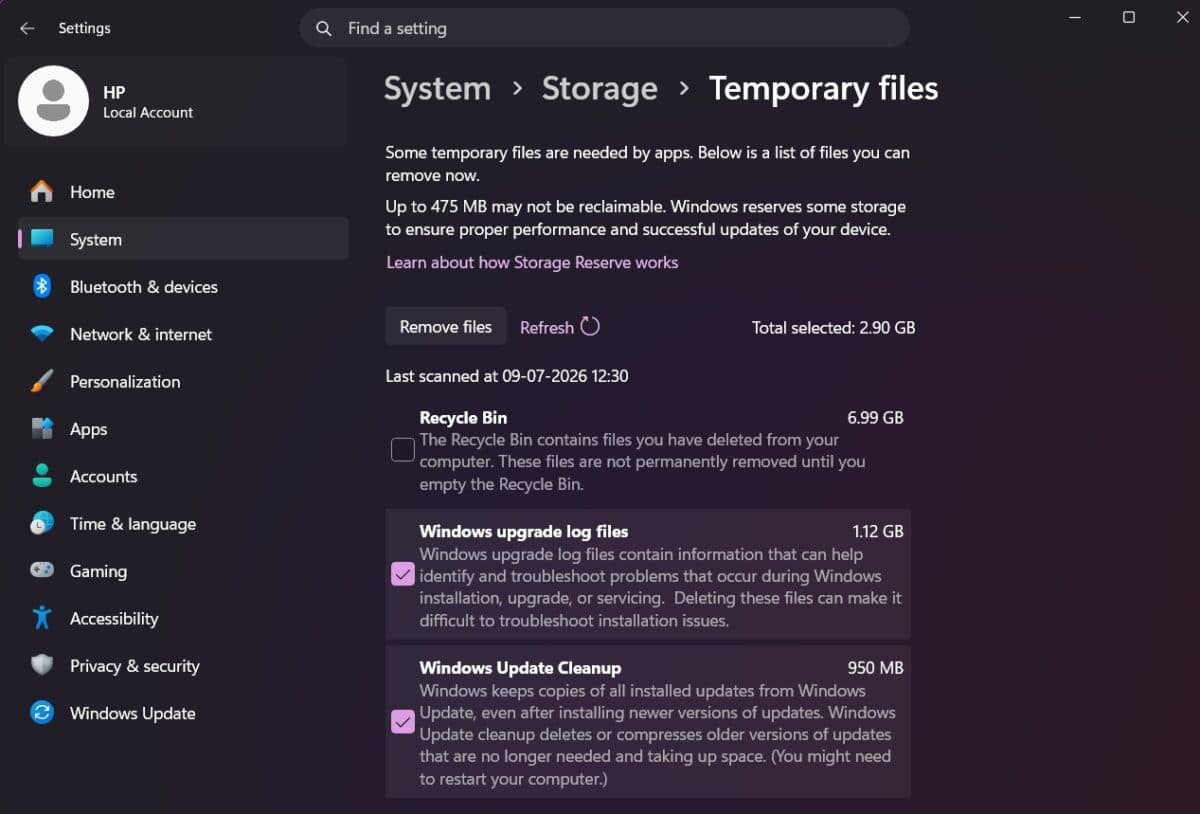
While I was making changes, I also cleaned up a few unnecessary system settings that can improve overall responsiveness.
- Disable startup apps you no longer use from Task Manager → Startup apps.
- Remove temporary files through Settings → System → Storage → Temporary files.
- Shut down virtual machines and emulators if not required.
- Check if any launchers like Steam, Discord, and Adobe’s Creative Cloud helper are running on your PC.
- Turn on Storage Sense in Settings to let Windows automatically clean up junk files in the future.
These tweaks won’t increase your installed RAM, but they can reduce unnecessary background activity and help Windows use system resources more efficiently.
Fix 3: Reseat your RAM and test the memory slots
Once I ruled out Windows itself, I turned my attention to the hardware. A RAM module that isn’t fully seated or a faulty memory slot can prevent Windows from recognizing all available memory, leaving a large portion marked as hardware reserved.
You need to shut down your PC, switch off the power supply, and unplug the power cable. After opening the case, remove each RAM stick by releasing the retaining clips and then firmly reinstall them until they click into place.
While doing that, I also:
- Cleaned away any visible dust
- Made sure each stick clicked firmly into place
- Verified they were installed in the motherboard’s recommended slots for dual-channel mode
To rule out a faulty module or slot, I tested one RAM stick at a time and tried each stick in different slots. This helped me confirm that both memory modules and the motherboard slots were working properly. Otherwise, use a dedicated tool like MemTest86 to identify faulty memory modules that Windows might not detect during normal operation.
After putting everything back together and starting the PC, check Task Manager and Settings > System > About again. In my case, Windows detected all of the installed RAM correctly, and the amount of hardware reserved memory dropped significantly.
Fix 4: Verify your BIOS memory settings
This ultimately turned out to be the most important step in my troubleshooting process.
In order to check, reboot your computer and access the BIOS using the key indicated upon booting (usually Delete, F2, or F10, depending on the motherboard). Once inside, look for settings related to memory.
Usually, I check three settings:
- Memory Remap: If this feature is disabled, Windows may not be able to use all of the installed RAM. Enabling it and saving the changes can often resolve the issue.
- Integrated Graphics Memory: In a processor with integrated graphics, the BIOS may reserve a fixed amount of RAM for the GPU. If you don’t rely heavily on integrated graphics, reducing the reserved amount can free additional system memory.
- BIOS Update: An outdated BIOS can occasionally misreport available memory or contain bugs affecting RAM detection. If your motherboard manufacturer has released a newer firmware version, updating it may solve the issue.
Other reasons Windows may reserve too much RAM
Not every case has the same cause. During my research, I found several other possibilities that can lead to unusually high hardware reserved memory:
- Integrated graphics reserving several gigabytes of shared memory
- Older BIOS versions with memory compatibility issues
- Outdated chipset drivers
- Incorrect BIOS defaults after a firmware update
- Virtualization settings on some systems
- Unsupported or mismatched RAM configurations
- A corrupted Windows installation (less common)
The biggest mistake is assuming Windows itself is responsible. In many cases, the memory is reserved before Windows even starts loading.
How much hardware reserved RAM is normal?
This was one question I kept asking while troubleshooting.
There’s no universal number because every PC is different, but as a general guideline:
| Installed RAM | Typical Hardware Reserved |
|---|---|
| 8GB | 100MB–600MB |
| 16GB | 100MB–800MB |
| 32GB | 100MB–1GB |
Systems using integrated graphics may reserve more memory, especially laptops.
If you’re seeing several gigabytes permanently marked as Hardware Reserved, it’s worth investigating rather than assuming it’s normal.
Things I wish I knew before troubleshooting
Looking back, I had wasted way too much time dealing with the wrong issues.
Here are the lessons that would’ve saved me hours:
- Hardware Reserved RAM isn’t automatically a bug.
- Don’t reinstall Windows as your first troubleshooting step.
- Always check the BIOS before changing Windows settings.
- Never assume new RAM is seated correctly just because the PC boots.
- MSConfig should usually be left at its default settings.
- Large amounts of reserved memory almost always have a specific cause—you just have to find it.
The biggest lesson? Troubleshoot methodically. Changing multiple settings at once makes it almost impossible to identify what actually fixed the problem.
Final thoughts
When I first discovered Windows wasn’t using all of my installed RAM, at first, I thought Windows itself was causing the problem. In reality, it came down to configuration rather than faulty hardware.
By checking Windows boot settings, confirming the BIOS recognized my memory, verifying RAM installation, and ruling out hardware faults, I recovered almost all of the missing memory without reinstalling Windows.
If your PC is showing several gigabytes as Hardware Reserved, don’t panic. Start with the simple fixes first, work through them one at a time, and verify the results after each change. More often than not, the missing RAM is recoverable.
In case you missed: