How to Disable Camera Access From Lock Screen on iPhone
Learn how to remove the camera from your iPhone Lock Screen. Use recent iOS controls to replace the shortcut, or block Camera everywhere with Screen Time.
- iOS 18 lets you customize Lock Screen controls, including removing the Camera icon to avoid accidental launches or improve privacy.
- To remove the Camera shortcut, tap and hold the Lock Screen, enter customization mode, and hit the minus icon over the Camera button.
- You can fully disable the Camera app in Screen Time, which blocks access from all areas, including the Lock Screen swipe gesture.
- Disabling Camera via Screen Time hides it across the system, but third-party camera apps can still be used if needed.
- Apple provides video tutorials and related guides, making it easier to follow step-by-step instructions for Lock Screen customization.
Apple added the camera control to the Lock Screen by default so users can click pictures and record videos instantly. However, this helpful accessibility has left many users frustrated, as the camera app often pops up unintentionally, especially when trying to unlock their iPhones. Fortunately, from the iOS 18 update, Apple finally paid heed to the users’ plight and added the ability to customize iPhone lock screen controls.
Keep reading to learn how to remove the camera from your iPhone Lock Screen.
How to Remove Camera From iPhone Lock Screen (iOS 18 or Later)
Starting with iOS 18, you can remove or customize the lock screen controls on your iPhone. This means you can remove the Camera control button and get rid of the Camera app constantly popping up.
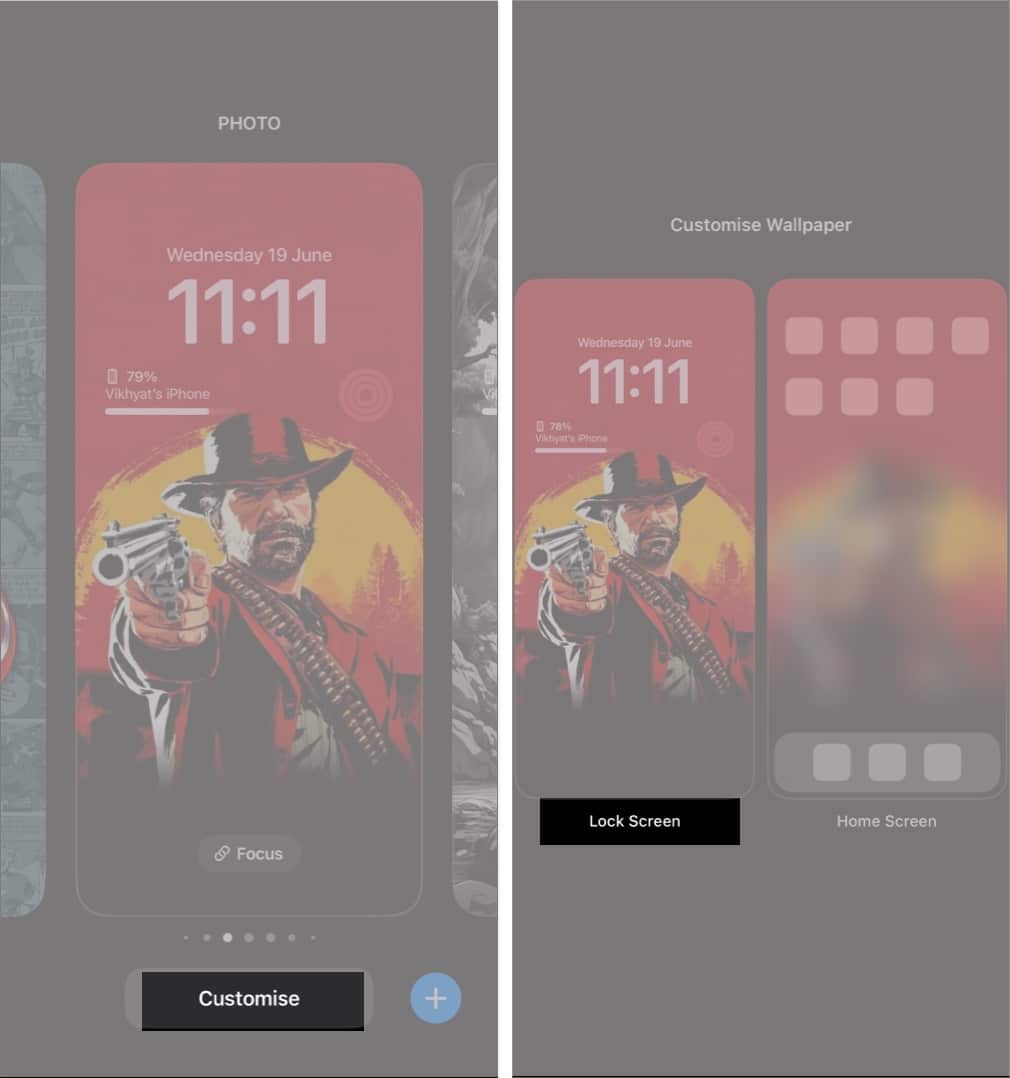
- Swipe down from the top left to pull down the Lock Screen.
- Touch & hold the Lock Screen and tap the Customise button that appears at the bottom.
- Tap on Lock Screen.
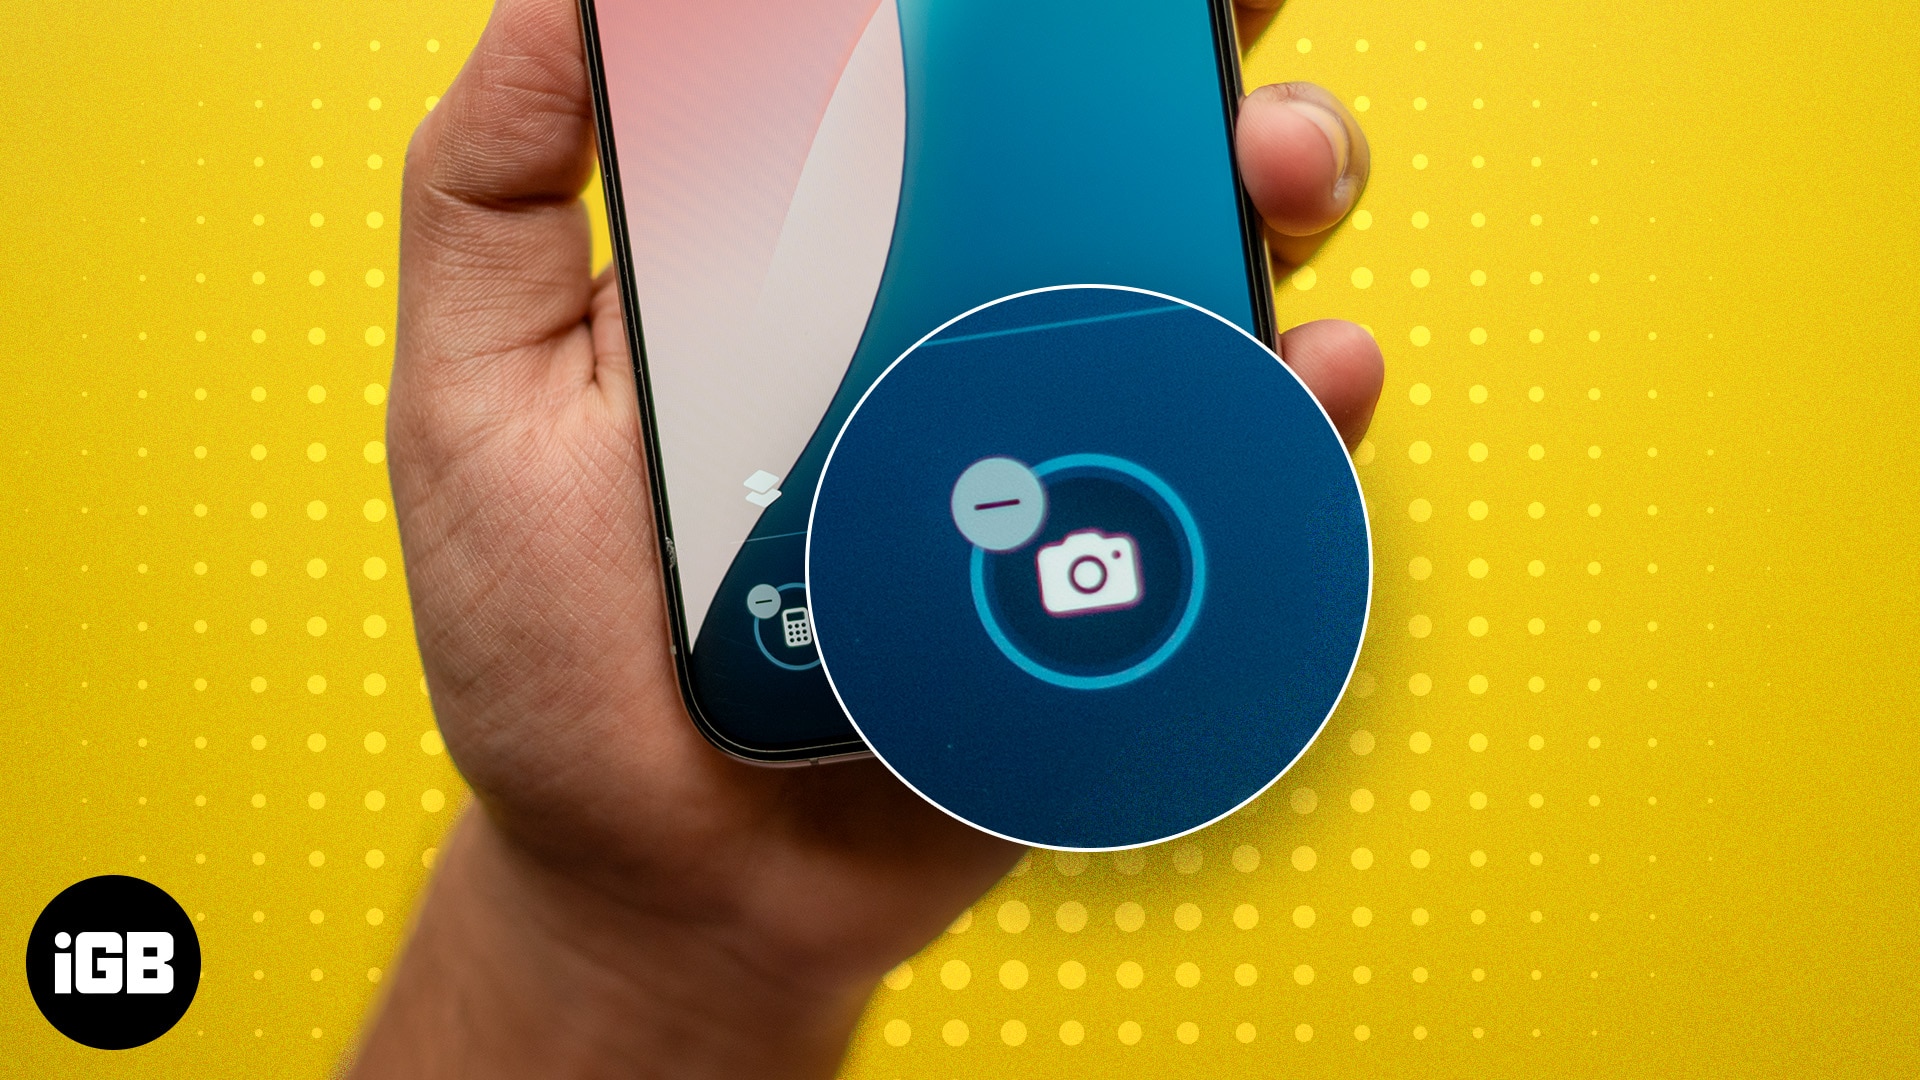
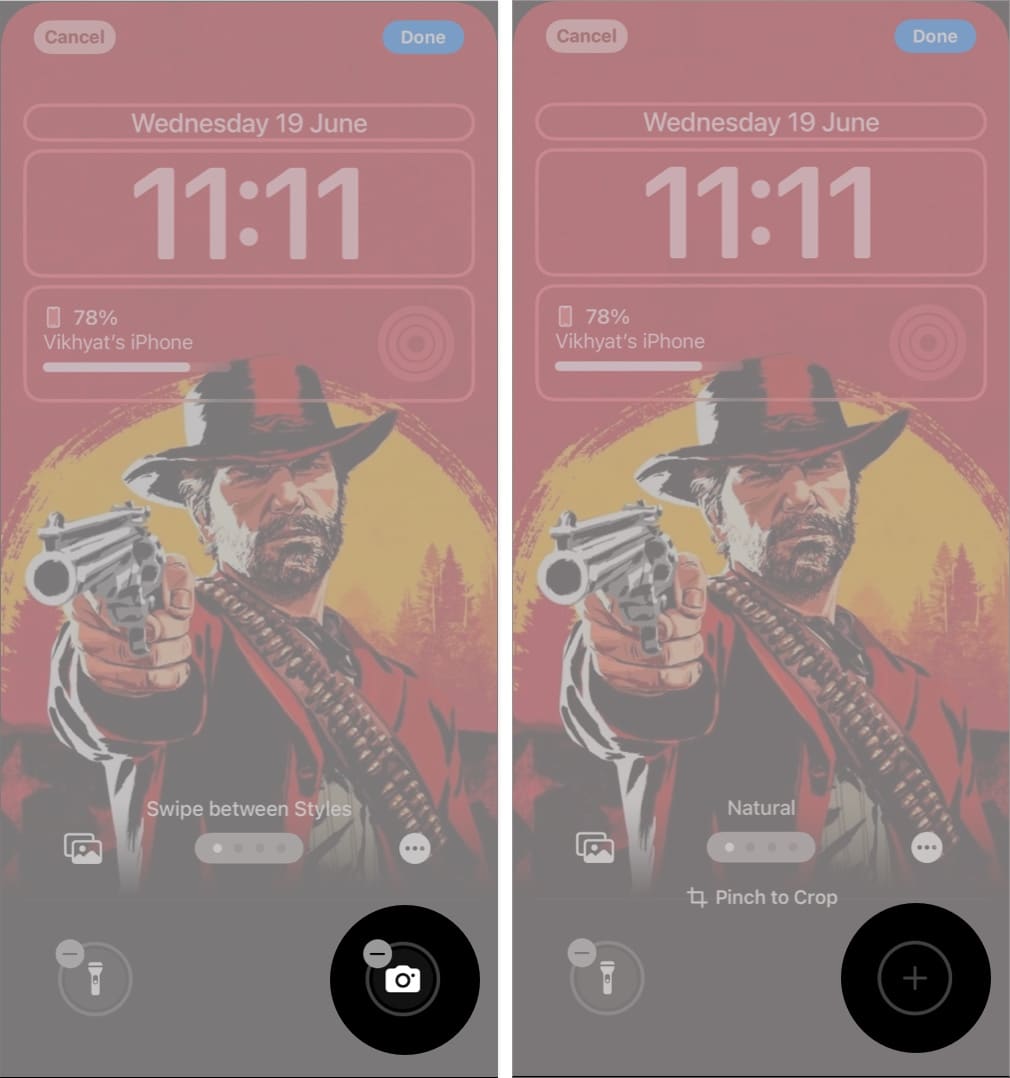
- Next, tap the “-” (minus) button over the Camera icon to remove it from the lock screen.
- To add a new control, tap the + button or tap Done at the top right corner.
Method 2: Disable the Camera Everywhere With Screen Time
If removing the camera access from the Lock Screen has more to do with Privacy than just accidentally opening the app, you can head to Screen Time to disable the Camera app altogether. Even swiping left on the Lock Screen won’t open the Camera app.
- Go to the Settings app → Scroll down and tap Screen Time.
- If it’s your first time using Screen Time, you will see a summary of the feature. Now, tap on Continue. You will be asked if the iPhone belongs to you or your children. Select the appropriate option.
- Scroll down and select Content & Privacy Restrictions.
- Toggle on Content & Privacy Restrictions.
- Then navigate to Allowed Apps → Toggle off Camera.

Note:
When you lock your screen and swipe left, the Camera app no longer opens. In fact, the Camera icon gets blurred out. To re-enable the Camera app, follow the same steps and toggle Camera access back on.
Signing off…
And that’s it; this is how you disable Camera Access from the Lock Screen on your iPhone. While latest iOS update does allow you to remove the Camera control button from the Lock Screen, you can still access the camera by swiping left on the Lock Screen. On the other hand, the Screen Time method restricts access to the Camera app at all locations, even from the Home Screen. So, whether you want to remove the Camera access due to frustration or privacy concerns, the choice is yours.
If you are still left with some doubts, comment down below, and I’ll happily respond.
You might want to refer to these posts as well:
Topics

Written by
Marcus Mears IIIMarcus Mears III is a lifelong technology enthusiast with half a decade of experience developing prose that keeps readers in the know. With hundreds of reviews, buying guides, and how-to explainers across a number of tech and lifestyle publications like How-To Geek, MakeUseOf, and iGeeksBlog, Mears’ work helps readers around the globe learn to make the most of their devices and software. He uses a 2016 MacBook Pro as his daily driver laptop and a self-built Windows PC for gaming and productivity.
View all posts →More from How-to

Snapchat Parental Controls: How to Set Up Family Center and Keep Your Teen Safe
Snapchat’s Family Center lets parents monitor their teen’s friend activity and screen time without reading private messages. Here’s how to set it up and what to expect.

How to Block and Unblock Someone on Instagram
Instagram lets you block or unblock someone in seconds. Follow these simple steps to take full control of your privacy and online peace.

Apple Watch Not Responding? 8 Fixes That Actually Work
Is your Apple Watch unresponsive or stuck on a black screen? Here are 8 proven fixes to help you unfreeze it and get it working again quickly.