So far, I had been using Universal Clipboard on my Apple devices without any issues. But suddenly, Universal Clipboard stopped working between Mac and iPhone. As a result, I couldn’t copy and paste anything across my devices. Thankfully, I was able to overcome the problem after trying out the fixes below.
Check them out if you need help with Universal Clipboard not working for you!
Requirements to use Universal Clipboard on Mac and iPhone
- Make sure you have a device running iPadOS, iOS 10, and macOS Sierra or later.
See the list below:
iPhone and iPad
- iPhone 5 or newer
- iPad Pro (all models)
- iPad (4th generation) or newer
- iPad Air or newer
- iPad mini 2 or newer
- iPod touch (6th generation) or newer
Mac
- MacBook (2015 or later)
- MacBook Pro (2012 or later)
- MacBook Air (2012 or later)
- Mac mini (2012 or later)
- iMac (2012 or later)
- iMac Pro (all models)
- Mac Pro (2013 or later)
- The devices must be within the Bluetooth range.
- You must use the same Apple ID on your iPhone, iPad, and Mac.
- Ensure W-Fi, Bluetooth, and Handoff are enabled on all your devices.
Once you are confident that you fulfill all the requisites and still the Universal Clipboard isn’t working, read along.
8 Fixes for Universal Clipboard not working on Mac and iPhone
1. Turn off/on Wi-Fi and Bluetooth
This is one of the quickest fixes that may bring this problem to rest. On iPhone, open the Settings app and one-by-one turn off Wi-Fi and Bluetooth. After 30 seconds, enable them again.
Follow the same on Mac. You will find the Wi-Fi and Bluetooth icon in the top menu bar, macOS Control Center on macOS Big Sur and later, and System Preferences.
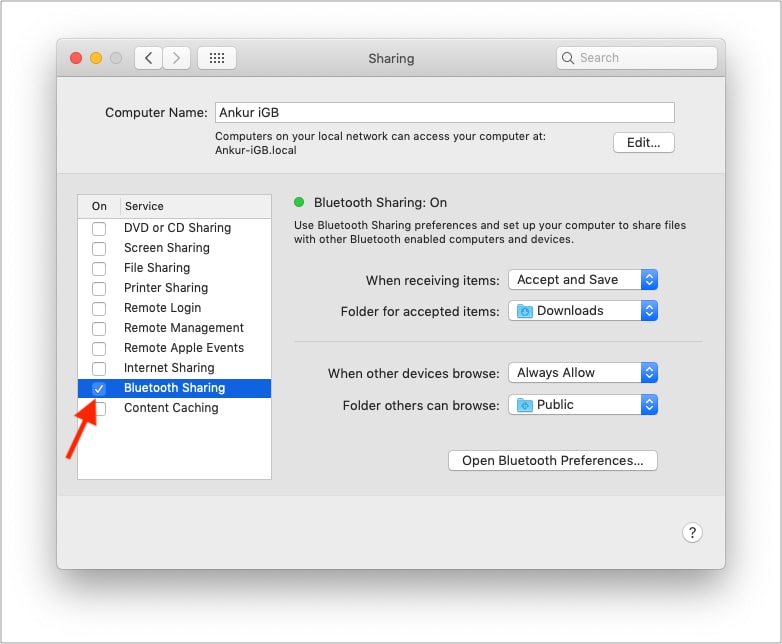
Secondly, enable Bluetooth Sharing on Mac and see if it brings any luck.
- Click the Apple logo at the top left.
- Select System Preferences.
- Click Sharing.
- Check the box for Bluetooth Sharing.
2. Restart your devices
Restarting your devices is an excellent and effortless way to ensure such issues are fixed. To restart your iPhone, use the physical switches. You may also go to Settings → General → Shut Down. After a minute, switch it on.
On Mac, click the Apple logo at the top left and choose Restart.
3. Disable and enable Handoff
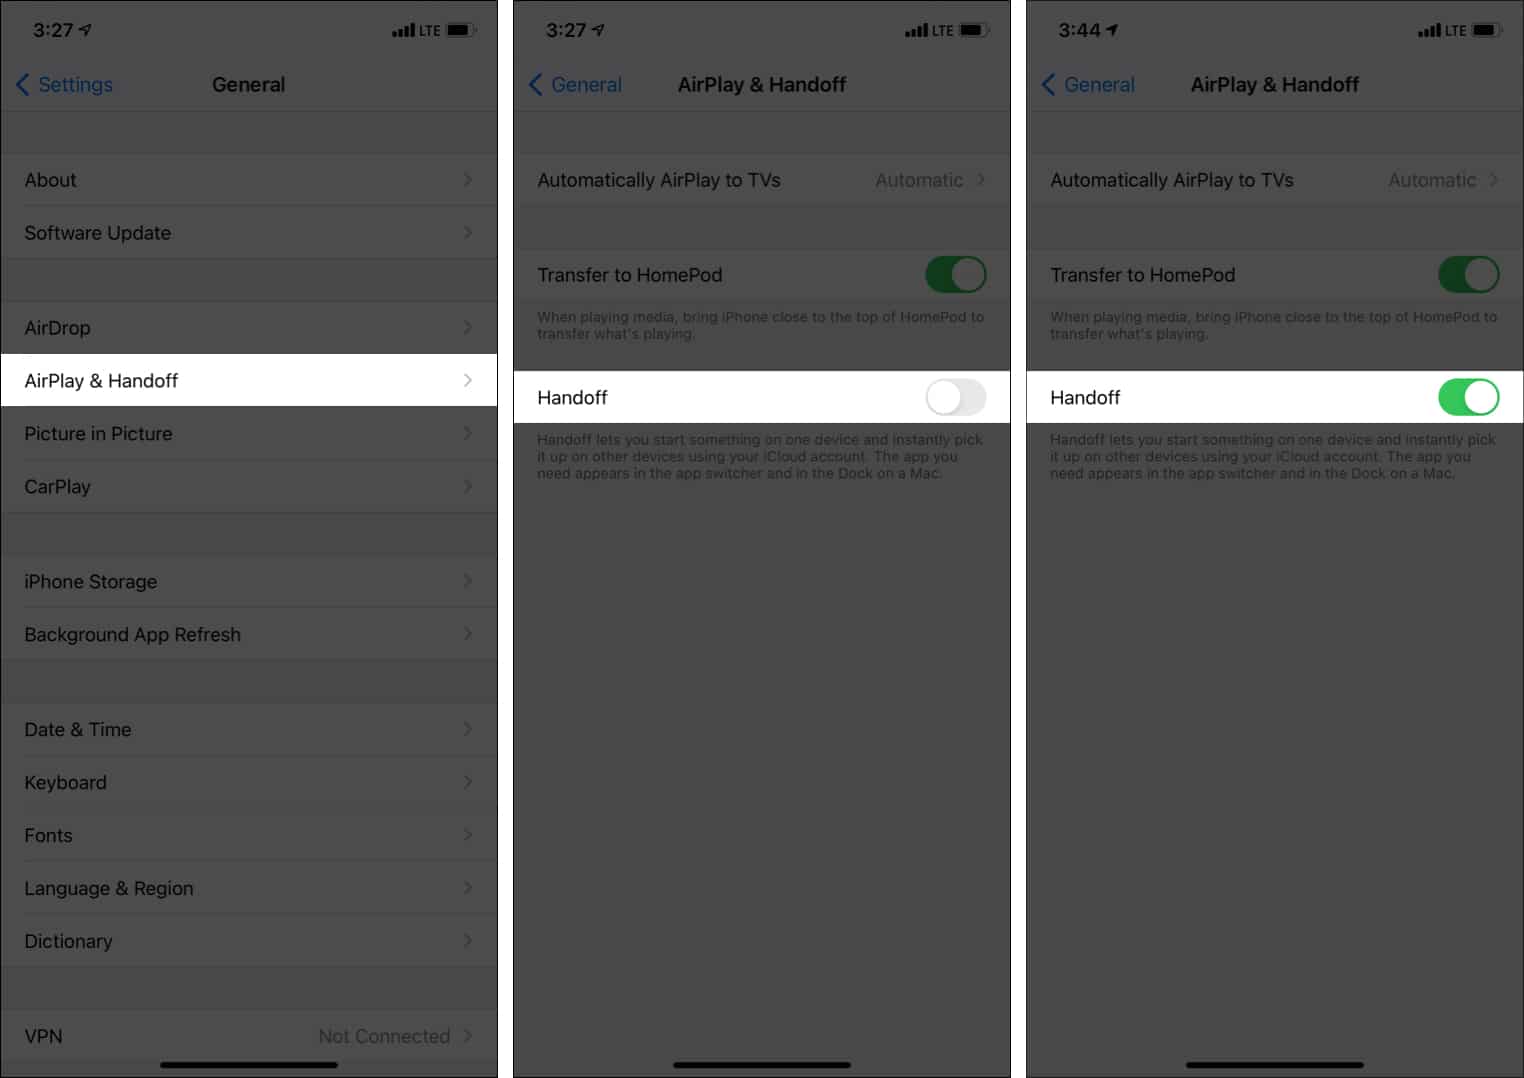
On iPhone or iPad:
- Open Settings and tap General.
- Tap AirPlay & Handoff.
- Turn off Handoff.
- After 30 seconds, turn it back on.
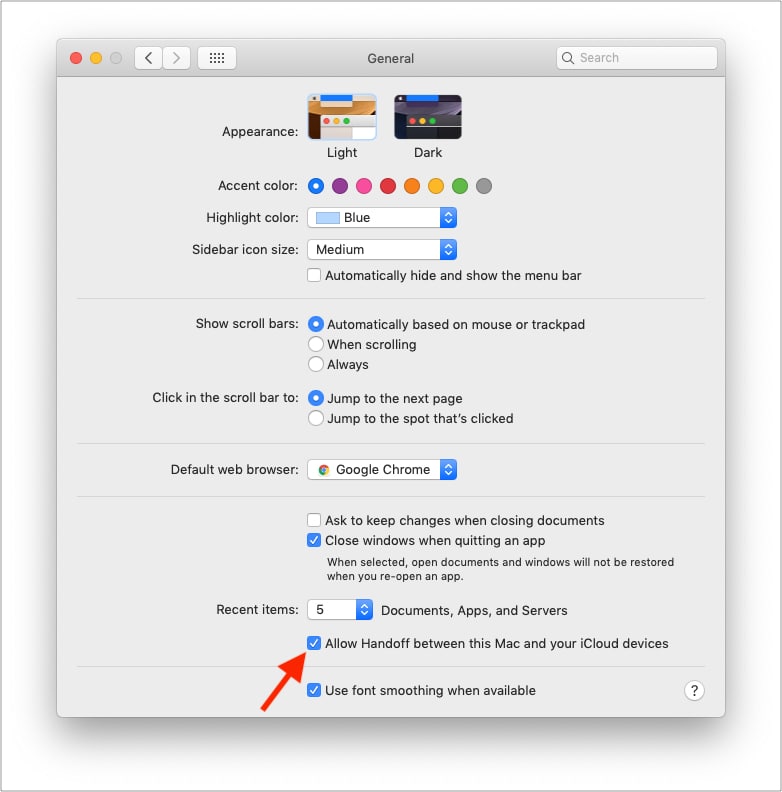
On Mac:
- Open System Preferences and click General.
- From the bottom, uncheck the box for Allow Handoff between this Mac and your iCloud devices to disable it.
- After 30 seconds, recheck the same box to enable it.
4. Sign out of iCloud and sign in again
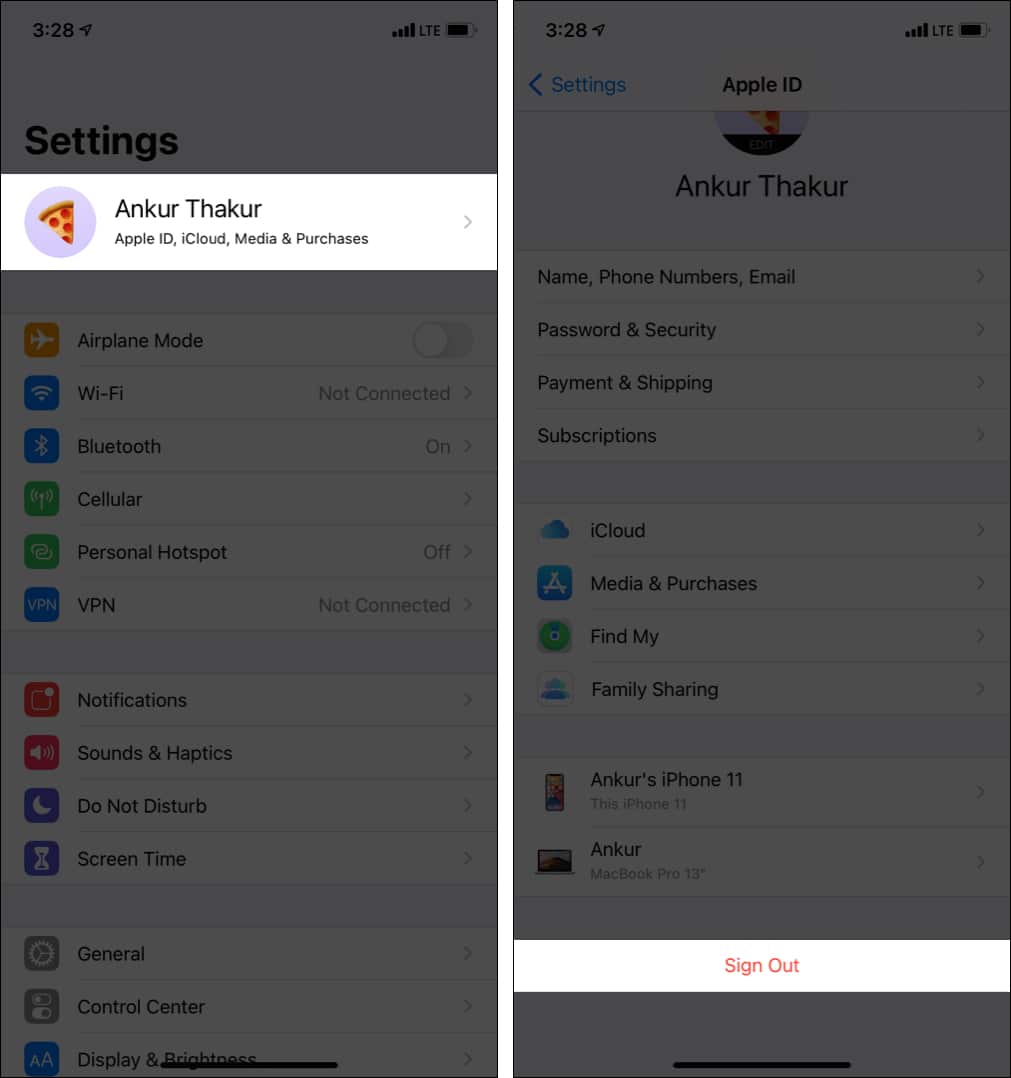
On iPhone or iPad:
- Open Settings and tap your name at the top.
- Scroll to the bottom and tap Sign Out.
- Enter your Apple ID password, and hit Turn Off.
You may keep a copy of your Calendars, Contacts, Health, and Keychain. Don’t worry! After you sign in to your Apple ID again, these will sync back. - Finally, tap Sign Out.
- Restart your iPhone or iPad.
- Go to Settings and tap Sign In at the top.
Enter your Apple ID credentials to sign in.
On Mac:
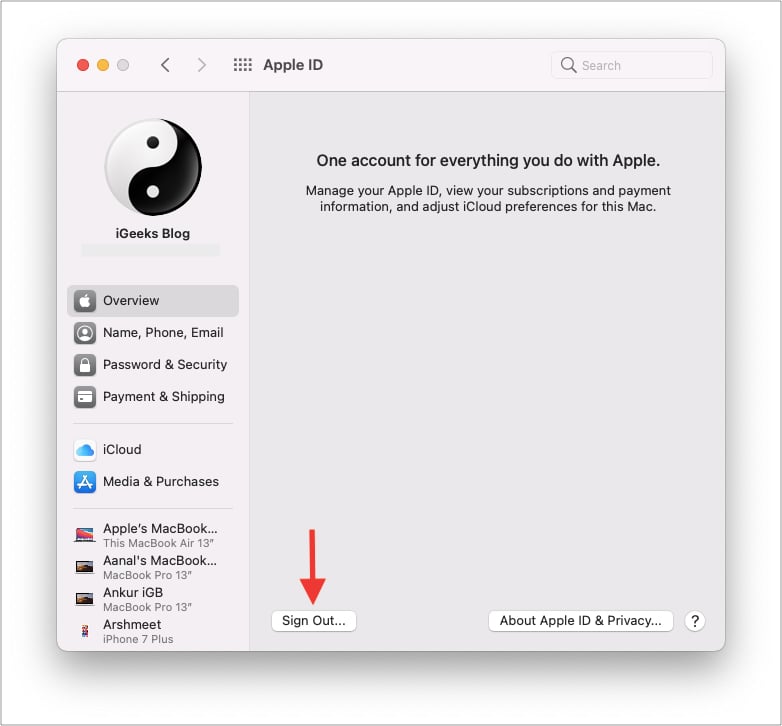
- Open System Preferences and click Apple ID.
- Click Overview → Sign Out.
- Restart your Mac.
- Follow the same steps to sign in again.
5. Reset Bluetooth Settings
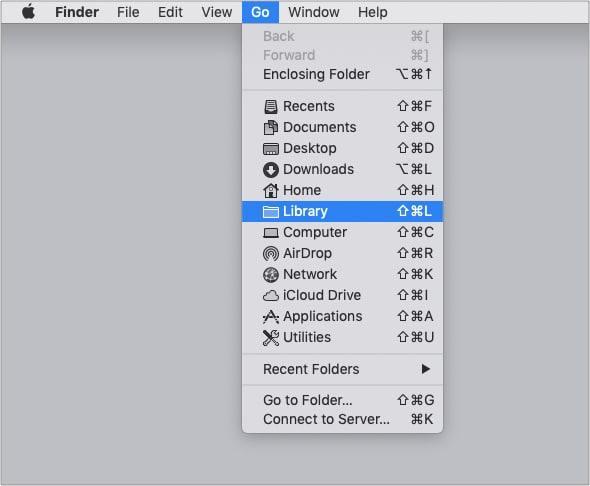
- When you are in Finder, press & hold the option key and click Go at the top menu bar.
- Click Library.
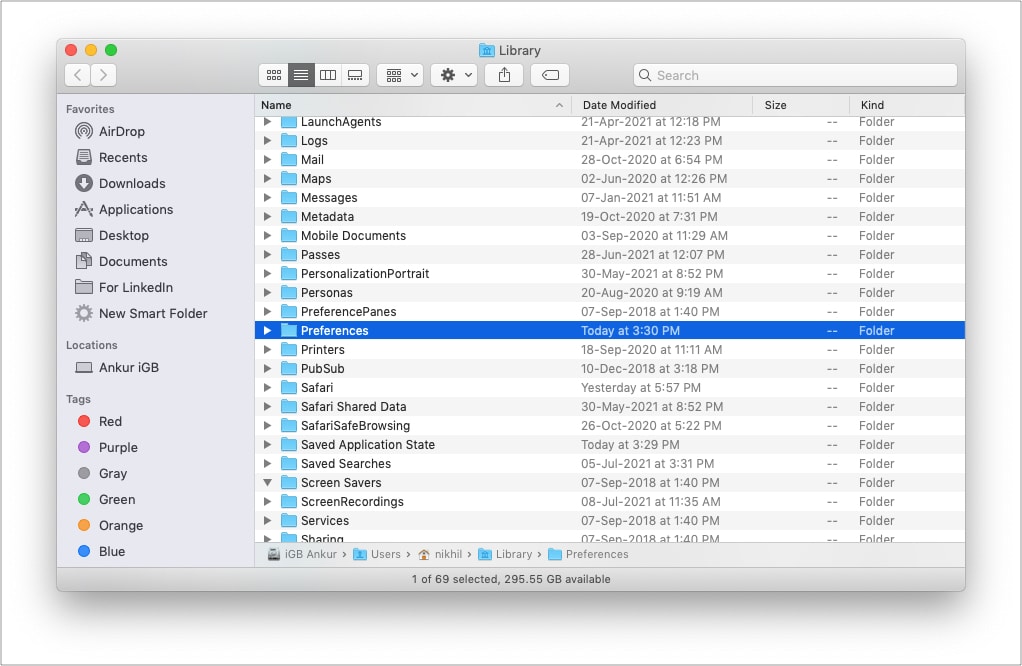
- Scroll down and click Preferences.
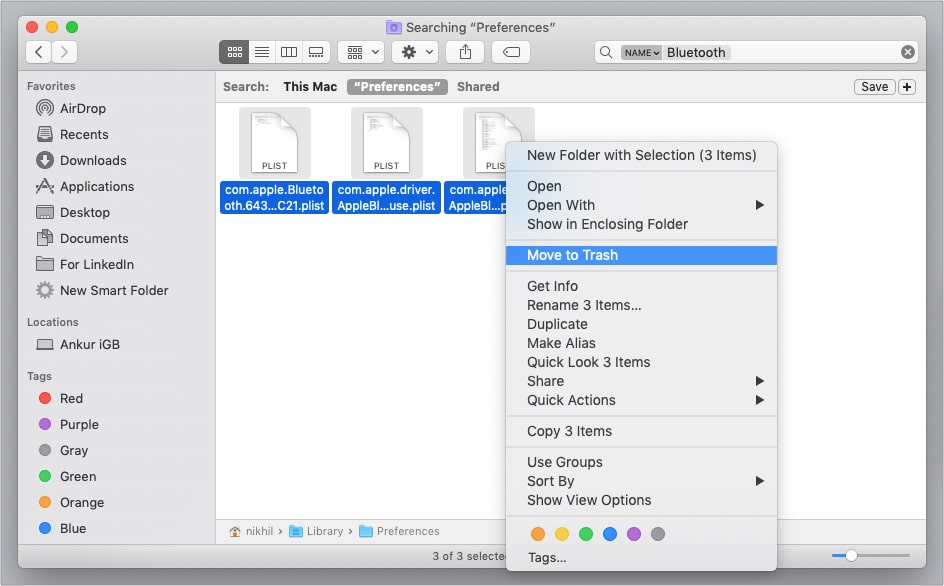
- In the top-right search box, type the word Bluetooth. Click Preferences.
You will see a few files. - Select all such files by pressing Command + A and move them to Trash.
- Empty the Trash and restart your Mac.
Once done, try using Universal Clipboard. It should work.
6. Reset iPhone Network Settings
Resetting your iPhone network settings won’t delete personal data like apps, app data, music, photos, videos, etc. However, all the settings you customized or added, like notifications, Wi-Fi, Bluetooth, VPN, etc., will go back to the default state.
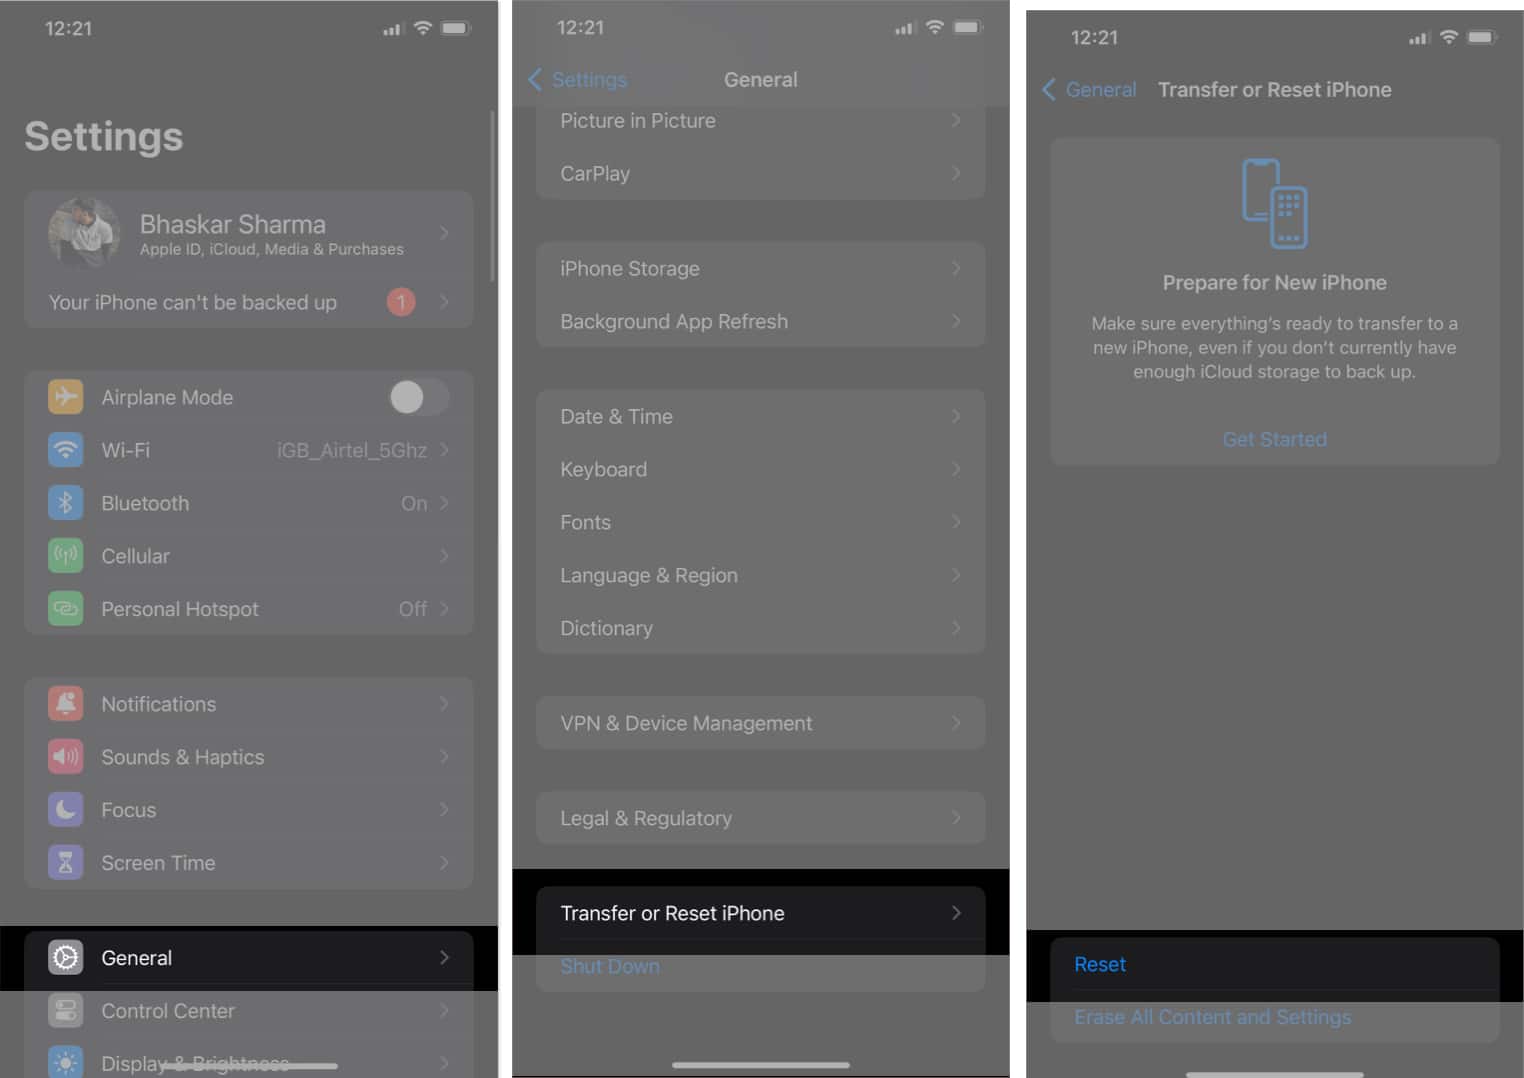
- Go to Settings → General → Transfer or Reset iPhone → Tap Reset.
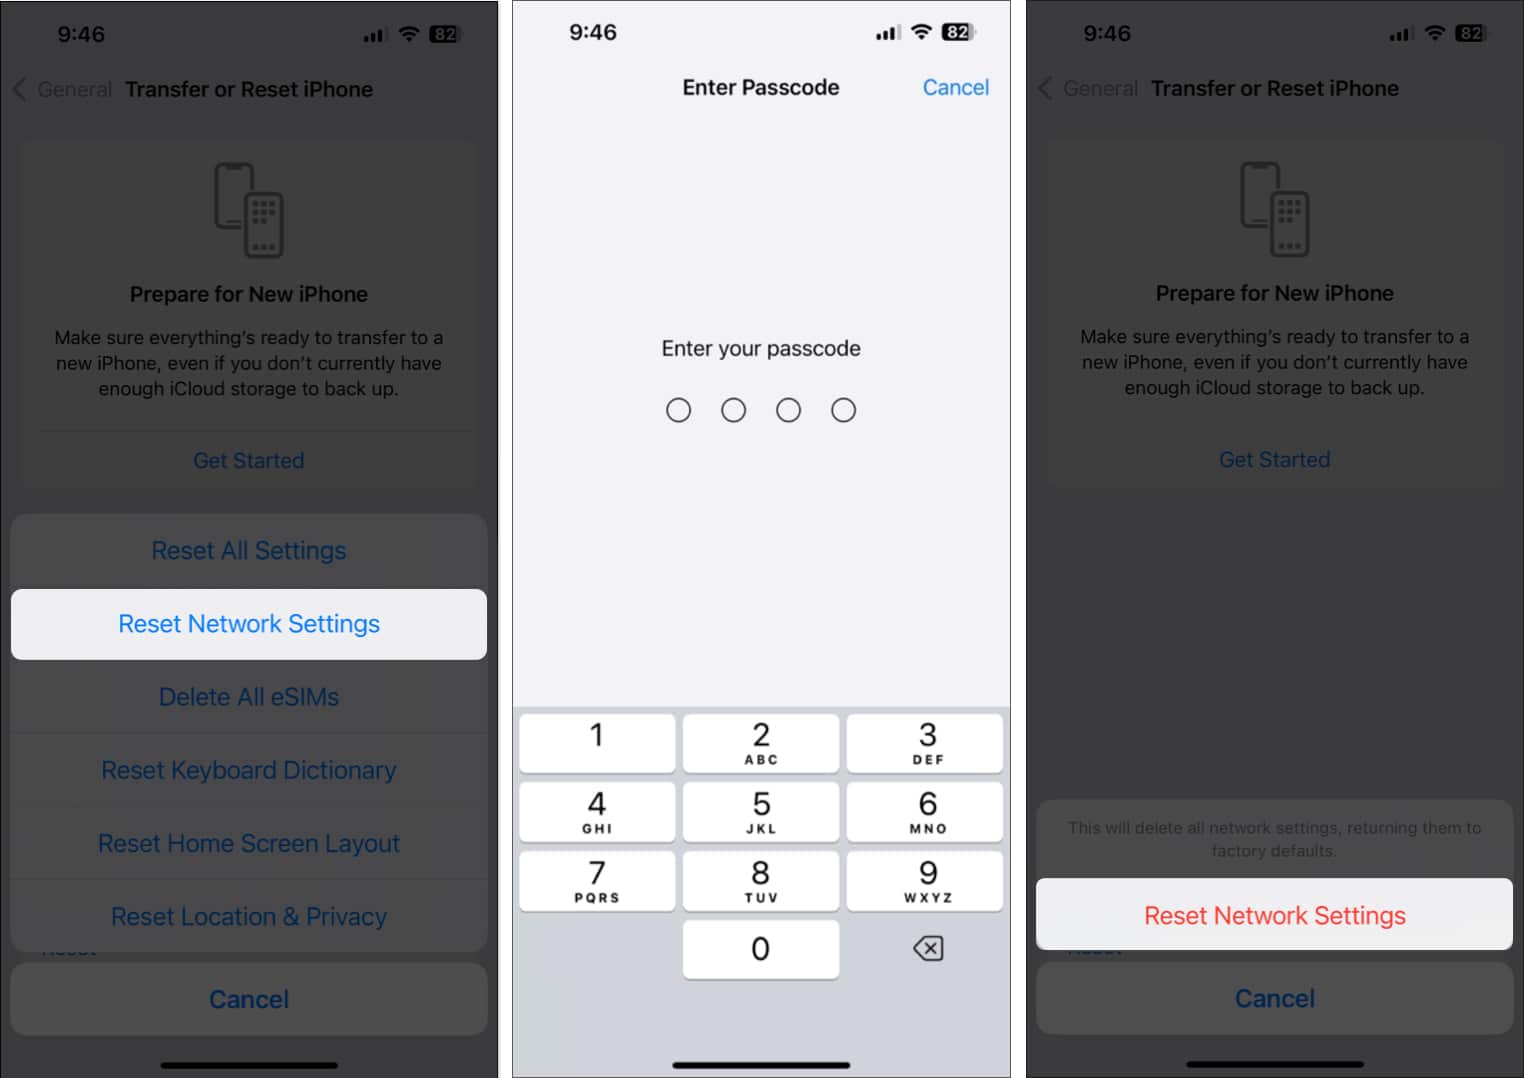
- Tap Reset Network Settings → Enter your Passcode → Tap Reset Network Settings.
Once it completes, try using Universal Clipboard again.
7. Reset Mac’s clipboard
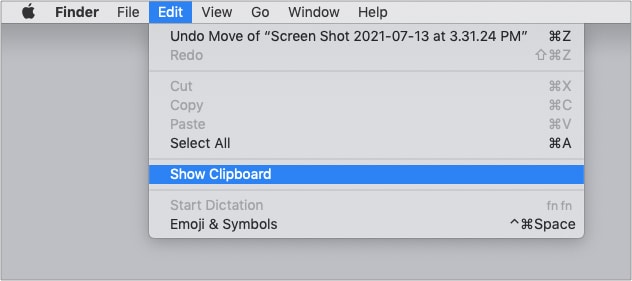
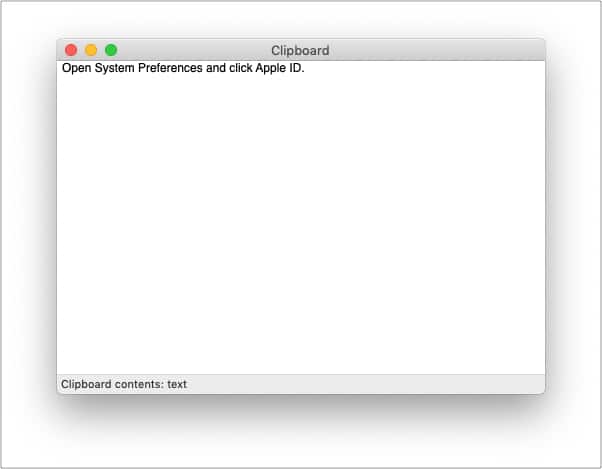
First, here is how to see your clipboard on Mac: When you are in Finder, click Edit in the top menu bar and select Show Clipboard.
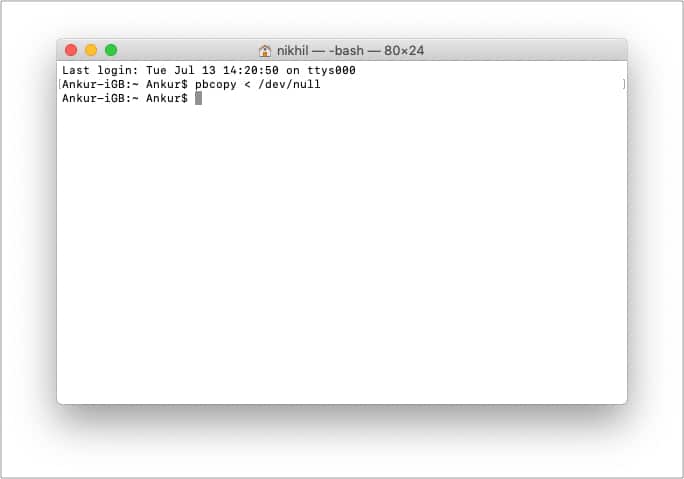
Next, here is how to reset Mac’s clipboard using Terminal.
- Open Terminal on your Mac.
Use the Applications folder, Launchpad, or by typing Terminal in Spotlight (accessed by pressing Command + Space Bar). - Copy this command and paste it into Terminal.
pbcopy < /dev/null - Hit the enter key to clear your Mac’s clipboard.
Now, Universal Clipboard should work flawlessly.
8. Update your Mac and iPhone
Finally, if nothing helps, update your devices.
- To update your iPhone, open Settings → General → Software Update.
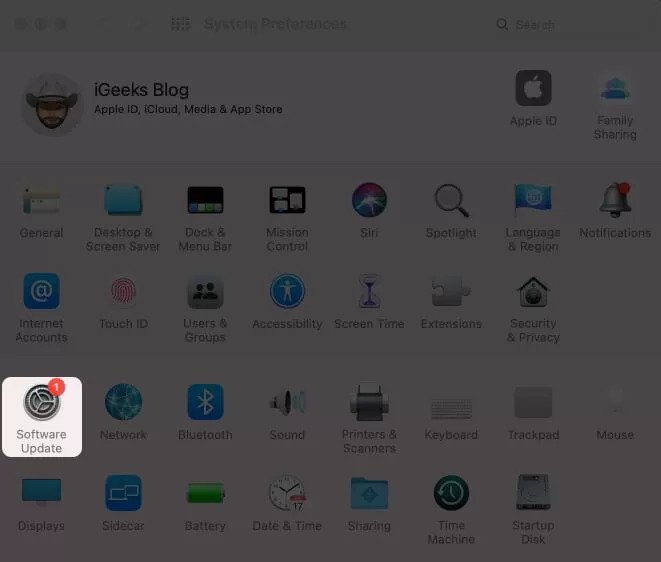
- To update your Mac, open System Preferences → Software Update.
This is how you can fix the Universal Clipboard not working between your Apple devices. I hope this guide helped you. If you need further assistance, contact Apple Support or reach me via the comments section below.
Check out next:



Leave a Reply