If you’ve used a Mac for a while, you already know the Control Center as a quick way to toggle settings like Wi-Fi, Bluetooth, or Do Not Disturb. But with each macOS update, Apple has made it more powerful and personalized. With macOS 26 Tahoe, the Control Center finally feels like the one we’ve always wanted—more intuitive and customizable, just like on the iPhone.
Here’s everything you need to know to master the Control Center on Mac and tailor it to your workflow.
What Control Center Does on macOS
The Control Center sits in the top-right corner of your Mac’s menu bar and gives you quick access to system settings. Click the icon that looks like a pair of toggle switches to open it. It includes settings for things like:
- Wi-Fi, Bluetooth, and AirDrop
- Sound and display sliders
- Focus modes
- Screen Mirroring
- Now Playing widgets
Starting with macOS 26, Control Center also supports:
- Window tiling options
- Screenshot tools
- Run Shortcuts
- Keyboard brightness
- Accessibility settings
Inside the Control Center, you can click icons to toggle settings on or off, drag sliders to adjust volume or brightness, or expand modules (with the little arrow) for more options—like choosing which Focus to activate or which screen to mirror to.
Privacy Indicators in Control Center
macOS also includes privacy indicators built into the Control Center icon. When your Mac uses the microphone, camera, system audio, or location, you’ll see an indicator:
- Orange dot = Microphone
- Green dot = Camera
- Purple dot = System audio
- Arrow = Location
Clicking the icon reveals which app is using the resource, as long as your Mac is running macOS 13.3 or later.
Customizing Control Center (macOS Sequoia and Earlier)
In older macOS versions (up to Sequoia), Control Center had customization options but with several limitations.
- Go to Apple Menu > System Settings > Control Center.
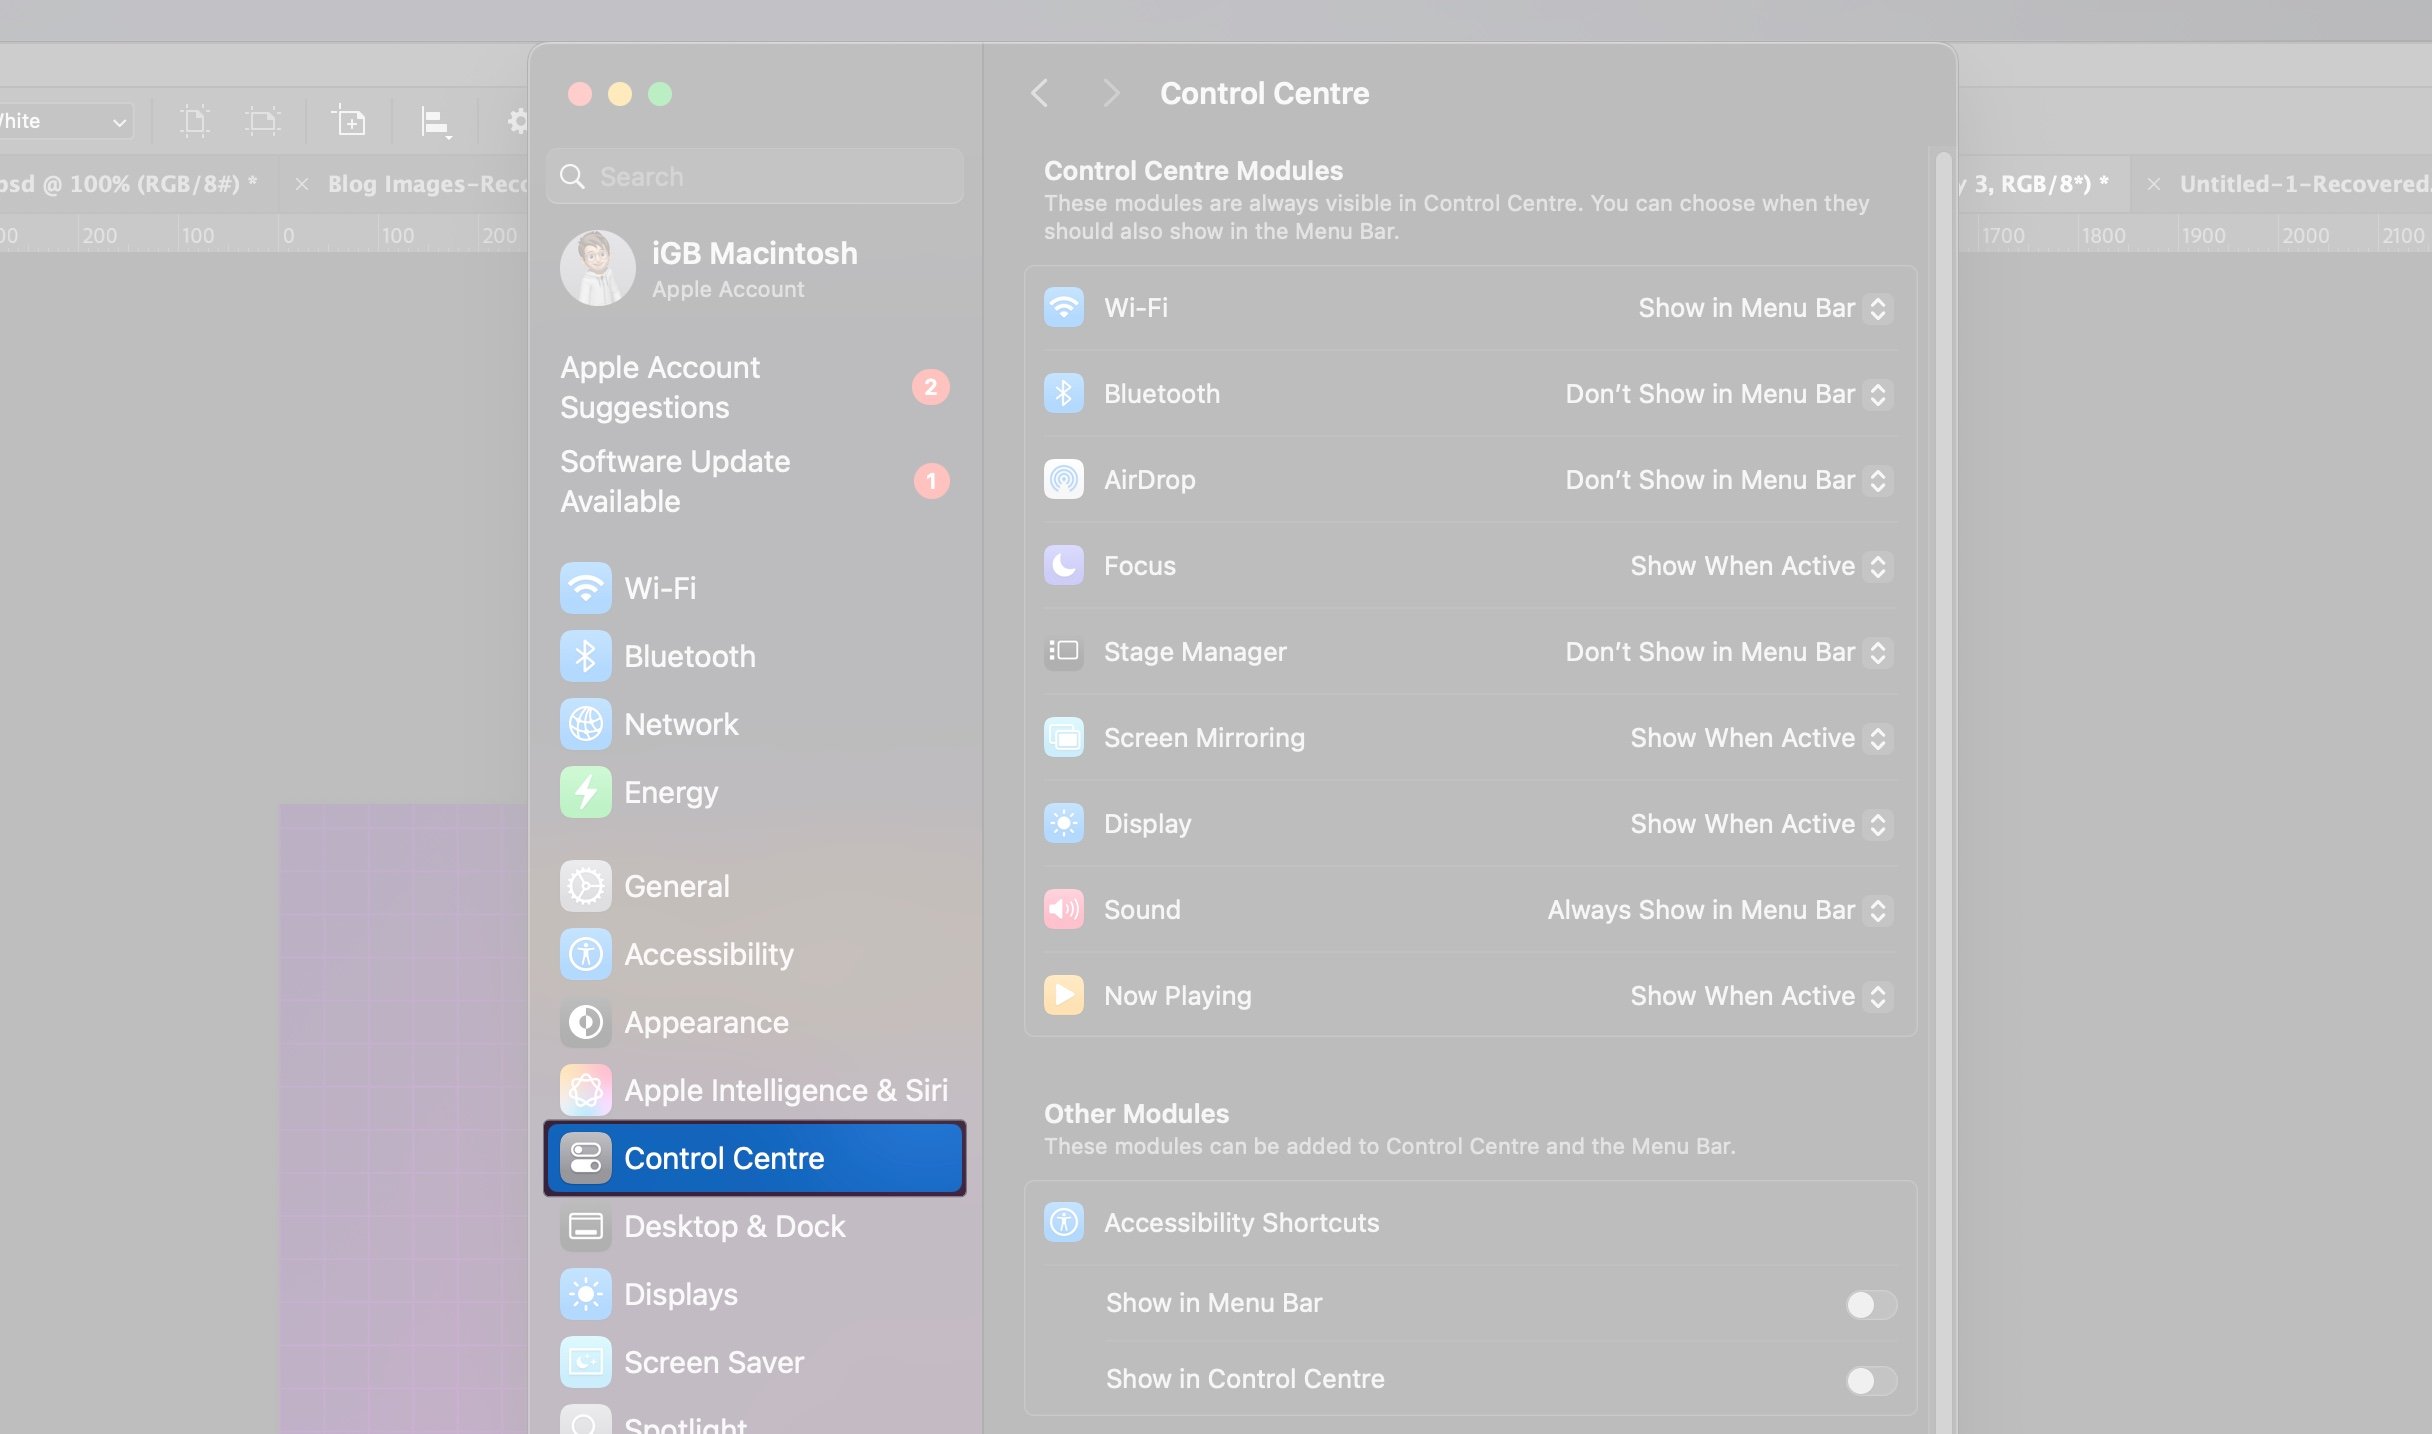
- In the Control Center Modules section, you could choose whether built-in items like Wi-Fi, Bluetooth, or Sound also appear in the menu bar. These modules were always part of the Control Center and couldn’t be removed.
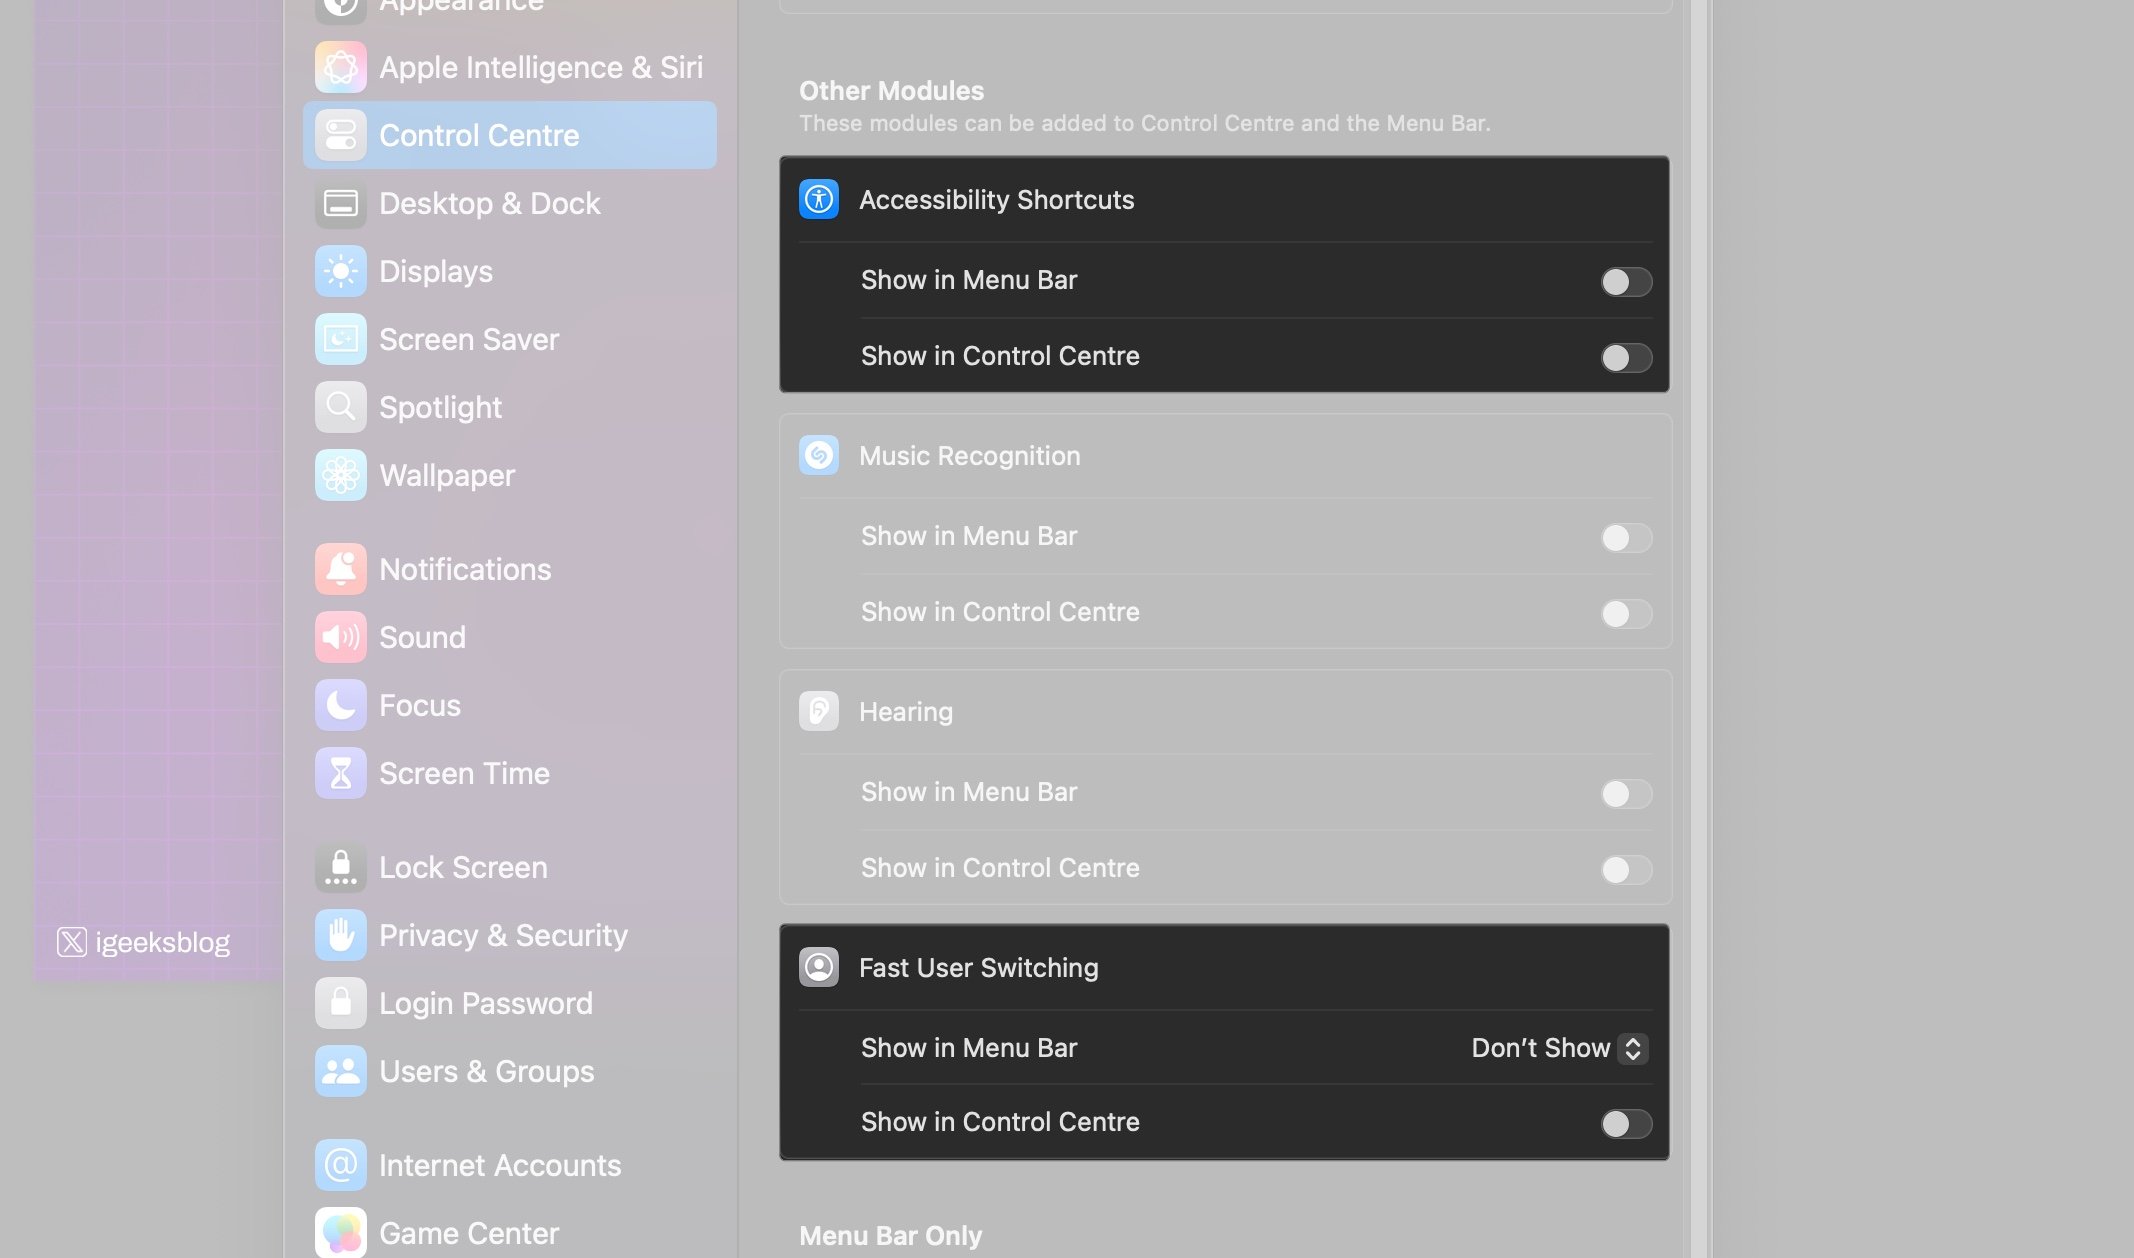
- In the Other Modules section, you could enable or disable items such as Accessibility Shortcuts, and Fast User Switching for both the Control Center and menu bar.
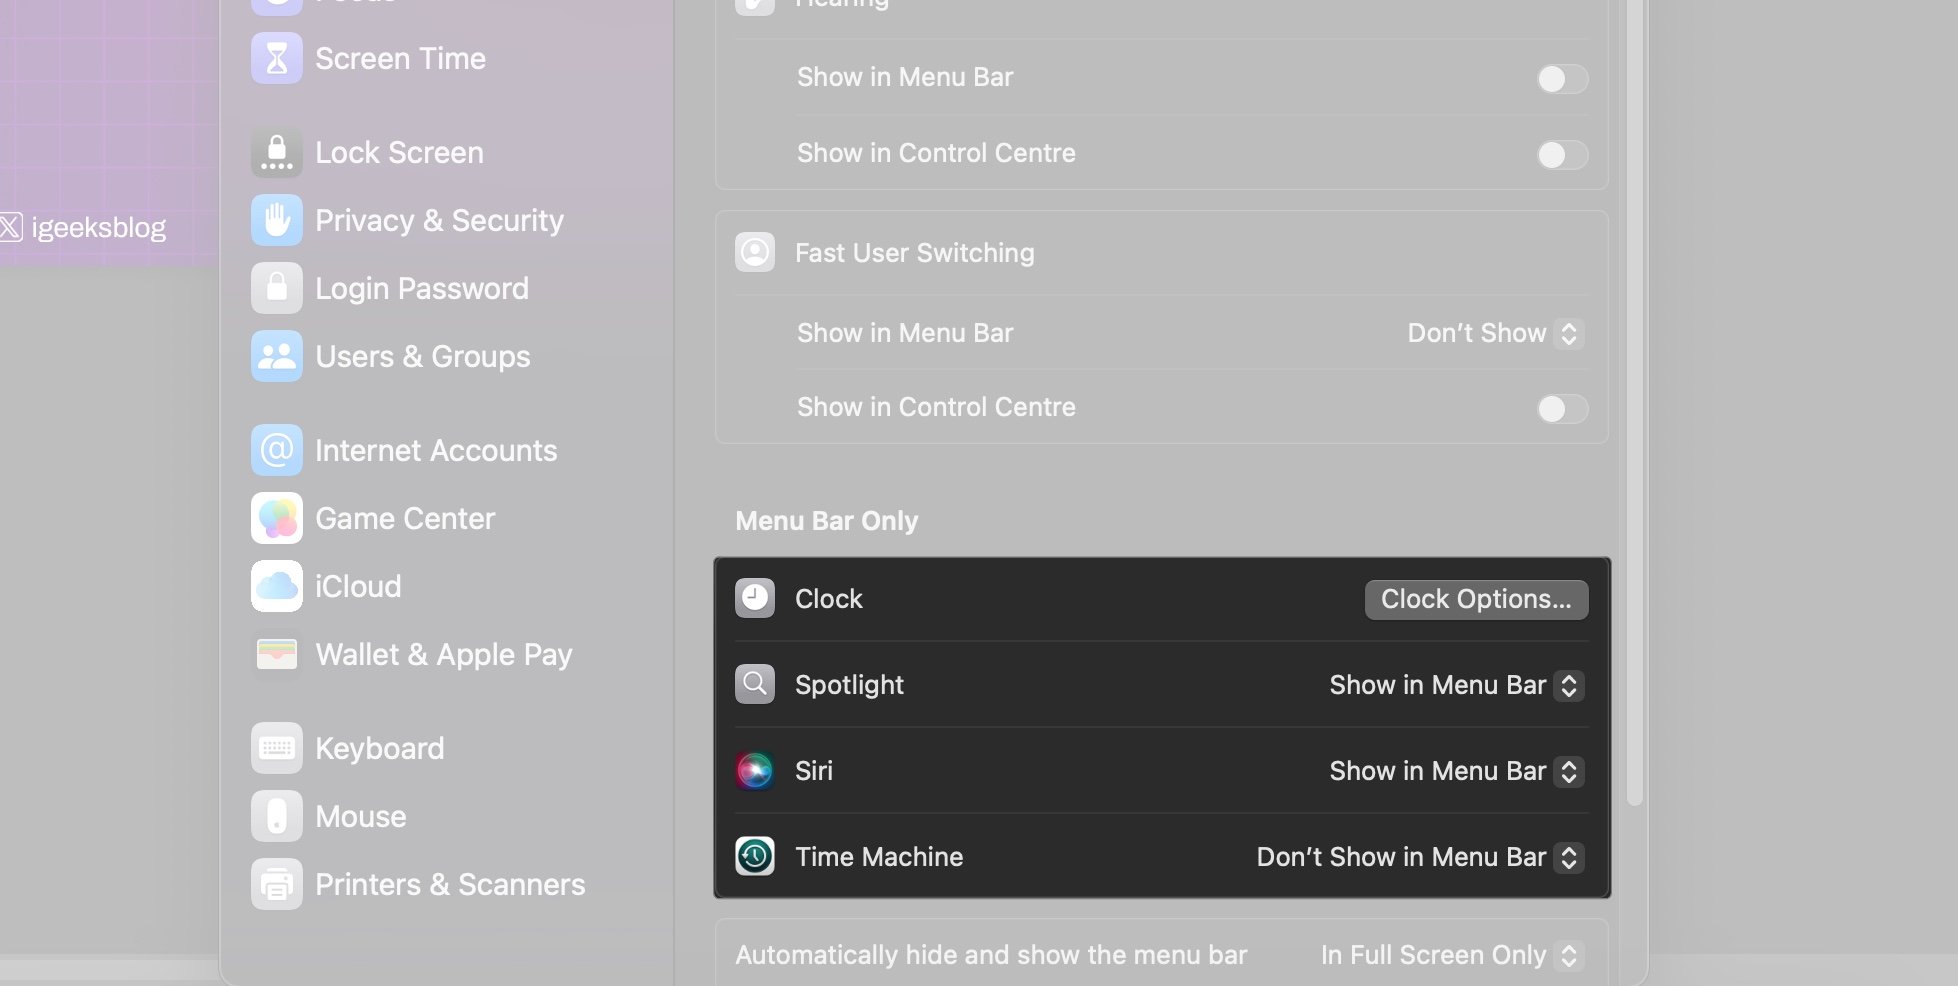
- In the Menu Bar Only section, you could add or remove items like the clock, Siri, Spotlight, VPN status, and Time Machine, but these appear in the menu bar itself, not in the Control Center.
While this setup gave you some control, it lacked flexibility compared to what macOS 26 now offers.
A Major Upgrade: Customizing Control Center in macOS 26
macOS 26 brings a redesigned Control Center with major improvements. You can now add, remove, or rearrange controls freely, just like on iOS. Plus, Apple introduced multiple Control Center pages, so you can organize your tools better—think one page for Home controls, another for screenshot tools, etc.
How to Customize Control Center in macOS 26:
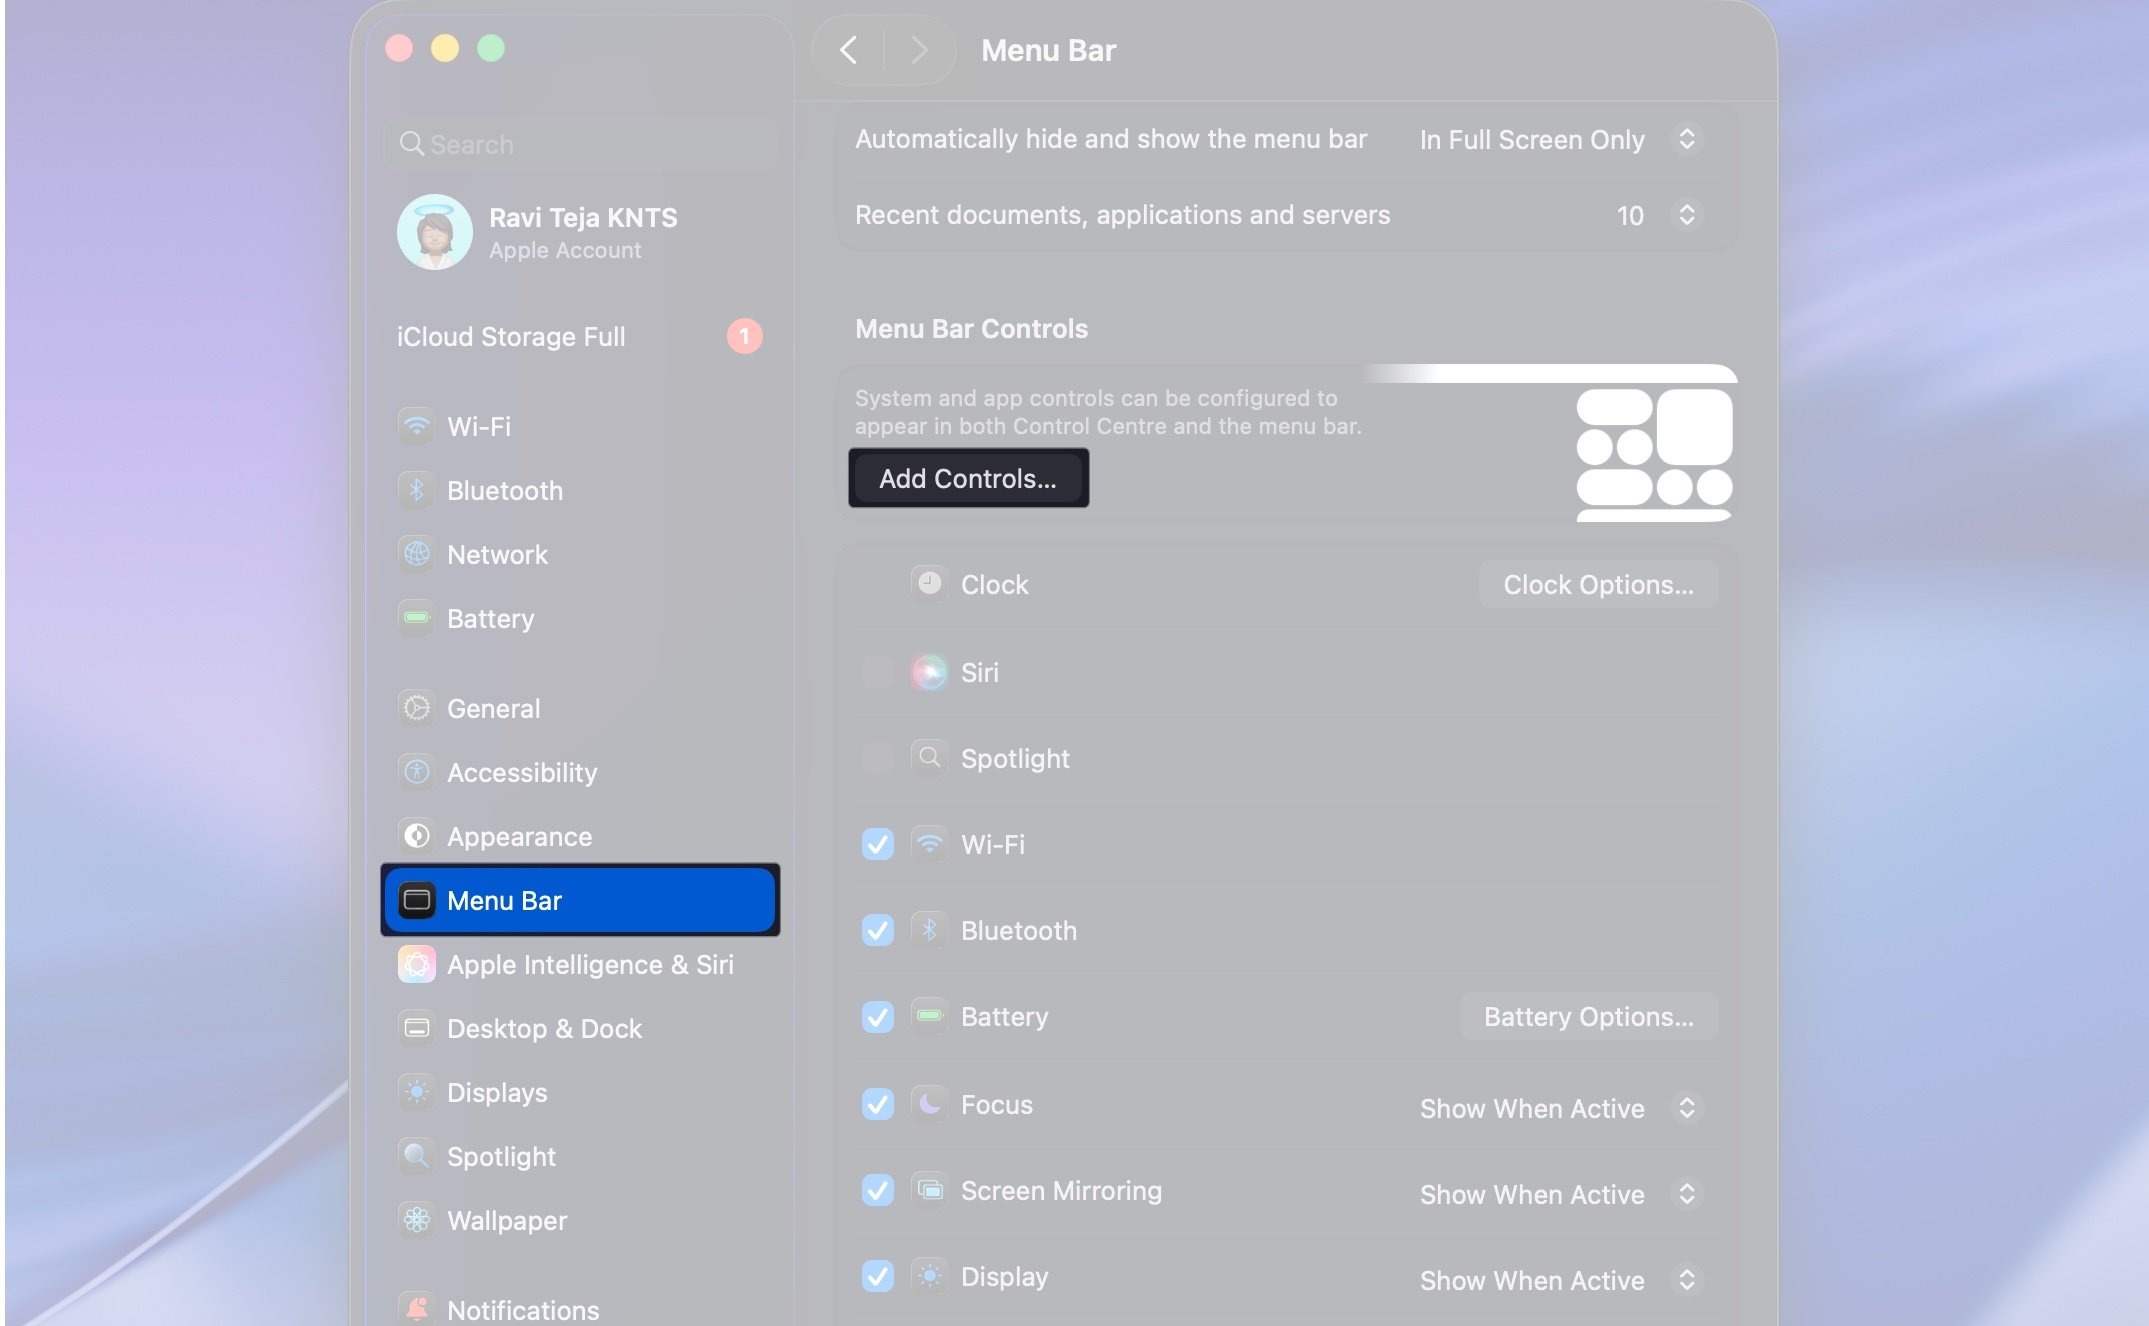
- Go to System Settings > Menu Bar (this replaces the old “Control Center” section).
- In the Controls section, click Add Controls to open the customization panel. This screen shows all the modules available to add to Control Center or the menu bar.
- Alternatively, you can open Control Center from the menu bar and click the Edit Controls button at the bottom. It leads to the same customization panel.
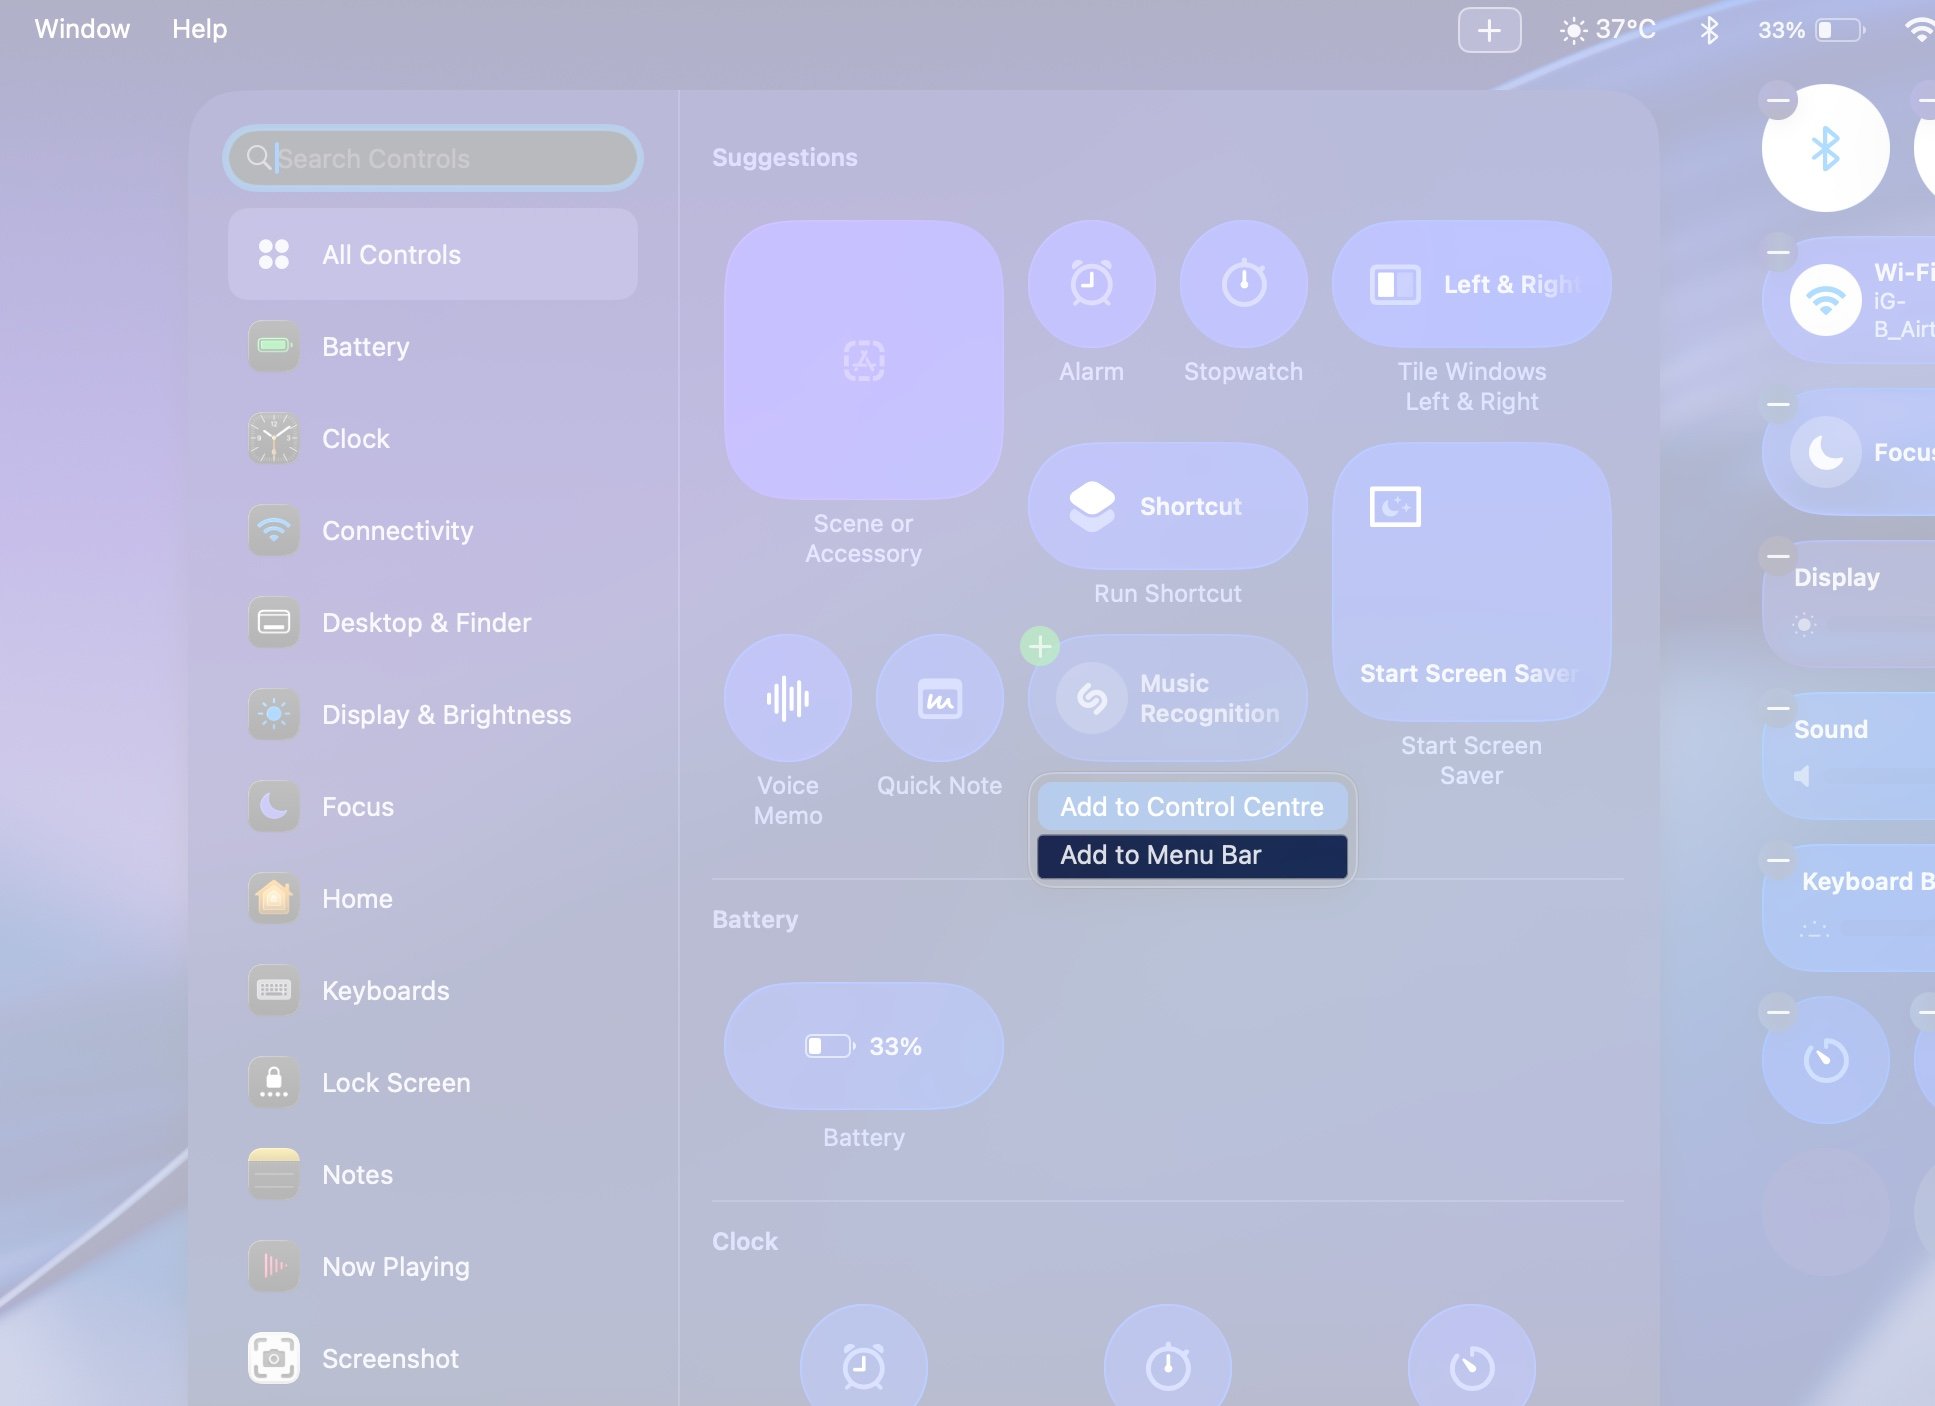
- Scroll through the list and click on the control you want to add. Then, choose Add to Control Center.
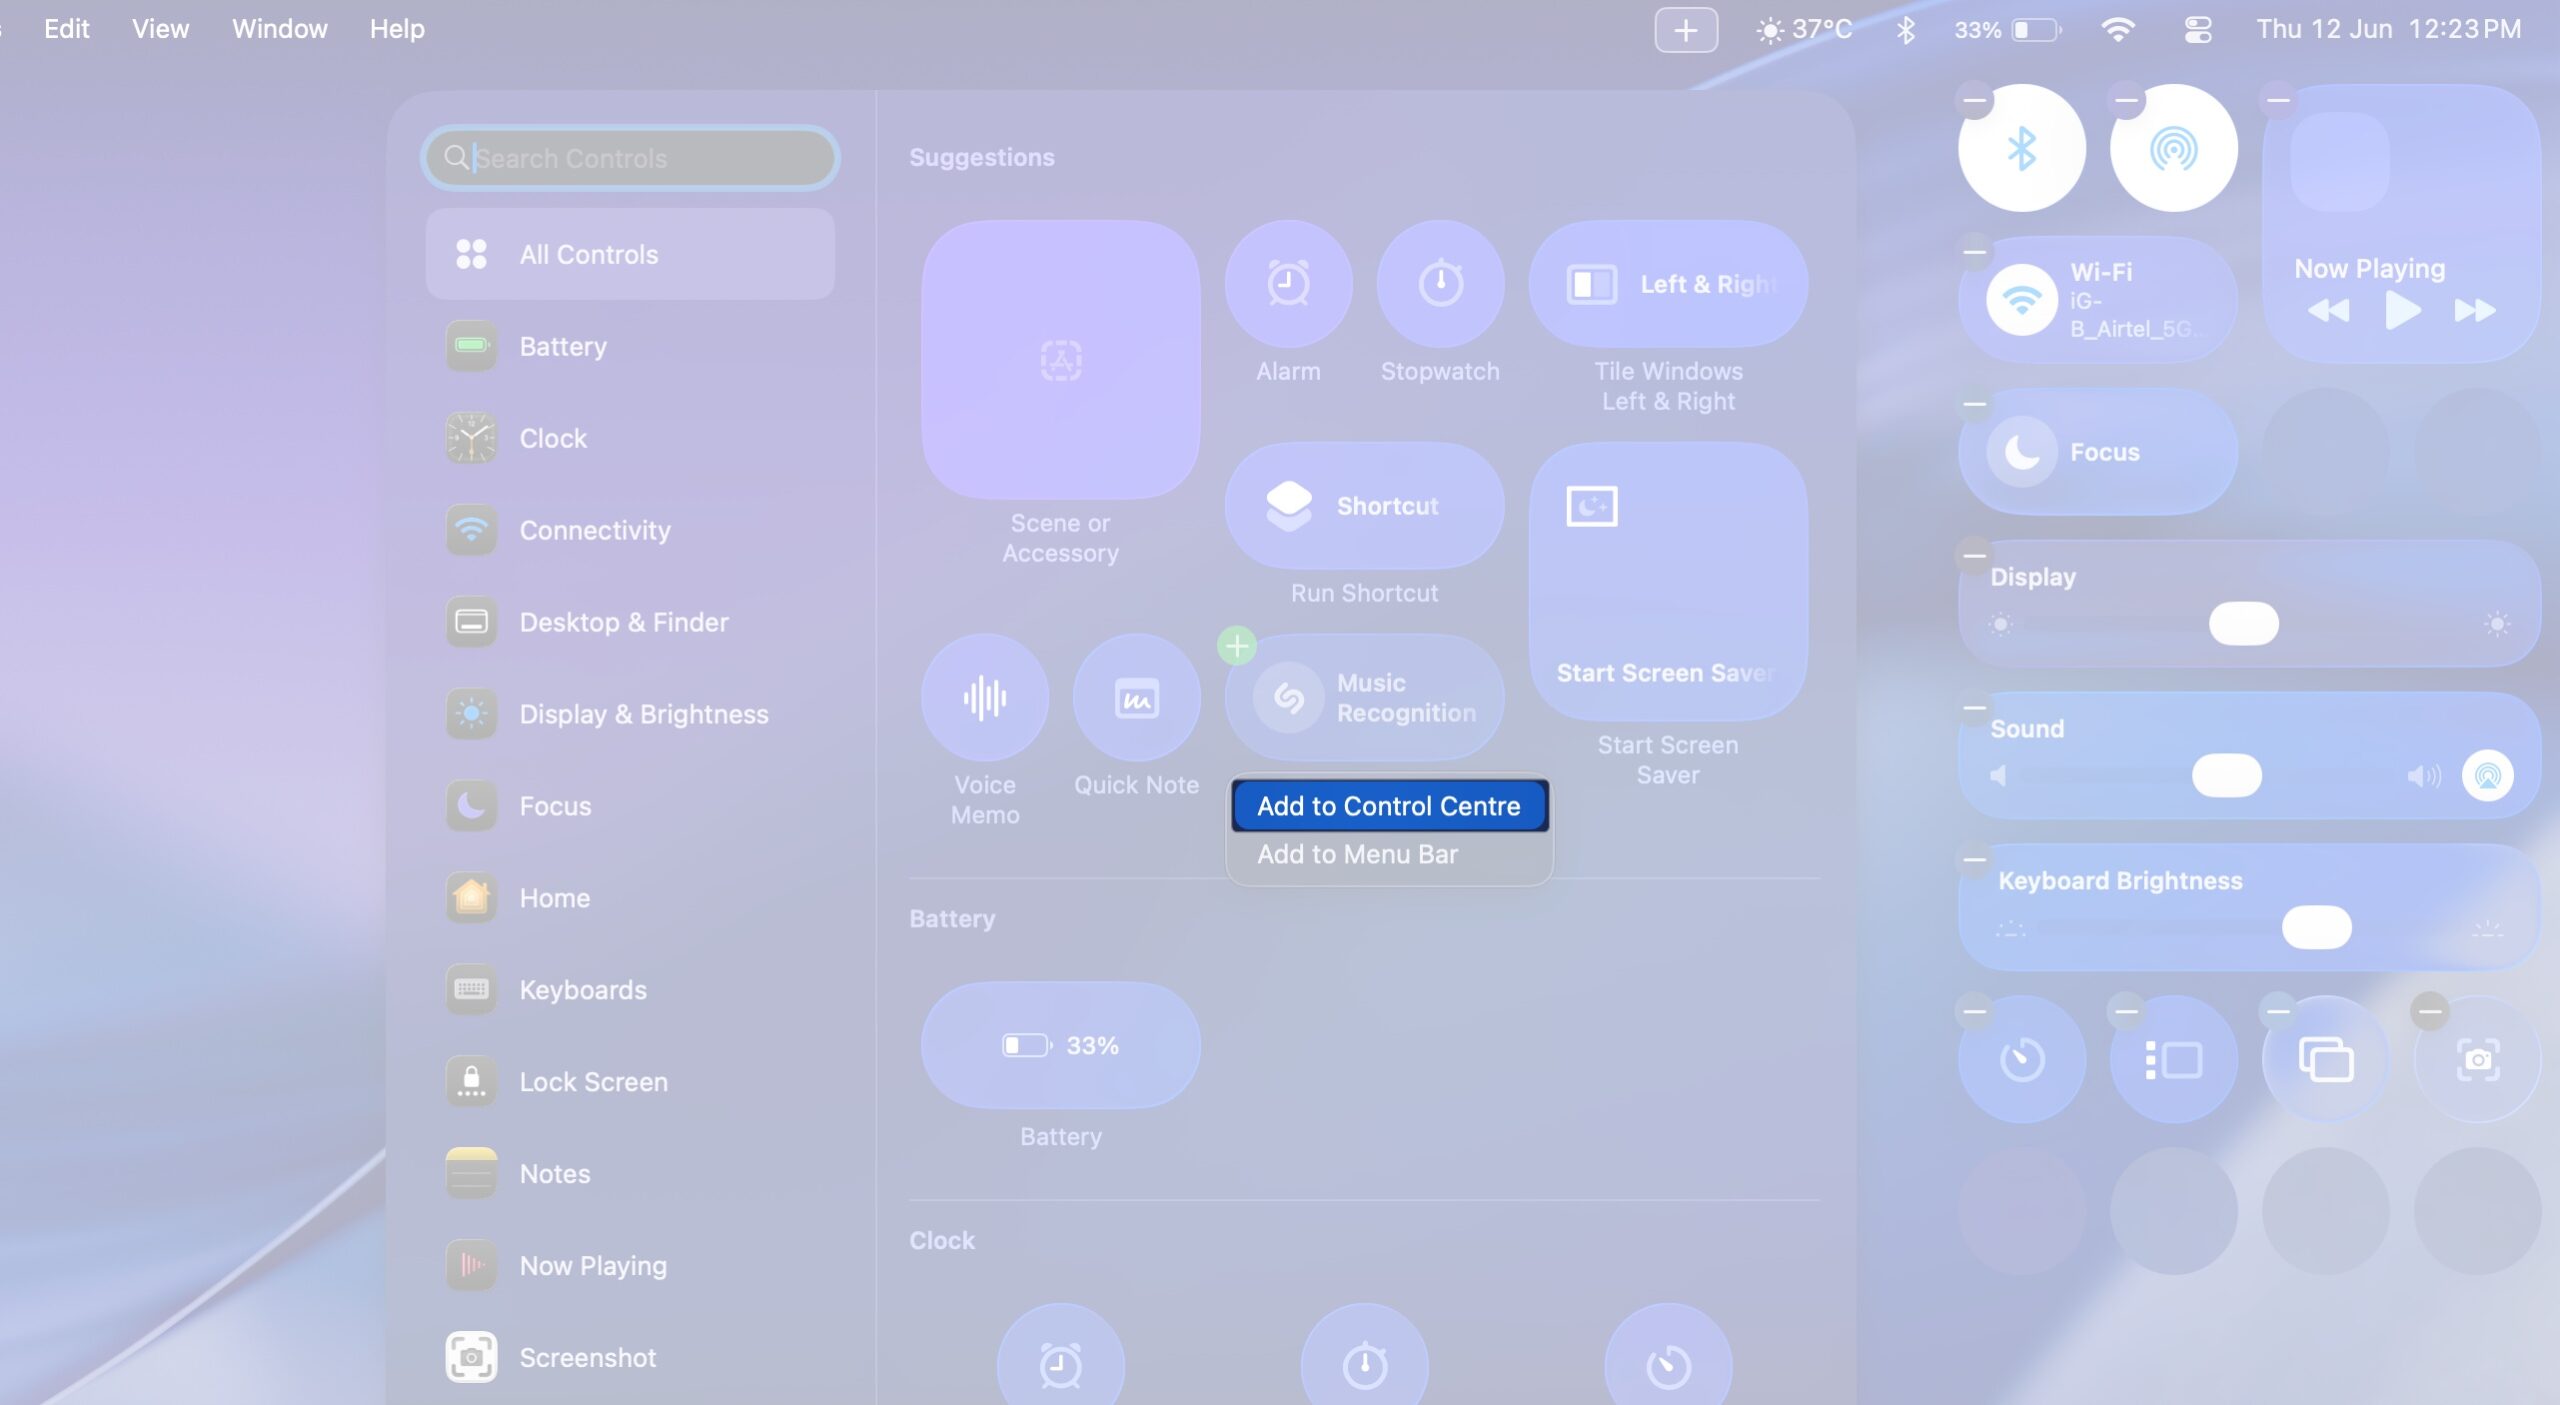
- If you want the control in your menu bar, select Add to Menu Bar.
- To remove a control, click the minus icon beside it or drag it out of the Control Center or menu bar.
- You can also reorder the controls by dragging them around—something not possible before macOS 26.
- Click on the Plus icon in the menu bar to create a new Control Center page. There, you can select the icon and add controls similarly.
- Once you’re done, click the Done button at the bottom.


You can also toggle certain settings directly from the Menu Bar settings page to show or hide them in the menu bar. All changes take effect instantly, and you can come back anytime to fine-tune your layout.
Why You Should Set Up Control Center Now
Control Center used to be something you only opened for AirDrop or quick toggles. But in macOS 26, it becomes your personalized command center. Whether you want to quickly access screenshot tools, toggle Focus modes, or run automation via Shortcuts, it’s all just one click away.
Spend a few minutes customizing it, and you’ll turn your Mac into a smoother, faster, and more efficient machine. Once you’ve set it up your way, you’ll wonder how you ever used macOS without it.
Related articles worth reading:


